XIAO ESP32C3 以不同方式永久存储数据
当我们使用开发板时,许多人都希望能够使用芯片上的闪存来存储一些重要数据。这需要一种存储方法,确保即使在开发板异常情况下也不会丢失数据。
本教程将介绍如何通过以下两种不同的存储方法在XIAO ESP32C3的闪存上存储重要数据:
-
第一个指南展示如何使用
Preferences.h库在ESP32闪存上永久保存数据。保存在闪存中的数据在重启或断电后仍然存在。使用Preferences.h库对于保存网络凭据、API密钥、阈值或甚至GPIO的最后状态等数据非常有用。您将学习如何从闪存中保存和读取数据。 -
第二个指南解释了什么是XIAO ESP32C3的EEPROM以及它的用途。我们还将向您展示如何从EEPROM写入和读取数据,并构建一个项目示例来将所学概念付诸实践。
本文的绝大部分内容来自RandomNerdTutorials.com,一些程序和描述已经稍作修改以适配XIAO ESP32C3。特别感谢RandomNerdTutorials.com提供的教程和方法。以下是原始资源的直接链接。
使用Preferences库永久保存数据
Preferences.h库
当您在Arduino IDE中安装XIAO ESP32C3开发板时,此库会"自动"安装。
Preferences.h库最好用于通过键值对存储变量值。永久保存数据对以下情况很重要:
-
记住变量的最后状态;
-
保存设置;
-
保存设备被激活的次数;
-
或任何其他需要永久保存的数据类型。
如果您想使用XIAO ESP32C3存储文件或非常长的字符串或数据,我们建议您使用扩展板和SD卡,我们不建议您使用本教程中的两种方法。
以下是Preferences.h库的有用函数
函数1. begin()方法打开一个具有定义命名空间的"存储空间"。false参数意味着我们将以读写模式使用它。使用true以只读模式打开或创建命名空间。
preferences.begin("my-app", false);
在这种情况下,命名空间名称是 my-app。命名空间名称限制为 15 个字符。
功能 2. 使用 clear() 清除已打开命名空间下的所有首选项(它不会删除命名空间):
preferences.clear();
功能 3. 从已打开的命名空间中移除一个键:
preferences.remove(key);
Func 4. 使用 end() 方法关闭已打开命名空间下的首选项:
preferences.end();
功能 5. 您应该根据要保存的变量类型使用不同的方法。
使用 Preferences.h 库时,您应该定义要保存的数据类型。稍后,如果您想读取该数据,必须知道保存的数据类型。换句话说,写入和读取的数据类型应该相同。
您可以使用 Preferences.h 保存以下数据类型:char、Uchar、short、Ushort、int、Uint、long、Ulong、long64、Ulong64、float、double、bool、string 和 bytes。
| Char | putChar(const char*key, int8_t value) |
| Unsigned Char | putUChar(const char* key, int8_t value) |
| Short | putShort(const char*key, int16_t value) |
| Unsigned Short | putUShort(const char* key, uint16_t value) |
| Int | putInt(const char*key, int32_t value) |
| Unsigned Int | putUInt(const char* key, uint32_t value) |
| Long | putLong(const char*key, int32_t value) |
| Unsigned Long | putULong(const char* key, uint32_t value) |
| Long64 | putLong64(const char*key, int64_t value) |
| Unsigned Long64 | putULong64(const char* key, uint64_t value) |
| Float | putFloat(const char*key, const float_t value) |
| Double | putDouble(const char* key, const double_t value) |
| Bool | putBool(const char*key, const bool value) |
| String | putString(const char* key, const String value) |
| Bytes | putBytes(const charkey, const void value, size_t len) |
Func 6. 同样,您应该根据要获取的变量类型使用不同的方法。
| Char | getChar(const char*key, const int8_t defaultValue) |
| Unsigned Char | getUChar(const char* key, const uint8_t defaultValue) |
| Short | getShort(const char*key, const int16_t defaultValue) |
| Unsigned Short | getUShort(const char* key, const uint16_t defaultValue) |
| Int | getInt(const char*key, const int32_t defaultValue) |
| Unsigned Int | getUInt(const char* key, const uint32_t defaultValue) |
| Long | getLong(const char*key, const int32_t defaultValue) |
| Unsigned Long | getULong(const char* key, const uint32_t defaultValue) |
| Long64 | getLong64(const char*key, const int64_t defaultValue) |
| Unsigned Long64 | gettULong64(const char* key, const uint64_t defaultValue) |
| Float | getFloat(const char*key, const float_t defaultValue) |
| Double | getDouble(const char* key, const double_t defaultValue) |
| Bool | getBool(const char*key, const bool defaultValue) |
| String | getString(const char* key, const String defaultValue) |
| String | getString(const charkey, char value, const size_t maxLen) |
| Bytes | getBytes(const charkey, void buf, size_t maxLen) |
Func 7. 移除命名空间
在 Arduino 的 Preferences 实现中,没有完全移除命名空间的方法。因此,在经过几个项目后,ESP32 非易失性存储 (nvs) Preferences 分区可能会变满。要完全擦除和重新格式化 Preferences 使用的 NVS 内存,请创建一个包含以下内容的草图:
#include <nvs_flash.h>

void setup() {
  nvs_flash_erase(); // erase the NVS partition and...
  nvs_flash_init(); // initialize the NVS partition.
  while(true);
}

void loop() {

}
您应该在运行上述代码后立即将新的程序下载到您的开发板上,否则每次上电时它都会重新格式化 NVS 分区。
如需更多信息,您可以在这里访问 Preferences.cpp 文件。
使用 Preferences.h 库的一般方法
步骤 1. 要使用 Preferences.h 库存储数据,首先需要在您的程序中包含它:
#include <Preferences.h>
步骤 2. 然后,你必须初始化一个 Preferences 库的实例。你可以将其命名为 preferences,例如:
Preferences preferences;
步骤 3. 在setup()中,以115200的波特率初始化串口监视器。
Serial.begin(115200);
步骤 4. 在闪存中创建一个名为 my-app 的"存储空间",设置为读/写模式。您可以给它起任何其他名称。
preferences.begin("my-app", false);
步骤 5. 使用 get 和 put 方法来获取/存储数据内容。
存储/获取键值对数据
使用 preferences 保存的数据结构如下:
namespace {
  key:value
}
您可以在同一个命名空间中保存不同的键,例如:
namespace {
  key1: value1
  key2: value2
}
您还可以拥有多个具有相同键的命名空间(但每个键都有其对应的值):
namespace1{
  key:value1
}
namespace2{
  key:value2
}
例如,将新值存储在"counter"键上:
preferences.putUInt("counter", counter);
然后,获取保存在首选项中的 counter 键的值。如果没有找到任何值,默认返回 0(这在代码第一次运行时会发生)。
unsigned int counter = preferences.getUInt("counter", 0);
因此,你的数据是以这种方式结构化的:
my-app{
  counter: counter
}
存储/获取字符串数据
以下代码使用 Preferences.h 将您的网络凭据永久保存在 ESP32 闪存中。
创建一个名为 ssid 的键,用于保存您的 SSID 值(ssid 变量)– 使用 putString() 方法。
preferences.putString("ssid", ssid);
添加另一个名为 password 的键来保存密码值(password 变量):
preferences.putString("password", password);
因此,您的数据结构如下:
my-app{
  ssid: ssid
  password: password
}
使用 getString() 方法获取 SSID 和密码值。您需要使用保存变量时使用的键名,在这种情况下是 ssid 和 password 键:
String ssid = preferences.getString("ssid", "");
String password = preferences.getString("password", "");
作为 getString() 函数的第二个参数,我们传递了一个空字符串。这是在首选项中没有保存 ssid 或 password 键时返回的值。
步骤 6. 关闭首选项。
preferences.end();
- 存储/获取键值对数据的完整过程如下所示。
#include <Preferences.h>
Preferences preferences;
void setup() {
Serial.begin(115200);
delay(3000);
Serial.println();
// Open Preferences with my-app namespace. Each application module, library, etc
// has to use a namespace name to prevent key name collisions. We will open storage in
// RW-mode (second parameter has to be false).
// Note: Namespace name is limited to 15 chars.
preferences.begin("my-app", false);
// Remove all preferences under the opened namespace
//preferences.clear();
// Or remove the counter key only
//preferences.remove("counter");
// Get the counter value, if the key does not exist, return a default value of 0
// Note: Key name is limited to 15 chars.
unsigned int counter = preferences.getUInt("counter", 0);
// Increase counter by 1
counter++;
// Print the counter to Serial Monitor
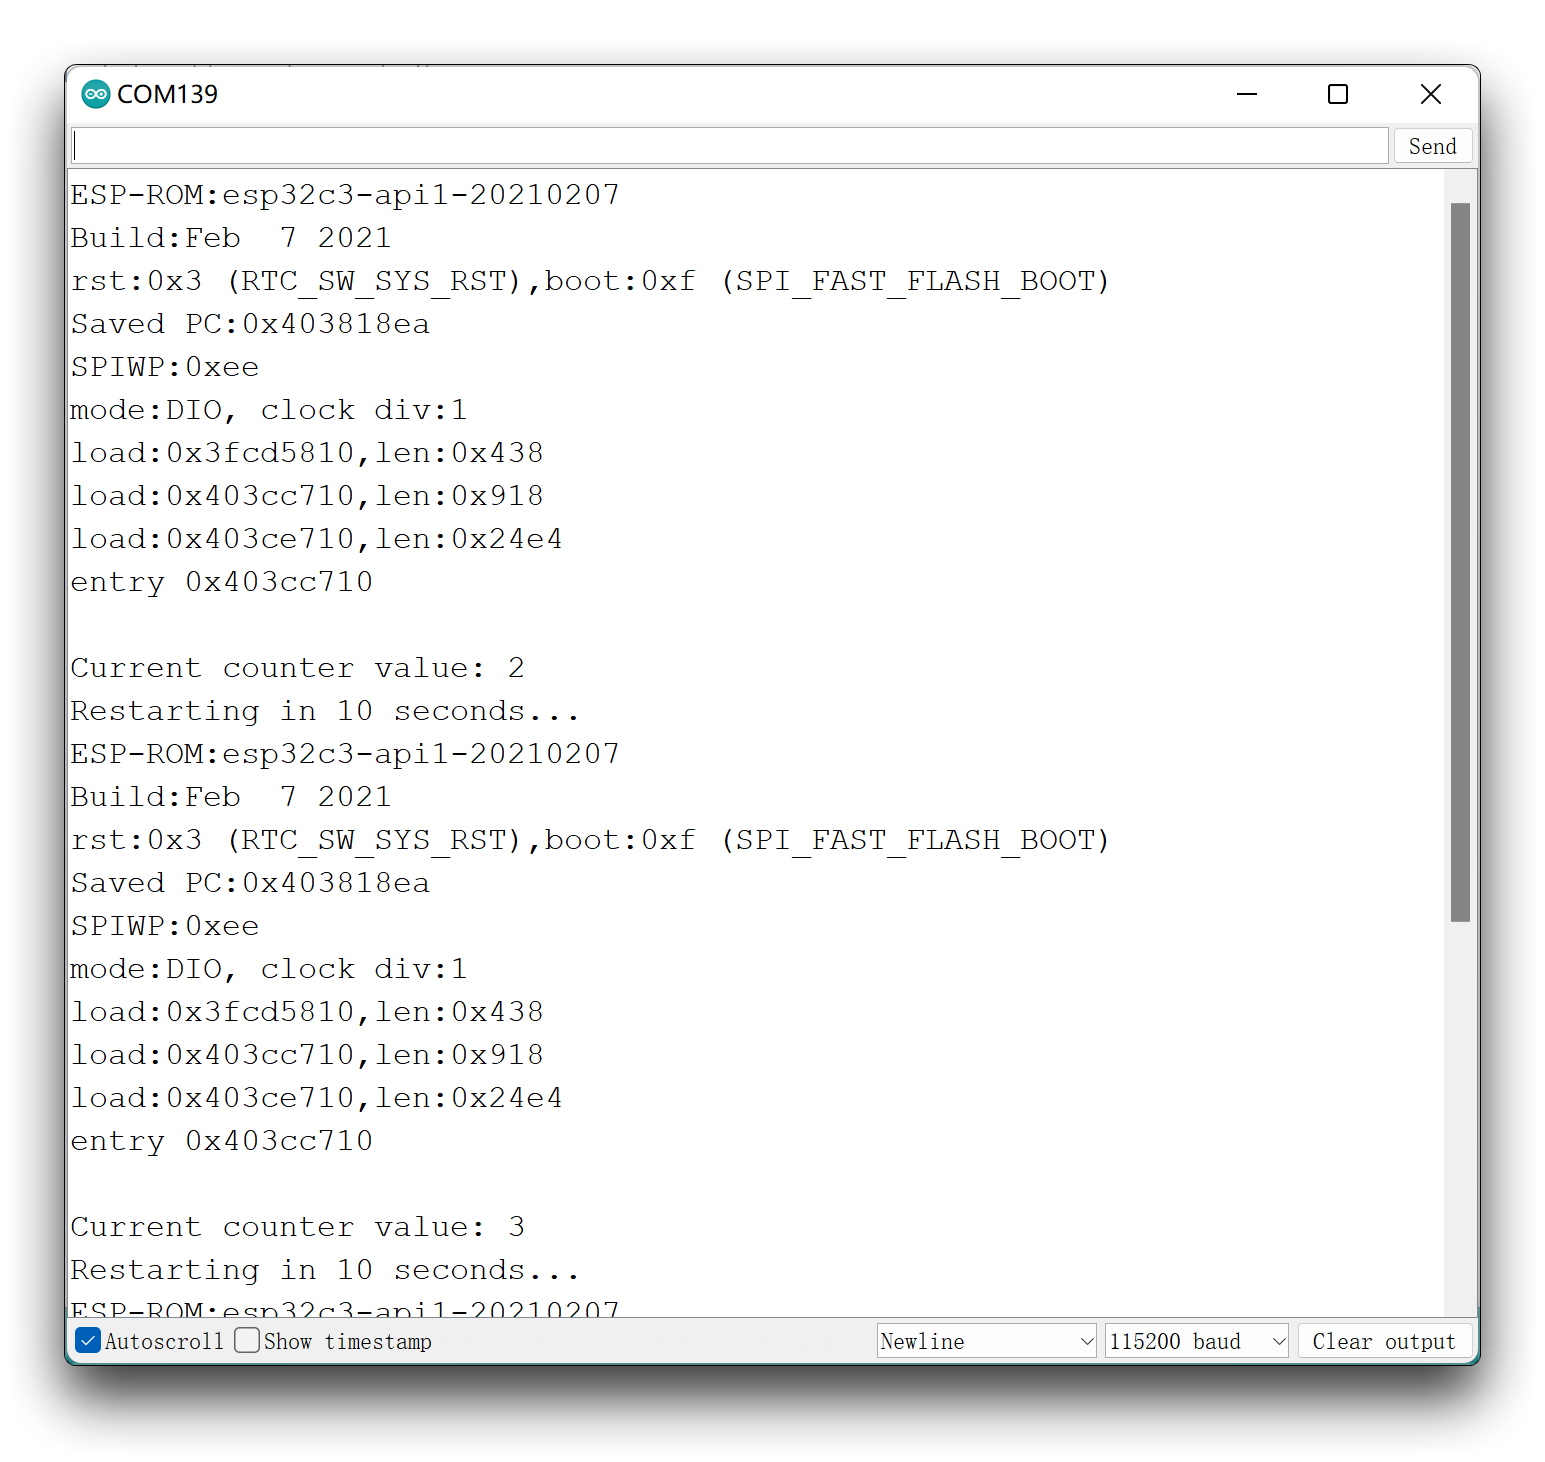
Serial.printf("Current counter value: %u\n", counter);
// Store the counter to the Preferences
preferences.putUInt("counter", counter);
// Close the Preferences
preferences.end();
// Wait 10 seconds
Serial.println("Restarting in 10 seconds...");
delay(10000);
// Restart ESP
ESP.restart();
}
void loop() {
}
将代码上传到您的开发板,您应该在串口监视器中看到以下内容:
- 存储/获取字符串数据的完整过程如下所示。
使用 Preferences.h 保存网络凭据。
#include <Preferences.h>
Preferences preferences;
const char* ssid = "REPLACE_WITH_YOUR_SSID";
const char* password = "REPLACE_WITH_YOUR_PASSWORD";
void setup() {
Serial.begin(115200);
delay(3000);
Serial.println();
preferences.begin("credentials", false);
preferences.putString("ssid", ssid);
preferences.putString("password", password);
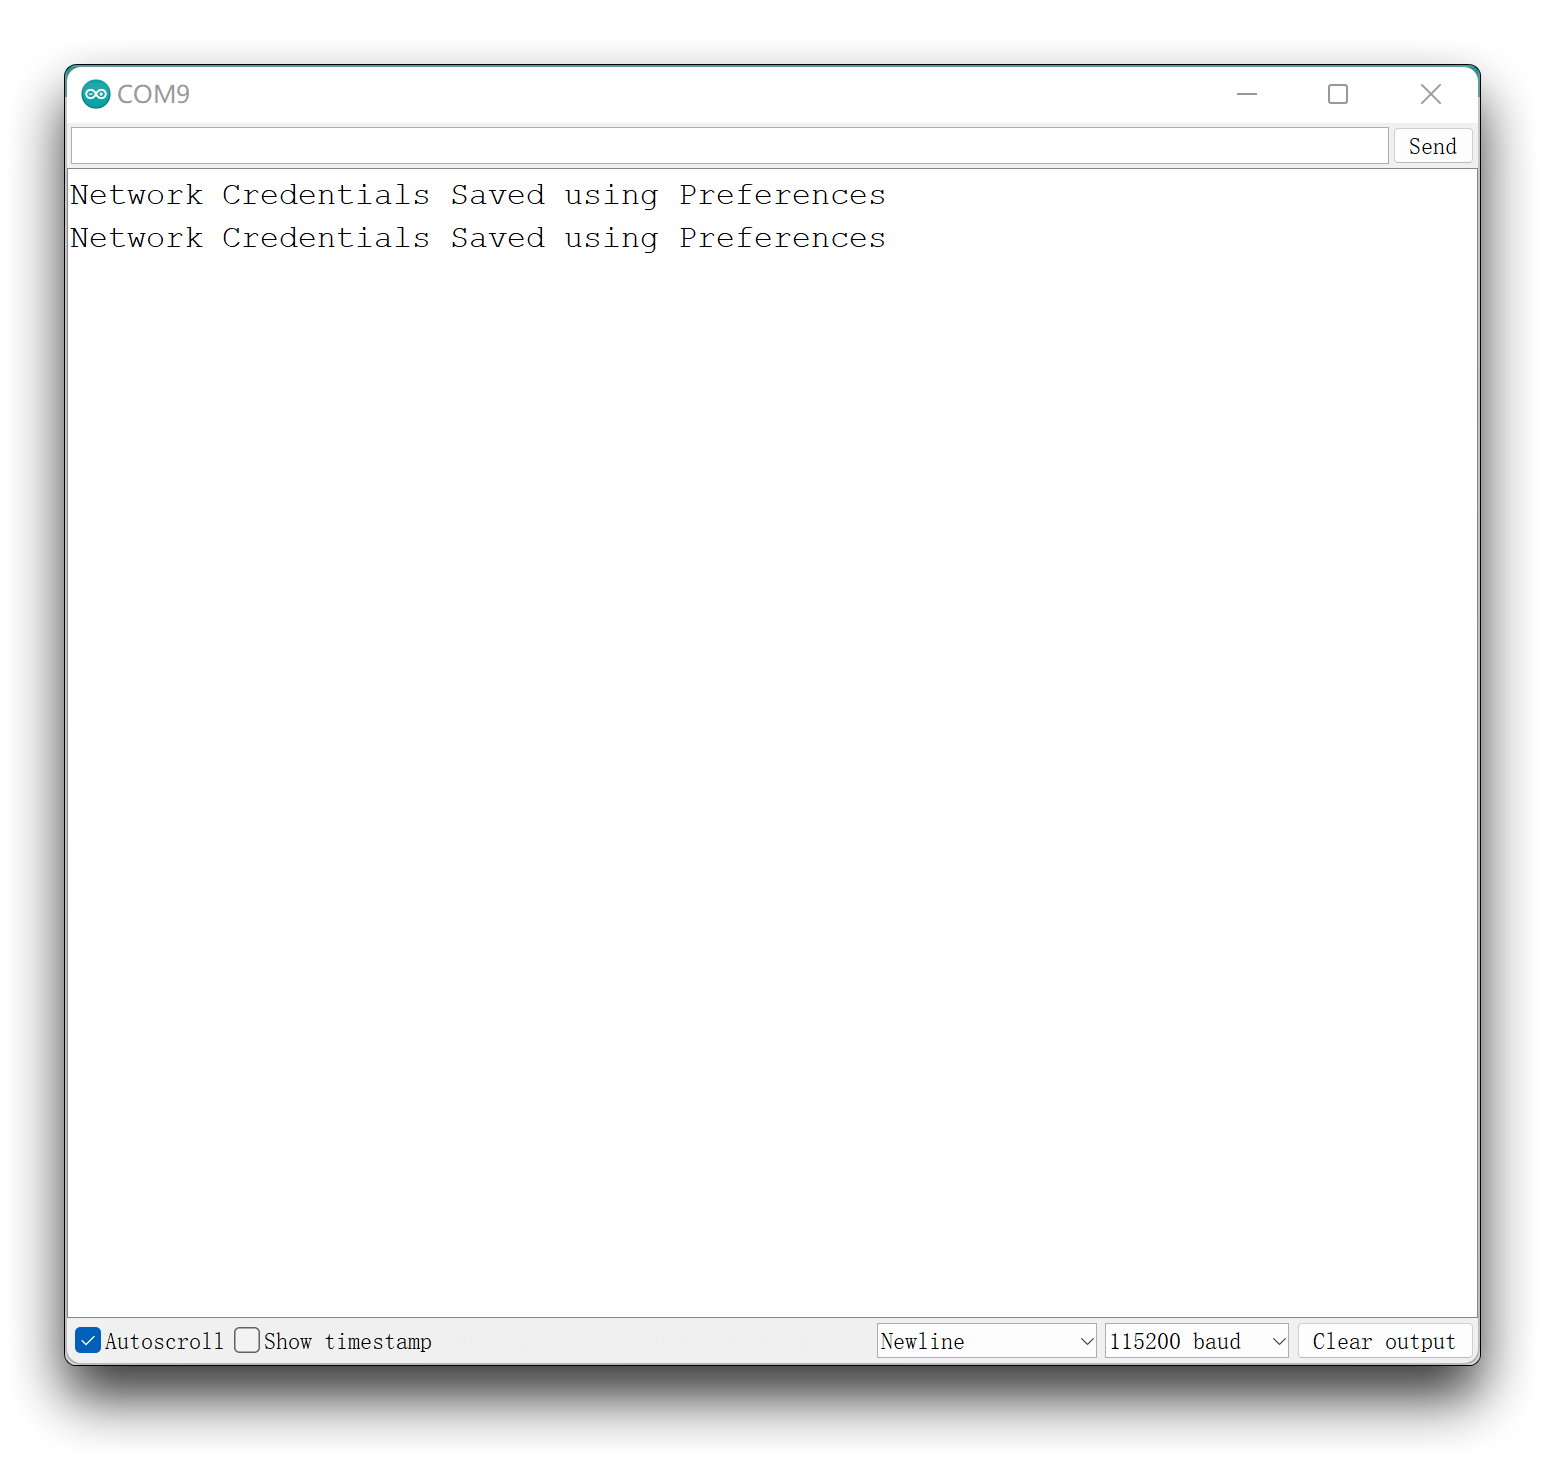
Serial.println("Network Credentials Saved using Preferences");
preferences.end();
}
void loop() {
}
将代码上传到您的开发板,您应该在串口监视器中看到以下内容:
使用保存在首选项中的网络凭据连接到 Wi-Fi。
#include <Preferences.h>
#include "WiFi.h"
Preferences preferences;
String ssid;
String password;
void setup() {
Serial.begin(115200);
delay(3000);
Serial.println();
preferences.begin("credentials", false);
ssid = preferences.getString("ssid", "");
password = preferences.getString("password", "");
if (ssid == "" || password == ""){
Serial.println("No values saved for ssid or password");
}
else {
// Connect to Wi-Fi
WiFi.mode(WIFI_STA);
WiFi.disconnect();
delay(100);
WiFi.begin(ssid.c_str(), password.c_str());
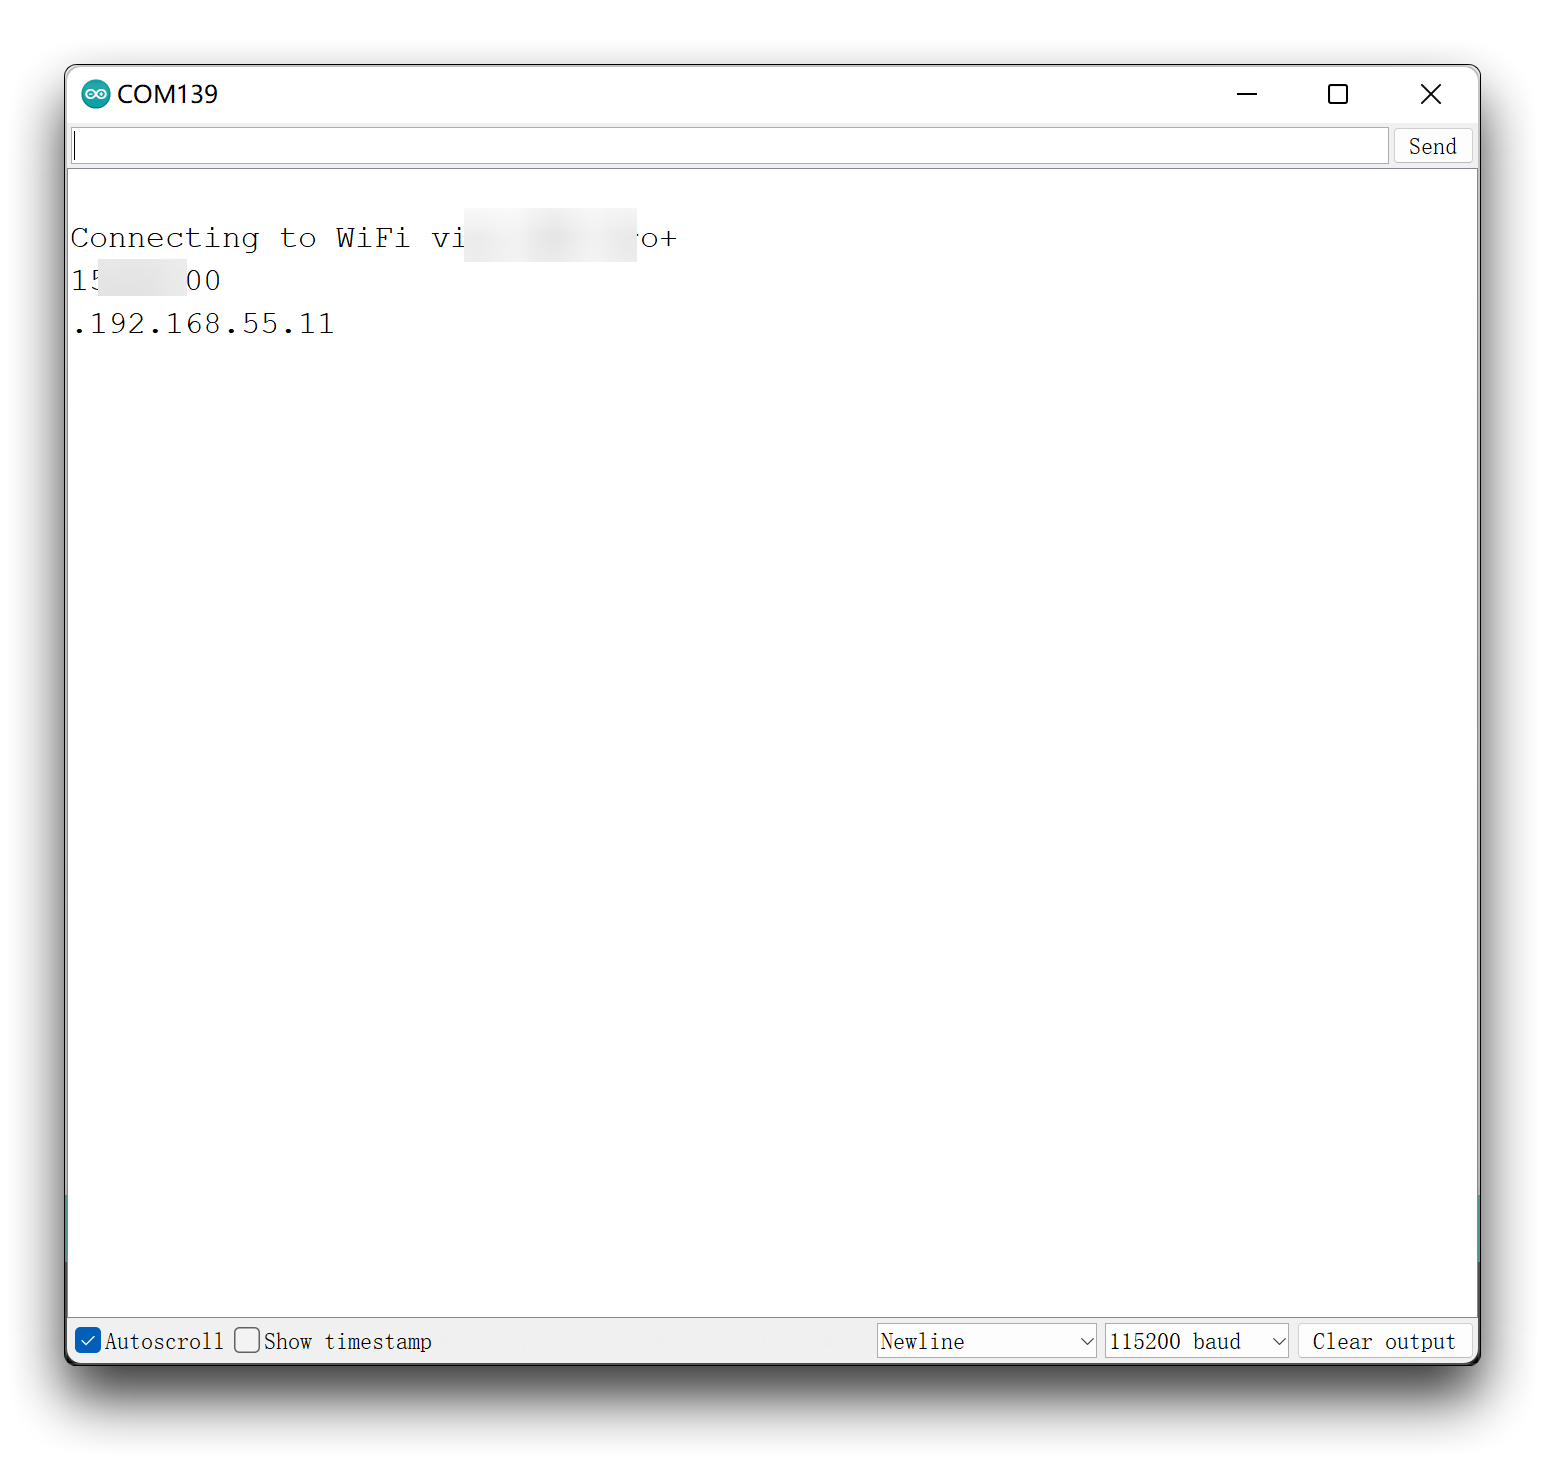
Serial.print("Connecting to WiFi ");
Serial.println(ssid);
Serial.println(password);
while (WiFi.status() != WL_CONNECTED) {
Serial.print('.');
delay(1000);
}
Serial.println(WiFi.localIP());
}
}
void loop() {
// put your main code here, to run repeatedly:
}
在上传完前一个代码后,将此代码上传到您的开发板(以确保您已保存了凭据)。如果一切按预期进行,您应该在串行监视器中看到以下内容。
使用 EEPROM 存储永久数据
什么是 EEPROM?
EEPROM 是 ESP32 微控制器的内部存储器,允许在重启开发板后将数据保留在内存中。在使用微控制器时,保持数据在内存中是很有意义的,特别是当开发板关闭时(无论是有意还是无意的),比如在断电的情况下。
ESP32 微控制器有一个 Flash 存储器区域,可以像 Arduino 的 EEPROM 一样进行接口操作,即使在开发板关闭后也能将数据保留在内存中。
需要注意的重要一点是,EEPROM 的大小和寿命是有限的。存储单元可以根据需要读取任意次数,但写入周期的数量限制为 100,000 次。建议密切关注存储数据的大小以及更新频率。EEPROM 存储器可以存储 512 个从 0 到 255 的值,或 128 个 IP 地址或 RFID 标签。
ESP32 上的微控制器具有 EEPROM(电可擦可编程只读存储器)。这是一个可以存储字节变量的小空间。存储在 EEPROM 中的变量会保留在那里,即使您重置或关闭 ESP32 电源也是如此。简单来说,EEPROM 是类似于计算机硬盘的永久存储。
EEPROM 可以电子方式读取、擦除和重写。在 Arduino 中,您可以使用 EEPROM 库轻松地从 EEPROM 读取和写入。
每个 EEPROM 位置可以保存一个字节,这意味着您只能存储 8 位数字,包括 0 到 255 之间的整数值。
可用的 EEPROM 函数
要使用 Arduino IDE 从 ESP32 闪存读取和写入,我们将使用 EEPROM 库。在 ESP32 上使用此库与在 Arduino 上使用非常相似。因此,如果您之前使用过 Arduino EEPROM,这没有太大区别。
所以,我们也建议查看我们关于 Arduino EEPROM 的文章。
函数 1. 初始化内存大小
在使用函数之前,我们必须使用 EEPROM.begin() 初始化内存大小。
EEPROM.begin(EEPROM_SIZE);
函数 2. 写入和存储
要将数据写入 EEPROM,您需要使用 EEPROM.write() 函数,该函数接受两个参数。第一个参数是您想要保存数据的 EEPROM 位置或地址,第二个参数是我们想要保存的值:
EEPROM.write(address, value);
EEPROM.write() is equivalent to using EEPROM.put().
EEPROM.put(address, value);
例如,要在地址 0 写入 9,你将会有:
EEPROM.write(0, 9);
如果我们想要存储浮点数据,通常使用 EEPROM.put() 方法而不是 EEPROM.write() 方法。如果你想使用 write() 方法来存储,那么你需要使用 EEPROM.writeFloat()。
功能 3. 读取 & 获取
要从 EEPROM 中读取一个字节,你可以使用 EEPROM.read() 函数。这个函数将字节的地址作为参数。
EEPROM.read(address);
EEPROM.read() is equivalent to using EEPROM.get().
EEPROM.get(address);
例如,要读取先前存储在地址 0 中的字节:
EEPROM.read(0);
这将返回 9,即存储在该位置的值。
如果我们想要获取浮点数据,通常使用 EEPROM.get() 方法而不是 EEPROM.read() 方法。如果你想使用 read() 方法获取,那么你需要使用 EEPROM.readFloat()。
功能 4. 更新一个值
EEPROM.update() 函数特别有用。它只有在要写入的值与已保存的值不同时才会写入 EEPROM。
由于 EEPROM 的写入/擦除周期有限,因此寿命有限,使用 EEPROM.update() 函数而不是 EEPROM.write() 可以节省周期。
你可以按如下方式使用 EEPROM.update() 函数:
EEPROM.update(address, value);
目前,我们在地址0中存储了9。因此,如果我们调用:
EEPROM.update(0, 9);
它不会再次写入EEPROM,因为当前保存的值与我们要写入的值相同。
要了解更多关于EEPROM操作的信息,您可以阅读官方Arduino文档。
使用EEPROM的一般方法
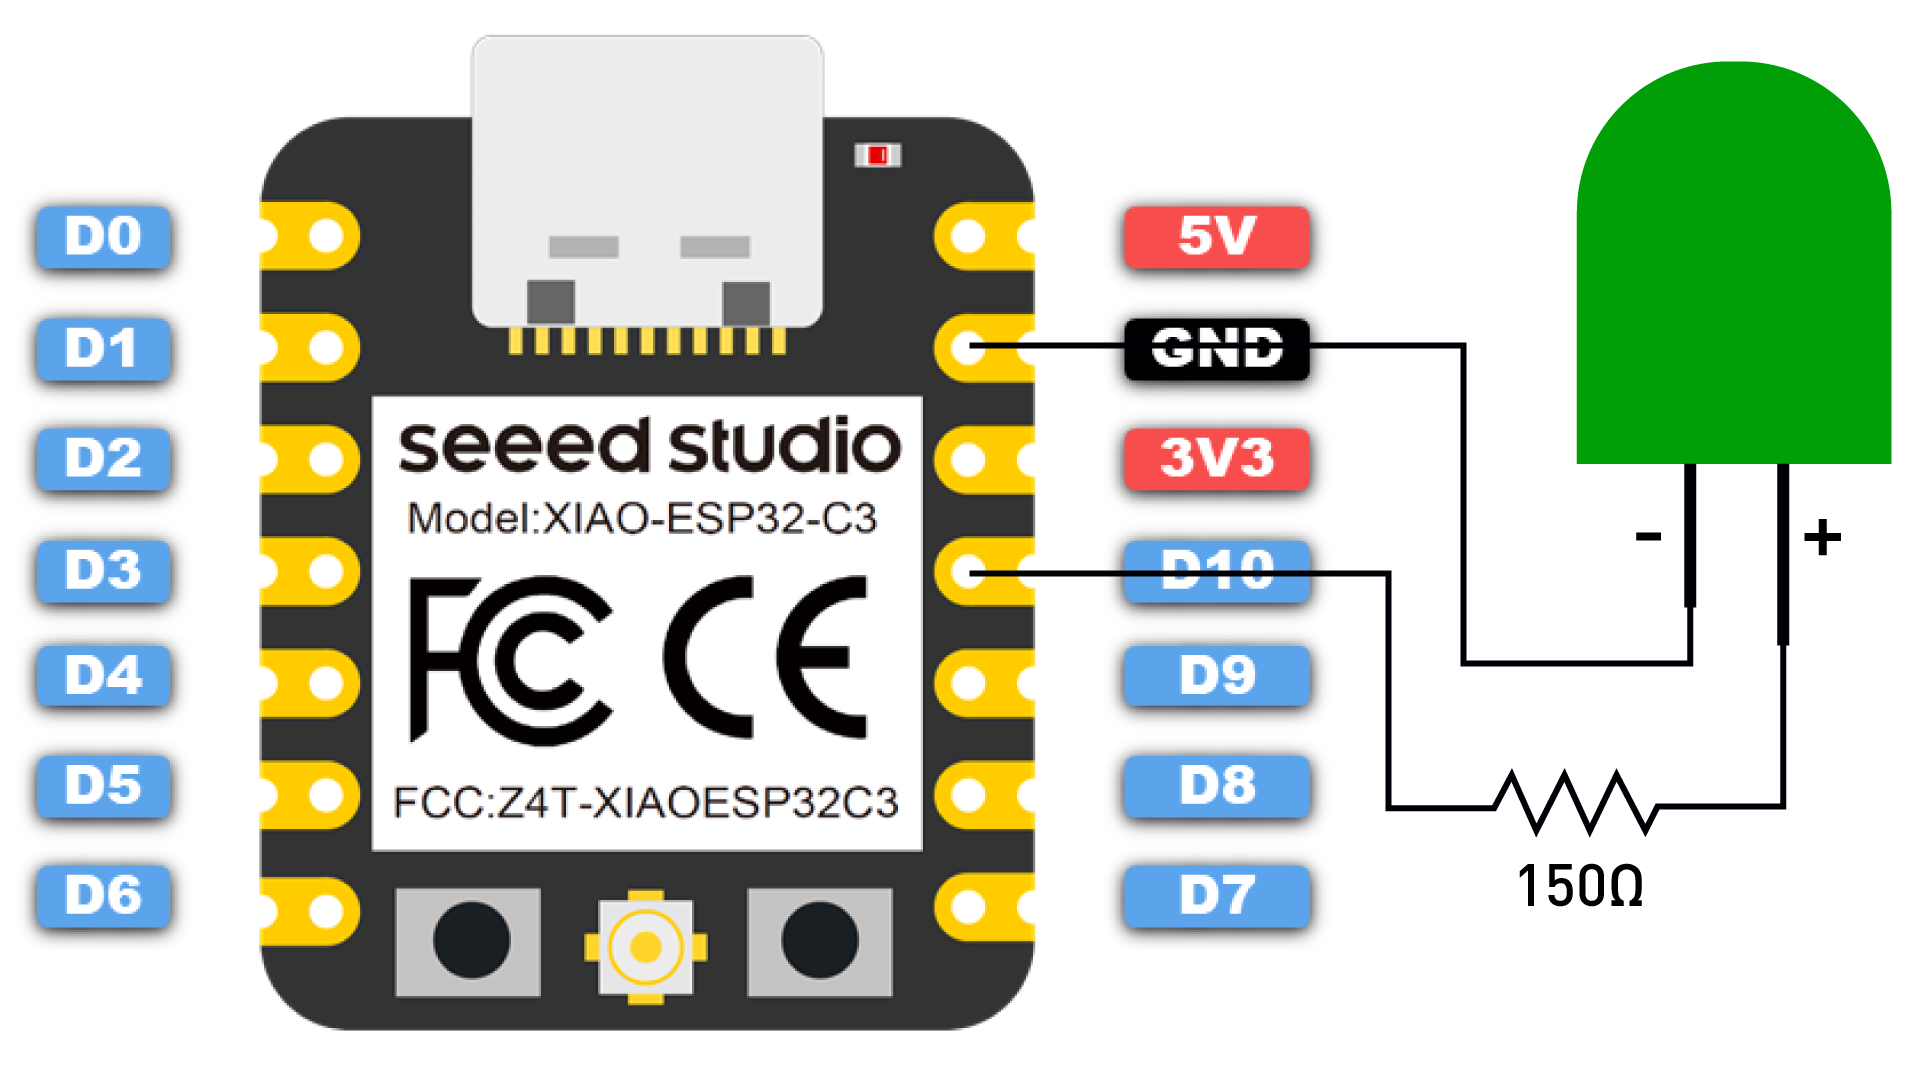
为了向您展示如何在XIAO ESP32C3闪存中保存数据,我们将保存输出的最后状态,在这种情况下是一个LED。
按照以下原理图将LED连接到XIAO ESP32C3。
首先,您需要包含EEPROM库。
#include <EEPROM.h>
然后,您定义 EEPROM 大小。这是您想要在闪存中访问的字节数。在这种情况下,我们只保存 LED 状态,所以 EEPROM 大小设置为 1。
#define EEPROM_SIZE 1
我们还定义了其他使这个草图能够工作所需的变量。
// constants won't change. They're used here to set pin numbers:
const int ledPin = D10;      // the number of the LED pin

// Variables will change:
int ledState = LOW;  // ledState used to set the LED

// Generally, you should use "unsigned long" for variables that hold time
// The value will quickly become too large for an int to store
unsigned long previousMillis = 0;  // will store last time LED was updated

// constants won't change:
const long interval = 10000;  // interval at which to blink (milliseconds)
在 setup() 中,你使用预定义的大小初始化 EEPROM。
EEPROM.begin(EEPROM_SIZE);
为了确保您的代码使用最新的LED状态进行初始化,在setup()中,您应该从闪存中读取最后的LED状态。它存储在地址零处。
然后,您只需要根据从闪存中读取的值相应地打开或关闭LED。
digitalWrite (ledPin, ledState);
在 loop() 函数部分,我们只需要在一段时间内翻转 LED 的状态。
// check to see if it's time to blink the LED; that is, if the difference
// between the current time and last time you blinked the LED is bigger than
// the interval at which you want to blink the LED.
unsigned long currentMillis = millis();

if (currentMillis - previousMillis >= interval) {
    // save the last time you blinked the LED
    previousMillis = currentMillis;
    Serial.println("State changed");
    // if the LED is off turn it on and vice-versa:
    if (ledState == LOW) {
      ledState = HIGH;
    } else {
      ledState = LOW;
    }

    // set the LED with the ledState of the variable:
    digitalWrite(ledPin, ledState);
}
接下来,我们需要确定倒计时是否已经结束,在结束后翻转LED的状态,并将其存储在闪存中。
EEPROM.write(0, ledState);
最后,我们使用EEPROM.commit()来使更改生效。
EEPROM.commit();
以下是完整的步骤。
请注意,您不应该长时间运行此示例。在此示例中,我们将每十秒写入一次EEPROM,长时间运行此示例将大大缩短EEPROM的使用寿命。
// include library to read and write from flash memory
#include <EEPROM.h>

// define the number of bytes you want to access
#define EEPROM_SIZE 1

// constants won't change. They're used here to set pin numbers:
const int ledPin = D10;      // the number of the LED pin

// Variables will change:
int ledState = LOW;  // ledState used to set the LED

// Generally, you should use "unsigned long" for variables that hold time
// The value will quickly become too large for an int to store
unsigned long previousMillis = 0;  // will store last time LED was updated

// constants won't change:
const long interval = 10000;  // interval at which to blink (milliseconds)

void setup() {
  Serial.begin(115200);

  // initialize EEPROM with predefined size
  EEPROM.begin(EEPROM_SIZE);

  pinMode(ledPin, OUTPUT);

  // read the last LED state from flash memory
  ledState = EEPROM.read(0);
  // set the LED to the last stored state
  digitalWrite(ledPin, ledState);
}

void loop() {
  // here is where you'd put code that needs to be running all the time.

  // check to see if it's time to blink the LED; that is, if the difference
  // between the current time and last time you blinked the LED is bigger than
  // the interval at which you want to blink the LED.
  unsigned long currentMillis = millis();

  if (currentMillis - previousMillis >= interval) {
    // save the last time you blinked the LED
    previousMillis = currentMillis;
    Serial.println("State changed");
    // if the LED is off turn it on and vice-versa:
    if (ledState == LOW) {
      ledState = HIGH;
    } else {
      ledState = LOW;
    }
    // save the LED state in flash memory
    EEPROM.write(0, ledState);
    EEPROM.commit();
    Serial.println("State saved in flash memory");

    // set the LED with the ledState of the variable:
    digitalWrite(ledPin, ledState);
  }
}
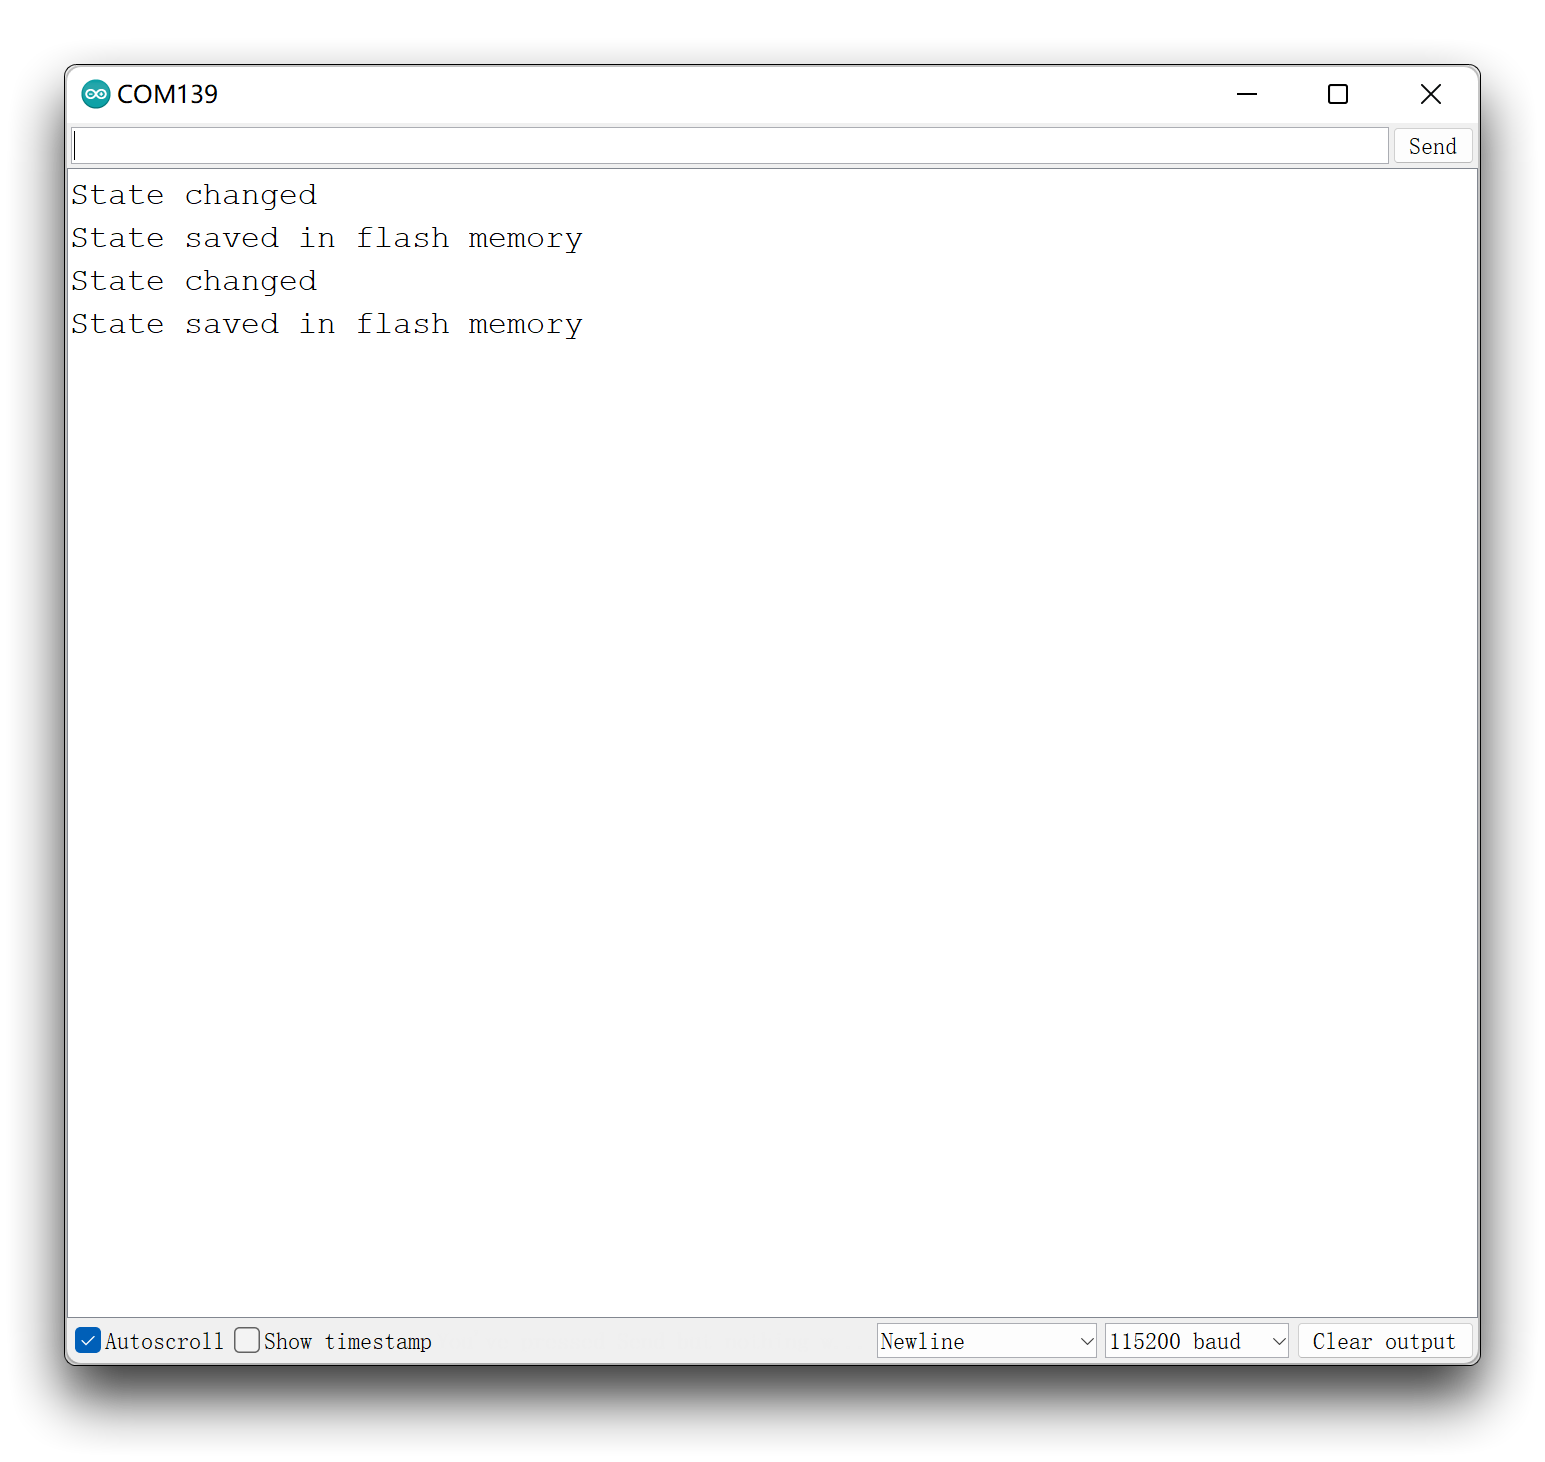
将代码上传到您的开发板,您应该在串口监视器中看到以下内容:
技术支持与产品讨论
感谢您选择我们的产品!我们在这里为您提供不同的支持,以确保您使用我们产品的体验尽可能顺畅。我们提供多种沟通渠道,以满足不同的偏好和需求。