CodeCraft Creation & Platform
2.1 Hands-on Development: Zero-Code Practice
2.1.1 Understanding the Conversational Workspace
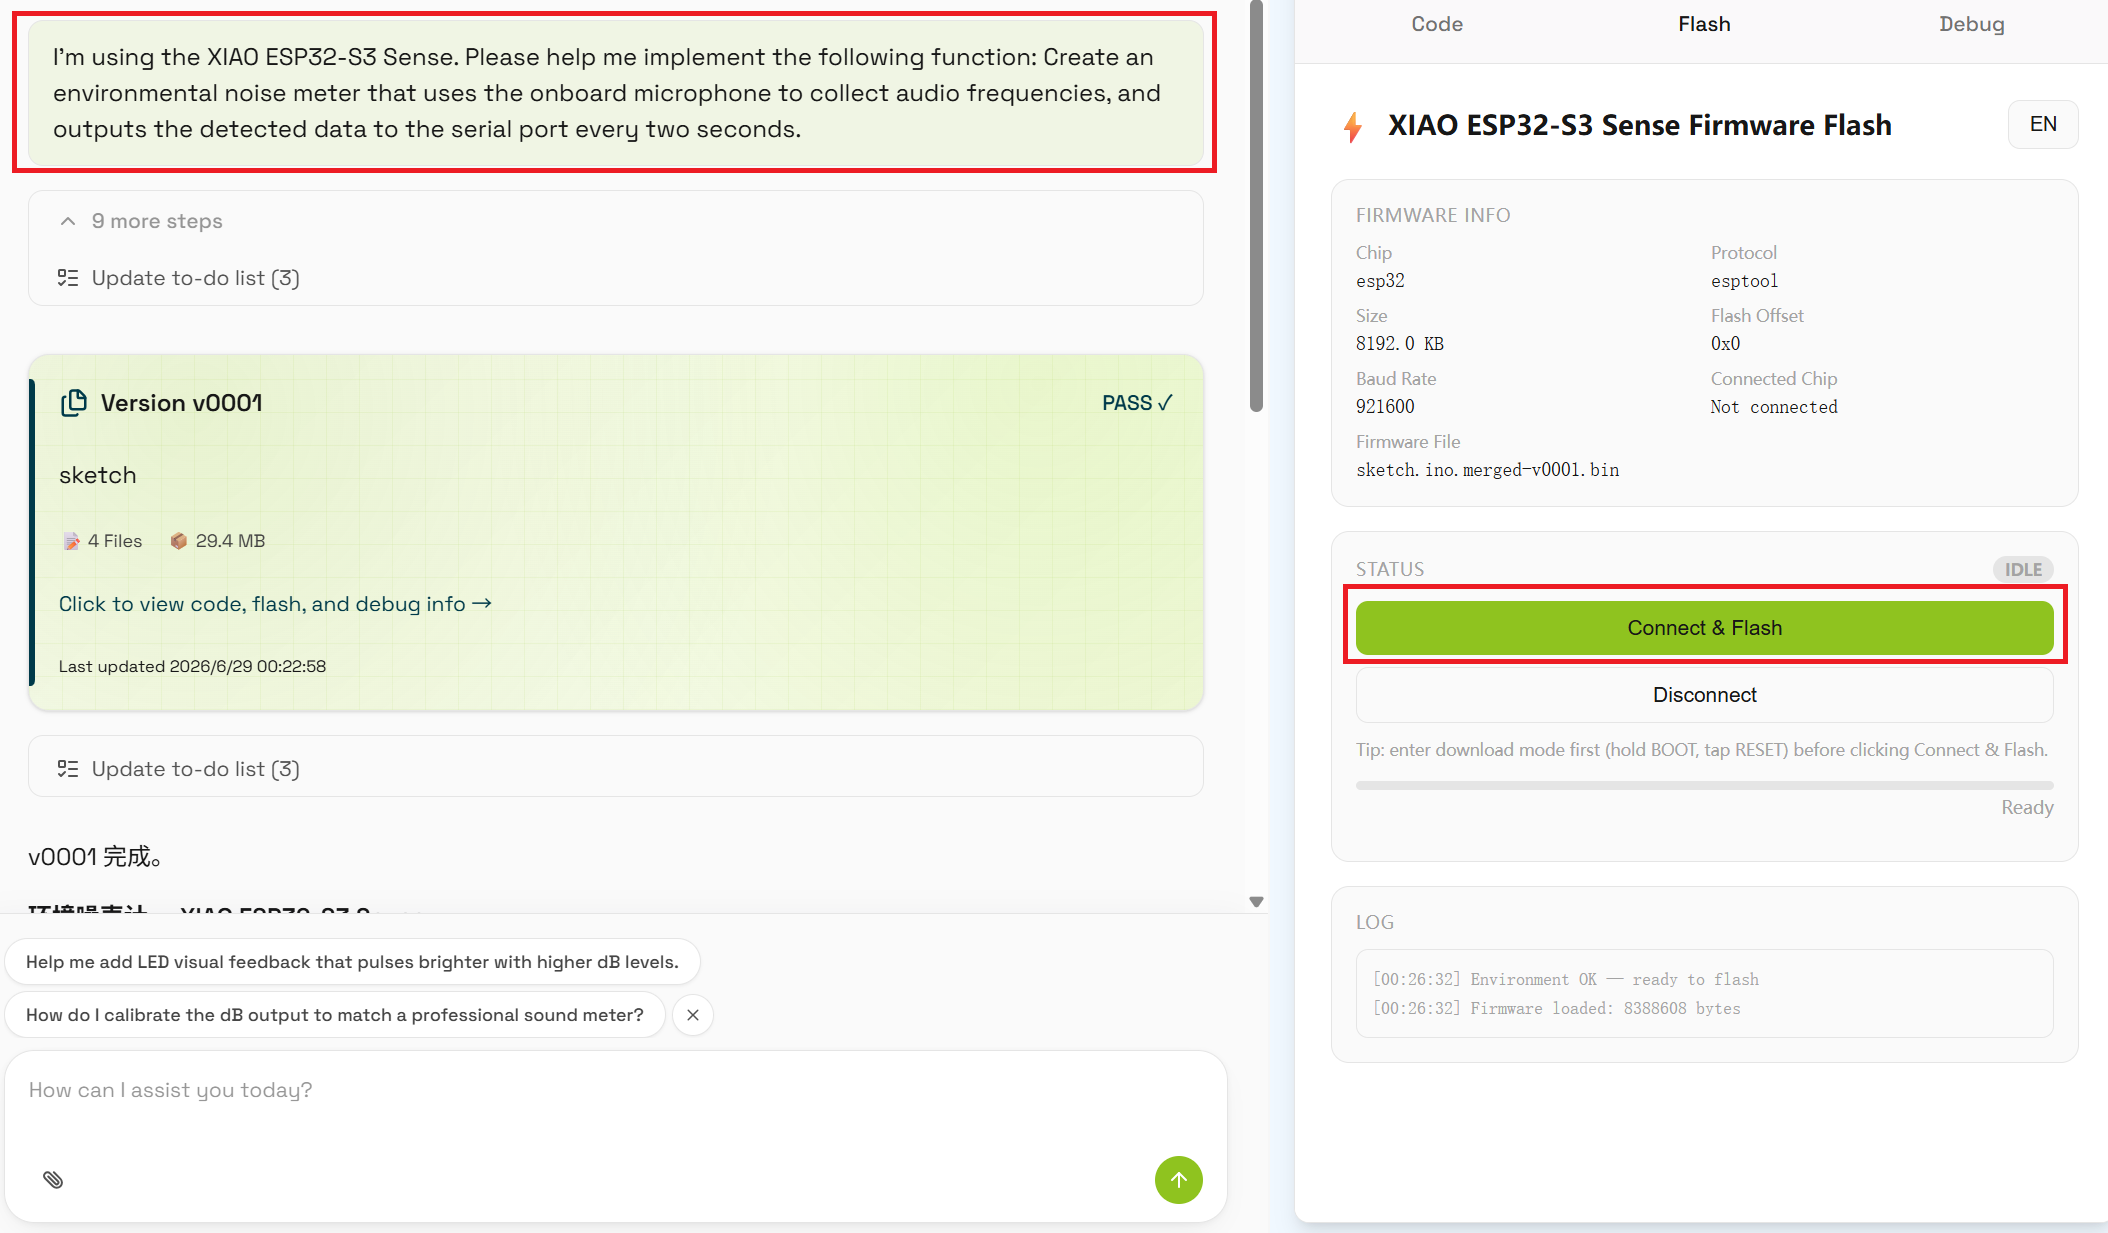
CodeCraft is a web-based conversational programming platform. You do not need to download software or install complex drivers. Simply select your hardware on the webpage and describe your requirements in natural language to quickly build hardware projects.
The basic workflow is as follows:
- Visit https://codecraft.seeed.cc
- Log in to your account
- Select your development board
- Describe the functionality you want to implement
- Wait for CodeCraft to generate the program
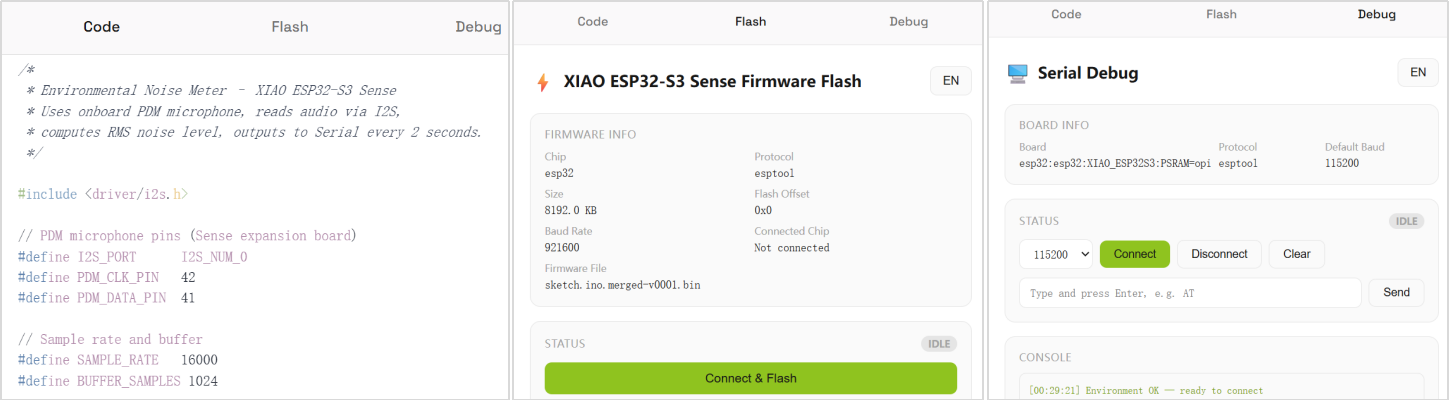
- Review the code, flash it to the hardware, and debug
2.1.2 Selecting Hardware
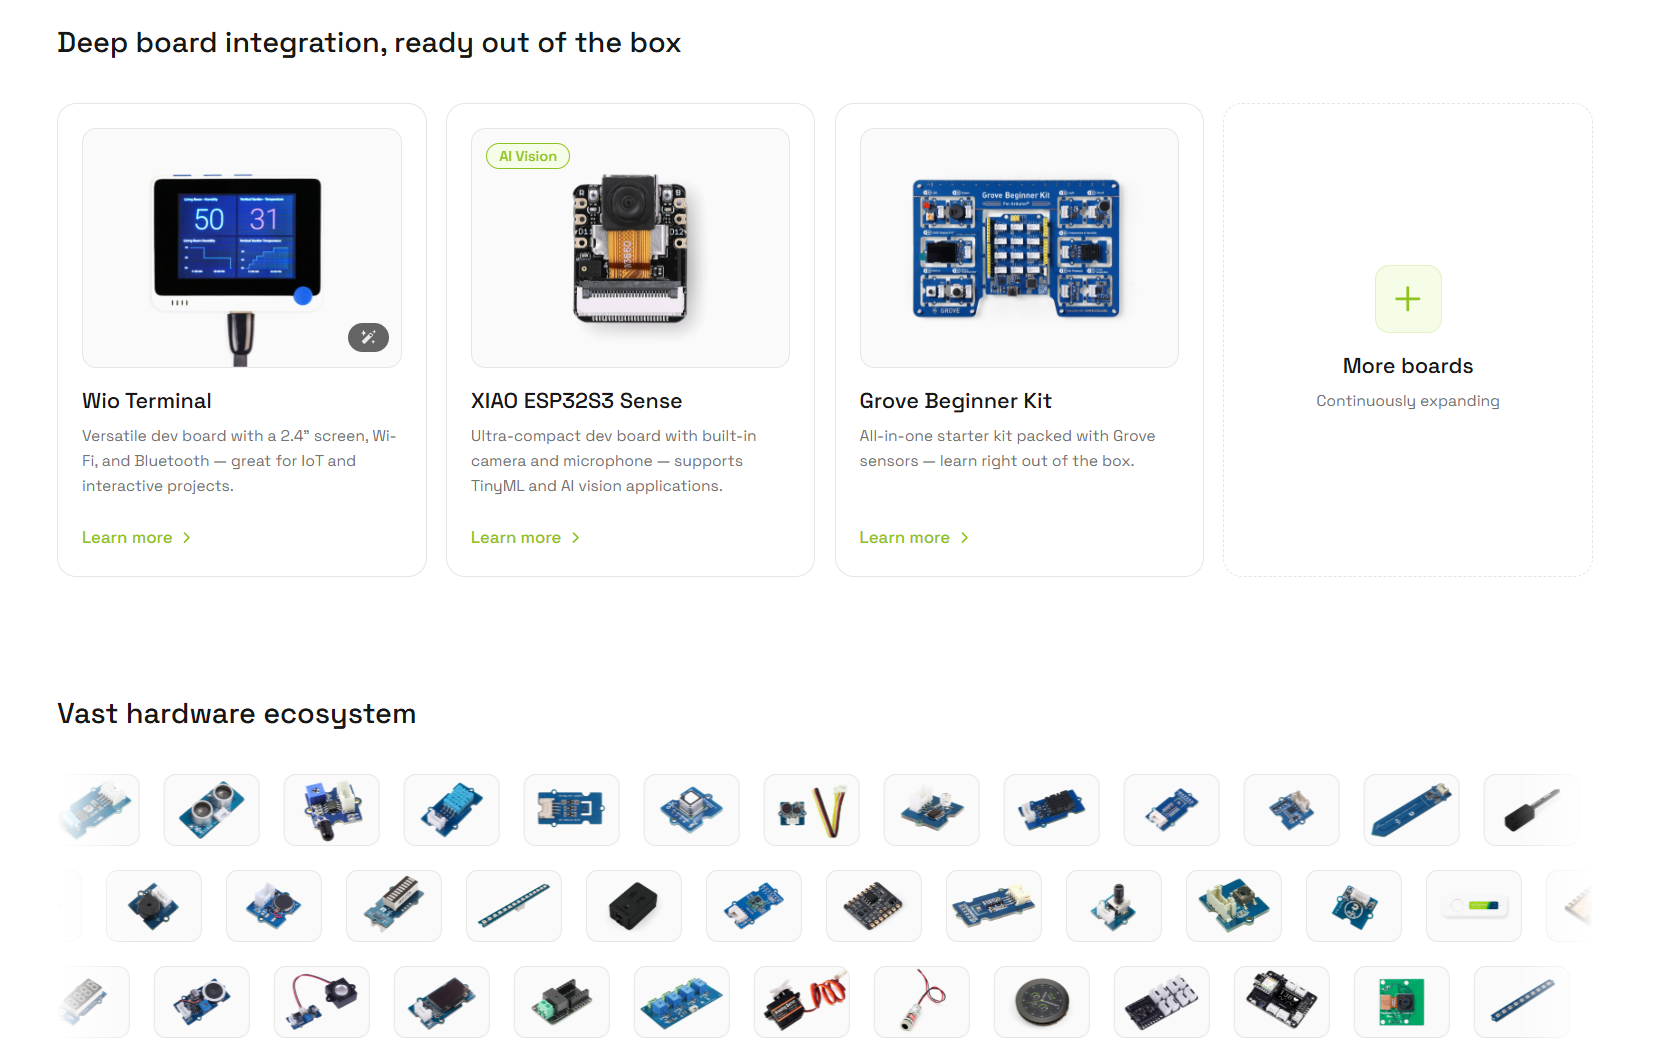
In the workspace, select your device. The recommended entry-level hardware includes:
- Wio Terminal
- XIAO ESP32S3 Sense
- Grove Beginner Kit
In addition to the above, CodeCraft also supports a wider range of devices in the Seeed Studio hardware ecosystem. You can choose development boards, sensors, or expansion modules based on your project needs. After selecting hardware, CodeCraft generates optimized code and documentation tailored to the device capabilities.
2.2 Project Examples
This section provides three project examples to help you understand how to create programs for different hardware platforms using CodeCraft. Each example includes project objectives, sample prompts, flashing instructions, and iteration guidance.
2.2.1 Pomodoro Timer
2.2.1.1 Project Objective
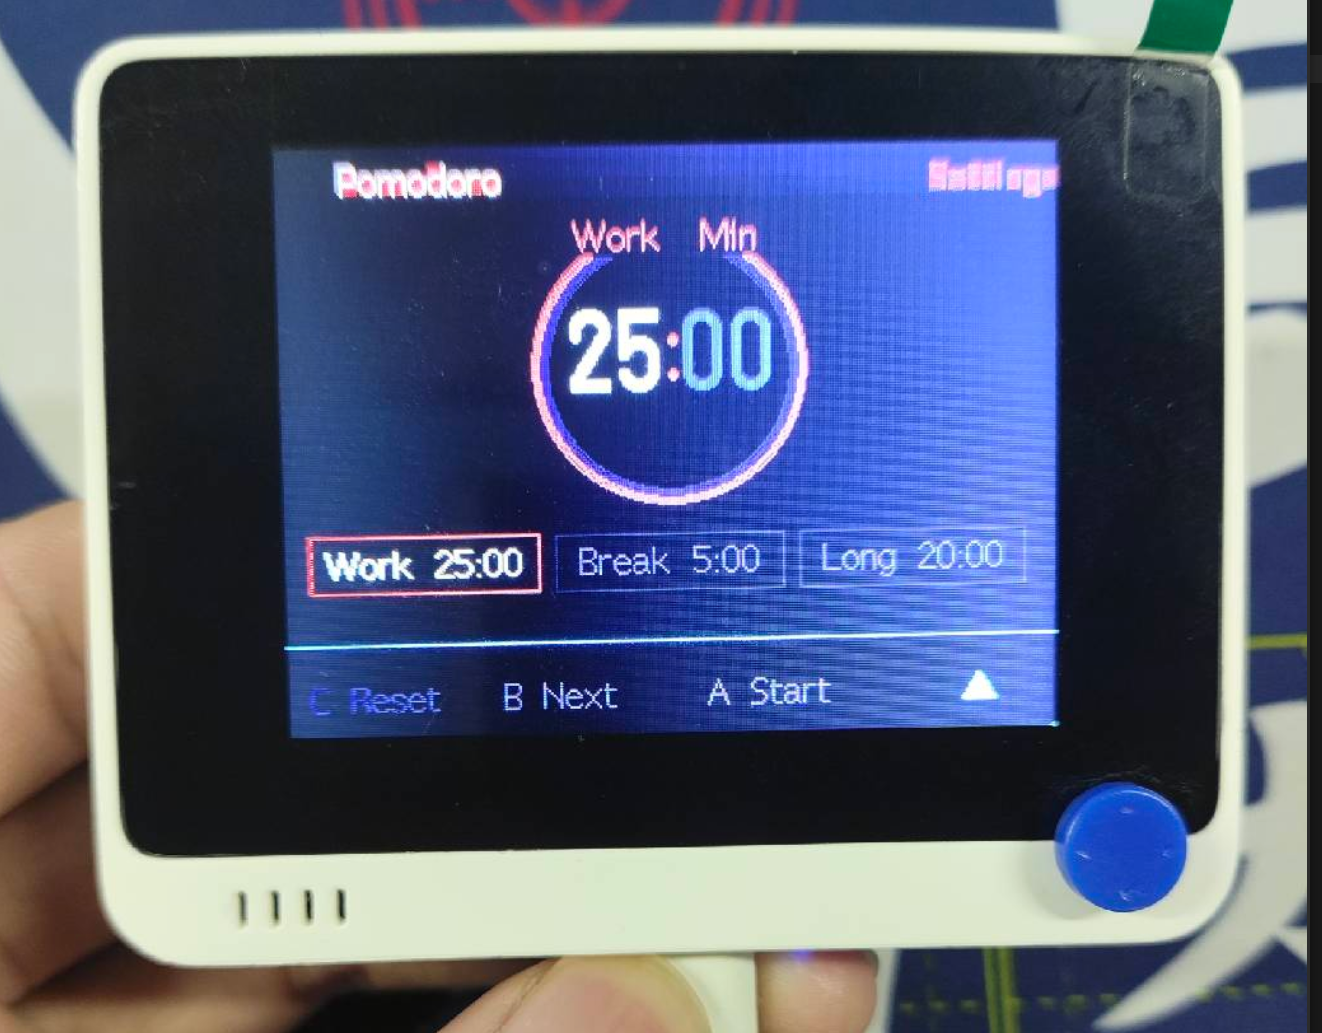
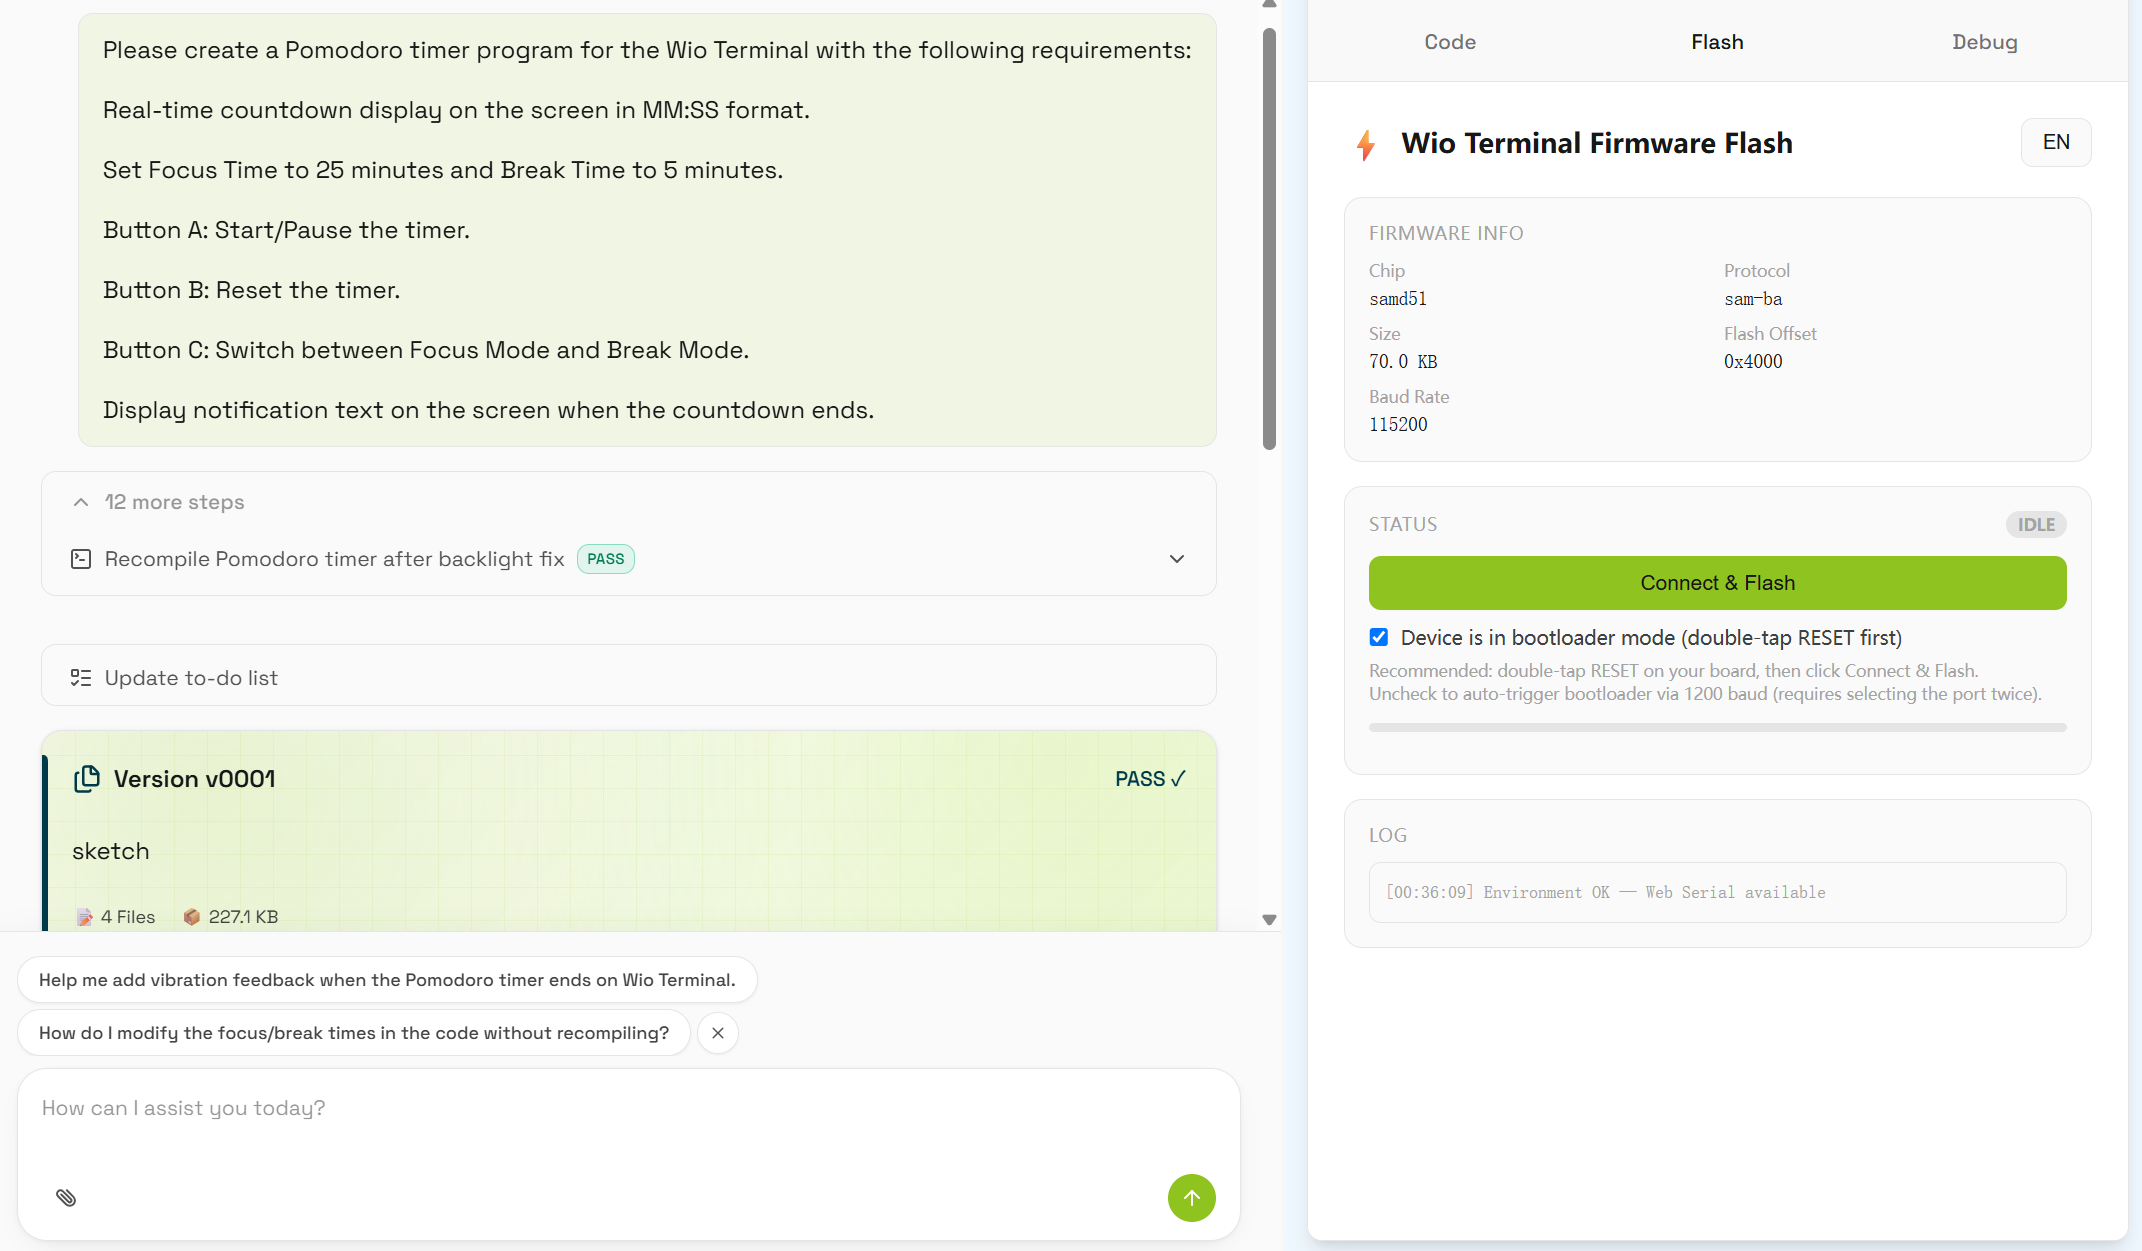
This example guides you to create a Pomodoro timer based on the Wio Terminal. The project displays a real-time countdown on the screen and uses buttons to control start, pause, reset, and mode switching.
2.2.1.2 Sample Prompt
You can enter:
Please create a Pomodoro timer program for Wio Terminal. Requirements:
- Display a real-time countdown in mm:ss format.
- Set focus time to 25 minutes and break time to 5 minutes.
- Button A starts or pauses the timer.
- Button B resets the timer.
- Button C switches between focus and break modes.
- Show a reminder message when the timer ends.
2.2.1.3 Flashing to Hardware
- Connect the Wio Terminal to your computer using a USB cable.
- Follow the on-screen instructions to enter flashing mode.
- Click the “Connect and Flash” button in CodeCraft.
- Wait for the upload to complete.
2.2.1.4 Iteration
If you want to modify the project, you can continue telling CodeCraft:
Please change the focus time to 45 minutes and the break time to 10 minutes.
CodeCraft will update the code and generate a new version based on your request.
2.2.2 ESP32 LED Blinking
2.2.2.1 Project Objective
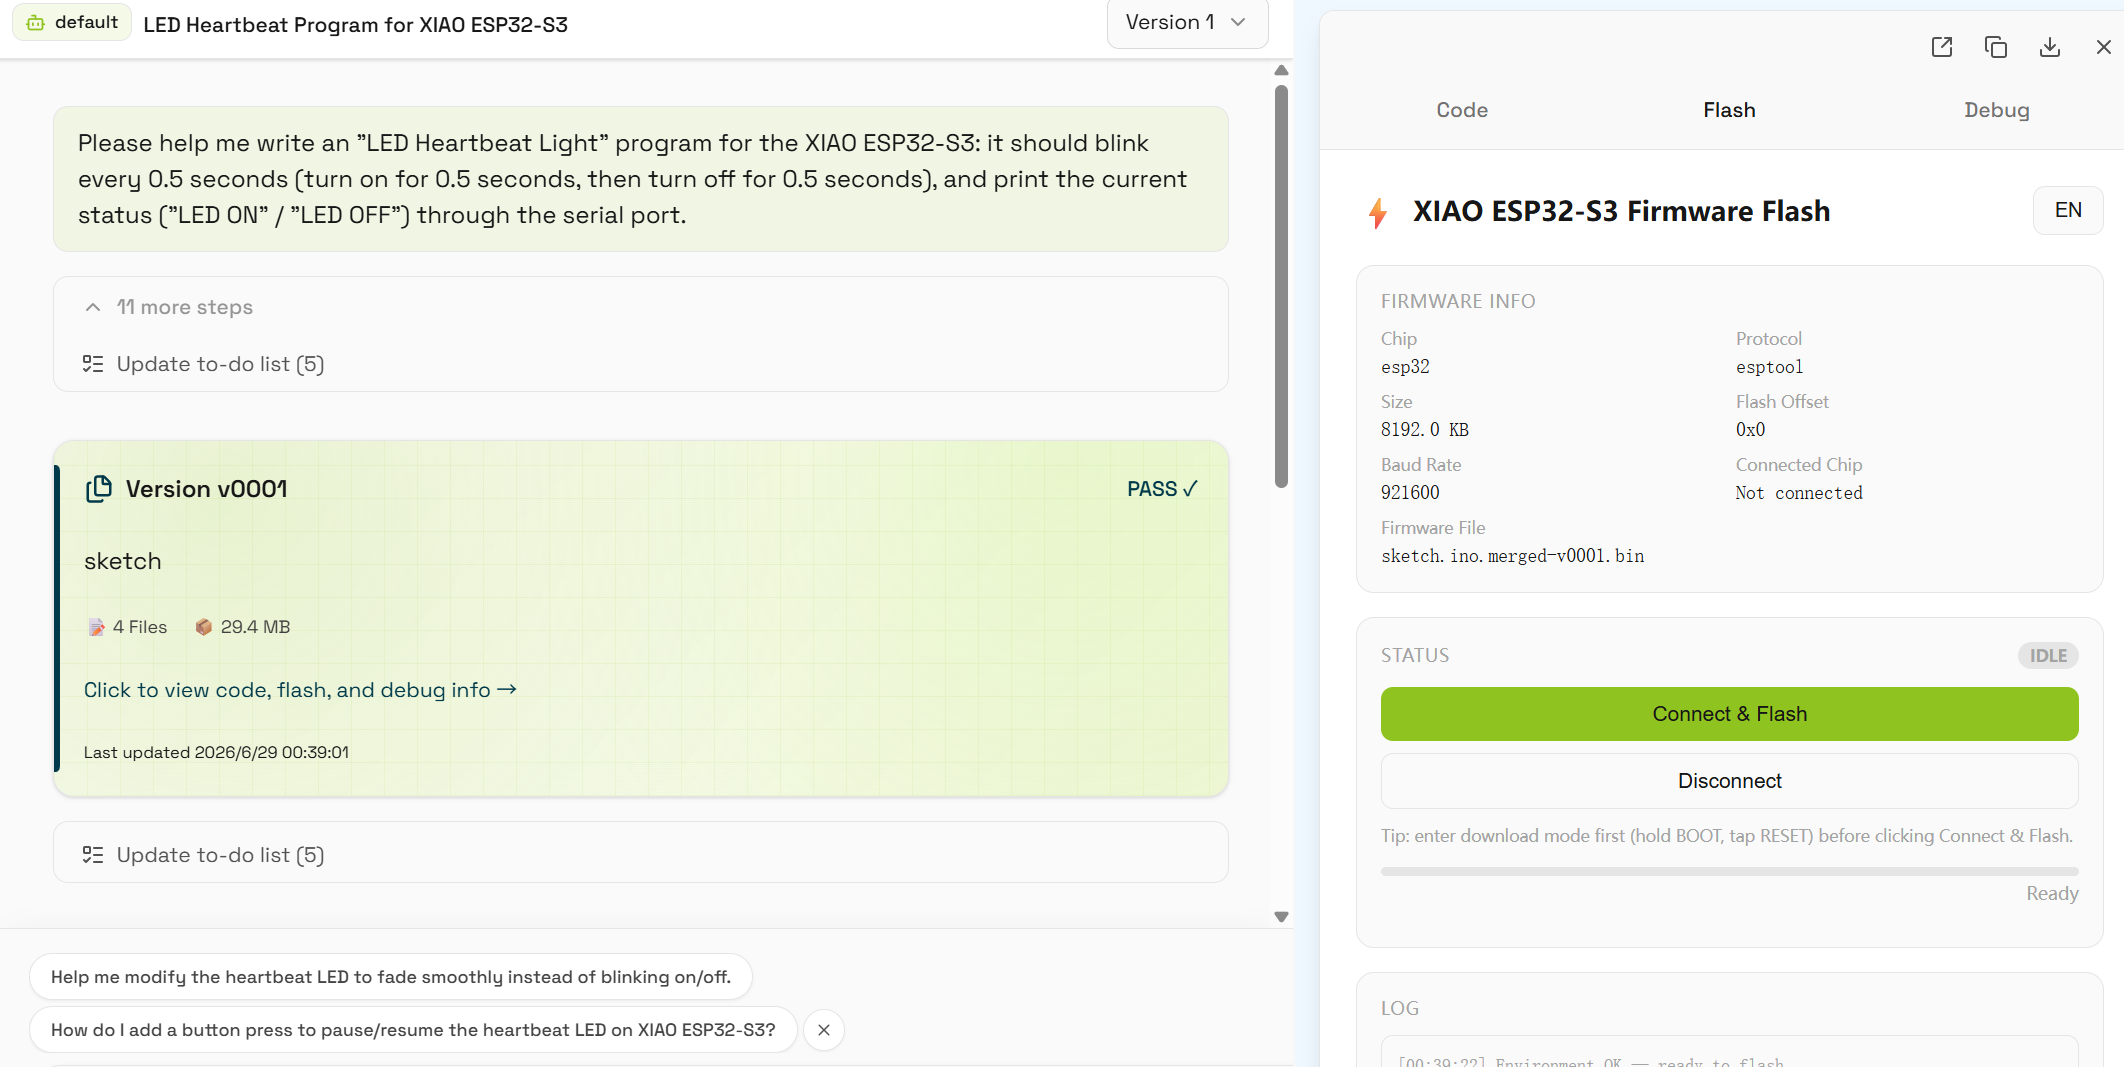
This example guides you to create an ESP32-based LED blinking project. The onboard LED toggles every 0.2 seconds to achieve rapid blinking. At the same time, the program sends LED status messages via serial output: when the LED is ON, it sends “LED ON”; when OFF, it sends “LED OFF”.
2.2.2.2 Sample Prompt
You can enter:
Please create an LED blinking program for ESP32. Requirements:
- Use the onboard LED.
- Toggle the LED every 0.2 seconds.
- When LED is ON, send “LED ON” via serial.
- When LED is OFF, send “LED OFF” via serial.
- Set serial baud rate to 115200.
- Run continuously.
2.2.2.3 Flashing to Hardware
- Connect the ESP32 development board to your computer via USB.
- Select the correct ESP32 serial port in CodeCraft.
- Click the “Connect and Flash” button.
- Wait for the upload to complete.
- Open the serial monitor and verify that “LED ON” and “LED OFF” appear alternately.
2.2.2.4 Iteration
If you want to modify the project, you can continue telling CodeCraft:
Please change the LED blinking interval to 1 second and display the blink count in the serial output.
CodeCraft will update the code and generate a new version.
2.2.3 Grove Beginner Kit Button-Controlled LED
2.2.3.1 Project Objective
This example guides you to create a button-controlled LED project using the Grove Beginner Kit. The onboard button controls the LED: when pressed, the LED turns on; when released, it turns off. The program also prints button status in real time via serial output: “Pressed” when pressed, and “Released” when released.
2.2.3.2 Sample Prompt
You can enter:
Please create a “button-controlled LED switch” using Grove Beginner Kit. Requirements:
- Use the onboard button to control the onboard LED.
- Turn on the LED when the button is pressed.
- Turn off the LED when the button is released.
- Print button status via serial in real time.
- Send “Pressed” when the button is pressed.
- Send “Released” when the button is released.
2.2.3.3 Flashing to Hardware
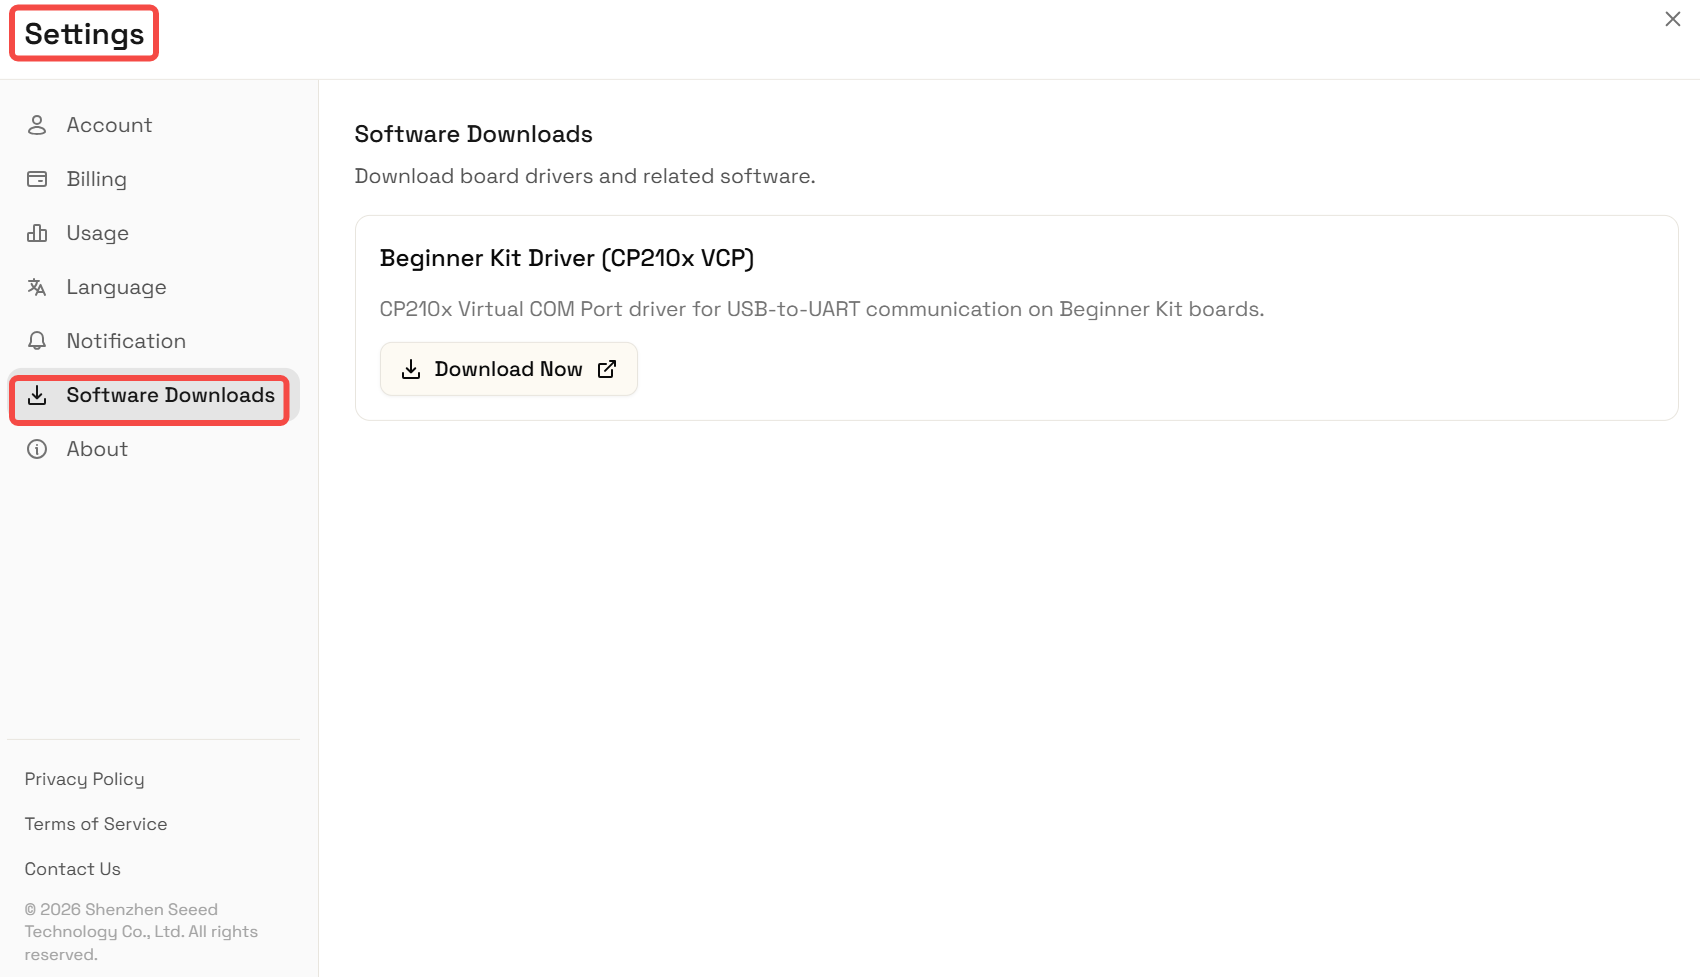
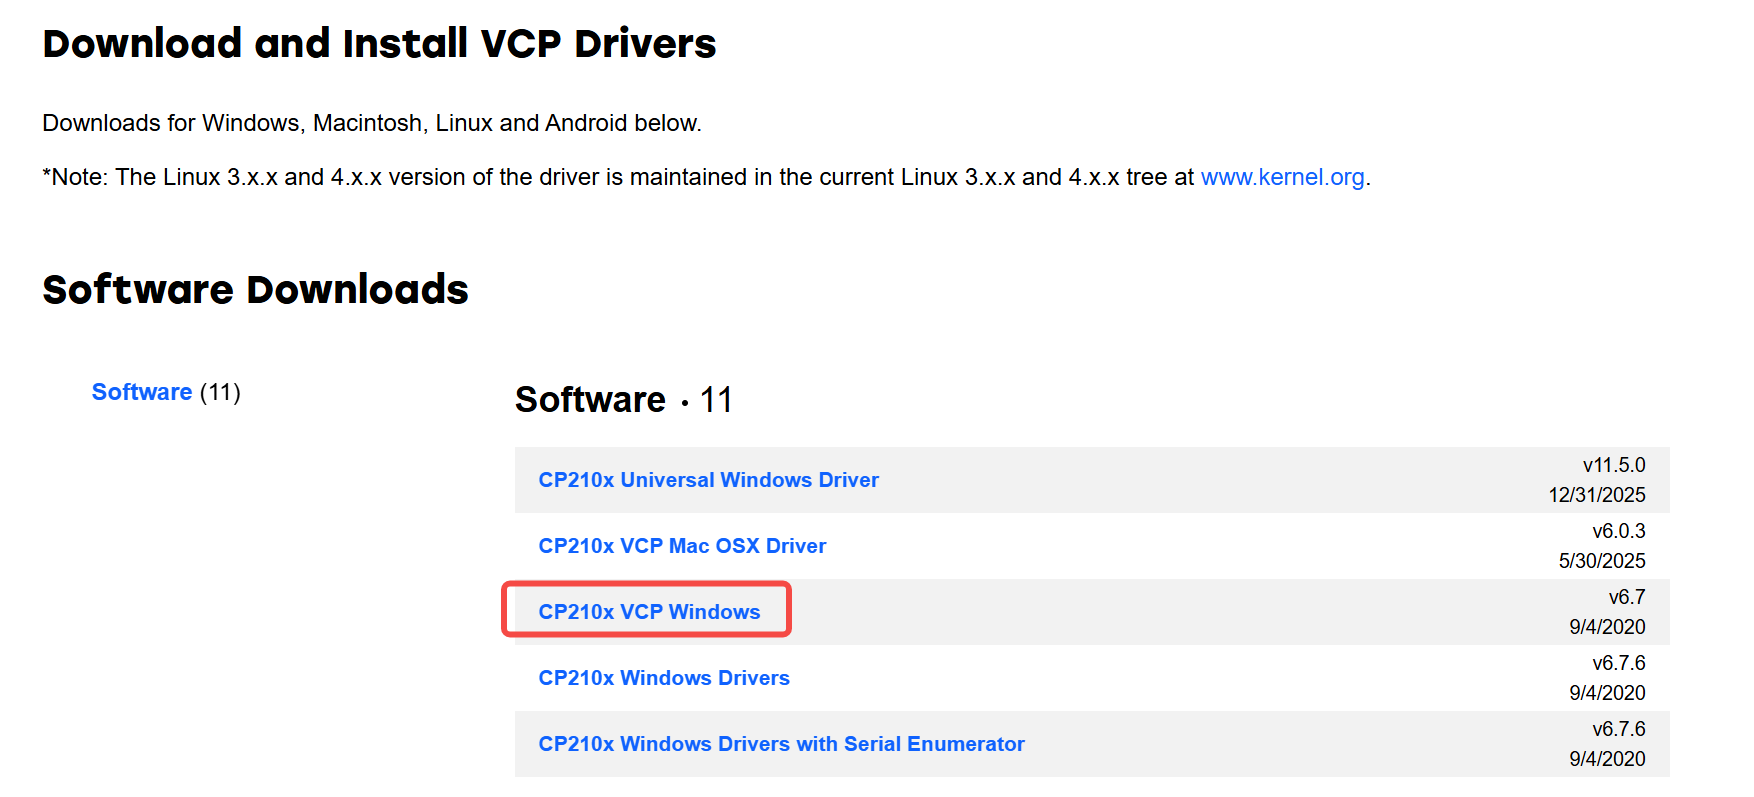
Before flashing, please check whether drivers are required:
- On Windows, you need to install the Grove Beginner Kit driver first, otherwise the device or serial port may not be recognized.
- On macOS, no additional drivers are usually required.
- Connect the Grove Beginner Kit to your computer via USB.
- Select the correct device and serial port in CodeCraft.
- Click the “Connect and Flash” button.
- Wait for the upload to complete.
- Press and release the onboard button and observe LED behavior.
- Open the serial monitor and confirm “Pressed” and “Released” appear.
(Note: Ensure the baud rate in the code matches the debugger tool.)

2.2.3.4 Iteration
If you want to modify the project, you can continue telling CodeCraft:
Please make the buzzer sound once when the button is pressed and display the number of button presses in the serial output.
CodeCraft will update the code and generate a new version.
2.3 FAQ
Q: Why does flashing fail?
A: Please check whether the USB cable supports data transmission and ensure the development board is in the correct flashing mode.
Q: What should I do if compilation errors occur?
A: Check the workspace debugging information and ensure baud rate, hardware model, and sensor configuration are correct.
Q: Where can I find more project examples?
A: Visit the SenseCraft AI Application Gallery: https://sensecraft.seeed.cc/ai/application