Connecting to ChirpStack
ChirpStack Configuration
ChirpStack provides open-source components for LoRaWAN networks. Together they form a ready-to-use solution including a user-friendly web interface for device management and APIs for integration.
Add Gateway
Before starting, please login into the ChirpStack Application Server.
The default credentials are:Username: admin;Password: admin
If you have not yet connected your ChirpStack Application Server instance with a ChirpStack Network Server instance, you need do this first. See Network servers. Also you need to connect the organization with the network-server by creating a Service profile.
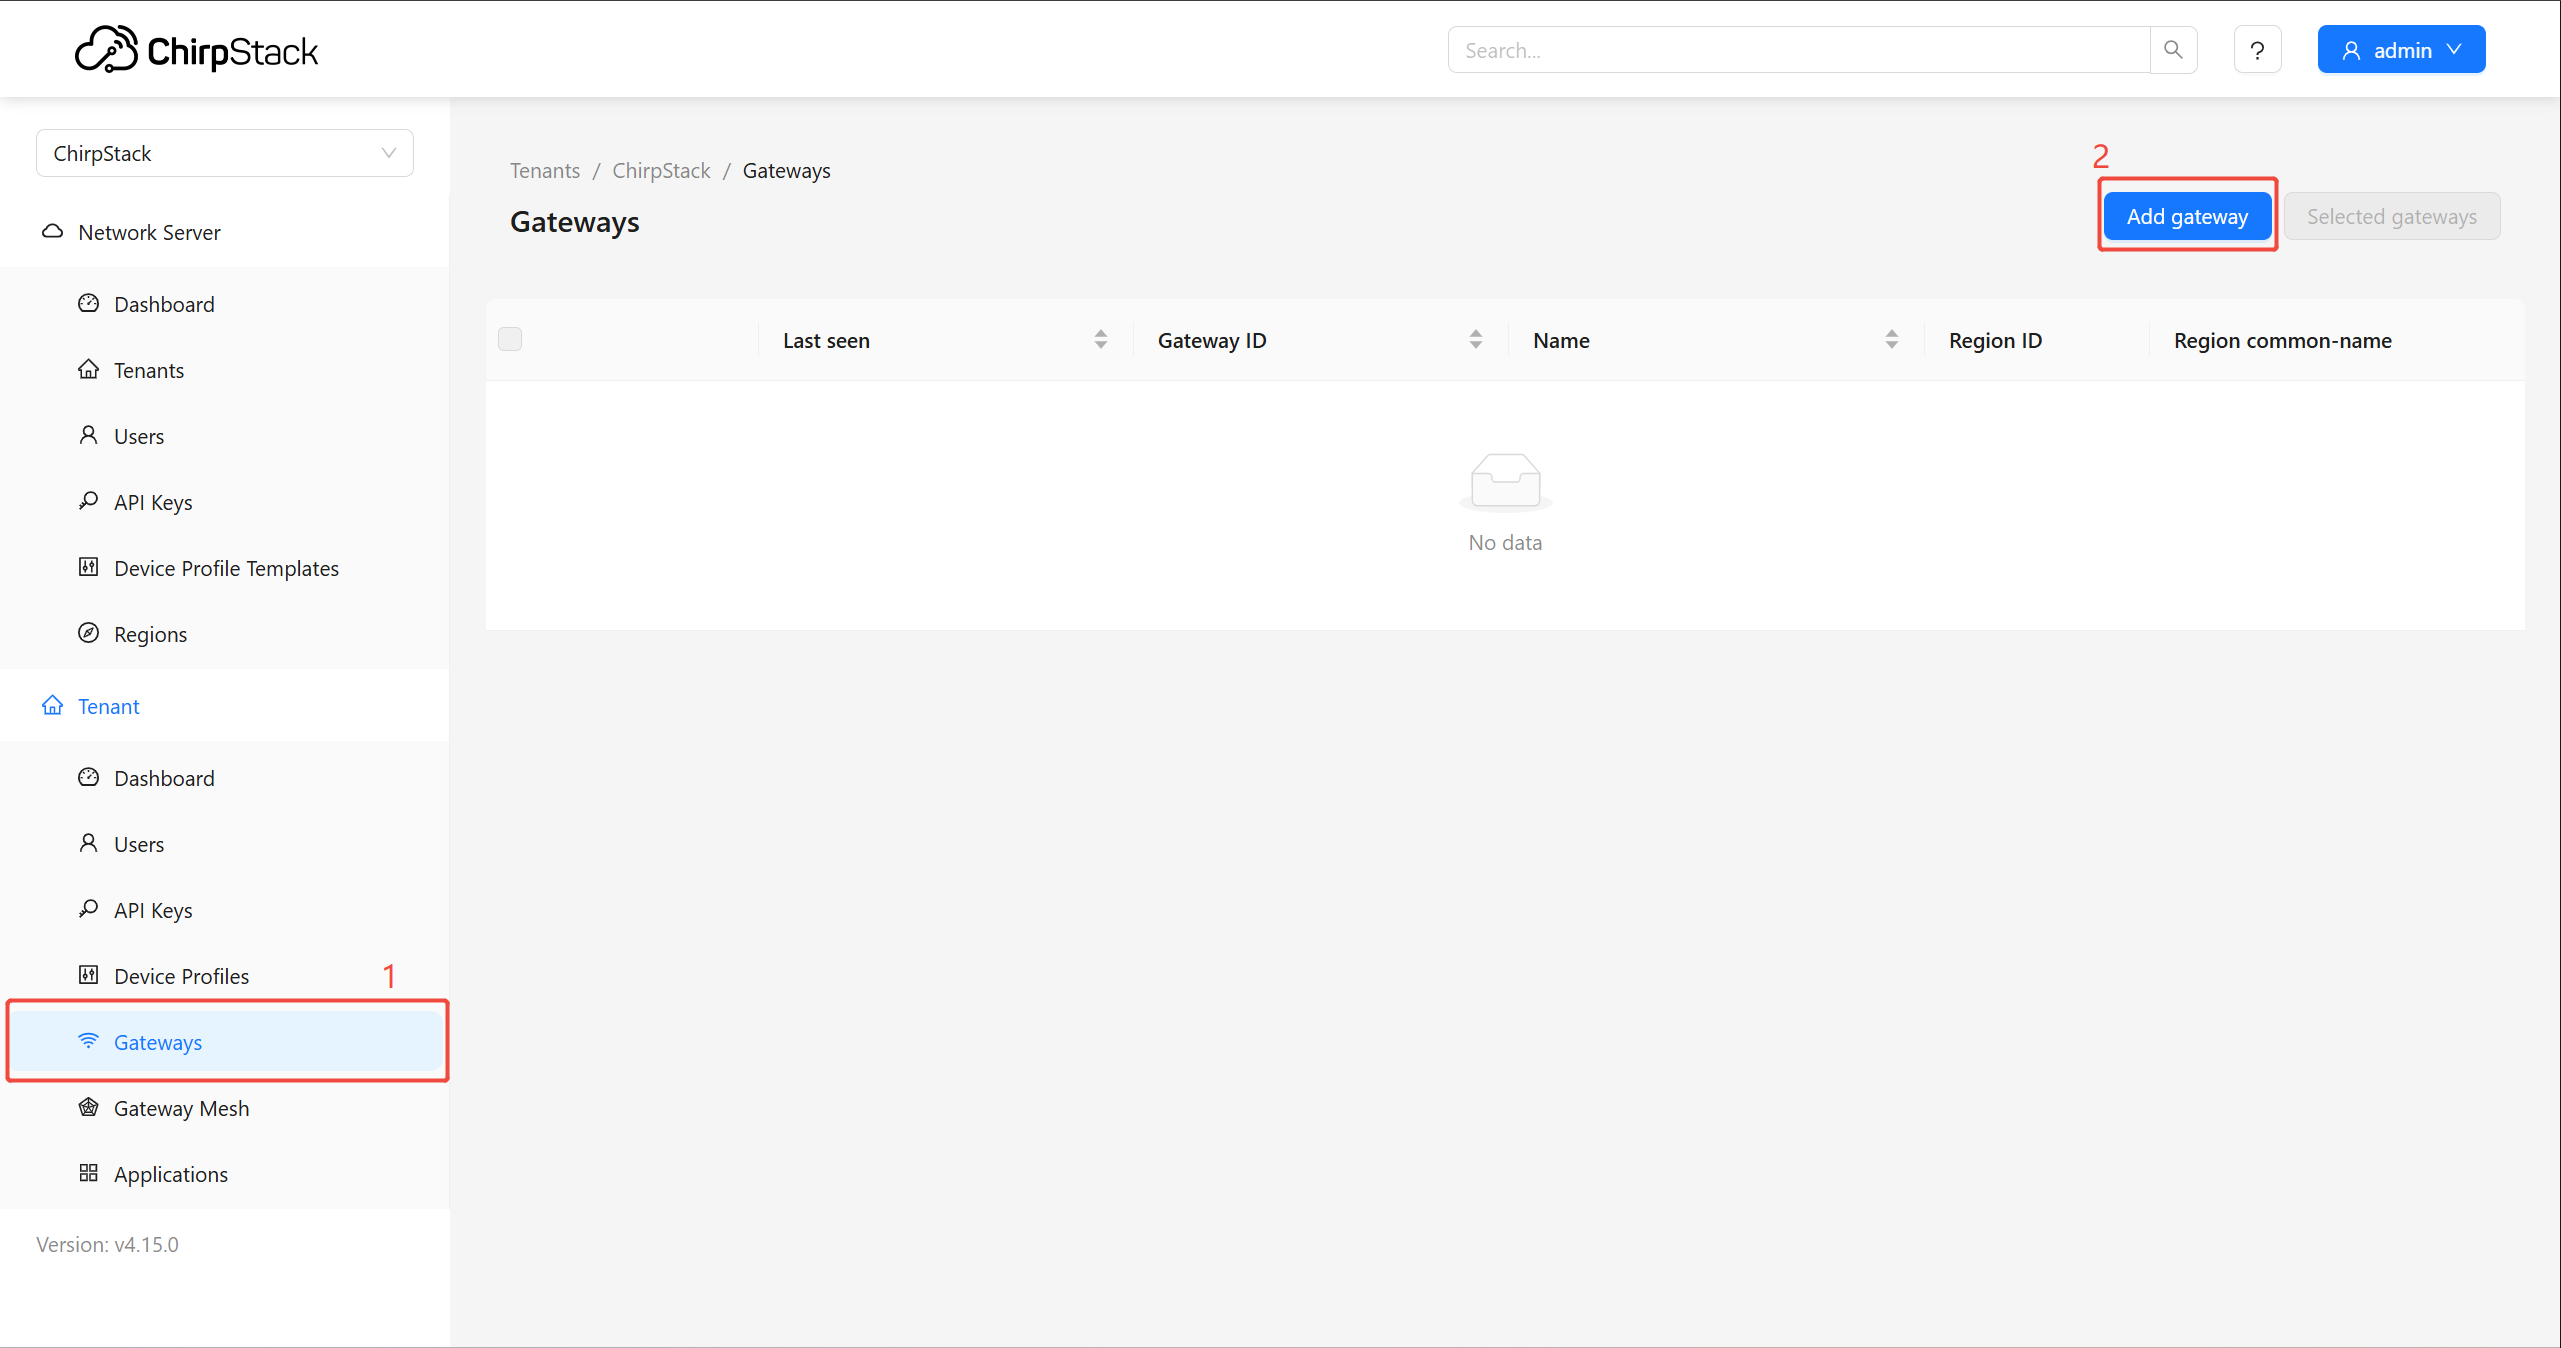
Navigate to Gateway > Add gateway
Enter the Gateway Name and Gateway ID (EUI: 64)
Gateway name: A name of your gateway
Gateway EUI: Gateway EUI can be found on the device label or Local Console
Stats interval(secs): The expected interval in seconds in which the gateway sends its statistics
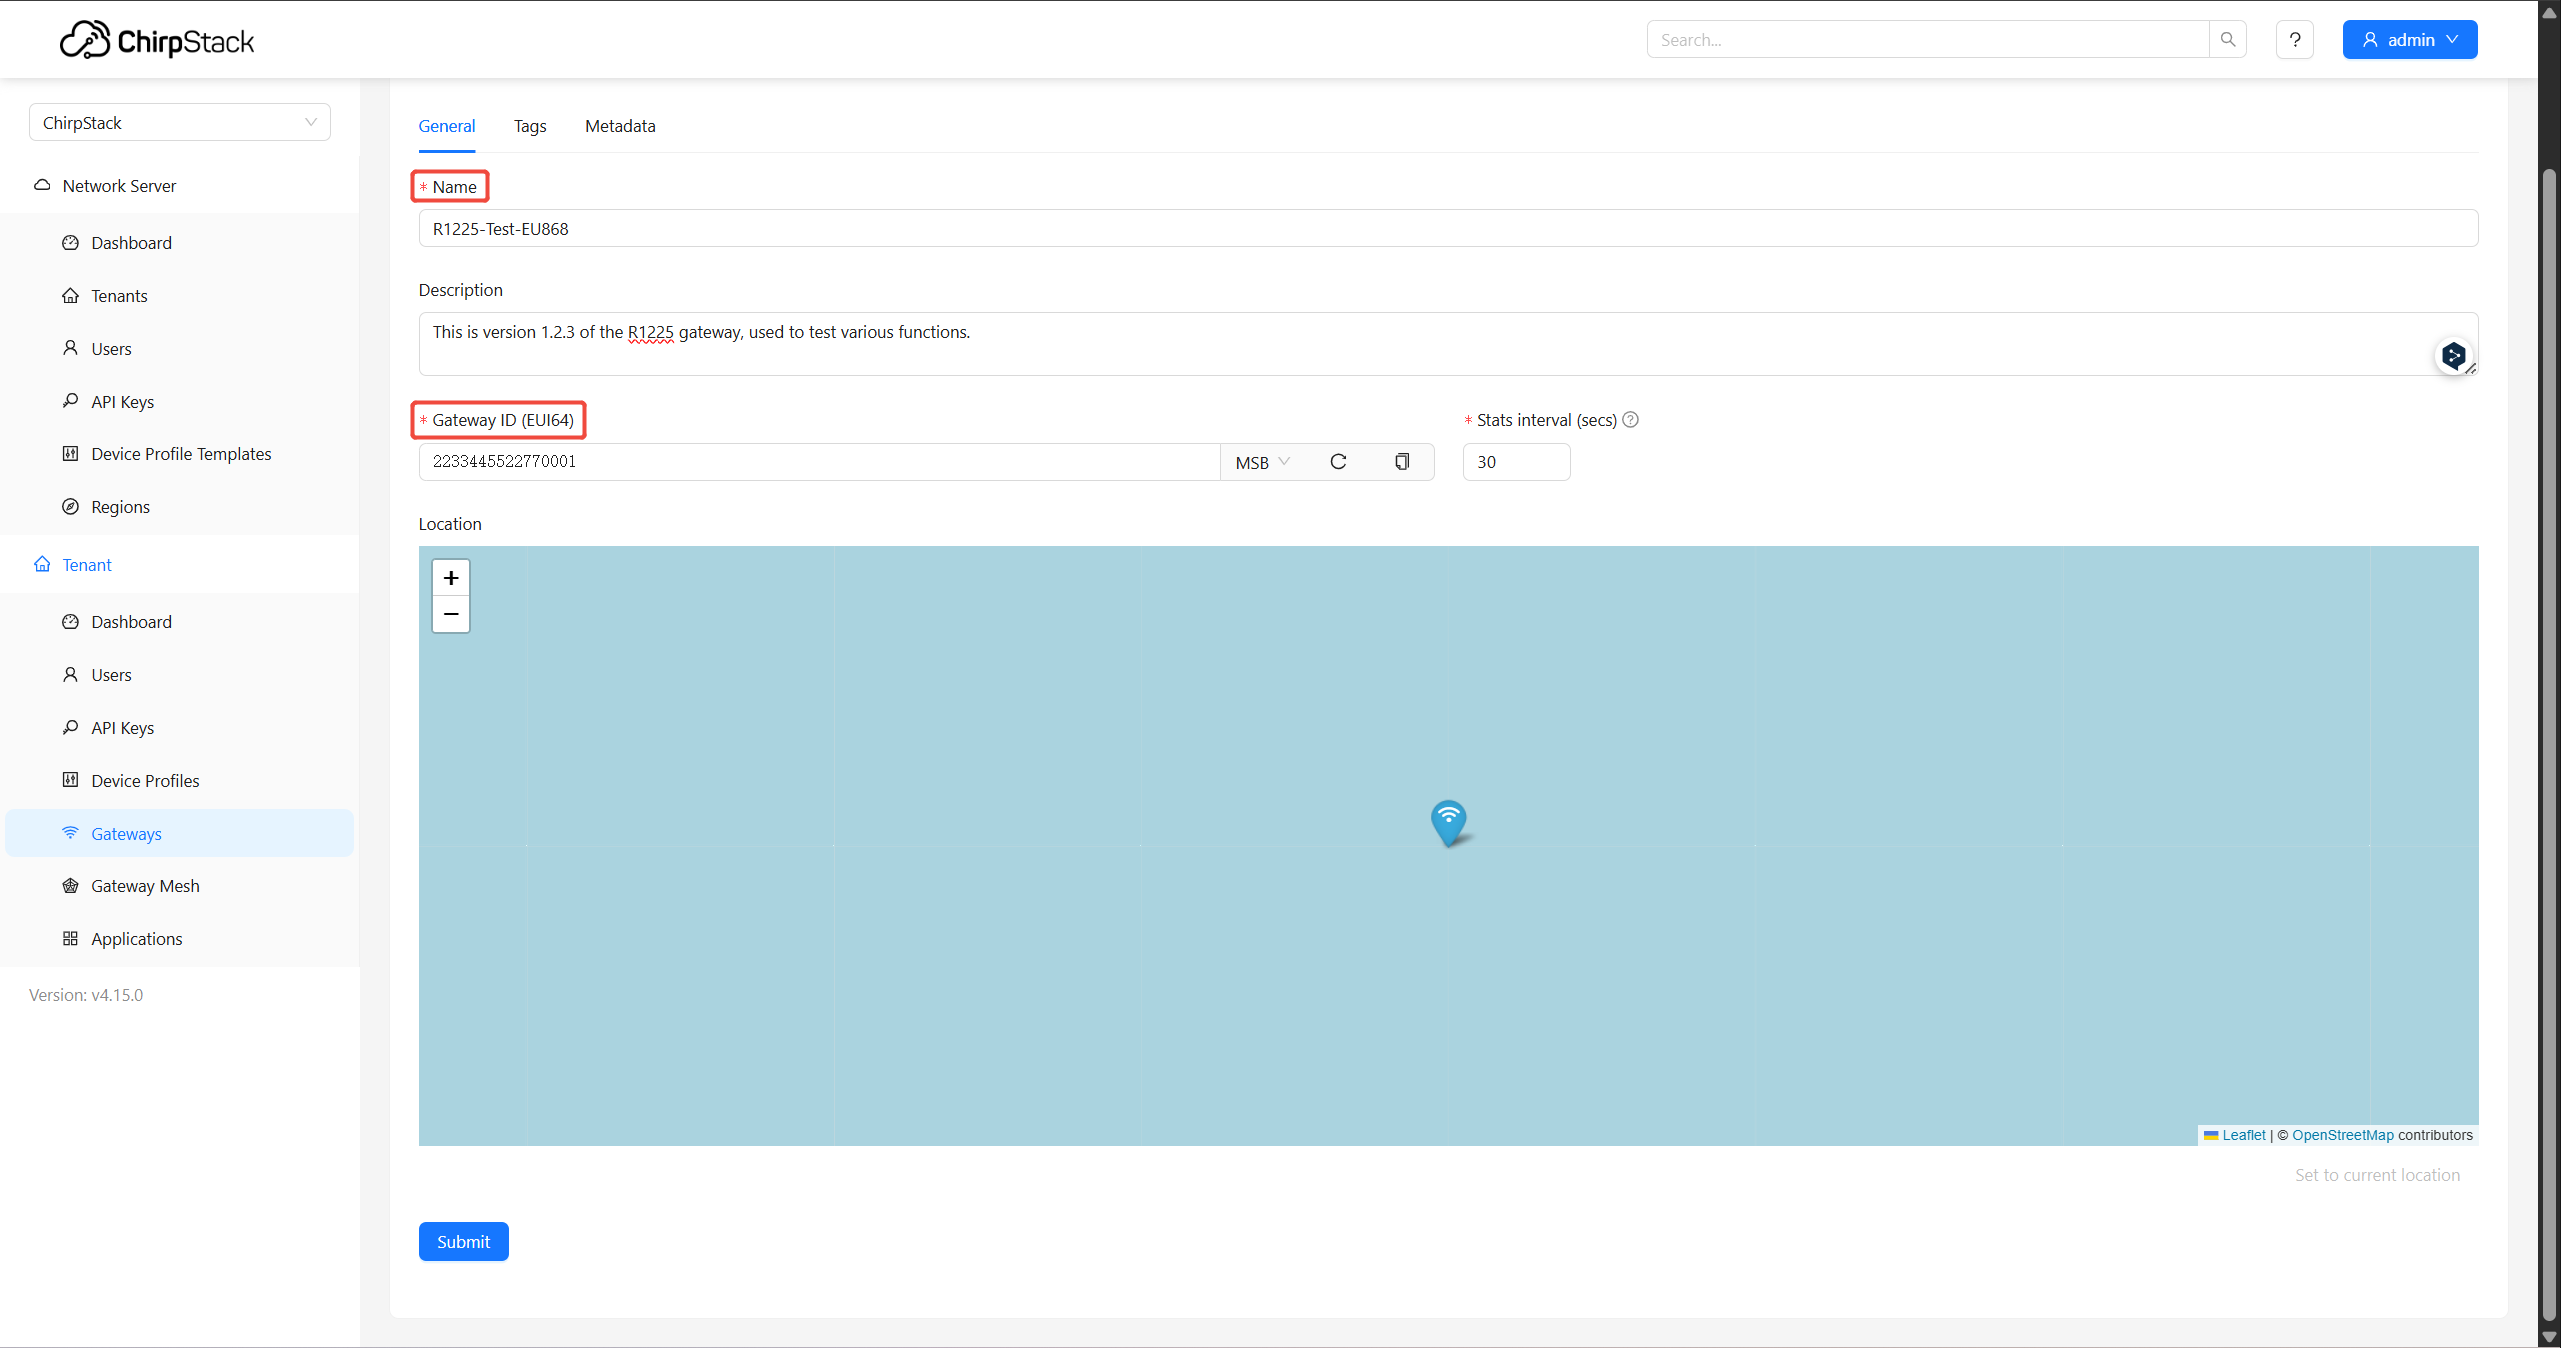
Then click Submit
Add device profile
Before you can add your device to ChirpStack, you have to create a device-profile if you haven't done this already.
Navigate to Device profile > Add device profile

Name: A name of your device profile
Region:Select the Region plan according to your gateway.
MAC version: LoRaWAN 1.0.3
Regional parameters revision: A
ADR algorithm: Default ADR algorithm( LoRa only)
Select MAC version/Regional parameters revision/ADR algorithm according to your device. For details, please refer to:https://lora-alliance.org/resource_hub/

Add device
Navigate to Application > Add Application

Click the application to which you want to add your device. Under the Devices tab, click Add device

Name: A name of your device
Device EUI: Device EUI can be found on the device label or SenseCAP Mate APP
Device profile: Choose the device profile we create .

Gateway Configuration
Configure the gateway via the Web UI,please check the Quick Start to log into Local Console first.
LoRa Network Settings
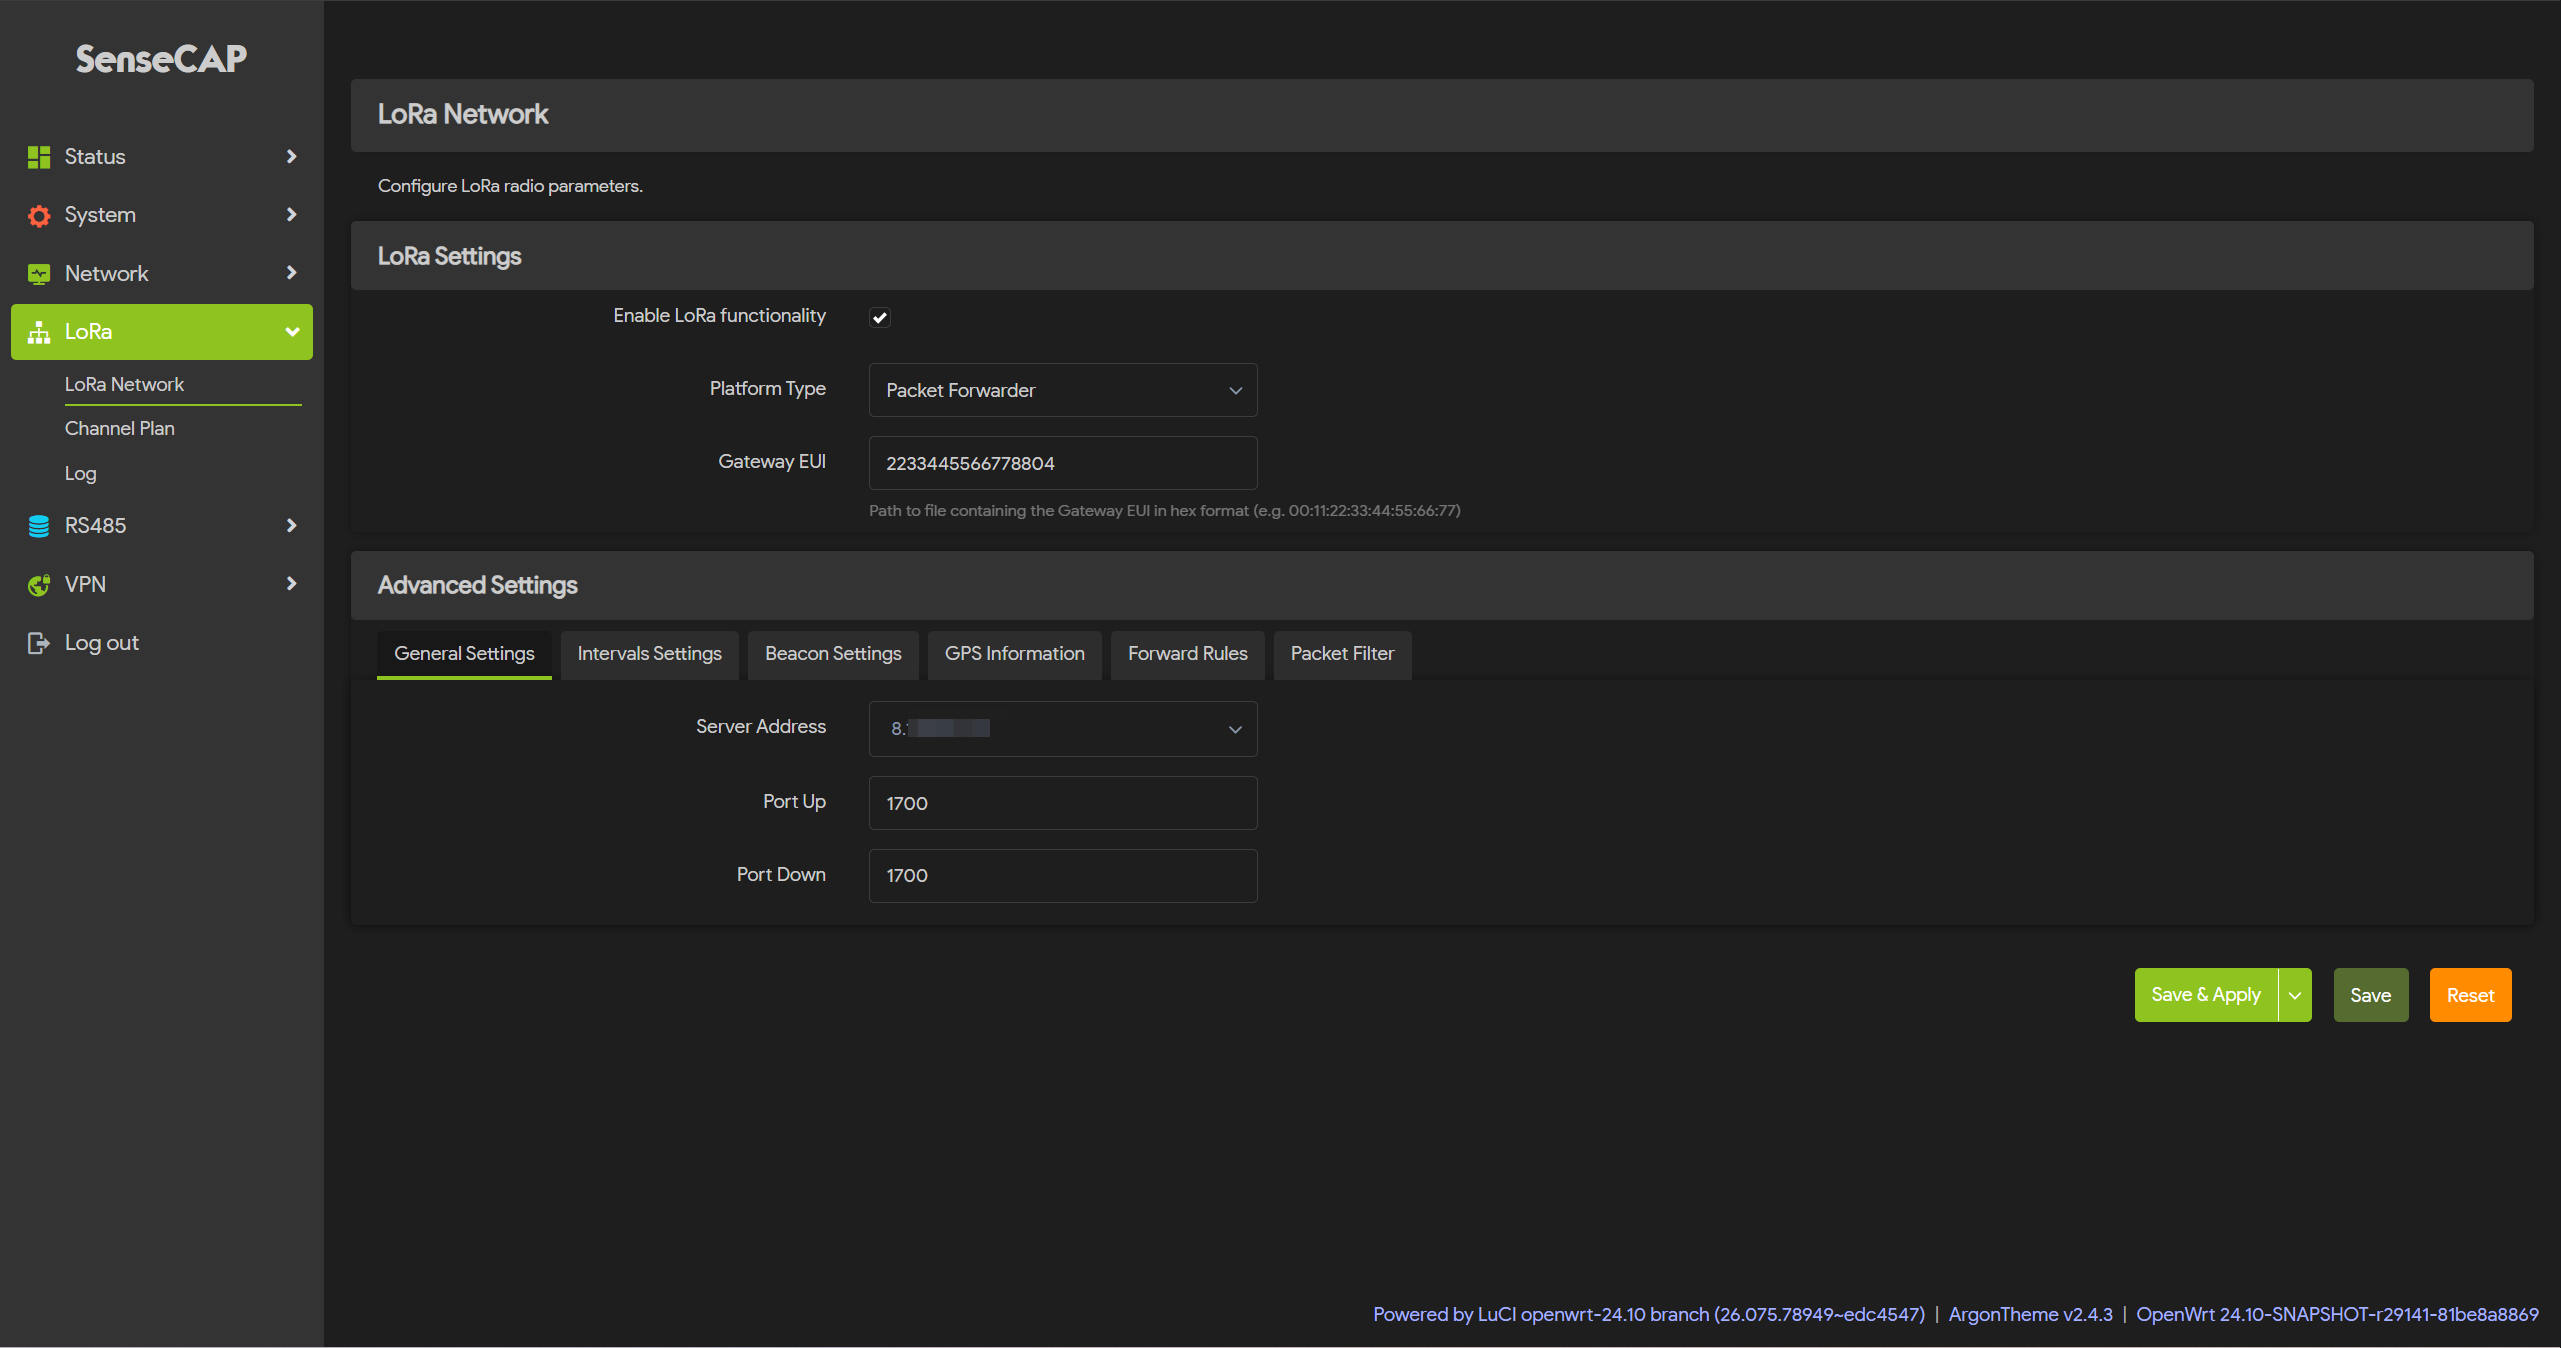
Navigate to LoRa > LoRa Network
Mode: Packet Forwarder
Packet Forwarder Settings:
Gateway EUI: It will automatically get the EUI of the connected gateway
Server Address: Your ChirpStack Server address
Server Port(Up/Down): 1700
Other settings can be left as default, or can be changed to suit your requirements.
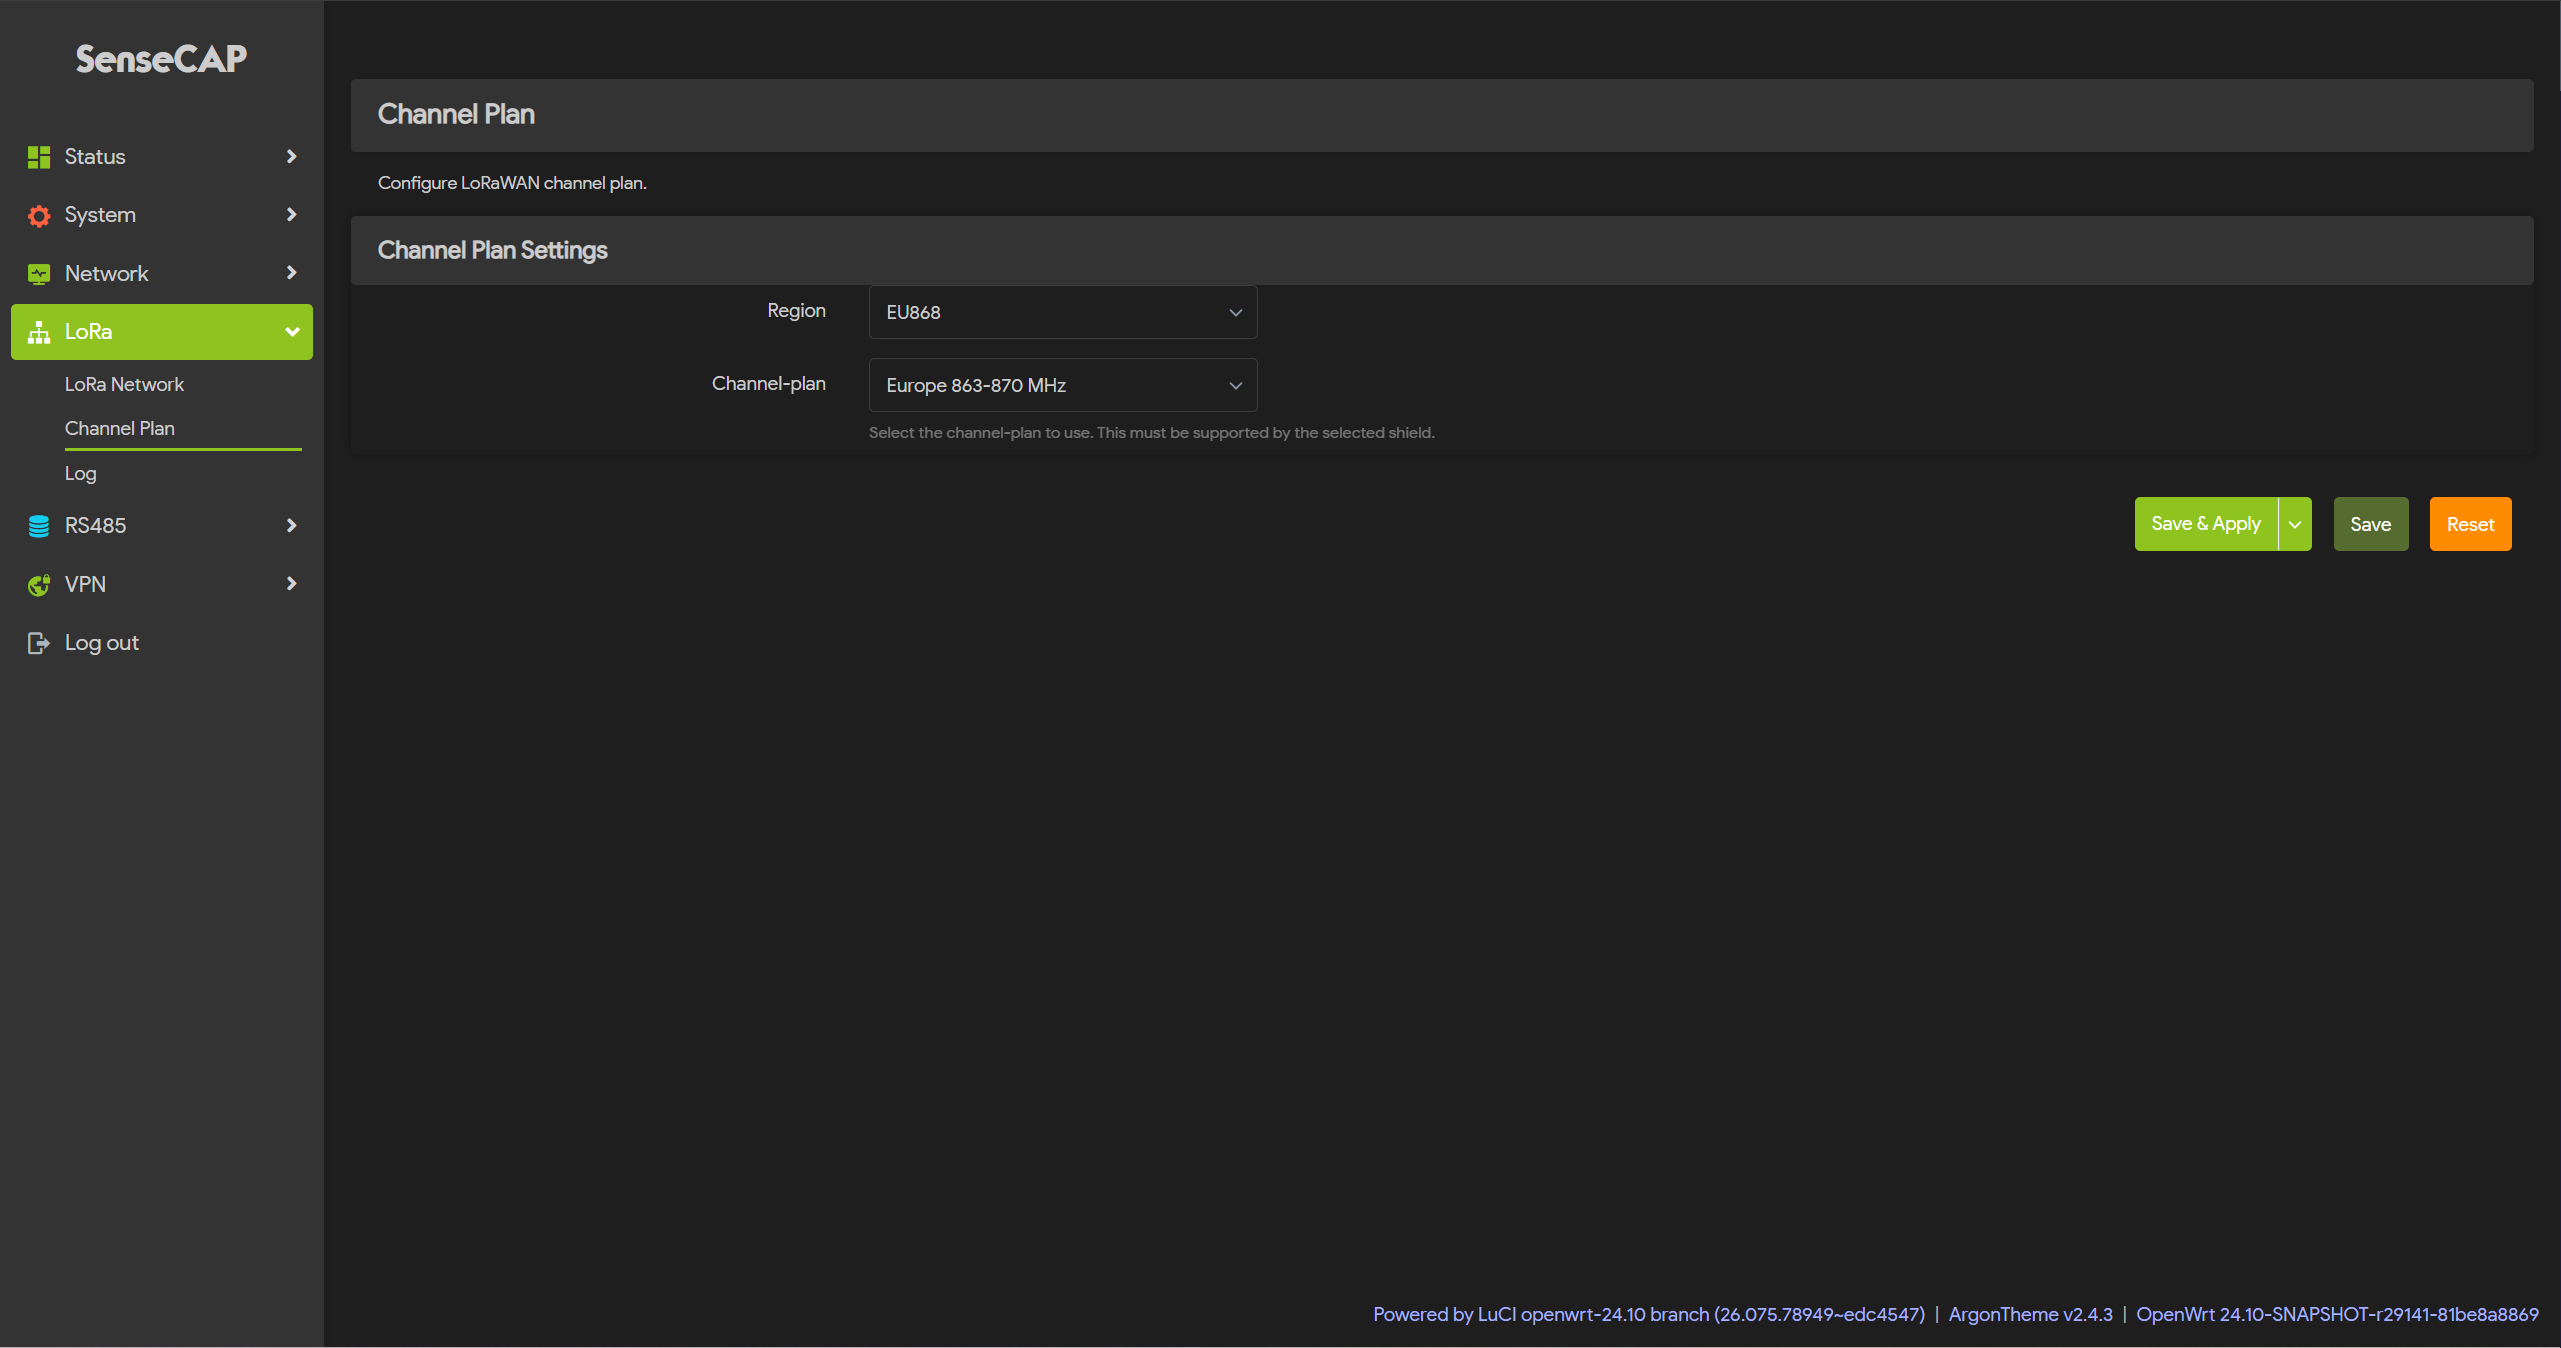
Channel Plan Settings
Navigate to LoRa > Channel Plan
Select the Region and Frequency plan according to the actual choice.
After setting, click Save&Apply
Data View
Gateway data
Navigate to Gateways, choose the gateway you want to check.

Device data
After adding your LoRaWAN device to ChirpStack, validate that your device is able to activate (in case of OTAA) and send data.
Navigate to Applications > Devices, choose the device you want to check.
