Create Backup and Restore on reComputer
Introduction
reComputer is a powerful and compact intelligent edge box to bring up to 275TOPS modern AI performance to the edge.When you have configured and installed the software and environment necessary for your business on recomputer, and need to replicate the project from another new recomputer, reinstalling the software is not efficient. Therefore, this wiki page will use reComputer J3011 to introduce how to back up your existing software and environment on the recomputer series, making it convenient for you to restore and transplant it to the new recomputer.
Our testing platform is reComputer J3011, JetPack 5.1.3 is provided for reference.
Prerequisite
- Ubuntu Host Computer
- USB Type-C data transmission cable
- reComputer J3011 (with JetPack 5.1.3 OS)
Installed and configured necessary software and applications on your reComputer. Ensure these modifications do not impair the device's boot functionality. It's recommended to reboot the device after making changes to confirm stability.
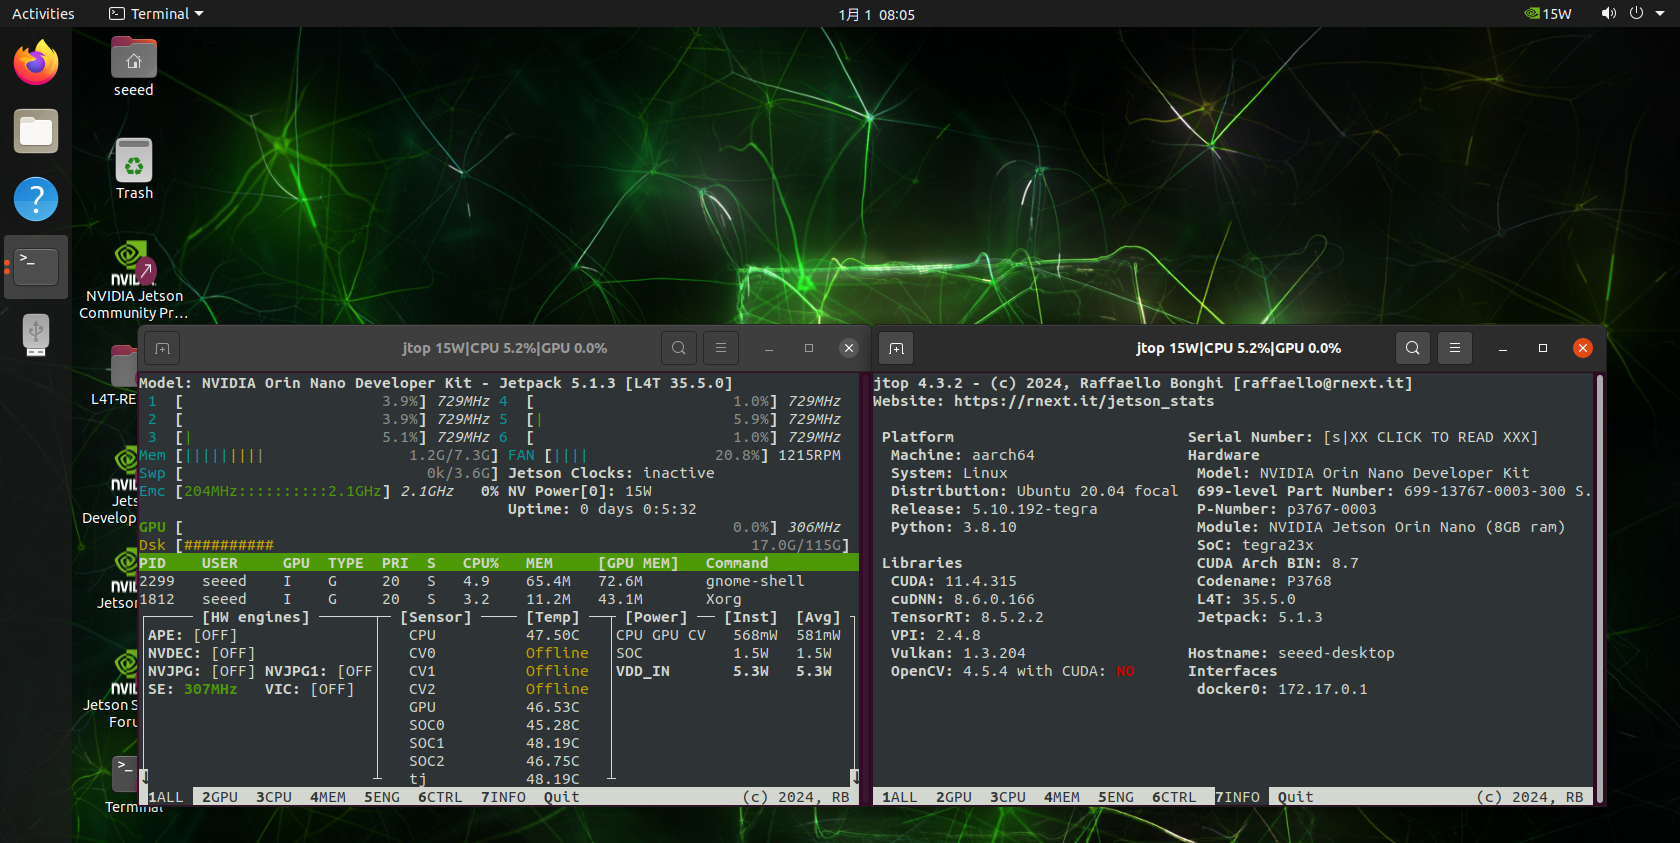
Like the screenshot above, we installed the jtop software, where we can use these commands on the terminal directly.
Backing Up the System
Step 1. Setting the device into recovery mode refer to this wiki page.
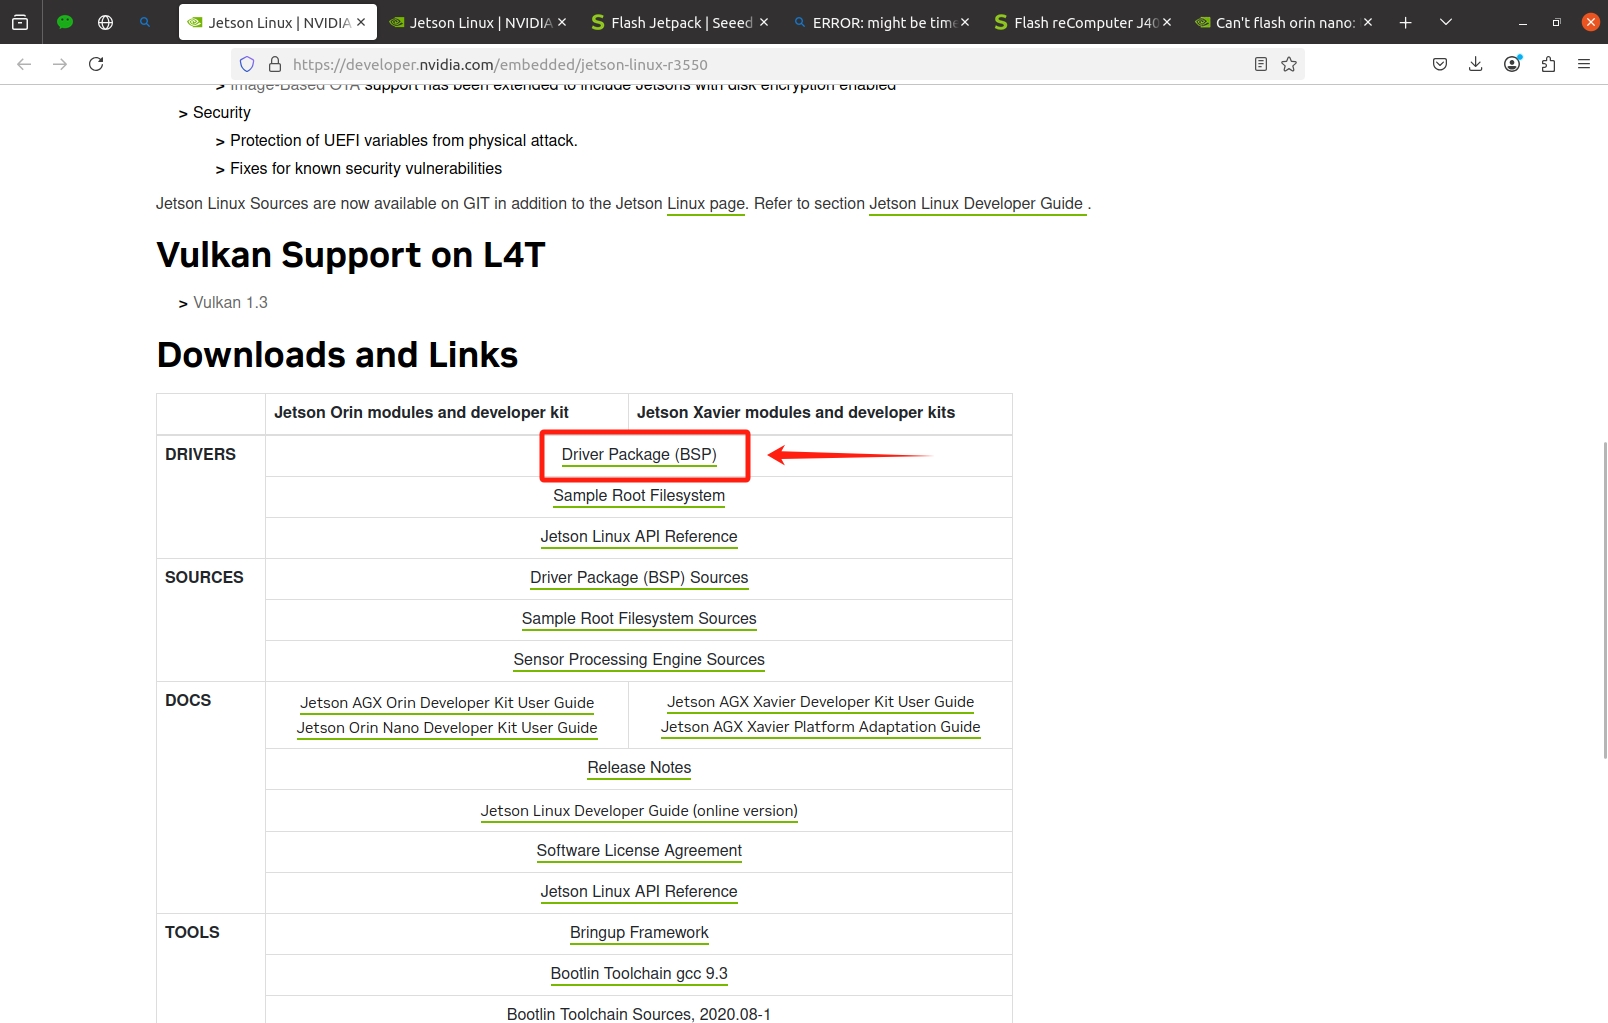
Step 2. Obtain the JetPack BSP corresponding to your Jetson module. For JetPack 5.1.3, download the Jetson Linux R35.5.0 BSP from NVIDIA's official site.
Step 3. Extract the BSP file to access the Linux_for_Tegra directory.
tar -xvzf jetson-linux-*.tbz2
# For Jetpack 5.1.3: tar -xvzf Jetson_Linux_R35.5.0_aarch64.tbz2
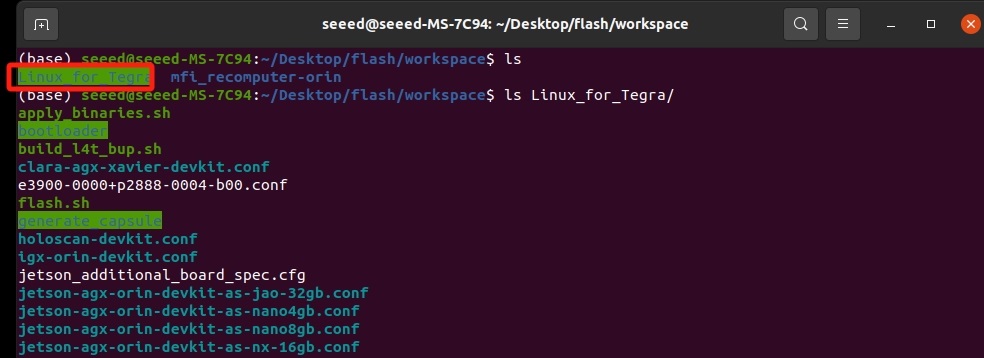
Step 4. Copy the contents of Linux_for_Tegra to your JetPack flashing package directory (e.g., mfi_recomputer-orin).
"flashing package directory" is the directory file used during the process of flashing the system.
Use the -rn options to preserve existing files:
sudo cp -rn Linux_for_Tegra/* mfi_recomputer-orin
Step 5. Navigate to your JetPack flashing package directory:
cd /path/to/mfi_recomputer-orin
Step 6. Execute the backup script, specifying your storage device and desired backup name:
sudo ./tools/backup_restore/l4t_backup_restore.sh -e nvme0n1 -b recomputer-orin
-b <target_board> replace with your device
you can navigate to your Jepack flashing package directory and find a xxx.conf file.
xxx is your <target_board>
ls | grep *.conf

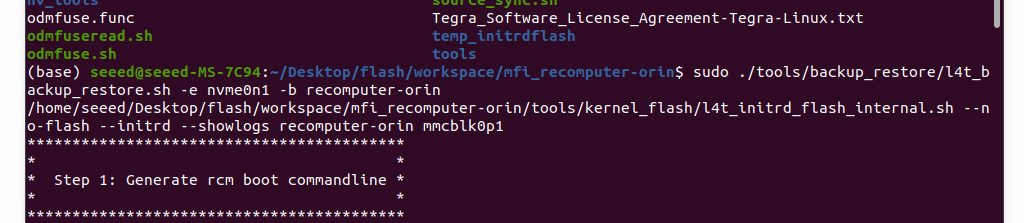
wait patiently until it finished. If all goes well, you will see something similar to the screenshot below in the terminal:

During this process, your device may reboot many times like the flashing process, you are not recommended to use virtual machines or WSL because it might lose connection and cause the backup/restore process failed. You may encounter some missing files; you can open the recomputer-orin.conf and remove the file that didn’t exist.
Usually these are temporary device tree overlay object files; they don't affect the backup and restore results. But if you made modifications to BSP, you will need to merge your overlay files.
Restoring the System
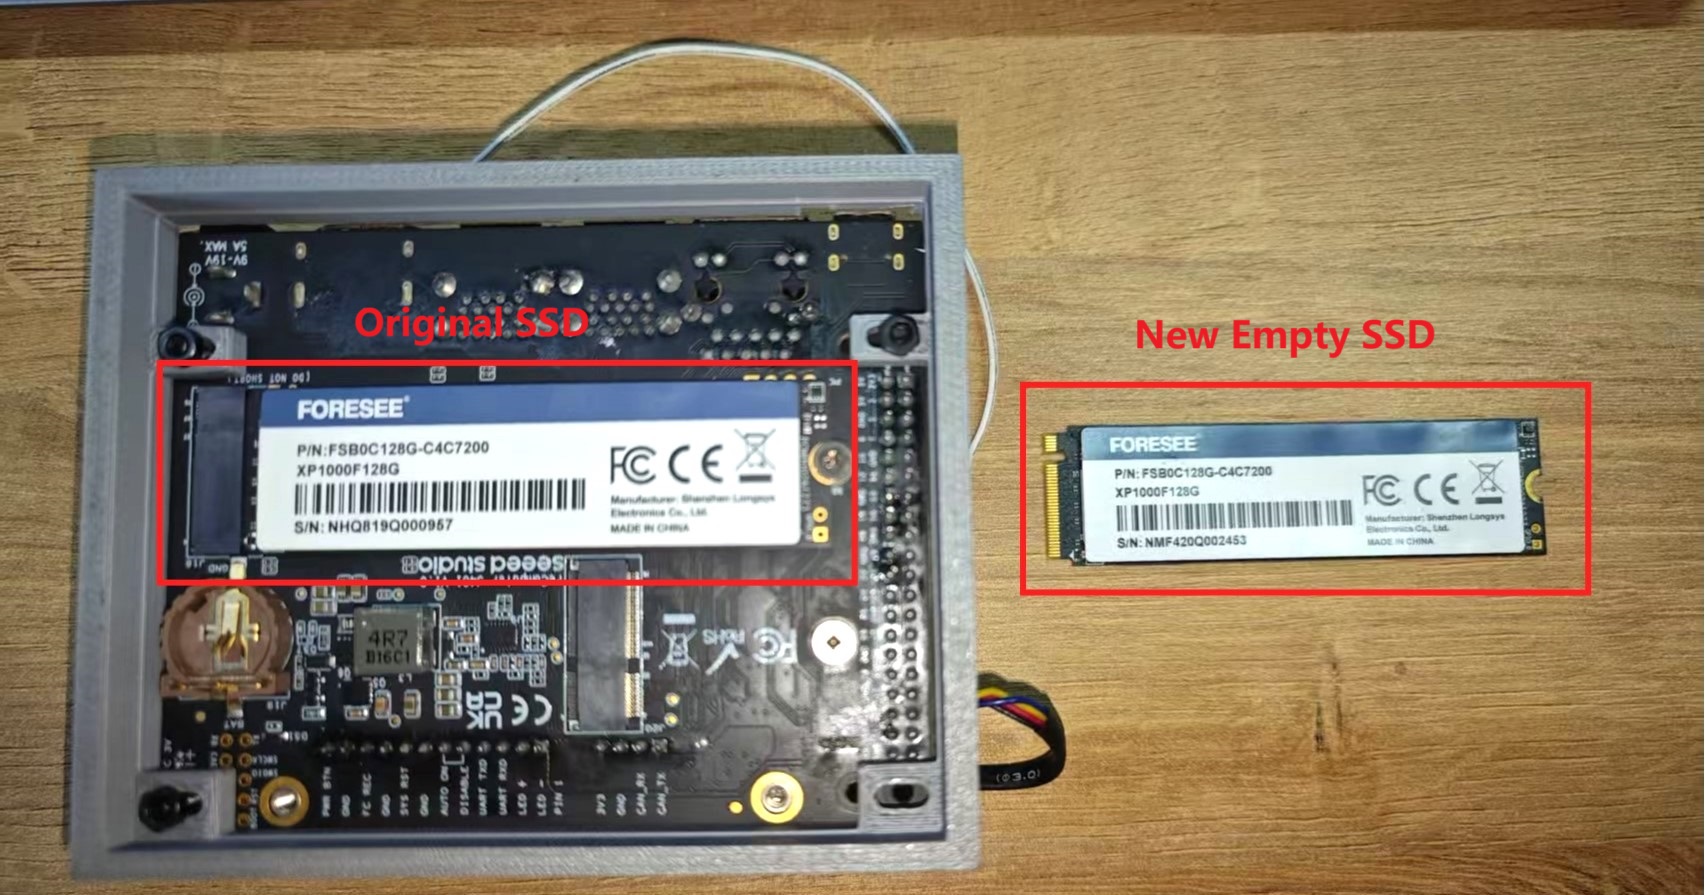
Step 1. Insert a new, empty SSD into your reComputer.
Step 2. Enter force recovery mode as previously described.
Step 3. On your host system, navigate to your JetPack flashing package directory and execute the restore command on host:
sudo ./tools/backup_restore/l4t_backup_restore.sh -e nvme0n1 -r recomputer-orin
If all goes well, you will see something similar to the screenshot below in the terminal:

Step 4. Power up the jetson device, use the username and password we previously set. And test some software we previously installed. If it worked, then our restore is successful.
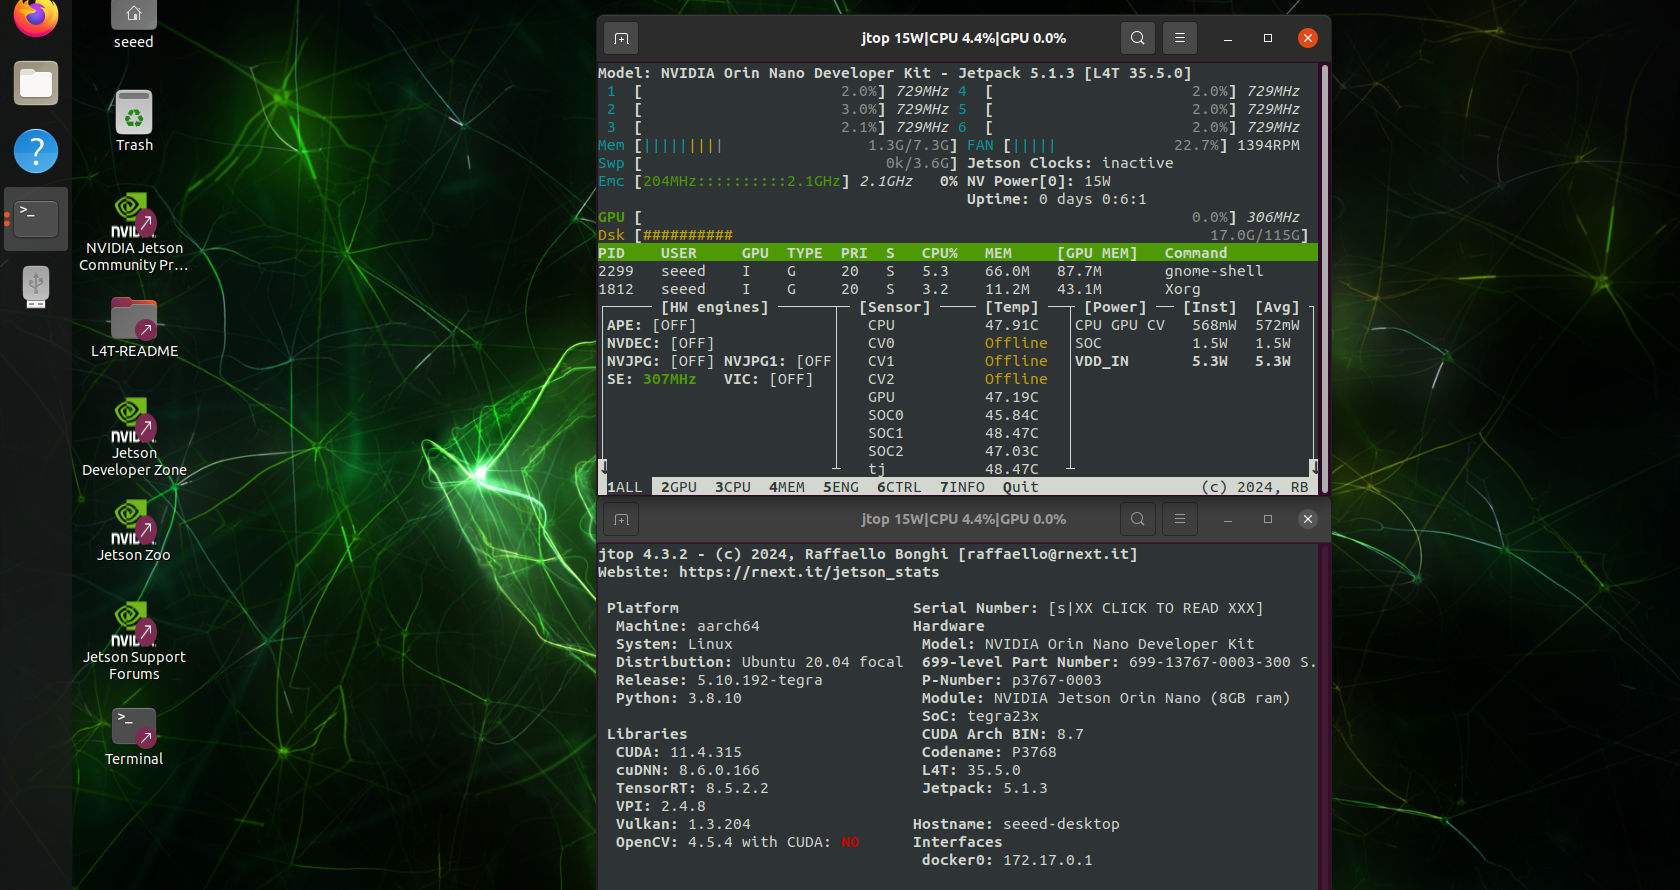
Because we had installed jtop in our previous system, we can directly launch jtop in the terminal of the new system.
Additionally, following cases have been tested for backup and restore:
- Restore the backup to original SSD.
- Restore the backup to different SSD.
- Restore the backup to same carrier board, with Jetson module in same batch, different SSDs.
Resources
- Flash JetPack OS to J401 Carrier Board
- reComputer J30x Datasheet
- reComputer J40x Datasheet
- reComputer J30/J40 Schematic
- reComputer J30/J40 3D File
- Seeed Jetson Serials Catalog
- Seeed Studio Edge AI Success Stories
- Seeed Jetson Serials Comparision
- Seeed Jetson Devices One Page
- Jetson examples
- reComputer-Jetson-for-Beginners
Tech Support & Product Discussion
Thank you for choosing our products! We are here to provide you with different support to ensure that your experience with our products is as smooth as possible. We offer several communication channels to cater to different preferences and needs.