Deploying AI Models on SenseCAP A1102 Using SenseCraft AI
Overview
The SenseCAP A1102 is a powerful sensor device that combines advanced AI capabilities with ease of deployment. This guide will walk you through deployingofficial or custom AI models on the A1102 using the SenseCraft AI website, offering step-by-step instructions for configuration, deploying, and testing.
Deploy AI Models on SenseCAP A1102
Train and Deploy Your AI Models: Empower your LoRaWAN cameras with custom or official AI models for real-time analysis. SenseCAP A1102 can provide the flexibility to bring AI-driven insights into your applications.
Custom AI Model Deployment with LoRaWAN Cameras
With SenseCAP A1102, you can train your own AI models and deploy them directly to LoRaWAN-enabled cameras. This allows for real-time object detection. The seamless integration with LoRaWAN ensures that your AI-driven insights are accessible and actionable on-site.
Use of Pre-trained Models or Custom Models
SenseCAP A1102 supports a wide range of pre-trained AI models, as well as the ability to train custom models using publicly available or custom datasets, such as those found on Roboflow Universe. This flexibility allows you to easily deploy models that are specifically tailored to your use cases.
Versatile Applications
SenseCAP A1102 can be deployed in various real-world applications. Whether it's monitoring the health of plant leaves in agriculture, detecting parking space occupancy in urban environments, or tracking vessel positions in maritime areas, your AI models can adapt to your specific needs.
Prerequisites
Required Hardware
- SenseCAP A1102 device
- USB Type-C data cable
- PC
Required Software
Official AI Model Delpying Process
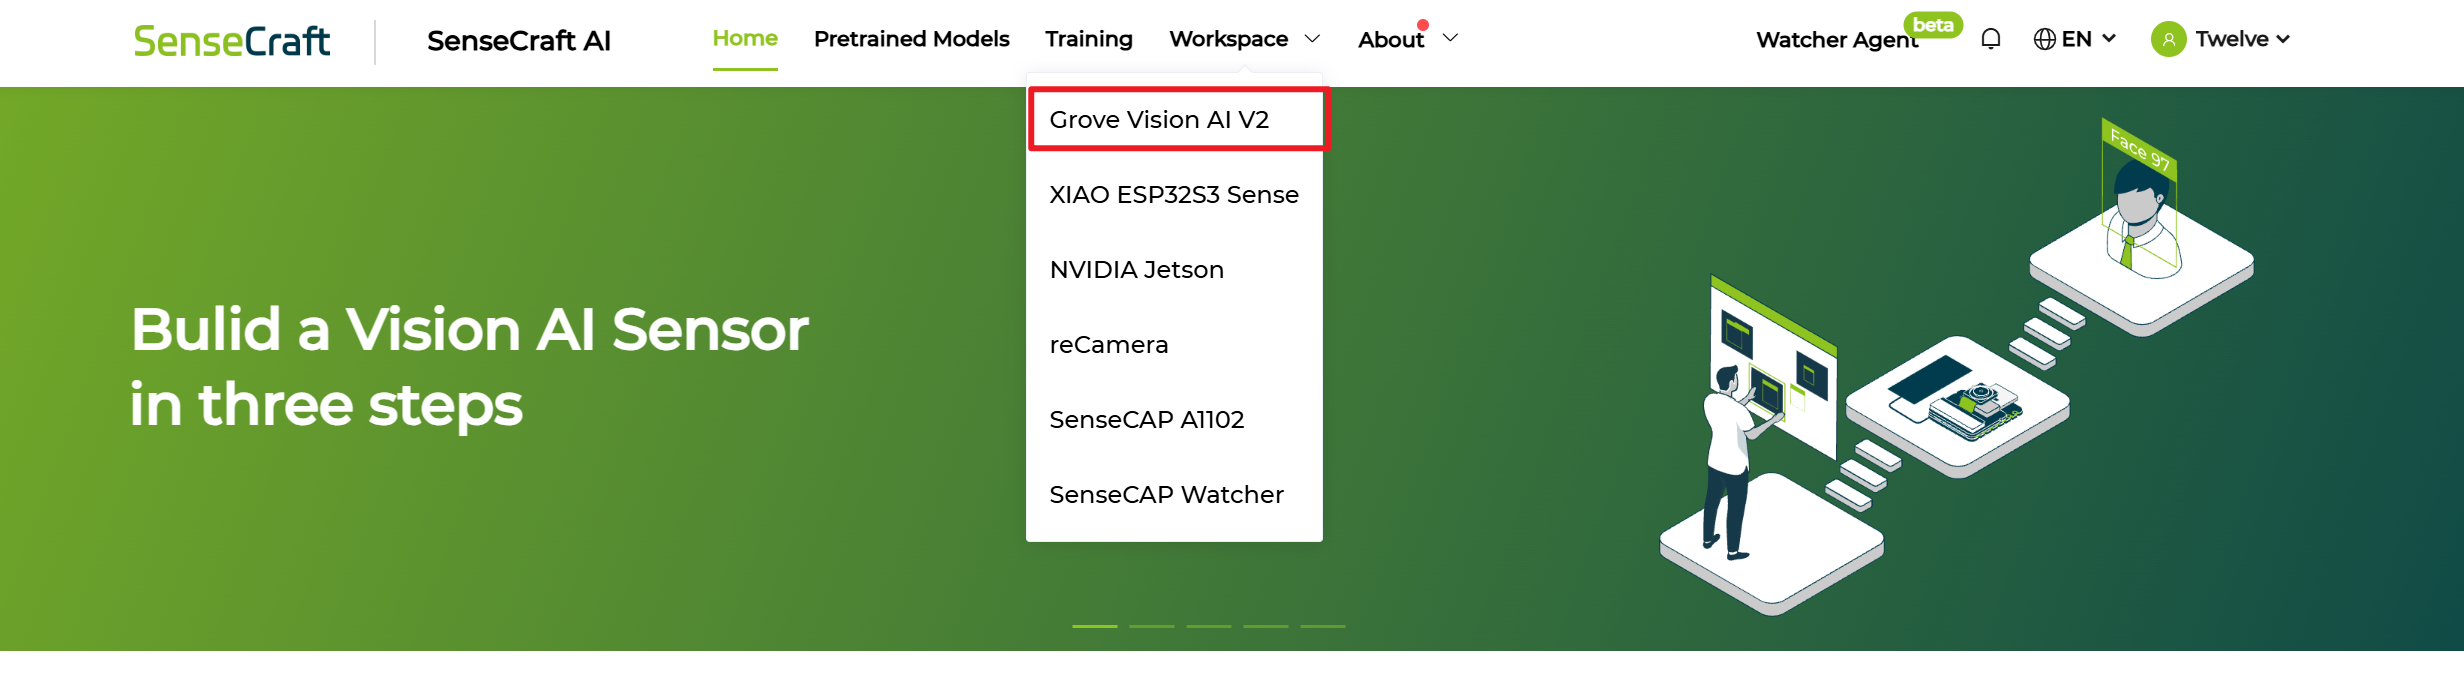
Step 1. Open our platform and Select A1102 in Workspace
Step 2. Connect to our Platform by serial port
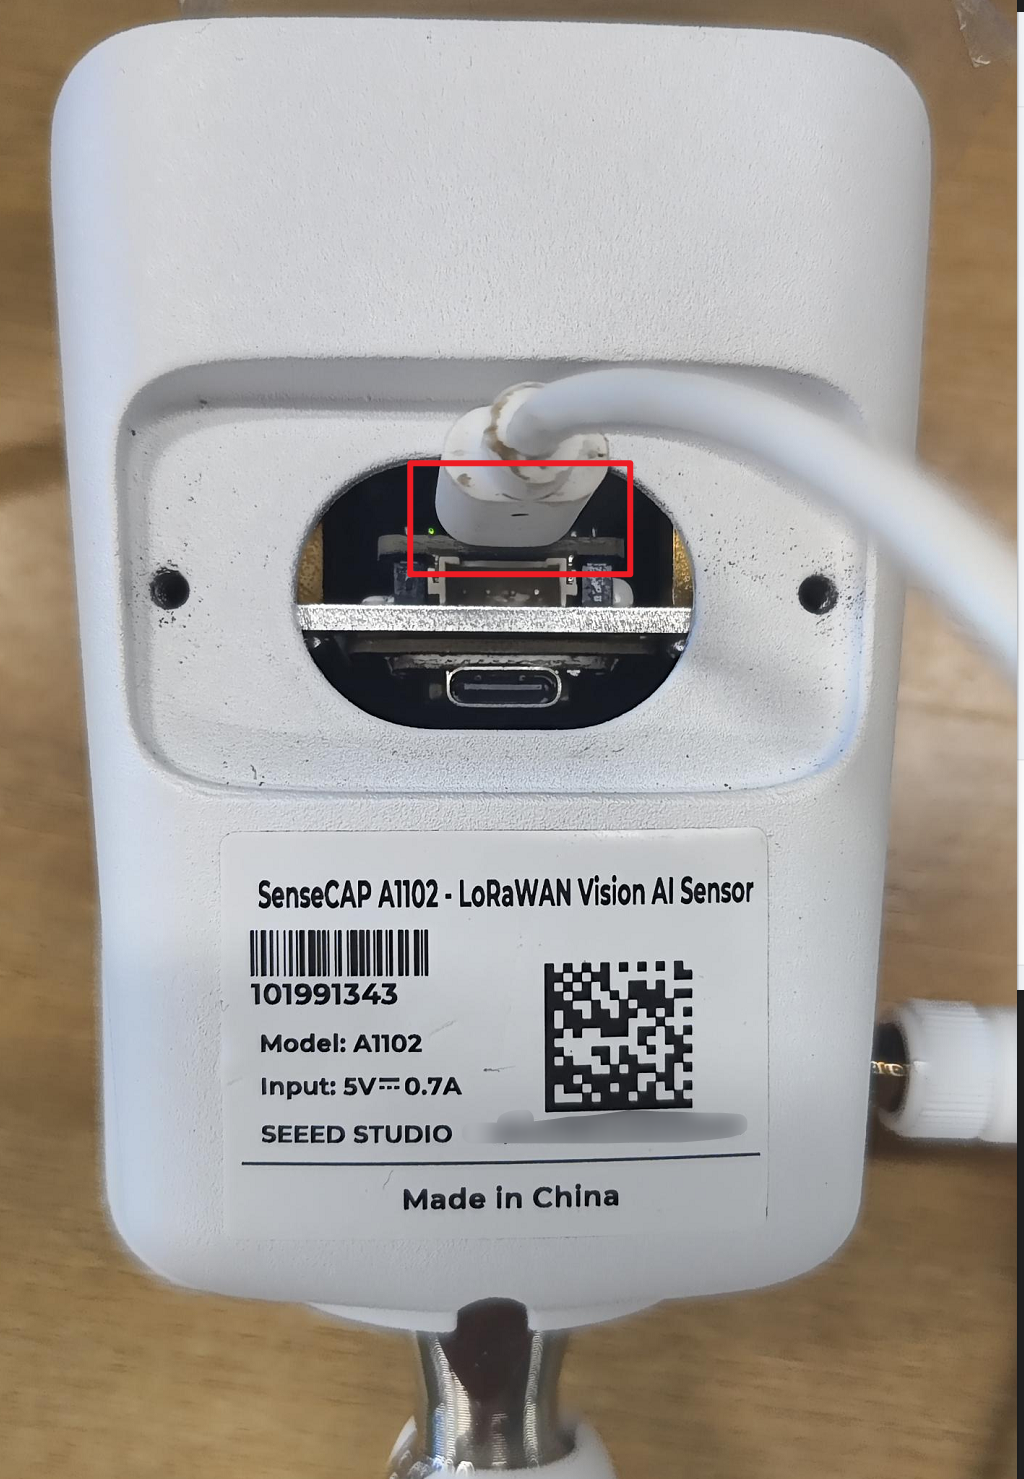
- Use a Type-C cable to connect the device to your PC (make sure you are connecting to the upper Type-C port, which is the Himax serial port, as shown in the image below).
- Click
Connect
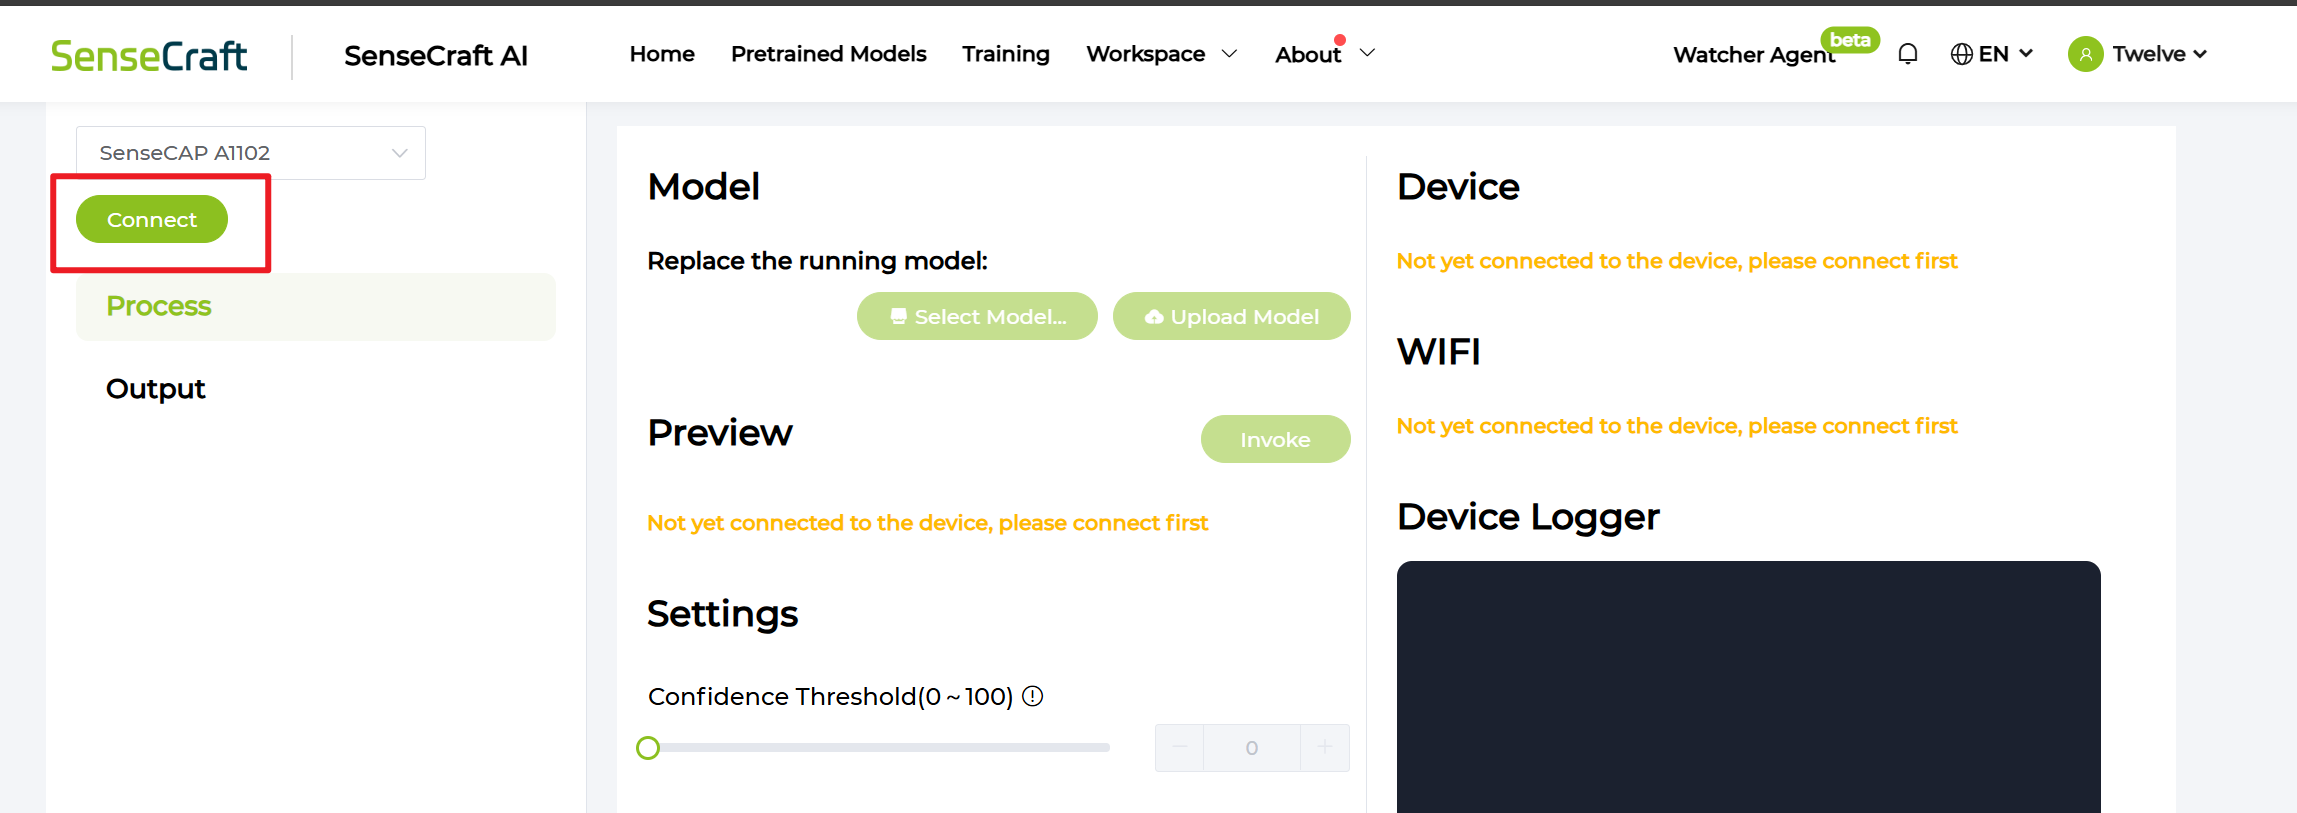
- Select correct serial port and click
Connectin the pop-up window
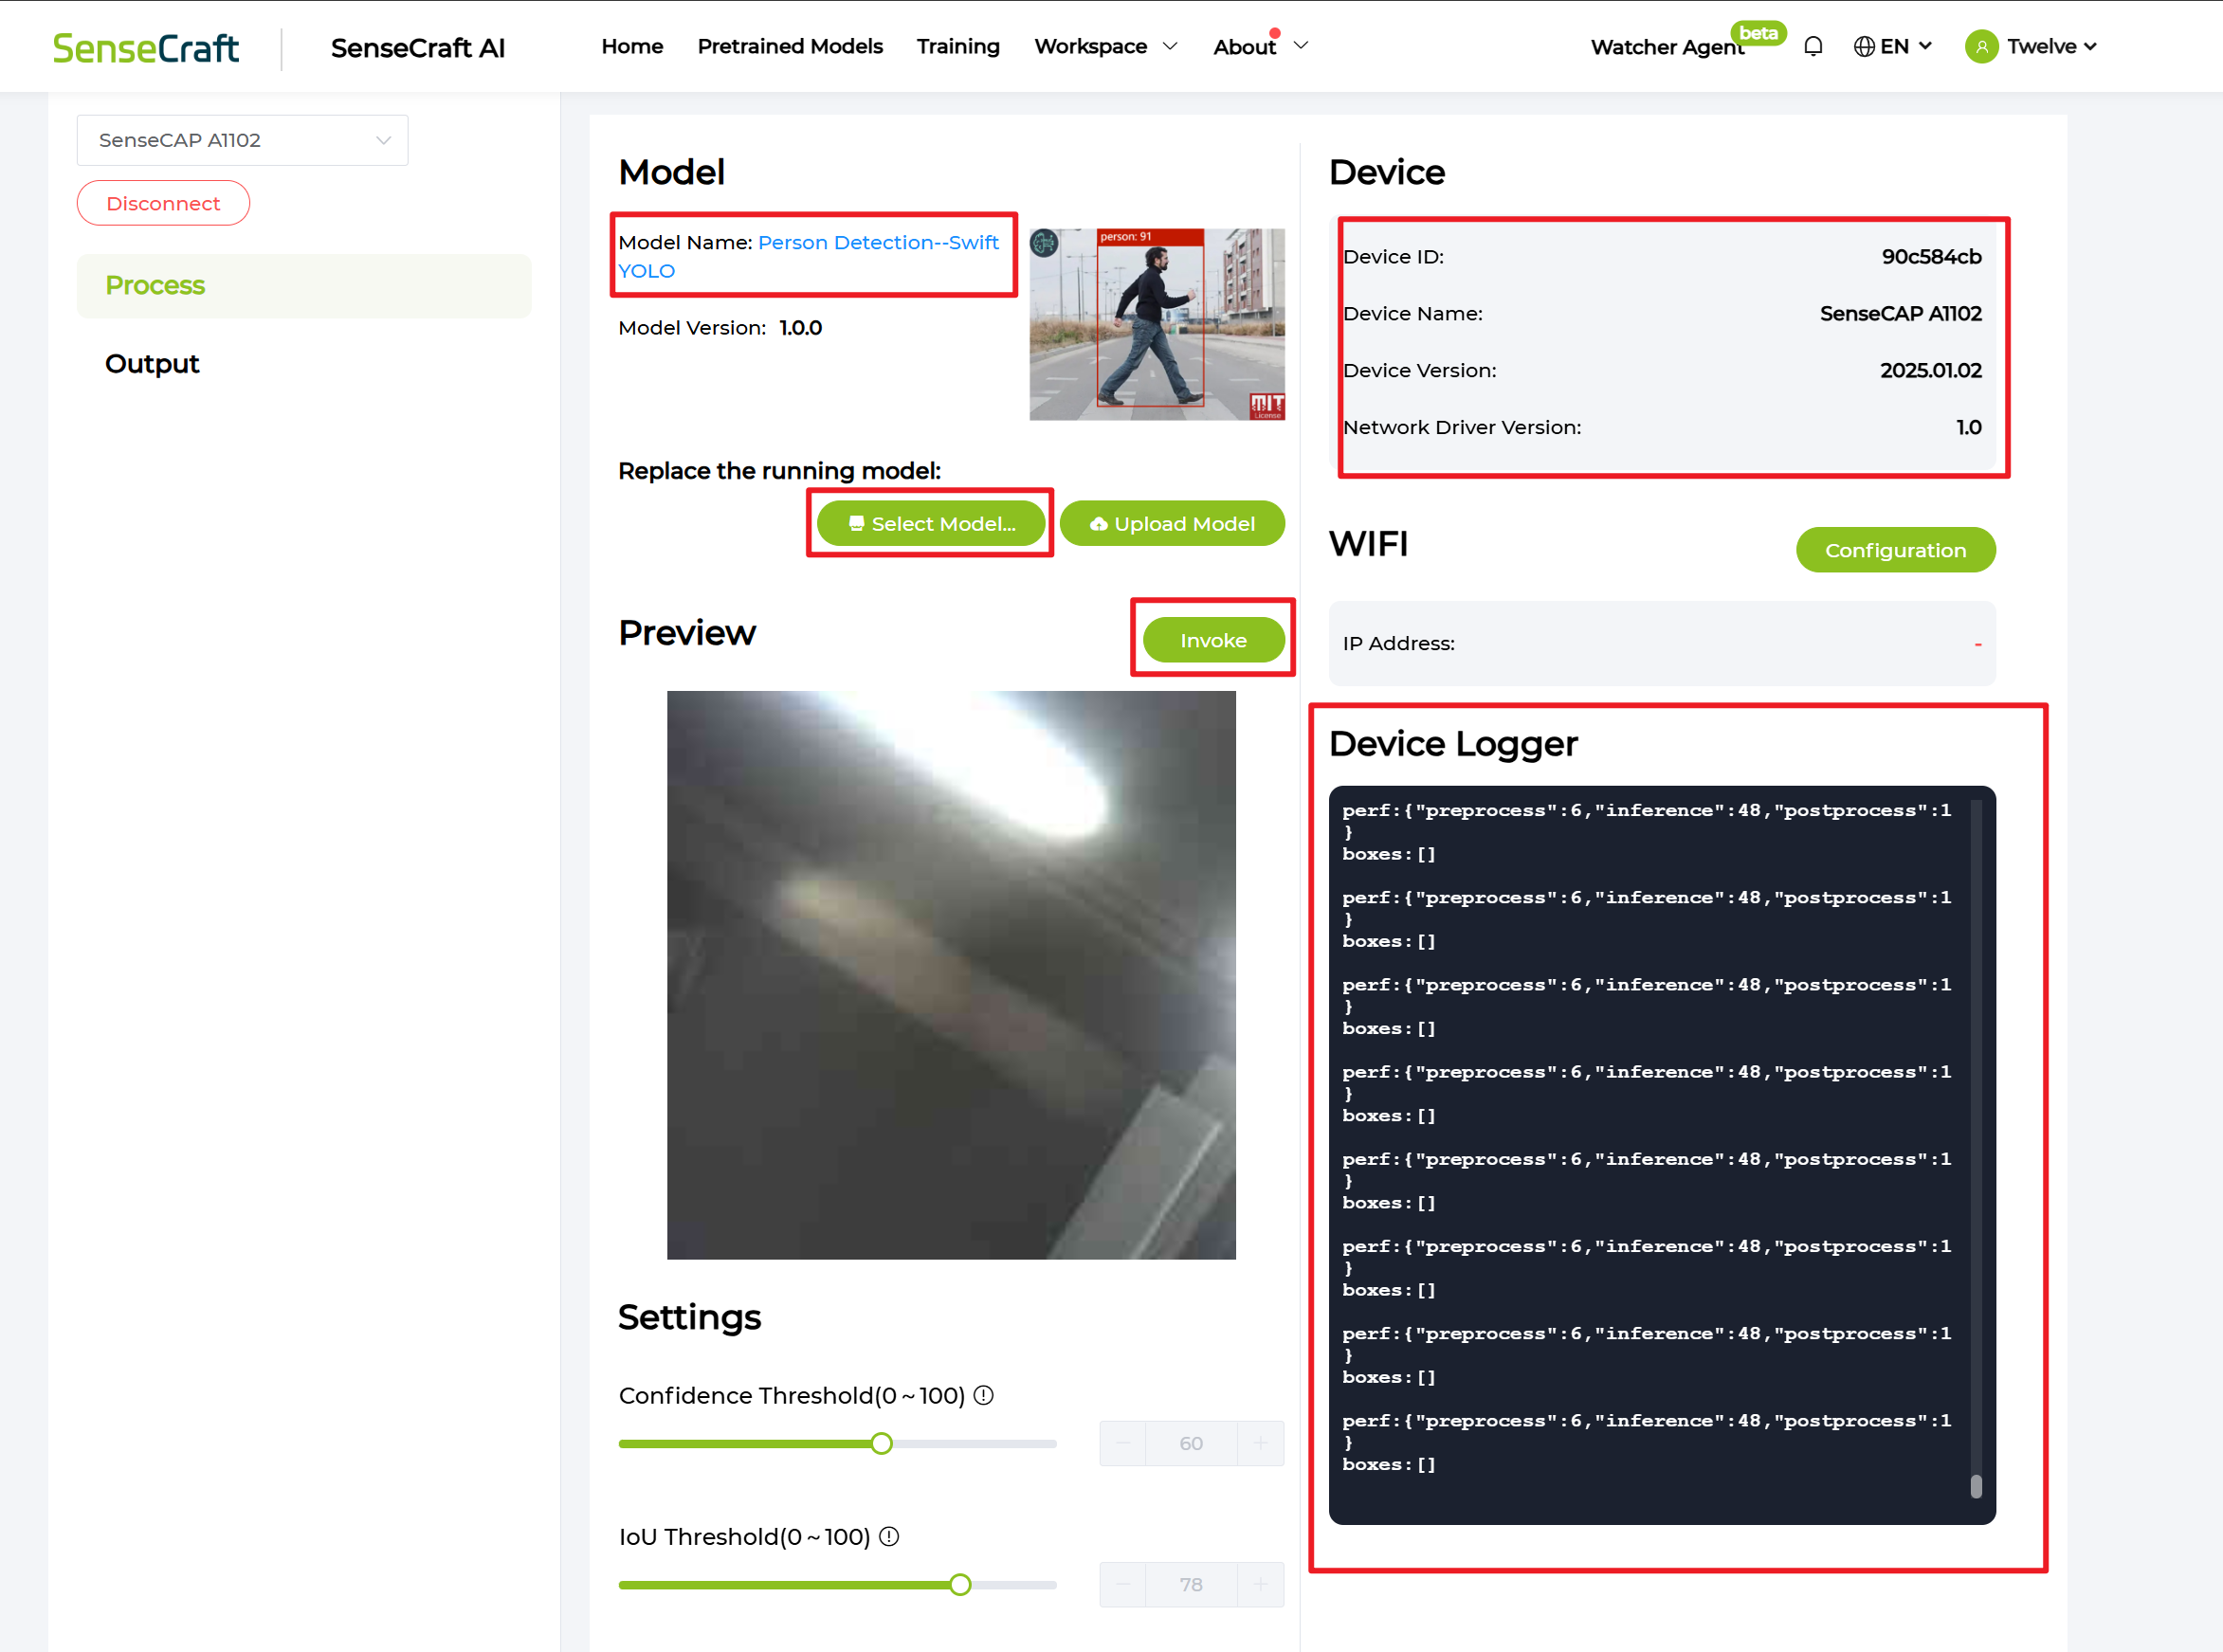
If the correct port is selected, you will be able to view the preview video stream through Invoke and proceed with selecting and flashing the model normally.
Step 3. Select the AI model you want to deploy to device
- Click
Select Model
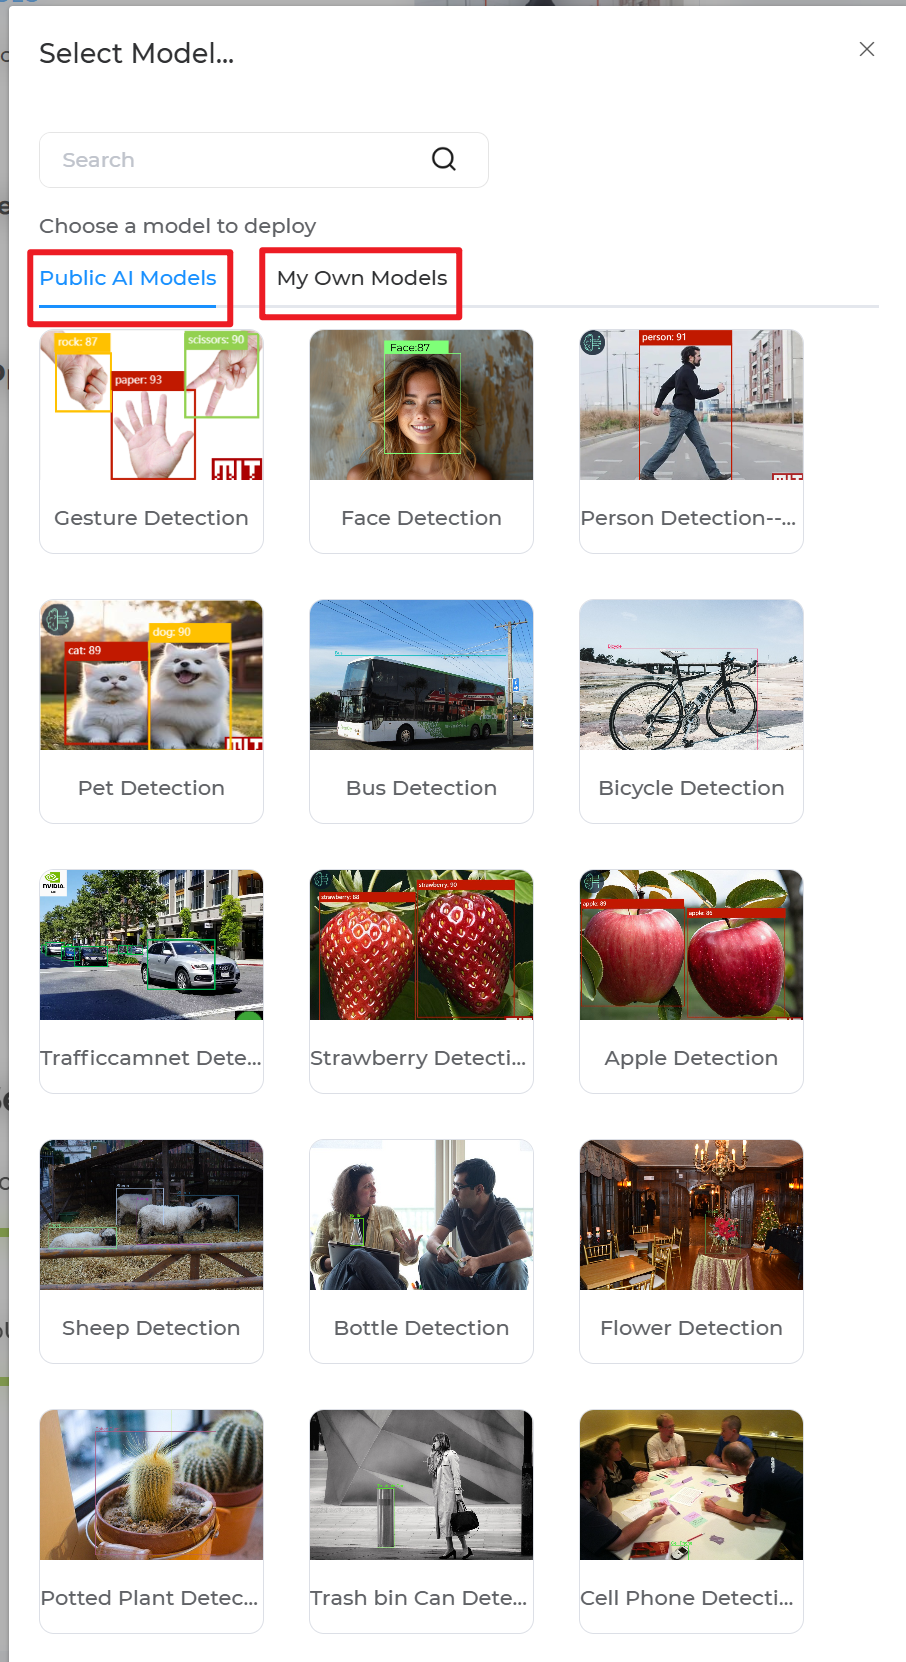
-
Choose from Public Models or your own trained models in SenseCraft AI
-
The flashing process will begin after you click the model
Your device is now using the AI model you depoly to detect and upload result! Please navigate to your APP or other platform to view.
Custom AI Model Deploying Process
Our AI model can be trained with many classes, but since the recognition results are transmitted via S2100, only the first 9 classes are effectively supported for reporting.
Step 1. Get your dataset from Roboflow
-
If you need open-source dataset, please navigate to Roboflow Universe
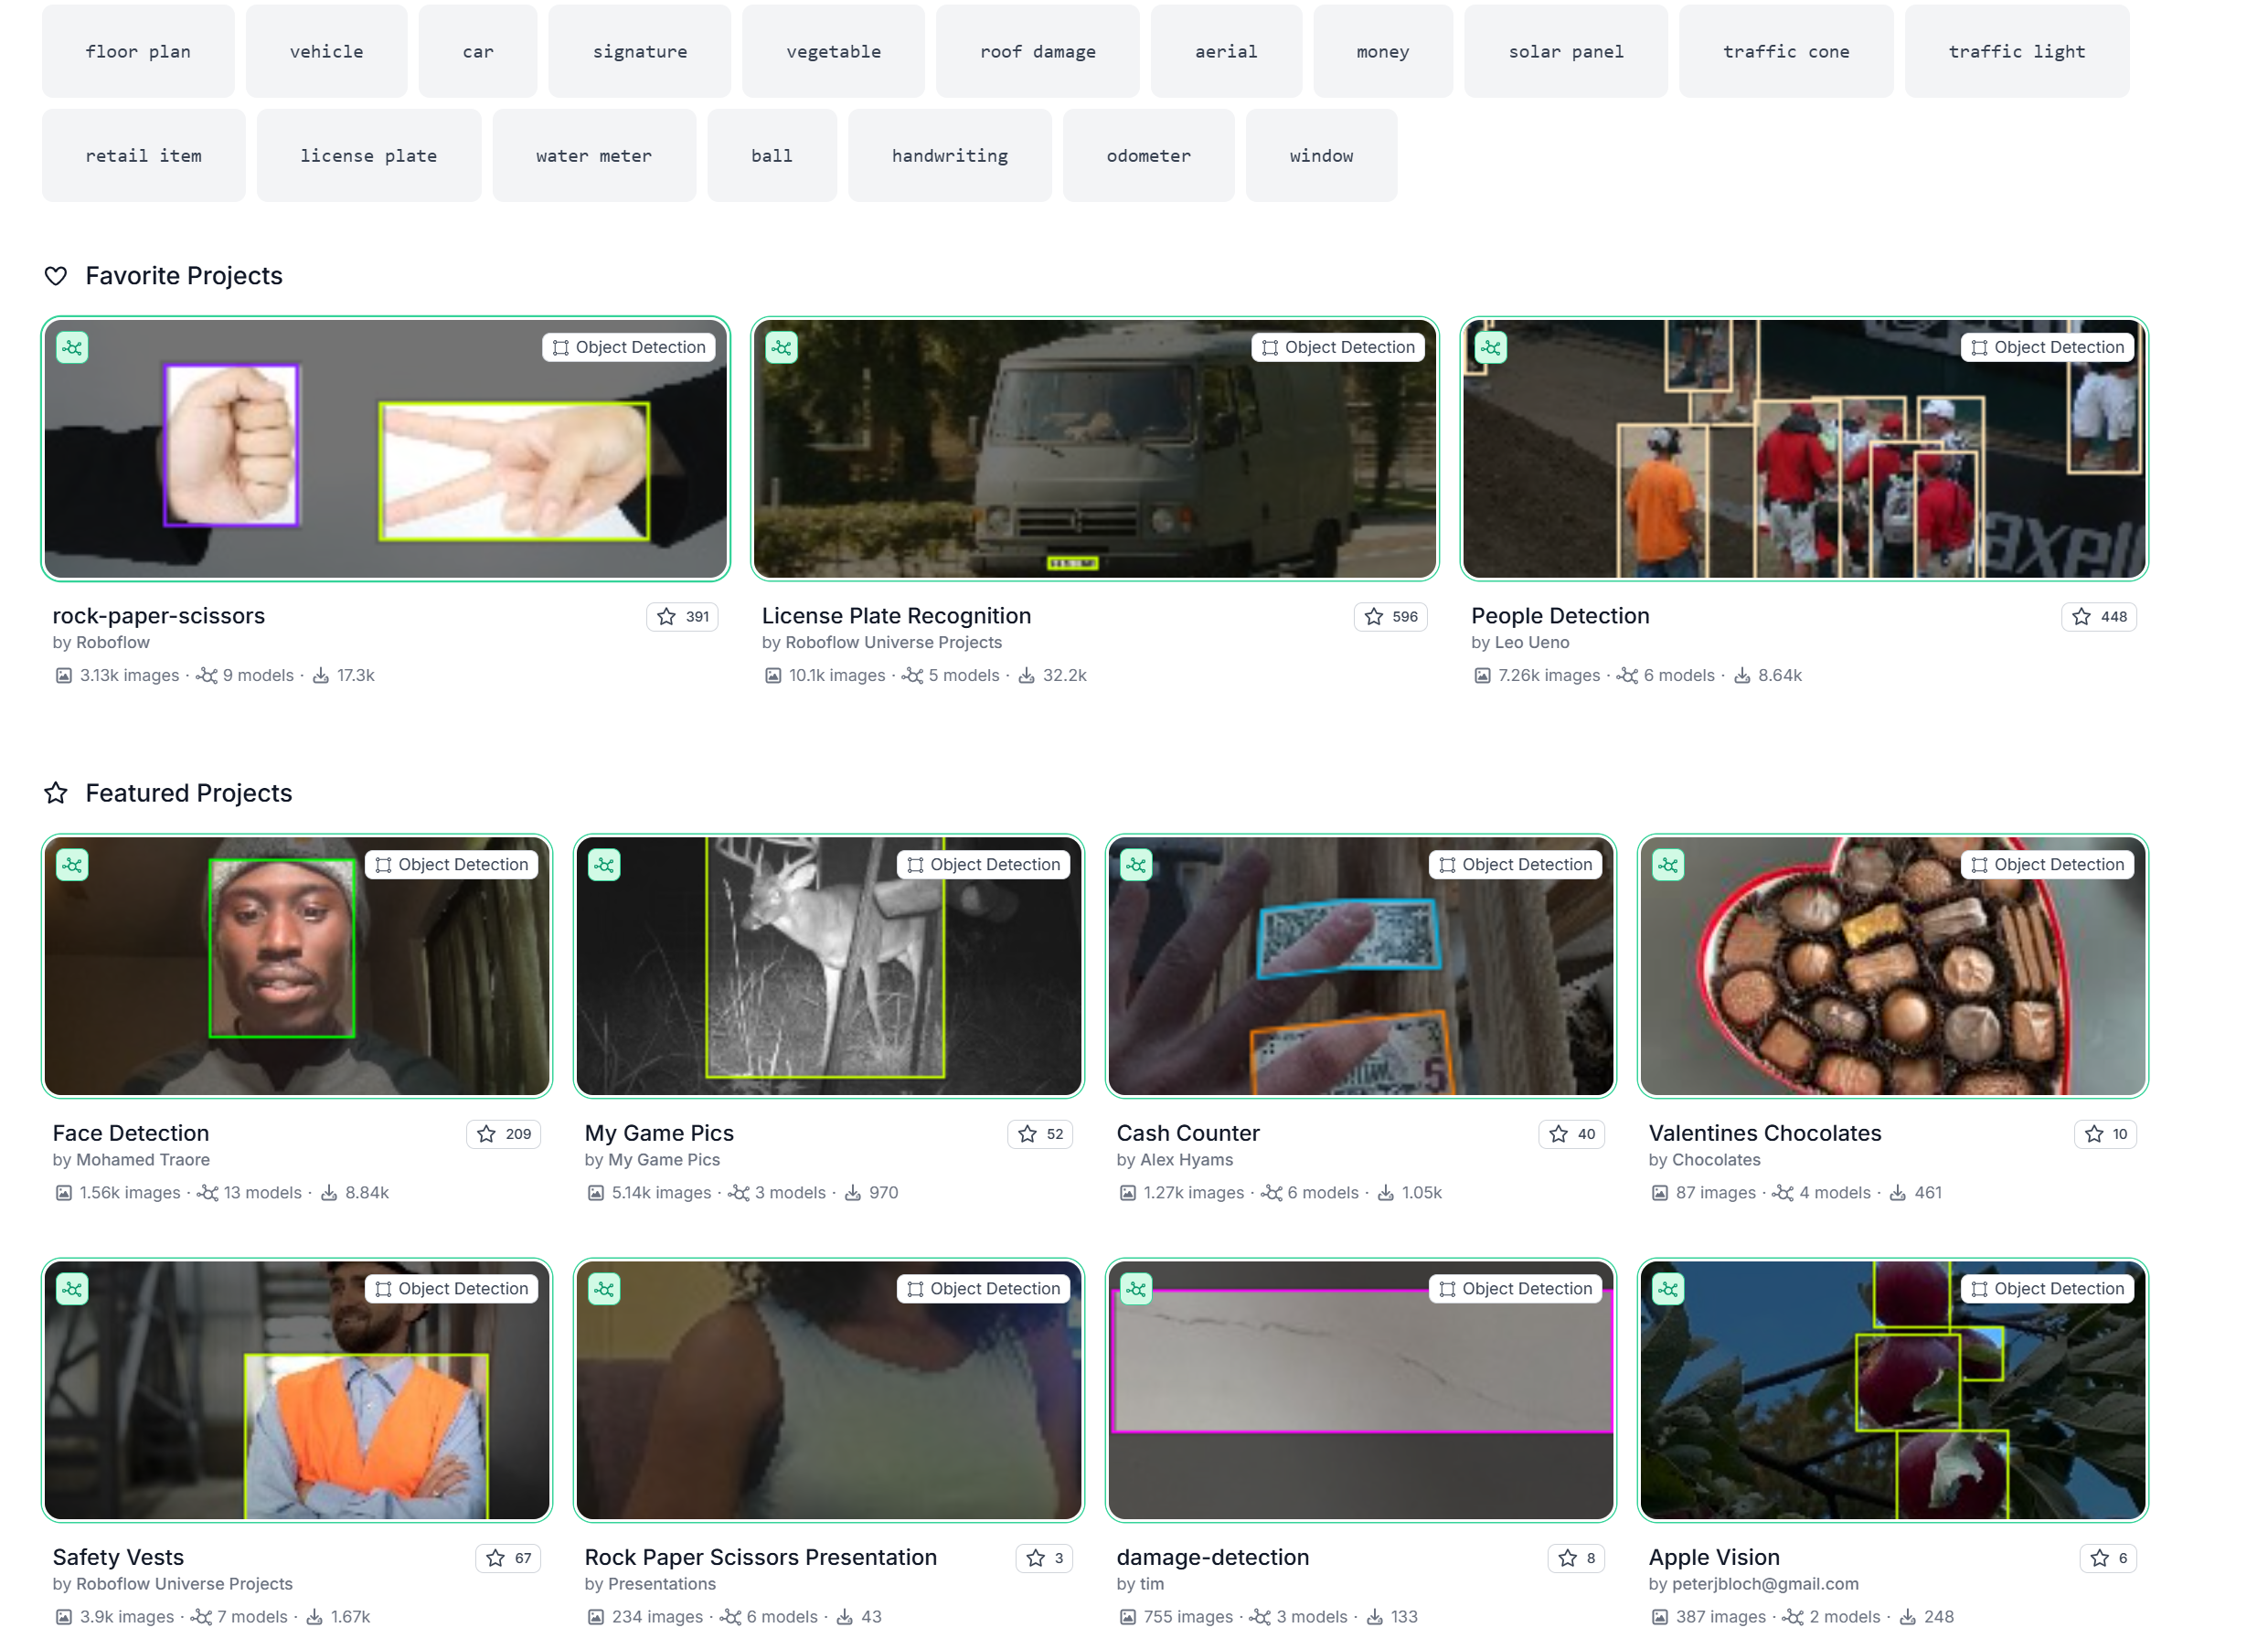
- If you want to use your own pictures and label them to get dataset, please navigate to Roboflow to create a Project
When using your own images, please pay special attention to the label order. Only the first 9 classes (label indices 0–8) are valid and can be recognized by the A1102. If your dataset contains more than 9 classes, you must select only the required nine classes by removing the others before exporting the model.
Step 2. Export your dataset from Roboflow
- Click Overview and Check the classes
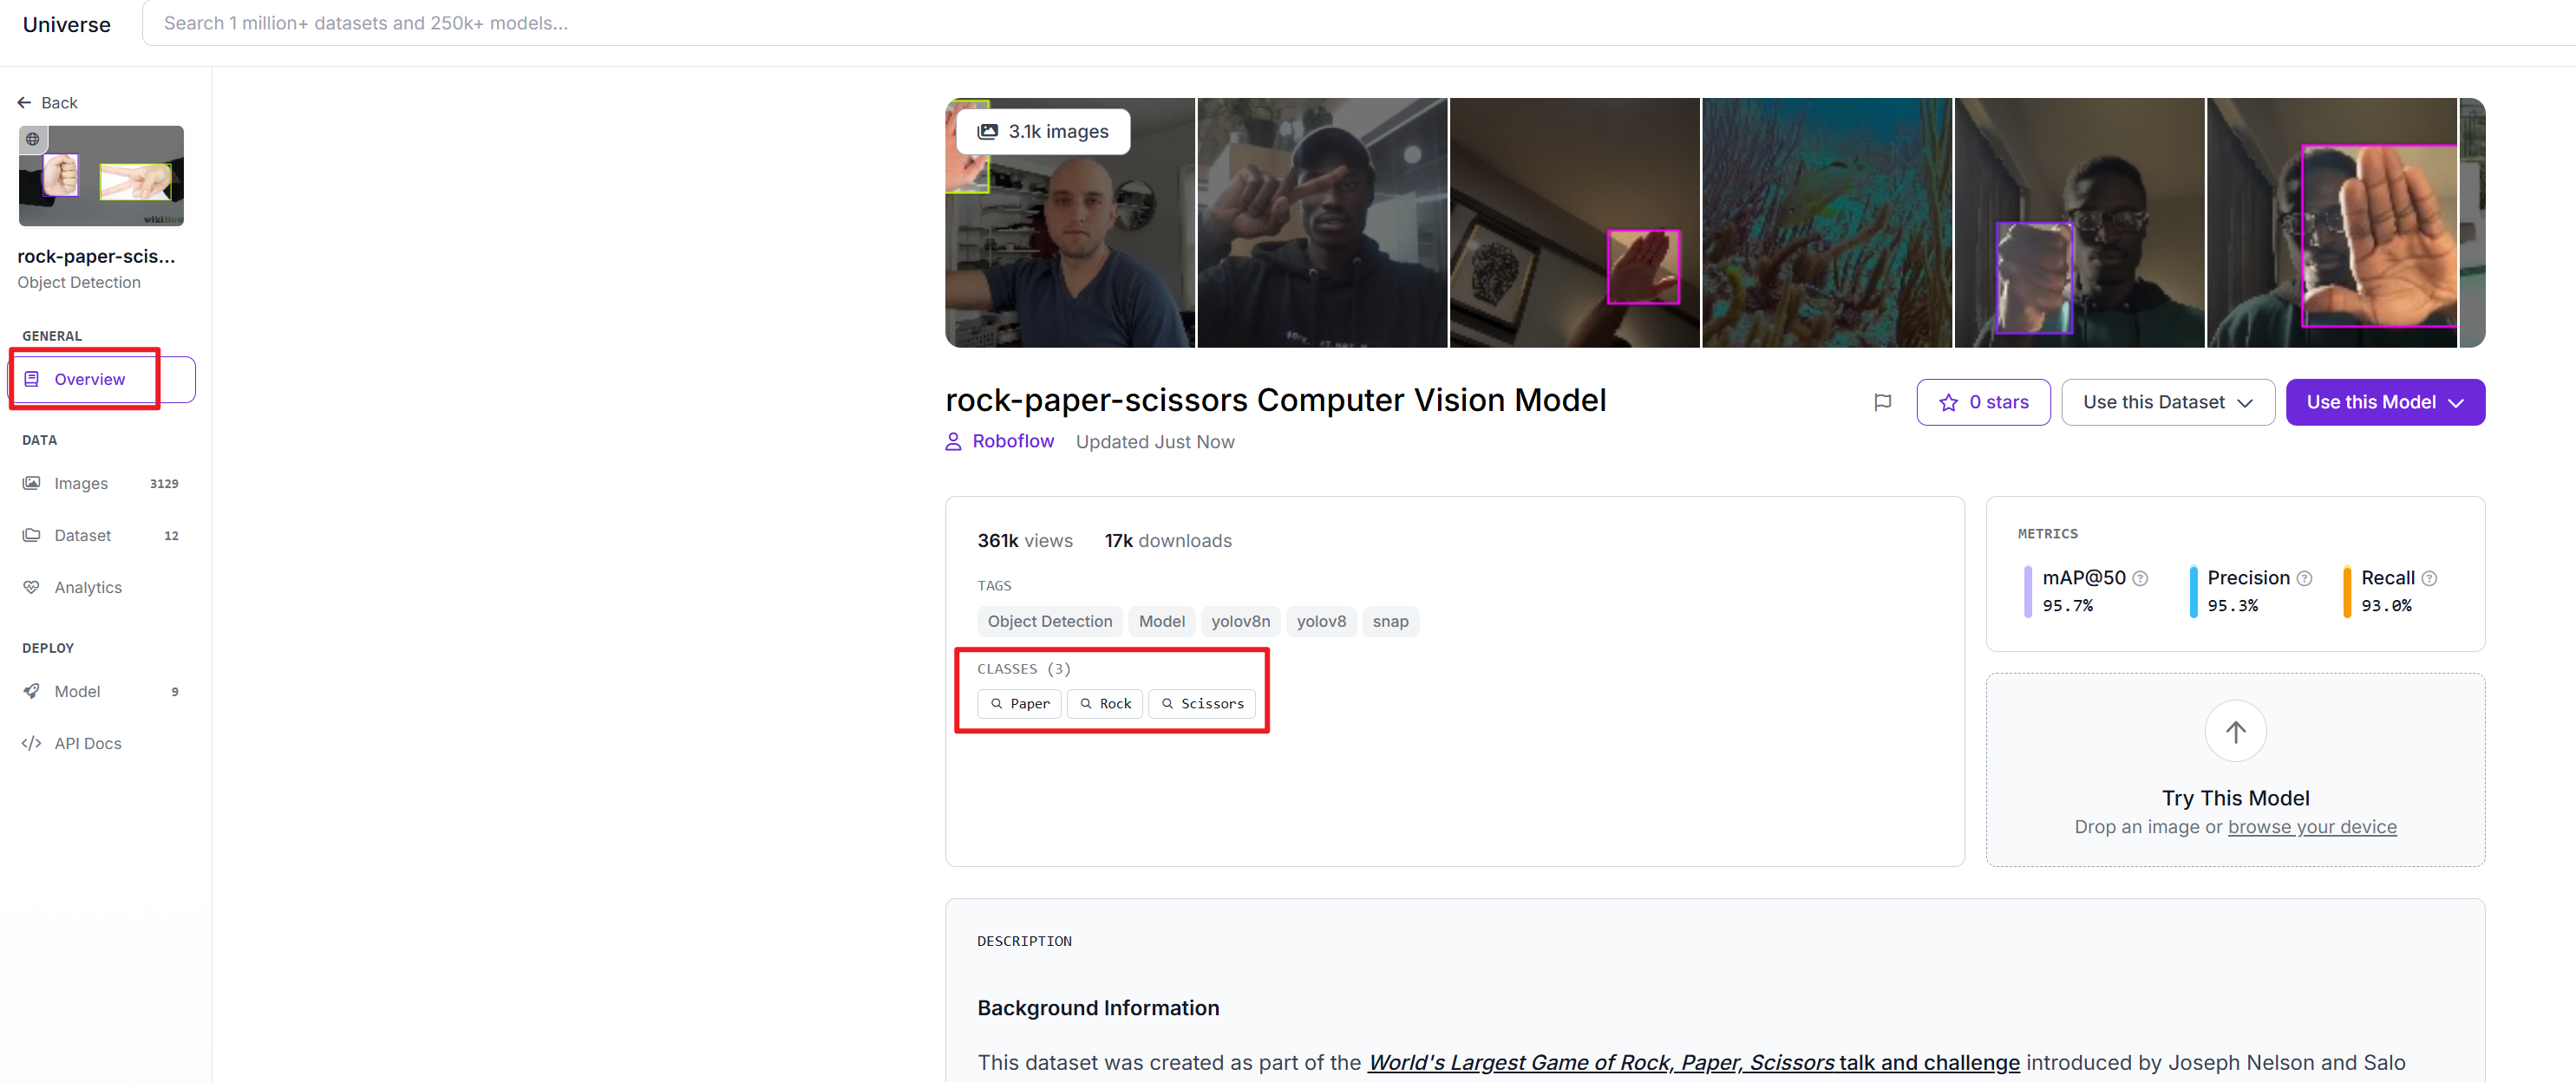
The order of classes displayed corresponds to the label index order. Therefore, only the first 9 classes (label indices 0–8) can be correctly uploaded as recognition results on the A1102. If your model contains more than 9 classes, you must select the nine classes you need by cloning the dataset into your own project, removing the other labels, and then exporting the dataset again.
- In the project, Click
Dataset

- Click
Download Dataset
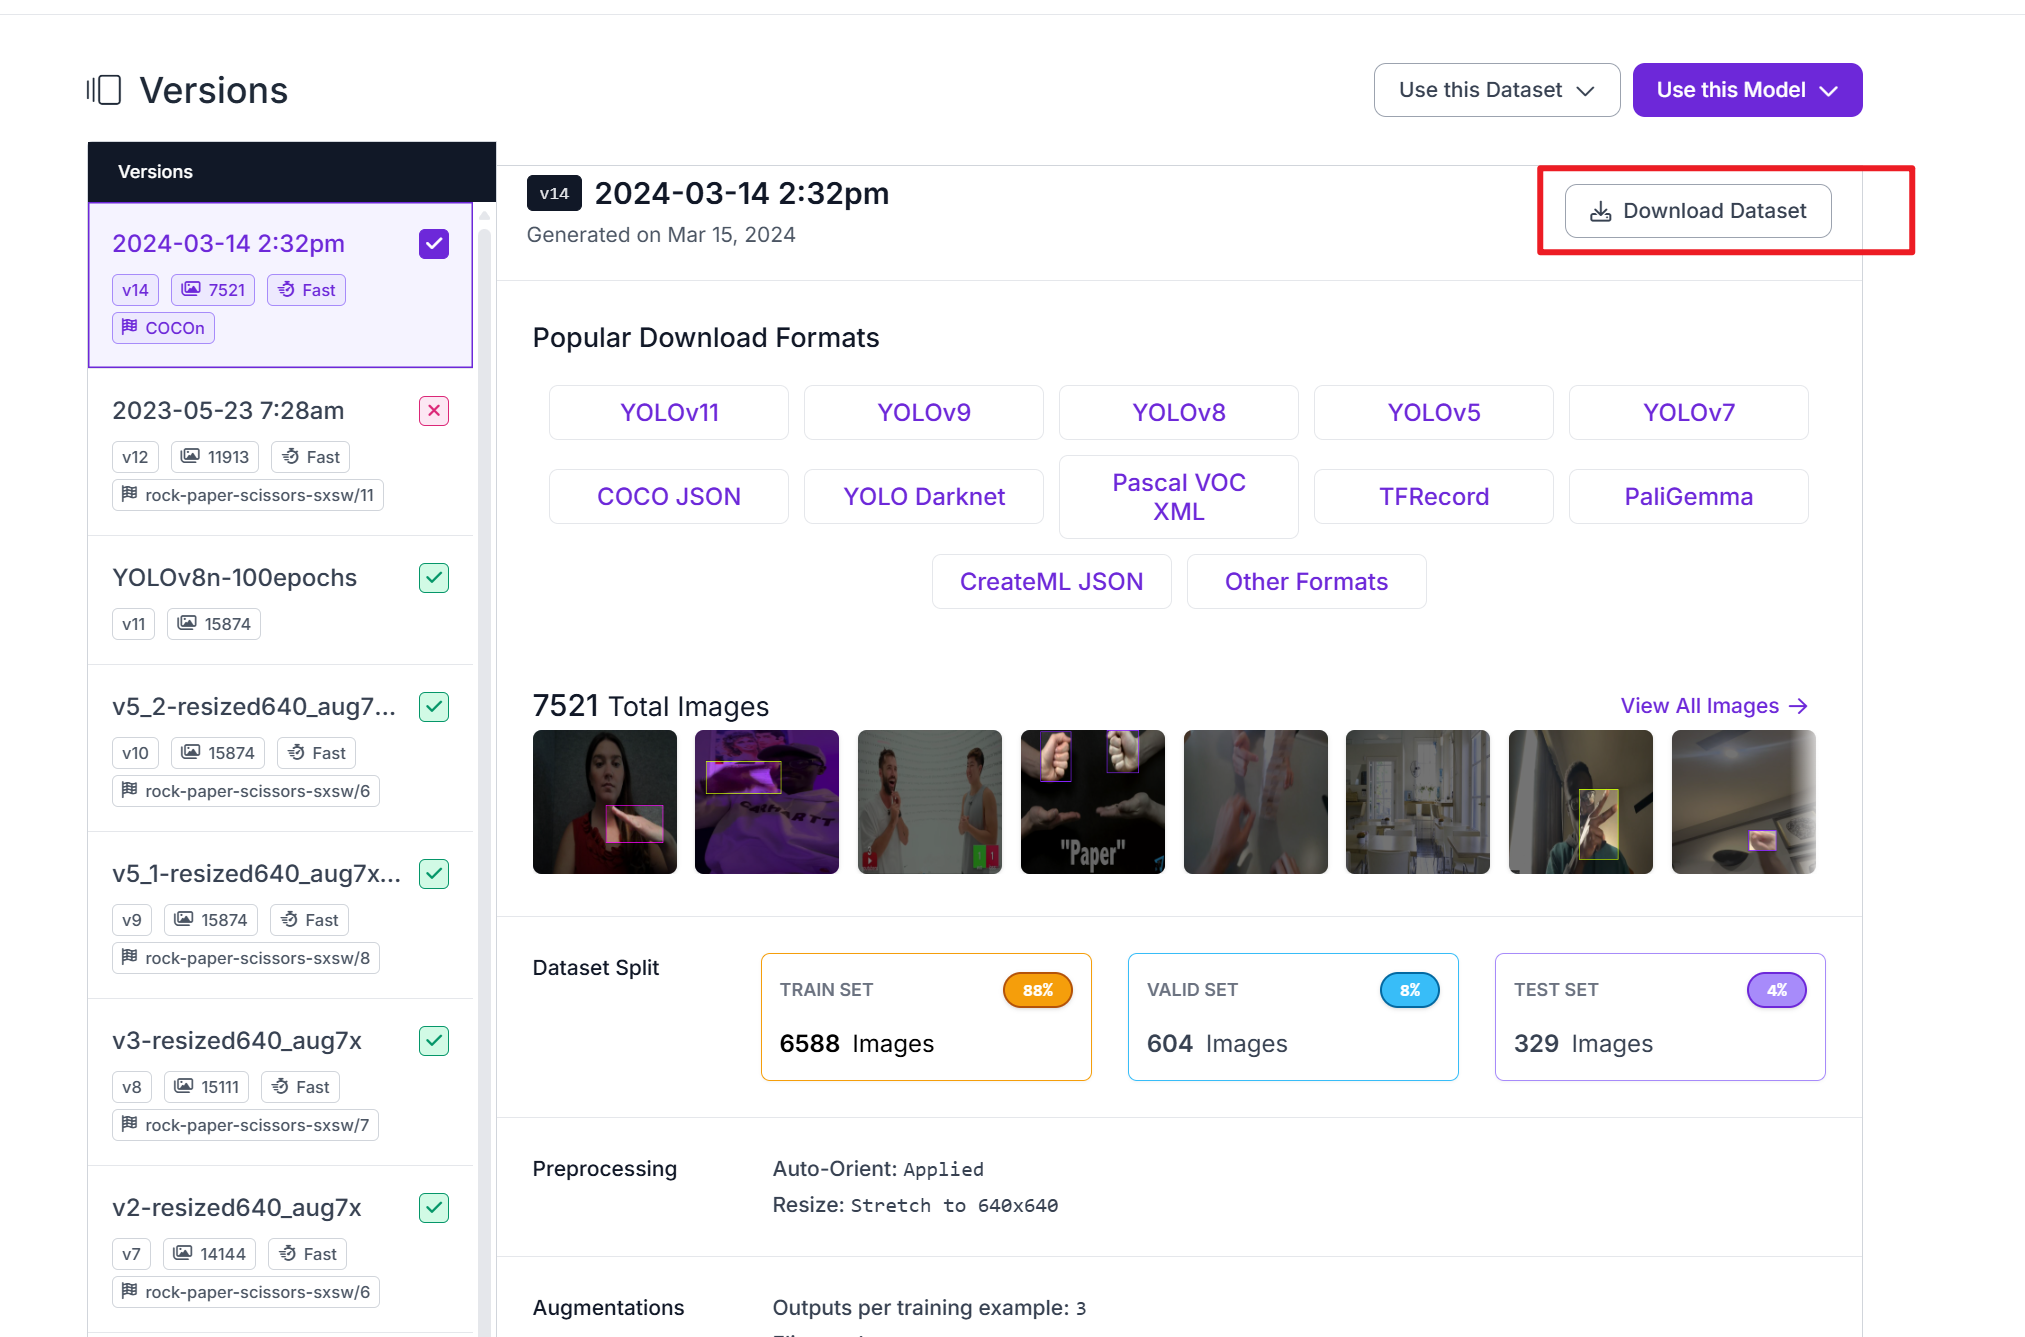
- Click
Download Dataset
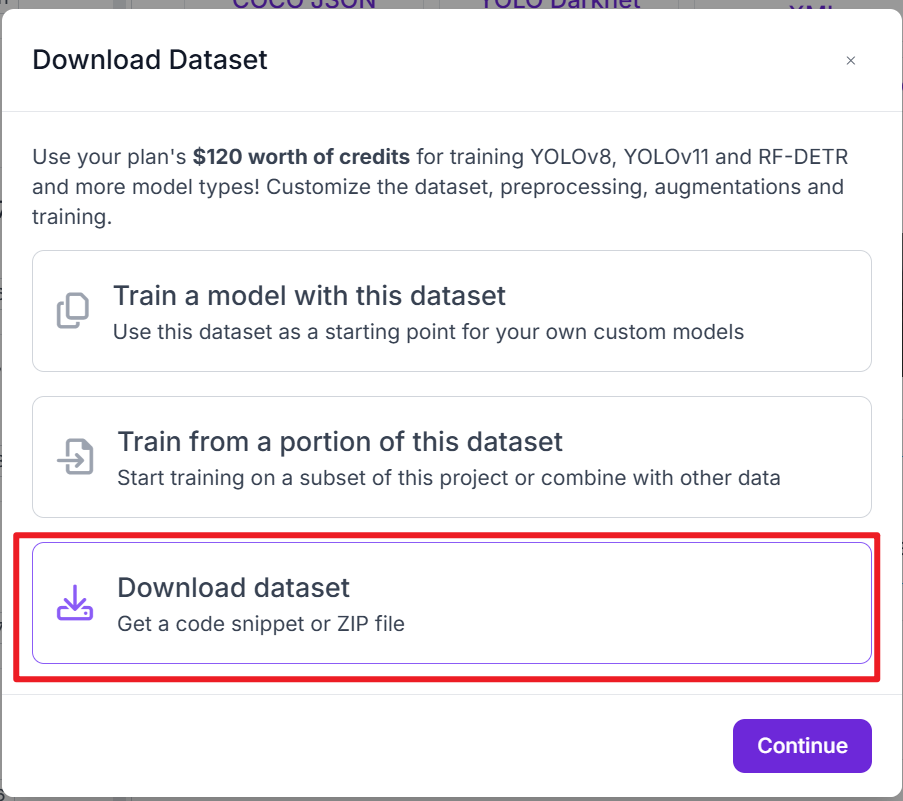
- Selct
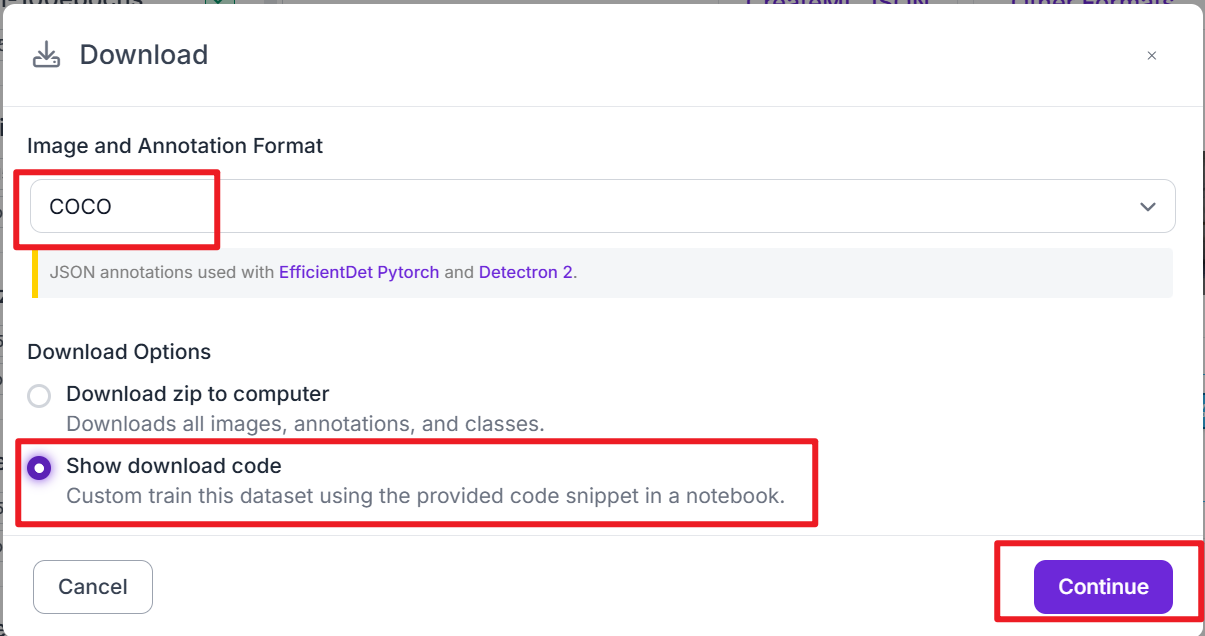
COCOandShow download code, then ClickContinue
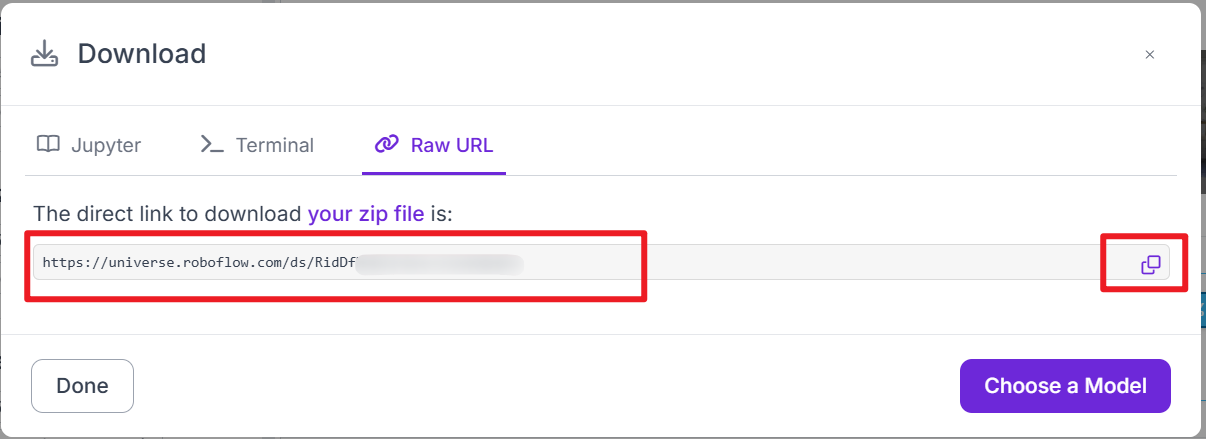
- Copy the Raw URL which would be used in AI model training process
Step 3. Train your AI model with dataset
-
Follow the Model training quick start to train your AI model with your prepared dataset.
-
After training is complete, export the trained model in .tflite format, which will be used for deployment on the device.
Step 4. Upload and flash the custom AI Model
- Open our platform and Select A1102 in Workspace
-
Connect to our Platform by serial port
-
Use a Type-C cable to connect the device to your PC (make sure you are connecting to the upper Type-C port, which is the Himax serial port, as shown in the image below).
- Click
Connect
-
Select correct serial port and click
Connectin the pop-up window -
Click
Upload Model
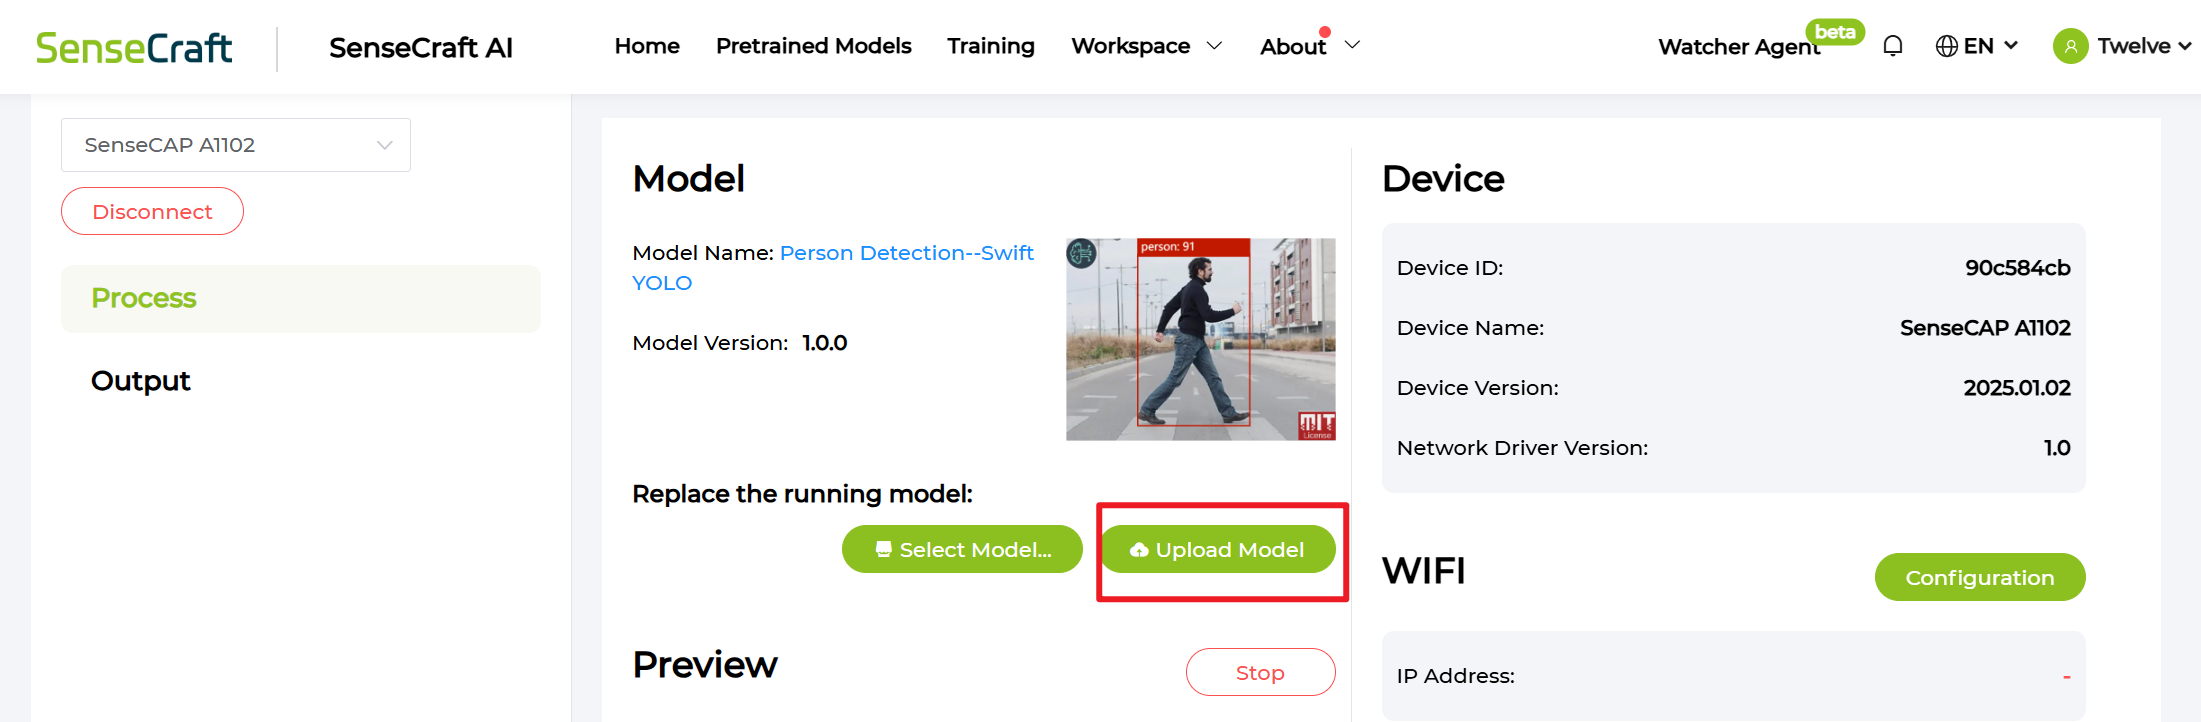
- Configure your model information
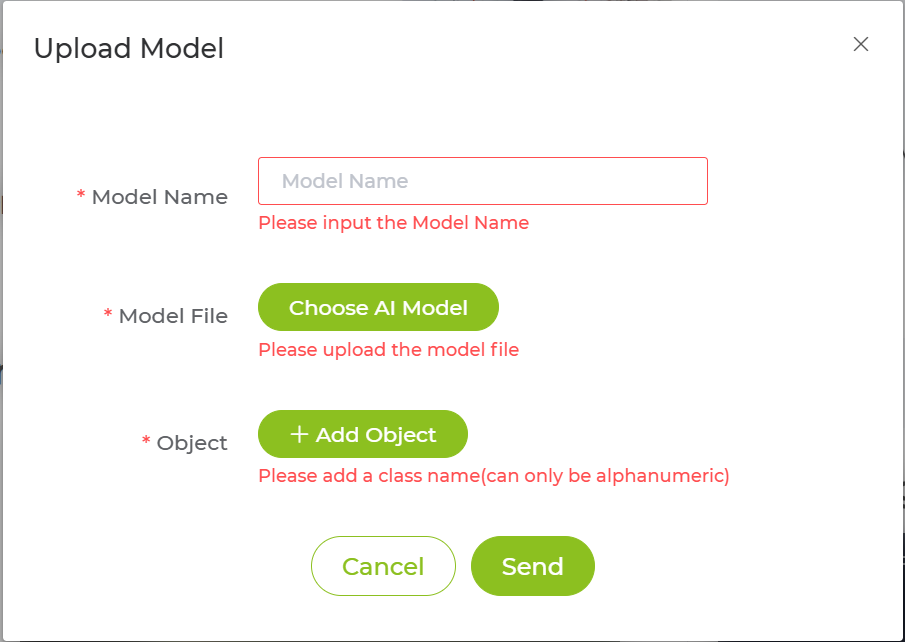
-
Model File: For detailed instructions on training and exporting a TFLite model, please refer to this guide -
Object: The category name corresponding to the model’s label order (from 0 to 8). Only up to nine classes are supported — any additional classes will not be displayed. -
Click
Sendand wait for flashing process
Result Analysis In Seeed Portal

-
The first value is the data reporting timestamp
-
The next nine value represent the confidence scores (measurementValue) of each class index (from 0 to 8).
-
The final value carries the model information, including metadata related to the deployed AI model.
Result Analysis In TTN

-
Each result contains 10 measurements, which correspond to the 10 RS485 channels.
-
The first nine measurements represent the confidence scores (measurementValue) of each class index (from 0 to 8).
-
The tenth measurement carries the model information, including metadata related to the deployed AI model.
FAQ
Q: What type of custom model can I upload?
A: You can upload models with the .tflite file extension. You can train and export your own models by following the instructions in Model training quick start.
Tech Support & Product Discussion
Thank you for choosing our products! We are here to provide you with different support to ensure that your experience with our products is as smooth as possible. We offer several communication channels to cater to different preferences and needs.