Edge Box RPi 200 with Node Red and Modbus RS485
Introduction
Modbus RTU (Remote Terminal Unit) is a popular protocol in industrial automation for connecting devices like sensors and controllers over serial communication lines. Known for its simplicity and reliability, it is widely used in monitoring and controlling industrial processes. The Edge Box RPi 200, an industrial IoT gateway based on the Raspberry Pi, enables integration of Modbus RTU devices with modern networks. Using Node-RED, a flow-based development tool, this wiki guides users in setting up Modbus RTU communication with the Edge Box RPi 200. It highlights applications such as energy management, environmental monitoring, and process control. This resource offers a quick and practical approach to leveraging Modbus RTU in various industrial scenarios.
Getting Start
Before you start this project, you may need to prepare your hardware and software in advance as described here.
Hardware Preparation
| Edge Box RPi 200 |
|---|
 |
Software Preparation
Edge Box comes to your hand pre-installed with Raspberry Pi OS. If you are booting this device for the first time, please read our Getting Started Wiki. We have prepared a Getting Started Guide on Node-RED. It is recommended that you review this guide before proceeding to the wiki. In this tutorial, we are going to connect the Host PC running the YABE room temperature simulator with Node-RED running on Edge Box.
RS485
In the Edge Box RPi 200, there is one RS-485 port. You can find more details here. Before working on Node-RED, you should wire the device properly.
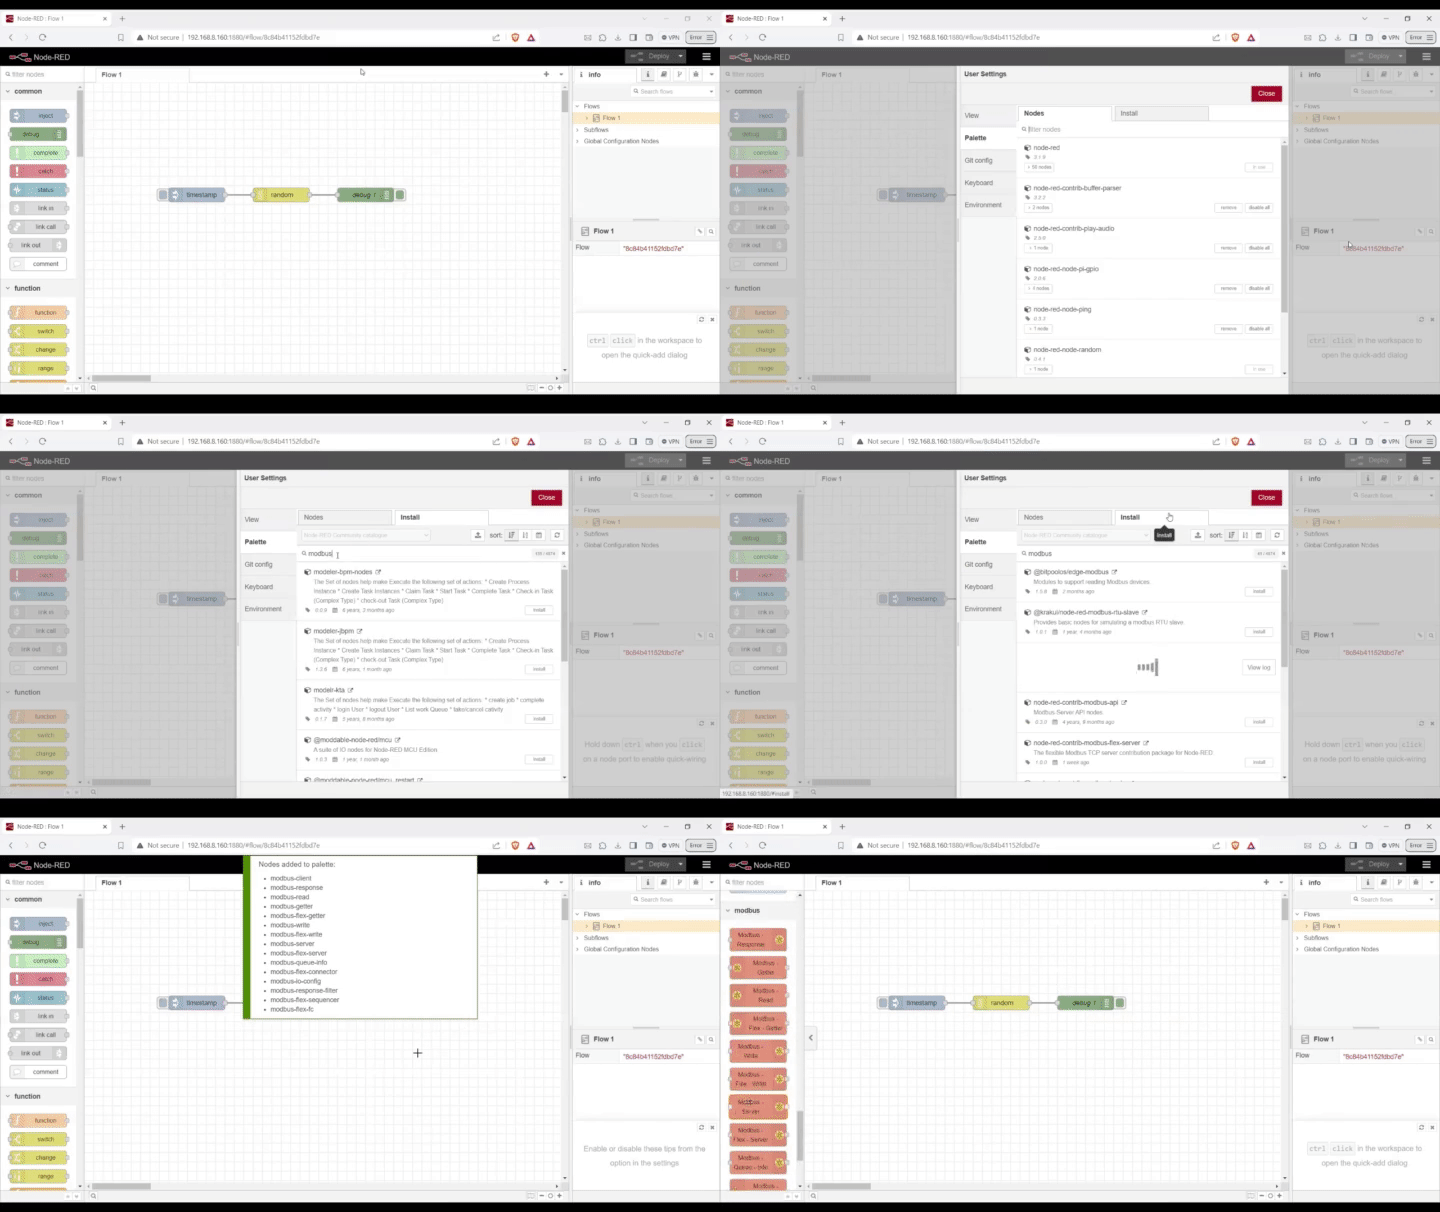
Install Modbus Node
To install the Modbus node, Start Node-RED on your Edge Box. You can usually access it by opening a web browser and navigating to http://<your-edgebox-ip>:1880. And follow these steps:
Step 1. Click the Settings button, indicated by a three-dash icon, located at the top-right corner, then select Manage palette.
Step 2. In the palette tab, navigate to the Install tab.
Step 3. Use the node search bar to find the desired Modbus node.
Step 4. Click the Install button next to the node.
Step 5. If prompted, click the Install button from the dropdown warning window to confirm the installation.
Step 6. Wait for the installation process to complete. Once finished, the Install button should change to Installed.

Identifying Modbus Addresses
Identifying the correct Modbus addresses is a crucial step. It is recommended to consult the PLC,device or sensor manufacturer's datasheet for detailed information on Modbus addresses, including input, output, and holding registers.
Here we are going to use SHT20 RS485 Temperature Sensor. Using an RS485 hardware interface (with lightning protection design), the protocol layer is compatible with the standard industrial Modbus-Rtu protocol. When we explore data sheet we can find the Input register which is given the temperature and humidity data.
Get Data from Device
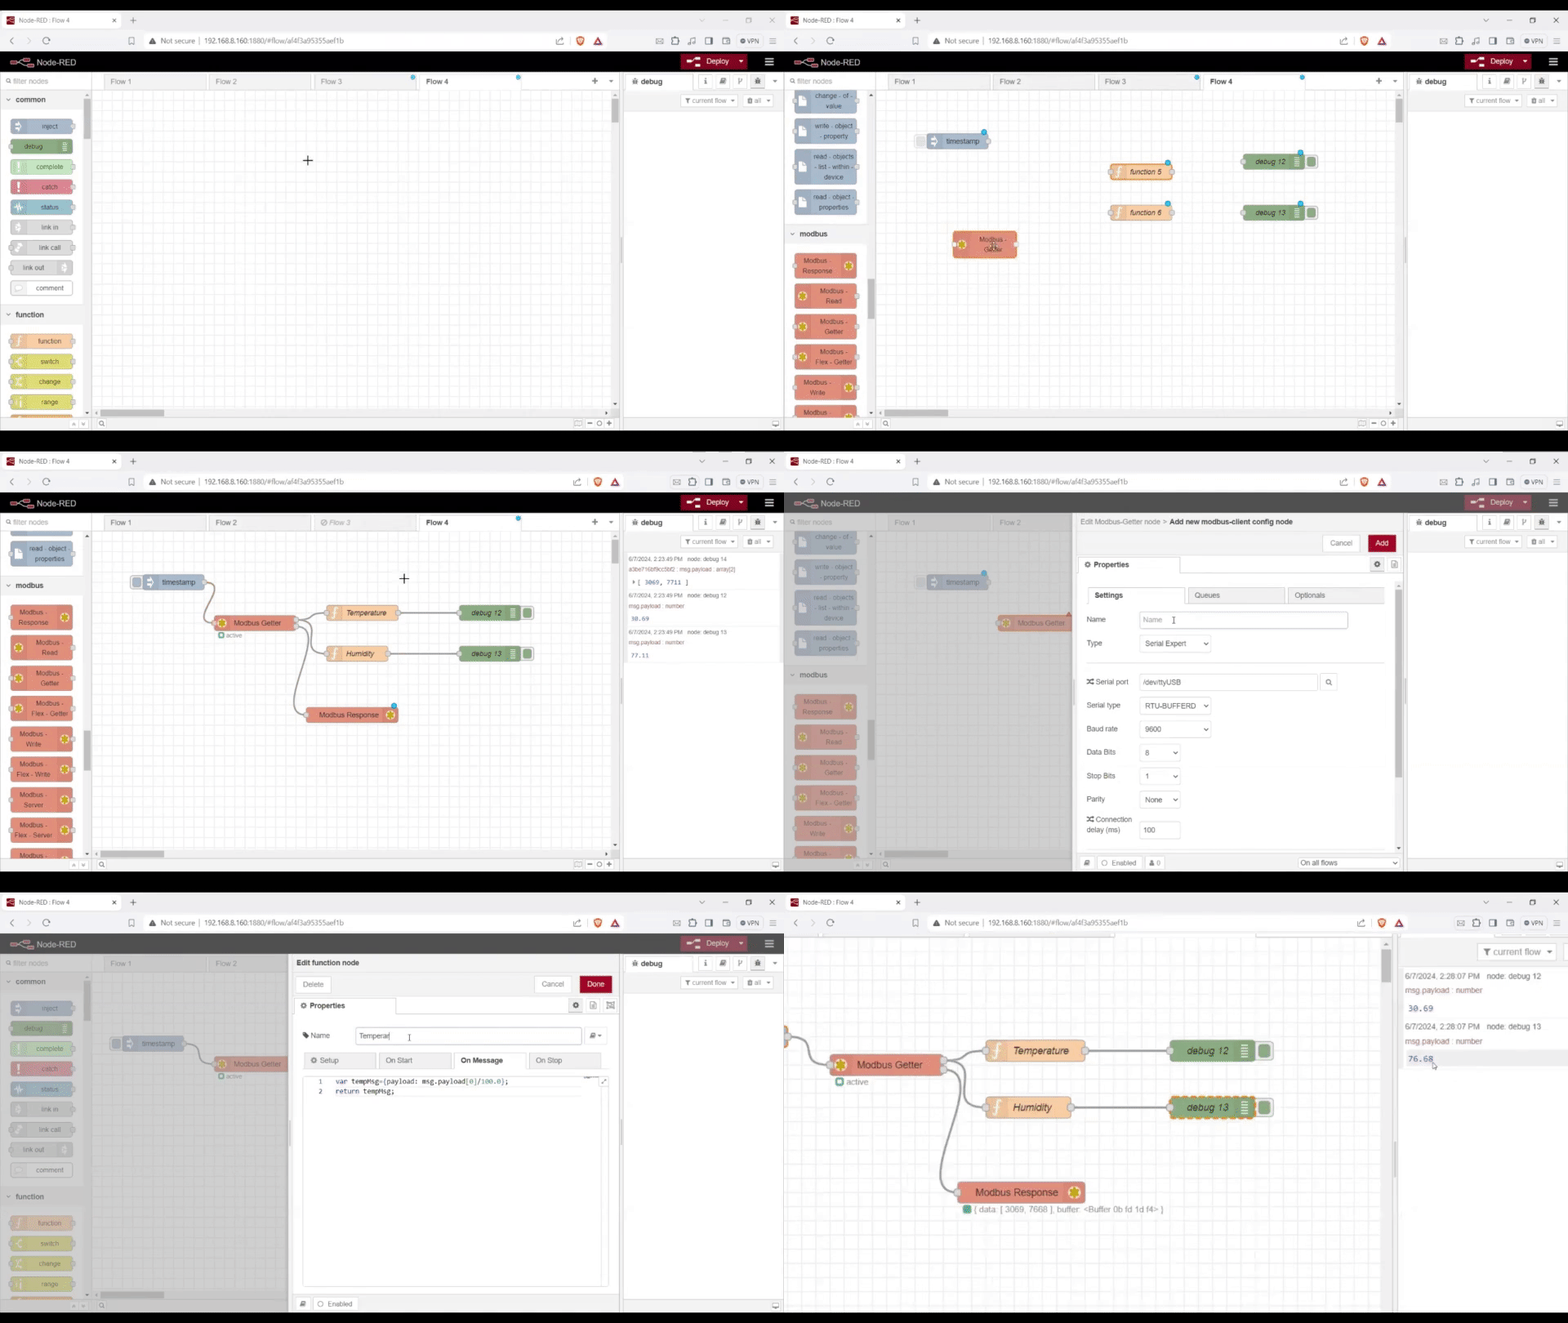
Required nodes: Modbus Getter, 2 Function nodes, 2 Debug nodes, Modbus Response.
Drag and drop these nodes and connect them according to the following manner/order.
Configure Modbus Getter Node
- Double-click on the Modbus Getter node.
- Set Unit ID to
1. - Set FC to
FC4: Read Input Registers. - Set Address to
1(as provided by the simulation device datasheet). - Set Quantity to
2(to read two blocks).
Configure Modbus Server
- Under the Server section, click the pencil button to create a new server configuration.
- Give the server a name.
- Set Type to
Serial Expert. - Set Serial Port to
/dev/ttyACM0. - Set Serial Type to
RTU. - Keep other settings as they are.
Function Blocks Configuration
We use the function block to extract the relevant temperature and humidity values. The output of the getter node is a decimal number containing both integer and floating point parts, so we need to adjust using basic mathematics.
For Temperature
var tempMsg = { payload: msg.payload[0] / 100.0 };
return tempMsg;
For Humidity
var humidMsg = { payload: msg.payload[1] / 100.0 };
return humidMsg;
Deploy
Press the Deploy button. You will see the values for humidity and temperature in the debug window.

Tech Support & Product Discussion
Thank you for choosing our products! We are here to provide you with different support to ensure that your experience with our products is as smooth as possible. We offer several communication channels to cater to different preferences and needs.