Connect N3uron with BACnet on EdgeBox RPi 200
BACnet is a widely adopted protocol in Building Management Systems (BMS) due to its open standard, which allows seamless integration and communication between devices from different manufacturers. Its popularity is also driven by its flexibility, supporting various network configurations and providing robust interoperability. N3uron, a powerful and versatile platform, enhances the capabilities of BACnet by enabling efficient data acquisition and management. Using BACnet TCP with the YABE Room Simulator, users can simulate and visualize BACnet devices, facilitating testing and development. This combination ensures a comprehensive and effective approach to BMS solutions, leveraging the strengths of each technology.
Prerequisites
Hardware
| Edge Box RPi 200 |
|---|
 |
Software
We highly recommend studying the Getting Started with N3uron guide. It provides essential insights into navigating the N3uron web interface, understanding concepts such as the Web UI and Web Vision module, grasping the concept of tags, and creating basic dashboards. If you haven't explored these fundamentals yet, it's advisable to do so before proceeding further. You can access the guide through the provided link.
YABE
Please go to this link and download YABE (Yet Another BACnet Explorer). YABE is a versatile tool that allows you to simulate and explore BACnet devices, making it ideal for testing and development purposes. Once downloaded and installed on your Host PC, YABE will be used to simulate room temperature data, which we will then read and process using Node-RED on the Edge Box.
Configure Ethernet settings
Since your PLC IP domain is different from your wireless settings, you may have to change the IP configuration manually. For that,
- Step 01: Run the following command:
sudo nano /etc/dhcpcd.conf
- Step 02: Then configure the Ethernet port settings according to your PLC network domain and set priorities using the 'metric' command. The lowest metric has the highest priority.
Connecting to a Room Control from N3uron using BACnet Client
Create the Module
-
Navigate to
Config => Modules => Model => New Module.
Configure the Module
-
Provide a name for the module (e.g.,
BACnetClient). -
Assign the module type (
BacnetClient). -
Save the new configuration.
Create a New Channel
-
Click the button on the left-hand side of the Model header.
-
Select
New Channel. -
Name the channel (e.g.,
CH01).
Configure the BACnet Client
- Click the
Network interface discoverybutton to the right of the Network interface field. - Select the corresponding interface of the network you want to connect to (e.g., use
0.0.0.0for all interfaces).
- The default BACnet communication port is
47808(BAC0 in HEX). - Leave the broadcast address as
255.255.255.255.
- Once the module is configured, click
Save. - Restart the module.
Discover and Select the Device
- Click the
Browse Devicesbutton to the right of the Devices field.
- Discover and select the corresponding device you want to connect to.
- Leave the other parameters as their default values.
-
Once the module and the device are configured, click
Save. -
Restart the module.
-
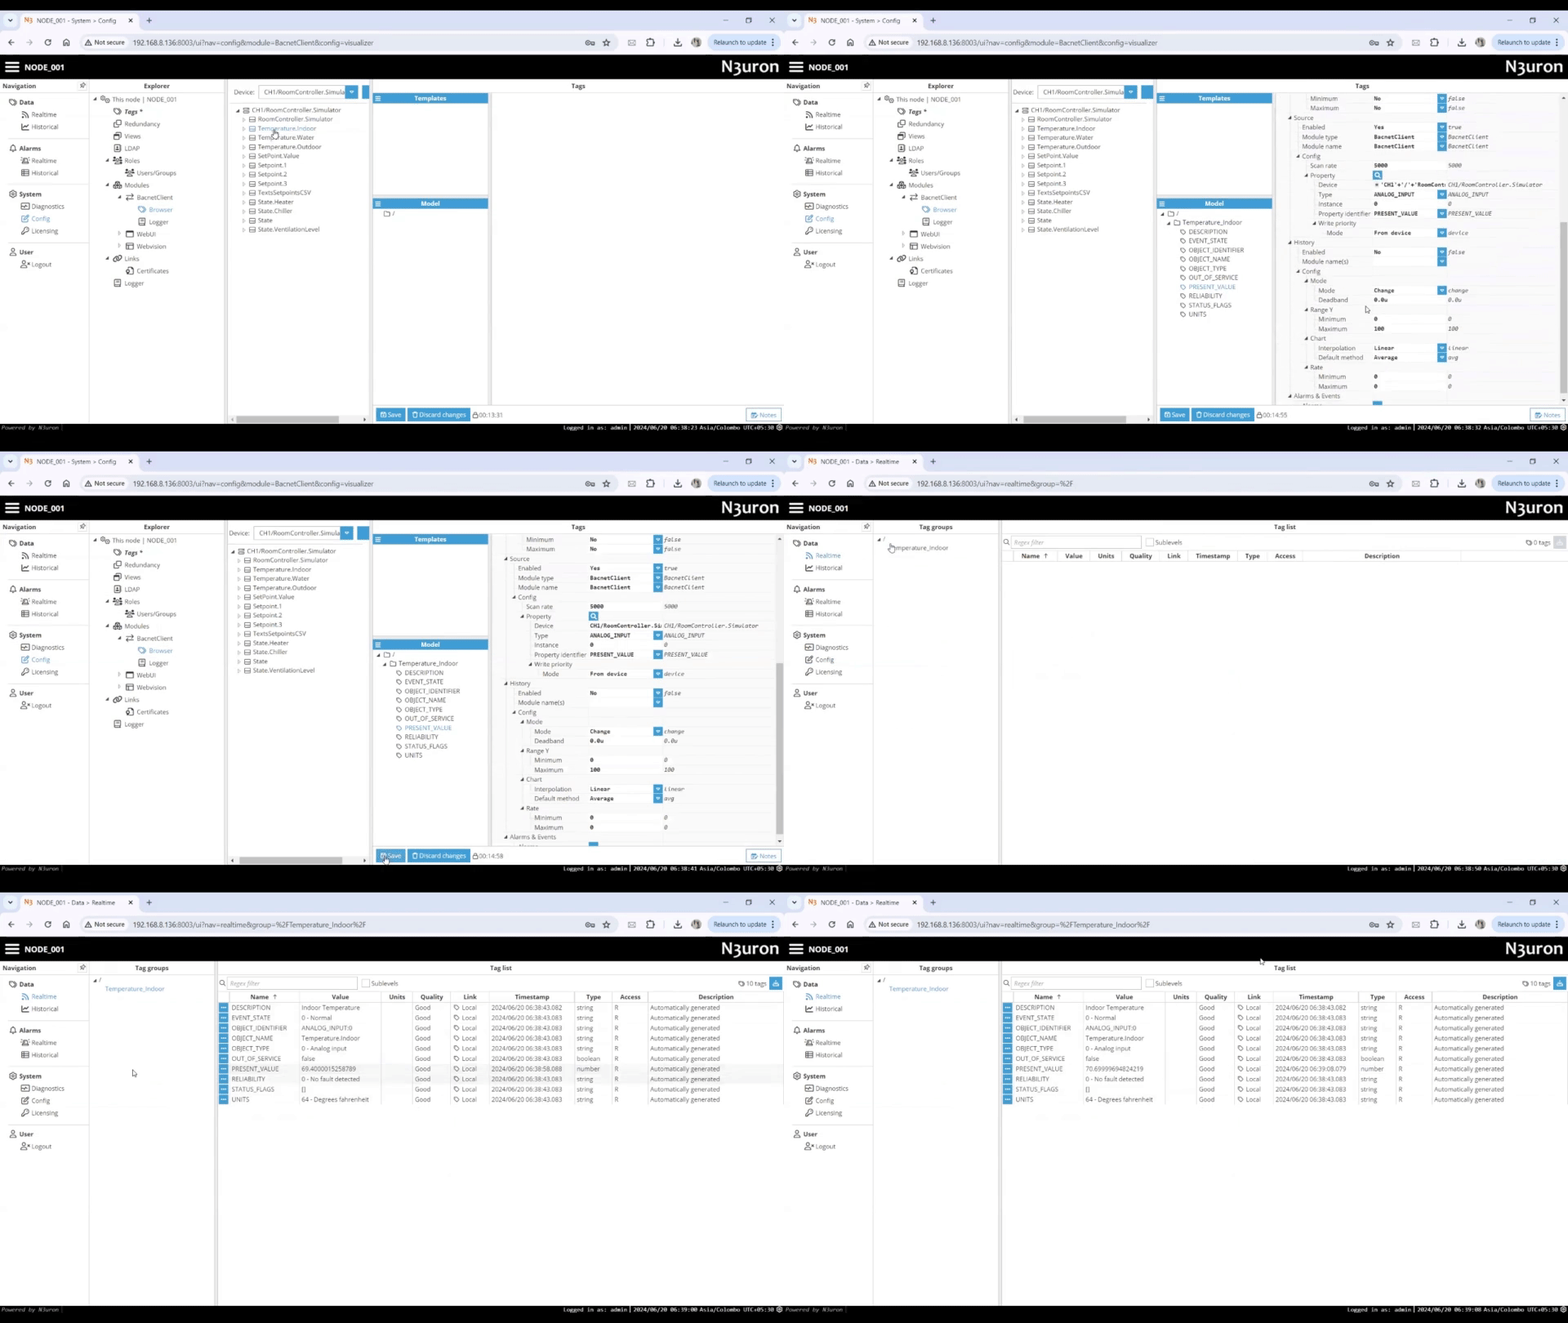
The "BACnet Browser" in N3uron is opened, and after selecting the device, "Rebrowse" is clicked to view a list of objects.
- The "Temperature Indoor" folder is located and dragged to the "Model" section. In the "Data" section under the "Real Time" tab, the tag values for "Temperature Indoor" are correctly displayed.

At this point, the connection is ready and we can move on to creating new tags from scratch.
Create a New Tag
- In the Explorer panel, select
Tags. - In the Model panel, create a new tag and name it
PRESENT_VALUE.
Configure the Tag
- Set the configuration parameters as follows:
- Type:
Number - Format:
Default - Client Access:
R - Details:
- Description:
Present value(Optional)
- Description:
- Scaling:
- Enabled:
Yes
- Enabled:
- Source:
- Enabled:
Yes - Module type:
BacnetClient - Module name:
BACnetClient - Config:
- Scan rate:
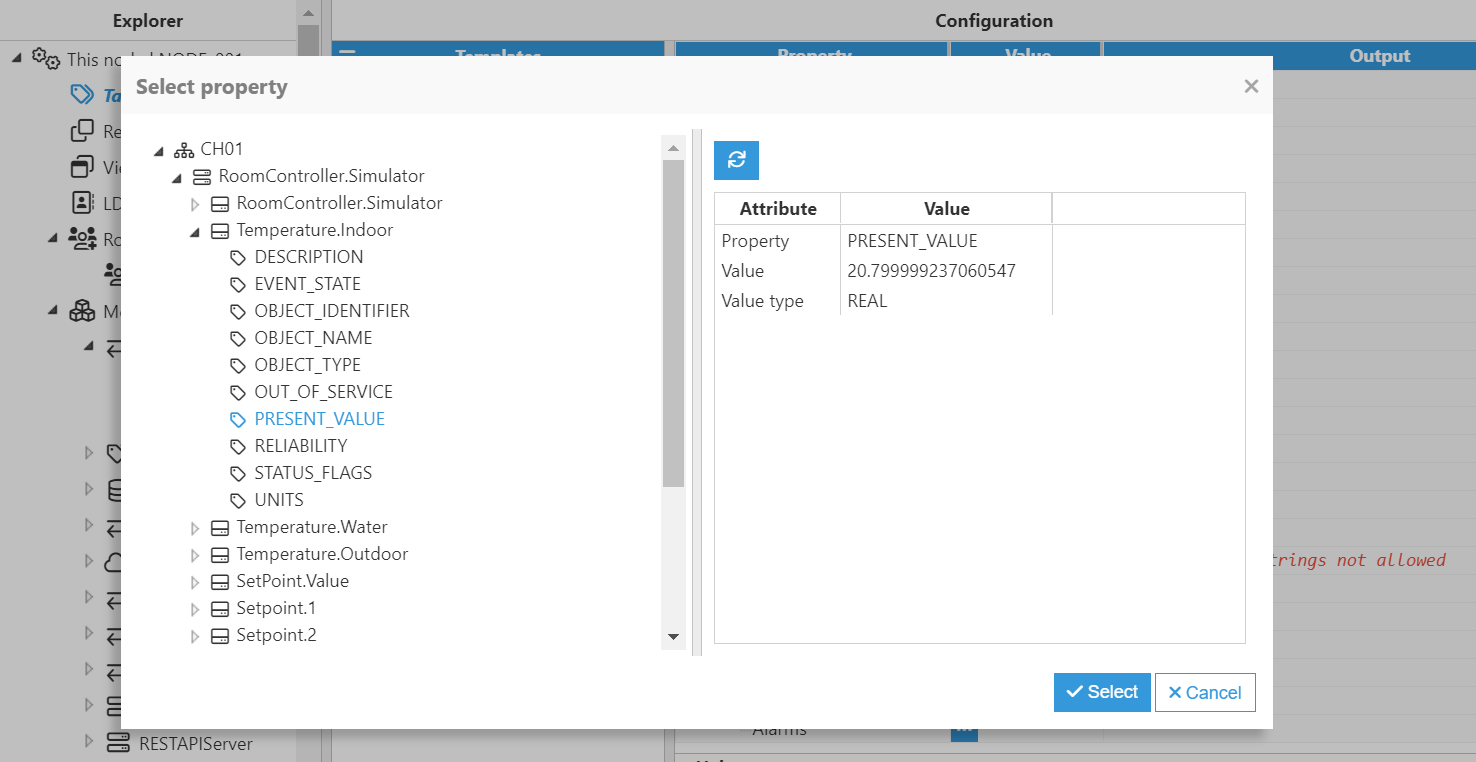
5000 - Property: Browse and discover the property by clicking the button to the right. Select
ANALOG_INPUT:0, thenPRESENT_VALUE. ChooseFrom devicein the write priority mode.
- Scan rate:
- Enabled:
- Type:

Now, go to the Data/Real-Time section in the Navigation panel where you should be able to see all the data read from that device.

Tech Support & Product Discussion
Thank you for choosing our products! We are here to provide you with different support to ensure that your experience with our products is as smooth as possible. We offer several communication channels to cater to different preferences and needs.