EM12-G GNSS Module Setup Guide for reComputer Robotics J3011
The EM12-G is a multi-constellation GNSS receiver module designed for positioning applications. It uses a standard M.2 Key B form factor and is compatible with embedded computing platforms such as NVIDIA Jetson and Raspberry Pi. It can provide stable and reliable real-time positioning services in complex urban environments and open outdoor scenarios.
This guide uses the J401 carrier board on reComputer Robotics J3011 as an example to show how to install, power on, and configure the EM12-G GNSS positioning module.
Notes
- Serial device names may change: This wiki uses
/dev/ttyUSB1as the default NMEA data port and/dev/ttyUSB2as the default AT command port. The actual USB serial nodes depend on the kernel enumeration order, so the ports may also appear asttyUSB0,ttyUSB3, or other nodes. If a command reports that the file does not exist, runls /dev/ttyUSB* /dev/ttyACM*first, confirm the actual device node, and replace the port name in the commands below. - Outdoor positioning is required: A GNSS first fix is very unlikely to succeed indoors. Perform the full test in an open outdoor area.
Hardware Installation
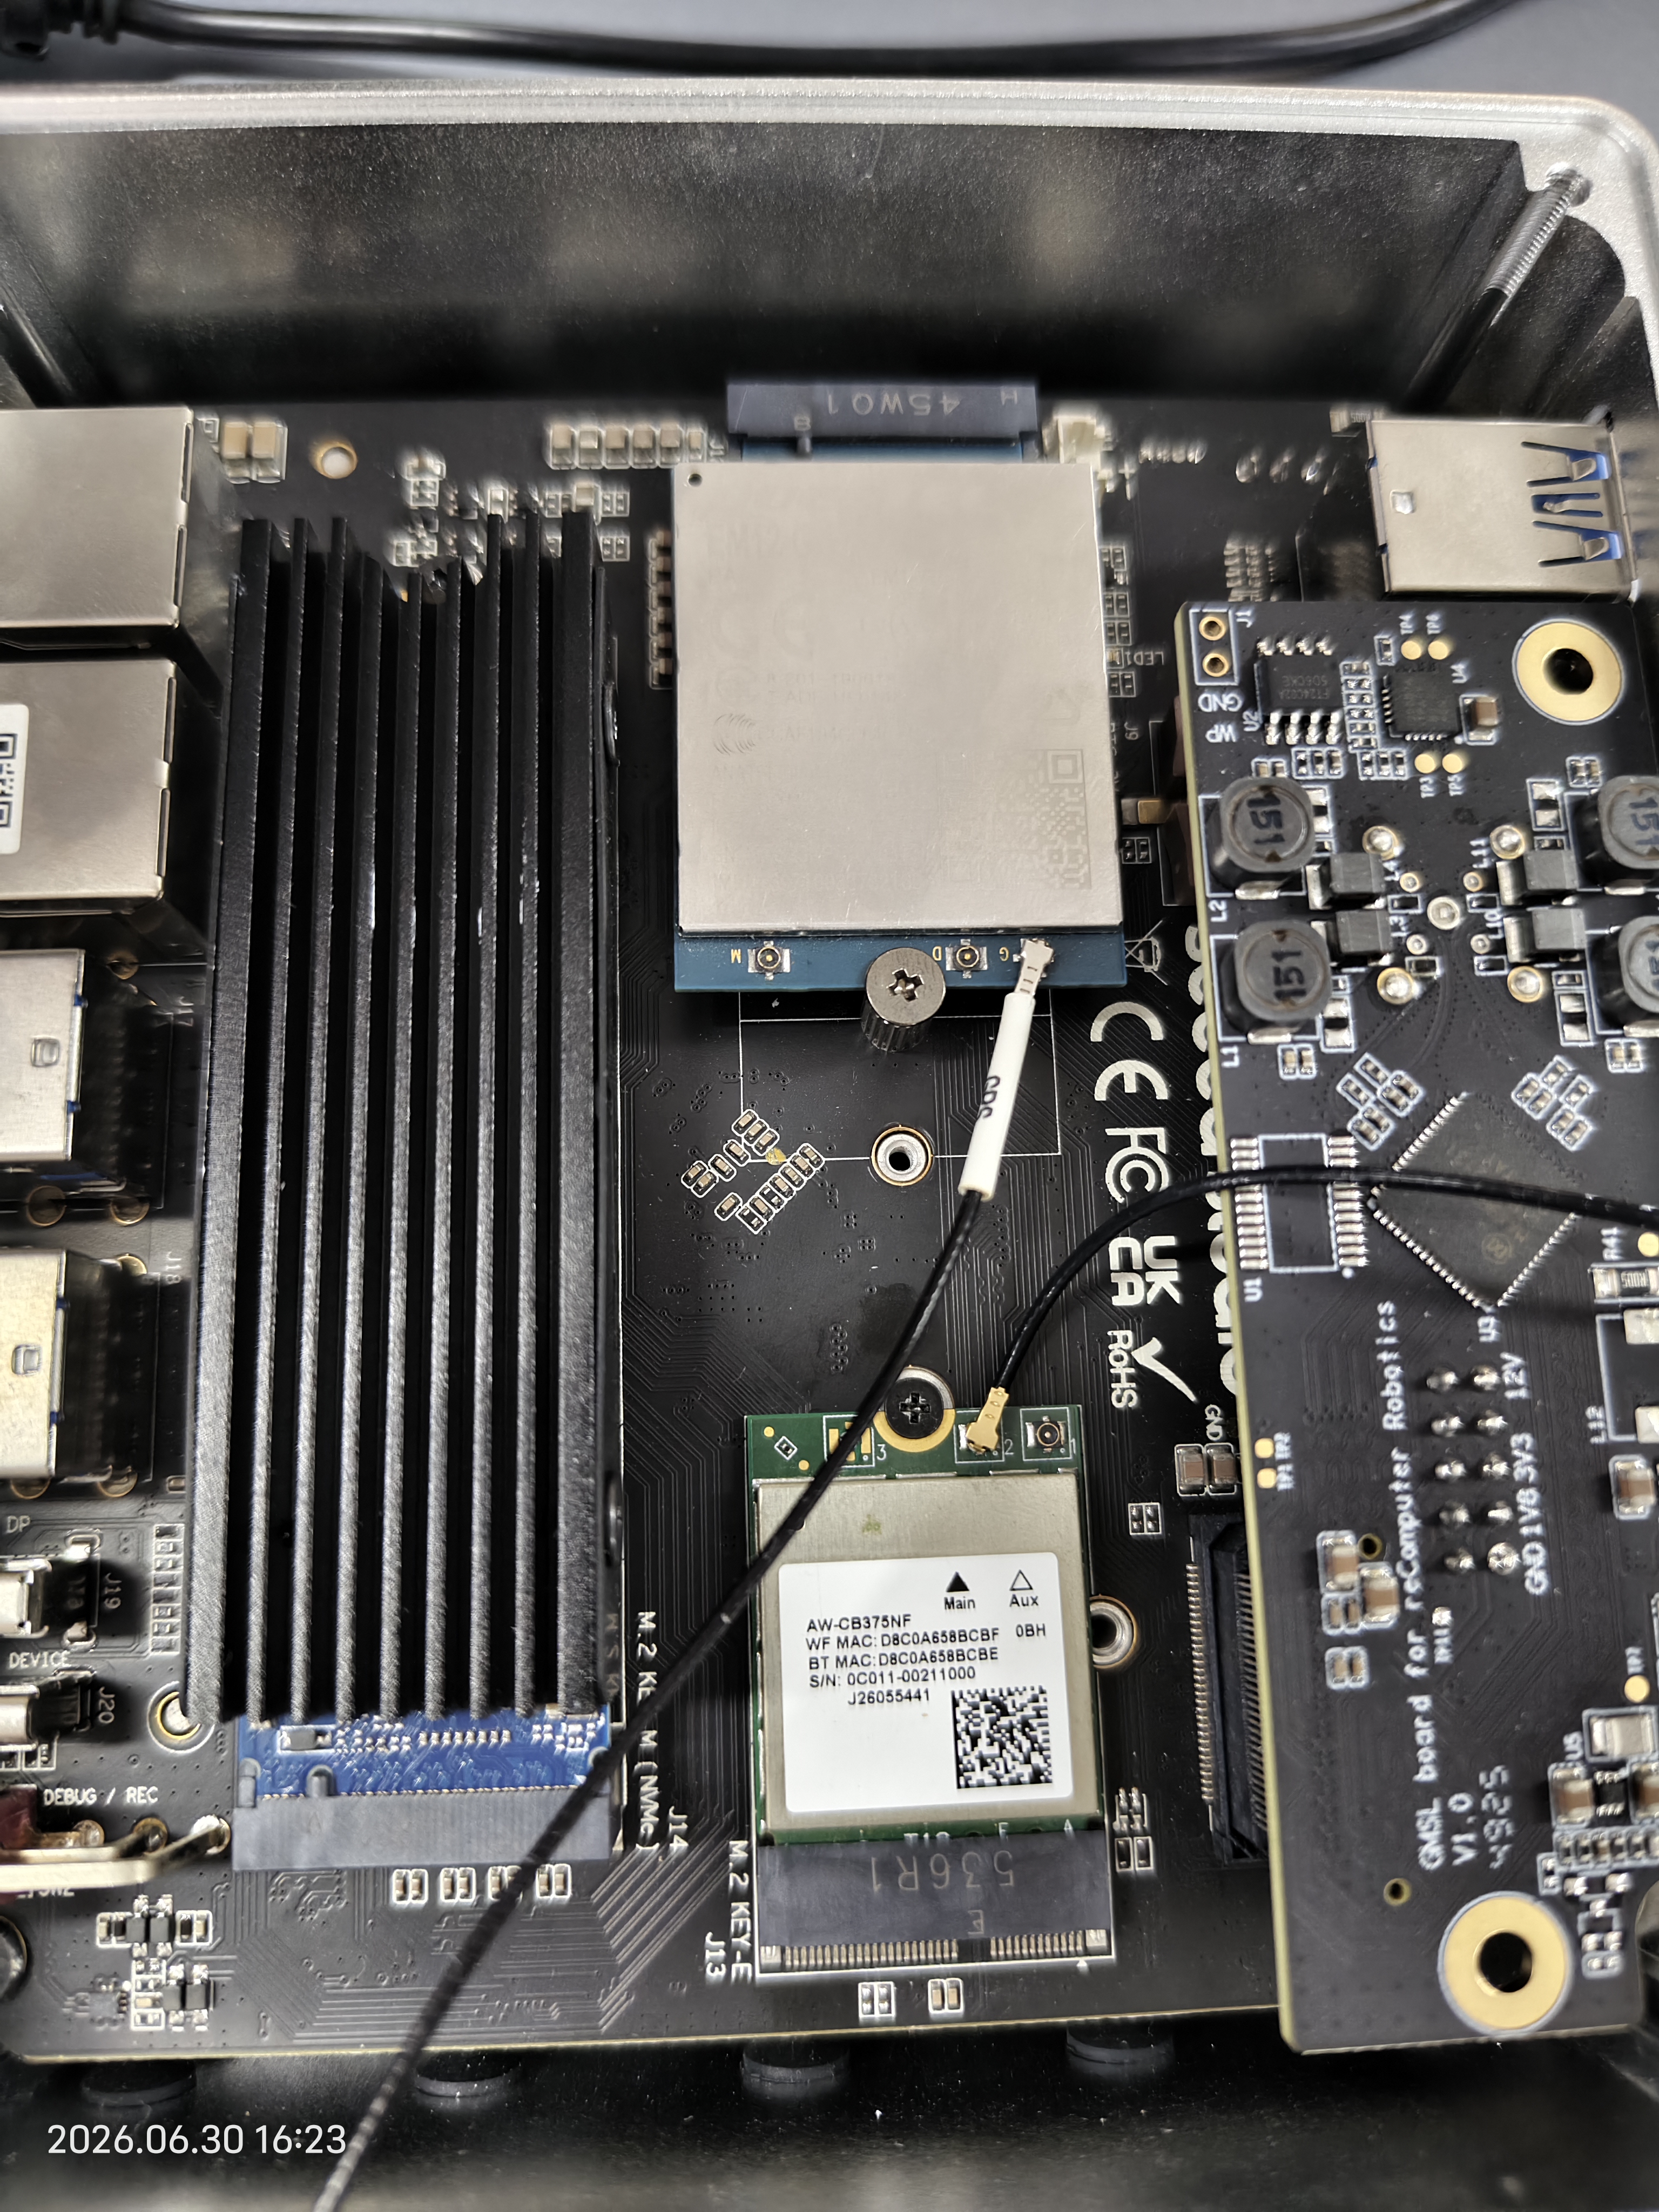
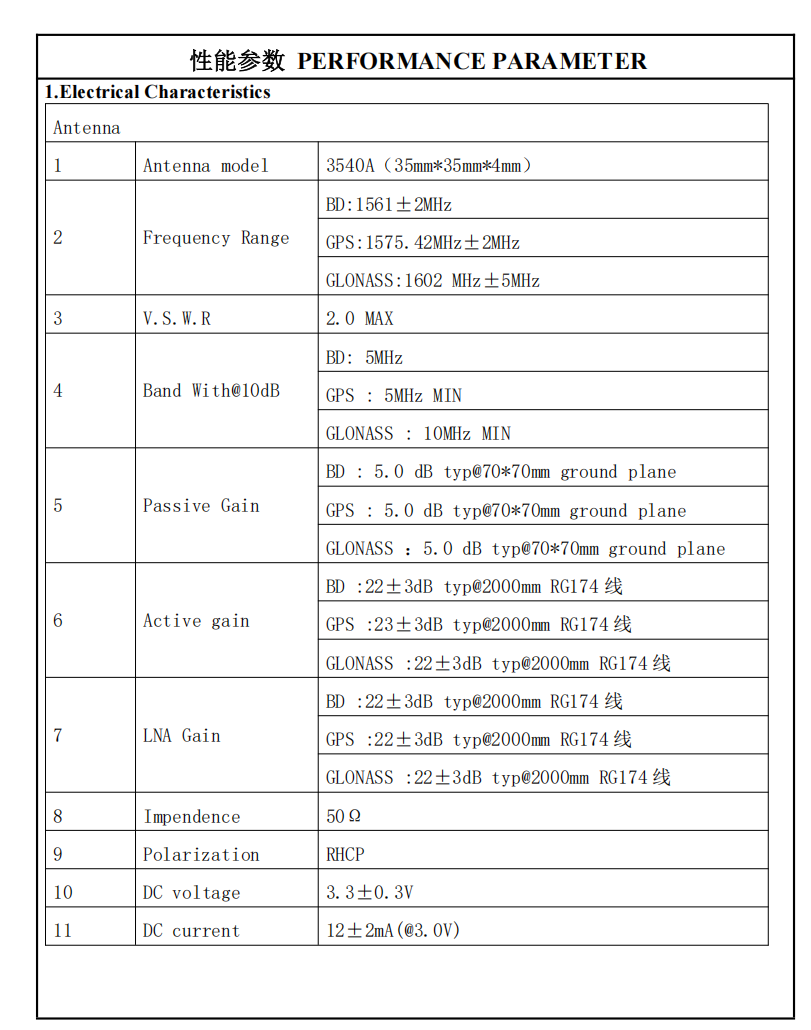
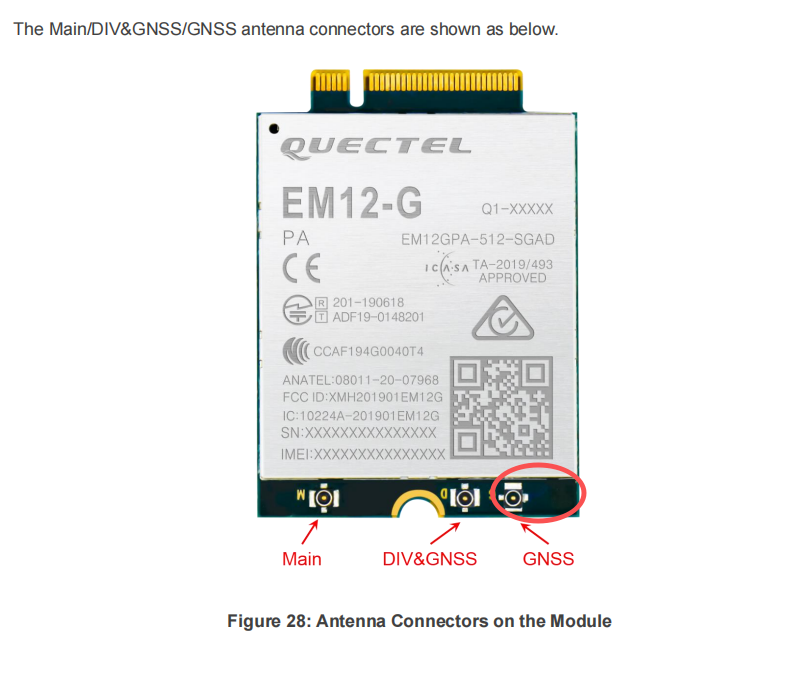
After installing the module on the device, connect a passive antenna to the contact marked G on the module. Place the device in an open outdoor area. The first satellite search may take about 3 to 5 minutes.
Clear Existing GPIO Processes
To avoid power-on failures caused by old GPIO control processes still occupying the pins, clear the existing gpioset processes first:
sudo pkill -f gpioset || true
|| true ensures that the following operations continue even if no existing gpioset process is found.
Power on the Module Through GPIO
The GPIO commands in this section are only for the J401 carrier board. They are the dedicated power-on sequence for the EM12-G module on J401. If you are using another carrier board, check the hardware schematic for that carrier board first. Do not run these GPIO commands on other carrier boards, otherwise the module may fail to power on or hardware damage may occur.
On the J401 carrier board, the power enable and wake-up pins of the EM12-G are controlled by Jetson GPIO. Run the following three commands in sequence and keep them running in the background:
sudo gpioset --mode=time --sec=200000 2 14=0 &
sudo gpioset --mode=time --sec=200000 2 12=0 &
sudo gpioset --mode=time --sec=200000 1 13=1 &
All three commands must be executed. They control the module power enable, reset, and W_DISABLE# pins respectively, forming the required J401 power-on sequence.
Wait for the Serial Device
After the module is powered on, USB serial enumeration may take several seconds to tens of seconds. Poll the NMEA data port manually:
for i in $(seq 1 60); do
    [ -e /dev/ttyUSB1 ] && echo "/dev/ttyUSB1 detected." && break
    echo "Waiting... ($i/60)"
    sleep 1
done
If /dev/ttyUSB1 is still not detected after 60 seconds, run the following command to check the actual serial ports. Also confirm that the antenna is connected properly and that the module is correctly inserted into the M.2 slot.
ls /dev/ttyUSB* /dev/ttyACM*
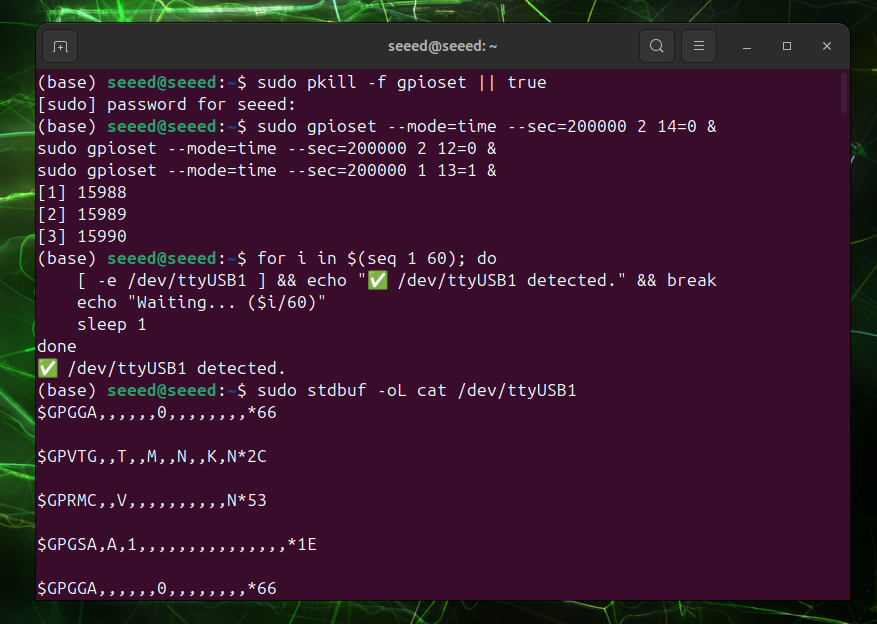
After confirming that the device node exists, run the following command. The GNSS NMEA output should appear in the terminal.
sudo stdbuf -oL cat /dev/ttyUSB1
Configure AT Commands
Open another terminal window and connect to the AT command port. The default port in this guide is /dev/ttyUSB2.
sudo minicom -D /dev/ttyUSB2 -b 115200
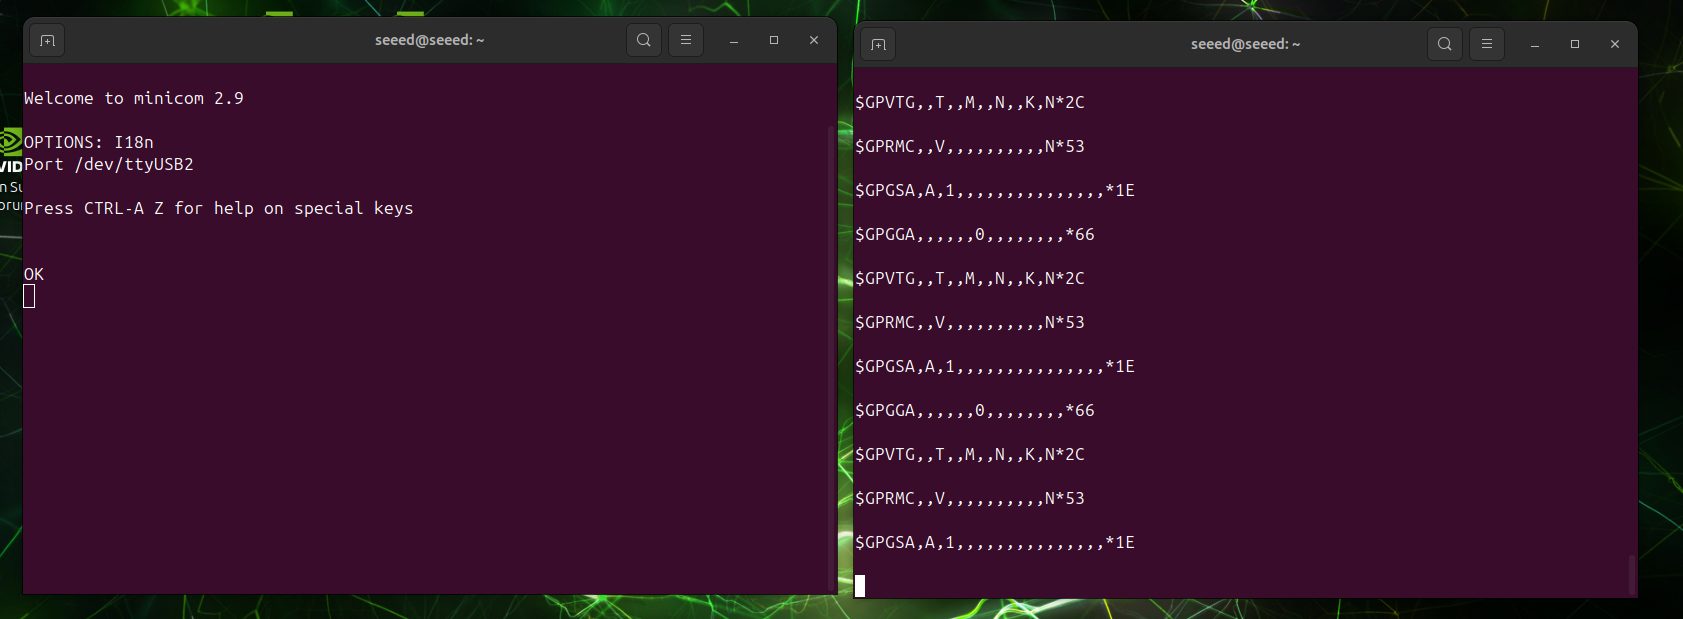
After entering minicom, configure the NMEA output and enable GNSS:
# Set NMEA output
AT+QGPSCFG="outport","usbnmea"
AT+QCFG="gpsdrx",0

# Enable GNSS
AT+QGPS=1
After GNSS is enabled, OK should be returned in the AT command terminal, and the previous terminal should start printing NMEA messages. The first satellite search may take 3 to 5 minutes. Test the module in an open outdoor area.
- If
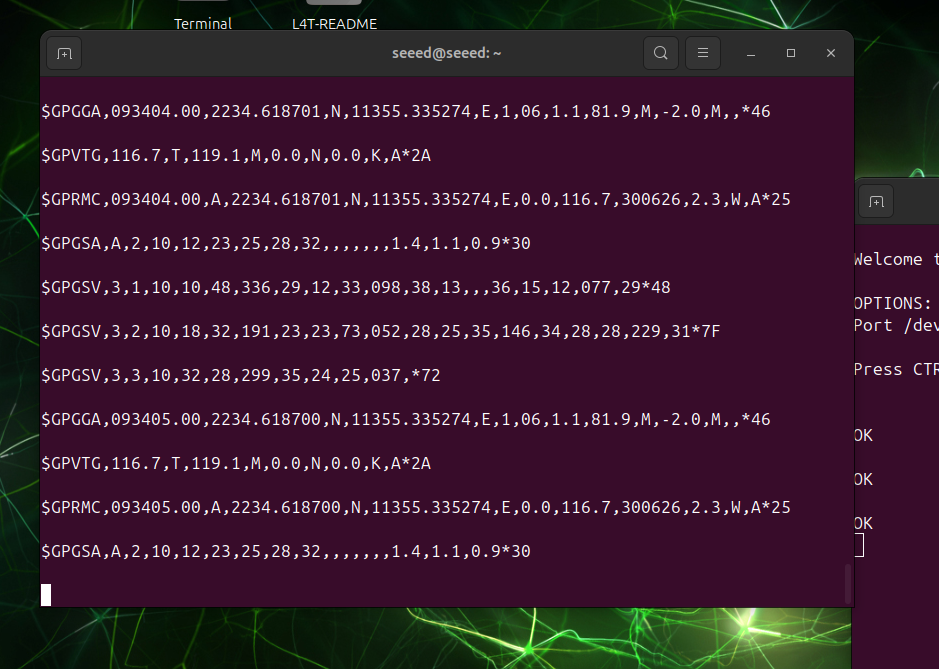
$GPGGA,$GPRMC, and similar sentences keep refreshing, the module communication is working correctly. - In a GGA sentence, the sixth field indicates the fix quality.
1means the module has obtained a valid fix, while0means it has not obtained a fix yet. Continue waiting outdoors for 1 to 5 minutes. - Press
Ctrl+Cto stop the output.
The following example shows positioning information that contains valid latitude and longitude data:
Tech Support & Product Discussion
Thank you for choosing our products! We are here to provide you with different support to ensure that your experience with our products is as smooth as possible. We offer several communication channels to cater to different preferences and needs.