OpenEPaperLink and ePaper config builder
Introduction
OpenEPaperLink (The following text will refer to this project as "OEPL") is an alternative protocol and firmware implementation for electronic shelf labels. Multiple displays are supported with ESP32-based access points and 802.15.4 radio communication. This is an open-source electronic paper label communication system, which enables users to update the display content of the electronic ink screen wirelessly. The system consists of an access point (AP) and label devices, and supports various types of electronic ink screens. It provides a wide range of content generation and transmission functions. Now, this project is also compatible with Seeed Studio XIAO nRF52840 Sense Plus.
After you purchase the ePaper Breakout Board, you may have the need to replace the electronic paper screen with a different specification. In this tutorial, we will use two tools for the process: OPEL Config Builder is used to modify the parameters of the electronic paper, and OEPL Image Uploader is used to upload images.
OEPL Config Builder is a low-code electronic paper parameter configuration tool that uses the BLE protocol for wireless transmission. Users no longer need to write complicated configuration codes; they can simply operate the mouse on the website to complete the configuration.
OEPL Image Uploader is also a tool that performs wireless transmission via the BLE protocol. The difference is that this tool transmits photos.
Hardware Preparation
| 4.26" Monochrome ePaper Display | ePaper Breakout Board for Seeed Studio XIAO | Seeed Studio XIAO nRF52840 Sense Plus |
|---|---|---|
 |  |  |
The MCU of the XIAO nRF52840 series all support this tool, not limited to the XIAO nRF52840 Sense Plus. The ePaper screen only supports a 4.26-inch display. However, we will continue to update in the future to support more screen sizes.
Usage of OEPL Config Builder
Step 1: Burn the BLE firmware
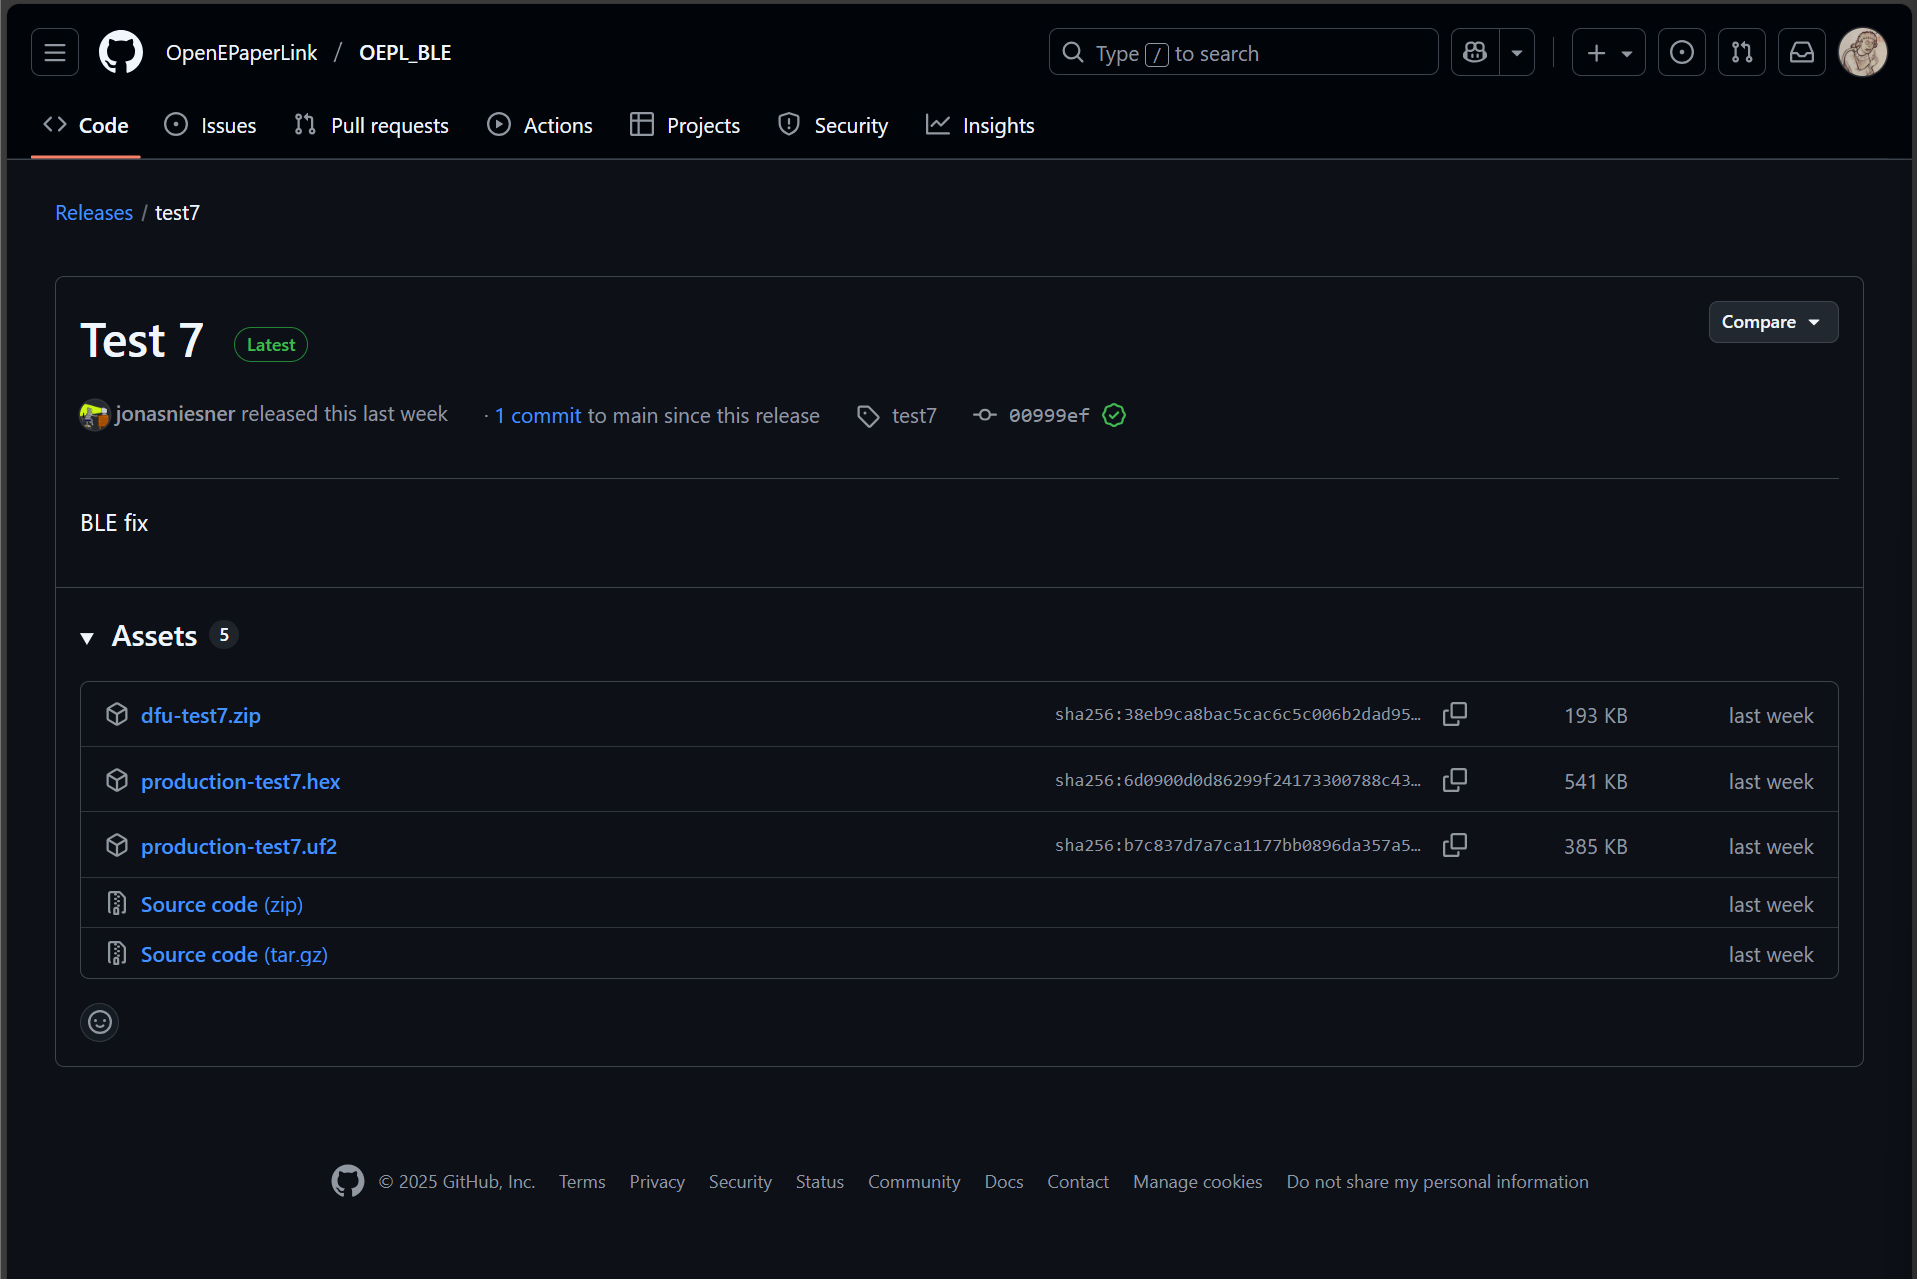
The first step is that you can obtain the OEPL_BLE firmware from the official repository of OEPL.
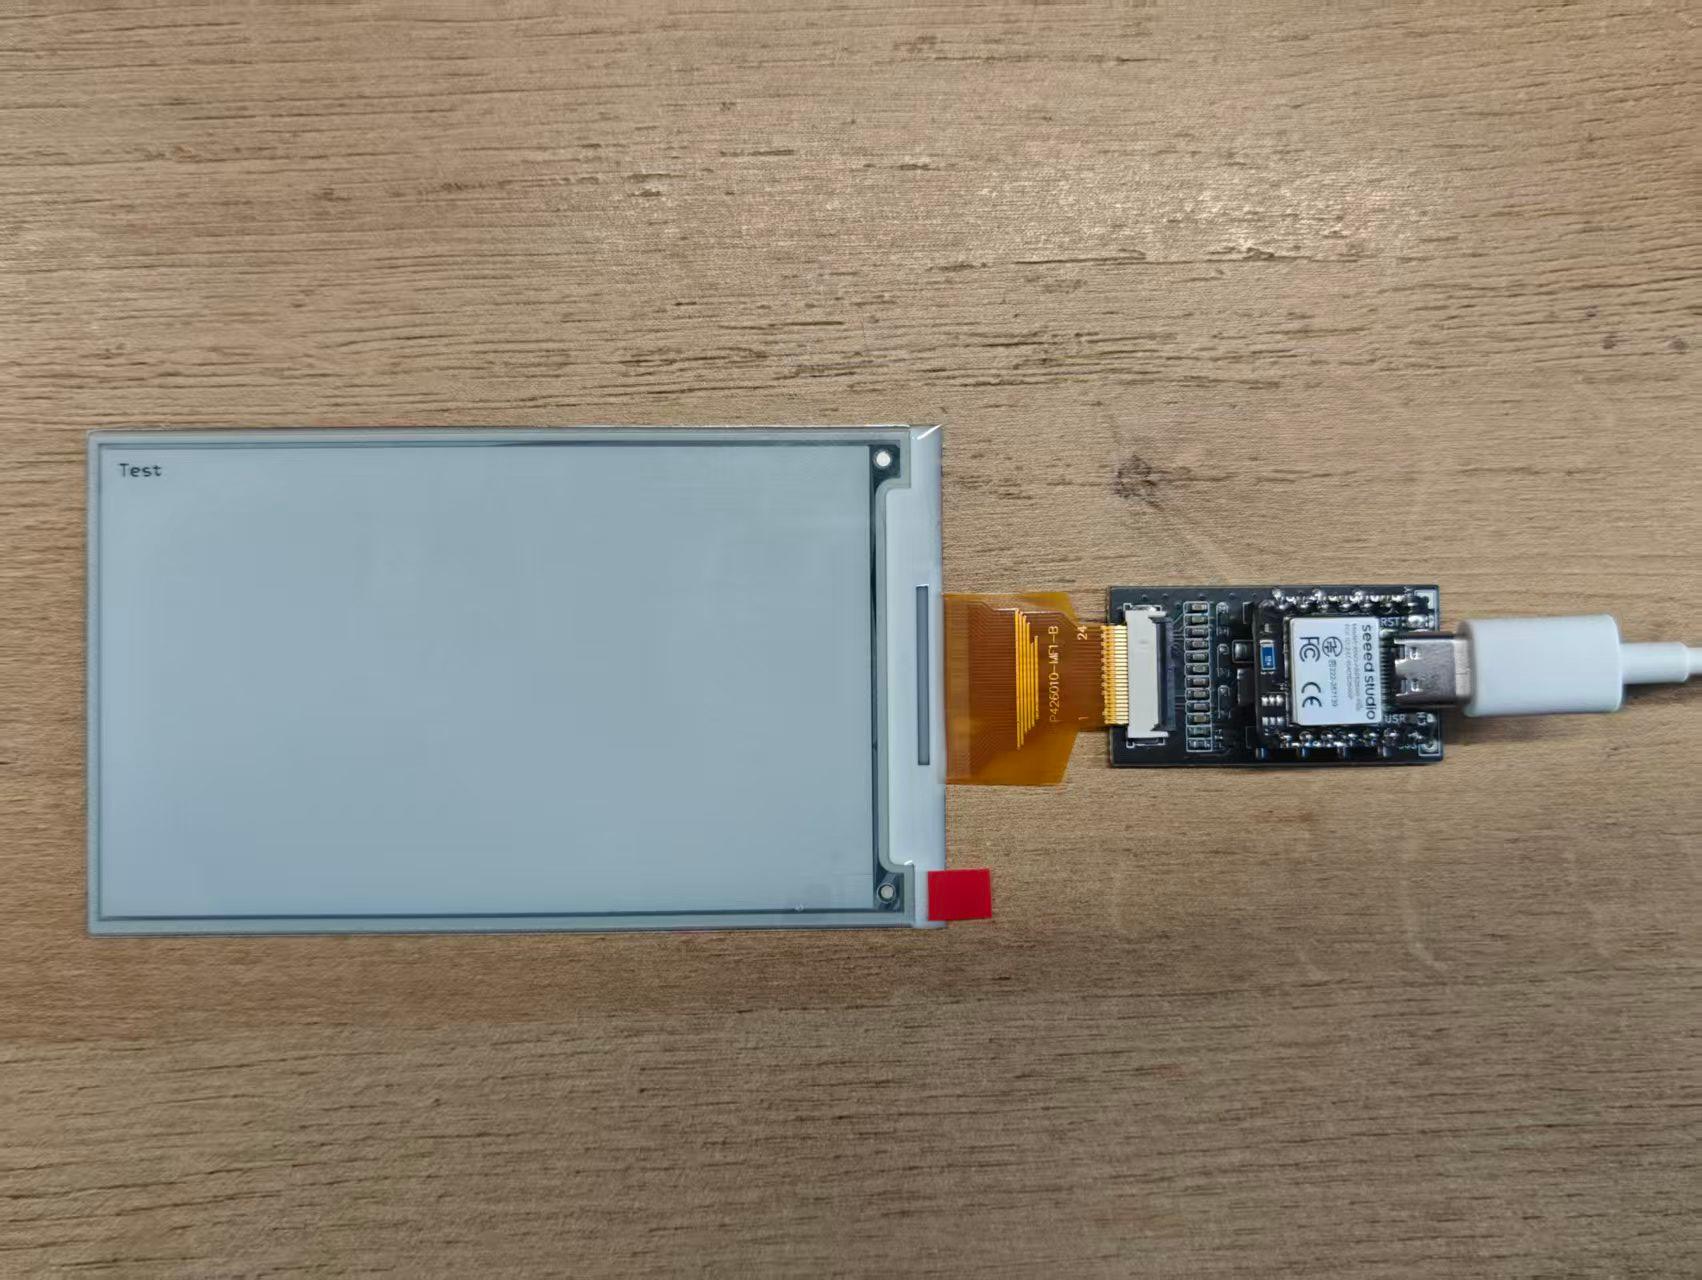
After connecting Seeed Studio XIAO nRF52840 Sense Plus, the ePaper Breakout Board and the screen together.Then connect the computer to the nRF52840 using a USB data cable, and then press the reset button twice consecutively.Then you will see a file manager pop up on the PC side.
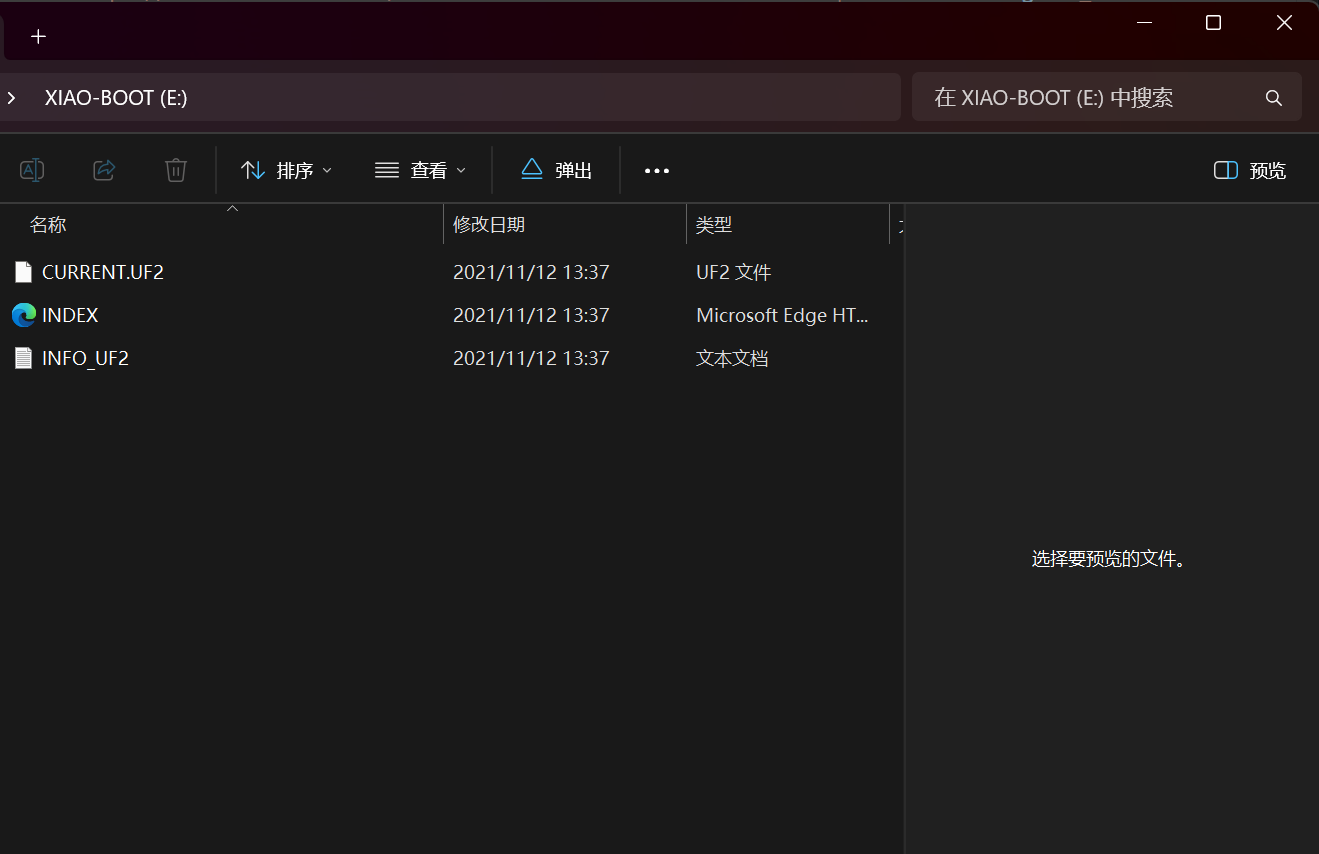
Then, copy the .uf2 file that was just obtained from the USB drive into the file manager of the nRF52840. The next time the MCU is powered on, it will automatically execute this .uf2 firmware.
Step 2: Use BLE to connect to the Builder
In the Builder interface, connect the devices via the BLE protocol(If no device is displayed, please reflash the firmware).This website can only achieve the following wireless upload function when it is connected via the BLE protocol.
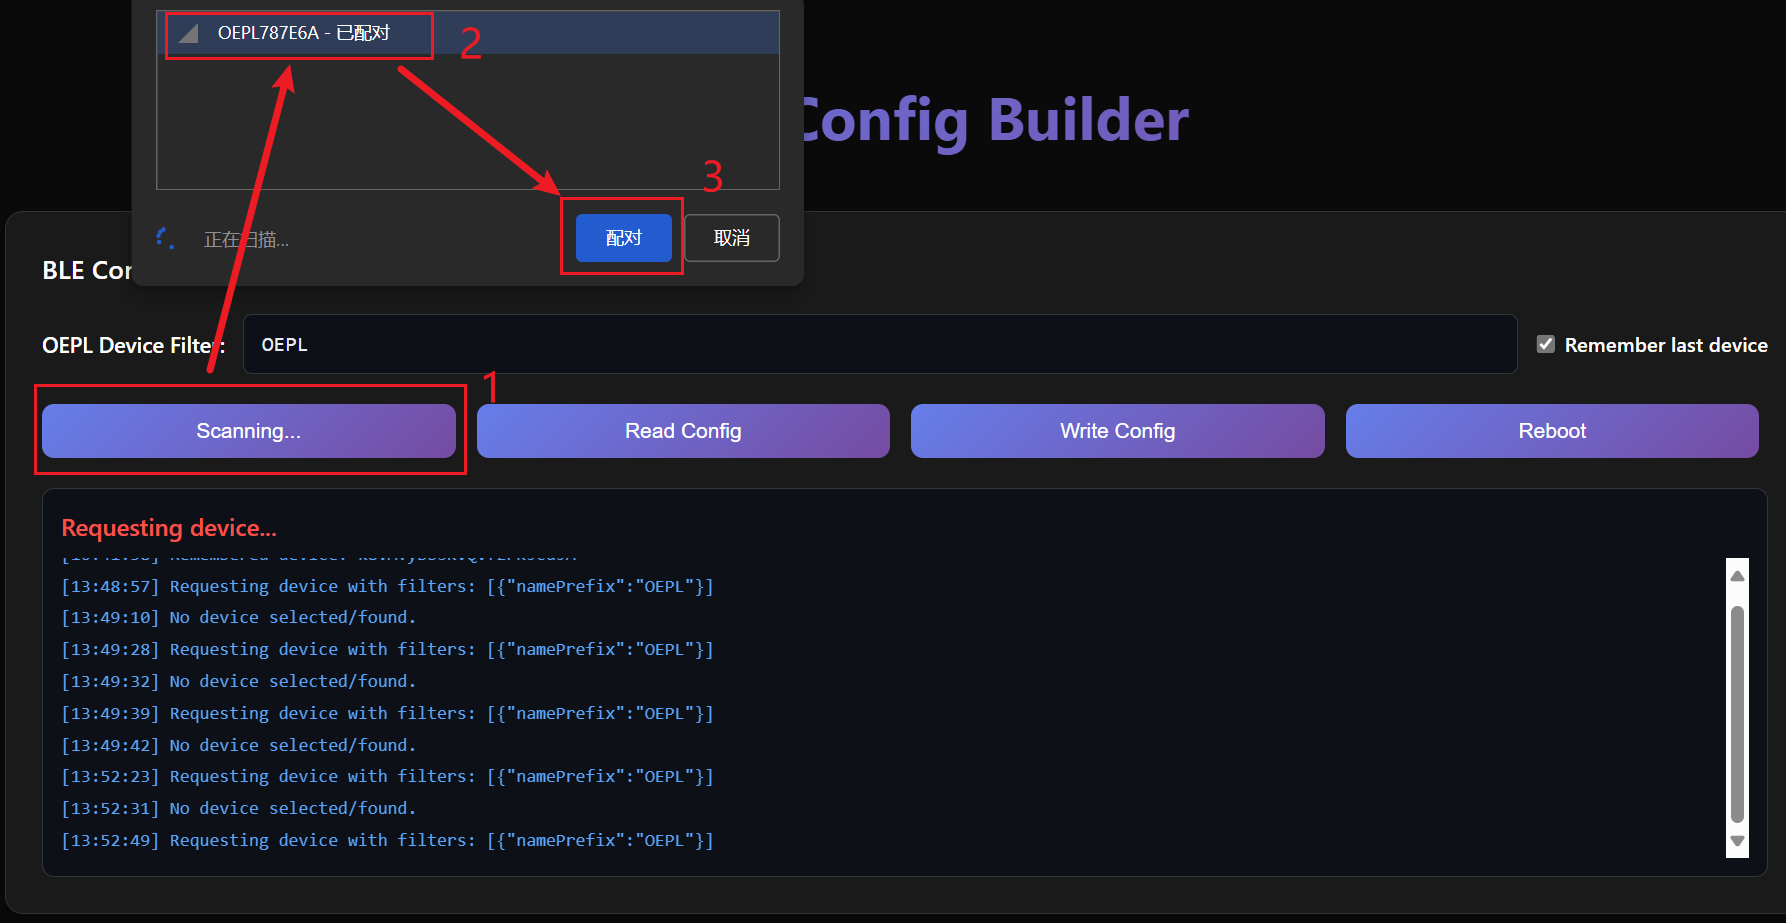
If the connection is successful, you can see the words "Connected" in the terminal box.
- Read Config: Read the configuration in the MCU.
- Write Config: Write the configuration to the MCU.
- Reboot: Reboot the MCU.
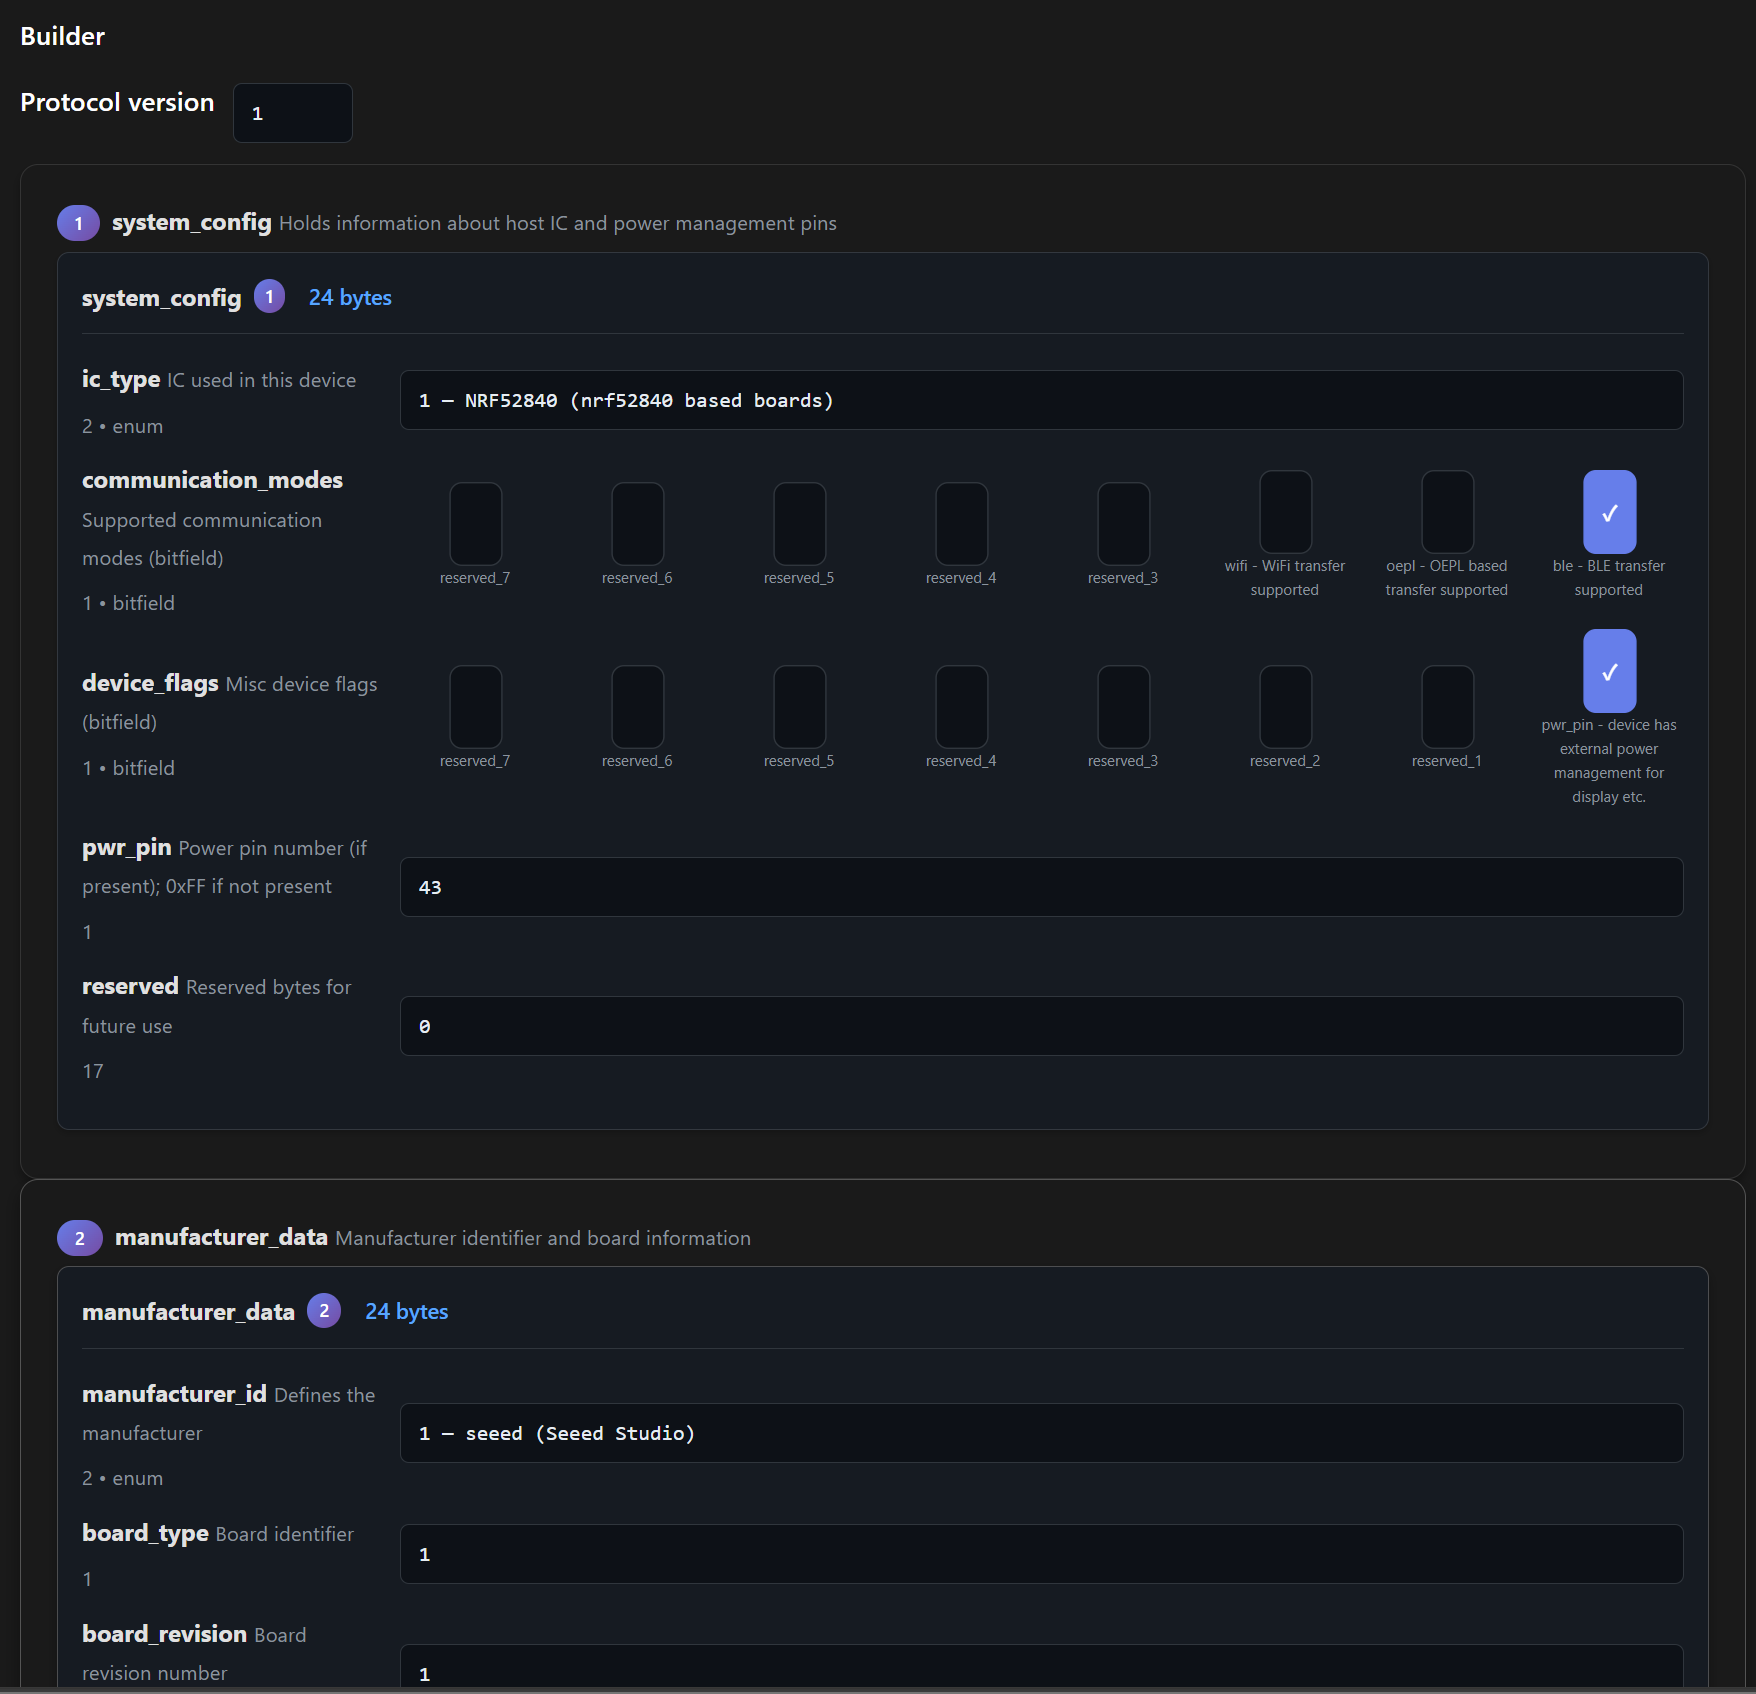
Step 3: Builder panel
Just select the corresponding variables or input parameters on the panel to complete the configuration.
- Parameters of Config Builder
- system_config: Holds information about host IC and power management pins
- manufacturer_data: Manufacturer identifier and board information
- power_option: Power supply and sleep related options
- display: Display / panel information (optional). Can appear multiple times for devices with several displays.
- led: Optional LED configuration (repeatable).
- sensor_data: Optional sensor readings / definitions (repeatable).
- data_bus: Global bus definitions (I2C/SPI etc).
- binary_inputs: Optional binary inputs (buttons, switches).
If you want to save the configuration you have set, you can export it as a .bin, Hex and JSON file within this panel. Conversely, this panel also supports importing JSON files for configuration purposes. The 4.26 screen configuration file can be obtained here.

After setting the configuration, you can upload it to the MCU by using the Write Config function.
Usage of the OEPL Image Uploader
OEPL Image Uploader is an online electronic paper upload tool, and it also operates via the BLE protocol. This tool is extremely lightweight and code-free, eliminating the hassle of the slow update speed of traditional e-paper. Its usage method is similar to OEPL Config Builder.
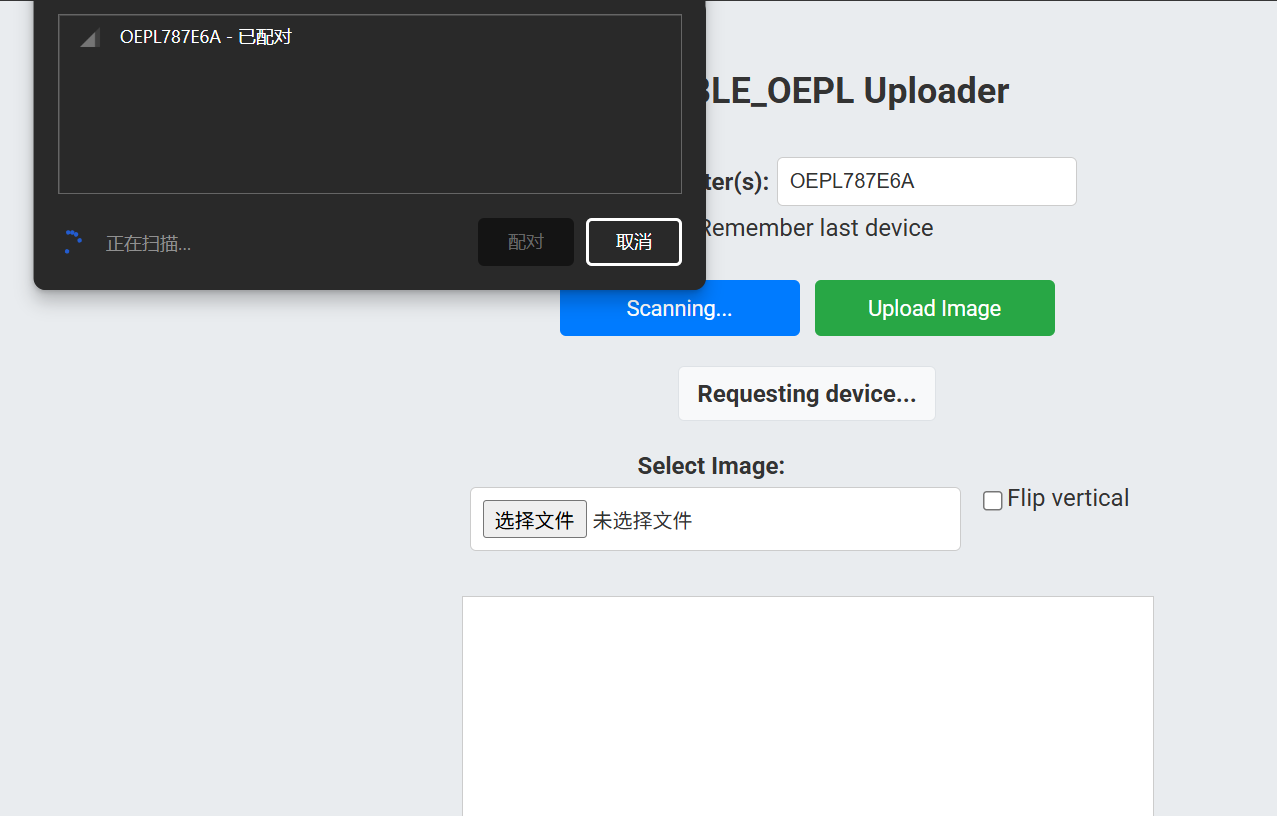
Step 1: Connect to the Uploader
The connection method is similar to that of Builder. The device is connected via BLE.However, it should be noted that due to some conflicts between the previous firmware and the pins required for this image upload, some modifications to the firmware are necessary before using this web function. Here, a new firmware is provided for burning. Just follow the steps mentioned earlier to perform the burning process.
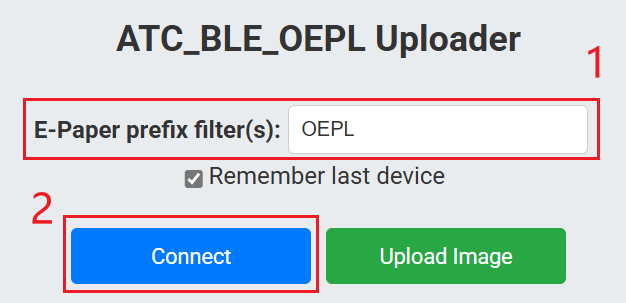
The variable in the "E-Paper prefix filter(s)" section needs to be changed to "OEPL"; otherwise, the device cannot be retrieved.
Step 2: Upload Image
Then click the "Select File" button to choose a local file for upload.
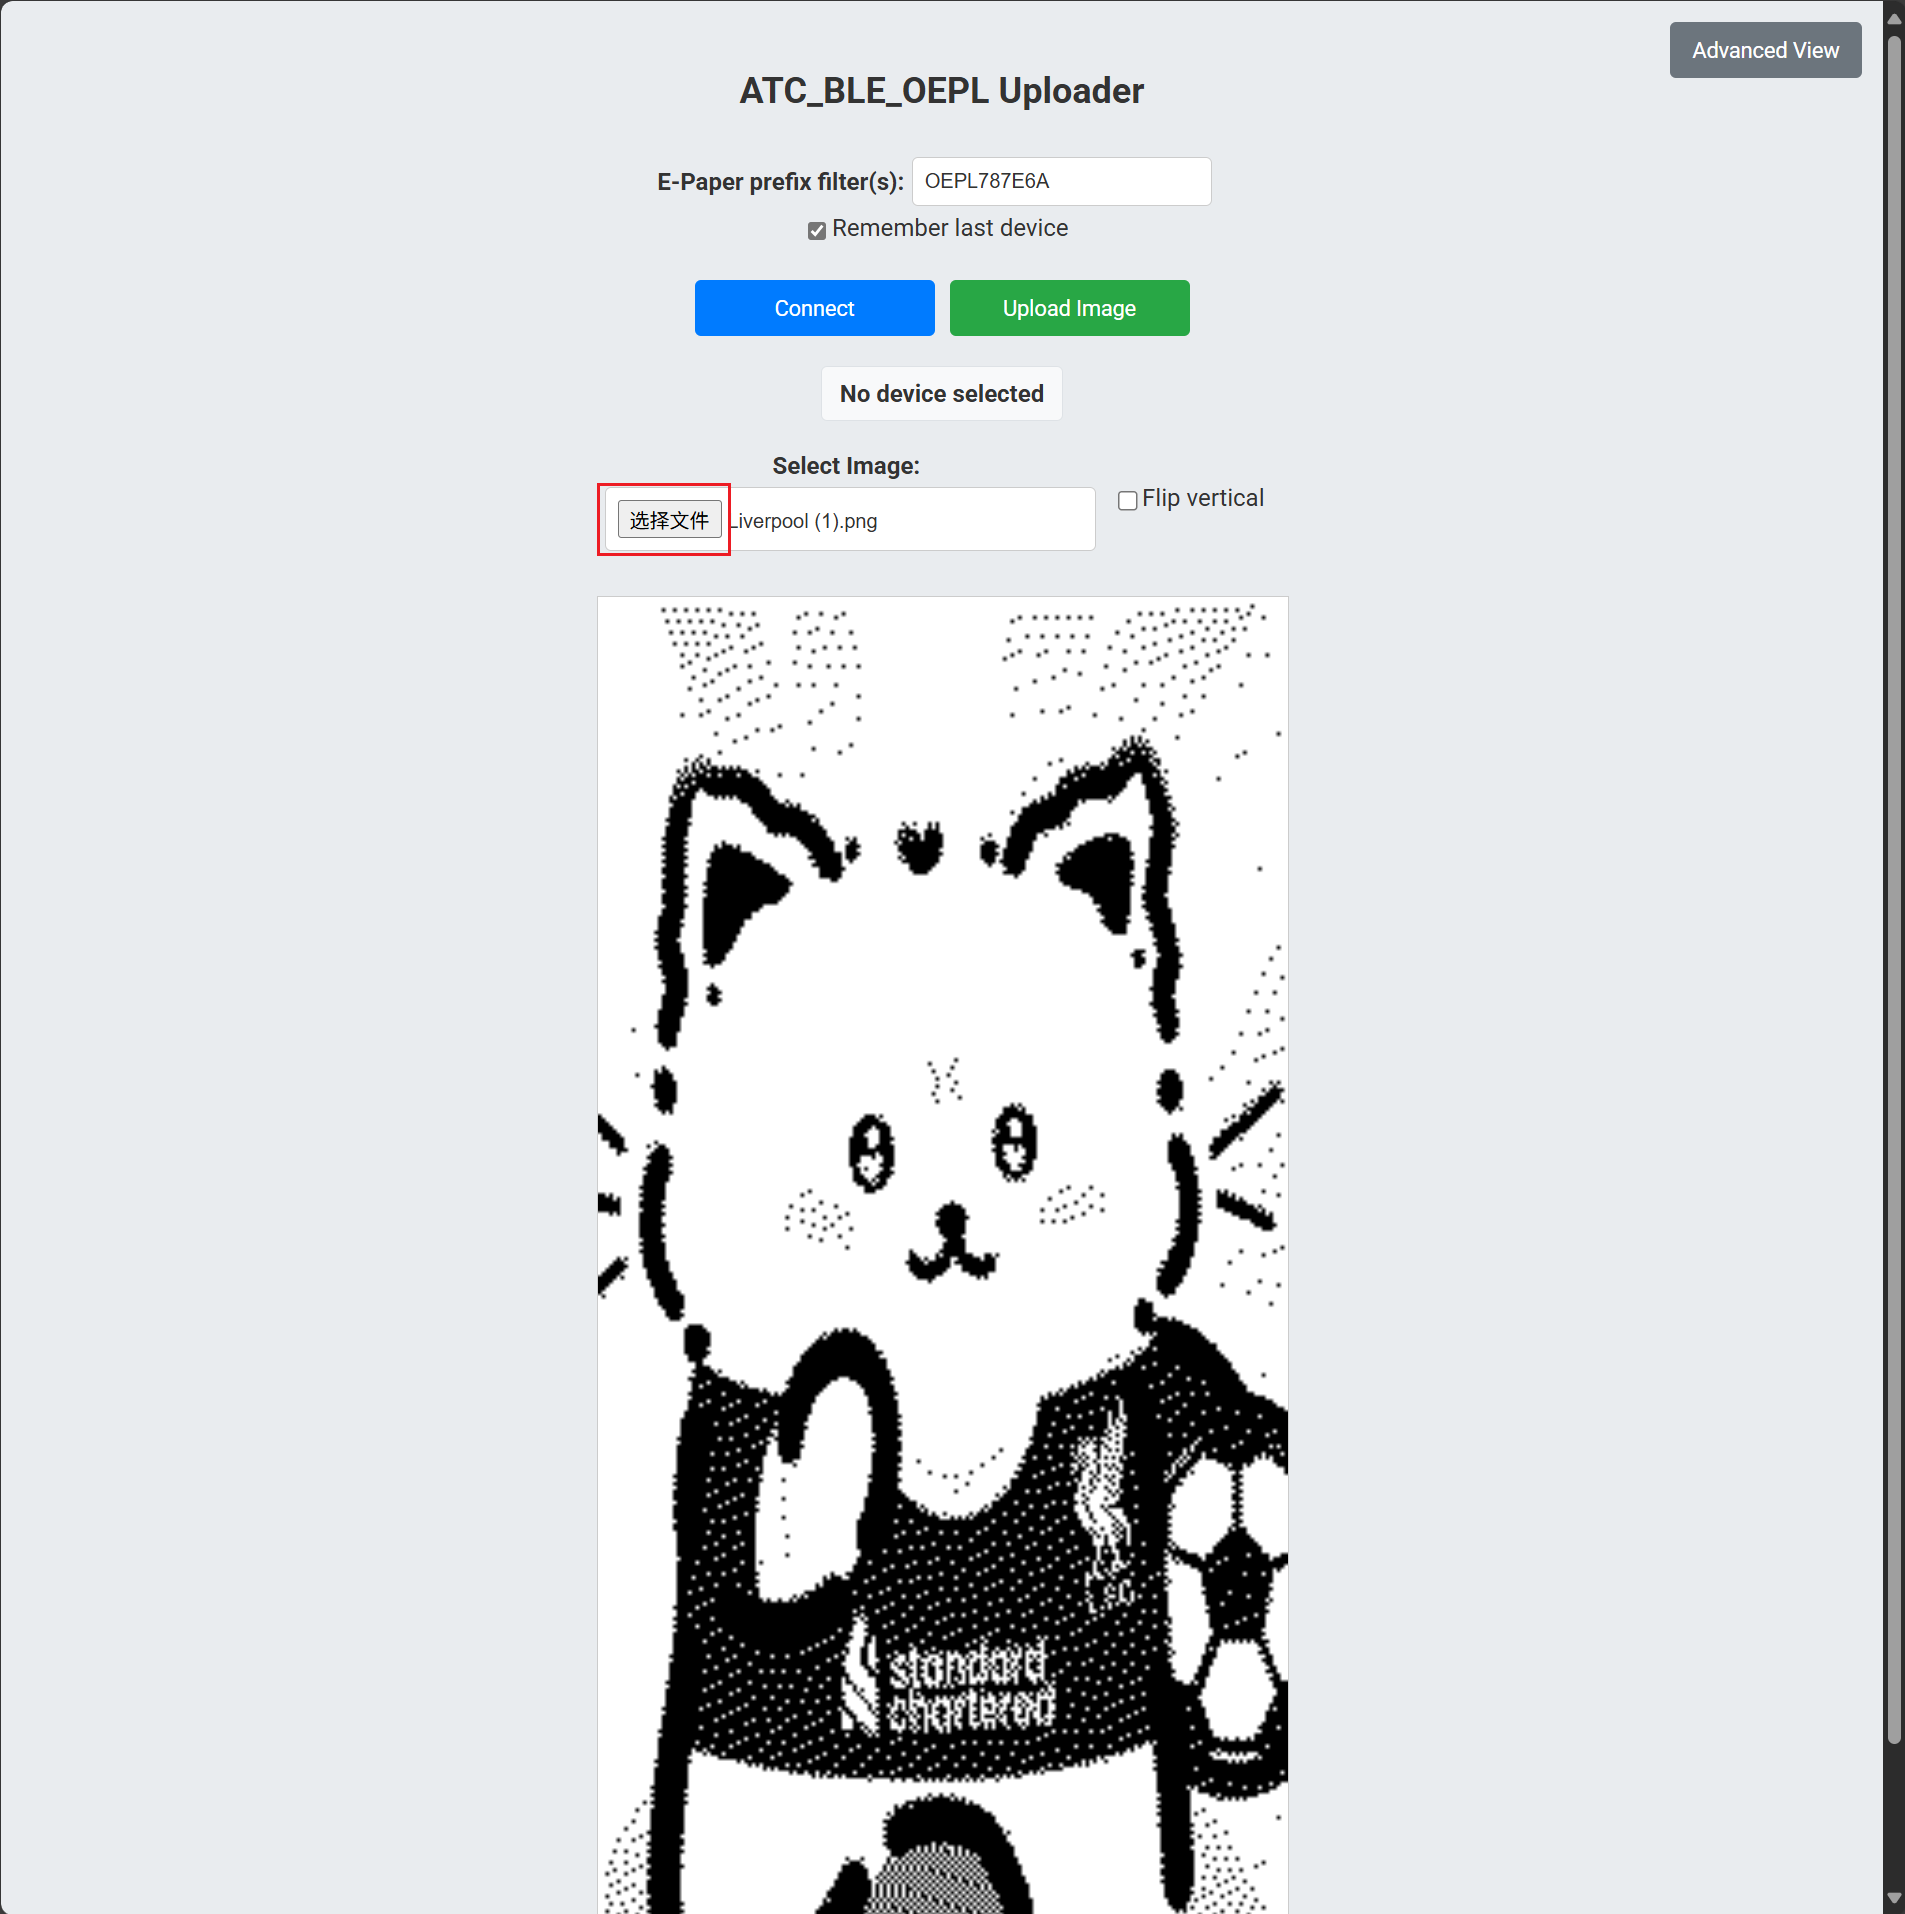
After the file transfer is completed, simply click the "Upload Image" button to upload it to the electronic paper.
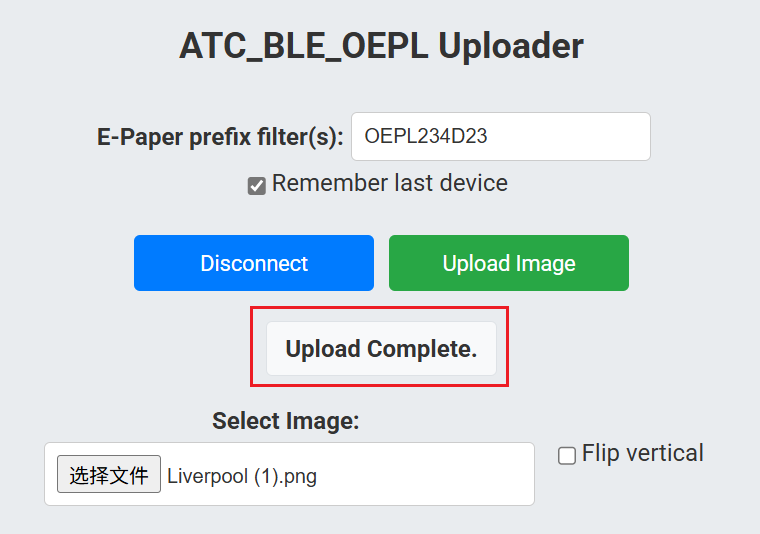
When "Upload Complete" is displayed, it indicates that the burning process has been successful! Then you will be able to see that the picture on the screen has changed.
Tech Support & Product Discussion
Thank you for choosing our products! We are here to provide you with different support to ensure that your experience with our products is as smooth as possible. We offer several communication channels to cater to different preferences and needs.