Getting Started with XIAO ePaper Display Board - EE05
| XIAO ePaper Display Board EE05 |
|---|
 |
Introduction
Powered by the XIAO ESP32-S3 Plus, the display board EE05 supports a wide range of 24-pin ePaper displays and enables no-code UI design and deployment with SenseCraft HMI. With extension IO and a battery connector power switch, it is ideal for low-power smart display applications.
Features
- Powered by XIAO ESP32-S3 Plus: Works immediately when connected to a compatible ePaper display.
- Versatile Display Support: Compatible with a wide range of 24-pin ePaper displays for various project requirements.
- Extension IO Port: Enables connection of additional sensors, such as temperature and humidity sensors, for enhanced functionality.
- BAT Connector with Switch: Provides simple battery connection and integrates a switch, enabling efficient power management and energy savings.
- No-Code UI Design & Deployment with SenseCraft HMI: Design and deploy personalized dashboards effortlessly with SenseCraft HMI, our new AI-powered no-code platform. Create your UI through simple drag-and-drop elements, choose from our rich templates, or let AI help you. Connect real-time data from web APIs, then deploy your finished dashboard to ePaper display with just a few clicks. From design to data configuration to deployment, everything happens seamlessly on one single platform.
Specifications
| Parameter | Description |
|---|---|
| Processor | XIAO ESP32-S3 Plus |
| ePaper Connector | SPI FPC 24-Pin 0.5mm |
| Battery Connector | JST 2.0mm |
| Switch | Hardware power slide switch |
| Power Supply | 3.7V Li-Battery / USB Type-C |
| Button | 1x Reset button (side-mounted) 3x User button (side-mounted) |
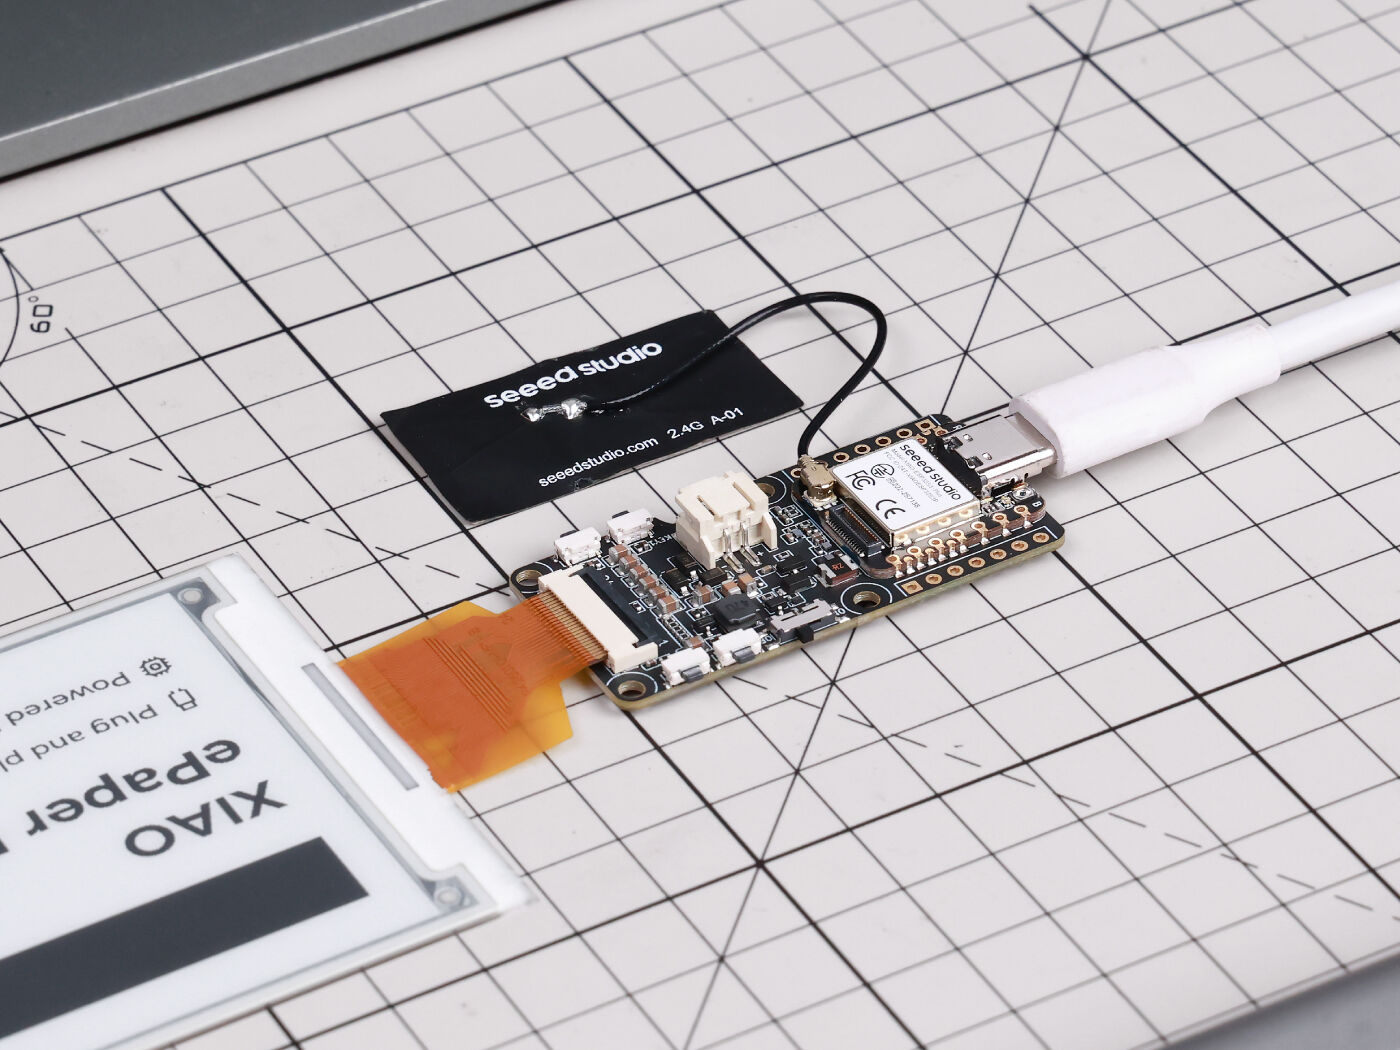
Hardware Overview
Supported ePaper Displays
The EE05 supports a variety of 24-Pin SPI ePaper displays, including but not limited to:
- 1.54-inch E-paper - Dotmatix 200x200
- 2.13-inch E-Paper -Flexible Monochrome 212x104
- 2.13-inch E-Paper - Quadruple 212x104
- 2.9 inch E-paper - Monocolor 128x296
- 4.2-inch E-Paper - Monocolor 400x300
- 4.26-inch E-Paper - Monocolor 800x480
- 5.83-inch E-paper - Monocolor 648x480
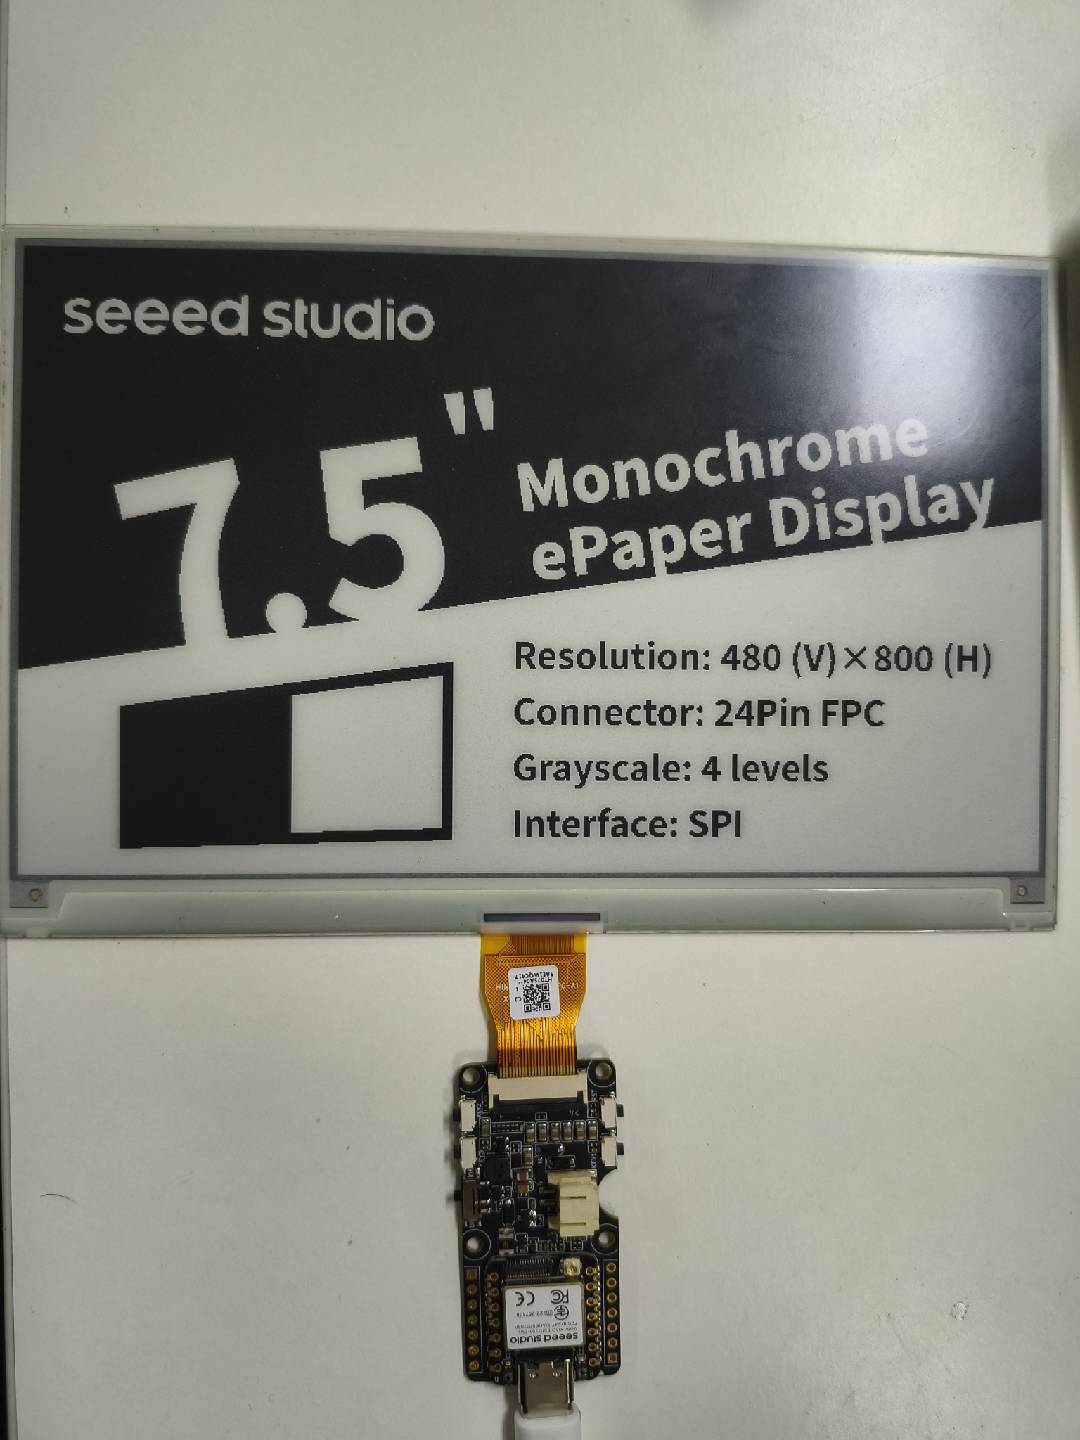
- 7.5-inch Monochrome ePaper Display with 800x480 Pixels
Software Overview
Install Seeed GFX Library
This library has the same function as the TFT library and is not compatible with it. If you have installed the TFT library or other similar display libraries, please uninstall them first.
Download and install the Seeed GFX library from GitHub.

Scroll down and open this link.

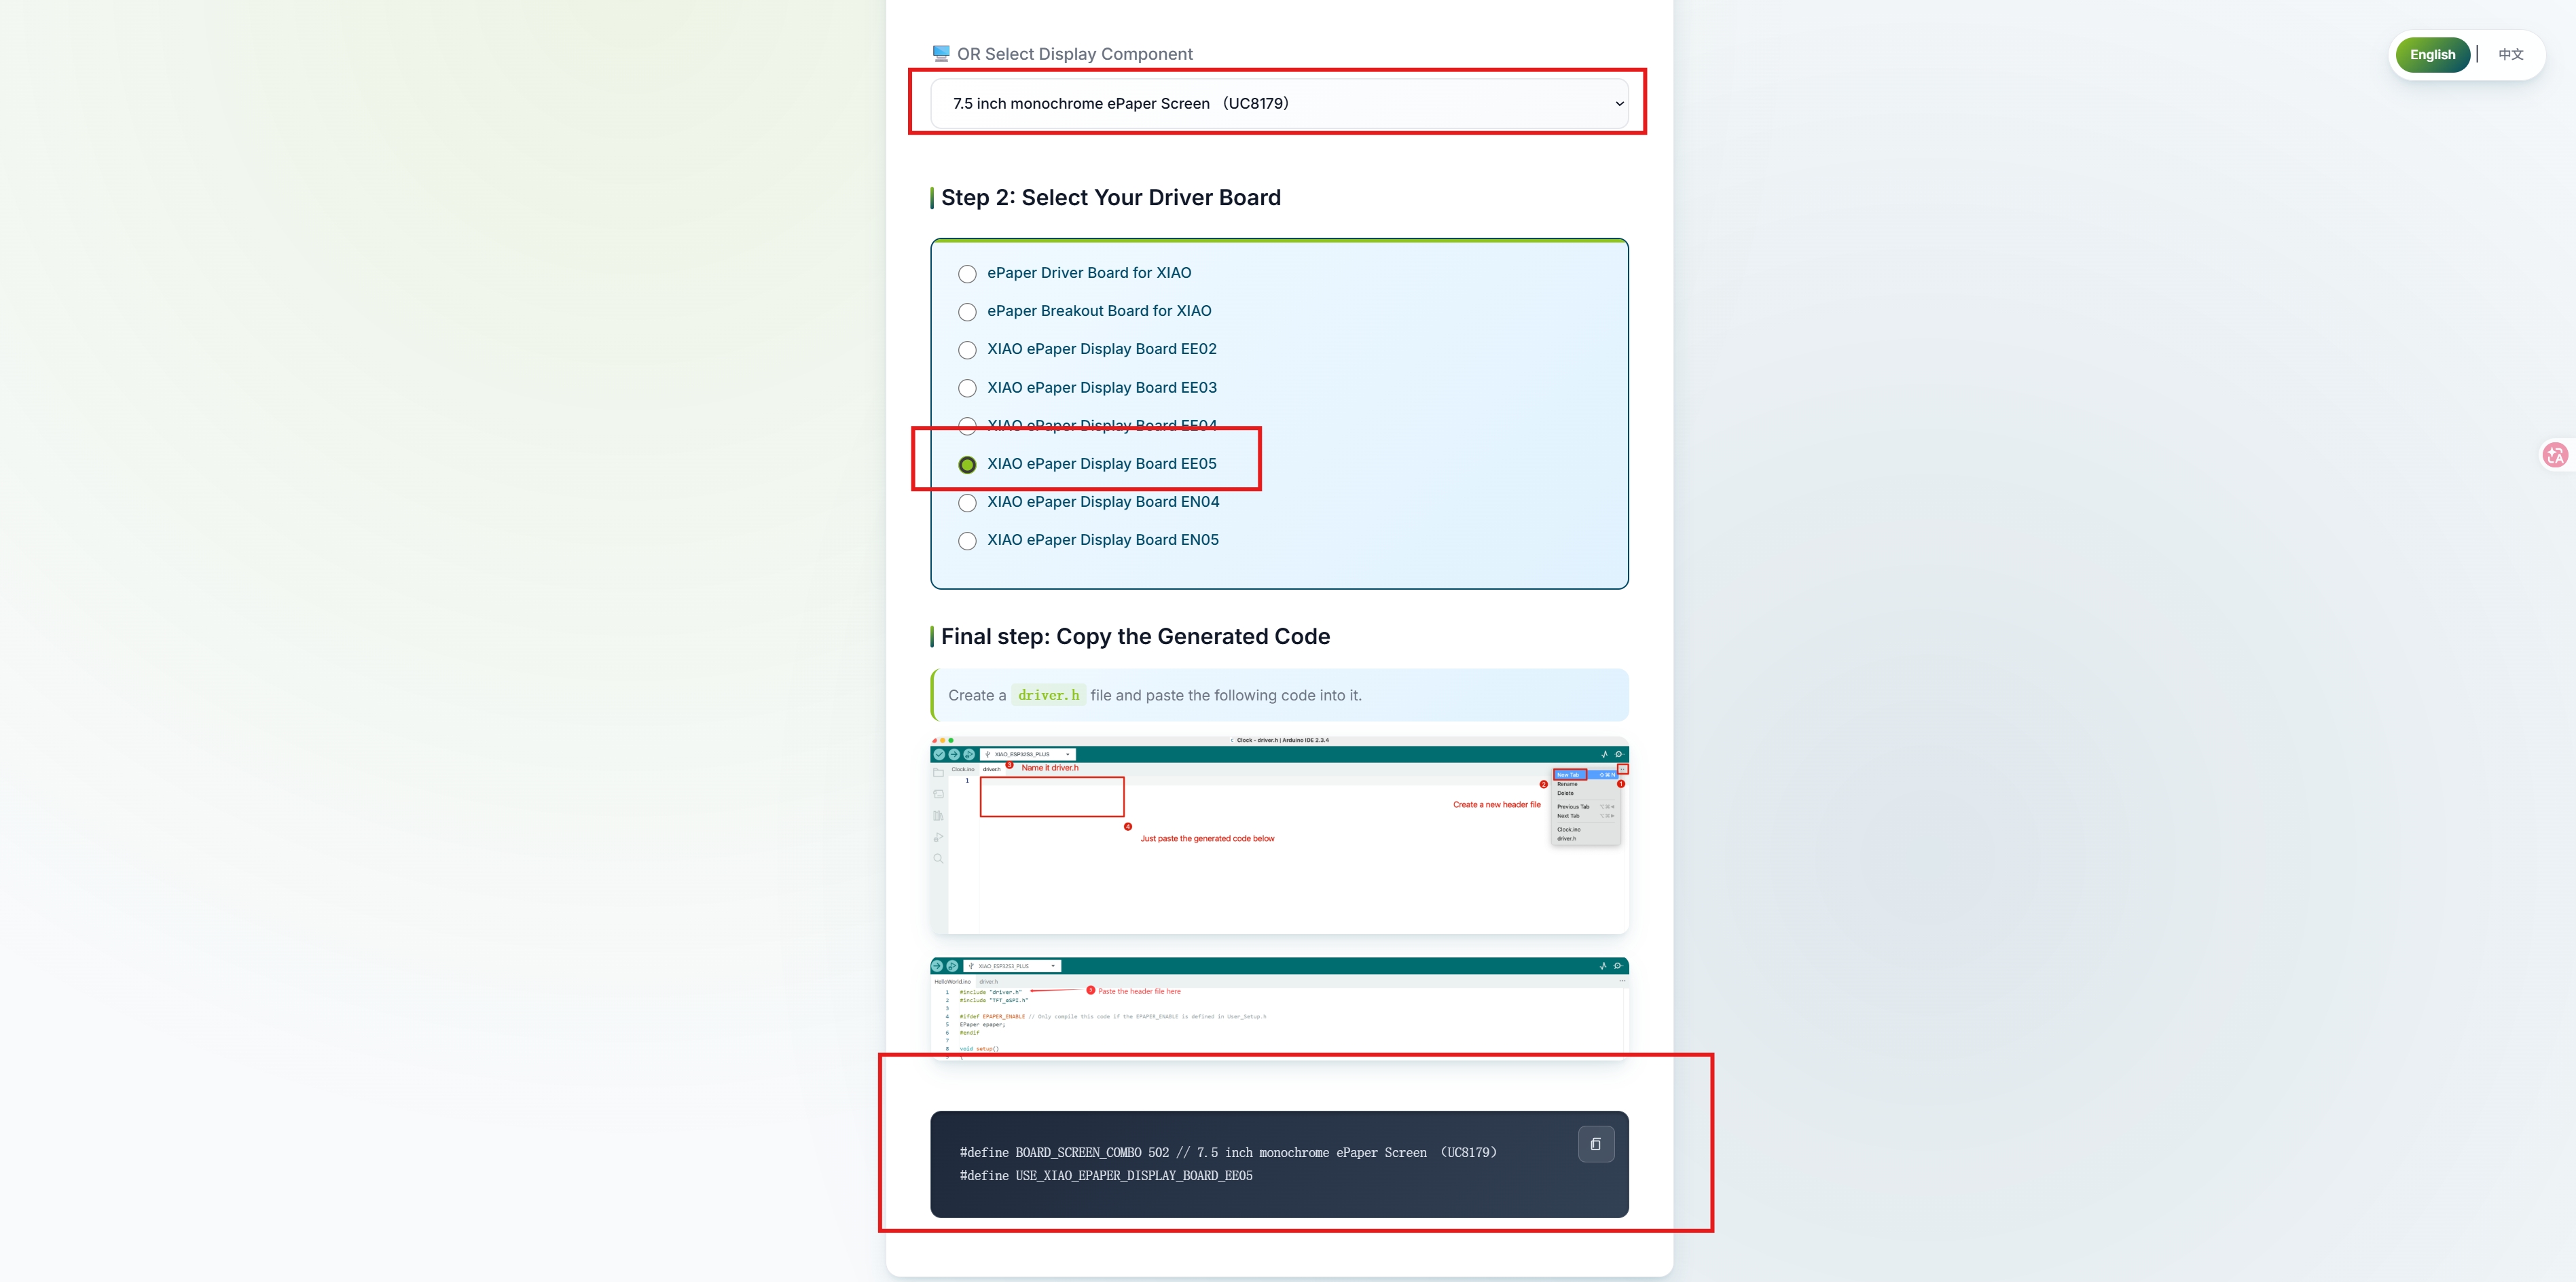
Select your device type and it will generate some code. Copy those code and we will use them later.
If you make the wrong choice, the screen will display nothing.
So please make sure you select the correct device or component type.
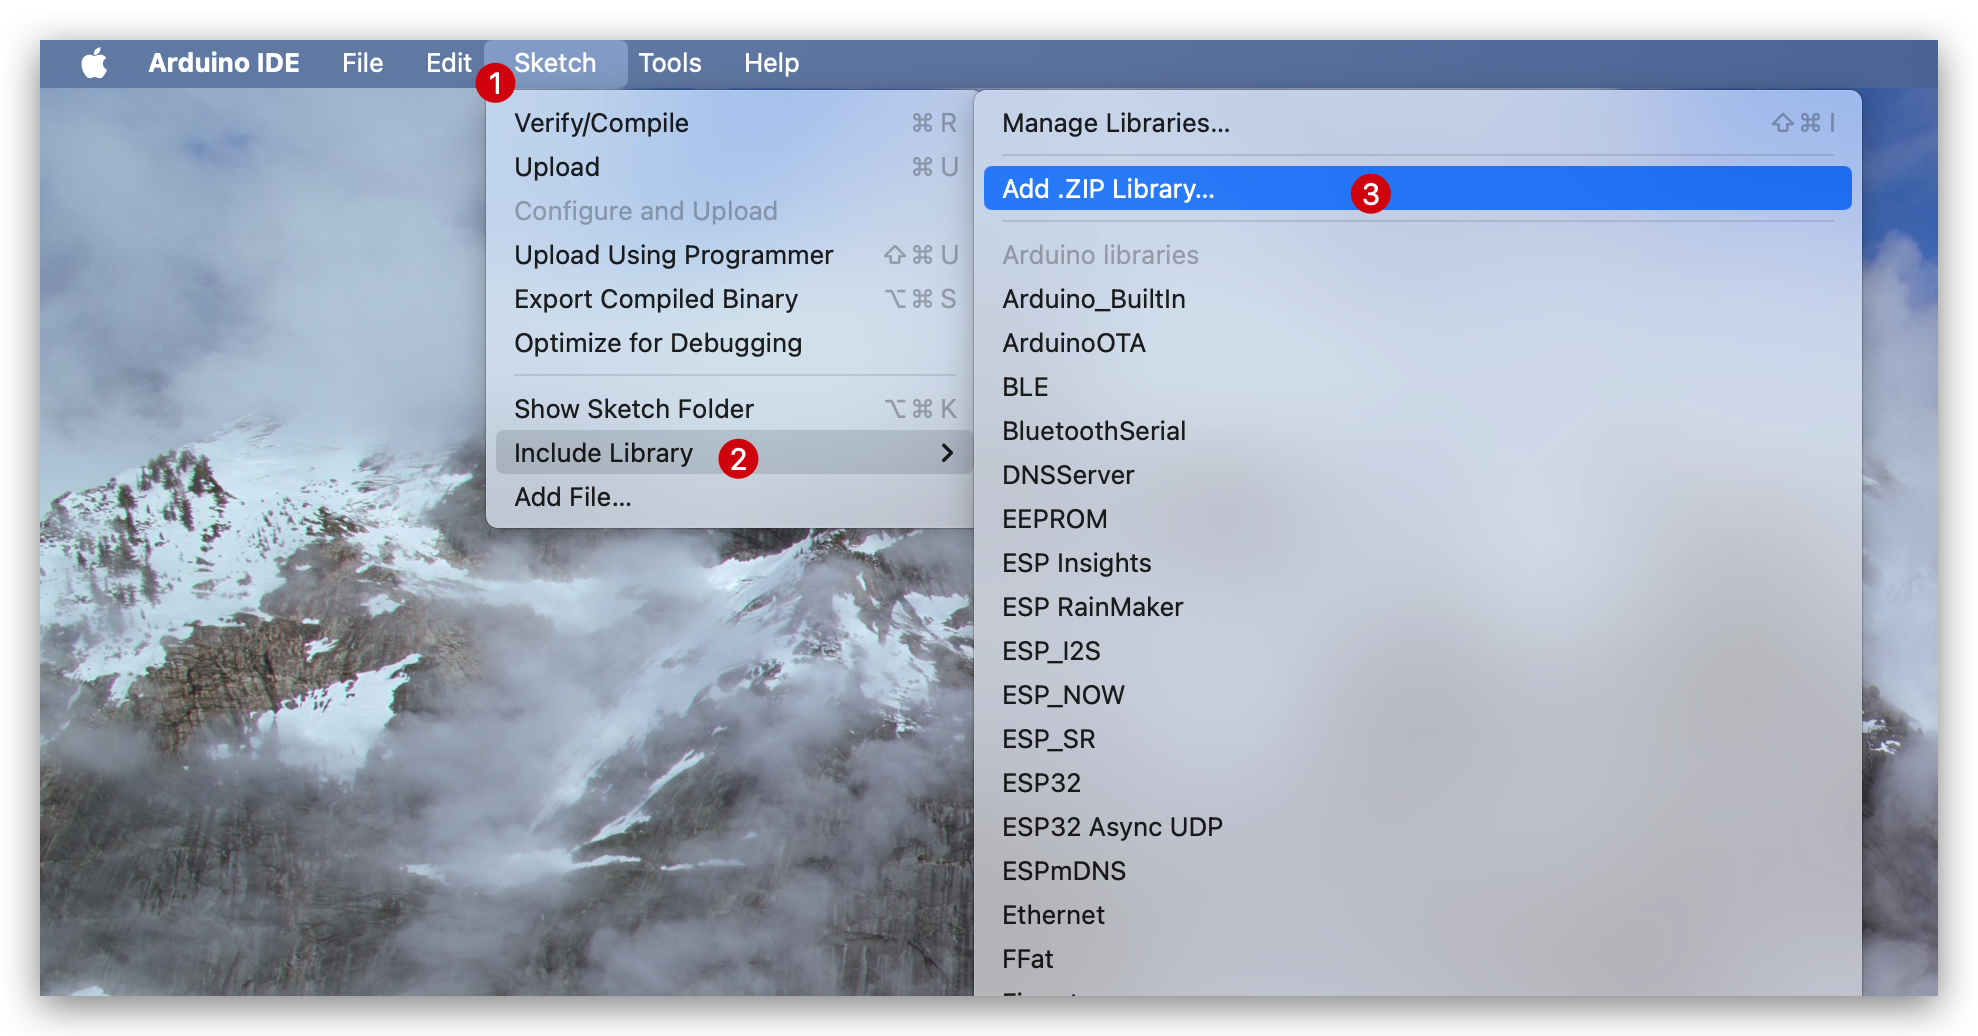
After downloading the library, go to Sketch -> Include Library -> Add .ZIP Library and select the downloaded library.
Getting Started
Here, we use a 7.5-inch monochrome display as an example. The steps are identical for other supported screens; you simply need to select the appropriate screen size identifier in the driver.
Configure and burn the program
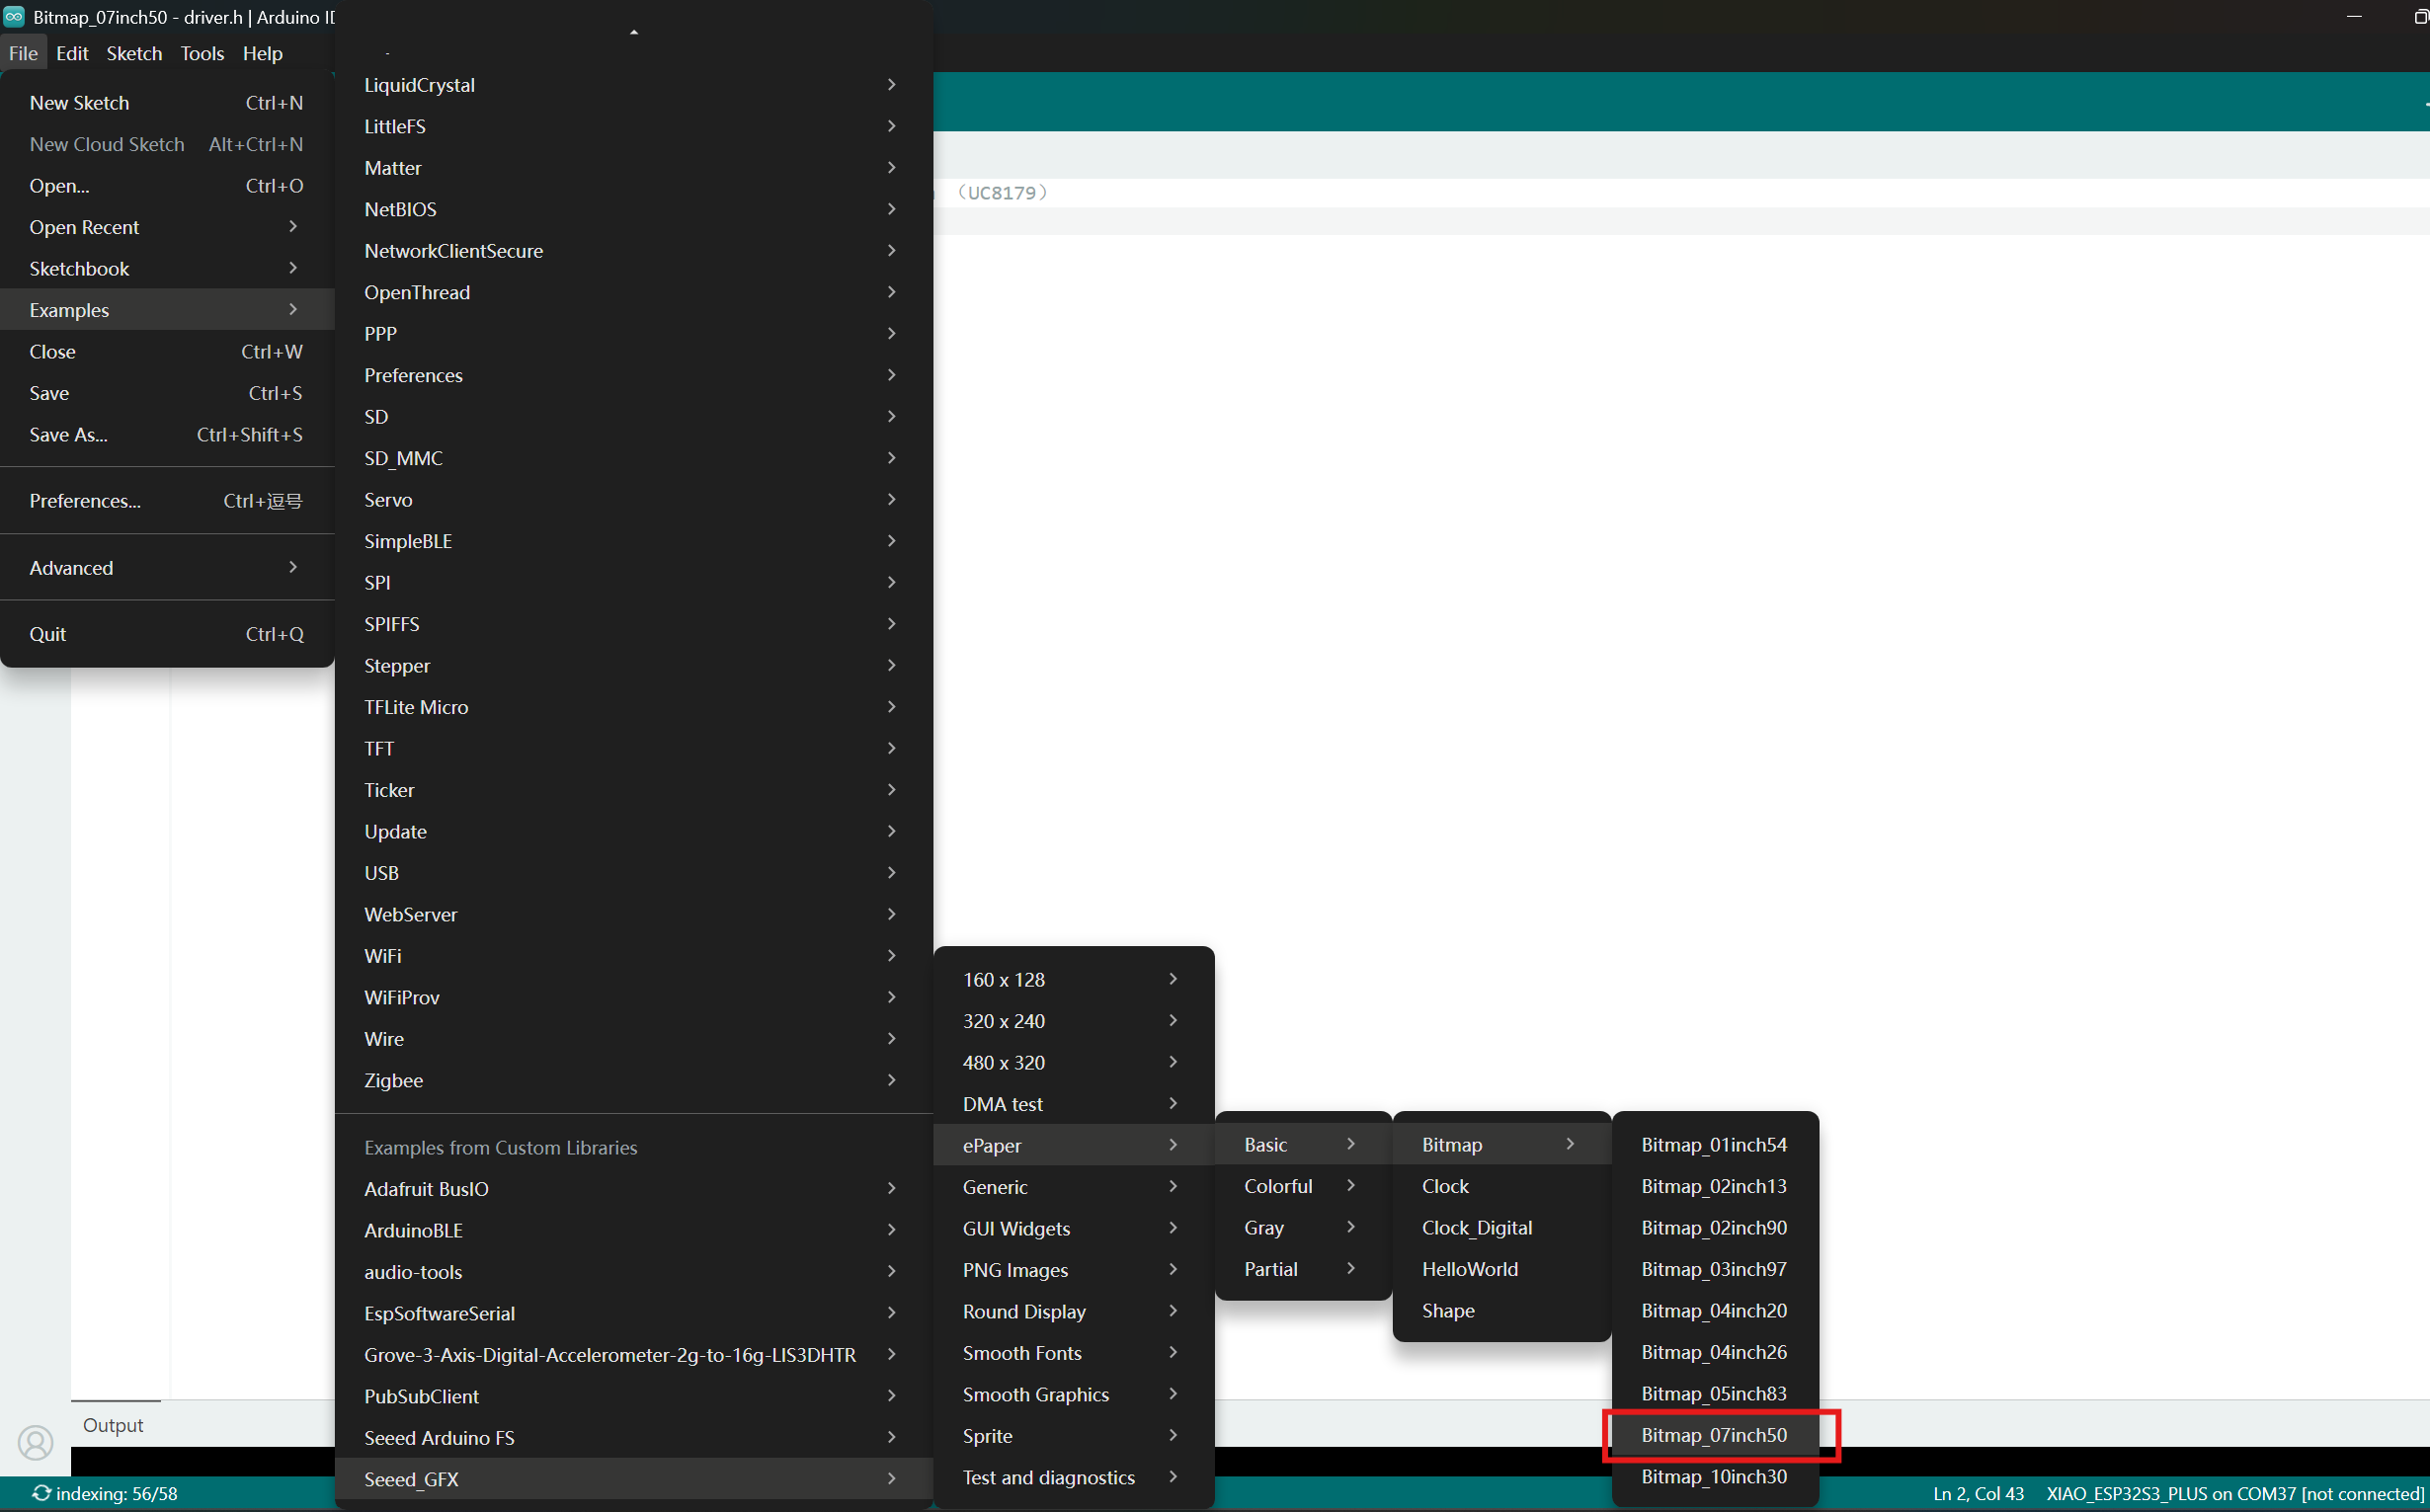
Select the example shown in the figure
Create a new "driver.h" file and paste those code into it. The code should be like:
#define BOARD_SCREEN_COMBO 502 // 7.5 inch monochrome ePaper Screen (UC8179)
#define USE_XIAO_EPAPER_DISPLAY_BOARD_EE05
After that, go to Tools -> Board -> XIAO ESP32S3 and Tools -> Port -> Select the port your board is connected to.
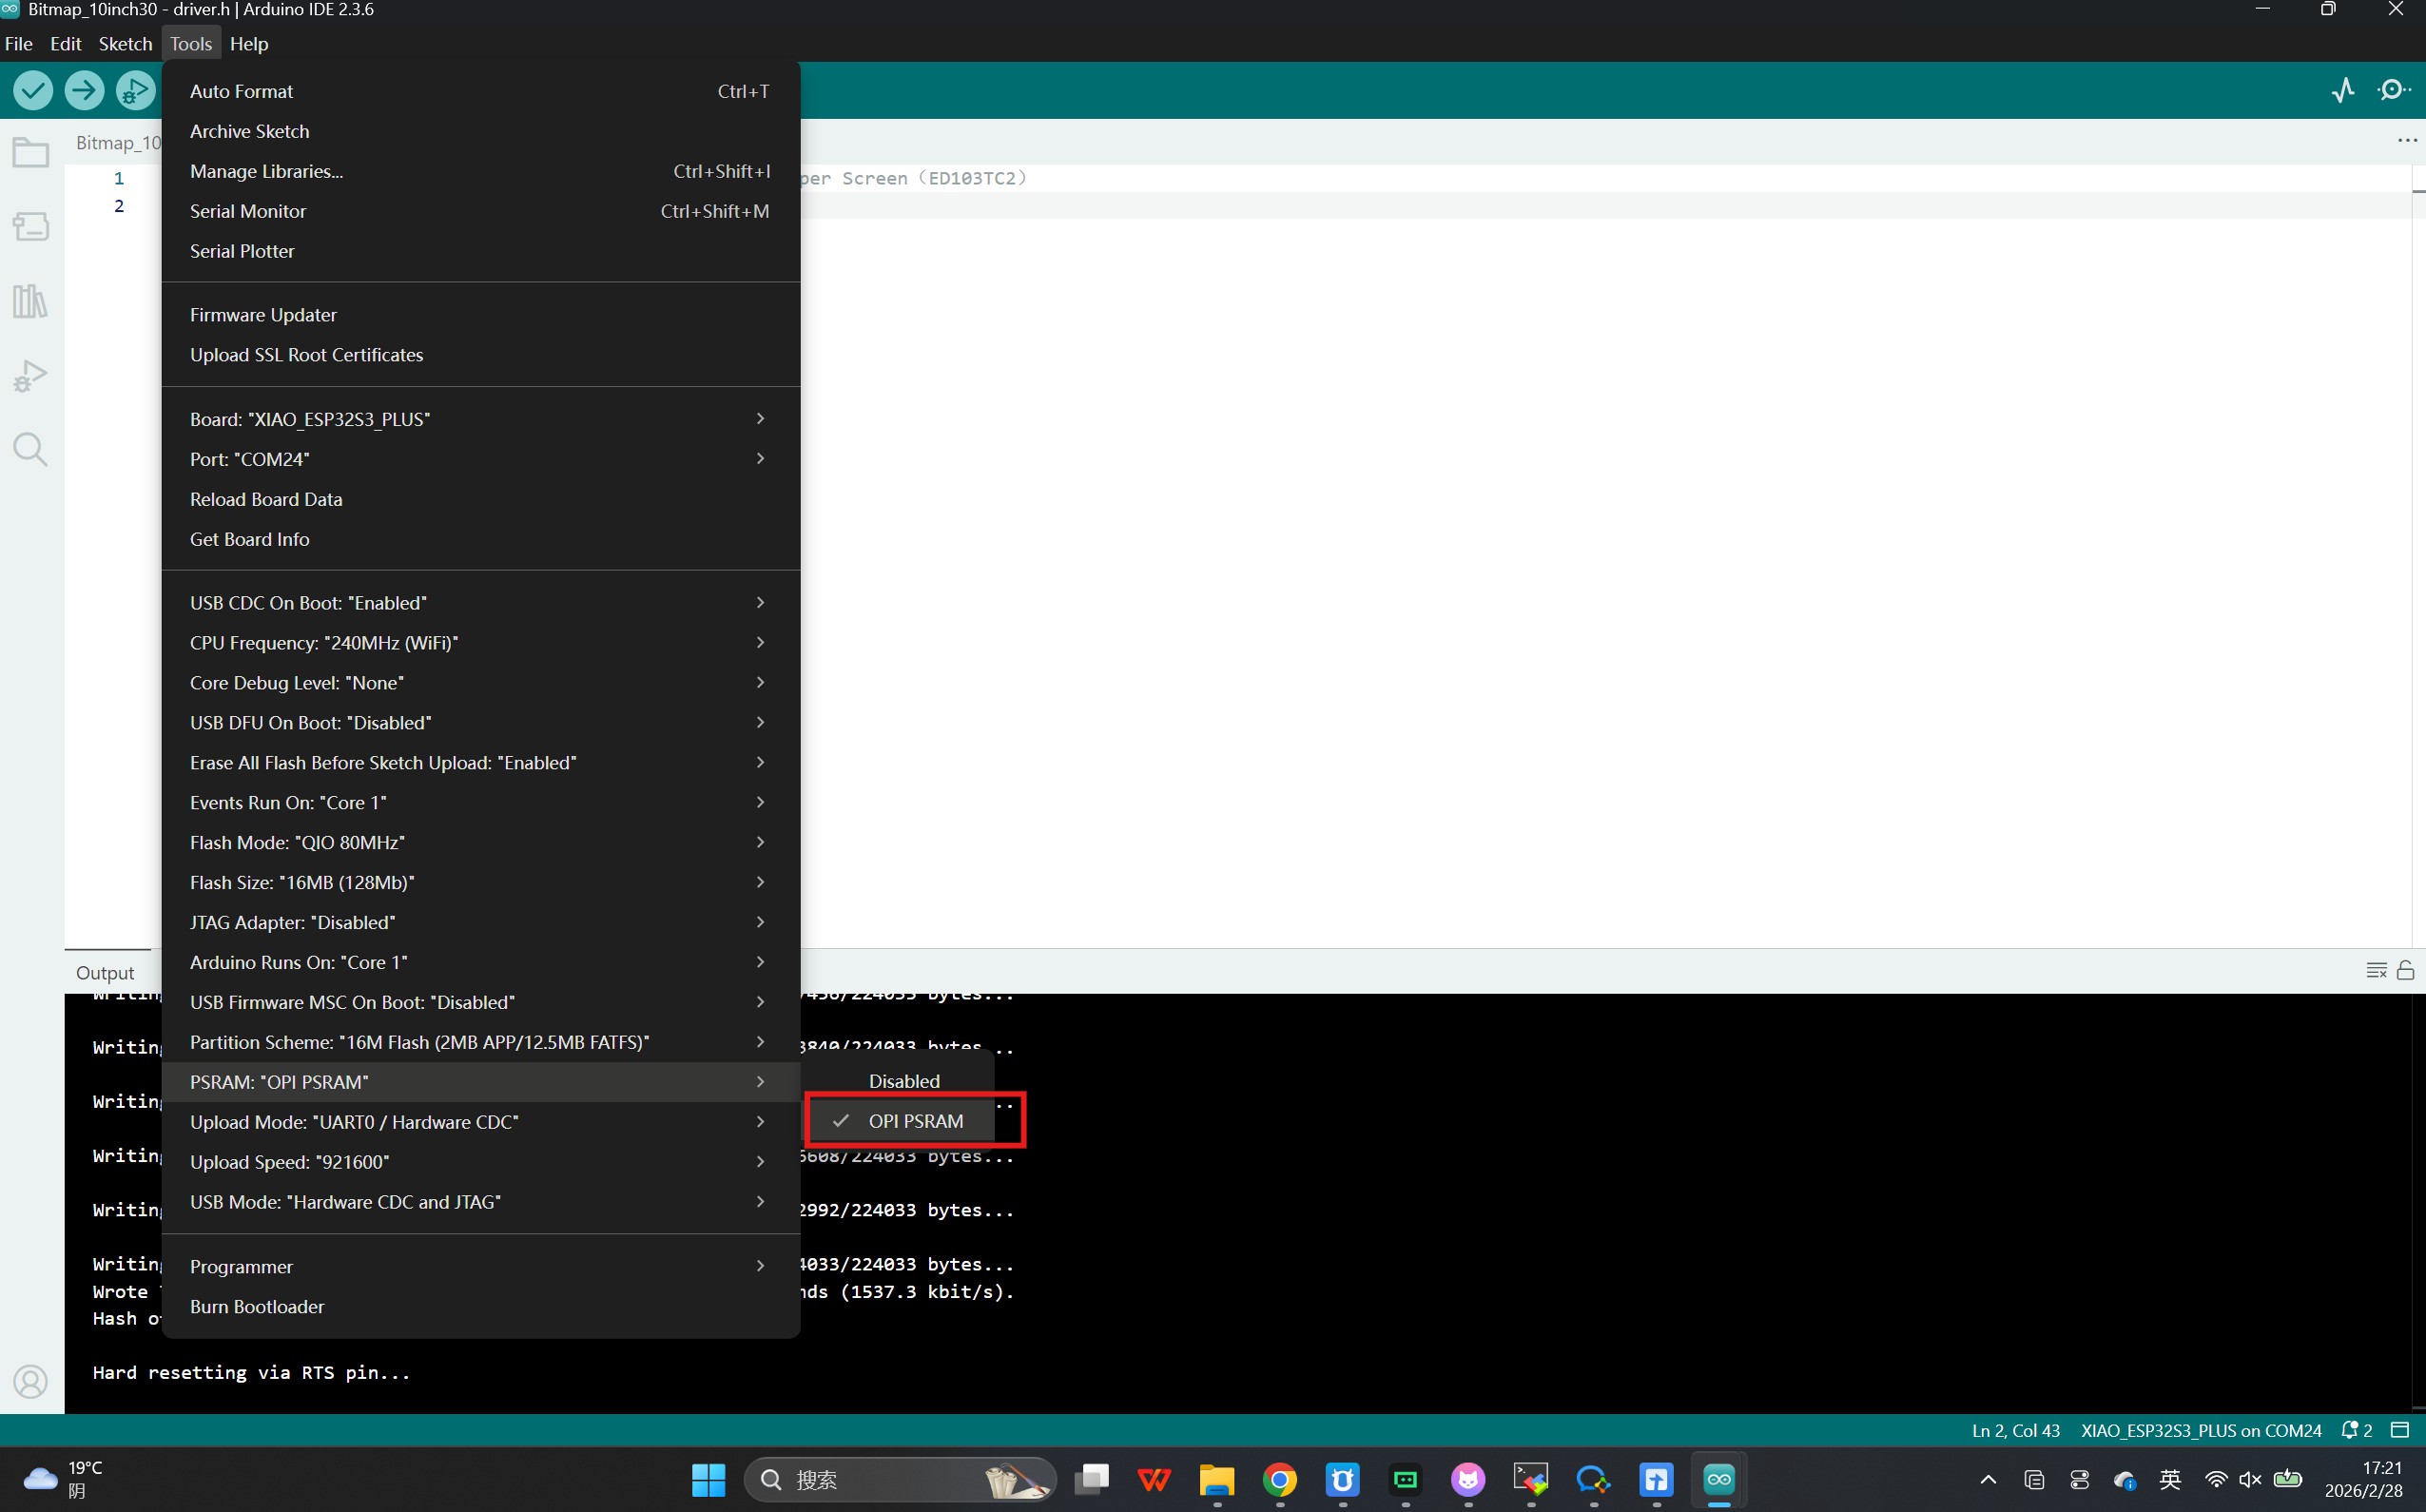
Note that PSRAM must be enabled.
Then click Upload to upload the code. Now you will see the feedback in your ePaper screen! Following are the results of Bitmap examples.
Resources
Troubleshooting
Q1: The screen does not display anything after uploading the code.
- Check the FPC Cable: Ensure the ePaper FPC cable is inserted in the correct orientation and is securely locked in the connector.
- Verify the Driver Configuration: Double-check
driver.hto make sure the correctBOARD_SCREEN_COMBOis selected for your specific screen size.
Q2: The colors are inverted or the display shows abnormal patterns.
- Select the Exact Model: Different screen sizes or IC revisions require specific driver configurations. Ensure the combo number perfectly matches your screen model.
- Check Power Supply: For larger screens (like 7.5-inch), ensure your power source can provide adequate current during screen refresh.
Q3: The board doesn't power on when connected to a battery.
- Hardware Switch: Verify that the hardware slide switch on the board is toggled to the ON position.
- Battery Connection: Check the JST 2.0mm connector polarity to ensure it matches the board's design.
Tech Support & Product Discussion
Thank you for choosing our products! We are here to provide you with different support to ensure that your experience with our products is as smooth as possible. We offer several communication channels to cater to different preferences and needs.