Desarrollar con Ubidots
Ubidots es una plataforma donde integradores de sistemas, emprendedores de IoT y OEMs pueden construir sin esfuerzo aplicaciones de Internet de las Cosas (IoT) y servicios conectados con las herramientas de recolección, análisis y visualización de datos de Ubidots. En la planificación del kit, elegimos la plataforma Ubidots como una alternativa sin LoRaWAN®, puedes usar la función WiFi que viene con Wio Terminal para obtener la presentación de datos en el panel de Ubidots con los datos del sensor que necesites a través del protocolo MQTT.
En este capítulo te mostraremos cómo enviar datos de sensores a Ubidots mediante programación de Arduino.
Preparación Preliminar
Conexión
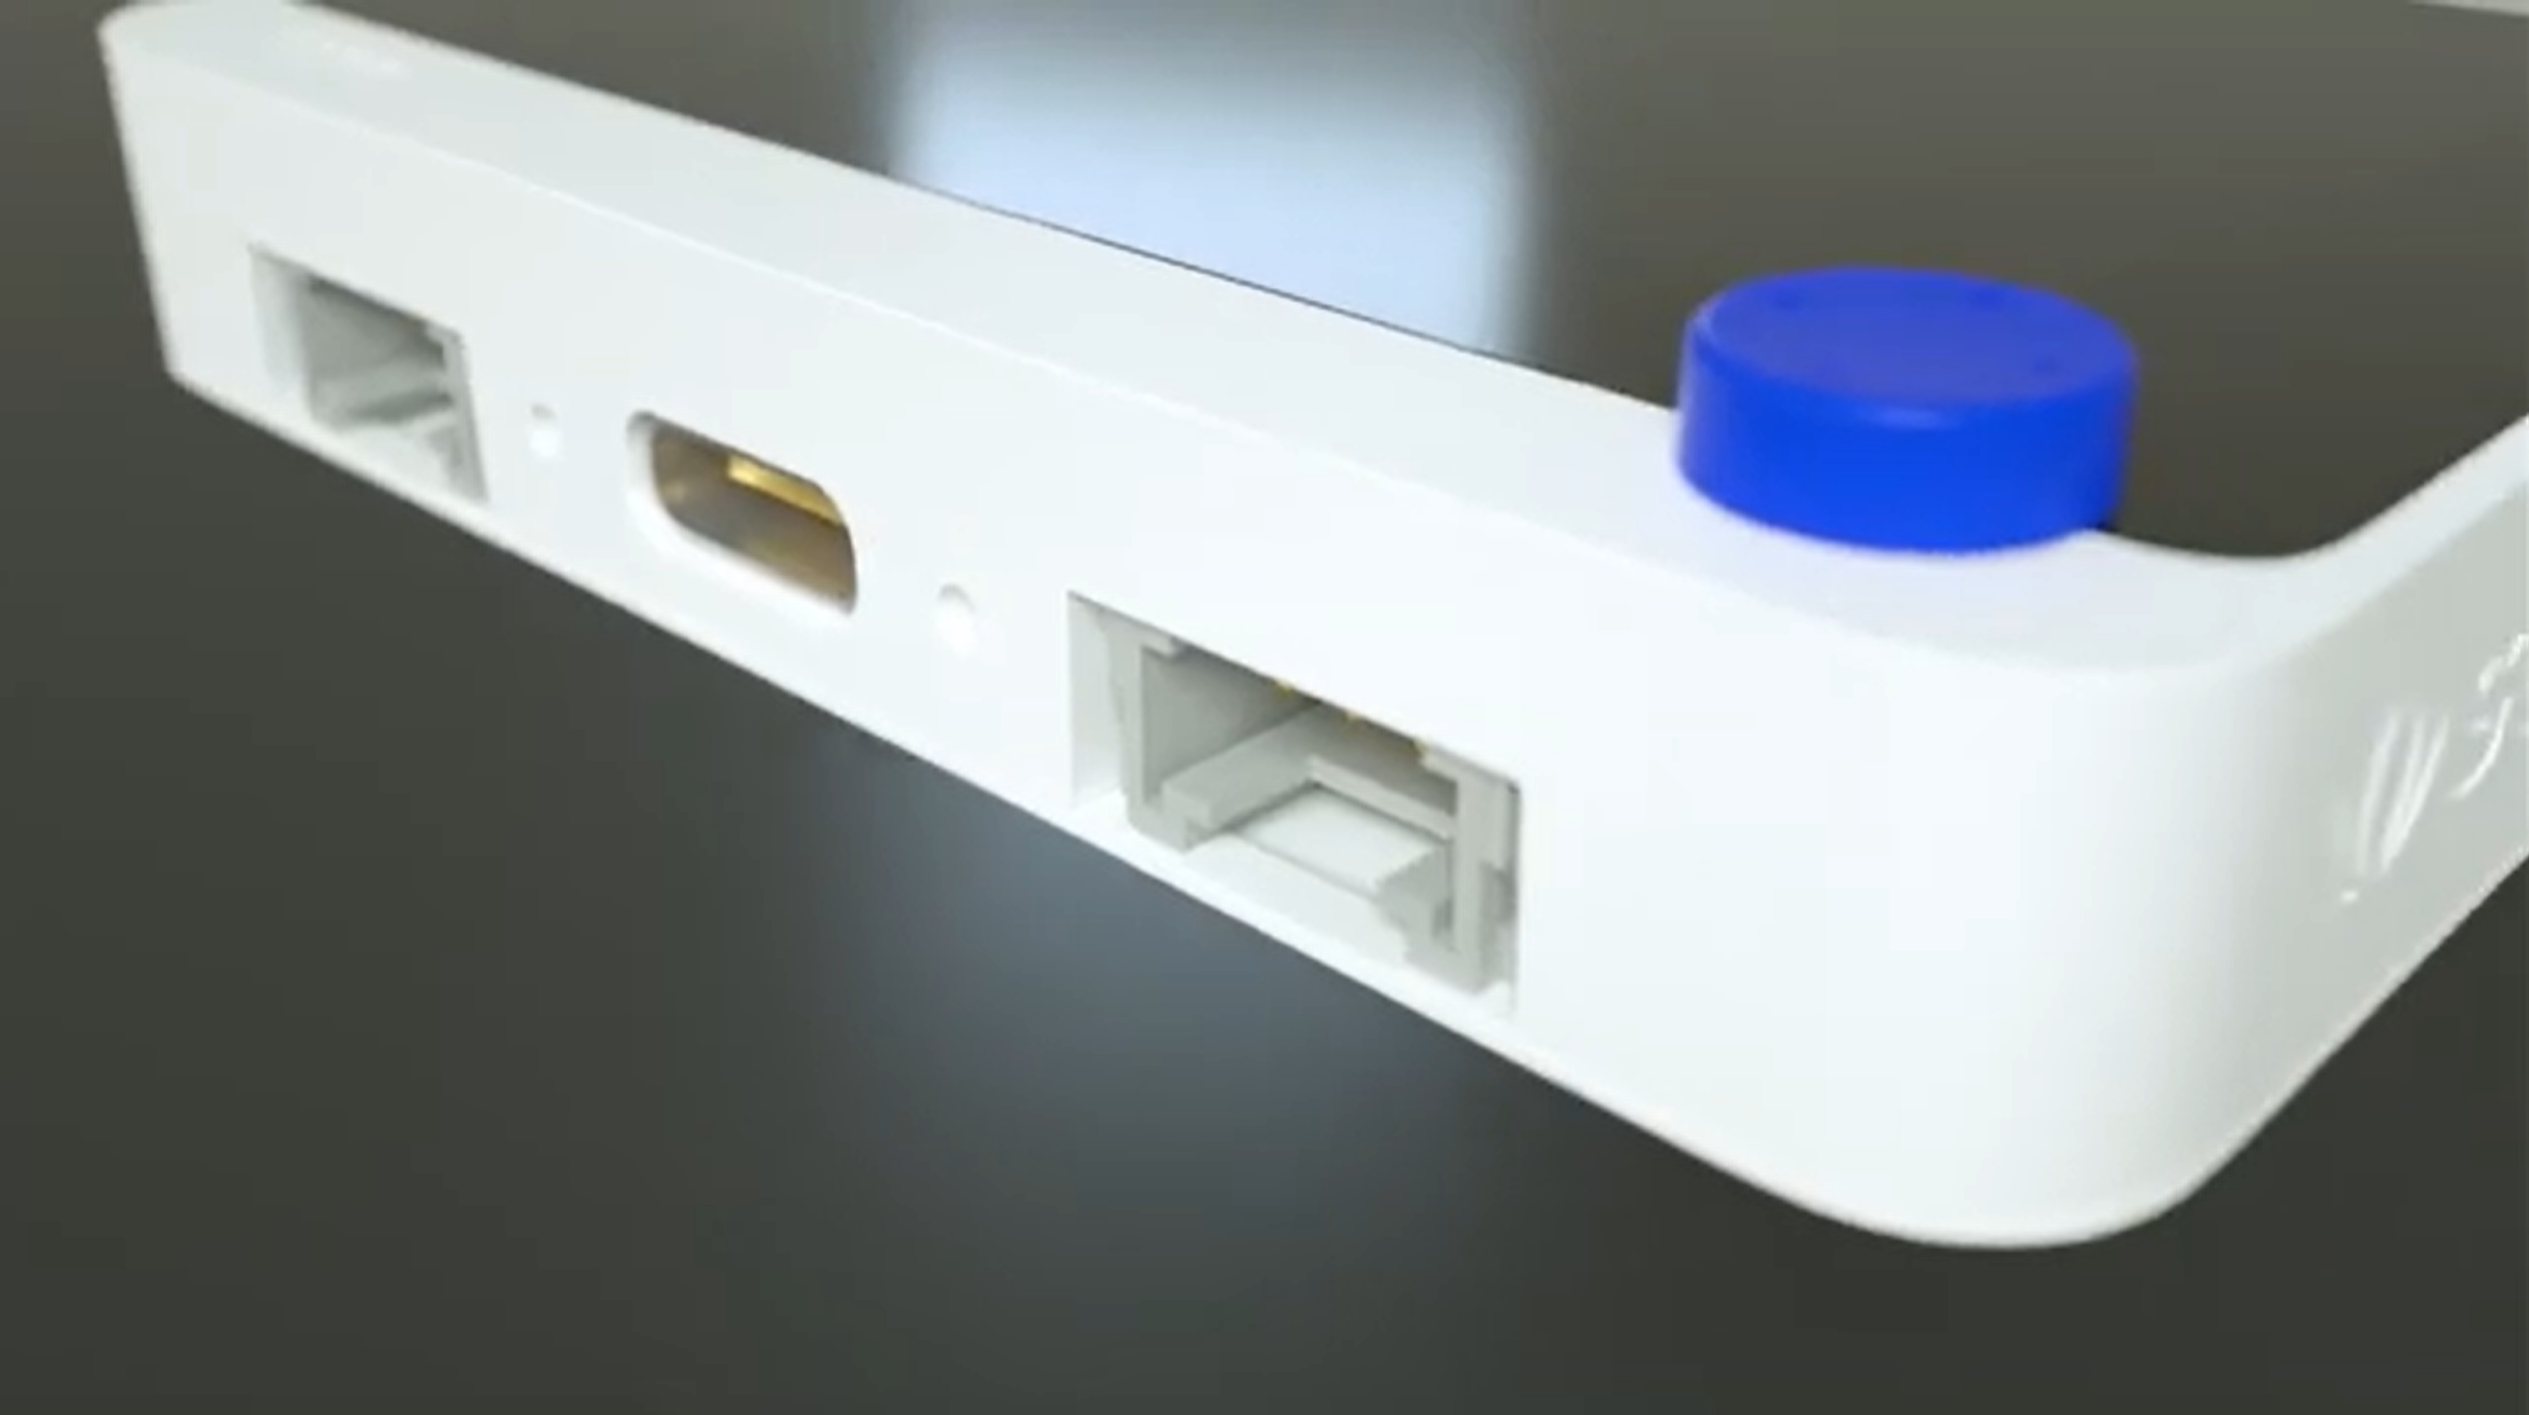
Los sensores dentro del Kit SeseCAP - K1100 pueden conectarse todos al conector Grove bajo el Wio Terminal a través del cable Grove. La siguiente tabla describe la ubicación del conector Grove al cual se conecta cada sensor.
| Tipo de Sensor | Protocolo de Comunicación | Interfaz Grove Conectada |
|---|---|---|
| Sensor de Temp&Humedad Grove (SHT40) | I2C | Interfaz Grove izquierda del Wio Terminal |
| Sensor de Gas VOC y eCO2 Grove (SGP30) | I2C | Interfaz Grove izquierda del Wio Terminal |
| Módulo de IA de Visión Grove | I2C | Interfaz Grove izquierda del Wio Terminal |
| Sensor de Humedad del Suelo Grove | ADC | Interfaz Grove derecha del Wio Terminal |
Preparación del software
Paso 1. Necesitas instalar un software de Arduino.

Paso 2. Inicia la aplicación de Arduino.
Paso 3. Añade Wio Terminal al IDE de Arduino.
Abre tu IDE de Arduino, haz clic en Archivo > Preferencias, y copia la siguiente url en URLs adicionales del gestor de placas:
https://files.seeedstudio.com/arduino/package_seeeduino_boards_index.json
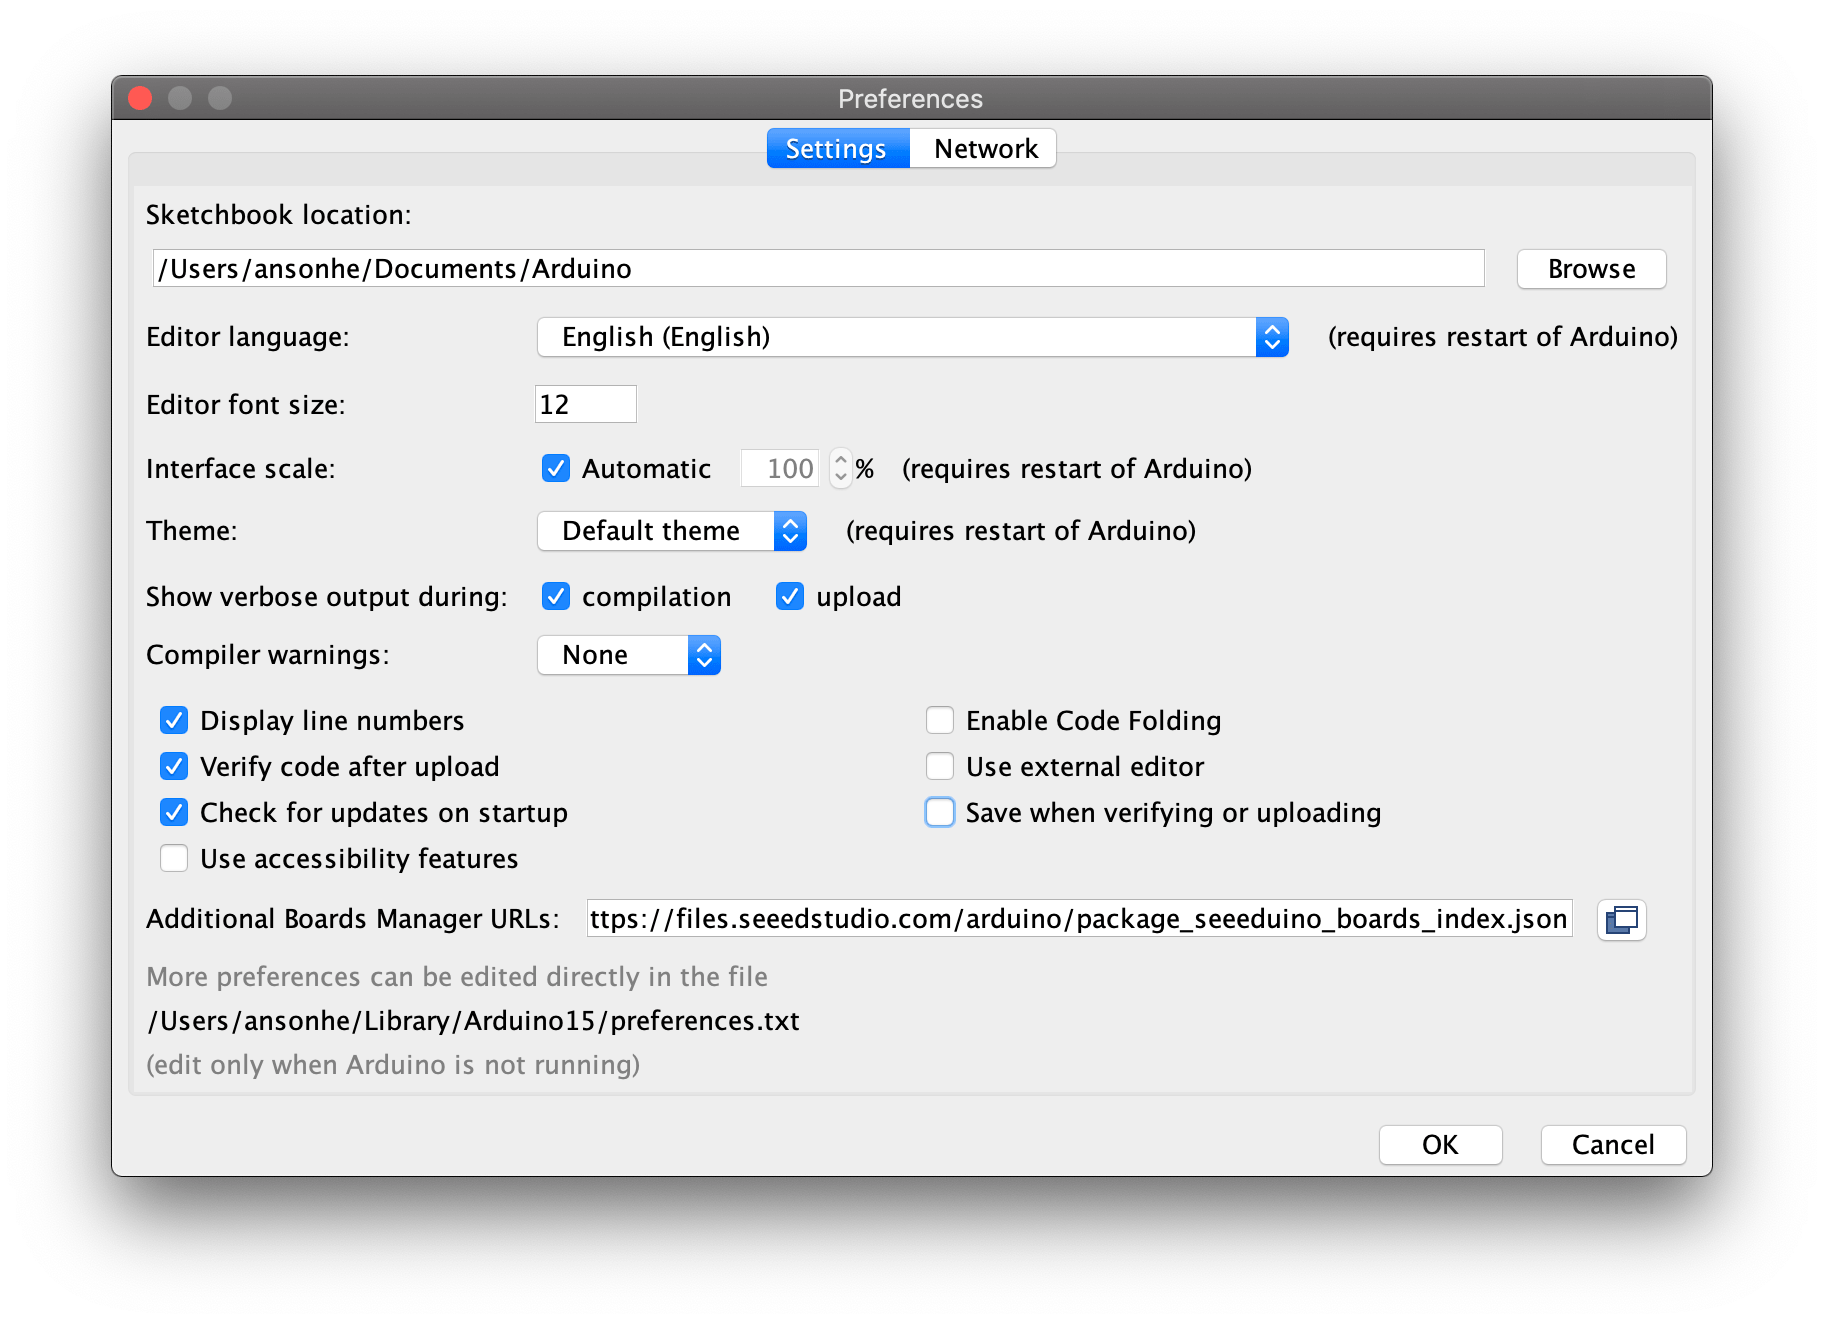
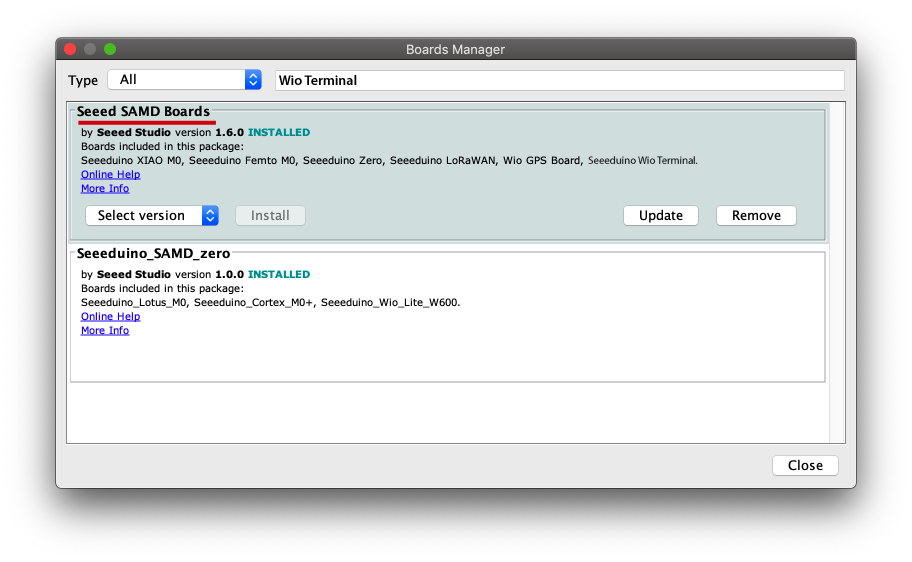
Haz clic en Tools > Board > Board Manager y busca Wio Terminal en el Administrador de Placas.
Paso 4. Selecciona tu placa y puerto
Necesitarás seleccionar la entrada en el menú Tools > Board que corresponda a tu Arduino. Selecciona el Wio Terminal.
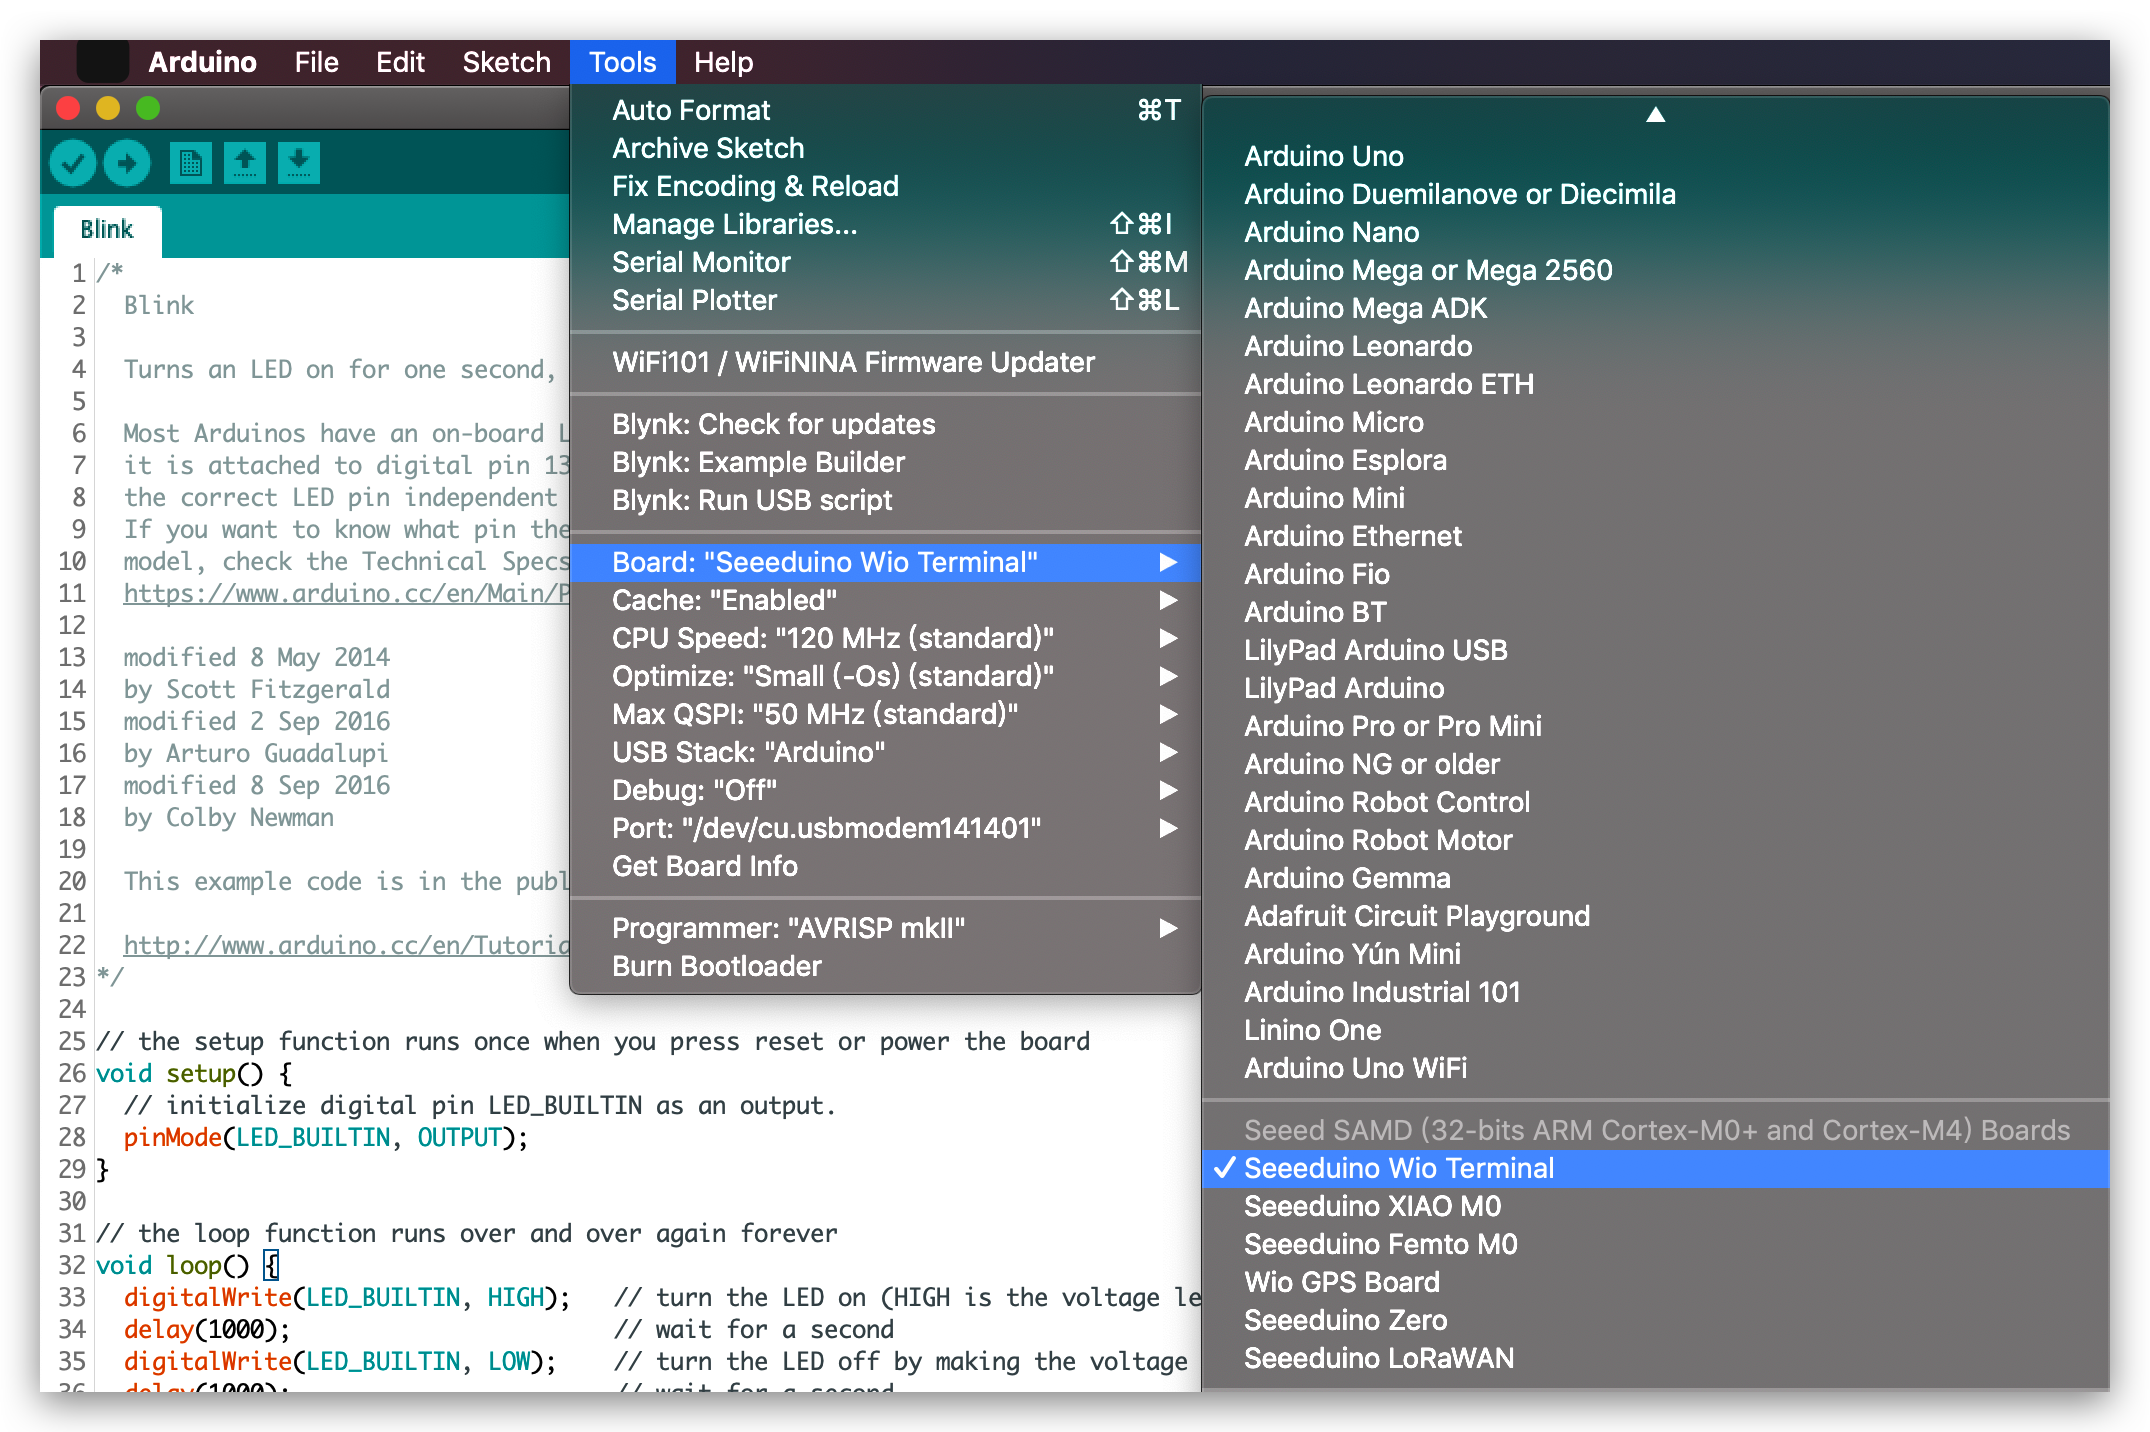
Selecciona el dispositivo serie de la placa Wio Terminal desde el menú Tools -> Port. Es probable que sea COM3 o superior (COM1 y COM2 generalmente están reservados para puertos serie de hardware). Para averiguarlo, puedes desconectar tu placa Wio Terminal y volver a abrir el menú; la entrada que desaparezca debería ser la placa Arduino. Vuelve a conectar la placa y selecciona ese puerto serie.
Para usuarios de Mac, será algo como /dev/cu.usbmodem141401.
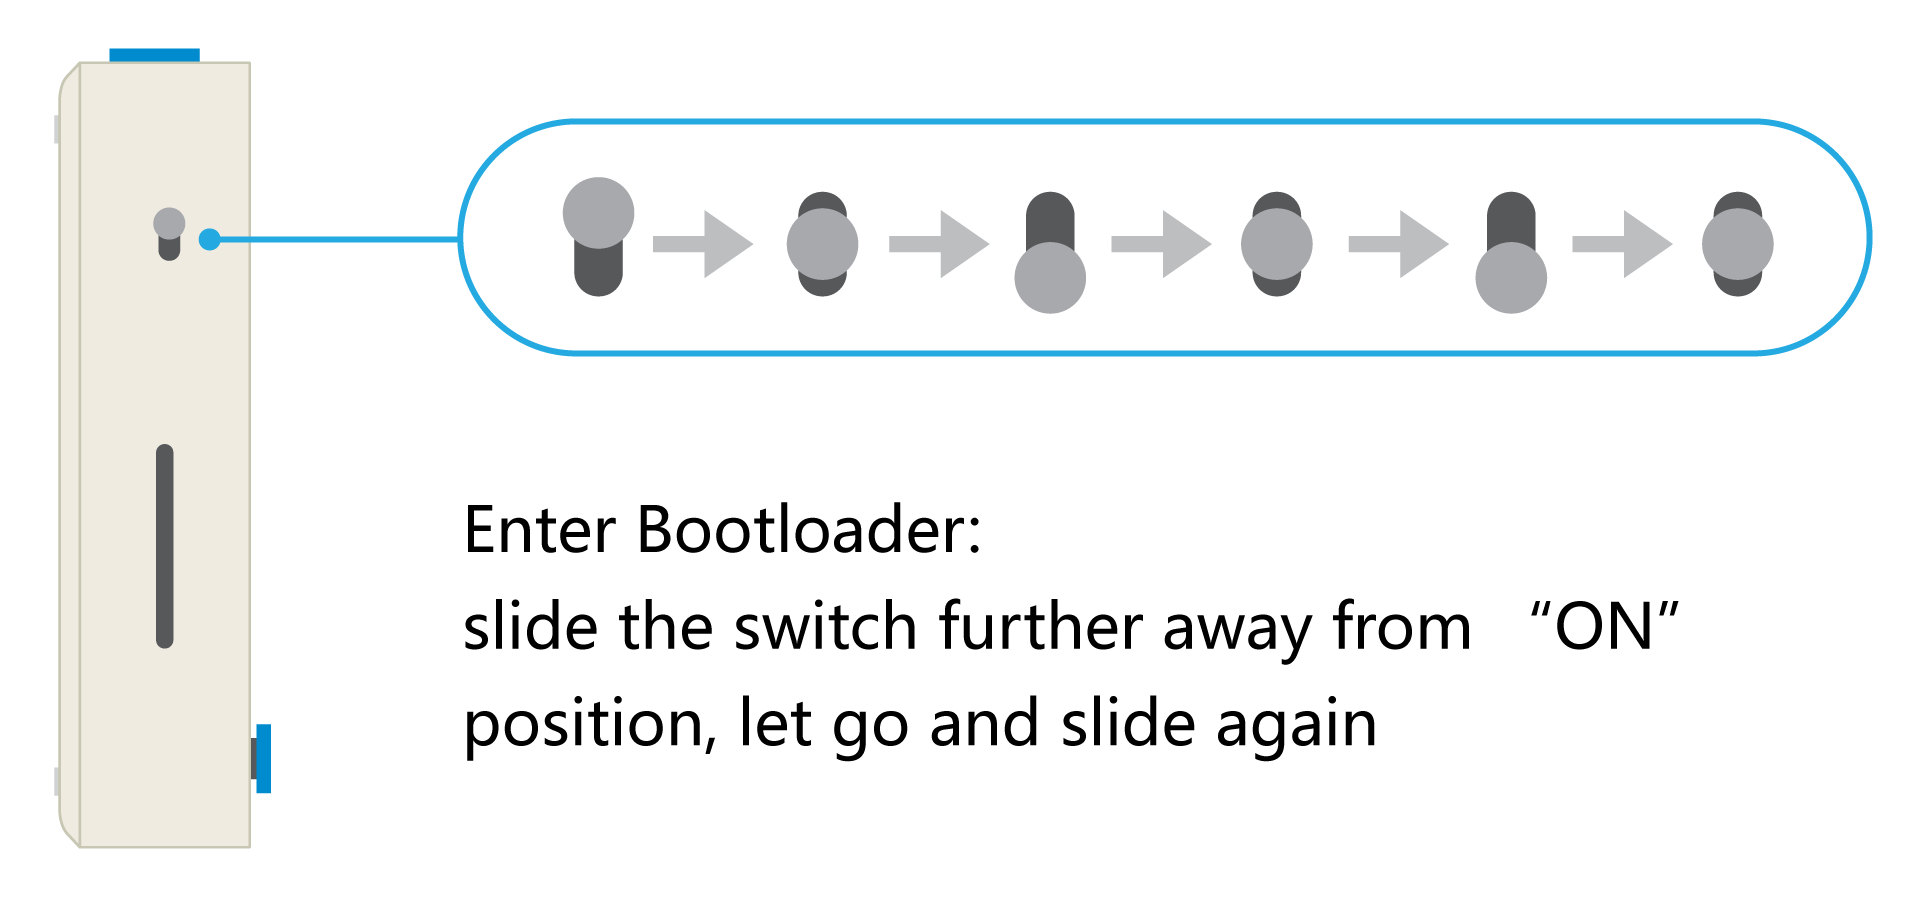
Si no puedes cargar el sketch, principalmente es porque Arduino IDE no pudo poner el Wio Terminal en modo bootloader. (Porque el MCU se detuvo o tu programa está manejando USB) La solución es poner tu Wio Terminal en modo bootloader manualmente.
Paso 5. Instala la biblioteca requerida para el sensor de tu elección
| Tipo de Sensor | Enlace 1 | Enlace 2 |
|---|---|---|
| Sensor IMU de Wio Terminal | Descargar | - |
| Sensor de Temp&Humi Grove (SHT40) | Descargar | Descargar |
| Sensor de Gas VOC y eCO2 Grove (SGP30) | Descargar | - |
| Módulo Vision AI Grove | Descargar | - |
Los sensores no listados en la tabla anterior indican que no se requiere descargar una biblioteca separada.
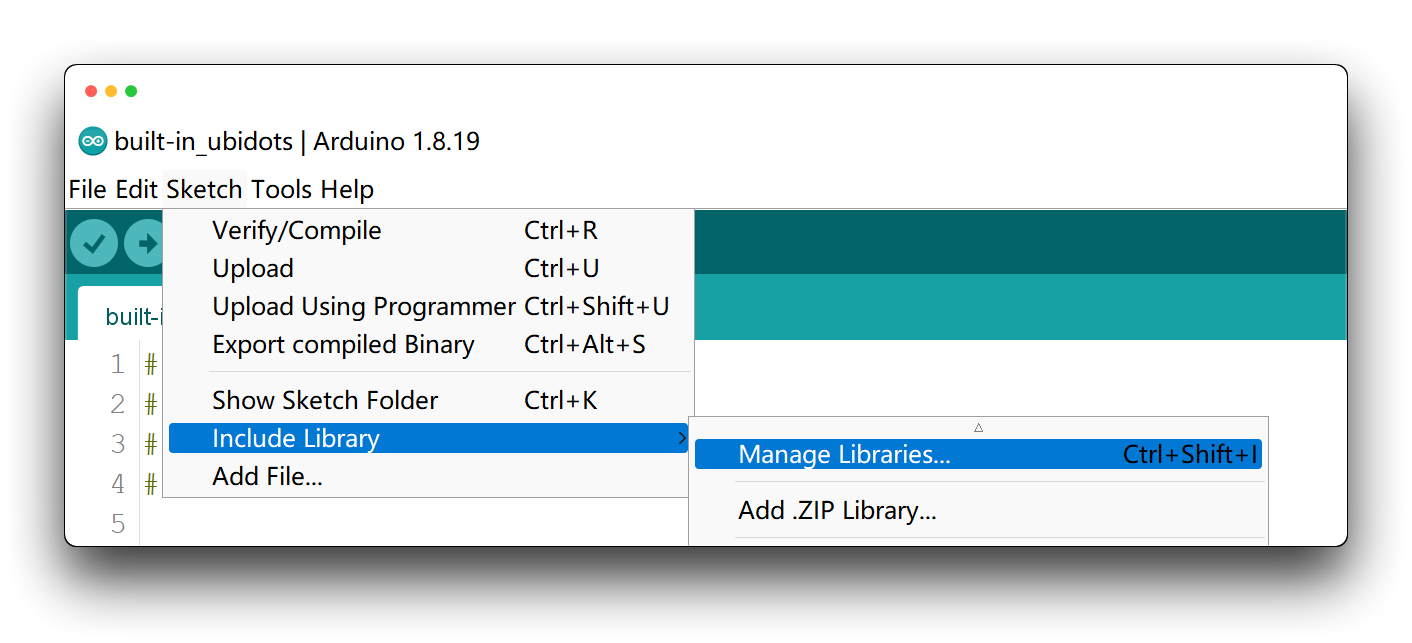
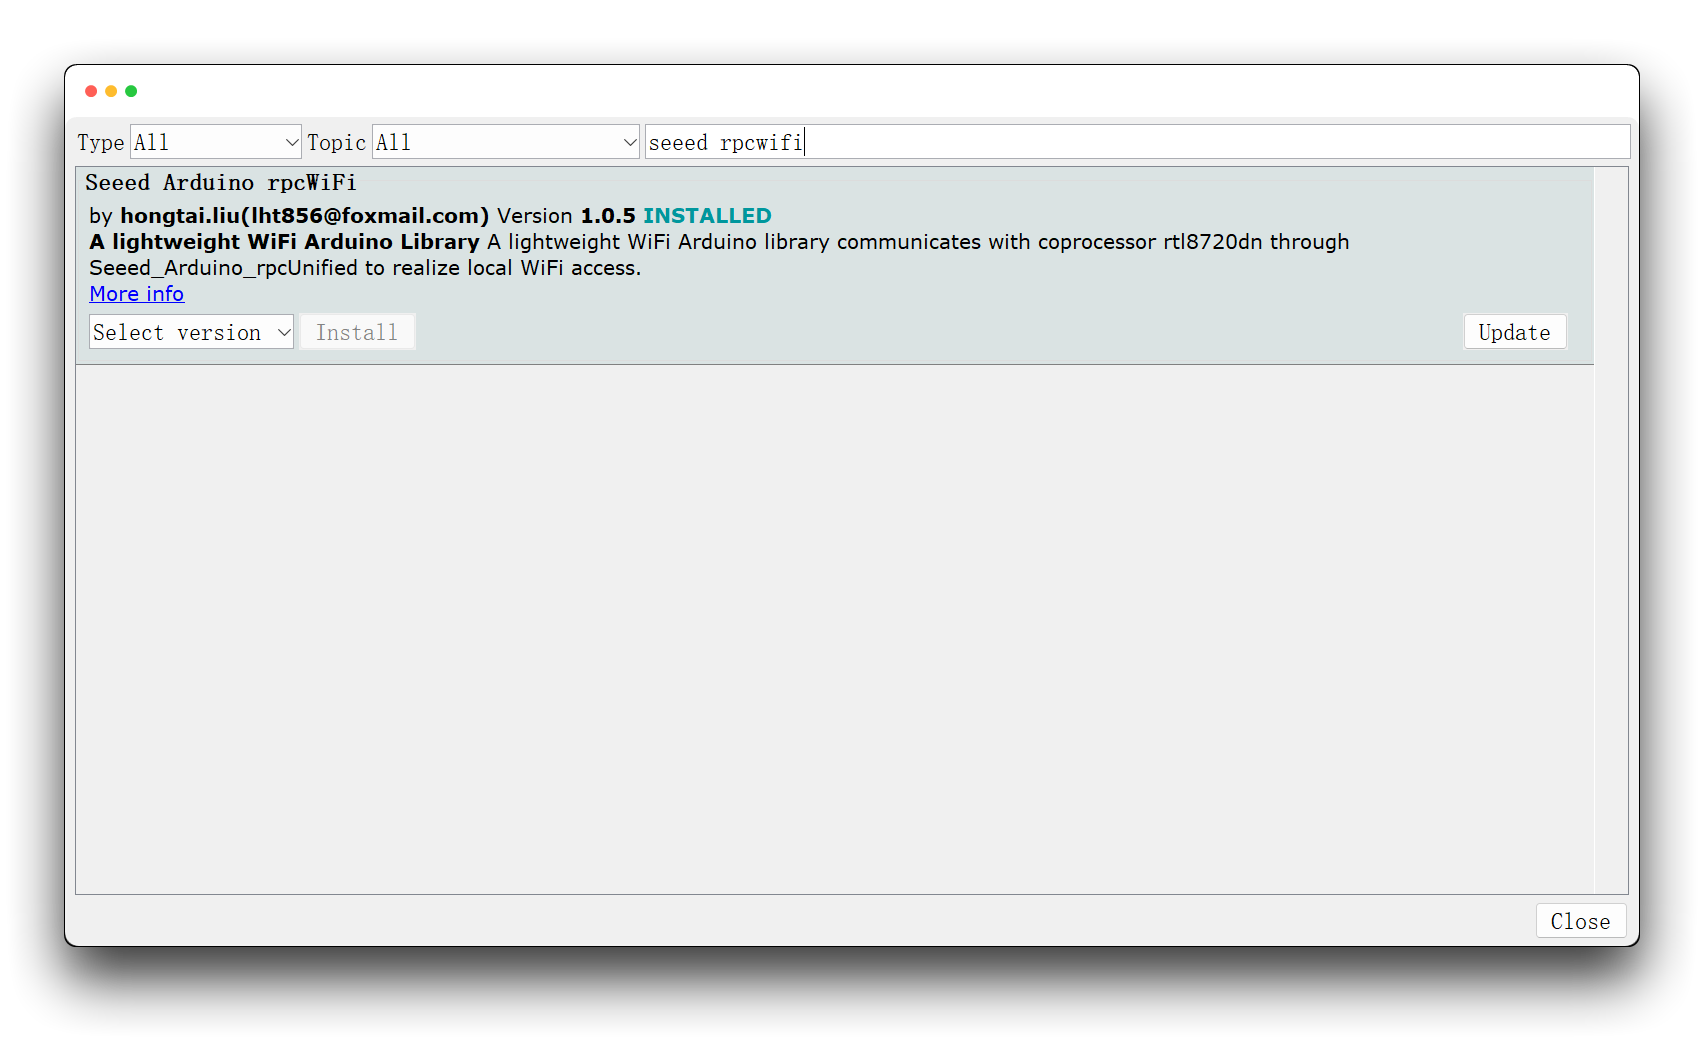
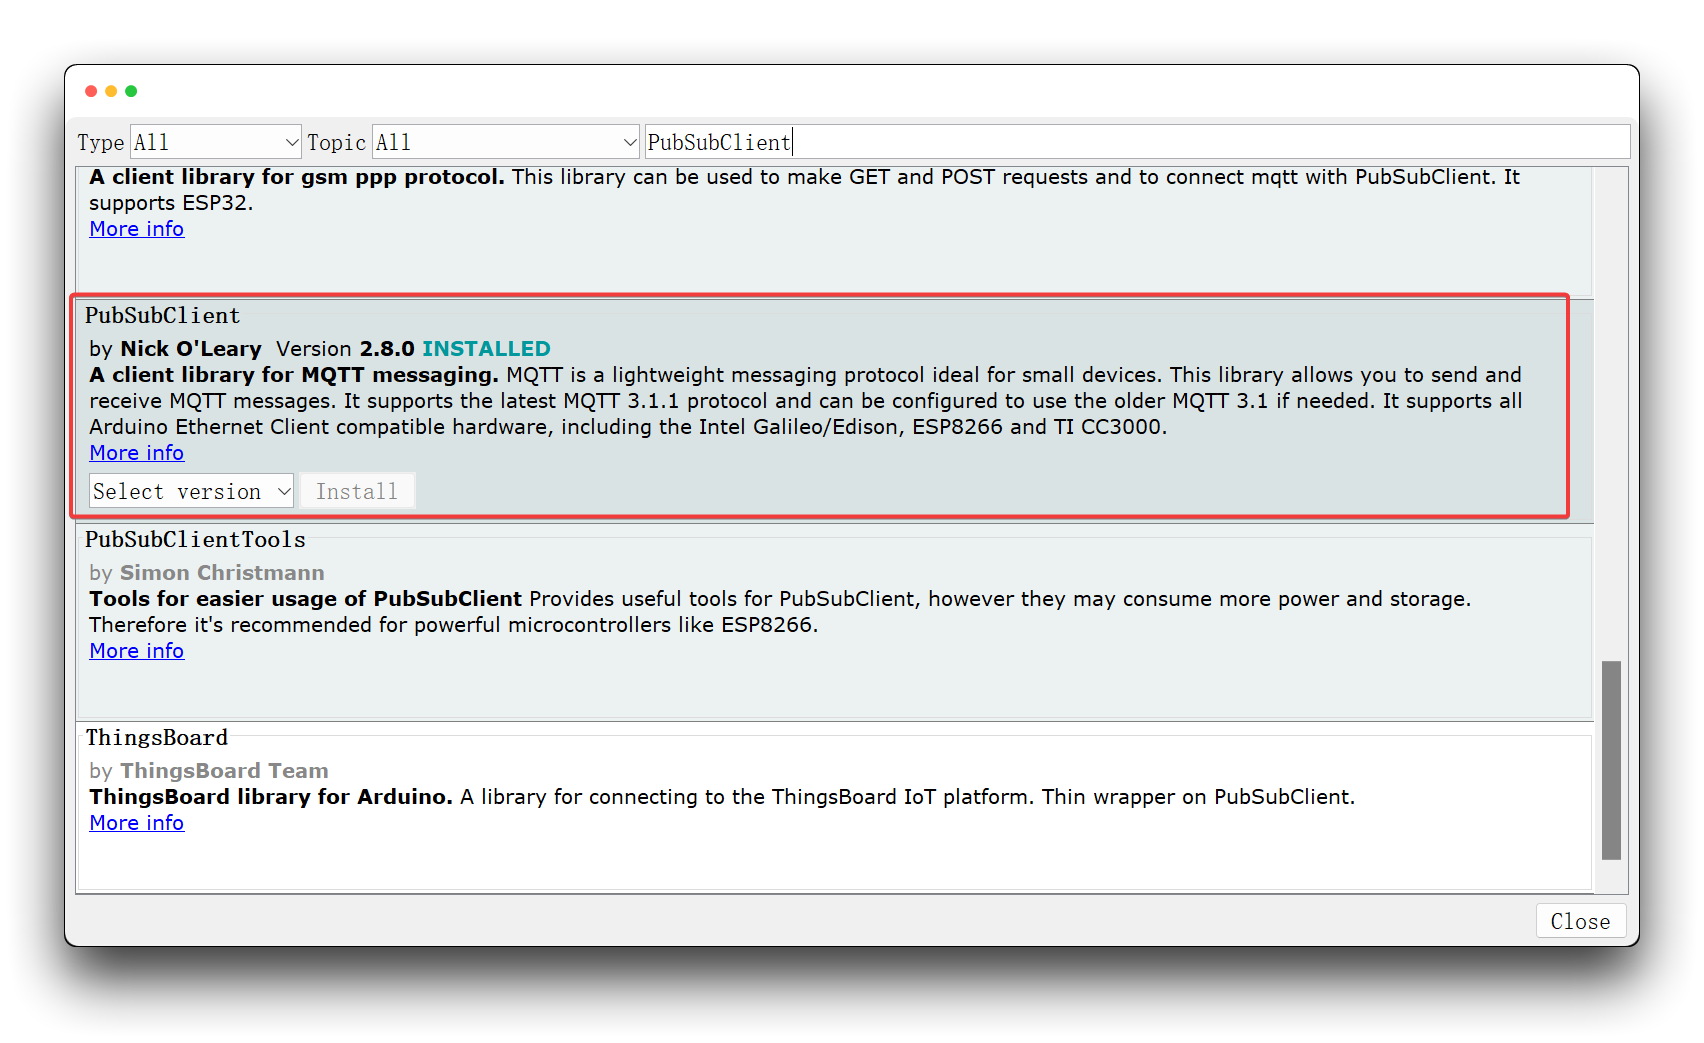
Paso 6. Bibliotecas Necesarias para Wi-Fi
Necesitamos las siguientes bibliotecas para comenzar con Wi-Fi en el Wio Terminal. Puedes buscar estas bibliotecas escribiendo el nombre de la biblioteca en el cuadro de búsqueda del Administrador de Bibliotecas de Arduino.
- Seeed_Arduino_rpcWiFi - buscar
seeed rpcwifi
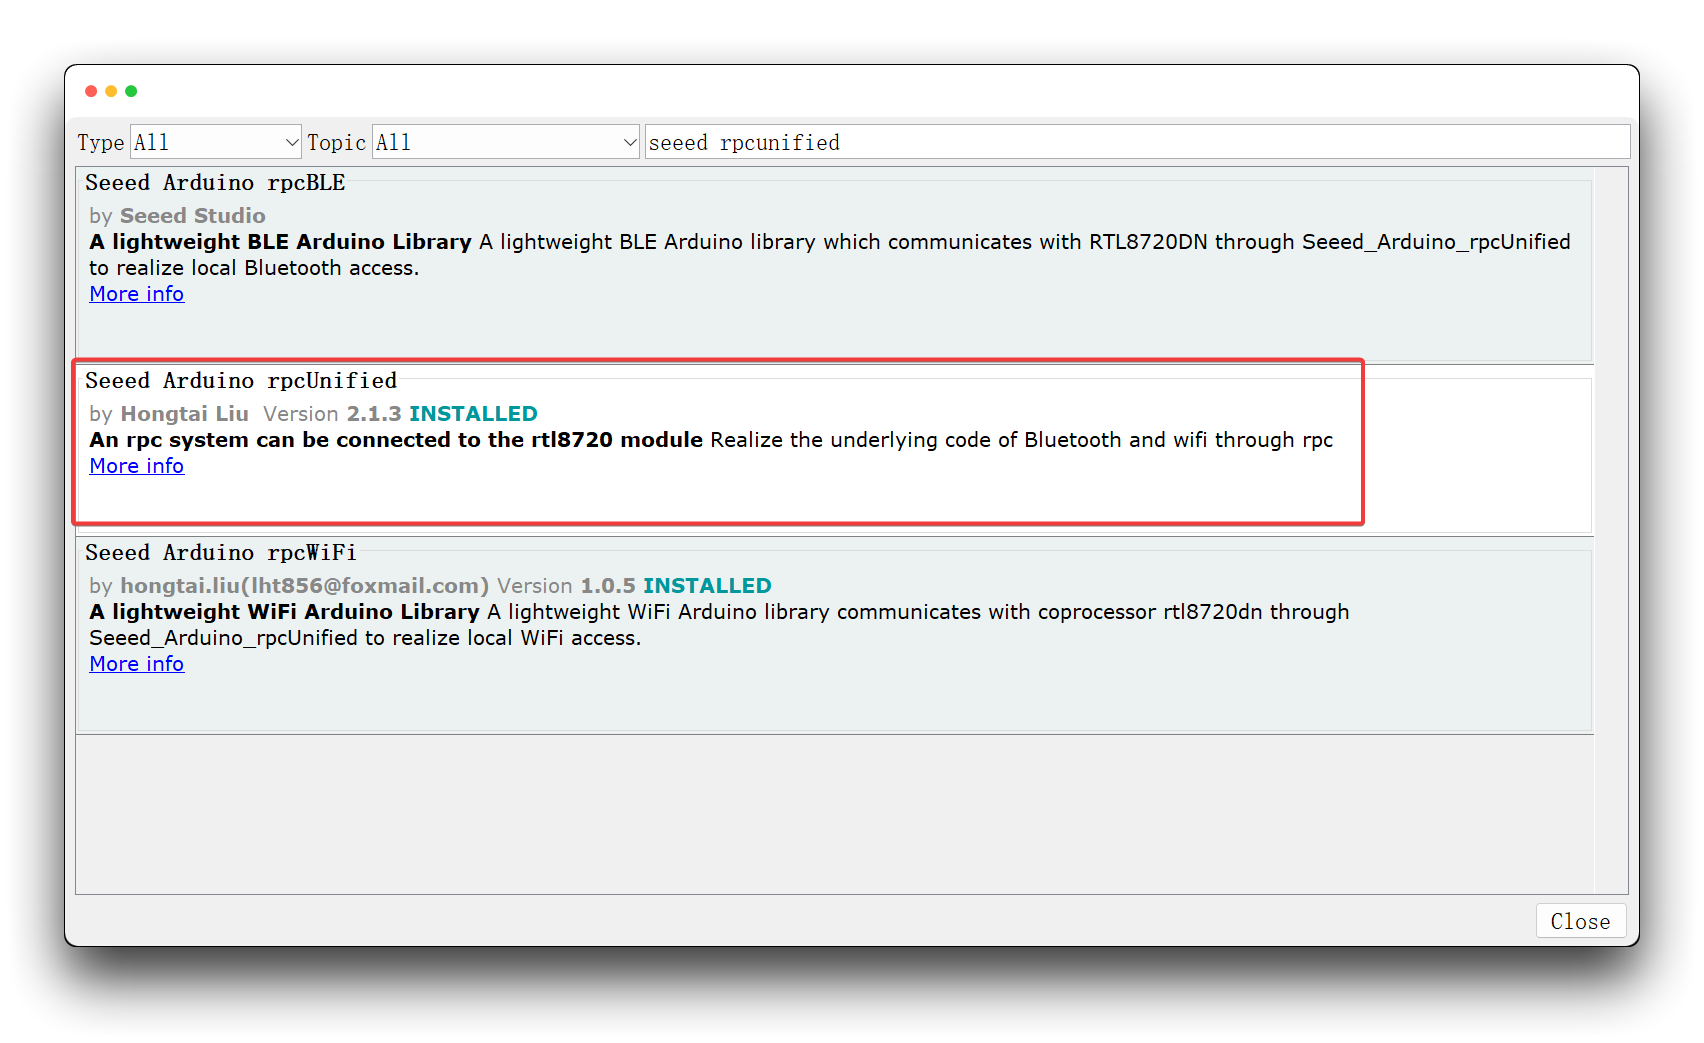
- Seeed_Arduino_rpcUnified - buscar
seeed rpcunified
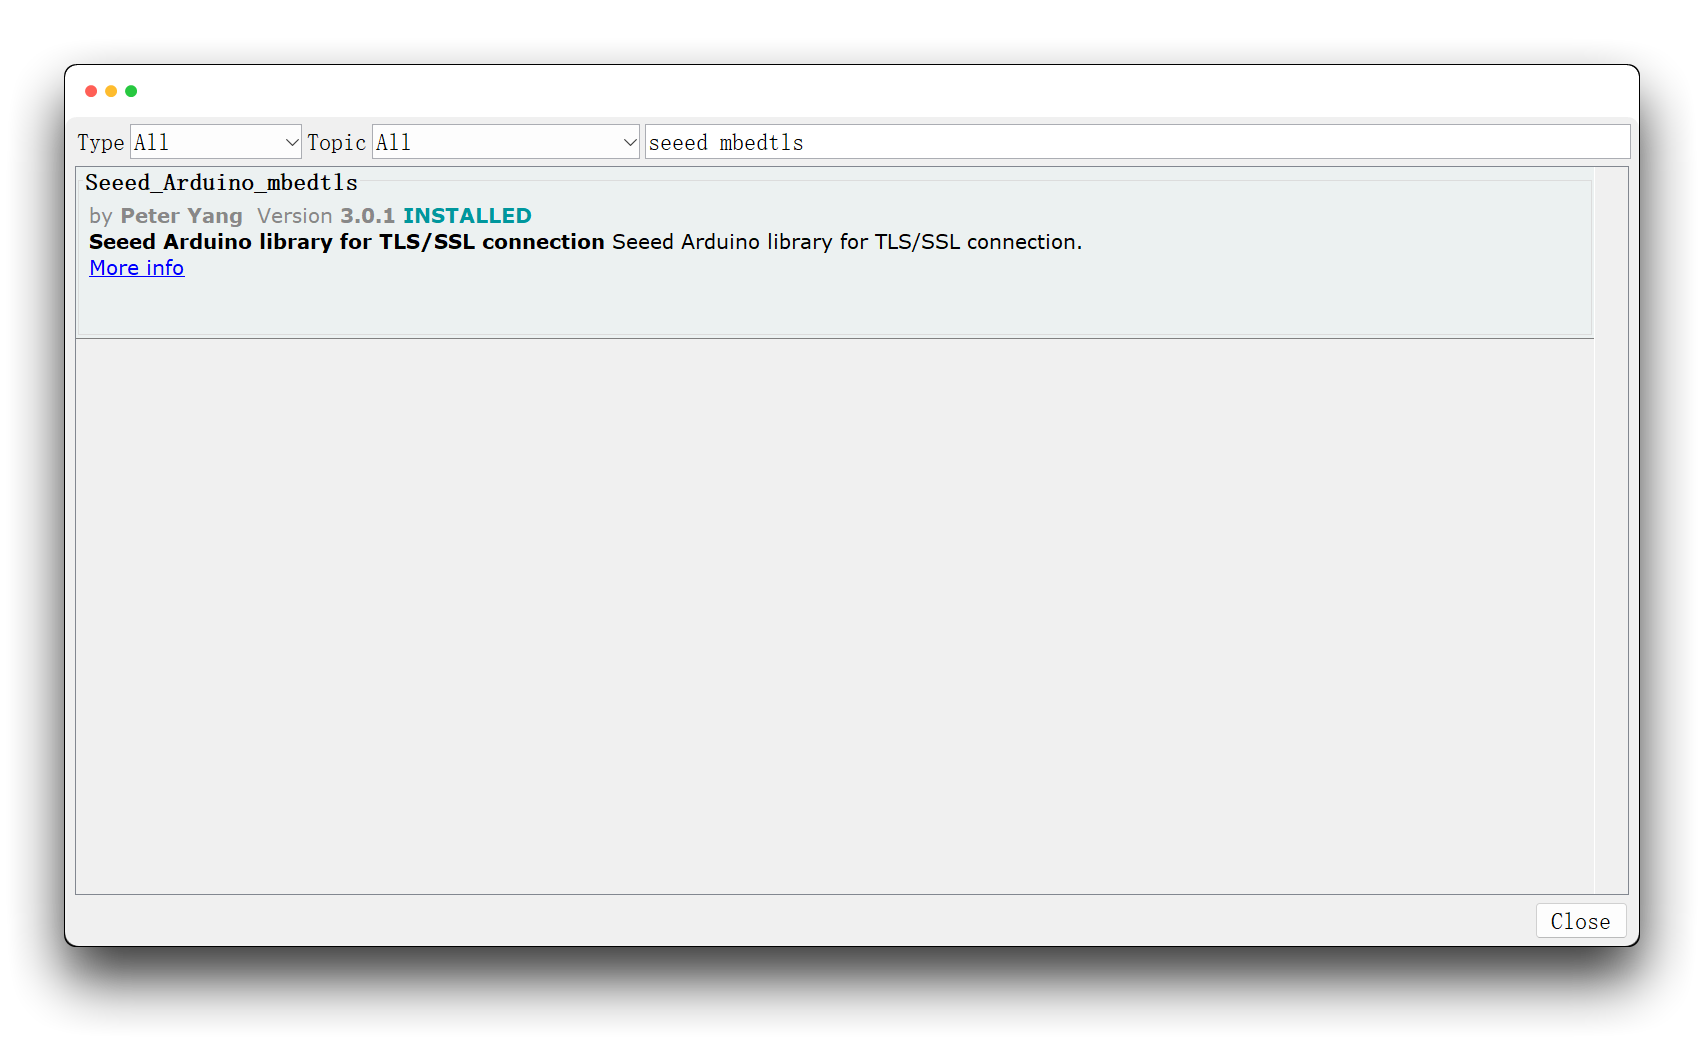
- Seeed_Arduino_mbedtls - buscar
seeed mbedtls
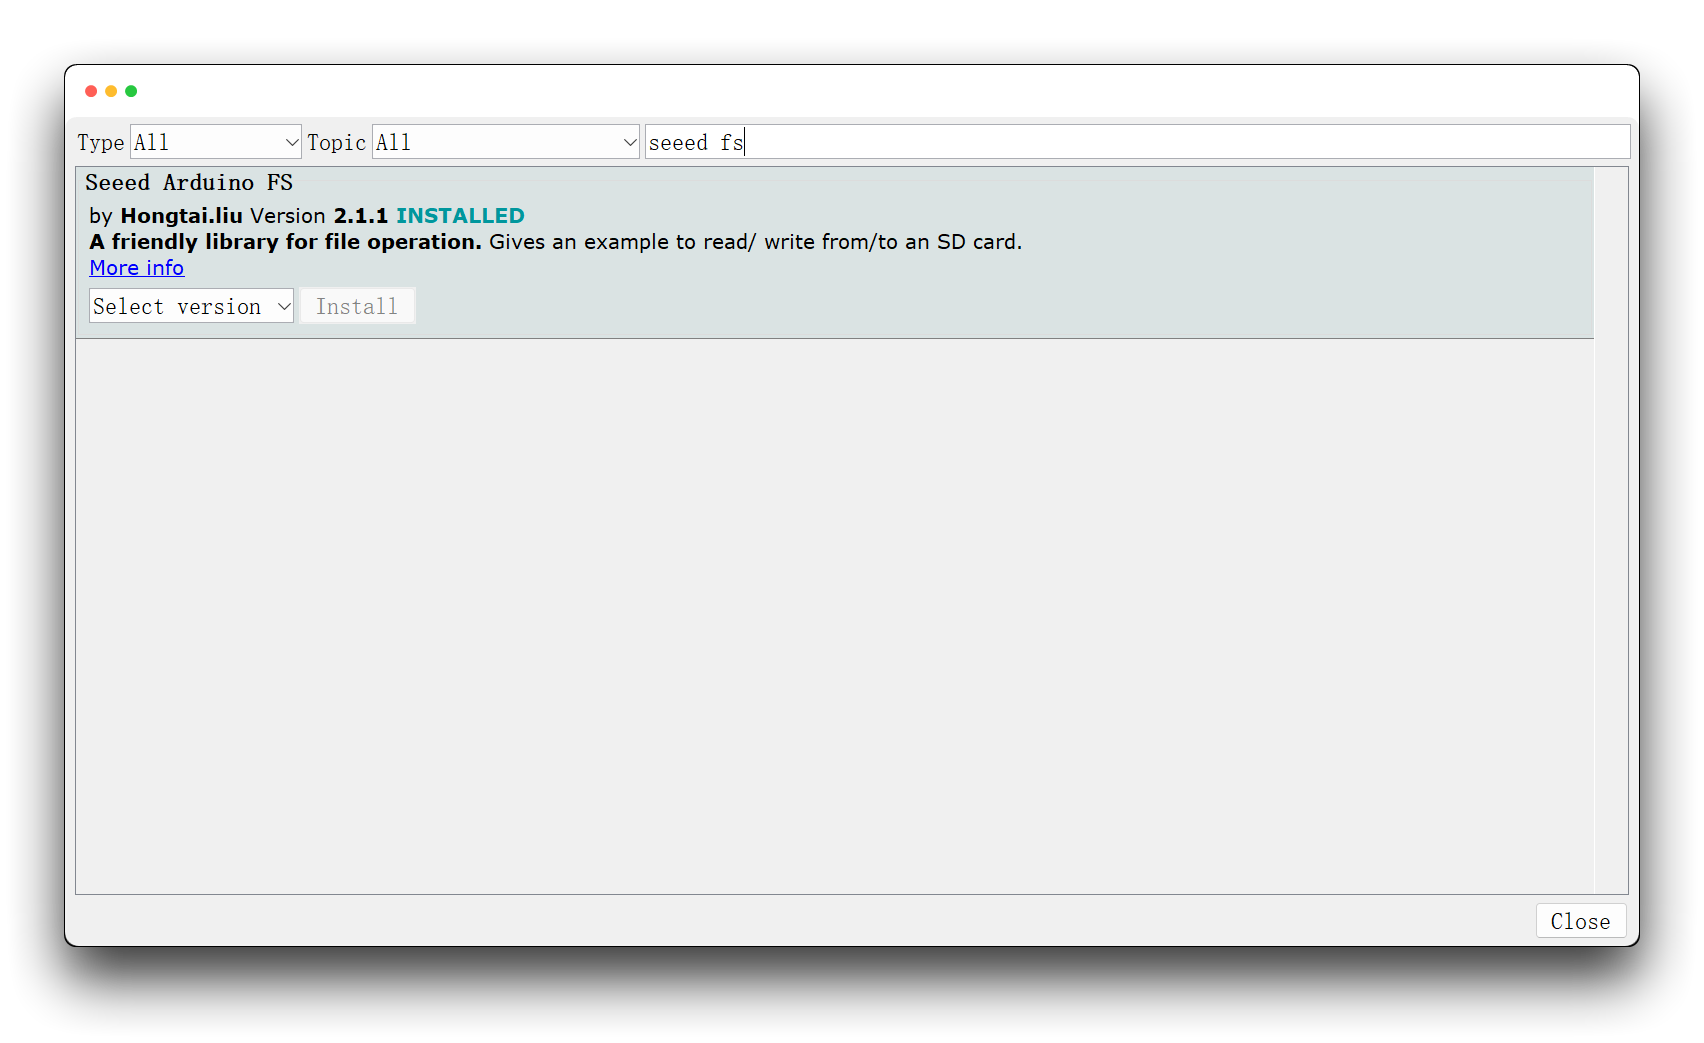
- Seeed_Arduino_FS - buscar
seeed fs
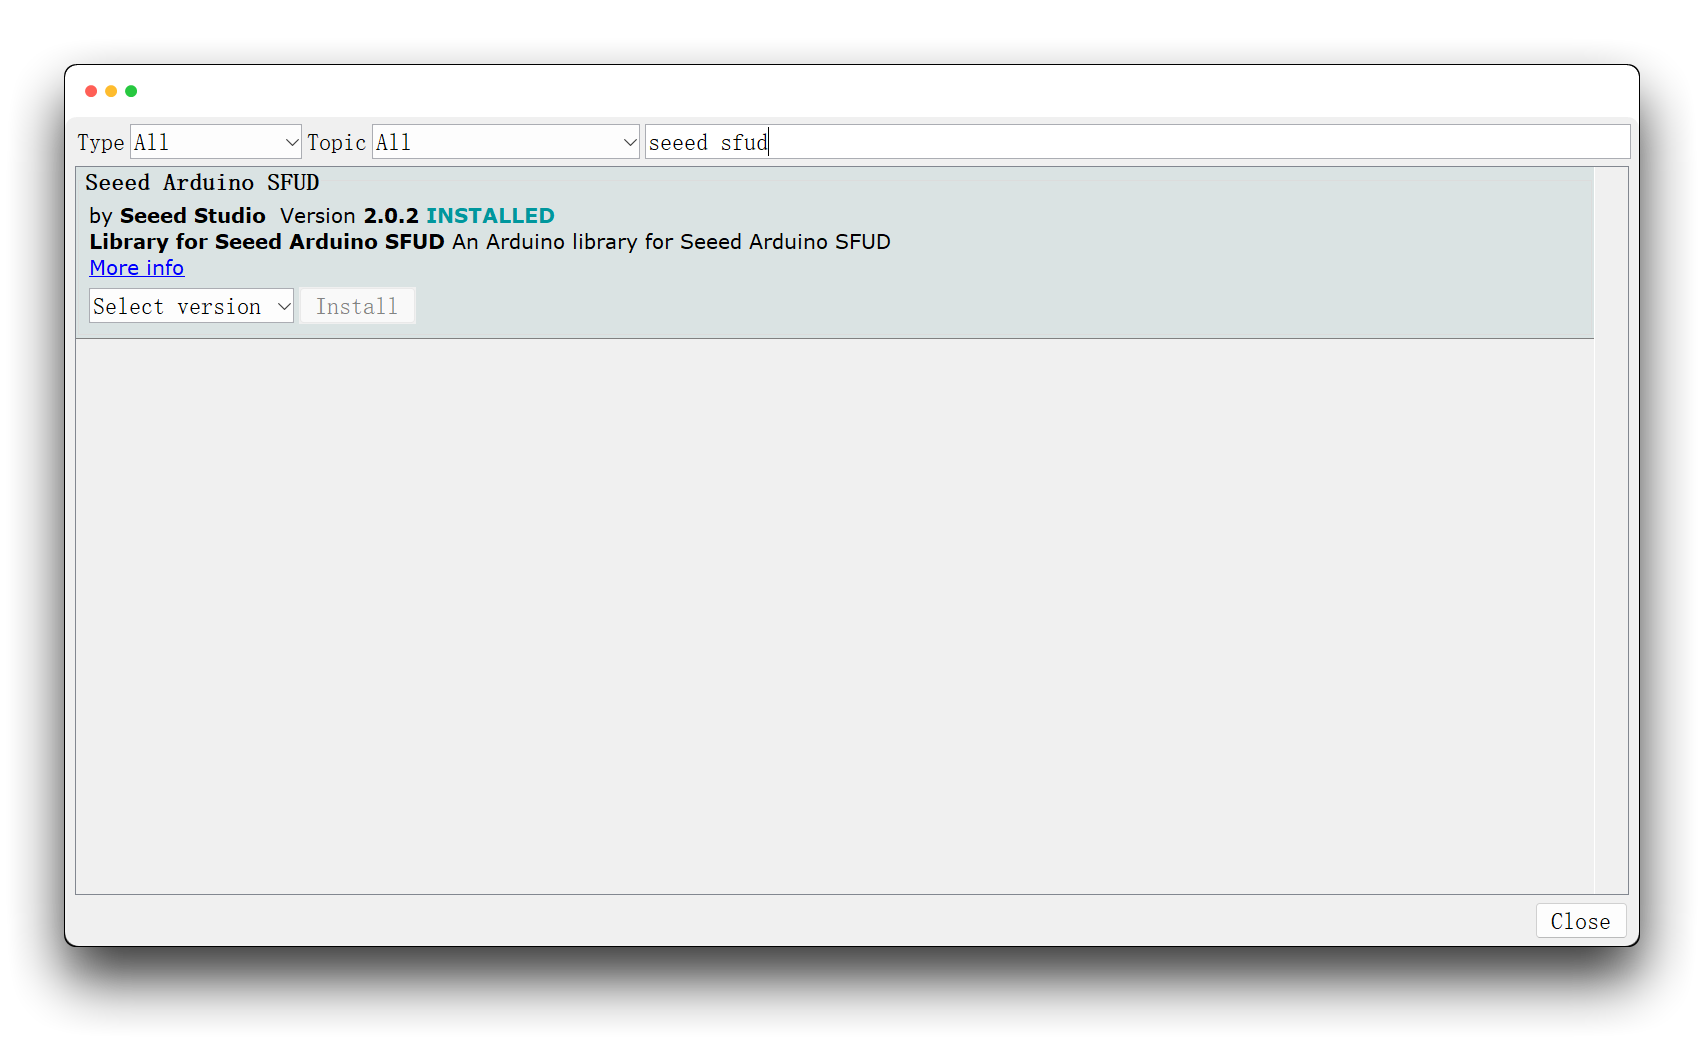
- Seeed_Arduino_SFUD - buscar
seeed sfud
- PubSubClinet - buscar
PubSubClient
Pasos de Operación
Paso 1. Registrarse e iniciar sesión en Ubidots
Si esta es tu primera vez usando Ubidots, por favor ve al sitio web de Ubidots y registra tu propia cuenta.
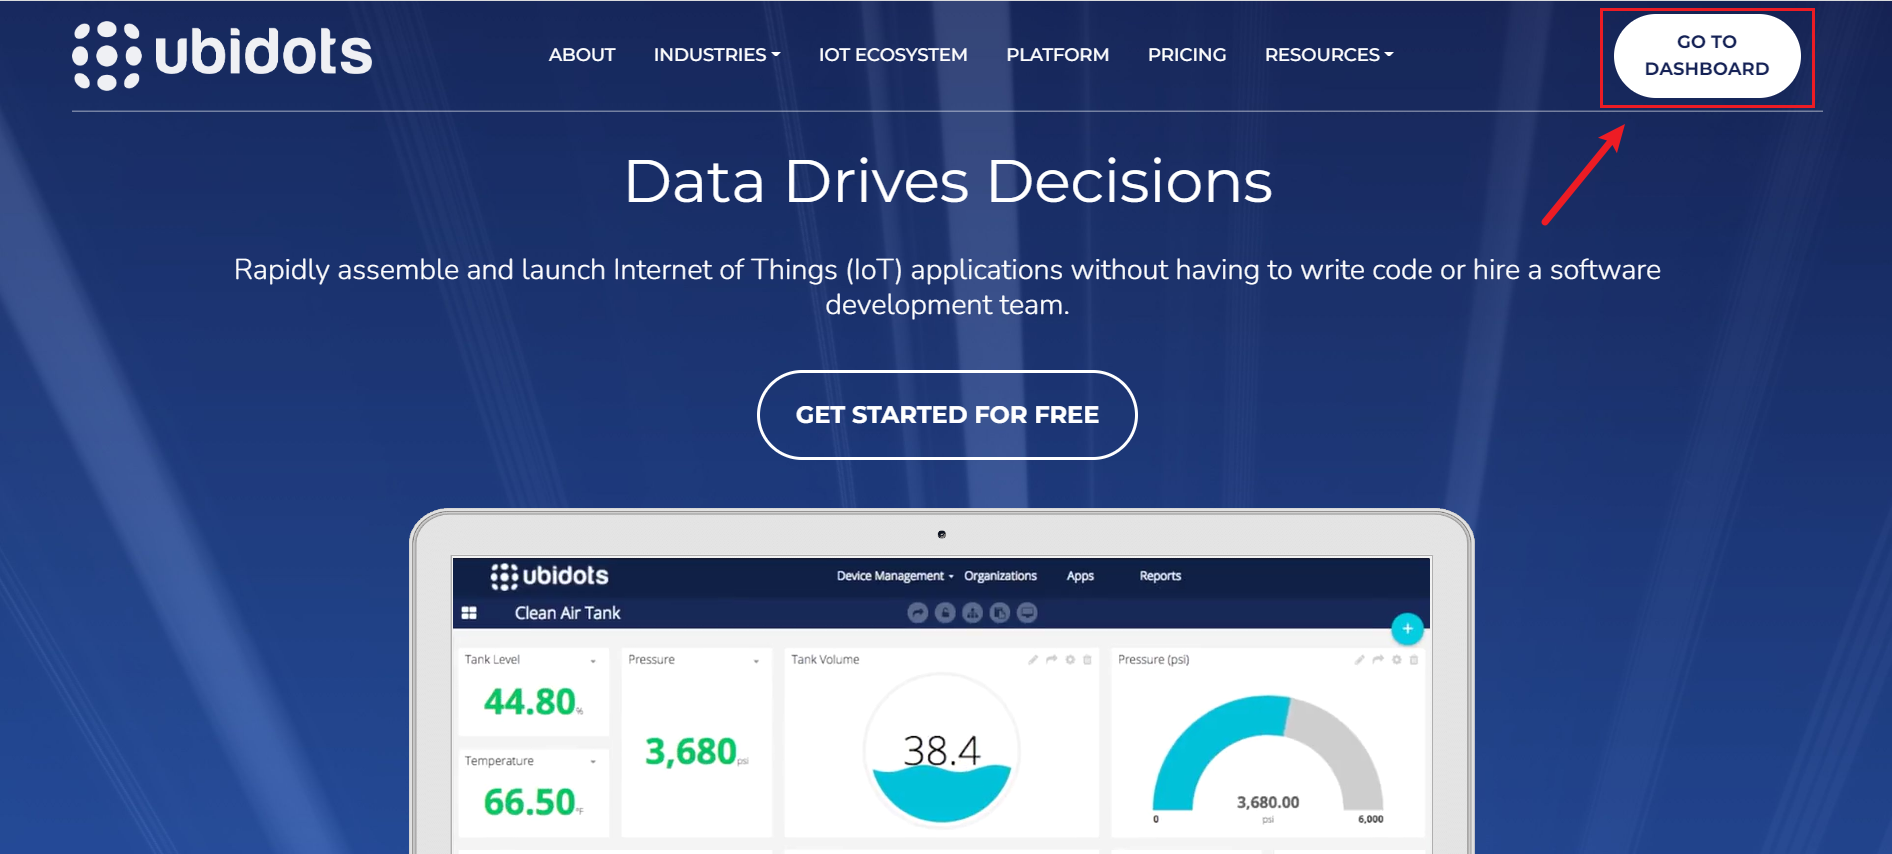
Una vez que te hayas registrado, por favor inicia sesión en Ubidots usando tu cuenta registrada.
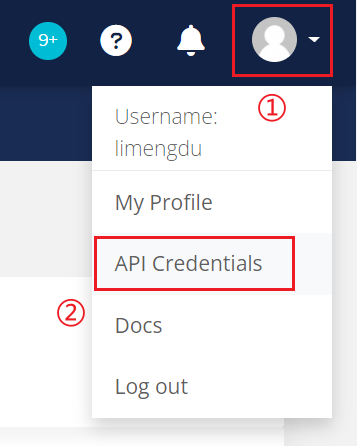
Paso 2. Asignar tu TOKEN de Ubidots único
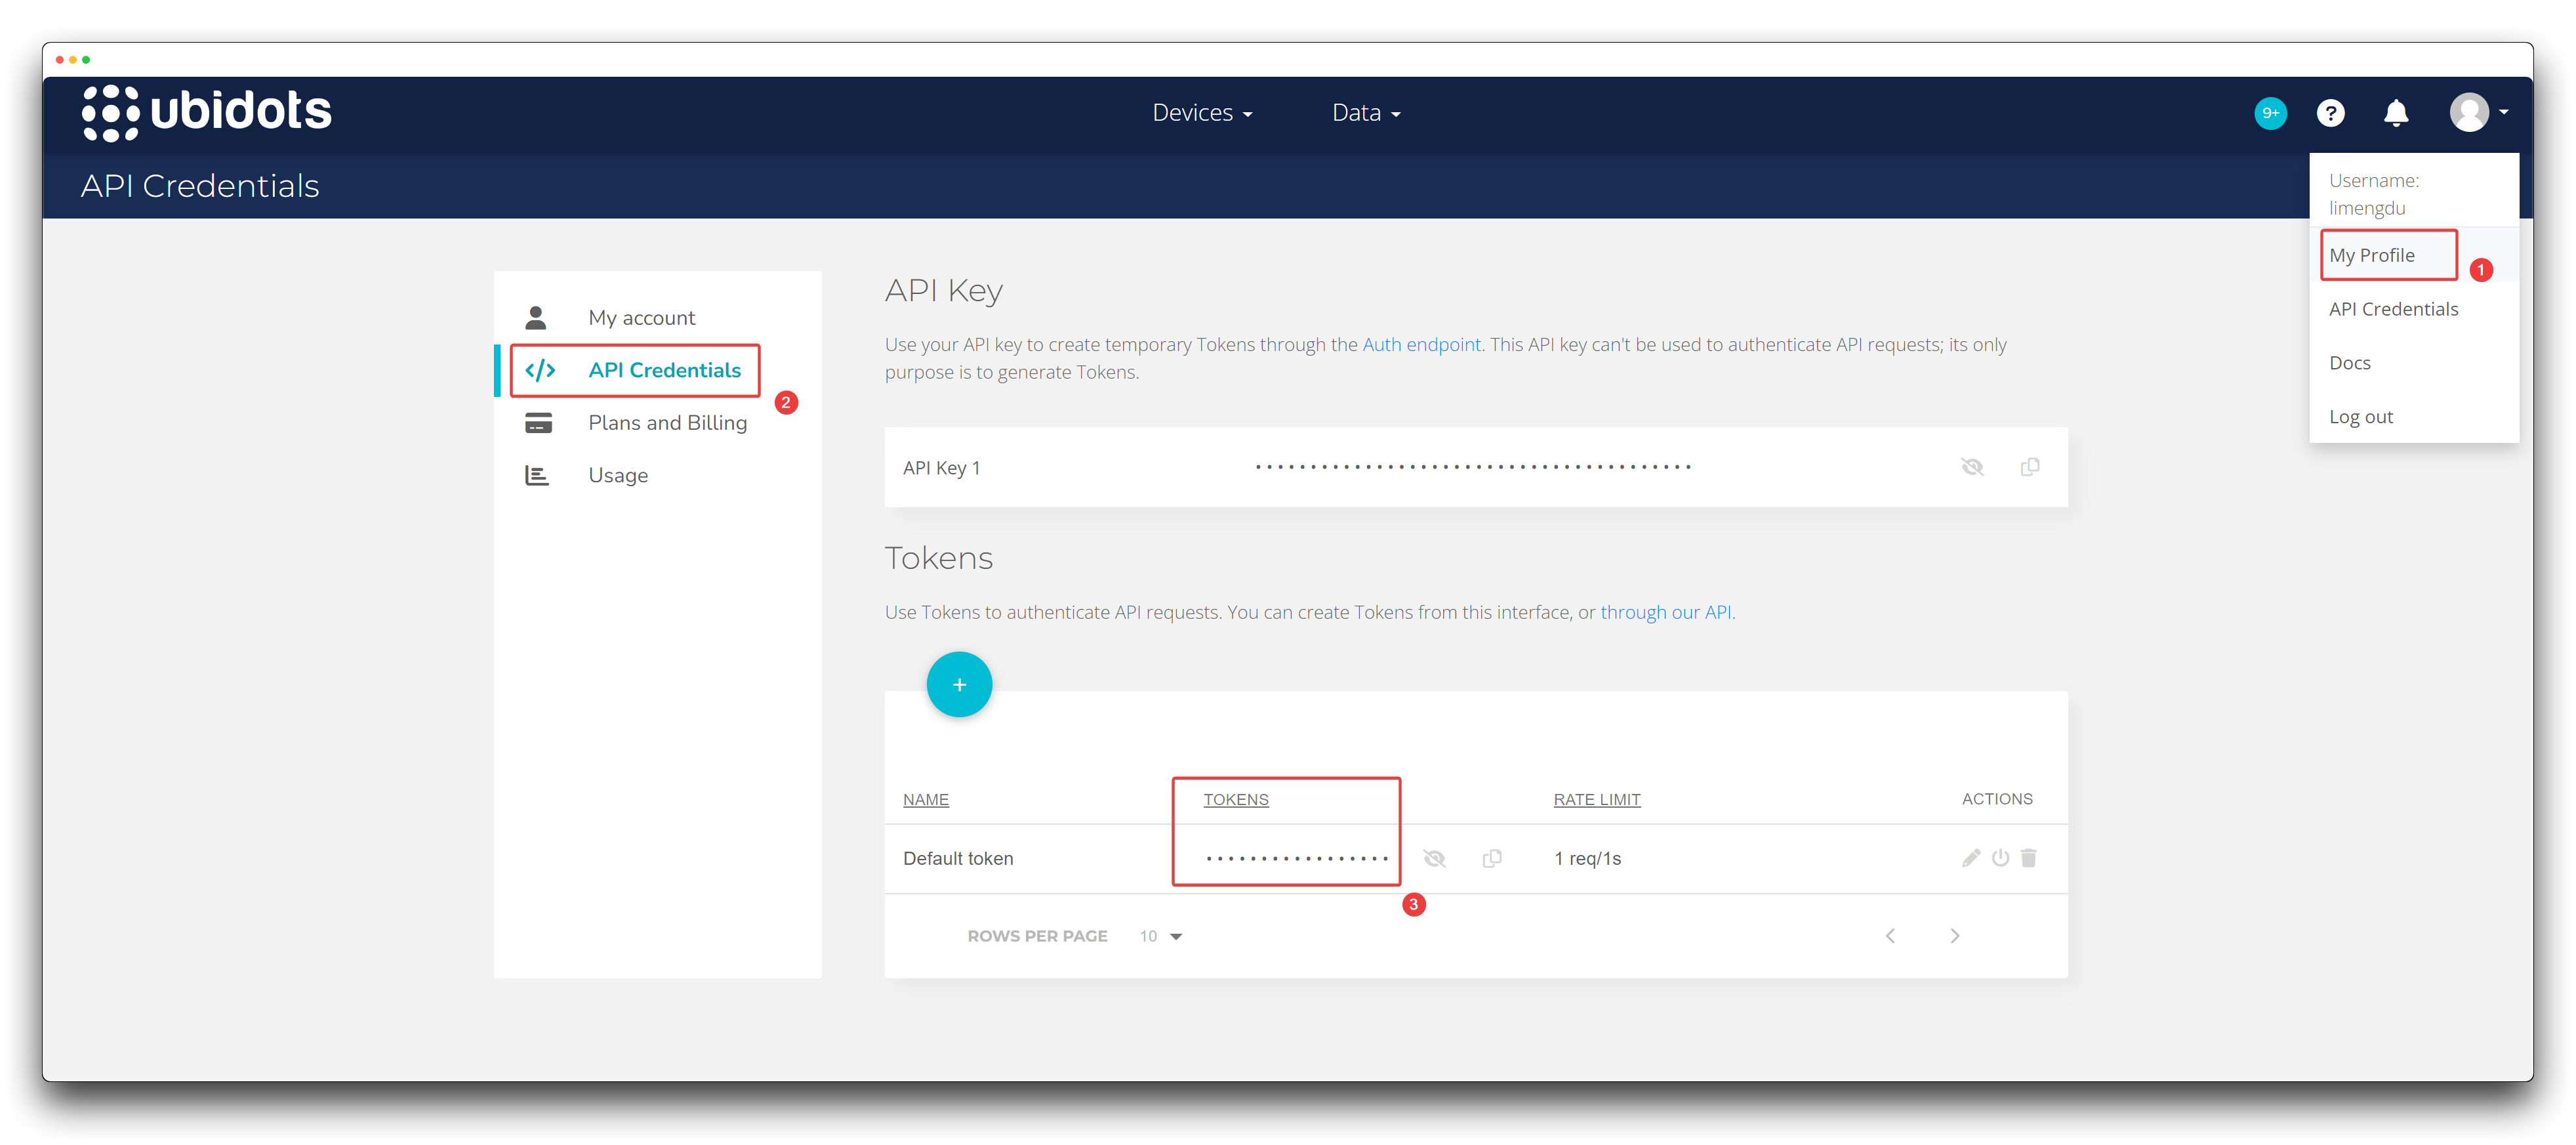
Cada solicitud a Ubidots requiere un TOKEN. La forma más fácil de obtener el tuyo es haciendo clic en "API Credentials" desde el menú desplegable del usuario.
Ve a tu menú desplegable de usuario y haz clic en API credentials:
Tokens: Claves temporales y revocables para usar en tus solicitudes de API. Por favor guarda el TOKEN por ahora, lo usaremos más tarde.
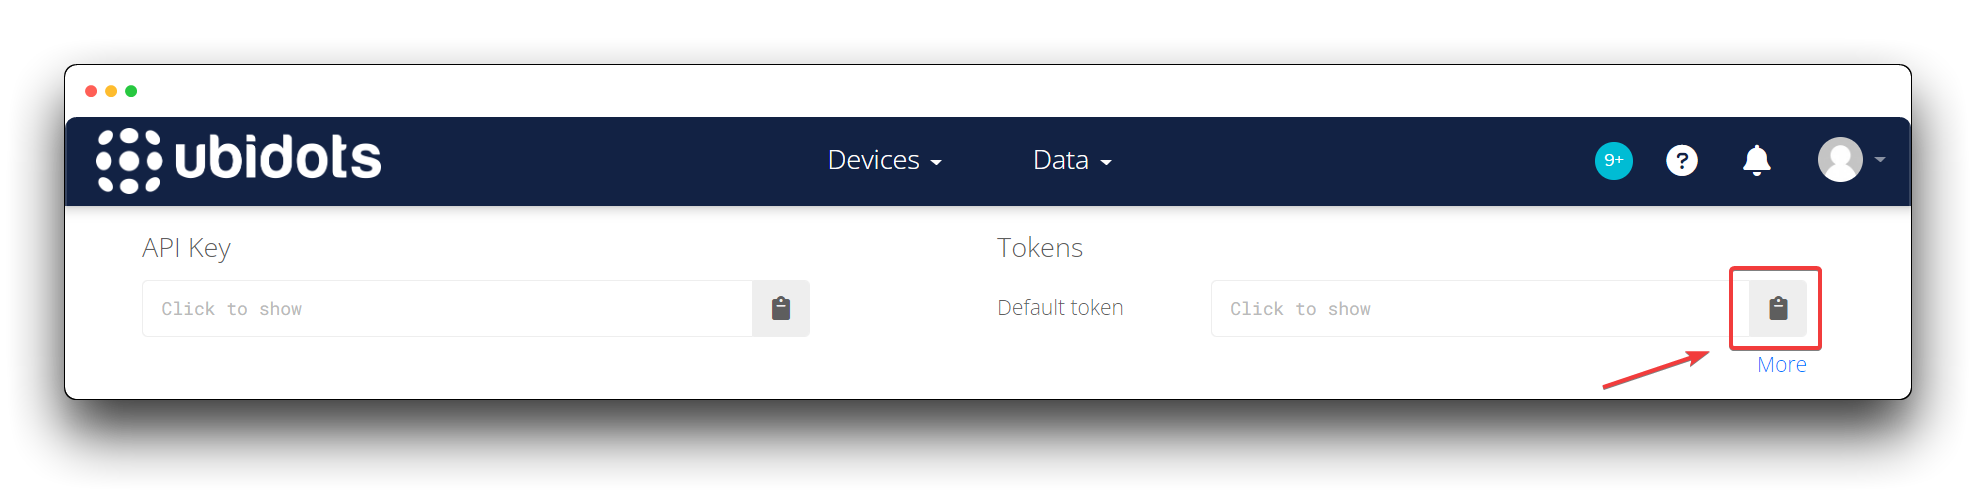
Todas las llamadas de API solo aceptan tu TOKEN. ¡No trates de usar tu API Key, no funcionará! También puedes acceder a todas tus claves de API de Ubidots en la sección de configuración de Mi Perfil en tu Menú Desplegable de Usuario. Selecciona Mi Perfil –> API Credentials para revisar la lista de TOKENS de API relacionados con tu cuenta específica de Ubidots.
Paso 3. Prepararse con la información necesaria
Para establecer una conexión MQTT, necesitaremos preparar la siguiente información con anticipación.
- SSID de WiFi
- Completa el SSID de WiFi al cual el Wio Terminal puede conectarse. El Wio Terminal buscará WiFi en sus alrededores y tratará de conectarse a él.
- Contraseña para el SSID de WiFi
- Completa la contraseña para el SSID de WiFi al cual el Wio Terminal puede conectarse.
- TOKEN de Ubidots
- Este es el TOKEN generado en el paso 2.
- Etiqueta de variable
- Este es el nombre del valor del sensor proporcionado por el usuario a Ubidots. Ubidots hace coincidir diferentes datos basándose en este nombre proporcionado por el usuario. Si la etiqueta de Variable no existe antes de que se envíe el primer punto, Ubidots las creará automáticamente.
- Etiqueta de dispositivo
- Este es el nombre del dispositivo y el nombre del dispositivo proporcionado por el usuario será usado por Ubidots para identificar el dispositivo. Si la etiqueta de Dispositivo no existe antes de que se envíe el primer punto, Ubidots las creará automáticamente.
- Nombre de cliente MQTT
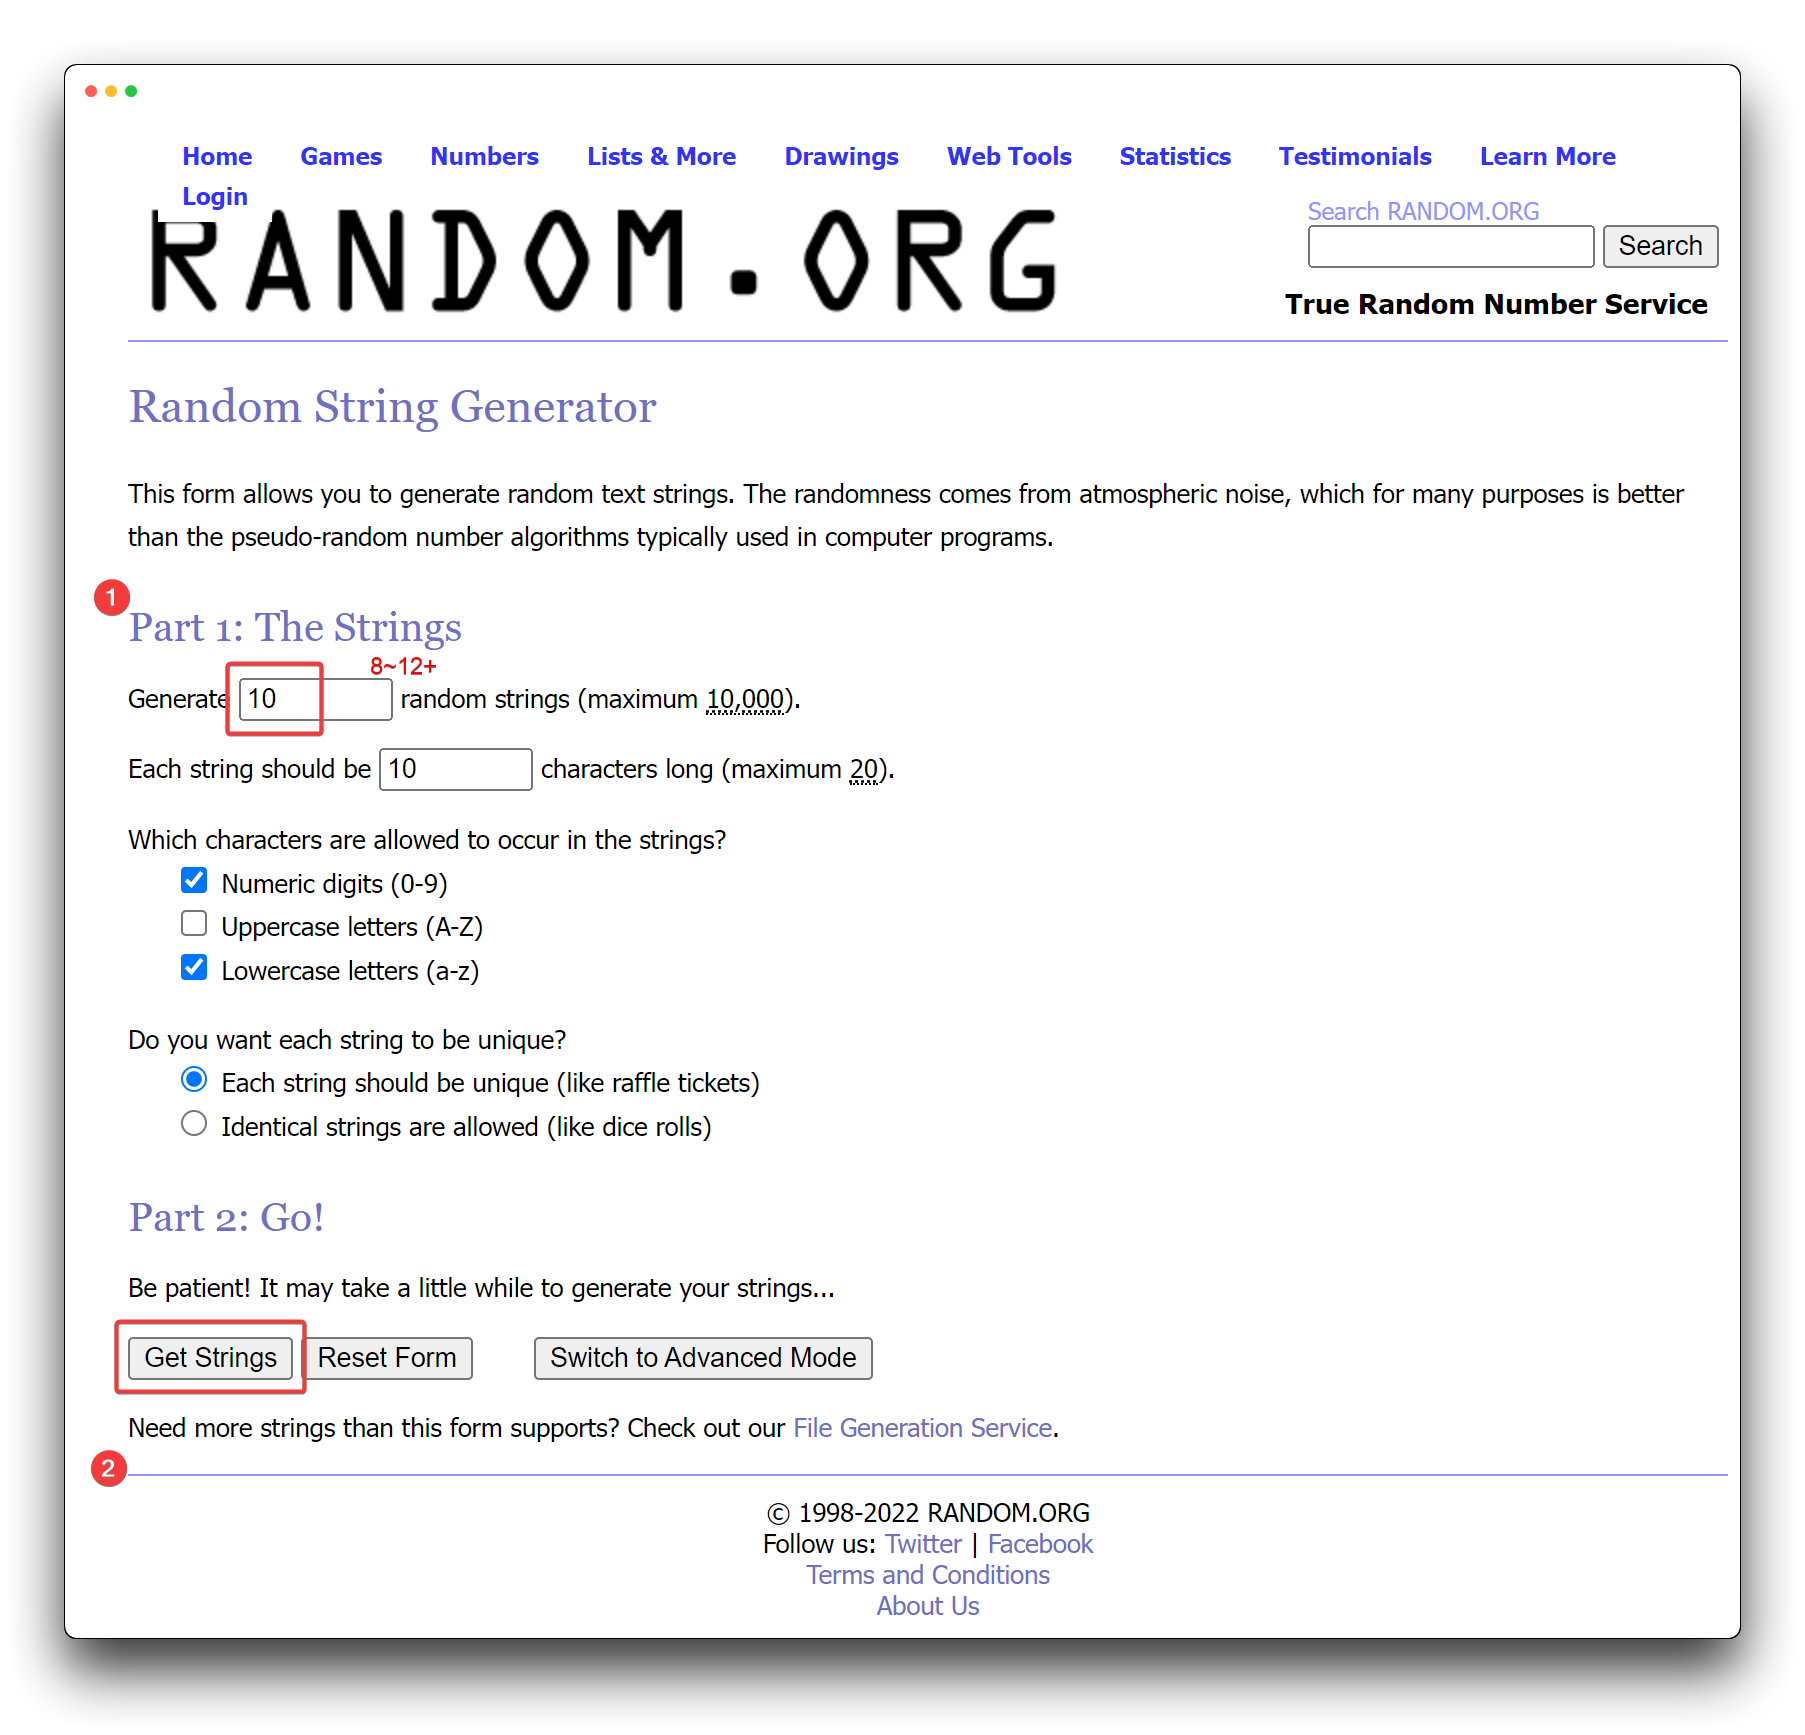
- Esto es especial porque es el ID con el cual tu dispositivo será identificado por el broker, por lo que DEBE ser único. Si tu dispositivo trata de conectarse con el mismo ID que ya ha sido tomado por otro dispositivo, la conexión será rechazada. Por favor crea tu propio nombre de cliente MQTT alfanumérico de 8-12+ caracteres e ingrésalo en el código según corresponda. ¿Necesitas ayuda creando un nombre de cliente MQTT único? Revisa este generador de ascii aleatorio, o simplemente usa la dirección MAC de tu dispositivo ya que cada dirección MAC es globalmente única.
Al comienzo del programa a continuación, definiremos estos requisitos en la parte superior del código, por favor completa tu propia información según corresponda.
//examples
#define WIFISSID "<YOUR-WIFISSD>" // Put your WifiSSID here
#define PASSWORD "<YOUR-WIFI-PASSWORD" // Put your wifi password here
#define TOKEN "<YOUR-UBIDOTS-TOKEN>" // Put your Ubidots' TOKEN
#define VARIABLE_LABEL "light" // Assign the variable label
#define DEVICE_LABEL "wio-terminal" // Assign the device label
#define MQTT_CLIENT_NAME "r6y1ax7mq8" // MQTT client Name
Enviar datos de sensores integrados a Ubidots
Si quieres enviar datos de detección de los sensores integrados del Wio Terminal a Ubidots, pega el código completo a continuación en Arduino y súbelo al Wio Terminal.
#include <PubSubClient.h>
#include <rpcWiFi.h>
#include <TFT_eSPI.h>
#include"LIS3DHTR.h"

LIS3DHTR<TwoWire> lis;

//Required Information
#define WIFISSID "<YOUR-WIFISSD>" // Put your WifiSSID here
#define PASSWORD "<YOUR-WIFI-PASSWORD" // Put your wifi password here
#define TOKEN "<YOUR-UBIDOTS-TOKEN>" // Put your Ubidots' TOKEN
#define VARIABLE_LABEL1 "light" // Assign the variable label
#define VARIABLE_LABEL2 "IMUx"
#define VARIABLE_LABEL3 "IMUy"
#define VARIABLE_LABEL4 "IMUz"
#define VARIABLE_LABEL5 "sound"
#define DEVICE_LABEL "wio-terminal" // Assign the device label
#define MQTT_CLIENT_NAME "r6y1ax7mq8" // MQTT client Name

const long interval = 100;
unsigned long previousMillis = 0;

TFT_eSPI tft;

char mqttBroker[] = "industrial.api.ubidots.com";

WiFiClient wifiClient;
PubSubClient client(wifiClient);

//sensor values
static int lightValue = 0;
static float imuxValue = 0;
static float imuyValue = 0;
static float imuzValue = 0;
static int soundValue = 0;

// Space to store values to send
static char str_light[6];
static char str_imux[6];
static char str_imuy[6];
static char str_imuz[6];
static char str_sound[6];
char payload[700];
char topic[150];

void callback(char* topic, byte* payload, unsigned int length){
  Serial.print("Message arrived [");
  Serial.print(topic);
  Serial.print("] ");
  for (int i=0;i<length;i++) {
    Serial.print((char)payload[i]);
  }
}

void reconnect() {
  // Loop until we're reconnected
  while (!client.connected()) {
    Serial.println("Attempting MQTT connection...");

  // Attempt to connect
  if (client.connect(MQTT_CLIENT_NAME, TOKEN,"")) {
    Serial.println("connected");
  }
  else {
    Serial.print("failed, rc=");
    Serial.print(client.state());
    Serial.println(" try again in 2 seconds");
    // Wait 2 seconds before retrying
    delay(2000);
    }
  }
}

//Reading built-in sensor values
void read_builtin()
{
  lightValue = analogRead(WIO_LIGHT);
  Serial.print("Light = ");
  Serial.println(lightValue);

  imuxValue = lis.getAccelerationX();
  Serial.print("IMU_x = ");
  Serial.println(imuxValue);
  imuyValue = lis.getAccelerationY();
  Serial.print("IMU_y = ");
  Serial.println(imuyValue);
  imuzValue = lis.getAccelerationZ();
  Serial.print("IMU_z = ");
  Serial.println(imuzValue);

  soundValue = analogRead(WIO_MIC);
  Serial.print("Sound = ");
  Serial.println(soundValue);
}

//Sending data to Ubidots
void send_data()
{
  dtostrf(lightValue, 4, 0, str_light);
  dtostrf(imuxValue, 4, 3, str_imux);
  dtostrf(imuyValue, 4, 3, str_imuy);
  dtostrf(imuzValue, 4, 3, str_imuz);
  dtostrf(soundValue, 4, 0, str_sound);

  if (!client.connected()) {
    reconnect();
  }

  // Builds the topic
  sprintf(topic, "%s", ""); // Cleans the topic content
  sprintf(topic, "%s%s", "/v2.0/devices/", DEVICE_LABEL);

  //Builds the payload
  sprintf(payload, "%s", ""); // Cleans the payload
  sprintf(payload, "{\"%s\":", VARIABLE_LABEL1); // Adds the variable label
  sprintf(payload, "%s%s", payload, str_light); // Adds the value
  sprintf(payload, "%s}", payload); // Closes the dictionary brackets
  client.publish(topic, payload);
  delay(500);

  sprintf(payload, "%s", ""); // Cleans the payload
  sprintf(payload, "{\"%s\":", VARIABLE_LABEL2); // Adds the variable label
  sprintf(payload, "%s%s", payload, str_imux); // Adds the value
  sprintf(payload, "%s}", payload); // Closes the dictionary brackets
  client.publish(topic, payload);
  delay(500);

  sprintf(payload, "%s", ""); // Cleans the payload
  sprintf(payload, "{\"%s\":", VARIABLE_LABEL3); // Adds the variable label
  sprintf(payload, "%s%s", payload, str_imuy); // Adds the value
  sprintf(payload, "%s}", payload); // Closes the dictionary brackets
  client.publish(topic, payload);
  delay(500);

  sprintf(payload, "%s", ""); // Cleans the payload
  sprintf(payload, "{\"%s\":", VARIABLE_LABEL4); // Adds the variable label
  sprintf(payload, "%s%s", payload, str_imuz); // Adds the value
  sprintf(payload, "%s}", payload); // Closes the dictionary brackets
  client.publish(topic, payload);
  delay(500);

  sprintf(payload, "%s", ""); // Cleans the payload
  sprintf(payload, "{\"%s\":", VARIABLE_LABEL5); // Adds the variable label
  sprintf(payload, "%s%s", payload, str_sound); // Adds the value
  sprintf(payload, "%s}", payload); // Closes the dictionary brackets
  client.publish(topic, payload);
  delay(500);

  client.loop();
}

void setup() {
  Serial.begin(115200);
  lis.begin(Wire1);
  pinMode(WIO_MIC, INPUT);
  pinMode(WIO_LIGHT, INPUT);

  tft.begin();
  tft.setRotation(3);
  tft.setTextSize(2);
  tft.fillScreen(TFT_BLACK);

  lis.setOutputDataRate(LIS3DHTR_DATARATE_25HZ); //Data output rate
  lis.setFullScaleRange(LIS3DHTR_RANGE_2G);

//  while(!Serial);

  // Set WiFi to station mode and disconnect from an AP if it was previously connected
  WiFi.mode(WIFI_STA);
  WiFi.disconnect();

  tft.drawString("Connecting to WiFi...",20,120);
  WiFi.begin(WIFISSID, PASSWORD);

  while (WiFi.status() != WL_CONNECTED) {
    delay(500);
    WiFi.begin(WIFISSID, PASSWORD);
  }

  tft.fillScreen(TFT_BLACK);
  tft.drawString("Connected to the WiFi",20,120);

  delay(1000);
  client.setServer(mqttBroker, 1883);
  client.setCallback(callback);

}

void loop() {
  read_builtin();   //Reading buile-in sensor values
  send_data();   //Sending data to Ubidots
  delay(5000);
}
Enviar datos del sensor de humedad del suelo Grove a Ubidots
Si quieres enviar datos del sensor de humedad del suelo Grove a Ubidots, pega el código completo a continuación en Arduino y súbelo al Wio Terminal.
#include <PubSubClient.h>
#include <rpcWiFi.h>
#include <TFT_eSPI.h>

//Required Information
#define WIFISSID "<YOUR-WIFISSD>" // Put your WifiSSID here
#define PASSWORD "<YOUR-WIFI-PASSWORD" // Put your wifi password here
#define TOKEN "<YOUR-UBIDOTS-TOKEN>" // Put your Ubidots' TOKEN
#define VARIABLE_LABEL "light" // Assign the variable label
#define DEVICE_LABEL "wio-terminal" // Assign the device label
#define MQTT_CLIENT_NAME "r6y1ax7mq8" // MQTT client Name

const long interval = 100;
unsigned long previousMillis = 0;

TFT_eSPI tft;

char mqttBroker[] = "industrial.api.ubidots.com";

WiFiClient wifiClient;
PubSubClient client(wifiClient);

//Soil moisture pins and sensor values
int sensorPin = A0;
static int soilValue = 0;

// Space to store values to send
char str_soil[6];
char payload[700];
char topic[150];

void callback(char* topic, byte* payload, unsigned int length){
  Serial.print("Message arrived [");
  Serial.print(topic);
  Serial.print("] ");
  for (int i=0;i<length;i++) {
    Serial.print((char)payload[i]);
  }
}

void reconnect() {
  // Loop until we're reconnected
  while (!client.connected()) {
    Serial.println("Attempting MQTT connection...");

  // Attempt to connect
  if (client.connect(MQTT_CLIENT_NAME, TOKEN,"")) {
    Serial.println("connected");
  }
  else {
    Serial.print("failed, rc=");
    Serial.print(client.state());
    Serial.println(" try again in 2 seconds");
    // Wait 2 seconds before retrying
    delay(2000);
    }
  }
}

//Reading soil moisture sensor values
void read_soil()
{
  soilValue = analogRead(sensorPin);
  Serial.print("Moisture = ");
  Serial.println(soilValue);
}

//Sending data to Ubidots
void send_data()
{
  dtostrf(soilValue, 4, 0, str_soil);

  if (!client.connected()) {
    reconnect();
  }

  // Builds the topic
  sprintf(topic, "%s", ""); // Cleans the topic content
  sprintf(topic, "%s%s", "/v2.0/devices/", DEVICE_LABEL);

  //Builds the payload
  sprintf(payload, "%s", ""); // Cleans the payload
  sprintf(payload, "{\"%s\":", VARIABLE_LABEL); // Adds the variable label
  sprintf(payload, "%s%s", payload, str_soil); // Adds the value
  sprintf(payload, "%s}", payload); // Closes the dictionary brackets

  client.publish(topic, payload);
  delay(500);

  client.loop();
}


void setup() {
  Serial.begin(115200);

  tft.begin();
  tft.setRotation(3);
  tft.setTextSize(2);
  tft.fillScreen(TFT_BLACK);

  // Set WiFi to station mode and disconnect from an AP if it was previously connected
  WiFi.mode(WIFI_STA);
  WiFi.disconnect();

  tft.drawString("Connecting to WiFi...",20,120);
  WiFi.begin(WIFISSID, PASSWORD);

  while (WiFi.status() != WL_CONNECTED) {
    delay(500);
    WiFi.begin(WIFISSID, PASSWORD);
  }

  tft.fillScreen(TFT_BLACK);
  tft.drawString("Connected to the WiFi",20,120);

  delay(1000);
  client.setServer(mqttBroker, 1883);
  client.setCallback(callback);
}

void loop() {
  read_soil();   //Reading soil moisture sensor values
  send_data();   //Sending data to Ubidots
  delay(5000);
}
Enviar datos del sensor de gas VOC y eCO2 Grove a Ubidots
Si quieres enviar datos del sensor de gas VOC y eCO2 Grove a Ubidots, pega el código completo a continuación en Arduino y súbelo al Wio Terminal.
#include <PubSubClient.h>
#include <rpcWiFi.h>
#include <TFT_eSPI.h>
#include "sensirion_common.h"
#include "sgp30.h"

#define WIFISSID "<YOUR-WIFISSD>" // Put your WifiSSID here
#define PASSWORD "<YOUR-WIFI-PASSWORD" // Put your wifi password here
#define TOKEN "<YOUR-UBIDOTS-TOKEN>" // Put your Ubidots' TOKEN
#define VARIABLE_LABEL1 "voc" // Assign the variable label
#define VARIABLE_LABEL2 "co2"
#define DEVICE_LABEL "wio-terminal" // Assign the device label
#define MQTT_CLIENT_NAME "r6y1ax7mq8" // MQTT client Name

const long interval = 100;
unsigned long previousMillis = 0;

char mqttBroker[] = "industrial.api.ubidots.com";

WiFiClient wifiClient;
PubSubClient client(wifiClient);

TFT_eSPI tft = TFT_eSPI();

static unsigned short int VOC = 0;
static unsigned short int CO2 = 0;

// Space to store values to send
char str_voc[6];
char str_co2[6];
char payload[700];
char topic[150];

void callback(char* topic, byte* payload, unsigned int length){
  Serial.print("Message arrived [");
  Serial.print(topic);
  Serial.print("] ");
  for (int i=0;i<length;i++) {
    Serial.print((char)payload[i]);
  }
}

void reconnect() {
  // Loop until we're reconnected
  while (!client.connected()) {
    Serial.println("Attempting MQTT connection...");

  // Attempt to connect
  if (client.connect(MQTT_CLIENT_NAME, TOKEN,"")) {
    Serial.println("connected");
  }
  else {
    Serial.print("failed, rc=");
    Serial.print(client.state());
    Serial.println(" try again in 2 seconds");
    // Wait 2 seconds before retrying
    delay(2000);
    }
  }
}

void read_sgp30()
{
  s16 err = 0;
  sgp_measure_iaq_blocking_read(&VOC, &CO2);
  if (err == STATUS_OK) {
      Serial.print("tVOC  Concentration:");
      Serial.print(VOC);
      Serial.println("ppb");

      Serial.print("CO2eq Concentration:");
      Serial.print(CO2);
      Serial.println("ppm");
  } else {
      Serial.println("error reading IAQ values\n");
  }
}

void send_data()
{
  dtostrf(VOC, 4, 0, str_voc);
  dtostrf(CO2, 4, 0, str_co2);

  if (!client.connected()) {
    reconnect();
  }

  // Builds the topic
  sprintf(topic, "%s", ""); // Cleans the topic content
  sprintf(topic, "%s%s", "/v2.0/devices/", DEVICE_LABEL);

  //Builds the payload
  sprintf(payload, "%s", ""); // Cleans the payload
  sprintf(payload, "{\"%s\":", VARIABLE_LABEL1); // Adds the variable label
  sprintf(payload, "%s%s", payload, str_voc); // Adds the value
  sprintf(payload, "%s}", payload); // Closes the dictionary brackets
  client.publish(topic, payload);
  Serial.println(payload);
  delay(500);

  sprintf(payload, "%s", ""); // Cleans the payload
  sprintf(payload, "{\"%s\":", VARIABLE_LABEL2); // Adds the variable label
  sprintf(payload, "%s%s", payload, str_co2); // Adds the value
  sprintf(payload, "%s}", payload); // Closes the dictionary brackets
  client.publish(topic, payload);
  Serial.println(payload);
  delay(500);

  client.loop();
}

void setup() {
  Serial.begin(115200);
  while (sgp_probe() != STATUS_OK) {
      Serial.println("SGP failed");
  }
  sgp_set_absolute_humidity(13000);
  sgp_iaq_init();

  tft.begin();
  tft.setRotation(3);
  tft.setTextSize(2);
  tft.fillScreen(TFT_BLACK);

//  while(!Serial);

  // Set WiFi to station mode and disconnect from an AP if it was previously connected
  WiFi.mode(WIFI_STA);
  WiFi.disconnect();

  tft.drawString("Connecting to WiFi...",20,120);
  WiFi.begin(WIFISSID, PASSWORD);

  while (WiFi.status() != WL_CONNECTED) {
    delay(500);
    WiFi.begin(WIFISSID, PASSWORD);
  }

  tft.fillScreen(TFT_BLACK);
  tft.drawString("Connected to the WiFi",20,120);

  delay(1000);
  client.setServer(mqttBroker, 1883);
  client.setCallback(callback);
}

void loop() {
  read_sgp30();    //Reading sgp30 sensor values
  send_data();     //Sending data to Ubidots
  delay(5000);
}
Enviar datos del sensor Grove Temp&Humi a Ubidots
Si quieres enviar datos del sensor Grove Temp&Humi a Ubidots, pega el código completo a continuación en Arduino y súbelo al Wio Terminal.
#include <PubSubClient.h>
#include <rpcWiFi.h>
#include <TFT_eSPI.h>
#include <SensirionI2CSht4x.h>
#include <Wire.h>

#define WIFISSID "<YOUR-WIFISSD>" // Put your WifiSSID here
#define PASSWORD "<YOUR-WIFI-PASSWORD" // Put your wifi password here
#define TOKEN "<YOUR-UBIDOTS-TOKEN>" // Put your Ubidots' TOKEN
#define VARIABLE_LABEL1 "temperature" // Assign the variable label
#define VARIABLE_LABEL2 "humidity"
#define DEVICE_LABEL "wio-terminal" // Assign the device label
#define MQTT_CLIENT_NAME "r6y1ax7mq8" // MQTT client Name

const long interval = 100;
unsigned long previousMillis = 0;

char mqttBroker[] = "industrial.api.ubidots.com";

WiFiClient wifiClient;
PubSubClient client(wifiClient);

TFT_eSPI tft = TFT_eSPI();
SensirionI2CSht4x sht4x;

static float temp = 0;
static float humi = 0;

// Space to store values to send
char str_temp[6];
char str_humi[6];
char payload[700];
char topic[150];

void callback(char* topic, byte* payload, unsigned int length){
  Serial.print("Message arrived [");
  Serial.print(topic);
  Serial.print("] ");
  for (int i=0;i<length;i++) {
    Serial.print((char)payload[i]);
  }
}

void reconnect() {
  // Loop until we're reconnected
  while (!client.connected()) {
    Serial.println("Attempting MQTT connection...");

  // Attempt to connect
  if (client.connect(MQTT_CLIENT_NAME, TOKEN,"")) {
    Serial.println("connected");
  }
  else {
    Serial.print("failed, rc=");
    Serial.print(client.state());
    Serial.println(" try again in 2 seconds");
    // Wait 2 seconds before retrying
    delay(2000);
    }
  }
}

void read_sht40()
{
  uint16_t error;
  char errorMessage[256];
  error = sht4x.measureHighPrecision(temp, humi);
  if (error) {
      Serial.print("Error trying to execute measureHighPrecision(): ");
      errorToString(error, errorMessage, 256);
      Serial.println(errorMessage);
  } else {
      Serial.print("Temperature:");
      Serial.print(temp);
      Serial.print("\t");
      Serial.print("Humidity:");
      Serial.println(humi);
  }
}

void send_data()
{
  dtostrf(temp, 4, 2, str_temp);
  dtostrf(humi, 4, 2, str_humi);

  if (!client.connected()) {
    reconnect();
  }

  // Builds the topic
  sprintf(topic, "%s", ""); // Cleans the topic content
  sprintf(topic, "%s%s", "/v2.0/devices/", DEVICE_LABEL);

  //Builds the payload
  sprintf(payload, "%s", ""); // Cleans the payload
  sprintf(payload, "{\"%s\":", VARIABLE_LABEL1); // Adds the variable label
  sprintf(payload, "%s%s", payload, str_temp); // Adds the value
  sprintf(payload, "%s}", payload); // Closes the dictionary brackets
  client.publish(topic, payload);
  delay(500);

  sprintf(payload, "%s", ""); // Cleans the payload
  sprintf(payload, "{\"%s\":", VARIABLE_LABEL2); // Adds the variable label
  sprintf(payload, "%s%s", payload, str_humi); // Adds the value
  sprintf(payload, "%s}", payload); // Closes the dictionary brackets
  client.publish(topic, payload);
  delay(500);

  client.loop();
}

void setup() {
  Serial.begin(115200);
  Wire.begin();
  sht4x.begin(Wire);

  tft.begin();
  tft.setRotation(3);
  tft.setTextSize(2);
  tft.fillScreen(TFT_BLACK);

//  while(!Serial);

  // Set WiFi to station mode and disconnect from an AP if it was previously connected
  WiFi.mode(WIFI_STA);
  WiFi.disconnect();

  tft.drawString("Connecting to WiFi...",20,120);
  WiFi.begin(WIFISSID, PASSWORD);

  while (WiFi.status() != WL_CONNECTED) {
    delay(500);
    WiFi.begin(WIFISSID, PASSWORD);
  }

  tft.fillScreen(TFT_BLACK);
  tft.drawString("Connected to the WiFi",20,120);

  delay(1000);
  client.setServer(mqttBroker, 1883);
  client.setCallback(callback);
}

void loop() {
  read_sht40();    //Reading sht40 sensor values
  send_data();     //Sending data to Ubidots
  delay(5000);
}
Enviar datos del módulo Grove Vision AI a Ubidots
Si quieres enviar datos del módulo Grove Vision AI a Ubidots, pega el código completo a continuación en Arduino y súbelo al Wio Terminal.
#include <PubSubClient.h>
#include <rpcWiFi.h>
#include <TFT_eSPI.h>
#include"LIS3DHTR.h"
#include "Seeed_Arduino_GroveAI.h"

//Required Information
#define WIFISSID "<YOUR-WIFISSD>" // Put your WifiSSID here
#define PASSWORD "<YOUR-WIFI-PASSWORD" // Put your wifi password here
#define TOKEN "<YOUR-UBIDOTS-TOKEN>" // Put your Ubidots' TOKEN
#define VARIABLE_LABEL1 "num" // Assign the variable label
#define VARIABLE_LABEL2 "confidence"
#define DEVICE_LABEL "wio-terminal" // Assign the device label
#define MQTT_CLIENT_NAME "r6y1ax7mq8" // MQTT client Name

const long interval = 100;
unsigned long previousMillis = 0;

char mqttBroker[] = "industrial.api.ubidots.com";

WiFiClient wifiClient;
PubSubClient client(wifiClient);

GroveAI ai(Wire);
uint8_t state = 0;
TFT_eSPI tft = TFT_eSPI();

static int num = 0;
static int conf = 0;

// Space to store values to send
char str_num[6];
char str_conf[6];
char payload[700];
char topic[150];

void callback(char* topic, byte* payload, unsigned int length){
  Serial.print("Message arrived [");
  Serial.print(topic);
  Serial.print("] ");
  for (int i=0;i<length;i++) {
    Serial.print((char)payload[i]);
  }
}

void reconnect() {
  // Loop until we're reconnected
  while (!client.connected()) {
    Serial.println("Attempting MQTT connection...");

  // Attempt to connect
  if (client.connect(MQTT_CLIENT_NAME, TOKEN,"")) {
    Serial.println("connected");
  }
  else {
    Serial.print("failed, rc=");
    Serial.print(client.state());
    Serial.println(" try again in 2 seconds");
    // Wait 2 seconds before retrying
    delay(2000);
    }
  }
}

//Vision AI init
void VisionAI_Init()
{
  Serial.println("begin");
  if (ai.begin(ALGO_OBJECT_DETECTION, MODEL_EXT_INDEX_1)) // Object detection and pre-trained model 1
  {
    state = 1;
  }
  else
  {
    Serial.println("Algo begin failed.");
  }
}

//Read VisionAI values: number of characters recognized, confidence level for each person
void read_VisionAI()
{
  if (state == 1)
  {
    uint32_t tick = millis();
    if (ai.invoke()) // begin invoke
    {
      while (1) // wait for invoking finished
      {
        CMD_STATE_T ret = ai.state();
        if (ret == CMD_STATE_IDLE)
        {
          break;
        }
        delay(20);
      }
      uint8_t len = ai.get_result_len(); // receive how many people detect
      if(len)
      {
         Serial.print("Number of people: ");

         num = len;
         Serial.println(num);

         object_detection_t data;       //get data
         for (int i = 0; i < len; i++)
         {
            ai.get_result(i, (uint8_t*)&data, sizeof(object_detection_t)); //get result
            Serial.print("confidence:");

            conf = data.confidence;
            Serial.println(conf);
          }
      }
     else
     {
       Serial.println("No identification");
       num = 0;
       conf = 0;
     }
   }
    else
    {
      Serial.println("Invoke Failed.");
      num = 0;
      conf = 0;
      delay(1000);
    }
  }
}

void send_data()
{
  dtostrf(num, 4, 0, str_num);
  dtostrf(conf, 4, 0, str_conf);

  if (!client.connected()) {
    reconnect();
  }

  // Builds the topic
  sprintf(topic, "%s", ""); // Cleans the topic content
  sprintf(topic, "%s%s", "/v2.0/devices/", DEVICE_LABEL);

  //Builds the payload
  sprintf(payload, "%s", ""); // Cleans the payload
  sprintf(payload, "{\"%s\":", VARIABLE_LABEL1); // Adds the variable label
  sprintf(payload, "%s%s", payload, str_num); // Adds the value
  sprintf(payload, "%s}", payload); // Closes the dictionary brackets
  client.publish(topic, payload);
  delay(500);

  sprintf(payload, "%s", ""); // Cleans the payload
  sprintf(payload, "{\"%s\":", VARIABLE_LABEL2); // Adds the variable label
  sprintf(payload, "%s%s", payload, str_conf); // Adds the value
  sprintf(payload, "%s}", payload); // Closes the dictionary brackets
  client.publish(topic, payload);
  delay(500);

  client.loop();
}

void setup() {
  Serial.begin(115200);
  Wire.begin();

  tft.begin();
  tft.setRotation(3);
  tft.setTextSize(2);
  tft.fillScreen(TFT_BLACK);
  VisionAI_Init();

  // Set WiFi to station mode and disconnect from an AP if it was previously connected
  WiFi.mode(WIFI_STA);
  WiFi.disconnect();

  tft.drawString("Connecting to WiFi...",20,120);
  WiFi.begin(WIFISSID, PASSWORD);

  while (WiFi.status() != WL_CONNECTED) {
    delay(500);
    WiFi.begin(WIFISSID, PASSWORD);
  }

  tft.fillScreen(TFT_BLACK);
  tft.drawString("Connected to the WiFi",20,120);

  delay(1000);
  client.setServer(mqttBroker, 1883);
  client.setCallback(callback);
}

void loop() {
  read_VisionAI(); //Reading visionai sensor values
  send_data();     //Sending data to Ubidots
  delay(5000);
}
Paneles de Ubidots
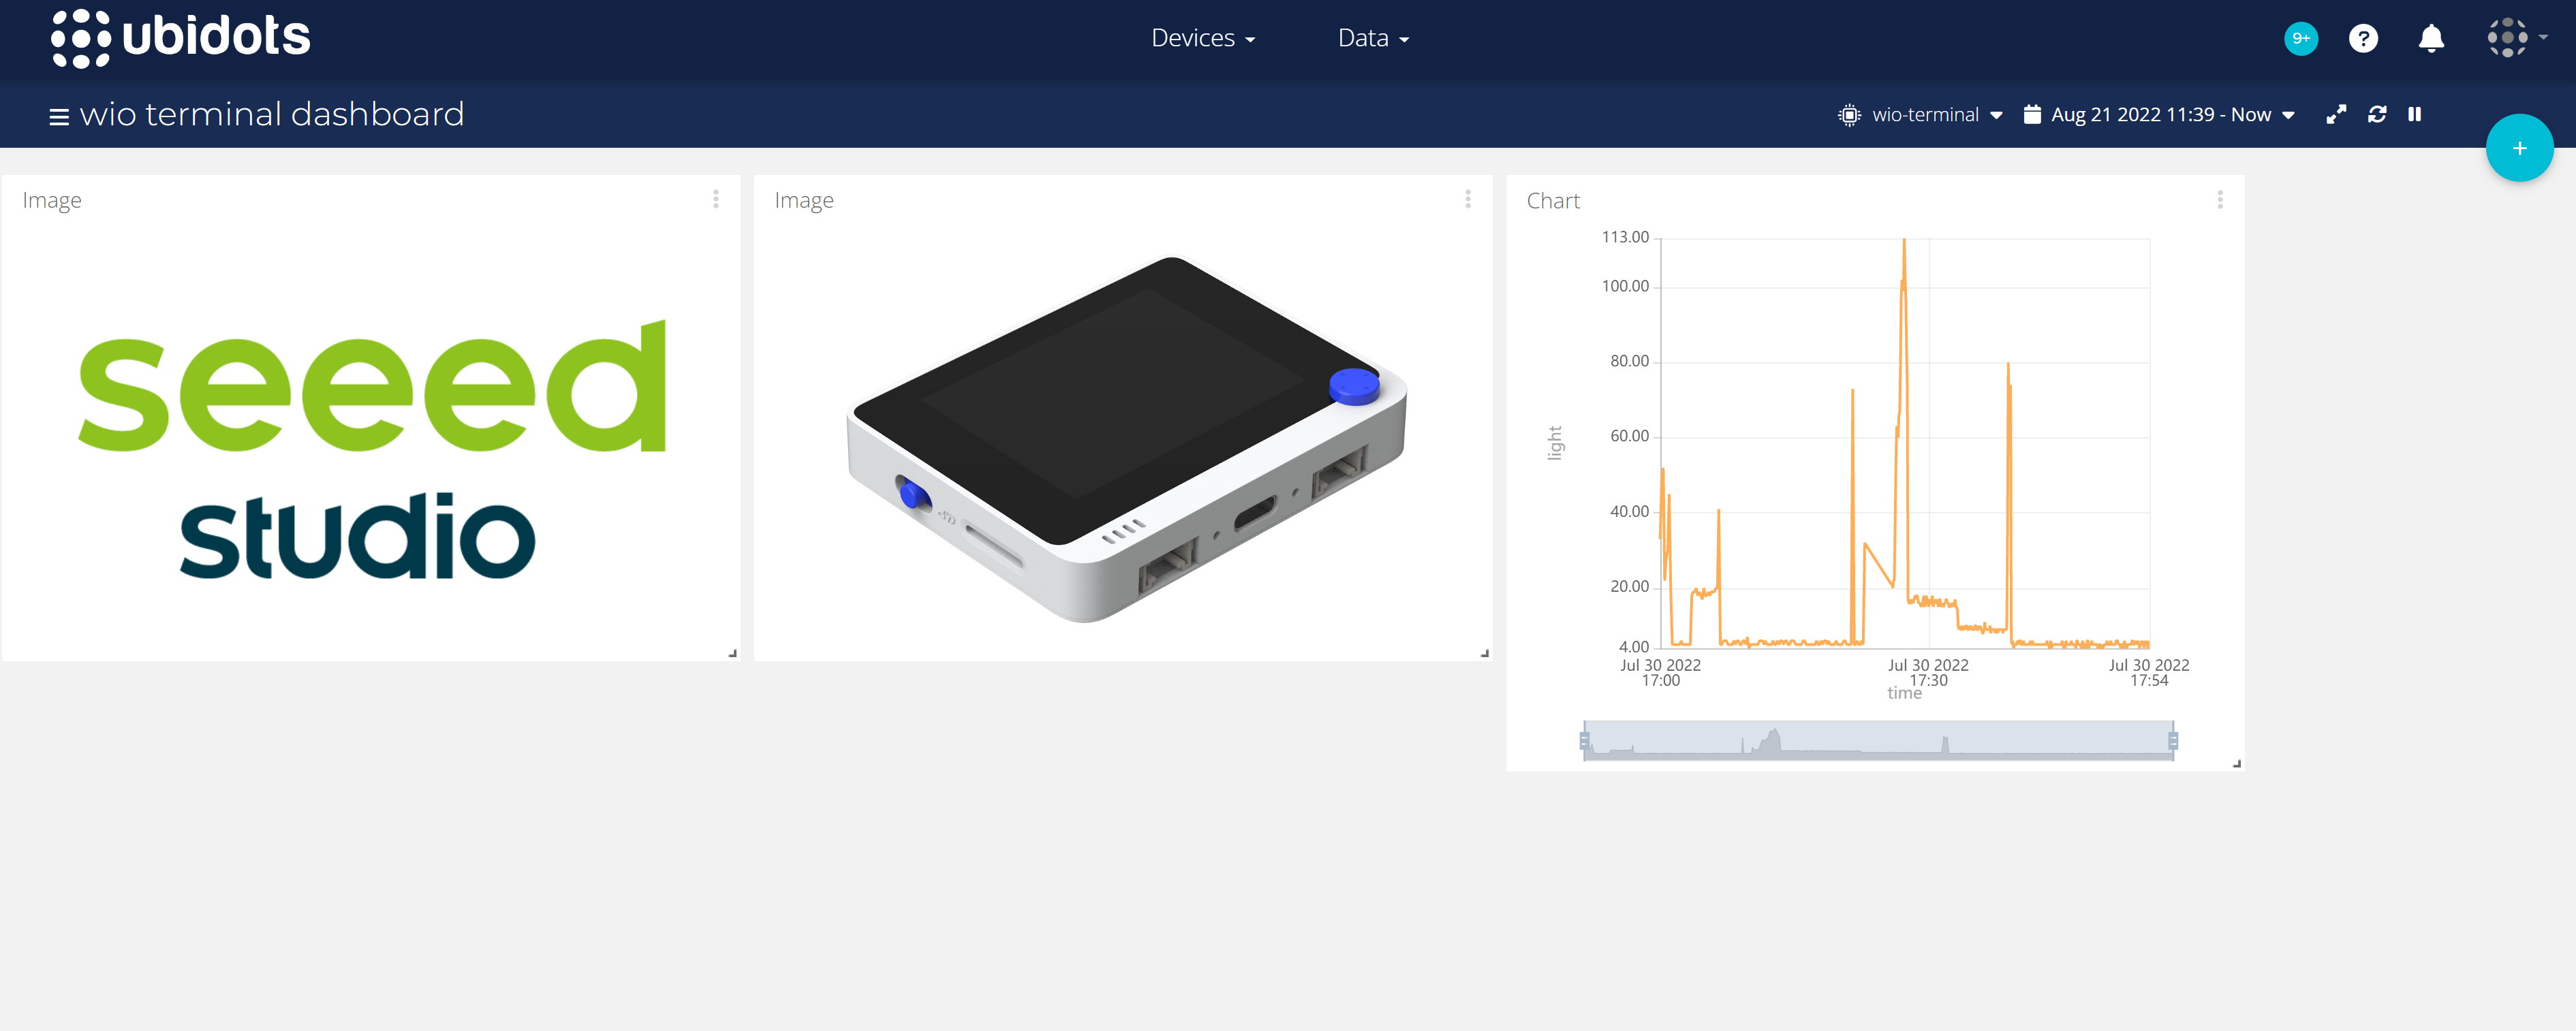
Una vez que el código ha sido subido, podemos prepararnos para configurar el panel de control para ver cómo se han subido los datos.
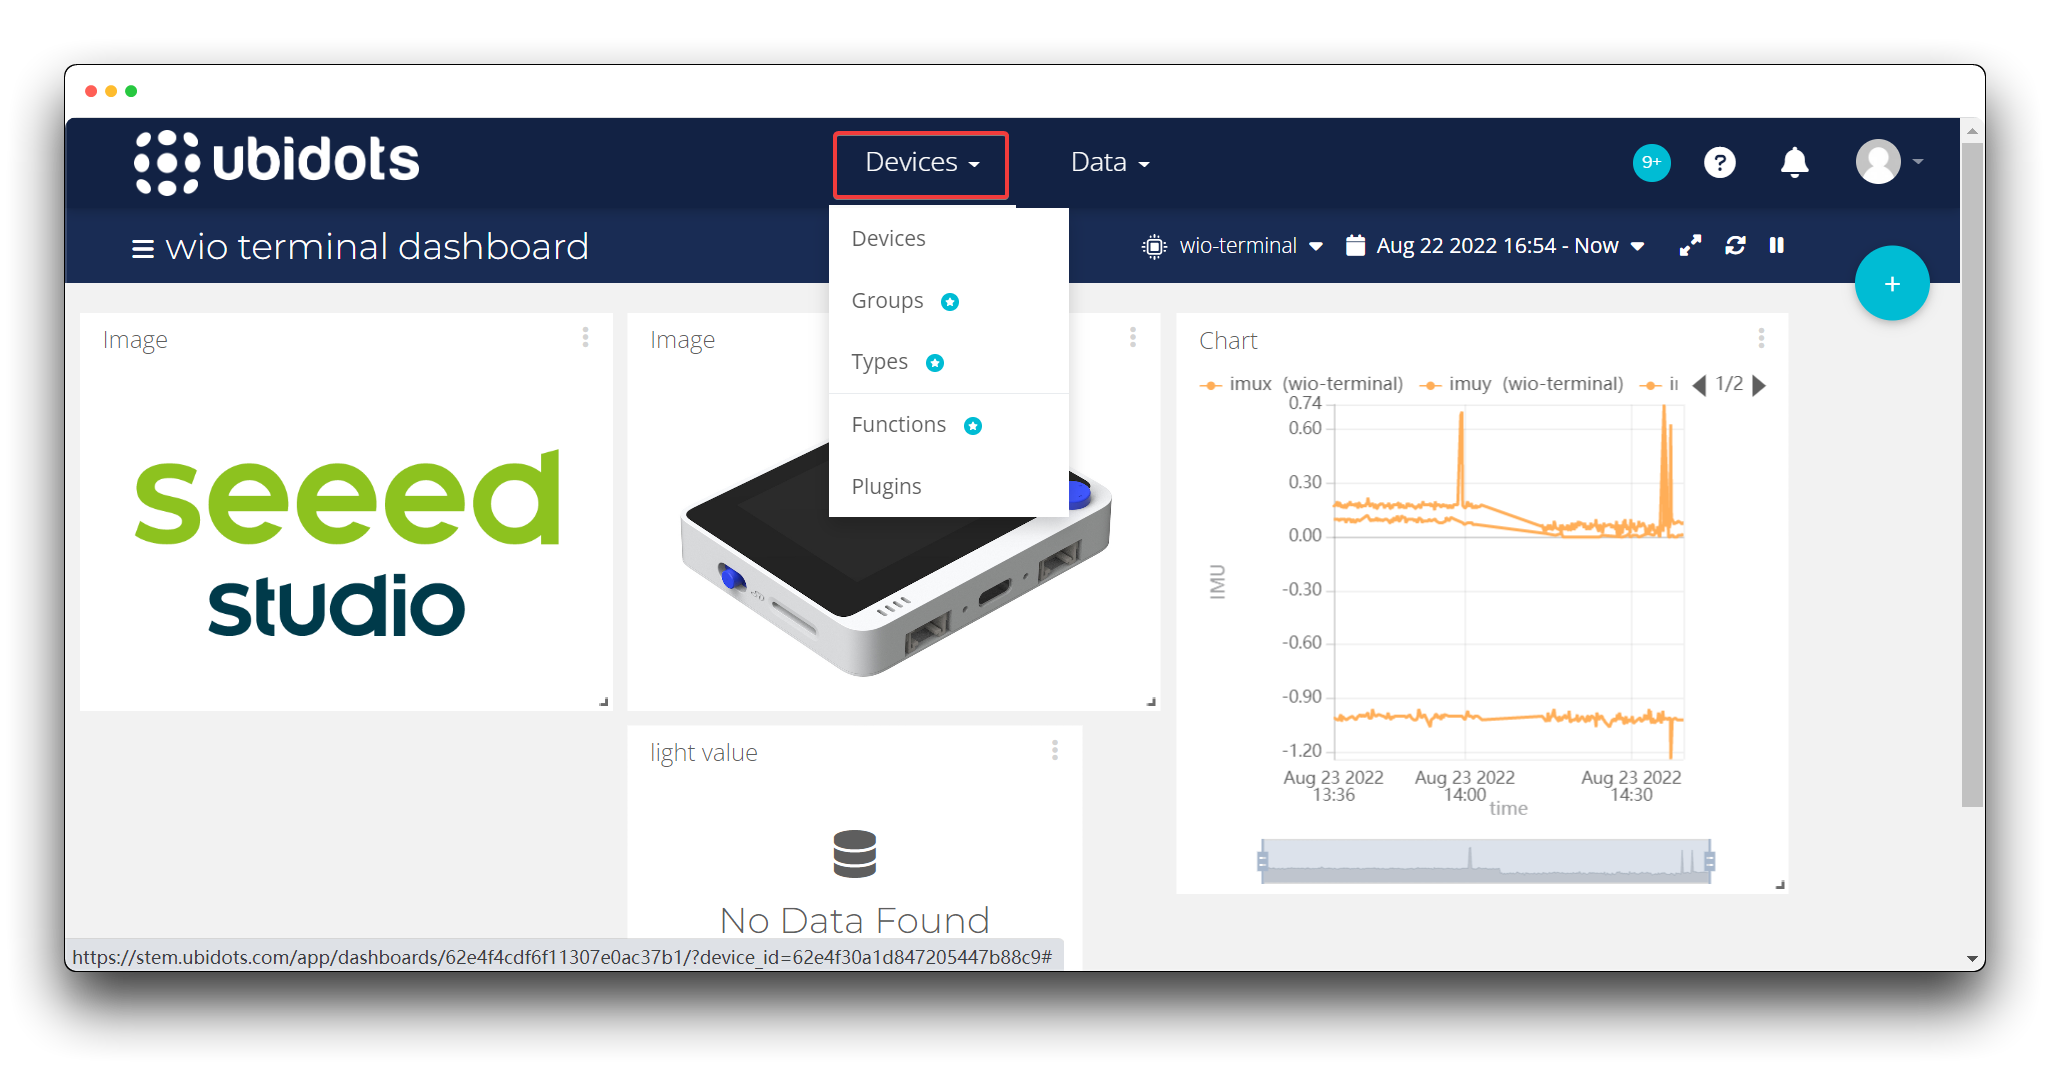
Ubidots tiene una interfaz muy simple y si quieres ver información sobre tu dispositivo, puedes seleccionar Devices justo en la parte superior del panel de control.
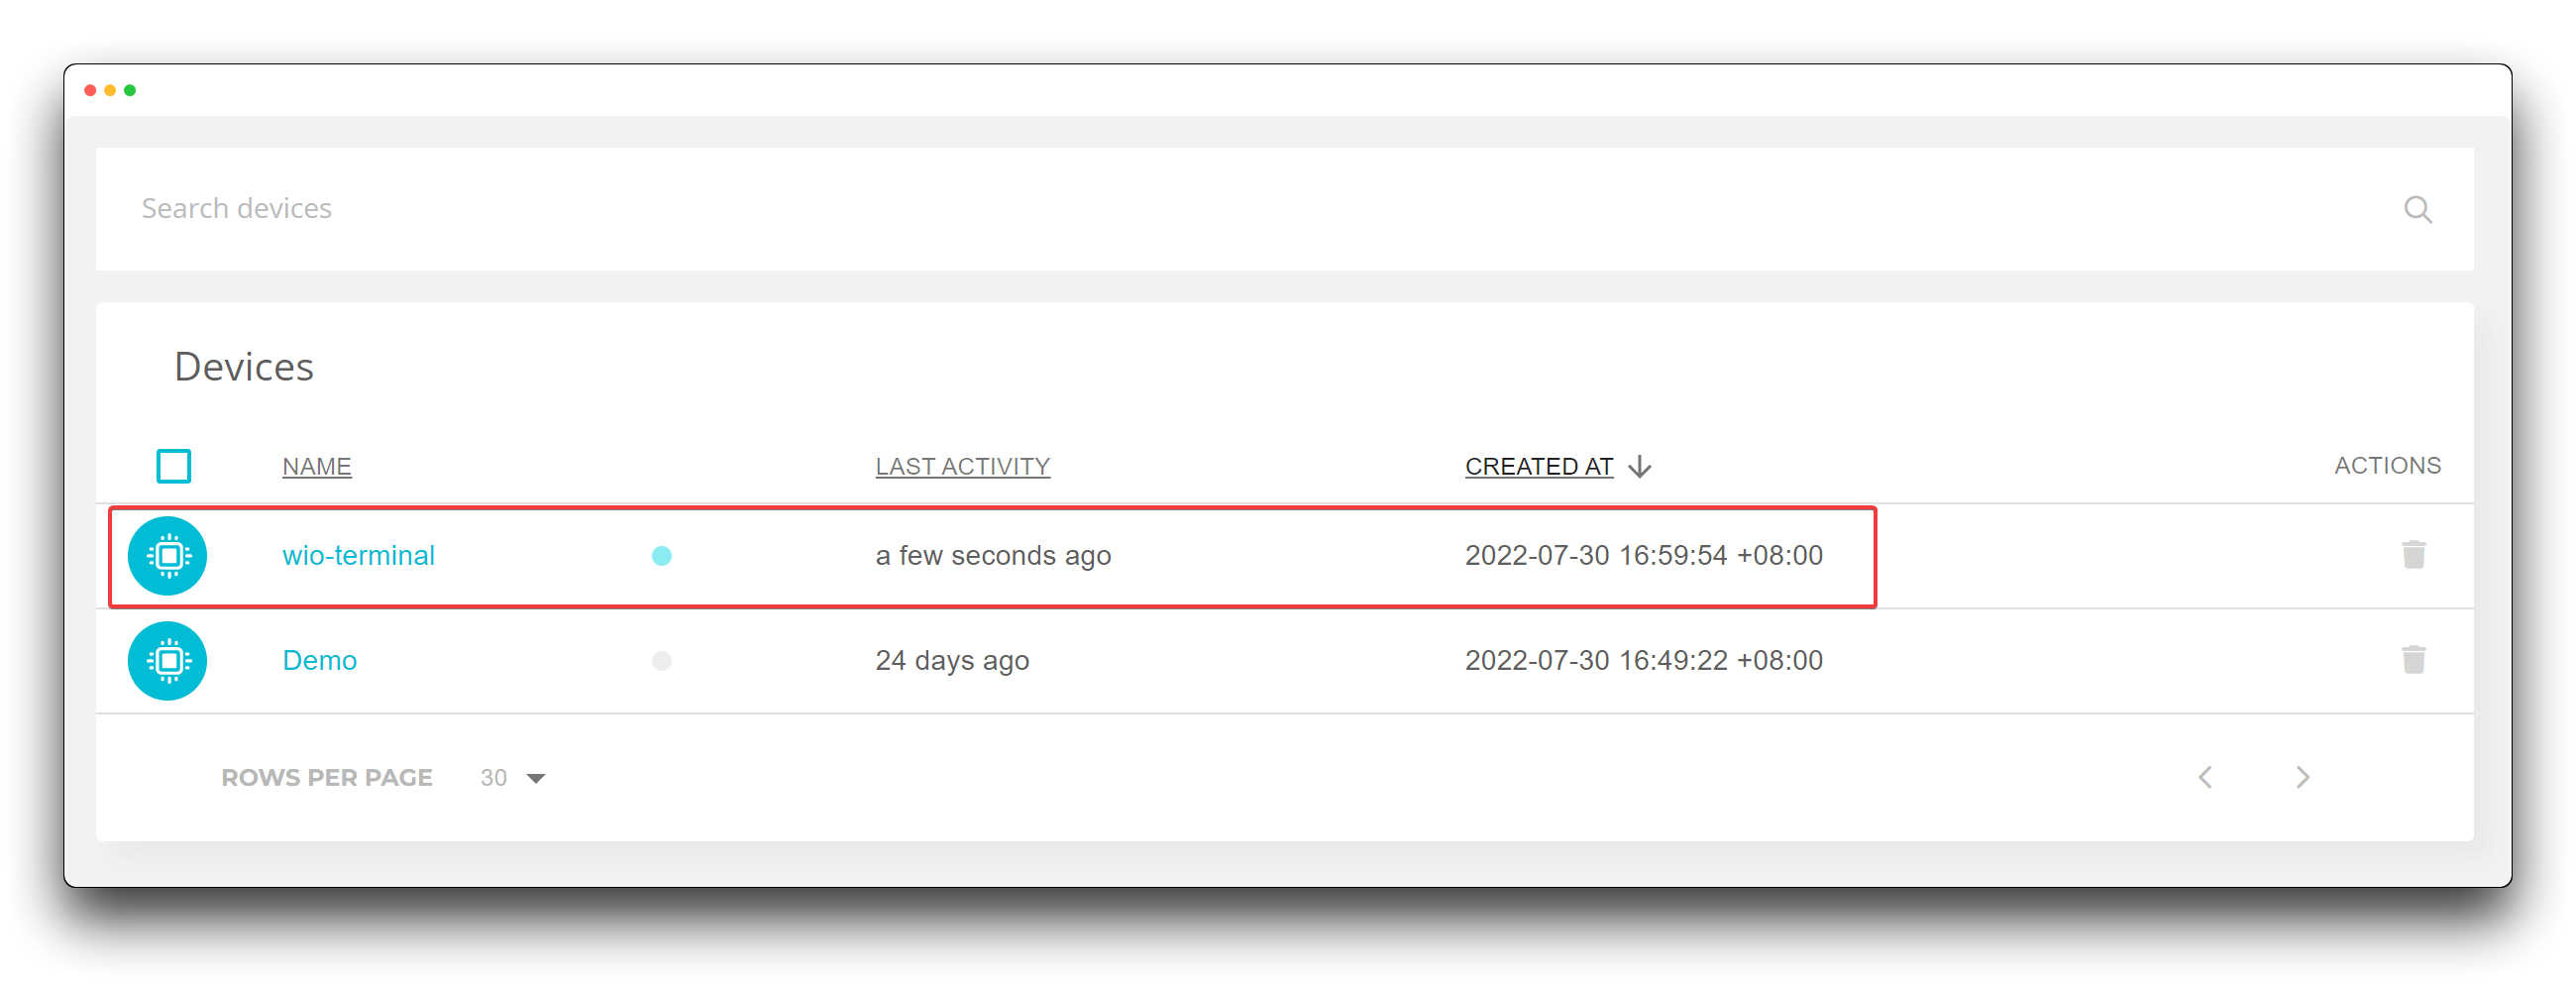
Haz clic en el nombre de tu dispositivo aquí para poder ver todas las pestañas del historial. Esto está determinado por el VARIABLE_LABEL en el código.
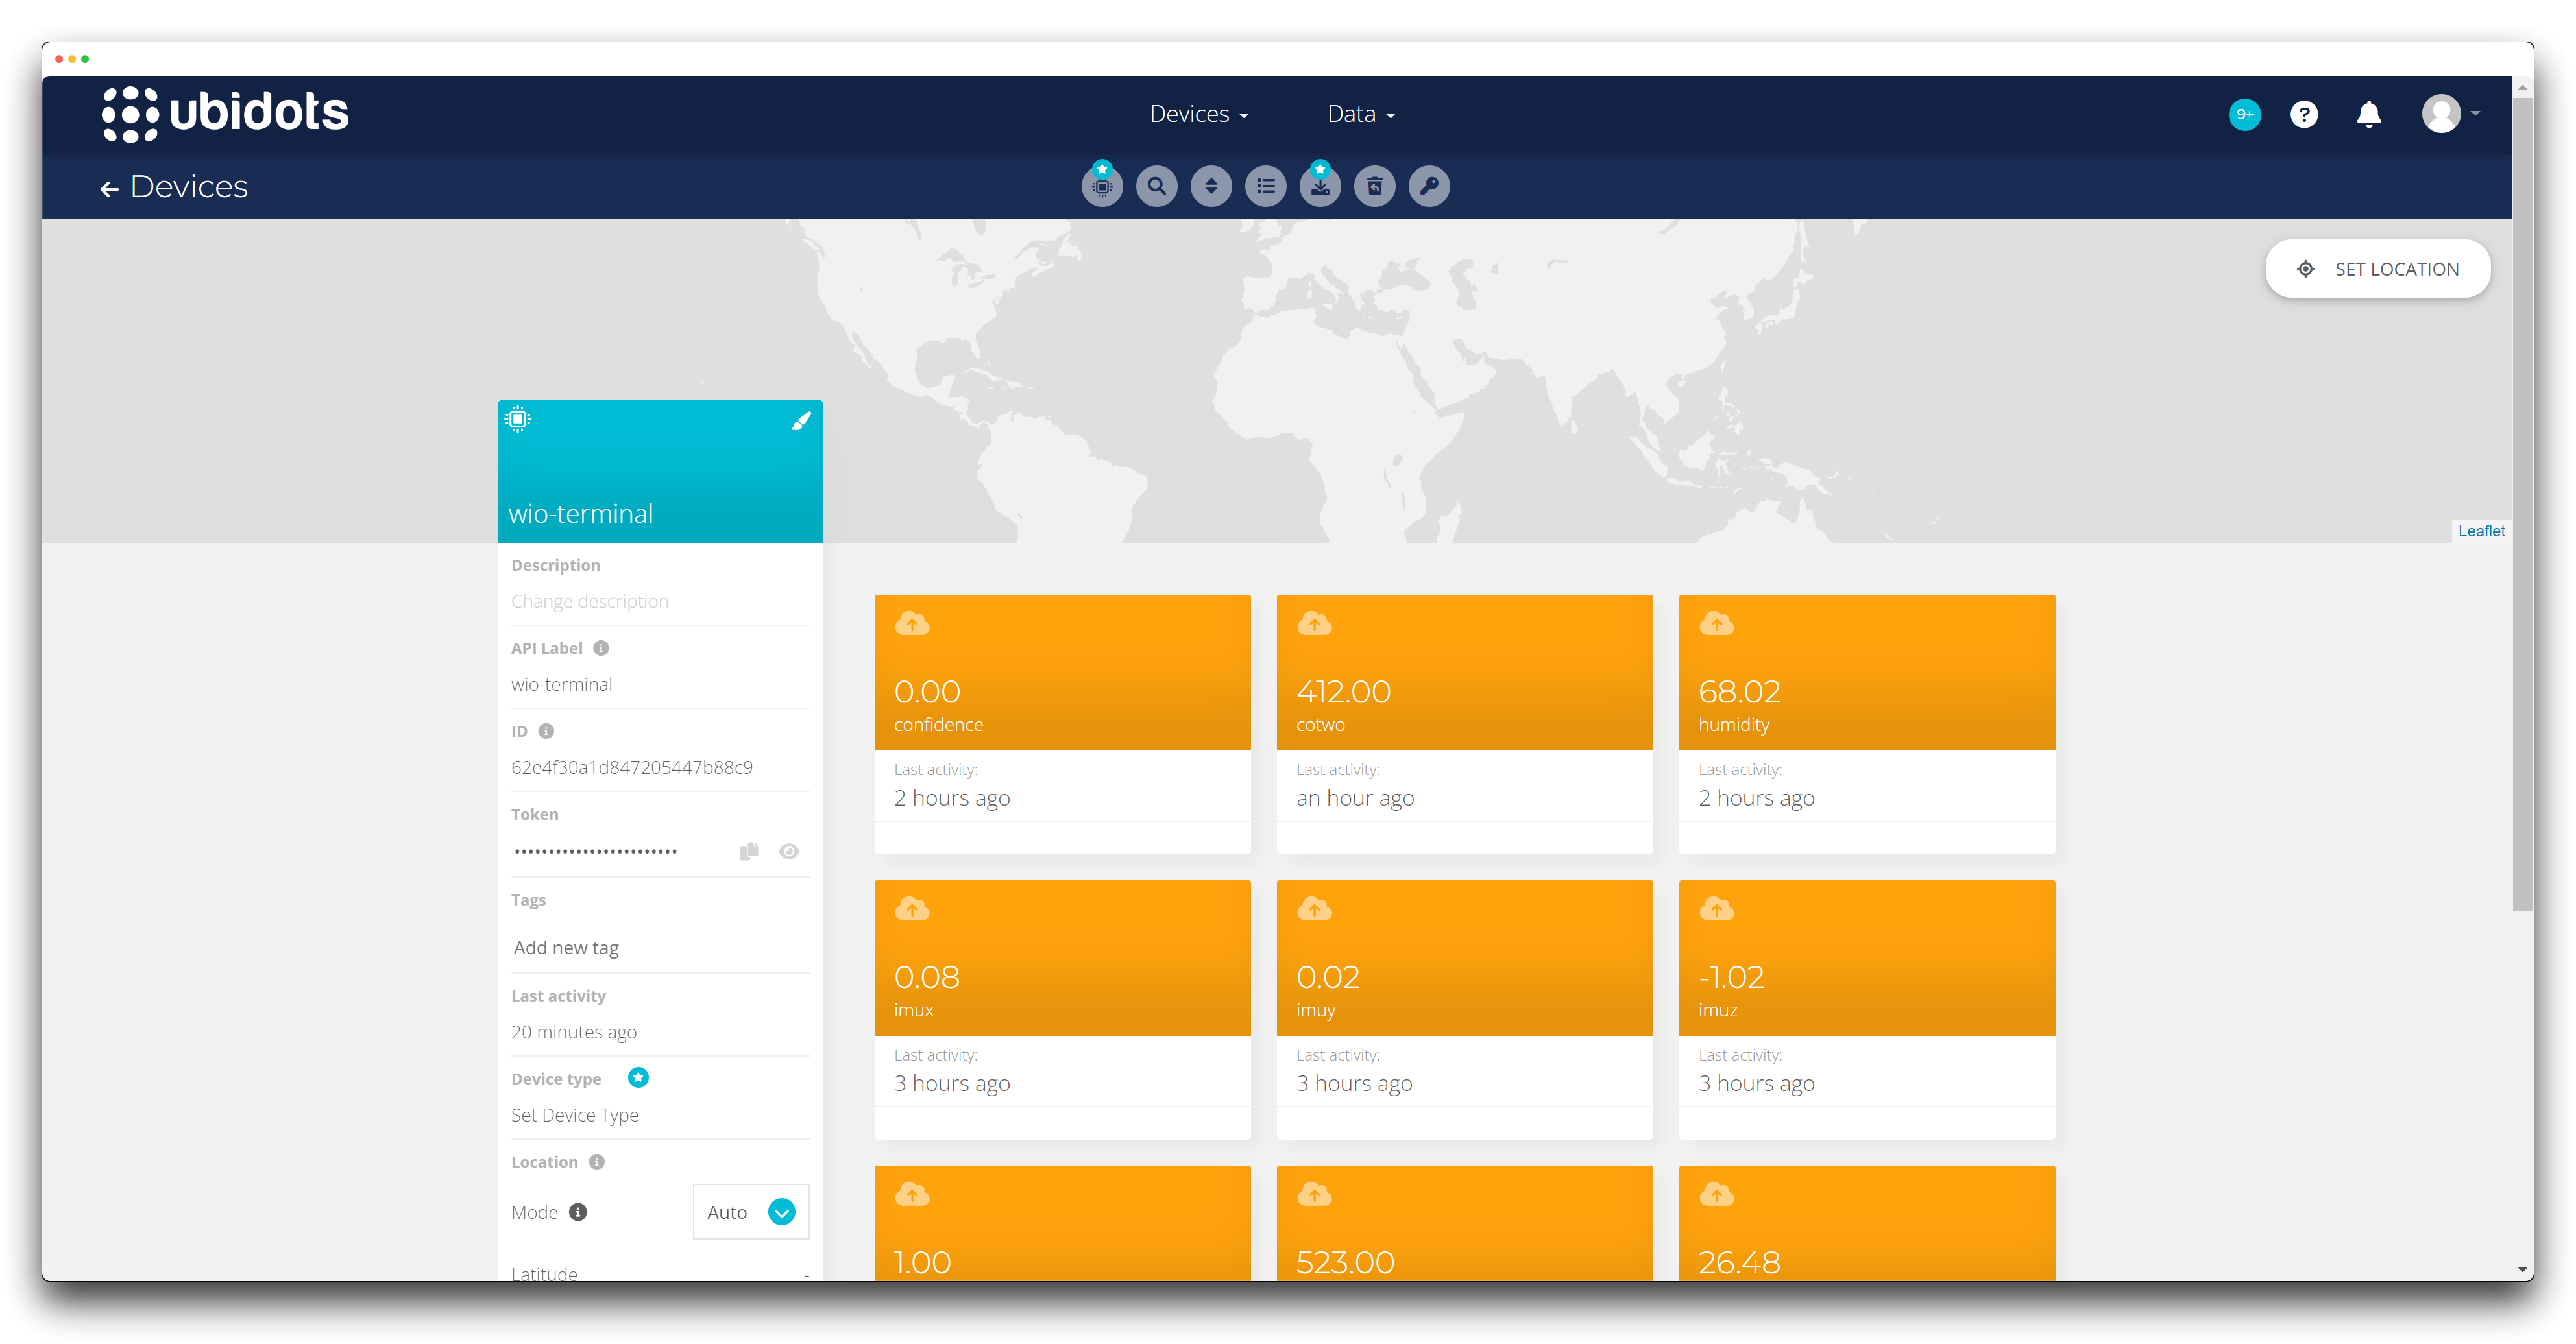
La versión gratuita de Ubidots solo admite la creación de un TOKEN y diez etiquetas. Una vez que tengas más de diez etiquetas, las etiquetas que hayas subido así como los datos serán descartados.
Si quieres ver la información de datos de tu dispositivo, puedes seleccionar Data.
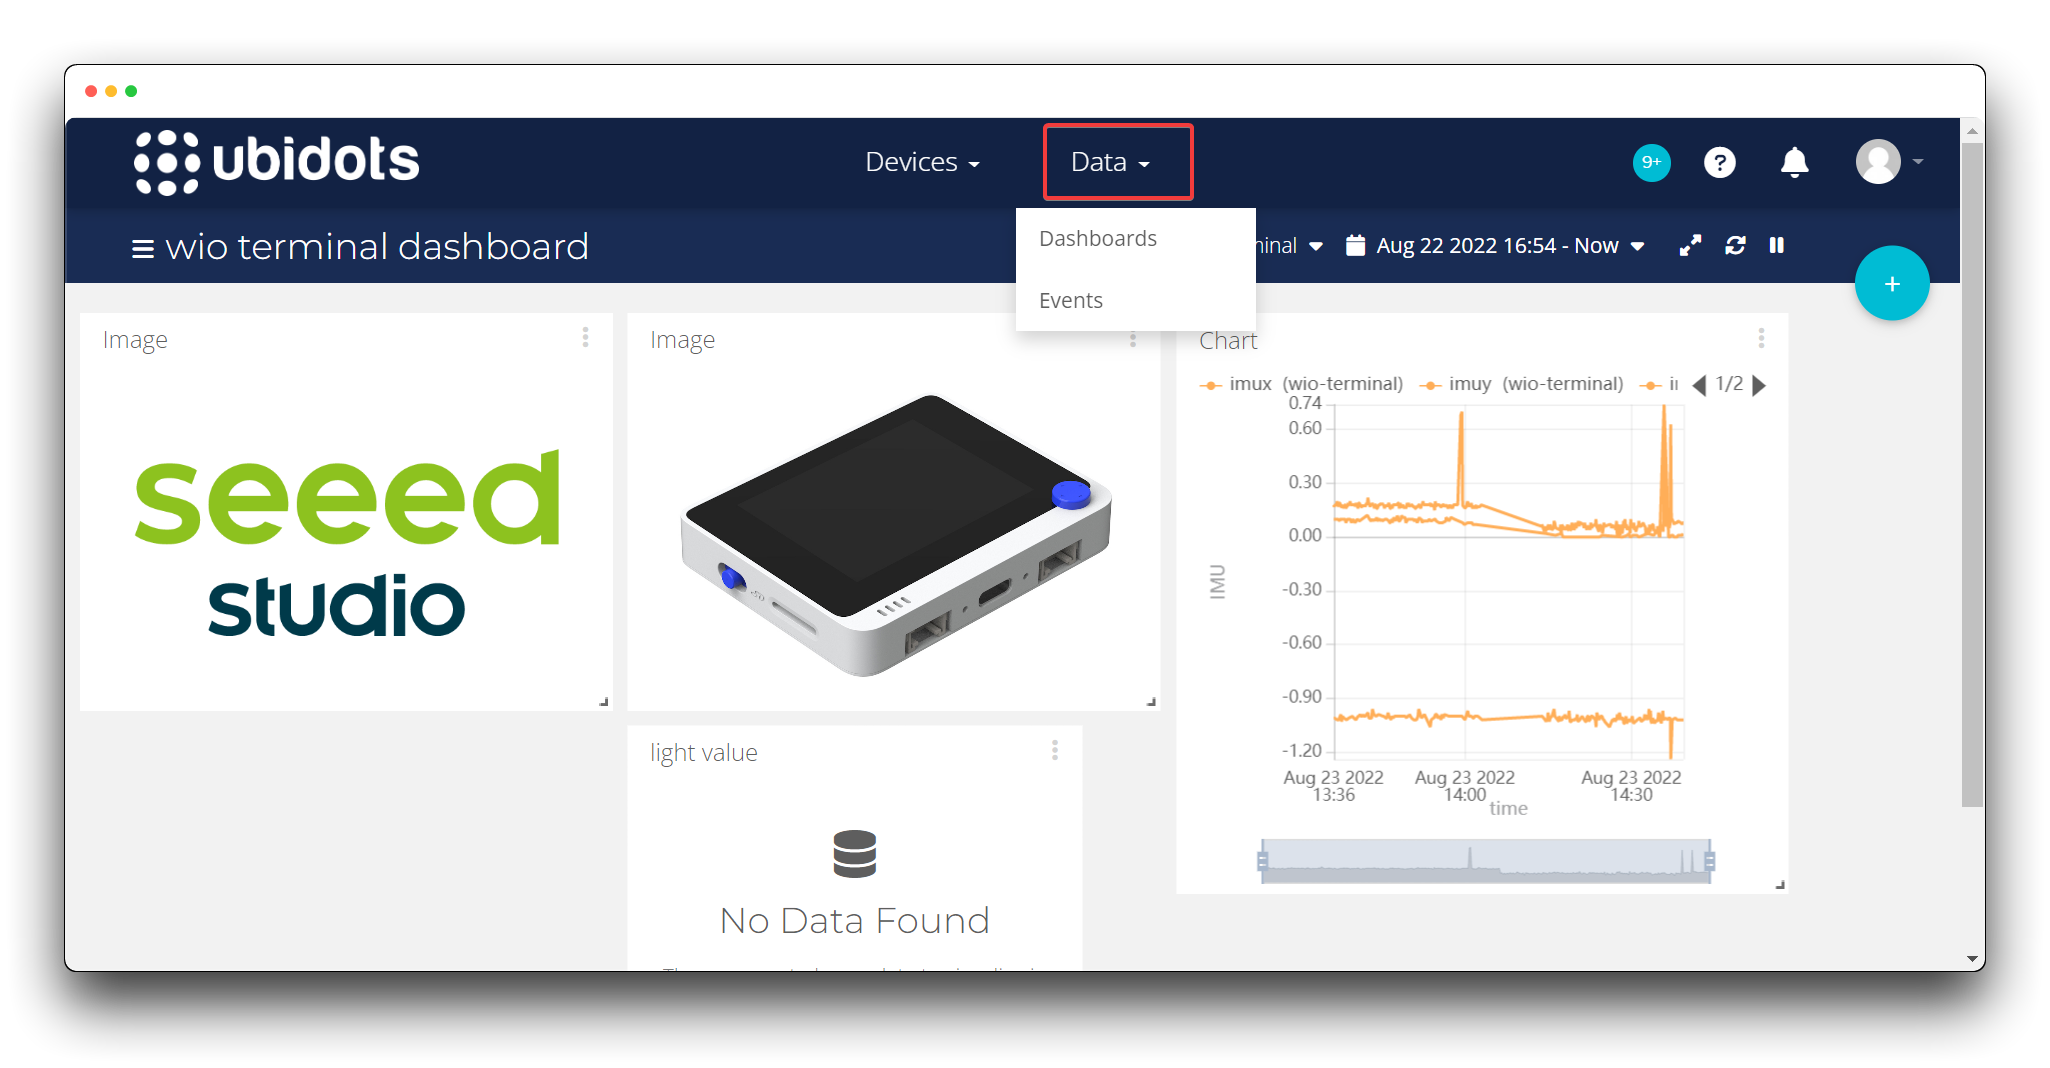
También puedes seleccionar una pantalla de panel de control diferente en la esquina superior izquierda de la página principal. Por defecto para empezar, Ubidots creará automáticamente un panel de control para ti llamado Demo Dashboard. Una vez que el Wio Terminal esté conectado a la red y enviando datos, podrás ver un panel de control llamado wio terminal dashboard. Esto está definido en el código bajo DEVICE_LABEL.

Puedes agregar diferentes paneles bajo el panel de control actual, lo cual requiere que hagas clic en el signo + en la esquina superior derecha.

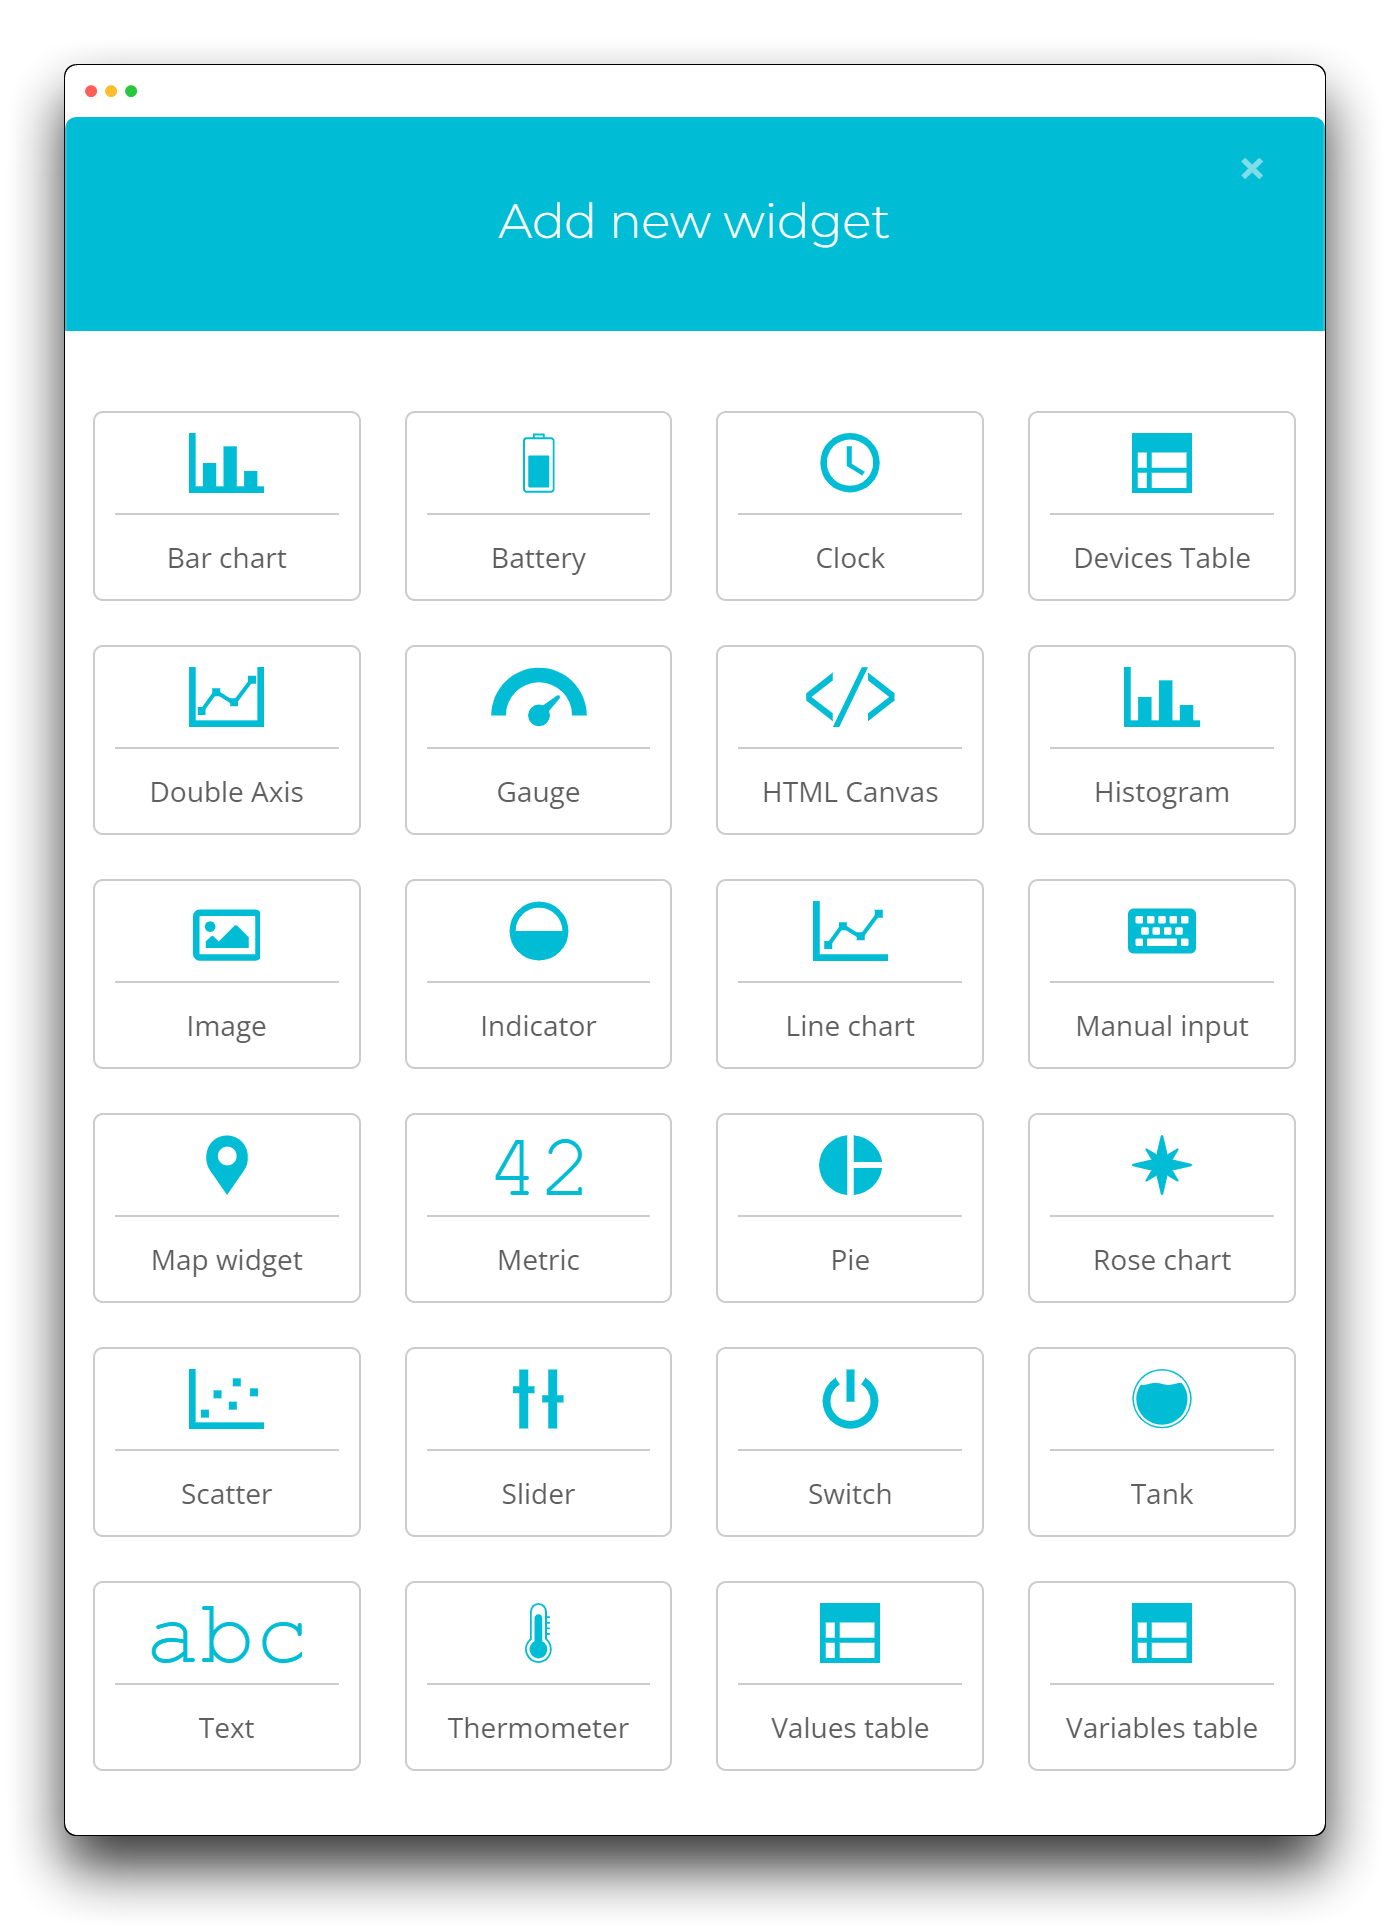
A continuación se muestra una lista de los paneles compatibles con Ubidots.
Tomemos el ejemplo de crear una tabla de gráfico de líneas. Si quieres dibujar un gráfico de líneas de los valores del sensor IMU, entonces necesitas crear tres etiquetas y los nombres de las etiquetas necesitan coincidir con el VARIABLE_LABEL en tu código, luego solo deja todo a Ubidots y se generará automáticamente para ti.
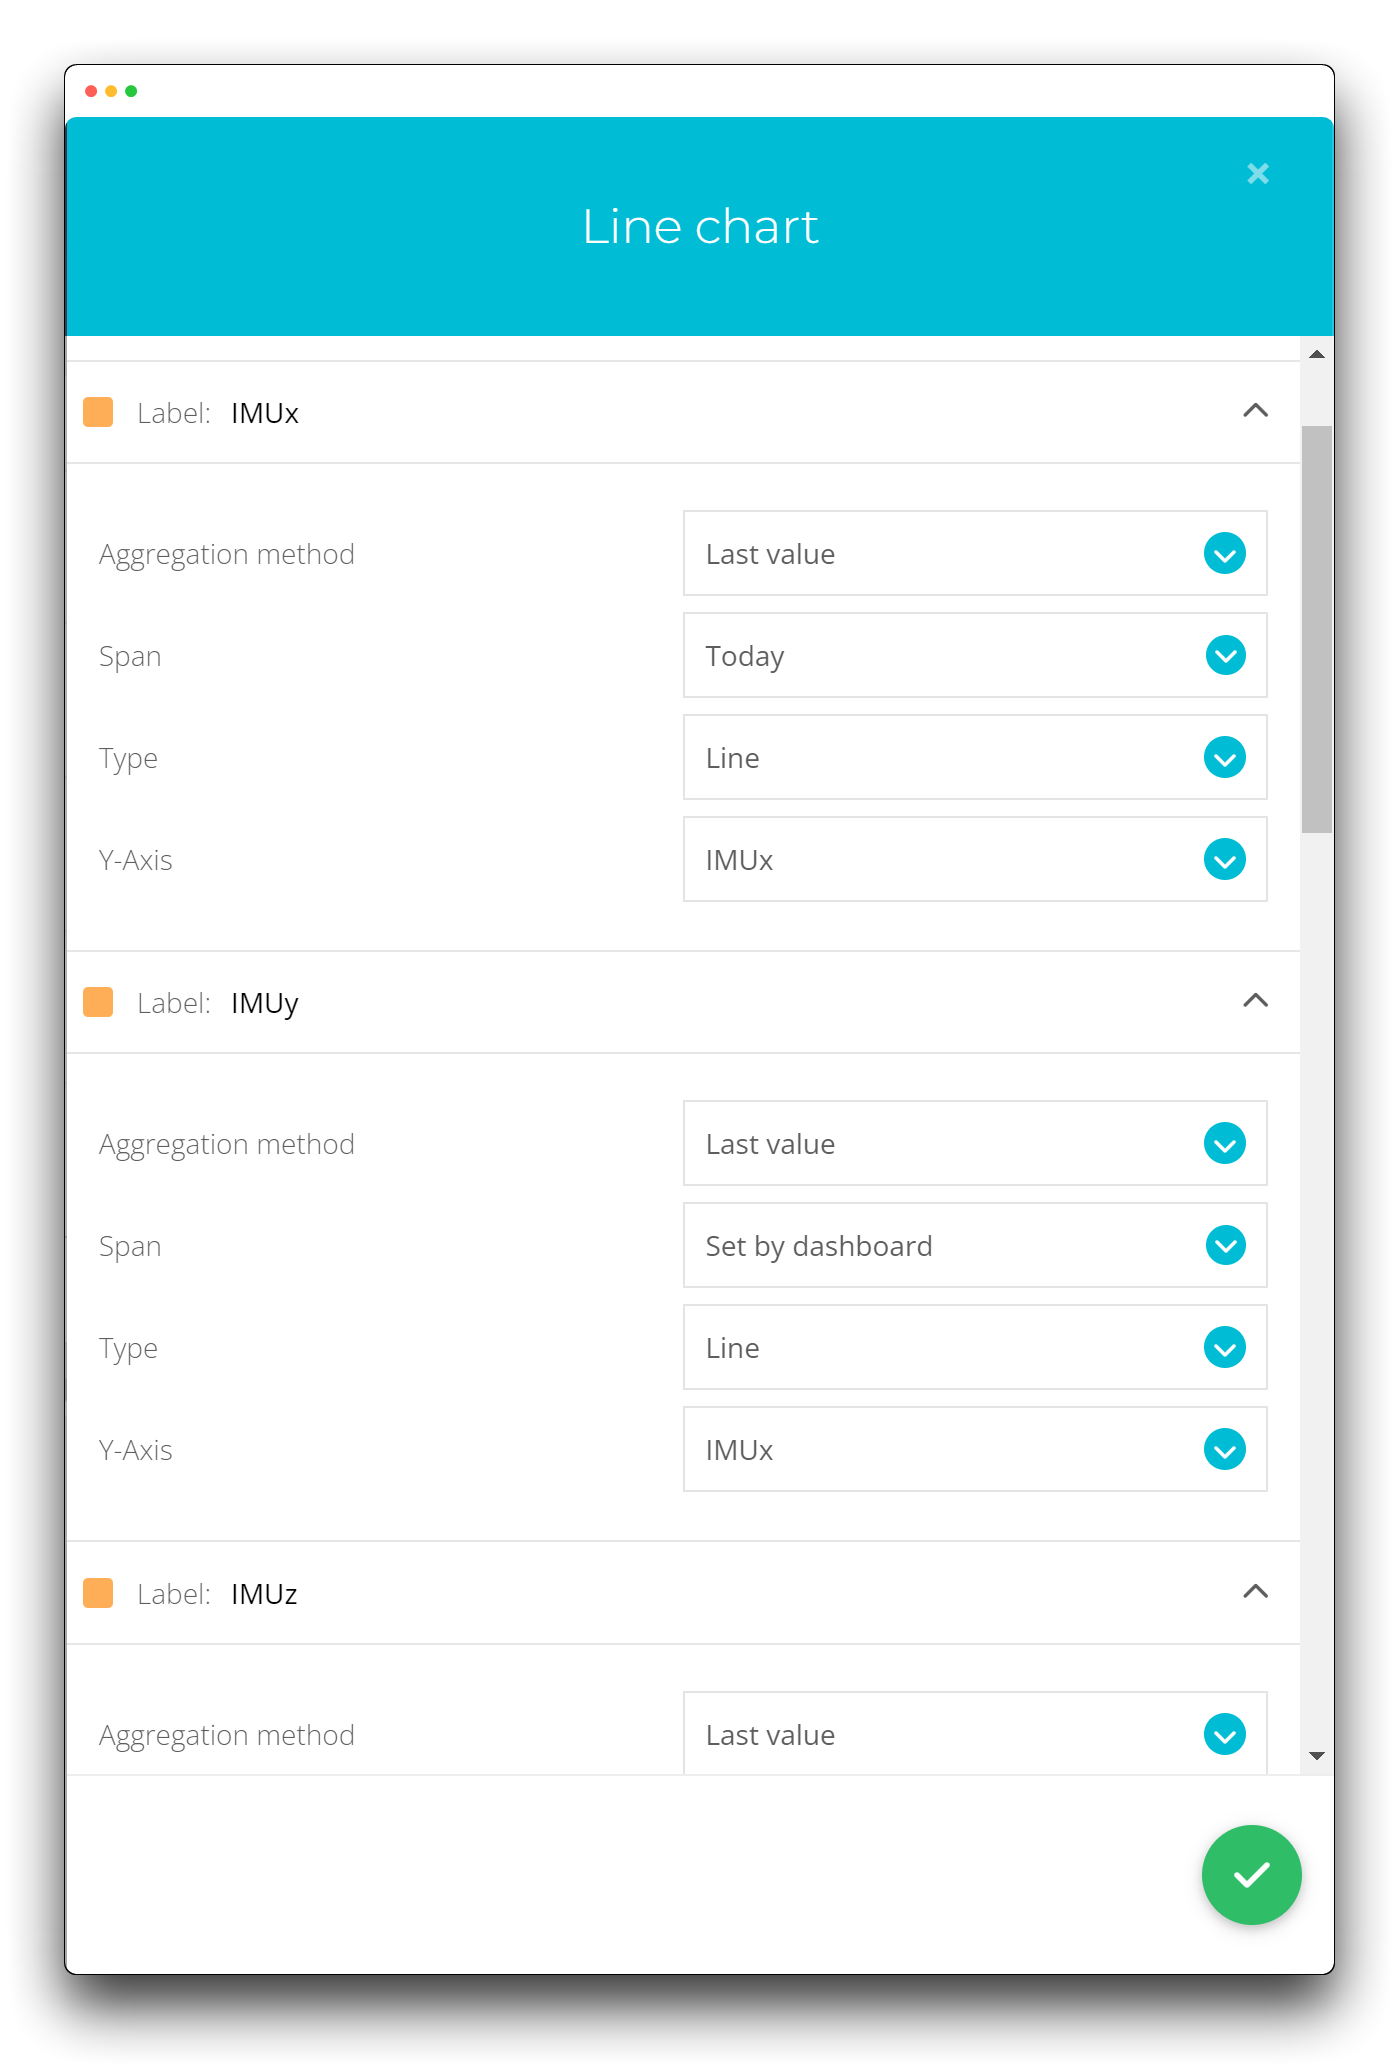
Ubidots también tiene características de personalización muy potentes, como si mostrar valores, el nombre del eje Y y cuántos datos mostrar, todo lo cual puedes explorar libremente.
Recursos
Para todos los códigos utilizados en este tutorial, por favor haz clic en el icono para acceder a ellos.
Soporte Técnico y Discusión de Productos
¡Gracias por elegir nuestros productos! Estamos aquí para brindarte diferentes tipos de soporte para asegurar que tu experiencia con nuestros productos sea lo más fluida posible. Ofrecemos varios canales de comunicación para atender diferentes preferencias y necesidades.
Declaración
- La marca LoRa® es una marca comercial de Semtech Corporation o sus subsidiarias.
- LoRaWAN® es una marca utilizada bajo licencia de LoRa Alliance®.