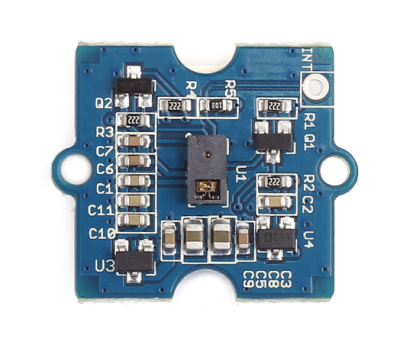
Grove - Gesture V1.0
El sensor en Grove - Gesture es PAJ7620U2 que integra la función de reconocimiento de gestos con interfaz I2C general en un solo chip. Puede reconocer 9 gestos básicos, y esta información de gestos se puede acceder simplemente a través del bus I2C.
Aplicación: Puedes usar Gesture como un dispositivo de entrada para controlar otro grove, o una computadora, teléfono móvil, auto inteligente, robot, y más con un simple movimiento de tu mano.
Características
- Detección de proximidad integrada
- Soporte para varias placas principales: Arduino UNO/Seeeduino/Arduino Mega2560
- 9 gestos básicos
- Arriba
- Abajo
- Izquierda
- Derecha
- Adelante
- Atrás
- Sentido horario
- Sentido antihorario
- Onda
Más detalles sobre los módulos Grove consulte Sistema Grove
Especificaciones
| Nombre de Especificación | Valor |
|---|---|
| Sensor | PAJ7620U2 |
| Fuente de alimentación | 5V |
| Inmunidad a luz ambiental | < 100k Lux |
| Velocidad de gesto en Modo Normal | 60°/s a 600°/s |
| Velocidad de gesto en Modo Gaming | 60°/s a 1200°/s |
| Tipo de interfaz IIC | hasta 400 kbit/s |
| Temperatura de Operación | -40°C a +85°C |
| Dimensiones | 20 * 20mmv |
| Rango de detección | 5-10cm |
| Dirección I2C | 0x73 |
Si quieres usar múltiples dispositivos I2C, por favor consulta Software I2C.
Comenzando
Jugar con Arduino
Hardware
- Paso 1. Prepara los siguientes elementos:
| Seeeduino V4.2 | Base Shield | Grove-Gesture v1.0 |
|---|---|---|
 |  |  |
| Obtener Uno Ahora | Obtener Uno Ahora | Obtener Uno Ahora |
- Paso 2. Conecta Grove-Gesture_v1.0 al puerto I2C del Grove-Base Shield.
- Paso 3. Conecta Grove - Base Shield al Seeeduino.
- Paso 4. Conecta Seeeduino a la PC mediante un cable USB.
Si no tenemos Grove Base Shield, también podemos conectar directamente Grove-Gesture v1.0 al Seeeduino como se muestra a continuación.
| Seeeduino | Grove-Gesture v1.0 |
|---|---|
| 5V | VCC |
| GND | GND |
| SDA | SDA |
| SCL | SCL |
INT:Bandera de máscara de interrupción de detección de gestos. Puedes conectar el pad INT al dígito 2 de Arduino usando un cable puente.
La imagen de abajo muestra cómo conectar Grove - Gesture al puerto I2C del shield Base

Luego conecta el shield Base al Seeeduino

Software
- Paso 1. Descarga la biblioteca desde Github.
- Paso 2. Consulta Cómo instalar biblioteca para instalar la biblioteca para Arduino. Instalación de Software.
- Paso 3. Si no sabes cómo subir el código, por favor revisa cómo subir código.
- Paso 4. Inicia el IDE de Arduino, Probemos la demostración arriba/abajo.
- Paso 5. Copia el código de abajo y pégalo en el IDE de arduino.
/*
The following simple demo will show you a very easy application: When you move up, the red led will be turned on, otherwise the red led will be turned off.
*/
#include <Wire.h>
#include "paj7620.h"

void setup()
{
  paj7620Init();
}

void loop()
{
 uint8_t data = 0;  // Read Bank_0_Reg_0x43/0x44 for gesture result.

 paj7620ReadReg(0x43, 1, &data);  // When different gestures be detected, the variable 'data' will be set to different values by paj7620ReadReg(0x43, 1, &data).

 if (data == GES_UP_FLAG)      // When up gesture be detected,the variable 'data' will be set to GES_UP_FLAG.
  digitalWrite(4, HIGH);      // turn the LED on (HIGH is the voltage level)
 if (data == GES_DOWN_FLAG)      // When down gesture be detected,the variable 'data' will be set to GES_DOWN_FLAG.
        digitalWrite(4, LOW);       // turn the LED off by making the voltage LOW
}
- Paso 6. Selecciona Seeeduino V4 en el administrador de placas y el puerto COM.
- Paso 7. Haz clic en cargar y pon la mano sobre el sensor de gestos hacia arriba y hacia abajo. Verás el led encenderse y apagarse como se muestra a continuación.

- Paso 8. Probemos los 9 gestos seleccionando File->Example->Grove_Gesture->paj7620_9gestures, luego selecciona Seeeduino v4 como administrador de placas y el puerto COM correcto.
#include <Wire.h>
#include "paj7620.h"

/*
Notice: When you want to recognize the Forward/Backward gestures, your gestures' reaction time must less than GES_ENTRY_TIME(0.8s).
        You also can adjust the reaction time according to the actual circumstance.
*/
#define GES_REACTION_TIME  500    // You can adjust the reaction time according to the actual circumstance.
#define GES_ENTRY_TIME   800    // When you want to recognize the Forward/Backward gestures, your gestures' reaction time must less than GES_ENTRY_TIME(0.8s).
#define GES_QUIT_TIME   1000

void setup()
{
 uint8_t error = 0;

 Serial.begin(9600);
 Serial.println("\nPAJ7620U2 TEST DEMO: Recognize 9 gestures.");

 error = paj7620Init();   // initialize Paj7620 registers
 if (error)
 {
  Serial.print("INIT ERROR,CODE:");
  Serial.println(error);
 }
 else
 {
  Serial.println("INIT OK");
 }
 Serial.println("Please input your gestures:\n");
}

void loop()
{
 uint8_t data = 0, data1 = 0, error;

 error = paj7620ReadReg(0x43, 1, &data);    // Read Bank_0_Reg_0x43/0x44 for gesture result.
 if (!error)
 {
  switch (data)          // When different gestures be detected, the variable 'data' will be set to different values by paj7620ReadReg(0x43, 1, &data).
  {
   case GES_RIGHT_FLAG:
    delay(GES_ENTRY_TIME);
    paj7620ReadReg(0x43, 1, &data);
    if(data == GES_FORWARD_FLAG)
    {
     Serial.println("Forward");
     delay(GES_QUIT_TIME);
    }
    else if(data == GES_BACKWARD_FLAG)
    {
     Serial.println("Backward");
     delay(GES_QUIT_TIME);
    }
    else
    {
     Serial.println("Right");
    }
    break;
   case GES_LEFT_FLAG:
    delay(GES_ENTRY_TIME);
    paj7620ReadReg(0x43, 1, &data);
    if(data == GES_FORWARD_FLAG)
    {
     Serial.println("Forward");
     delay(GES_QUIT_TIME);
    }
    else if(data == GES_BACKWARD_FLAG)
    {
     Serial.println("Backward");
     delay(GES_QUIT_TIME);
    }
    else
    {
     Serial.println("Left");
    }
    break;
   case GES_UP_FLAG:
    delay(GES_ENTRY_TIME);
    paj7620ReadReg(0x43, 1, &data);
    if(data == GES_FORWARD_FLAG)
    {
     Serial.println("Forward");
     delay(GES_QUIT_TIME);
    }
    else if(data == GES_BACKWARD_FLAG)
    {
     Serial.println("Backward");
     delay(GES_QUIT_TIME);
    }
    else
    {
     Serial.println("Up");
    }
    break;
   case GES_DOWN_FLAG:
    delay(GES_ENTRY_TIME);
    paj7620ReadReg(0x43, 1, &data);
    if(data == GES_FORWARD_FLAG)
    {
     Serial.println("Forward");
     delay(GES_QUIT_TIME);
    }
    else if(data == GES_BACKWARD_FLAG)
    {
     Serial.println("Backward");
     delay(GES_QUIT_TIME);
    }
    else
    {
     Serial.println("Down");
    }
    break;
   case GES_FORWARD_FLAG:
    Serial.println("Forward");
    delay(GES_QUIT_TIME);
    break;
   case GES_BACKWARD_FLAG:
    Serial.println("Backward");
    delay(GES_QUIT_TIME);
    break;
   case GES_CLOCKWISE_FLAG:
    Serial.println("Clockwise");
    break;
   case GES_COUNT_CLOCKWISE_FLAG:
    Serial.println("anti-clockwise");
    break;
   default:
    paj7620ReadReg(0x44, 1, &data1);
    if (data1 == GES_WAVE_FLAG)
    {
     Serial.println("wave");
    }
    break;
  }
 }
 delay(100);
}
- Paso 9. Haz clic en cargar y abre el puerto del Monitor Serie.
- Paso 10. Este ejemplo puede reconocer 9 gestos y mostrar el resultado, incluyendo mover arriba, mover abajo, mover izquierda, mover derecha, mover adelante, mover atrás, círculo en sentido horario, círculo en sentido antihorario, y onda. Probemos y veamos la salida del puerto COM como se muestra a continuación.
PAJ7620U2 TEST DEMO: Recognize 9 gestures.
INIT SENSOR...
Addr0 =20,  Addr1 =76
wake-up finish.
Set up gaming mode.
Paj7620 initialize register finished.
INIT OK
Please input your gestures:

Left
Left
Up
Right
Up
Up
Down
Up
Down
Down
Up
Right
Left
Cuando quieras reconocer los gestos Adelante/Atrás, el tiempo de reacción de tus gestos debe ser menor que GES_ENTRY_TIME(0.8s). También puedes ajustar el tiempo de reacción según las circunstancias reales.
Jugar con Codecraft
Hardware
Paso 1. Conecta un Grove - Gesture al puerto I2C, y conecta un Grove - Red LED al puerto D4 de un Base Shield.
Paso 2. Conecta el Base Shield a tu Seeeduino/Arduino.
Paso 3. Conecta el Seeeduino/Arduino a tu PC mediante un cable USB.
Software
Paso 1. Abre Codecraft, añade soporte para Arduino, y arrastra un procedimiento principal al área de trabajo.
Si esta es tu primera vez usando Codecraft, consulta también Guía para usar Codecraft con Arduino.
Paso 2. Arrastra bloques como en la imagen de abajo o abre el archivo cdc que se puede descargar al final de esta página.

Sube el programa a tu Arduino/Seeeduino.
Cuando el código termine de subirse, el LED se encenderá cuando hagas un gesto hacia arriba, y se apagará cuando hagas un gesto hacia abajo.
Jugar con Raspberry Pi (Con Grove Base Hat para Raspberry Pi)
Hardware
- Paso 1. Elementos utilizados en este proyecto:
| Raspberry pi | Grove Base Hat para RasPi | Grove - Gesture Sensor |
|---|---|---|
 |  | |
| Consigue UNO Ahora | Consigue UNO Ahora | Consigue UNO Ahora |
- Paso 2. Conecta el Grove Base Hat al Raspberry.
- Paso 3. Conecta el sensor de gestos al puerto I^2^C del Base Hat.
- Paso 4. Conecta el Raspberry Pi a la PC a través del cable USB.

Software
- Paso 1. Sigue Configuración de Software para configurar el entorno de desarrollo.
- Paso 2. Descarga el archivo fuente clonando la biblioteca grove.py.
cd ~
git clone https://github.com/Seeed-Studio/grove.py
- Paso 3. Ejecuta los siguientes comandos para ejecutar el código.
cd grove.py/grove
python3 grove_gesture_sensor.py
A continuación se muestra el código de grove_gesture_sensor.py.
import time,sys
import RPi.GPIO as GPIO
from grove.i2c import Bus

# use the bus that matches your raspi version
rev = GPIO.RPI_REVISION
if rev == 2 or rev == 3:
    bus = Bus(1)
else:
    bus = Bus(0)

class gesture:
 #Registers and variables for the gesture sensor
 GES_REACTION_TIME  =.500    # You can adjust the reaction time according to the actual circumstance.
 GES_ENTRY_TIME   =.800    # When you want to recognize the Forward/Backward gestures, your gestures' reaction time must less than GES_ENTRY_TIME(0.8s).
 GES_QUIT_TIME   =1.000

 BANK0 = 0
 BANK1 = 1

 PAJ7620_ADDR_BASE =0x00

 #REGISTER BANK SELECT
 PAJ7620_REGITER_BANK_SEL  =(PAJ7620_ADDR_BASE + 0xEF) #W

 #DEVICE ID
 PAJ7620_ID  =0x73

 #REGISTER BANK 0
 PAJ7620_ADDR_SUSPEND_CMD  =(PAJ7620_ADDR_BASE + 0x3) #W
 PAJ7620_ADDR_GES_PS_DET_MASK_0 =(PAJ7620_ADDR_BASE + 0x41) #RW
 PAJ7620_ADDR_GES_PS_DET_MASK_1 =(PAJ7620_ADDR_BASE + 0x42) #RW
 PAJ7620_ADDR_GES_PS_DET_FLAG_0 =(PAJ7620_ADDR_BASE + 0x43) #R
 PAJ7620_ADDR_GES_PS_DET_FLAG_1 =(PAJ7620_ADDR_BASE + 0x44) #R
 PAJ7620_ADDR_STATE_INDICATOR =(PAJ7620_ADDR_BASE + 0x45) #R
 PAJ7620_ADDR_PS_HIGH_THRESHOLD =(PAJ7620_ADDR_BASE + 0x69) #RW
 PAJ7620_ADDR_PS_LOW_THRESHOLD =(PAJ7620_ADDR_BASE + 0x6A) #RW
 PAJ7620_ADDR_PS_APPROACH_STATE =(PAJ7620_ADDR_BASE + 0x6B) #R
 PAJ7620_ADDR_PS_RAW_DATA  =(PAJ7620_ADDR_BASE + 0x6C) #R

 #REGISTER BANK 1
 PAJ7620_ADDR_PS_GAIN   =(PAJ7620_ADDR_BASE + 0x44) #RW
 PAJ7620_ADDR_IDLE_S1_STEP_0  =(PAJ7620_ADDR_BASE + 0x67) #RW
 PAJ7620_ADDR_IDLE_S1_STEP_1  =(PAJ7620_ADDR_BASE + 0x68) #RW
 PAJ7620_ADDR_IDLE_S2_STEP_0  =(PAJ7620_ADDR_BASE + 0x69) #RW
 PAJ7620_ADDR_IDLE_S2_STEP_1  =(PAJ7620_ADDR_BASE + 0x6A) #RW
 PAJ7620_ADDR_OP_TO_S1_STEP_0 =(PAJ7620_ADDR_BASE + 0x6B) #RW
 PAJ7620_ADDR_OP_TO_S1_STEP_1 =(PAJ7620_ADDR_BASE + 0x6C) #RW
 PAJ7620_ADDR_OP_TO_S2_STEP_0 =(PAJ7620_ADDR_BASE + 0x6D) #RW
 PAJ7620_ADDR_OP_TO_S2_STEP_1 =(PAJ7620_ADDR_BASE + 0x6E) #RW
 PAJ7620_ADDR_OPERATION_ENABLE =(PAJ7620_ADDR_BASE + 0x72) #RW

 #PAJ7620_REGITER_BANK_SEL
 PAJ7620_BANK0=0
 PAJ7620_BANK1=1

 #PAJ7620_ADDR_SUSPEND_CMD
 PAJ7620_I2C_WAKEUP =1
 PAJ7620_I2C_SUSPEND =0

 #PAJ7620_ADDR_OPERATION_ENABLE
 PAJ7620_ENABLE=1
 PAJ7620_DISABLE=0

 #ADC, delete
 REG_ADDR_RESULT = 0x00
 REG_ADDR_ALERT  = 0x01
 REG_ADDR_CONFIG = 0x02
 REG_ADDR_LIMITL = 0x03
 REG_ADDR_LIMITH = 0x04
 REG_ADDR_HYST   = 0x05
 REG_ADDR_CONVL  = 0x06
 REG_ADDR_CONVH  = 0x07

 GES_RIGHT_FLAG    =1<<0
 GES_LEFT_FLAG    =1<<1
 GES_UP_FLAG     =1<<2
 GES_DOWN_FLAG    =1<<3
 GES_FORWARD_FLAG   =1<<4
 GES_BACKWARD_FLAG   =1<<5
 GES_CLOCKWISE_FLAG   =1<<6
 GES_COUNT_CLOCKWISE_FLAG =1<<7
 GES_WAVE_FLAG    =1<<0

 #Gesture output
 FORWARD   = 1
 BACKWARD   = 2
 RIGHT   = 3
 LEFT   = 4
 UP    = 5
 DOWN   = 6
 CLOCKWISE  = 7
 ANTI_CLOCKWISE = 8
 WAVE   = 9

 #Initial register state
 initRegisterArray=( [0xEF,0x00],
      [0x32,0x29],
      [0x33,0x01],
      [0x34,0x00],
      [0x35,0x01],
      [0x36,0x00],
      [0x37,0x07],
      [0x38,0x17],
      [0x39,0x06],
      [0x3A,0x12],
      [0x3F,0x00],
      [0x40,0x02],
      [0x41,0xFF],
      [0x42,0x01],
      [0x46,0x2D],
      [0x47,0x0F],
      [0x48,0x3C],
      [0x49,0x00],
      [0x4A,0x1E],
      [0x4B,0x00],
      [0x4C,0x20],
      [0x4D,0x00],
      [0x4E,0x1A],
      [0x4F,0x14],
      [0x50,0x00],
      [0x51,0x10],
      [0x52,0x00],
      [0x5C,0x02],
      [0x5D,0x00],
      [0x5E,0x10],
      [0x5F,0x3F],
      [0x60,0x27],
      [0x61,0x28],
      [0x62,0x00],
      [0x63,0x03],
      [0x64,0xF7],
      [0x65,0x03],
      [0x66,0xD9],
      [0x67,0x03],
      [0x68,0x01],
      [0x69,0xC8],
      [0x6A,0x40],
      [0x6D,0x04],
      [0x6E,0x00],
      [0x6F,0x00],
      [0x70,0x80],
      [0x71,0x00],
      [0x72,0x00],
      [0x73,0x00],
      [0x74,0xF0],
      [0x75,0x00],
      [0x80,0x42],
      [0x81,0x44],
      [0x82,0x04],
      [0x83,0x20],
      [0x84,0x20],
      [0x85,0x00],
      [0x86,0x10],
      [0x87,0x00],
      [0x88,0x05],
      [0x89,0x18],
      [0x8A,0x10],
      [0x8B,0x01],
      [0x8C,0x37],
      [0x8D,0x00],
      [0x8E,0xF0],
      [0x8F,0x81],
      [0x90,0x06],
      [0x91,0x06],
      [0x92,0x1E],
      [0x93,0x0D],
      [0x94,0x0A],
      [0x95,0x0A],
      [0x96,0x0C],
      [0x97,0x05],
      [0x98,0x0A],
      [0x99,0x41],
      [0x9A,0x14],
      [0x9B,0x0A],
      [0x9C,0x3F],
      [0x9D,0x33],
      [0x9E,0xAE],
      [0x9F,0xF9],
      [0xA0,0x48],
      [0xA1,0x13],
      [0xA2,0x10],
      [0xA3,0x08],
      [0xA4,0x30],
      [0xA5,0x19],
      [0xA6,0x10],
      [0xA7,0x08],
      [0xA8,0x24],
      [0xA9,0x04],
      [0xAA,0x1E],
      [0xAB,0x1E],
      [0xCC,0x19],
      [0xCD,0x0B],
      [0xCE,0x13],
      [0xCF,0x64],
      [0xD0,0x21],
      [0xD1,0x0F],
      [0xD2,0x88],
      [0xE0,0x01],
      [0xE1,0x04],
      [0xE2,0x41],
      [0xE3,0xD6],
      [0xE4,0x00],
      [0xE5,0x0C],
      [0xE6,0x0A],
      [0xE7,0x00],
      [0xE8,0x00],
      [0xE9,0x00],
      [0xEE,0x07],
      [0xEF,0x01],
      [0x00,0x1E],
      [0x01,0x1E],
      [0x02,0x0F],
      [0x03,0x10],
      [0x04,0x02],
      [0x05,0x00],
      [0x06,0xB0],
      [0x07,0x04],
      [0x08,0x0D],
      [0x09,0x0E],
      [0x0A,0x9C],
      [0x0B,0x04],
      [0x0C,0x05],
      [0x0D,0x0F],
      [0x0E,0x02],
      [0x0F,0x12],
      [0x10,0x02],
      [0x11,0x02],
      [0x12,0x00],
      [0x13,0x01],
      [0x14,0x05],
      [0x15,0x07],
      [0x16,0x05],
      [0x17,0x07],
      [0x18,0x01],
      [0x19,0x04],
      [0x1A,0x05],
      [0x1B,0x0C],
      [0x1C,0x2A],
      [0x1D,0x01],
      [0x1E,0x00],
      [0x21,0x00],
      [0x22,0x00],
      [0x23,0x00],
      [0x25,0x01],
      [0x26,0x00],
      [0x27,0x39],
      [0x28,0x7F],
      [0x29,0x08],
      [0x30,0x03],
      [0x31,0x00],
      [0x32,0x1A],
      [0x33,0x1A],
      [0x34,0x07],
      [0x35,0x07],
      [0x36,0x01],
      [0x37,0xFF],
      [0x38,0x36],
      [0x39,0x07],
      [0x3A,0x00],
      [0x3E,0xFF],
      [0x3F,0x00],
      [0x40,0x77],
      [0x41,0x40],
      [0x42,0x00],
      [0x43,0x30],
      [0x44,0xA0],
      [0x45,0x5C],
      [0x46,0x00],
      [0x47,0x00],
      [0x48,0x58],
      [0x4A,0x1E],
      [0x4B,0x1E],
      [0x4C,0x00],
      [0x4D,0x00],
      [0x4E,0xA0],
      [0x4F,0x80],
      [0x50,0x00],
      [0x51,0x00],
      [0x52,0x00],
      [0x53,0x00],
      [0x54,0x00],
      [0x57,0x80],
      [0x59,0x10],
      [0x5A,0x08],
      [0x5B,0x94],
      [0x5C,0xE8],
      [0x5D,0x08],
      [0x5E,0x3D],
      [0x5F,0x99],
      [0x60,0x45],
      [0x61,0x40],
      [0x63,0x2D],
      [0x64,0x02],
      [0x65,0x96],
      [0x66,0x00],
      [0x67,0x97],
      [0x68,0x01],
      [0x69,0xCD],
      [0x6A,0x01],
      [0x6B,0xB0],
      [0x6C,0x04],
      [0x6D,0x2C],
      [0x6E,0x01],
      [0x6F,0x32],
      [0x71,0x00],
      [0x72,0x01],
      [0x73,0x35],
      [0x74,0x00],
      [0x75,0x33],
      [0x76,0x31],
      [0x77,0x01],
      [0x7C,0x84],
      [0x7D,0x03],
      [0x7E,0x01])

 #Enable debug message
 debug=0

 #Initialize the sensors
 def init(self):
  time.sleep(.001)
  self.paj7620SelectBank(self.BANK0)
  self.paj7620SelectBank(self.BANK0)

  data0 = self.paj7620ReadReg(0, 1)[0]
  data1 = self.paj7620ReadReg(1, 1)[0]
  if self.debug:
   print("data0:",data0,"data1:",data1)
  if data0 != 0x20  :#or data1 <> 0x76:
   print("Error with sensor")
   #return 0xff
  if data0 == 0x20:
   print("wake-up finish.")

  for i in range(len(self.initRegisterArray)):
   self.paj7620WriteReg(self.initRegisterArray[i][0],self.initRegisterArray[i][1])

  self.paj7620SelectBank(self.BANK0)

  print("Paj7620 initialize register finished.")

 #Write a byte to a register on the Gesture sensor
 def paj7620WriteReg(self,addr,cmd):
  bus.write_word_data(self.PAJ7620_ID, addr, cmd)

 #Select a register bank on the Gesture Sensor
 def paj7620SelectBank(self,bank):
  if bank==self.BANK0:
   self.paj7620WriteReg(self.PAJ7620_REGITER_BANK_SEL, self.PAJ7620_BANK0)

 #Read a block of bytes of length "qty" starting at address "addr" from the Gesture sensor
 def paj7620ReadReg(self,addr,qty):
  return bus.read_i2c_block_data(self.PAJ7620_ID, addr,qty)

 #Print the values from the gesture sensor
 def print_gesture(self):
  data=self.paj7620ReadReg(0x43,1)[0]
  if data==self.GES_RIGHT_FLAG:
   time.sleep(self.GES_ENTRY_TIME)
   data=self.paj7620ReadReg(0x43, 1)[0]
   if data == self.GES_FORWARD_FLAG:
    print("Forward")
    time.sleep(self.GES_QUIT_TIME)
   elif data == self.GES_BACKWARD_FLAG:
    print("Backward")
    time.sleep(self.GES_QUIT_TIME)
   else:
    print("Right")

  elif data==self.GES_LEFT_FLAG:
   time.sleep(self.GES_ENTRY_TIME)
   data=self.paj7620ReadReg(0x43, 1)[0]
   if data == self.GES_FORWARD_FLAG:
    print("Forward")
    time.sleep(self.GES_QUIT_TIME)
   elif data == self.GES_BACKWARD_FLAG:
    print("Backward")
    time.sleep(self.GES_QUIT_TIME)
   else:
    print("Left")

  elif data==self.GES_UP_FLAG:
   time.sleep(self.GES_ENTRY_TIME)
   data=self.paj7620ReadReg(0x43, 1)[0]
   if data == self.GES_FORWARD_FLAG:
    print("Forward")
    time.sleep(self.GES_QUIT_TIME)
   elif data == self.GES_BACKWARD_FLAG:
    print("Backward")
    time.sleep(self.GES_QUIT_TIME)
   else:
    print("Up")

  elif data==self.GES_DOWN_FLAG:
   time.sleep(self.GES_ENTRY_TIME)
   data=self.paj7620ReadReg(0x43, 1)[0]
   if data == self.GES_FORWARD_FLAG:
    print("Forward")
    time.sleep(self.GES_QUIT_TIME)
   elif data == self.GES_BACKWARD_FLAG:
    print("Backward")
    time.sleep(self.GES_QUIT_TIME)
   else:
    print("Down")

  elif data==self.GES_FORWARD_FLAG:
   print("Forward")
   time.sleep(self.GES_QUIT_TIME)

  elif data==self.GES_BACKWARD_FLAG:
   print("Backward")
   time.sleep(self.GES_QUIT_TIME)

  elif data==self.GES_CLOCKWISE_FLAG:
   print("Clockwise")

  elif data==self.GES_COUNT_CLOCKWISE_FLAG:
   print("anti-clockwise")

  else:
   data1=self.paj7620ReadReg(0x44, 1)[0]
   if (data1 == self.GES_WAVE_FLAG):
    print("wave")

 #Return a vlaue from the gestire sensor which can be used in a program
 #  0:nothing
 #  1:Forward
 #  2:Backward
 #  3:Right
 #  4:Left
 #  5:Up
 #  6:Down
 #  7:Clockwise
 #  8:anti-clockwise
 #  9:wave
 def return_gesture(self):

  data=self.paj7620ReadReg(0x43,1)[0]
  if data==self.GES_RIGHT_FLAG:
   time.sleep(self.GES_ENTRY_TIME)
   data=self.paj7620ReadReg(0x43, 1)[0]
   if data == self.GES_FORWARD_FLAG:
    return 1
    time.sleep(self.GES_QUIT_TIME)
   elif data == self.GES_BACKWARD_FLAG:
    return 2
    time.sleep(self.GES_QUIT_TIME)
   else:
    return 3

  elif data==self.GES_LEFT_FLAG:
   time.sleep(self.GES_ENTRY_TIME)
   data=self.paj7620ReadReg(0x43, 1)[0]
   if data == self.GES_FORWARD_FLAG:
    return 1
    time.sleep(self.GES_QUIT_TIME)
   elif data == self.GES_BACKWARD_FLAG:
    return 2
    time.sleep(self.GES_QUIT_TIME)
   else:
    return 4

  elif data==self.GES_UP_FLAG:
   time.sleep(self.GES_ENTRY_TIME)
   data=self.paj7620ReadReg(0x43, 1)[0]
   if data == self.GES_FORWARD_FLAG:
    return 1
    time.sleep(self.GES_QUIT_TIME)
   elif data == self.GES_BACKWARD_FLAG:
    return 2
    time.sleep(self.GES_QUIT_TIME)
   else:
    return 5

  elif data==self.GES_DOWN_FLAG:
   time.sleep(self.GES_ENTRY_TIME)
   data=self.paj7620ReadReg(0x43, 1)[0]
   if data == self.GES_FORWARD_FLAG:
    return 1
    time.sleep(self.GES_QUIT_TIME)
   elif data == self.GES_BACKWARD_FLAG:
    return 2
    time.sleep(self.GES_QUIT_TIME)
   else:
    return 6

  elif data==self.GES_FORWARD_FLAG:
   return 1
   time.sleep(self.GES_QUIT_TIME)

  elif data==self.GES_BACKWARD_FLAG:
   return 2
   time.sleep(self.GES_QUIT_TIME)

  elif data==self.GES_CLOCKWISE_FLAG:
   return 7

  elif data==self.GES_COUNT_CLOCKWISE_FLAG:
   return 8

  else:
   data1=self.paj7620ReadReg(0x44, 1)[0]
   if (data1 == self.GES_WAVE_FLAG):
    return 9
  return 0

if __name__ == "__main__":
 g=gesture()
 g.init()
 while True:
  g.print_gesture()
  time.sleep(.1)
  # print g.return_gesture()
  # time.sleep(.1)
Si todo va bien, podrás ver el siguiente resultado
pi@raspberrypi:~/grove.py/grove $ python3 grove_gesture_sensor.py
wake-up finish.
Paj7620 initialize register finished.
Left
Forward
Left
Backward
Right
Up
Down
Puedes salir de este programa simplemente presionando ++ctrl+c++.
Si usas la herramienta I2C para escanear la dirección I2C del módulo grove, puedes encontrar dos o más direcciones. 0x04 es la dirección del Grove Base Hat para Raspberry Pi.
Jugar con Raspberry Pi (con GrovePi_Plus)
Hardware
- Paso 1. Prepara los siguientes elementos:
| Raspberry pi | GrovePi_Plus | Grove-Gesture_v1.0 |
|---|---|---|
|  | |
| Consigue Uno Ahora | Consigue Uno Ahora | Consigue Uno Ahora |
- Paso 2. Conecta el GrovePi_Plus al Raspberry.
- Paso 3. Conecta Grove-Gesture_v1.0 al puerto I2C del GrovePi_Plus.
- Paso 4. Conecta el Raspberry a la PC a través del cable USB.

Software
- Paso 1. Sigue Setting Software para configurar el entorno de desarrollo.
- Paso 2. Clona el repositorio de Github con Git.
cd ~
git clone https://github.com/DexterInd/GrovePi.git
- Paso 3. Ejecuta los siguientes comandos para usar este sensor
cd ~/GrovePi/Software/Python/grove_gesture_sensor
python3 gesture_value.py
Aquí está el código de gesture_value.py
#!/usr/bin/env python
#
# GrovePi Example for using the Grove - Gesture Sensor v1.0(https://www.seeedstudio.com/depot/Grove-Gesture-p-2463.html)
#
# This example returns a value when a user does an action over the sensor
#
# The GrovePi connects the Raspberry Pi and Grove sensors.  You can learn more about GrovePi here:  http://www.dexterindustries.com/GrovePi
#
# Have a question about this example?  Ask on the forums here:  http://forum.dexterindustries.com/c/grovepi
#
'''
## License
The MIT License (MIT)
GrovePi for the Raspberry Pi: an open source platform for connecting Grove Sensors to the Raspberry Pi.
Copyright (C) 2017  Dexter Industries
Permission is hereby granted, free of charge, to any person obtaining a copy
of this software and associated documentation files (the "Software"), to deal
in the Software without restriction, including without limitation the rights
to use, copy, modify, merge, publish, distribute, sublicense, and/or sell
copies of the Software, and to permit persons to whom the Software is
furnished to do so, subject to the following conditions:
The above copyright notice and this permission notice shall be included in
all copies or substantial portions of the Software.
THE SOFTWARE IS PROVIDED "AS IS", WITHOUT WARRANTY OF ANY KIND, EXPRESS OR
IMPLIED, INCLUDING BUT NOT LIMITED TO THE WARRANTIES OF MERCHANTABILITY,
FITNESS FOR A PARTICULAR PURPOSE AND NONINFRINGEMENT. IN NO EVENT SHALL THE
AUTHORS OR COPYRIGHT HOLDERS BE LIABLE FOR ANY CLAIM, DAMAGES OR OTHER
LIABILITY, WHETHER IN AN ACTION OF CONTRACT, TORT OR OTHERWISE, ARISING FROM,
OUT OF OR IN CONNECTION WITH THE SOFTWARE OR THE USE OR OTHER DEALINGS IN
THE SOFTWARE.
'''

import grove_gesture_sensor
import time

g=grove_gesture_sensor.gesture()
g.init()
while True:
 gest=g.return_gesture()
 #Match the gesture
 if gest==g.FORWARD:
  print("FORWARD")
 elif gest==g.BACKWARD:
  print("BACKWARD")
 elif gest==g.RIGHT:
  print("RIGHT")
 elif gest==g.LEFT:
  print("LEFT")
 elif gest==g.UP:
  print("UP")
 elif gest==g.DOWN:
  print("DOWN")
 elif gest==g.CLOCKWISE:
  print("CLOCKWISE")
 elif gest==g.ANTI_CLOCKWISE:
  print("ANTI_CLOCKWISE")
 elif gest==g.WAVE:
  print("WAVE")
 elif gest==0:
  print("-")
 else:
  print("Error")
 time.sleep(.1)
- Step 4. Here is the screen output.
pi@raspberrypi:~/Dexter/GrovePi/Software/Python/grove_gesture_sensor $ python3 gesture_value.py
wake-up finish.
Paj7620 initialize register finished.

-
-
DOWN
-
-
LEFT
-
-
-
-
UP
-
-
-
-
RIGHT
-
-
UP
-
-
CLOCKWISE
-
-
CLOCKWISE
Referencias
Definimos algunos datos de registro de gestos, consulta la siguiente tabla.
| Gesto | Datos de Registro | Dirección de Registro | Si Sí | Si No |
|---|---|---|---|---|
| Arriba | data==GES_UP_FLAG | 0x43 | Gesto detectado | No se detectó gesto |
| Abajo | data==GES_DOWN_FLAG | 0x43 | Gesto detectado | No se detectó gesto |
| Izquierda | data==GES_LEFT_FLAG | 0x43 | Gesto detectado | No se detectó gesto |
| Derecha | data==GES_RIGHT_FLAG | 0x43 | Gesto detectado | No se detectó gesto |
| Adelante | data==GES_FORWARD_FLAG | 0x43 | Gesto detectado | No se detectó gesto |
| Atrás | data==GES_BACKWARD_FLAG | 0x43 | Gesto detectado | No se detectó gesto |
| Sentido horario | data==GES_CLOCKWISE_FLAG | 0x43 | Gesto detectado | No se detectó gesto |
| Sentido antihorario | data==GES_COUNT_CLOCKWISE_FLAG | 0x43 | Gesto detectado | No se detectó gesto |
| Onda | data==GES_WAVE_FLAG | 0x44 | Gesto detectado | No se detectó gesto |
Visor Esquemático en Línea
Recursos
- [ZIP] Grove - Gesture_v1.0 sch pcb.zip
- [Hoja de Datos] PAJ7620U2_Datasheet_V0.8_20140611.pdf
- [Hoja de Datos] PAJ7620U2_DS_v1.5_05012022_Confidential.pdf
- [Librería] Librería Grove - Guesture
- [Codecraft] Archivo CDC
Proyecto
Taller de Reutilización en Seeed x.factory [Episodio 1]: El fin de semana pasado, tuvimos un increíble taller de hacking de reutilización con 20 makers, diseñadores e ingenieros de la comunidad reunidos en x.factory (¡incluso lo incluí como mi taller favorito!).

Jesty - Controla tu PC con Gestos: Controla una PC con un sensor de gestos, asociando una tecla o un clic del ratón a cada gesto.
PHPoC - Control Pan-Tilt mediante Gestos de Mano: Una forma interesante de controlar tu robot: mediante gestos de mano
Soporte Técnico y Discusión de Productos
¡Gracias por elegir nuestros productos! Estamos aquí para brindarle diferentes tipos de soporte para asegurar que su experiencia con nuestros productos sea lo más fluida posible. Ofrecemos varios canales de comunicación para atender diferentes preferencias y necesidades.