Grove - DS1307 RTC (Reloj de Tiempo Real) para Arduino
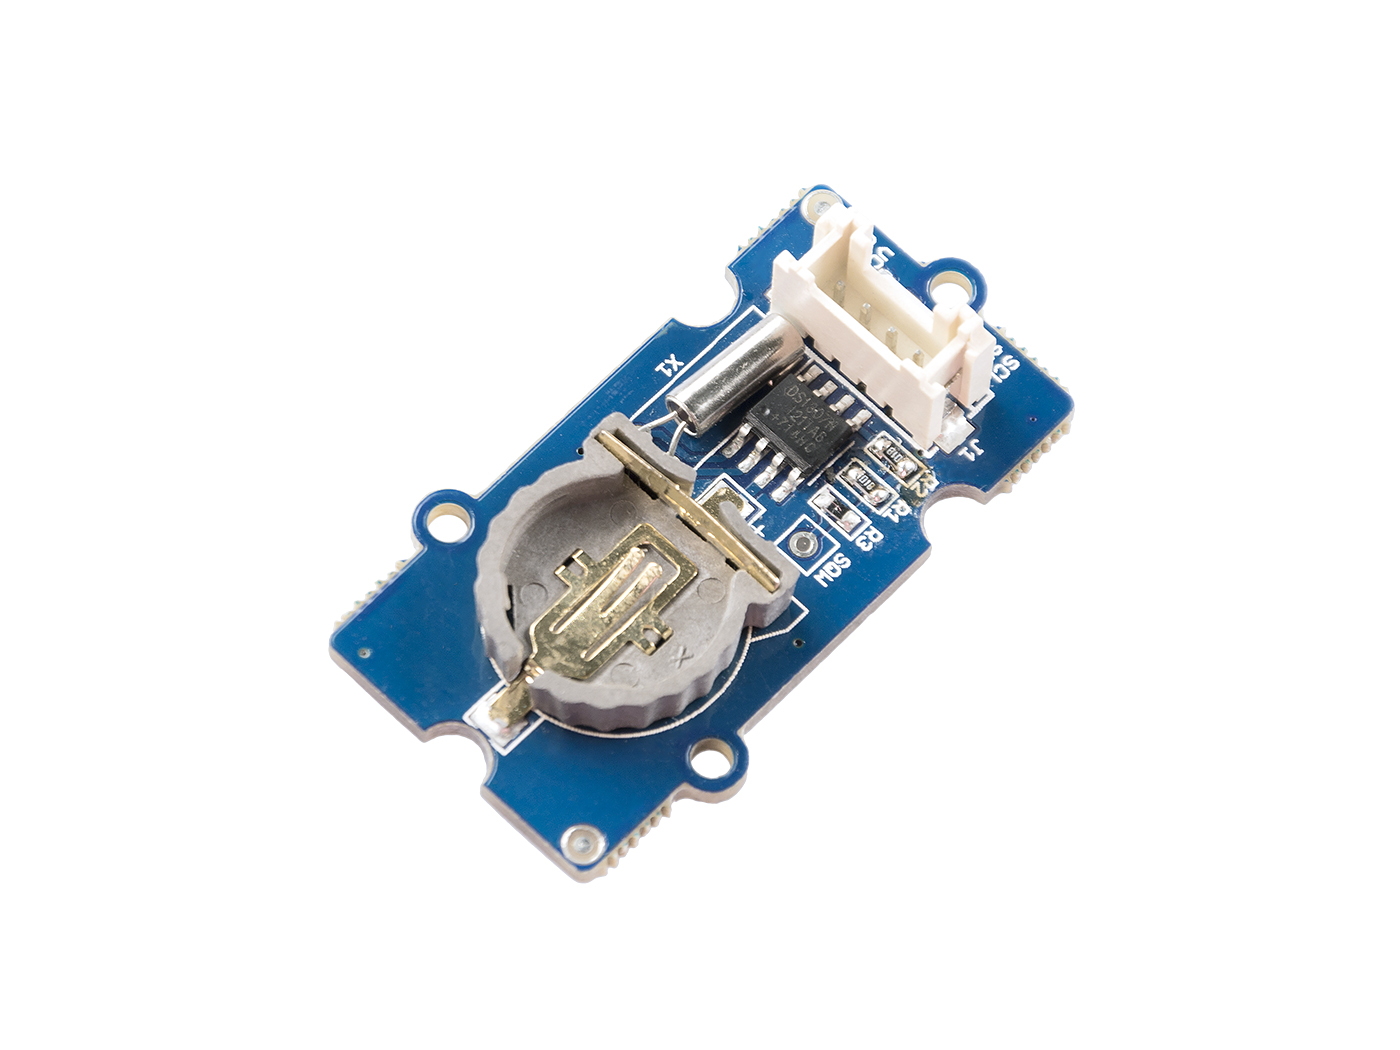
El módulo RTC está basado en el chip de reloj DS1307, que soporta el protocolo I2C. Utiliza una batería de celda de litio (CR1225). El reloj/calendario proporciona segundos, minutos, horas, día, fecha, mes y año. La fecha de fin de mes se ajusta automáticamente para meses con menos de 31 días, incluyendo correcciones para años bisiestos. El reloj opera en formato de 24 horas o 12 horas con indicador AM/PM. Y es válido hasta el año 2100. Para obtener un rendimiento robusto, debe colocar una celda de litio CR1225 de 3 voltios en el portabaterías. Si usa solo la alimentación primaria, el módulo puede no funcionar normalmente, porque el cristal puede no oscilar.

La batería no está incluida.
Lectura previa
Se recomienda encarecidamente leer una introducción de RTC para Arduino si no está familiarizado con él:

Especificaciones
- Tamaño de PCB: 2.0cm*4.0cm
- Interfaz: conector de pines de paso 2.0mm
- Estructura de E/S: SCL,SDA,VCC,GND
- ROHS: SÍ
- VCC:3.3~5.5V
- Entrada de Nivel Lógico Alto:2.2~VCC+0.3 V
- Entrada de Nivel Lógico Bajo:-0.3~+0.8 V
- Voltaje de Batería:2.0~3.5 V
Más detalles sobre los módulos Grove consulte Sistema Grove
Plataformas Soportadas
| Arduino | Raspberry Pi | |||
|---|---|---|---|---|
Las plataformas mencionadas anteriormente como compatibles son una indicación de la compatibilidad de software o teórica del módulo. Solo proporcionamos biblioteca de software o ejemplos de código para la plataforma Arduino en la mayoría de los casos. No es posible proporcionar biblioteca de software / código de demostración para todas las plataformas MCU posibles. Por lo tanto, los usuarios tienen que escribir su propia biblioteca de software.
Primeros pasos
Jugar con Arduino
Hardware
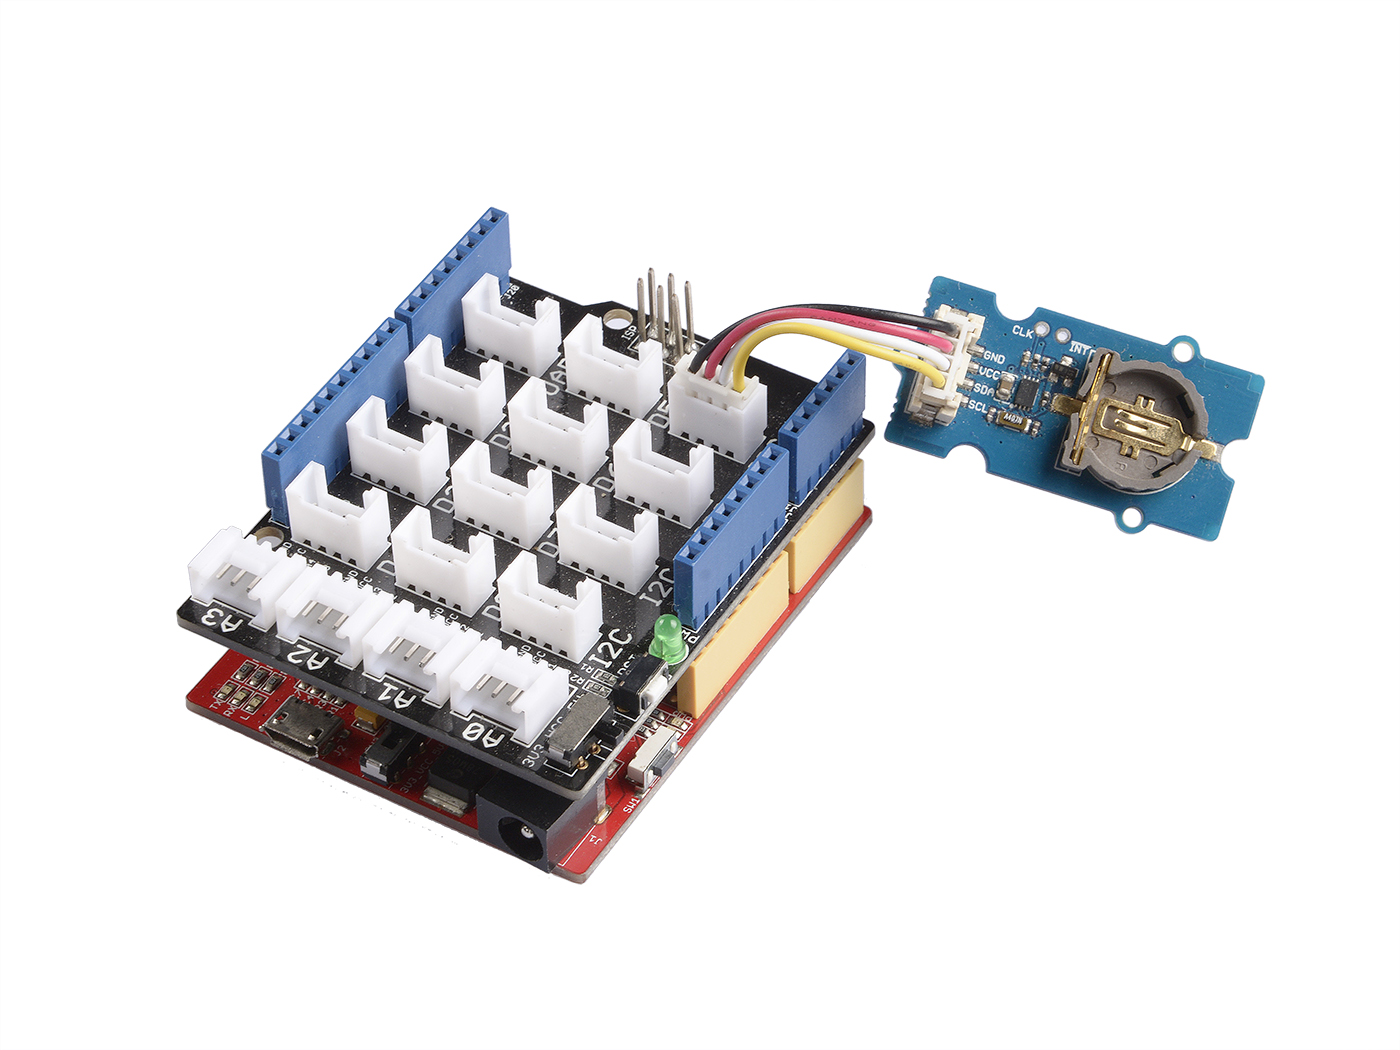
- Paso 1. Prepara los siguientes elementos:
| Seeeduino V4.2 | Base Shield | Grove-RTC |
|---|---|---|
 |  |  |
| Obtener Uno Ahora | Obtener Uno Ahora | Obtener Uno Ahora |
- Paso 2. Conecta Grove-RTC al puerto I2C del Grove-Base Shield.
- Paso 3. Conecta Grove - Base Shield al Seeeduino.
- Paso 4. Conecta Seeeduino a la PC mediante un cable USB.
Para obtener un rendimiento robusto, debes colocar una celda de litio CR1225 de 3 voltios en el portapilas. Si usas solo la alimentación primaria, el módulo puede no funcionar normalmente, porque el cristal puede no oscilar.
Si no tenemos el shield base, también podemos conectar directamente el Grove-RTC a la placa Arduino. Por favor sigue la conexión de abajo.
| Seeeduino_v4 | Grove-RTC |
|---|---|
| 5V | VCC |
| GND | GND |
| SDA | SDA |
| SCL | SCL |
Software
Paso 1. Descarga la Biblioteca RTC.
Paso 2. Consulta Cómo instalar biblioteca para instalar la biblioteca para Arduino.
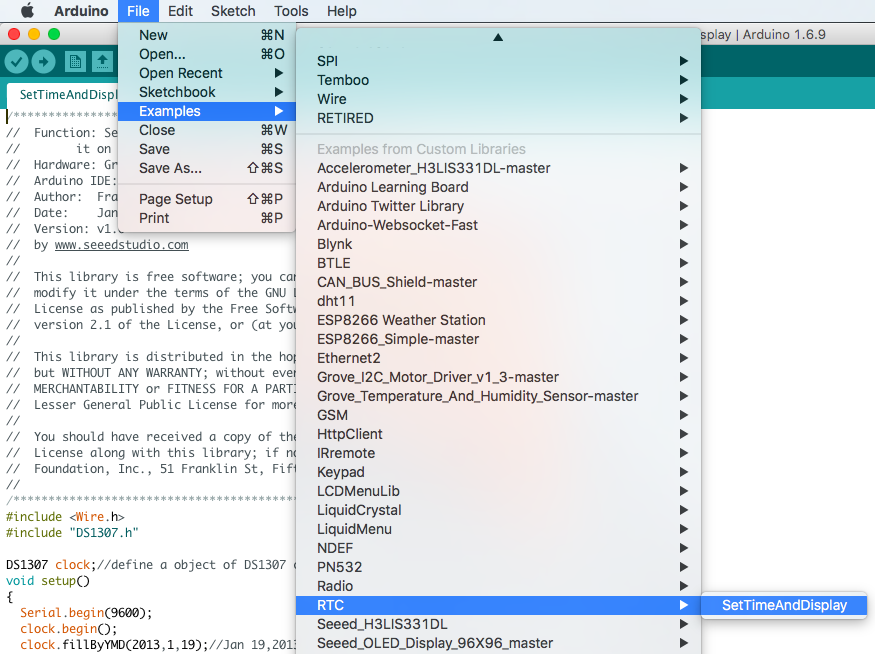
Paso 3. Crea un nuevo sketch de Arduino y pega los códigos a continuación o abre el código directamente por la ruta: Archivo -> Ejemplo ->RTC->SetTimeAndDisplay.
#include <Wire.h>
#include "DS1307.h"

DS1307 clock;//define a object of DS1307 class
void setup()
{
    Serial.begin(9600);
    clock.begin();
    clock.fillByYMD(2013,1,19);//Jan 19,2013
    clock.fillByHMS(15,28,30);//15:28 30"
    clock.fillDayOfWeek(SAT);//Saturday
    clock.setTime();//write time to the RTC chip
}
void loop()
{
    printTime();
}
    /*Function: Display time on the serial monitor*/
void printTime()
{
    clock.getTime();
    Serial.print(clock.hour, DEC);
    Serial.print(":");
    Serial.print(clock.minute, DEC);
    Serial.print(":");
    Serial.print(clock.second, DEC);
    Serial.print("  ");
    Serial.print(clock.month, DEC);
    Serial.print("/");
    Serial.print(clock.dayOfMonth, DEC);
    Serial.print("/");
    Serial.print(clock.year+2000, DEC);
    Serial.print(" ");
    Serial.print(clock.dayOfMonth);
    Serial.print("*");
    switch (clock.dayOfWeek)// Friendly printout the weekday
    {
        case MON:
        Serial.print("MON");
        break;
        case TUE:
        Serial.print("TUE");
        break;
        case WED:
        Serial.print("WED");
        break;
        case THU:
        Serial.print("THU");
        break;
        case FRI:
        Serial.print("FRI");
        break;
        case SAT:
        Serial.print("SAT");
        break;
        case SUN:
        Serial.print("SUN");
        break;
    }
    Serial.println(" ");
}
Paso 4. Configura la hora. Cambia los argumentos de la función a la fecha/hora actual. Por favor, presta atención al formato de los argumentos.
clock.fillByYMD(2013,1,19);//Jan 19,2013
clock.fillByHMS(15,28,30);//15:28 30"
clock.fillDayOfWeek(SAT);//Saturday
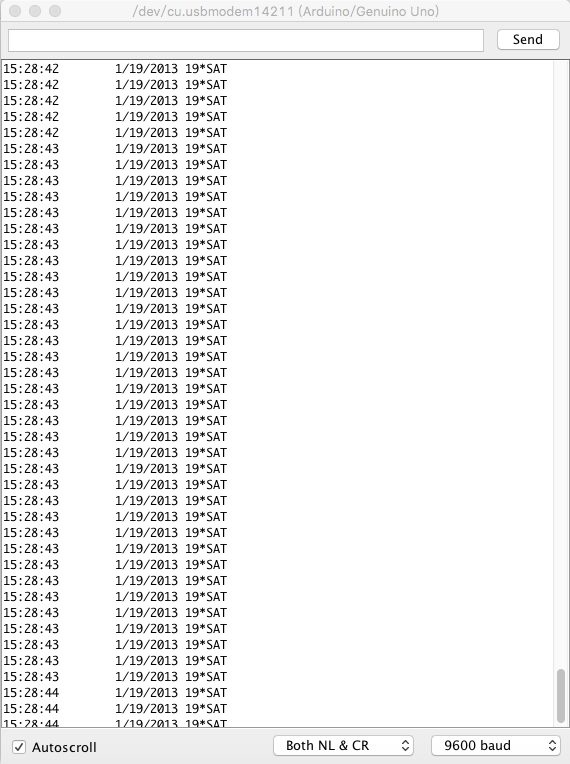
Paso 5. Sube el código y abre el monitor serie para recibir los datos del sensor
Jugar con Raspberry Pi
Hardware
- Paso 1. Prepara los siguientes elementos:
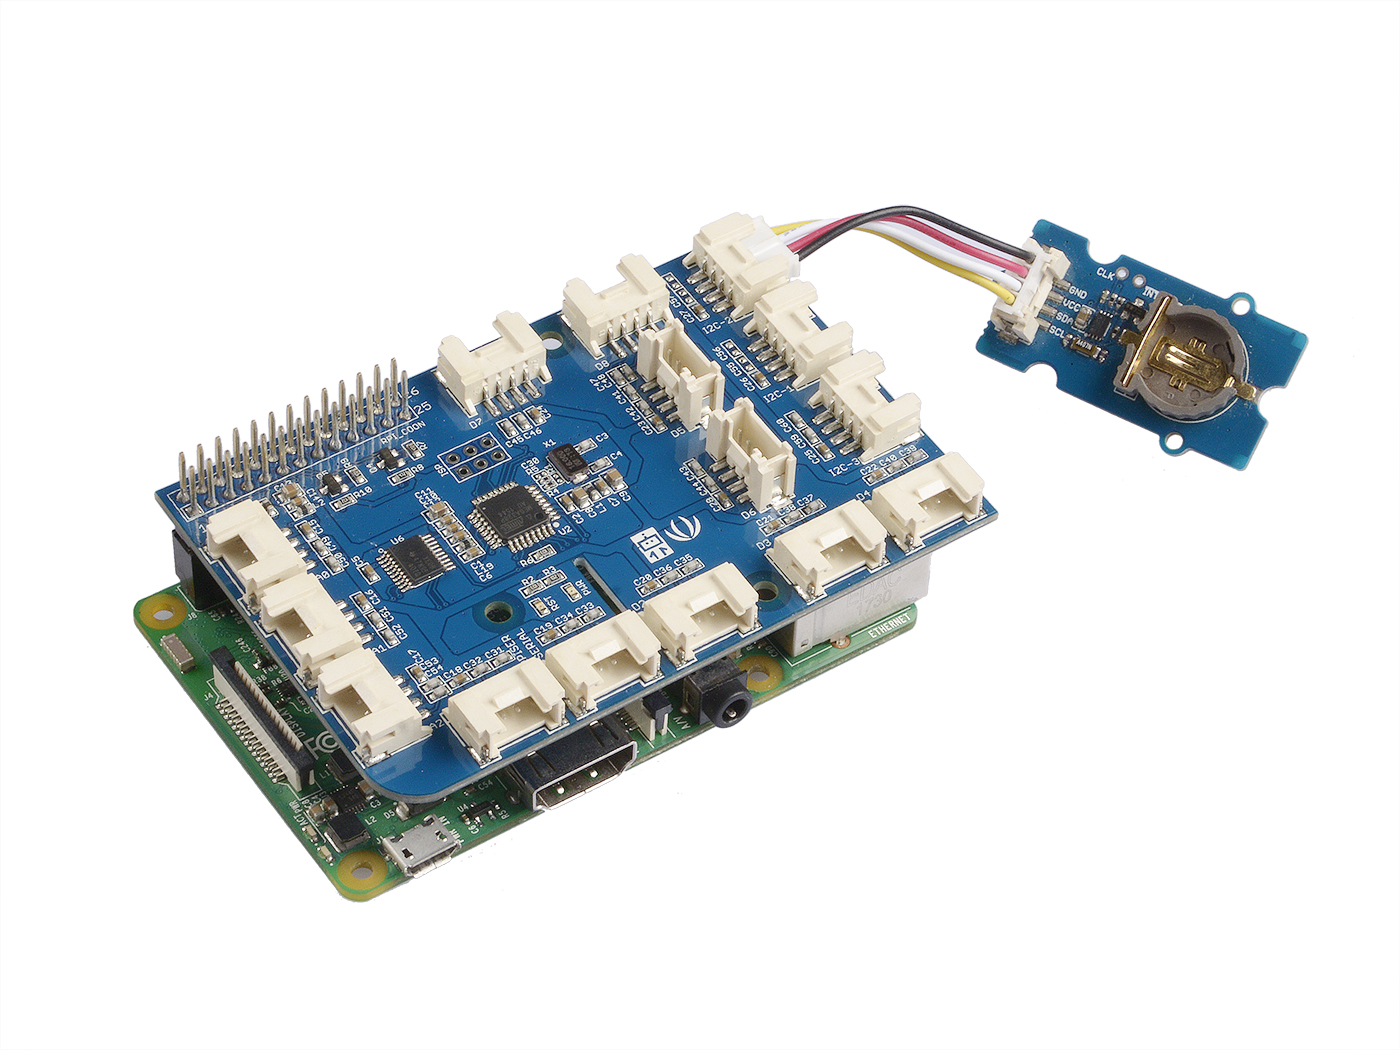
| Raspberry pi | GrovePi_Plus | Grove-RTC |
|---|---|---|
 |  | |
| Consigue Uno Ahora | Consigue Uno Ahora | Consigue Uno Ahora |
- Paso 2. Conecta el GrovePi_Plus al Raspberry.
- Paso 3. Conecta Grove-RTC al puerto I2C del GrovePi_Plus.
- Paso 4. Conecta el Raspberry a la PC a través del cable USB.
Software
- Paso 1. Sigue Setting Software para configurar el entorno de desarrollo.
- Paso 2. Clona el repositorio de Github con Git.
cd ~
git clone https://github.com/DexterInd/GrovePi.git
- Paso 3. Ejecuta los siguientes comandos para usar este sensor
cd ~/GrovePi/Software/Python
python grove_i2c_rtc.py
Aquí está el código
#!/usr/bin/env python
#
# GrovePi Example for using the Grove I2C RTC (https://www.seeedstudio.com/wiki/Grove_-_RTC)
#
# The GrovePi connects the Raspberry Pi and Grove sensors.  You can learn more about GrovePi here:  http://www.dexterindustries.com/GrovePi
#
# Have a question about this example?  Ask on the forums here:  http://forum.dexterindustries.com/c/grovepi
#
'''
## License
The MIT License (MIT)
GrovePi for the Raspberry Pi: an open source platform for connecting Grove Sensors to the Raspberry Pi.
Copyright (C) 2017  Dexter Industries
Permission is hereby granted, free of charge, to any person obtaining a copy
of this software and associated documentation files (the "Software"), to deal
in the Software without restriction, including without limitation the rights
to use, copy, modify, merge, publish, distribute, sublicense, and/or sell
copies of the Software, and to permit persons to whom the Software is
furnished to do so, subject to the following conditions:
The above copyright notice and this permission notice shall be included in
all copies or substantial portions of the Software.
THE SOFTWARE IS PROVIDED "AS IS", WITHOUT WARRANTY OF ANY KIND, EXPRESS OR
IMPLIED, INCLUDING BUT NOT LIMITED TO THE WARRANTIES OF MERCHANTABILITY,
FITNESS FOR A PARTICULAR PURPOSE AND NONINFRINGEMENT. IN NO EVENT SHALL THE
AUTHORS OR COPYRIGHT HOLDERS BE LIABLE FOR ANY CLAIM, DAMAGES OR OTHER
LIABILITY, WHETHER IN AN ACTION OF CONTRACT, TORT OR OTHERWISE, ARISING FROM,
OUT OF OR IN CONNECTION WITH THE SOFTWARE OR THE USE OR OTHER DEALINGS IN
THE SOFTWARE.
'''

import time
import grovepi

# Connect the Grove Real Time Clock to any I2C port eg. I2C-1
# Can be found at I2C address 0x68
# SCL,SDA,VCC,GND

while True:
    try:
        print(grovepi.rtc_getTime())
        time.sleep(.5)

    except IOError:
        print ("Error")
-
Paso 4. Aquí está el resultado.

Demo 2: Grove_rtc
También puedes usar esta demostración para mostrar la hora de forma común. Por favor crea grove_rtc.py y copia los códigos de abajo.
    '''
     * Grove-RTC.py
     * Demo for Raspberry Pi
     *
     * Copyright (c) 2014 seeed technology inc.
     * Website    : community.seeedstudio.com/
     * Author     : Lambor
     * Create Time: Nov 2014
     * Change Log :
     *
     * The MIT License (MIT)
     *
     * Permission is hereby granted, free of charge, to any person obtaining a copy
     * of this software and associated documentation files (the "Software"), to deal
     * in the Software without restriction, including without limitation the rights
     * to use, copy, modify, merge, publish, distribute, sublicense, and/or sell
     * copies of the Software, and to permit persons to whom the Software is
     * furnished to do so, subject to the following conditions:
     *
     * The above copyright notice and this permission notice shall be included in
     * all copies or substantial portions of the Software.
     *
     * THE SOFTWARE IS PROVIDED "AS IS", WITHOUT WARRANTY OF ANY KIND, EXPRESS OR
     * IMPLIED, INCLUDING BUT NOT LIMITED TO THE WARRANTIES OF MERCHANTABILITY,
     * FITNESS FOR A PARTICULAR PURPOSE AND NONINFRINGEMENT. IN NO EVENT SHALL THE
     * AUTHORS OR COPYRIGHT HOLDERS BE LIABLE FOR ANY CLAIM, DAMAGES OR OTHER
     * LIABILITY, WHETHER IN AN ACTION OF CONTRACT, TORT OR OTHERWISE, ARISING FROM,
     * OUT OF OR IN CONNECTION WITH THE SOFTWARE OR THE USE OR OTHER DEALINGS IN
     * THE SOFTWARE.
     '''

    #!/usr/bin/python
import time
import smbus


    bus = smbus.SMBus(1)    # 0 = /dev/i2c-0 (port I2C0), 1 = /dev/i2c-1 (port I2C1)

class DS1307():
        def __init__(self):
            self.MON = 1
            self.TUE = 2
            self.WED = 3
            self.THU = 4
            self.FRI = 5
            self.SAT = 6
            self.SUN = 7
            self.DS1307_I2C_ADDRESS = 0x68

            print 'begin'

        def decToBcd(self, val):
            return ( (val/10*16) + (val%10) )

        def bcdToDec(self,  val):
            return ( (val/16*10) + (val%16) )

        def begin(self, news):
            print news

        def startClock(self):
            bus.write_byte(self.DS1307_I2C_ADDRESS, 0x00)
            self.second = bus.read_byte(self.DS1307_I2C_ADDRESS) & 0x7f
            bus.write_byte_data(self.DS1307_I2C_ADDRESS, 0x00, self.second)

            print 'startClock..'

        def stopClock(self):
            bus.write_byte(self.DS1307_I2C_ADDRESS, 0x00)
            self.second = bus.read_byte(self.DS1307_I2C_ADDRESS) | 0x80
            bus.write_byte_data(self.DS1307_I2C_ADDRESS, 0x00, self.second)

            print 'stopClock..'

        def setTime(self):
            data = [self.decToBcd(self.second), self.decToBcd(self.minute), \
                    self.decToBcd(self.hour), self.decToBcd(self.dayOfWeek), \
                    self.decToBcd(self.dayOfMonth), self.decToBcd(self.month), \
                    self.decToBcd(self.year)]

            bus.write_byte(self.DS1307_I2C_ADDRESS, 0x00)
            bus.write_i2c_block_data(self.DS1307_I2C_ADDRESS,0x00,data)

            print 'setTime..'

        def getTime(self):
            bus.write_byte(self.DS1307_I2C_ADDRESS, 0x00)
            data = bus.read_i2c_block_data(self.DS1307_I2C_ADDRESS,0x00)
            #A few of these need masks because certain bits are control bits
            self.second = self.bcdToDec(data[0] & 0x7f)
            self.minute = self.bcdToDec(data[1])
            self.hour = self.bcdToDec(data[2] & 0x3f)  #Need to change this if 12 hour am/pm
            self.dayOfWeek = self.bcdToDec(data[3])
            self.dayOfMonth = self.bcdToDec(data[4])
            self.month = self.bcdToDec(data[5])
            self.year = self.bcdToDec(data[6])

            print 'getTime..'

        def fillByHMS(self, _hour,  _minute,  _second):
            self.hour = _hour
            self.minute = _minute
            self.second = _second

            print 'fillByHMS..'

        def fillByYMD(self, _year,  _month,  _day):
            self.year = _year - 2000
            self.month = _month;
            self.dayOfMonth = _day

            print 'fillByYMD..'

        def fillDayOfWeek(self,  _dow):
            self.dayOfWeek = _dow

            print 'fillDayOfWeek..'

    if __name__ == "__main__":
        clock = DS1307()
        clock.fillByYMD(2015,3,5)
        clock.fillByHMS(12,42,30)
        clock.fillDayOfWeek(clock.THU)
        clock.setTime()
        while True:
            clock.getTime()
            print clock.hour, ":", clock.minute, ":", \
                    clock.second, " ", clock.dayOfMonth, "/", \
                    clock.month, "/", clock.year,"  ", "weekday", \
                    ":", clock.dayOfWeek
            time.sleep(1)
Ejecuta los siguientes comandos para usar este sensor
sudo python grove_rtc.py

Visor de Esquemas en Línea
Recursos
- [Eagle] Grove-RTC en formato Eagle
- [PDF] Esquema Grove-RTC en formato PDF
- [PDF] PCB Grove-RTC en formato PDF
- [Librería]Repositorio Github para RTC
- [Hoja de Datos] Hoja de Datos DS1307
Proyectos
Usando un Reloj de Tiempo Real con Arduino: ¿Alguna vez quisiste hacer un proyecto que se activara según un horario? ¡Usar un Reloj de Tiempo Real (RTC) es una excelente manera de hacerlo!
Reloj Colorido: Un reloj que muestra tu nivel de energía y te saluda cuando te acercas
Soporte Técnico y Discusión de Productos
¡Gracias por elegir nuestros productos! Estamos aquí para brindarle diferentes tipos de soporte para asegurar que su experiencia con nuestros productos sea lo más fluida posible. Ofrecemos varios canales de comunicación para satisfacer diferentes preferencias y necesidades.