Despliegue del modelo de estimación de pose YOLOv8
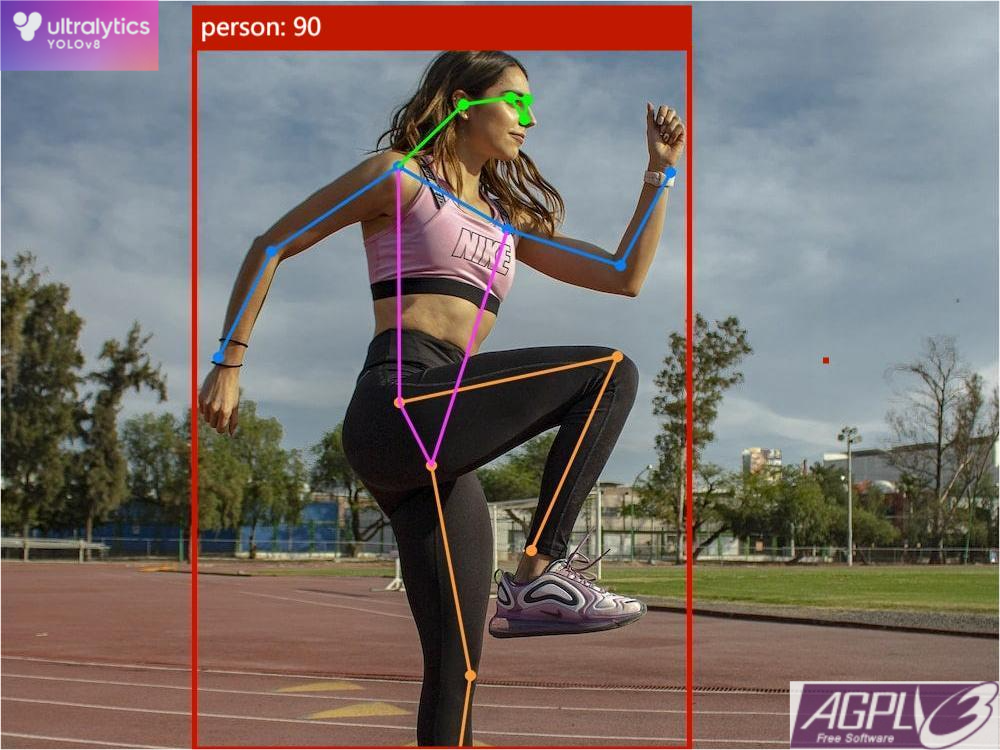
Este wiki introducirá cómo entrenar el modelo oficial de estimación de actitud YOLOv8 y desplegar el modelo entrenado en dispositivos Grove Vision AI(V2) o XIAO ESP32S3.
Preparación del conjunto de datos
Para el conjunto de datos de estimación de pose, se recomienda consultar la documentación oficial de YOLOv8.
Instalar la herramienta de línea de comandos YOLOv8
- Por defecto, ya tienes el entorno
pythony la herramienta de gestión de paquetespip, y python>=3.8.
# Clone the official repository
git clone https://github.com/ultralytics/ultralytics

# Go into the cloned folder
cd ultralytics

# Install in developer mode so that subsequent modifications can be synchronized
pip install -e .
La razón por la que se recomienda instalar usando Git es que algunos códigos necesitan ser modificados más tarde, por lo que necesita ser instalado en modo desarrollador.
- Puedes usar el comando de consulta de versión para probar si la herramienta de línea de comandos
yolose instaló exitosamente.
# Version query
yolo -v
Entrenar
-
Primero, ve a la carpeta del conjunto de datos descargado
-
Ejecuta el siguiente comando para comenzar a entrenar el modelo
yolo train detect model=yolov8n-pose.pt data=./data_pose.yaml imgsz=192
Exportar modelo a tflite
-
Después del entrenamiento, el modelo estará en la carpeta
runs/train/exp*/weights/. Asegúrate de que los indicadores de evaluación de tu modelo cumplan con tus necesidades. -
Posteriormente, necesitas modificar el código oficial para reducir algo del post-procesamiento del modelo. Primero modifica las funciones
forwardde las clasesDetectyPosebajo el archivo~/ultralytics/ultralytics/nn/modules/head.py. Después de la modificación, se muestra como sigue
# forward function of Detect class
    def forward(self, x):
        """Concatenates and returns predicted bounding boxes and class probabilities."""
        shape = x[0].shape  # BCHW

        if self.export:
            return [
                torch.permute(j, (0, 2, 3, 1)).reshape(j.shape[0], -1, x.shape[1])
                for j in [self.cv2[i](x[i]) for i in range(self.nl)]
                + [self.cv3[i](x[i]) for i in range(self.nl)]
            ]
        else:
            for i in range(self.nl):
                x[i] = torch.cat((self.cv2[i](x[i]), self.cv3[i](x[i])), 1)
        if self.training:
            return x
        elif self.dynamic or self.shape != shape:
            self.anchors, self.strides = (
                x.transpose(0, 1) for x in make_anchors(x, self.stride, 0.5)
            )
            self.shape = shape

        x_cat = torch.cat([xi.view(shape[0], self.no, -1) for xi in x], 2)
        if self.export and self.format in (
            "saved_model",
            "pb",
            "tflite",
            "edgetpu",
            "tfjs",
        ):  # avoid TF FlexSplitV ops
            box = x_cat[:, : self.reg_max * 4]
            cls = x_cat[:, self.reg_max * 4 :]
        else:
            box, cls = x_cat.split((self.reg_max * 4, self.nc), 1)
        dbox = (
            dist2bbox(self.dfl(box), self.anchors.unsqueeze(0), xywh=True, dim=1)
            * self.strides
        )

        if self.export and self.format in ("tflite", "edgetpu"):
            # Normalize xywh with image size to mitigate quantization error of TFLite integer models as done in YOLOv5:
            # https://github.com/ultralytics/yolov5/blob/0c8de3fca4a702f8ff5c435e67f378d1fce70243/models/tf.py#L307-L309
            # See this PR for details: https://github.com/ultralytics/ultralytics/pull/1695
            img_h = shape[2] * self.stride[0]
            img_w = shape[3] * self.stride[0]
            img_size = torch.tensor(
                [img_w, img_h, img_w, img_h], device=dbox.device
            ).reshape(1, 4, 1)
            dbox /= img_size

        y = torch.cat((dbox, cls.sigmoid()), 1)
        return y if self.export else (y, x)

# forward function of Pose class
    def forward(self, x):
        """Perform forward pass through YOLO model and return predictions."""
        bs = x[0].shape[0]  # batch size
        kpt = torch.cat([self.cv4[i](x[i]).view(bs, self.nk, -1) for i in range(self.nl)], -1)  # (bs, 17*3, h*w)
        x = self.detect(self, x)
        if self.training:
            return x, kpt
        if self.export:
            return x, torch.permute(kpt, (0, 2, 1))
        pred_kpt = self.kpts_decode(bs, kpt)
        return torch.cat([x, pred_kpt], 1) if self.export else (torch.cat([x[0], pred_kpt], 1), (x[1], kpt))
- Para evitar errores anormales en la línea de comandos, también puedes modificar el código del método
export_saved_modelde la claseExporterbajo el archivo~/ultralytics/ultralytics/engine/exporter.pyde la siguiente manera
    @try_export
    def export_saved_model(self, prefix=colorstr('TensorFlow SavedModel:')):
        """YOLOv8 TensorFlow SavedModel export."""
        cuda = torch.cuda.is_available()
        try:
            import tensorflow as tf  # noqa
        except ImportError:
            check_requirements(f"tensorflow{'-macos' if MACOS else '-aarch64' if ARM64 else '' if cuda else '-cpu'}")
            import tensorflow as tf  # noqa
        check_requirements(
            ('onnx', 'onnx2tf>=1.15.4,<=1.17.5', 'sng4onnx>=1.0.1', 'onnxsim>=0.4.33', 'onnx_graphsurgeon>=0.3.26',
             'tflite_support', 'onnxruntime-gpu' if cuda else 'onnxruntime'),
            cmds='--extra-index-url https://pypi.ngc.nvidia.com')  # onnx_graphsurgeon only on NVIDIA

        LOGGER.info(f'\n{prefix} starting export with tensorflow {tf.__version__}...')
        check_version(tf.__version__,
                      '<=2.13.1',
                      name='tensorflow',
                      verbose=True,
                      msg='https://github.com/ultralytics/ultralytics/issues/5161')
        f = Path(str(self.file).replace(self.file.suffix, '_saved_model'))
        if f.is_dir():
            import shutil
            shutil.rmtree(f)  # delete output folder

        # Pre-download calibration file to fix https://github.com/PINTO0309/onnx2tf/issues/545
        onnx2tf_file = Path('calibration_image_sample_data_20x128x128x3_float32.npy')
        if not onnx2tf_file.exists():
            attempt_download_asset(f'{onnx2tf_file}.zip', unzip=True, delete=True)

        # Export to ONNX
        self.args.simplify = True
        f_onnx, _ = self.export_onnx()

        # Export to TF
        tmp_file = f / 'tmp_tflite_int8_calibration_images.npy'  # int8 calibration images file
        if self.args.int8:
            verbosity = '--verbosity info'
            if self.args.data:
                # Generate calibration data for integer quantization
                LOGGER.info(f"{prefix} collecting INT8 calibration images from 'data={self.args.data}'")
                data = check_det_dataset(self.args.data)
                dataset = YOLODataset(data['val'], data=data, imgsz=self.imgsz[0], augment=False)
                images = []
                for i, batch in enumerate(dataset):
                    if i >= 100:  # maximum number of calibration images
                        break
                    im = batch['img'].permute(1, 2, 0)[None]  # list to nparray, CHW to BHWC
                    images.append(im)
                f.mkdir()
                images = torch.cat(images, 0).float()
                # mean = images.view(-1, 3).mean(0)  # imagenet mean [123.675, 116.28, 103.53]
                # std = images.view(-1, 3).std(0)  # imagenet std [58.395, 57.12, 57.375]
                np.save(str(tmp_file), images.numpy())  # BHWC
                int8 = f'-oiqt -qt per-tensor -cind images "{tmp_file}" "[[[[0, 0, 0]]]]" "[[[[255, 255, 255]]]]"'
            else:
                int8 = '-oiqt -qt per-tensor'
        else:
            verbosity = '--non_verbose'
            int8 = ''

        cmd = f'onnx2tf -i "{f_onnx}" -o "{f}" -nuo {verbosity} {int8}'.strip()
        LOGGER.info(f"{prefix} running '{cmd}'")
        subprocess.run(cmd, shell=True)
        yaml_save(f / 'metadata.yaml', self.metadata)  # add metadata.yaml

        # Remove/rename TFLite models
        if self.args.int8:
            tmp_file.unlink(missing_ok=True)
            for file in f.rglob('*_dynamic_range_quant.tflite'):
                file.rename(file.with_name(file.stem.replace('_dynamic_range_quant', '_int8') + file.suffix))
            for file in f.rglob('*_integer_quant_with_int16_act.tflite'):
                file.unlink()  # delete extra fp16 activation TFLite files

        # Add TFLite metadata
        # for file in f.rglob('*.tflite'):
            # f.unlink() if 'quant_with_int16_act.tflite' in str(f) else self._add_tflite_metadata(file)

        return str(f), tf.saved_model.load(f, tags=None, options=None)  # load saved_model as Keras model
- Usa el siguiente comando para exportar el modelo tflite
yolo export model=${your model path} format=tflite imgsz=192 int8
- Luego verás una carpeta
yolov8n-pose_saved_modelbajo la carpeta actual, que contiene el archivo de modeloyolov8n-pose_full_integer_quant.tflite. Este archivo de modelo puede ser desplegado en dispositivosGrove Vision AI(V2)oXIAO ESP32S3.
Optimización del grafo del modelo
- Grove Vision AI (V2) soporta modelos optimizados con vela y también puede acelerar la inferencia del modelo. Primero, ejecuta el siguiente comando para instalar la herramienta de línea de comandos vela (el dispositivo
XIAO ESP32S3aún no es compatible).
pip3 install ethos-u-vela
- Después de eso, necesitas descargar el archivo de configuración relacionado con
vela, o copiar el siguiente contenido en un archivo, que puede llamarsevela_config.ini
; file: my_vela_cfg.ini ; -----------------------------------------------------------------------------
; Vela configuration file ; -----------------------------------------------------------------------------
; System Configuration

; My_Sys_Cfg
[System_Config.My_Sys_Cfg]
core_clock=400e6
axi0_port=Sram
axi1_port=OffChipFlash
Sram_clock_scale=1.0
Sram_burst_length=32
Sram_read_latency=16
Sram_write_latency=16
Dram_clock_scale=0.75
Dram_burst_length=128
Dram_read_latency=500
Dram_write_latency=250
OnChipFlash_clock_scale=0.25
OffChipFlash_clock_scale=0.015625
OffChipFlash_burst_length=32
OffChipFlash_read_latency=64
OffChipFlash_write_latency=64
; -----------------------------------------------------------------------------
; Memory Mode
; My_Mem_Mode_Parent
[Memory_Mode.My_Mem_Mode_Parent]
const_mem_area=Axi1
arena_mem_area=Axi0
cache_mem_area=Axi0
- Finalmente, usa el siguiente comando para optimizar el grafo
vela --accelerator-config ethos-u55-64 \
    --config vela_config.ini \
    --system-config My_Sys_Cfg \
    --memory-mode My_Mem_Mode_Parent \
    --output-dir ${Save path of the optimized model} \
    ${The path of the tflite model that needs to be optimized}
Despliegue
-
El archivo de modelo que necesita ser desplegado es el archivo
tfliteexportado anteriormente. Puedes grabar el archivo de modelo en el dispositivo objetivo siguiendo el siguiente tutorial. -
Recomendamos encarecidamente usar nuestra herramienta web para grabar el modelo tflite entrenado en el dispositivo. Las operaciones detalladas se proporcionan en el Tutorial de Despliegue
Nota: Dado que el dispositivo ESP32S3 no soporta el despliegue de modelos después de la optimización de gráficos vela, no necesitas realizar la optimización de gráficos del modelo tflite si quieres desplegar el modelo en el dispositivo XIAO ESP32S3.