XIAO RA4M1 Mouse
Materiales Requeridos
| Seeed Studio XIAO RA4M1 | Grove Thumb Joystick | Grove Cable |
|---|---|---|
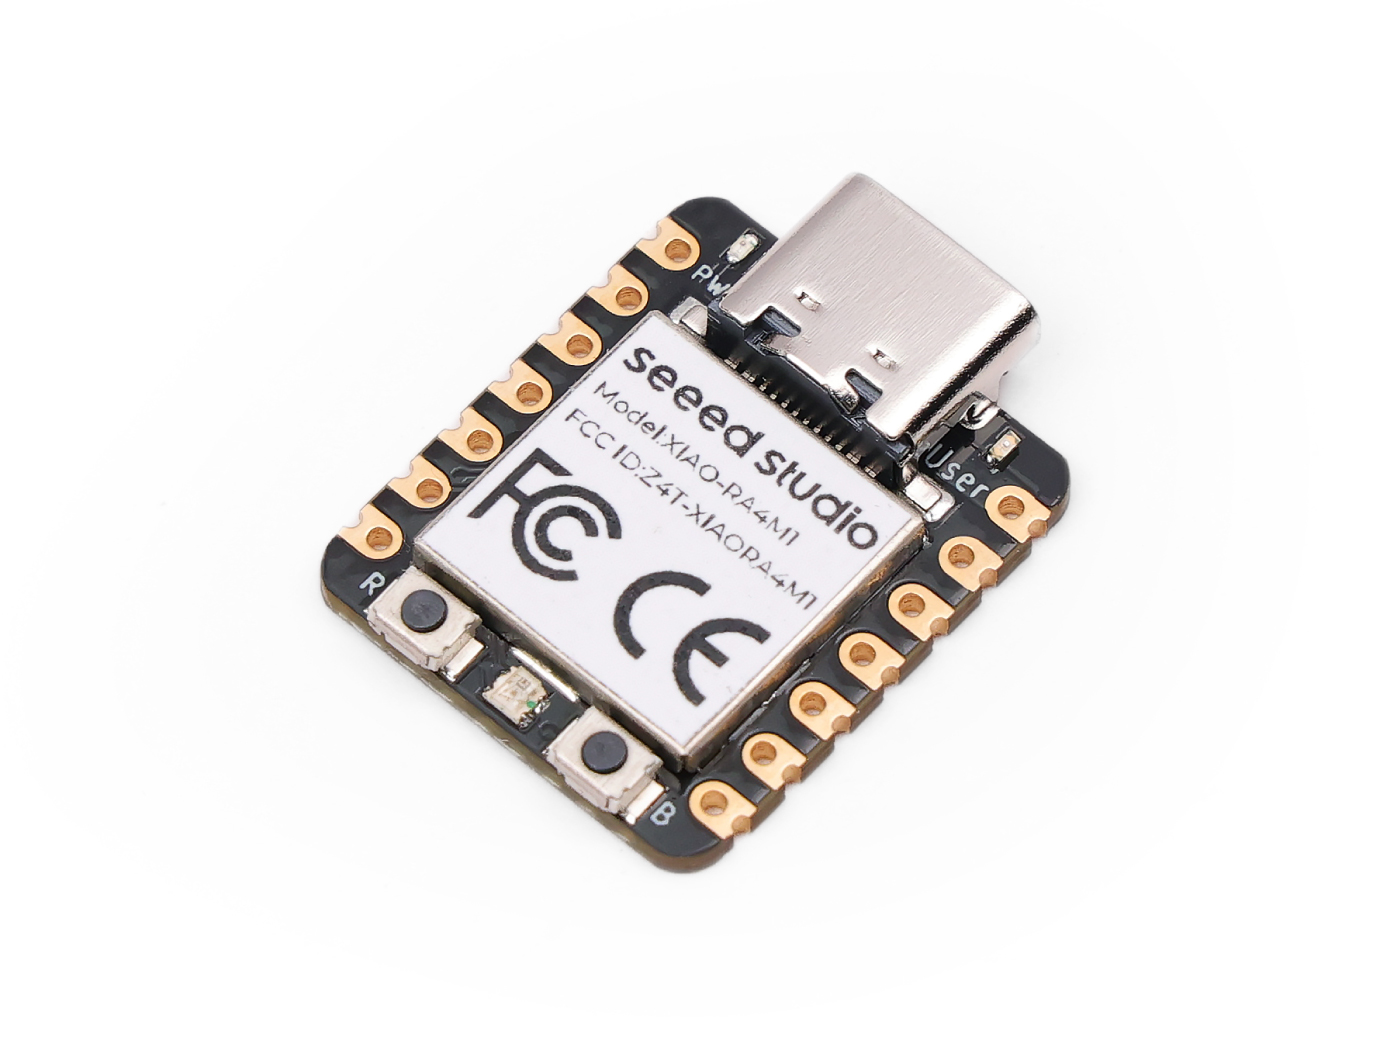 |  |  |
Preparación Preliminar
Encender el LED Integrado del XIAO RA4M1
Si nunca has usado el XIAO RA4M1 antes, por favor haz clic aquí para aprender cómo encender el LED integrado, lo cual asegura que tu entorno de desarrollo esté funcionando correctamente.
Leer datos del eje X e Y del Joystick Grove
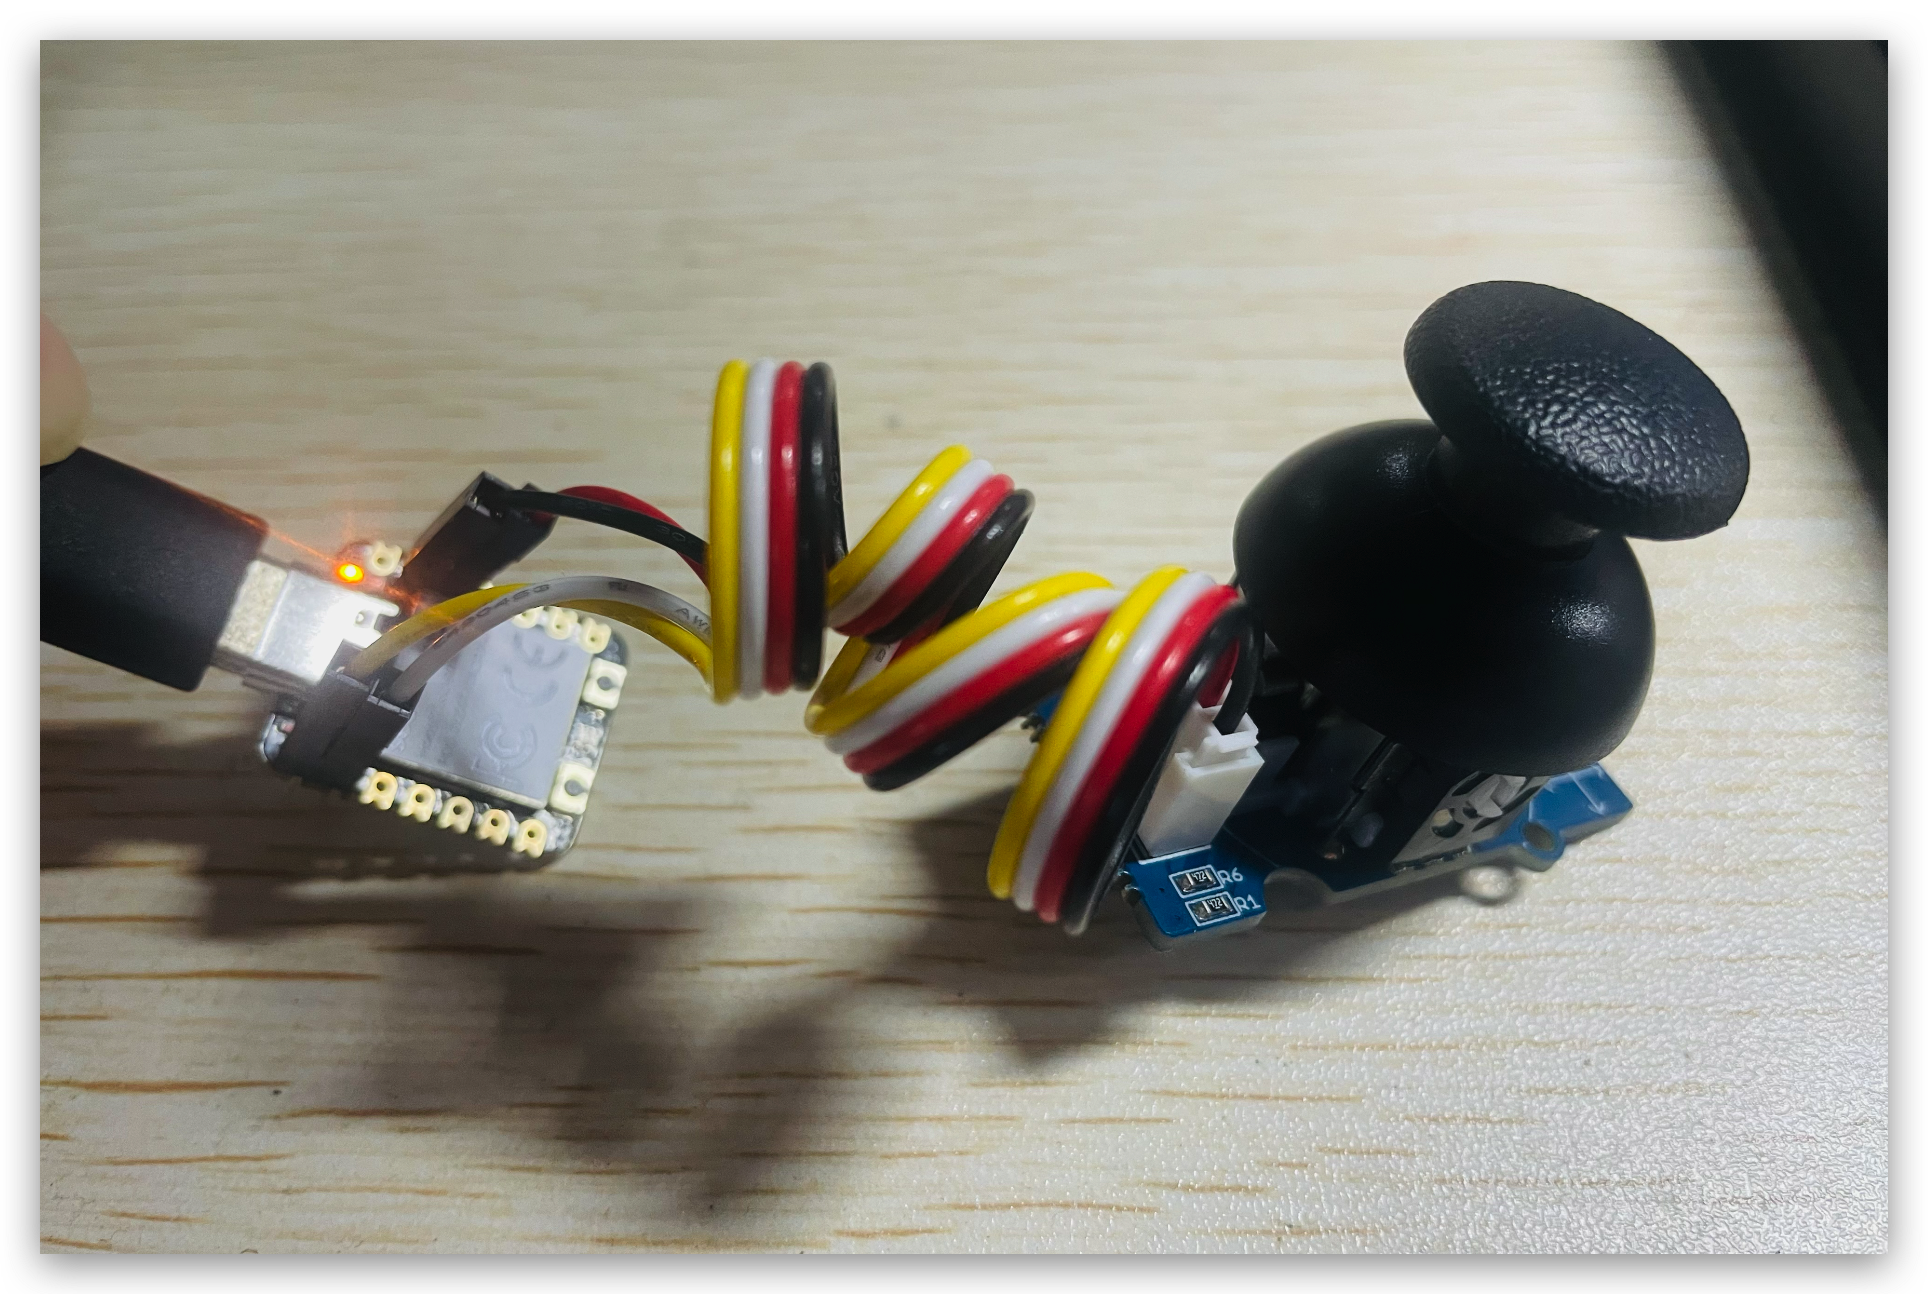
Paso 1. Conectar dispositivo
Primero que todo, necesitas conectar el XIAO RA4M1 y el Joystick juntos a través de los pines según la siguiente tabla.
| XIAO RA4M1 | Grove - Thumb Joystick |
|---|---|
| 3.3V | Rojo |
| GND | Negro |
| A0 | Blanco |
| A1 | Amarillo |
Ahora usa el cable Grove para conectarlos como se muestra en la siguiente imagen.
Paso 2. Subir programa de prueba
Copia el siguiente código, pégalo en el Arduino IDE y luego súbelo al XIAO RA4M1
void setup()
{
    Serial.begin(9600);
}

void loop()
{
    int sensorValue1 = analogRead(A0);
    int sensorValue2 = analogRead(A1);

    Serial.print("The X and Y coordinate is:");
    Serial.print(sensorValue1, DEC);
    Serial.print(",");
    Serial.println(sensorValue2, DEC);
    Serial.println(" ");
    delay(200);
}
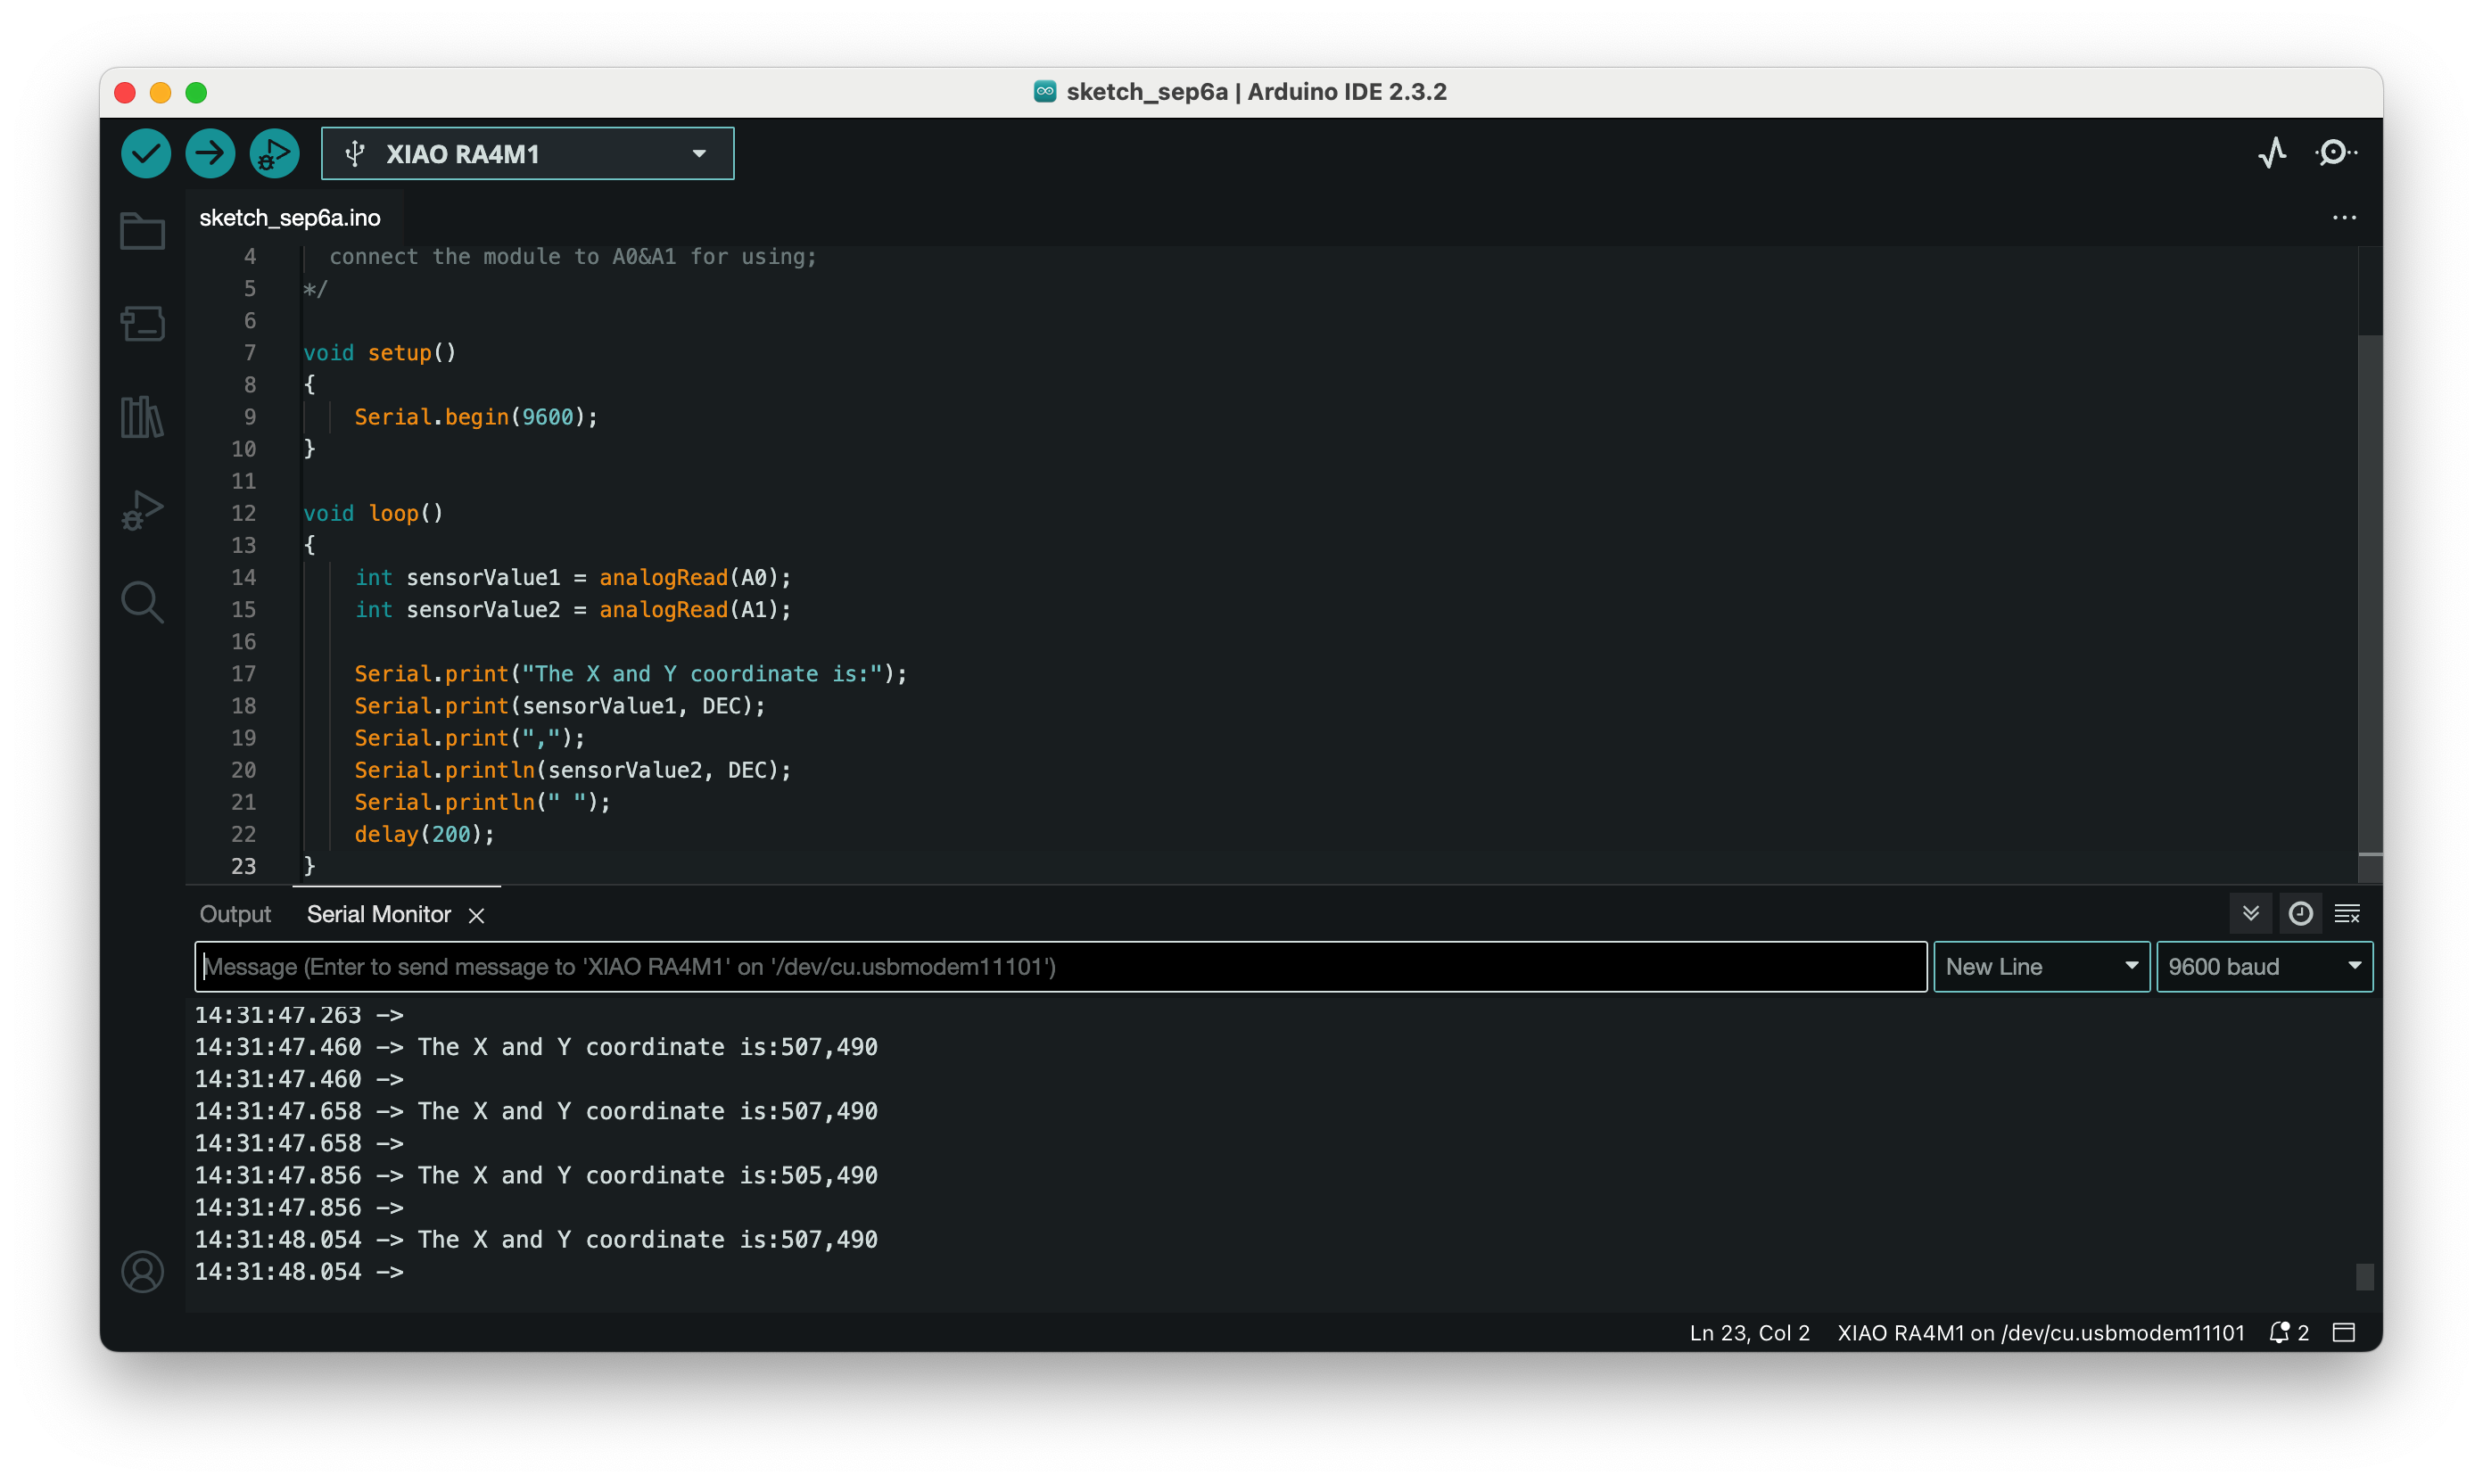
Ahora mueve el Joystick, los datos del eje cambiarán al mismo tiempo. Esto significa que XIAO RA4M1 y el Joystick funcionan perfectamente.
Construir ratón con XIAO RA4M1
Paso 3. Cargar programa controlador de ratón
#include <Mouse.h>

const int xaxis = A0;
const int yaxis = A1;
const int sensitivity = 5;//adjust the mouse sensetive

void setup()
{
    Mouse.begin();
    delay(1000);//at least 1000ms to initilize
    Serial.begin(9600);
}

void loop()
{
  int xValue = analogRead(xaxis);
  int yValue = analogRead(yaxis);

  /*
  when you click the central button of Grove joystick, xValue will equal to 1023,
  so when xValue < 1000, we move the mouse; when xValue>1000, we click the mouse
  */
  if(xValue<1000){

    //define mouse move distance
    int xDistance;
    int yDistance;

    /*
    The joystick reads the x and y values with 500 as the center of the coordinate axis,
    so we need to process the data by subtracting 500, while also eliminating some minor vibrations.
    */
    //Eliminate X minor vibrations.
    if(abs(xValue-500)<10){
      xDistance = 0;
    }else{
      xDistance = (xValue - 500);
    }
    //Eliminate X minor vibrations.
    if(abs(yValue-500)<10){
      yDistance = 0;
    }else{
      yDistance = (yValue - 500);
    }
    //read value from joystick
    Serial.print("value: ");
    Serial.print(xValue);
    Serial.print(",");
    Serial.println(yValue);
    Serial.println(" ");
    //read distance the mouse will move
    Serial.print("distance: ");
    Serial.print(xDistance);
    Serial.print(",");
    Serial.println(yDistance);
    Serial.println(" ");

    //make the mouse not so sensetive
    Mouse.move(xDistance/sensitivity,-yDistance/sensitivity,0);
  }else{
    //when xValue>1000, mouse click
    Mouse.click();
  }
    delay(100);
}
Ahora verás que el cursor se mueve cuando controlas el Joystick ~
¡Felicidades! Has construido exitosamente este pequeño y simple ratón. Hay más funciones interesantes de HID (Dispositivo de Interfaz Humana) esperando que las explores a través del XIAO RA4M1. ¿Quieres aprender más? Por favor haz clic aquí para saltar~
Soporte Técnico y Discusión de Productos
¡Gracias por elegir nuestros productos! Estamos aquí para brindarte diferentes tipos de soporte para asegurar que tu experiencia con nuestros productos sea lo más fluida posible. Ofrecemos varios canales de comunicación para satisfacer diferentes preferencias y necesidades.