ESPHome on XIAO(ESP32-S3) W5500 Ethernet Adapter for Home Assistant

This tutorial demonstrates how to implement a Bluetooth Proxy using the XIAO W5500 Ethernet Adapter, with integration and validation on Home Assistant.
Before proceeding with this tutorial, ensure the following prerequisites are met:
- A host device capable of running Home Assistant.
- A stable Ethernet or Wi-Fi connection.
- (Recommended) PoE (Power over Ethernet) capability or an external 5 V power supply.
- XIAO(ESP32-S3) W5500 Ethernet Adapter
| XIAO(ESP32-S3) W5500 Ethernet Adapter |
|---|
|
Introduction to Home Assistant
Home Assistant is a powerful open-source home automation platform that allows you to control and monitor your smart home devices from a single, unified interface. It acts as the central hub for your smart home, enabling you to automate routines, monitor sensors, and create a more intelligent living space.

ESPHome Integration
ESPHome is an open-source firmware creation tool specifically designed for ESP8266 / ESP32 devices. It allows you to create custom firmware using simple YAML configuration files, which can then be flashed to your device.
Getting Started With ESPHome
Bluetooth Proxy Overview
The Bluetooth Proxy acts as a lightweight distributed sensing bridge that extends Home Assistant’s Bluetooth coverage beyond the host’s built-in range. By deploying multiple ESP32 nodes throughout the space, a full-house Bluetooth sensing network can be established, enabling stable connections to a variety of BLE devices such as temperature and humidity sensors, door/window sensors, lighting modules, and plant monitors.
Key Functions:
- Extended Coverage: Removes dependency on the host’s Bluetooth range by utilizing distributed ESP32 proxy nodes to achieve whole-home Bluetooth connectivity.
- How It Works:
- The XIAO W5500 Ethernet Adapter enables Bluetooth scanning
- It receives nearby BLE broadcast packets (e.g., thermometers, smart locks, lights)
- Data is forwarded to Home Assistant via Ethernet or Wi-Fi
- Home Assistant recognizes these devices as Bluetooth entities
- Users can view temperature, battery level, signal strength, and other metrics directly in the Home Assistant interface
Install The Firmware
If you have not set up Home Assistant, you can click this link and follow the official Home Assistant tutorial to complete the setup.Home Assistant Installation
Step 1. Install ESPhome
If you have already installed ESPHome, you can skip this step.
- Go to Settings -> Add-ons

- ADD-ON STORE -> Search ESPHome


- Start ESPhome

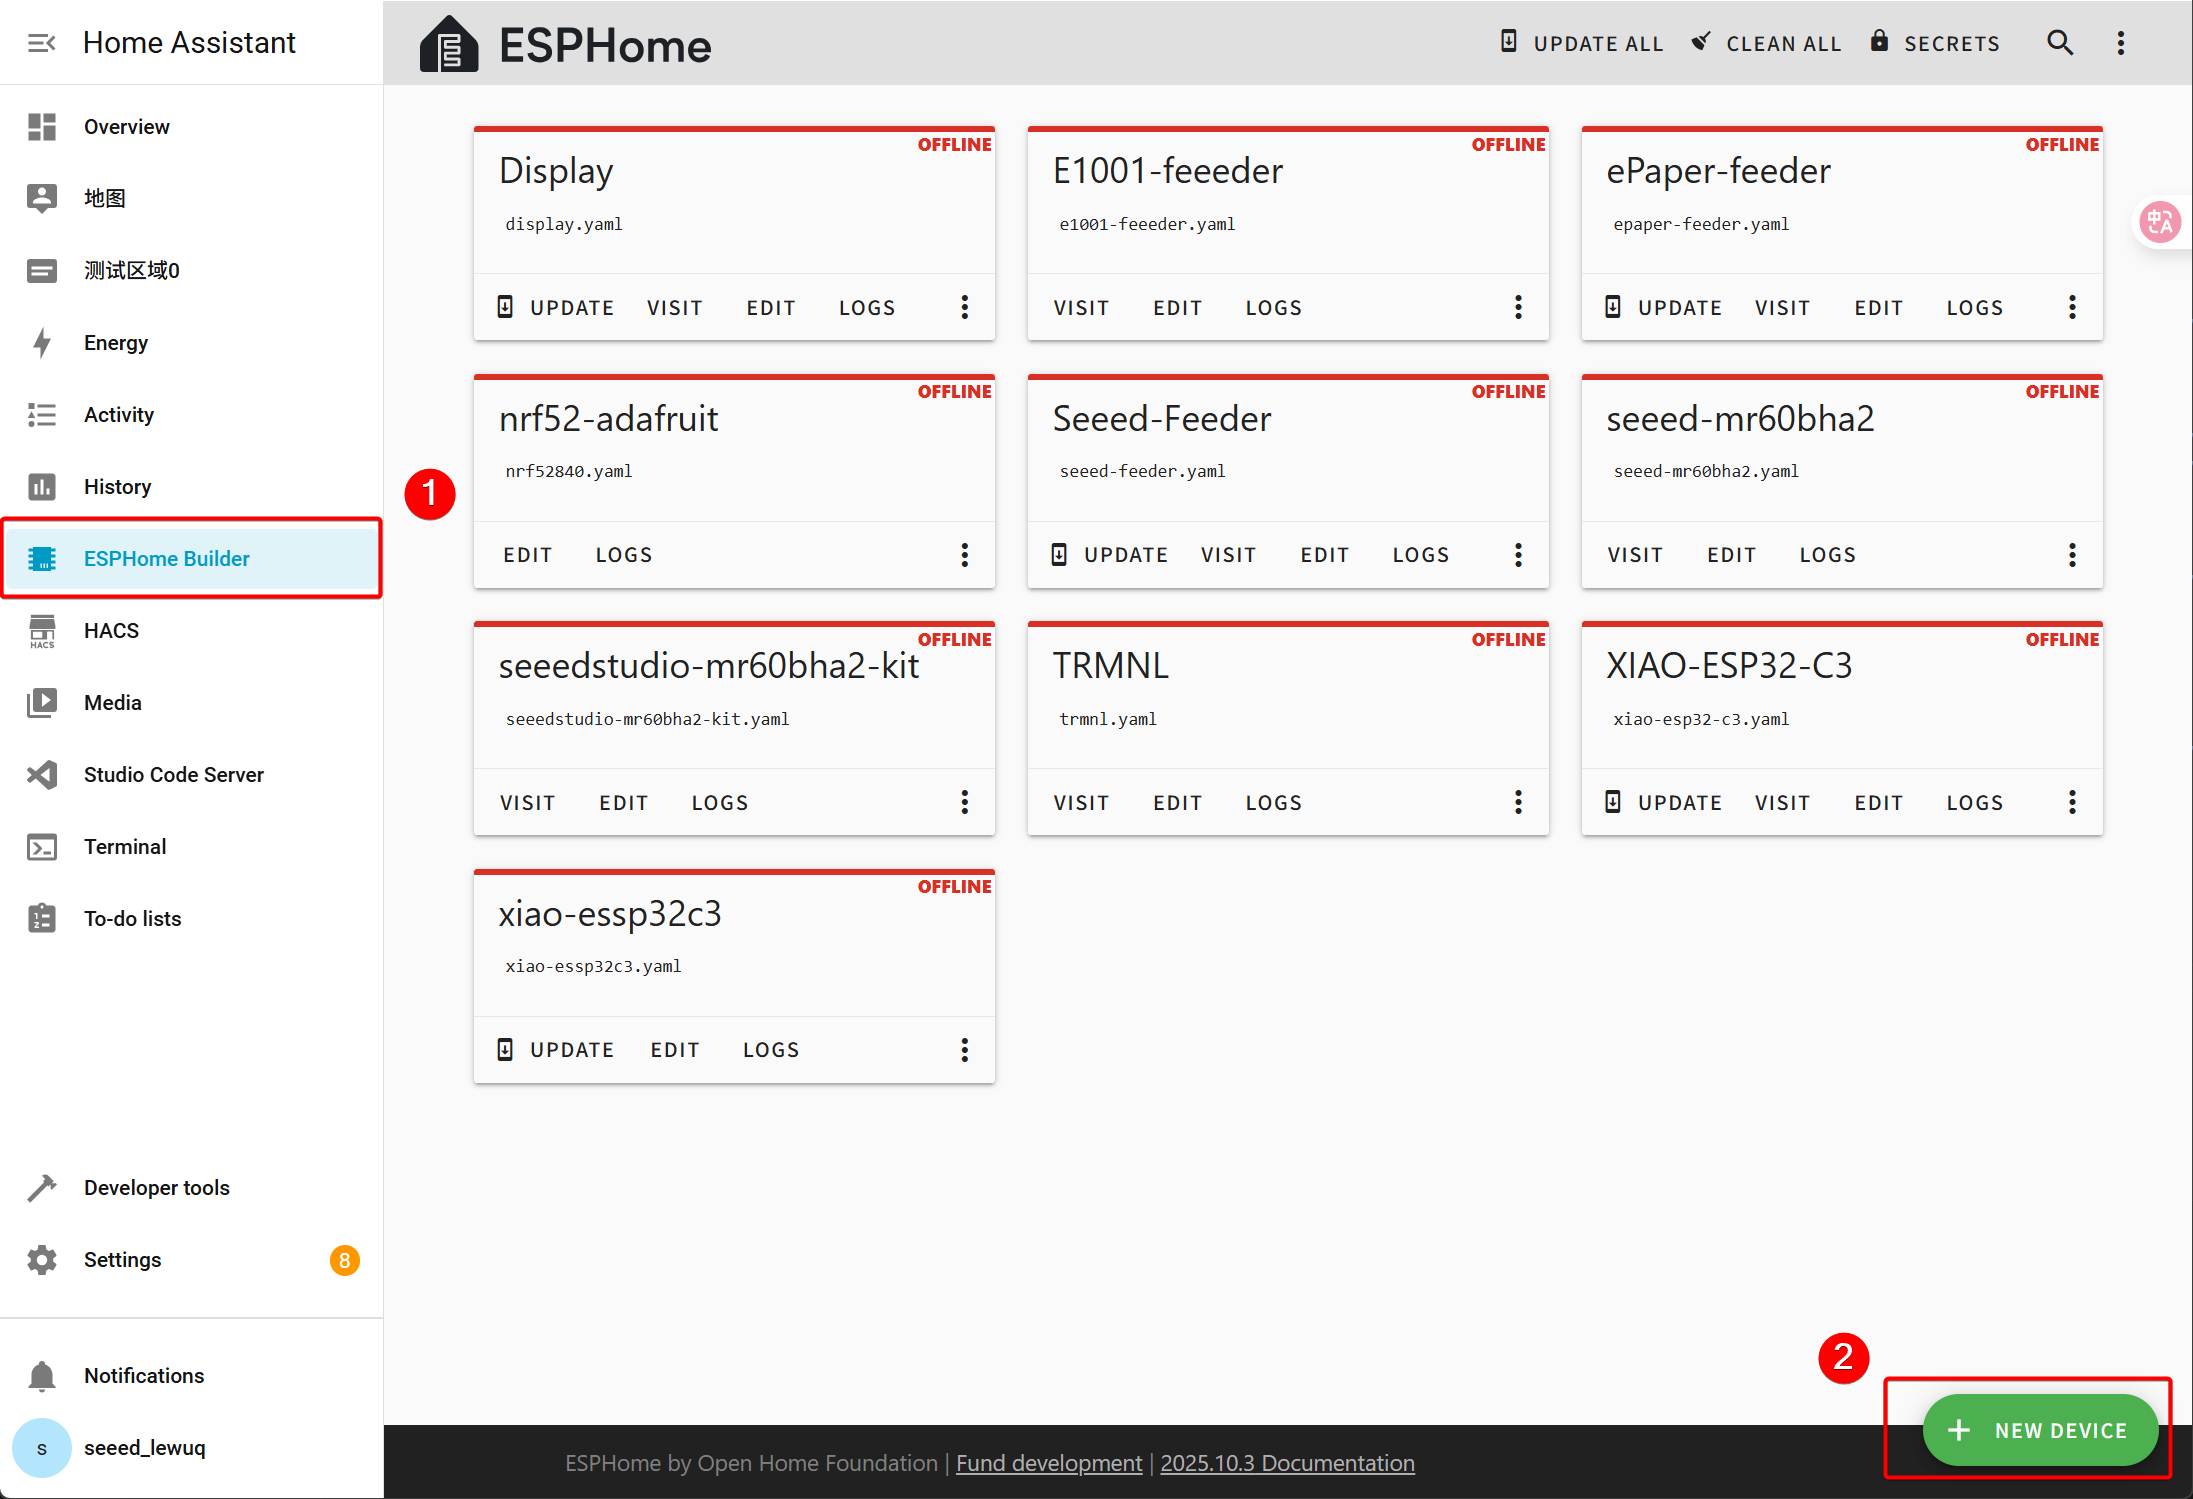
Step 2. Add new device
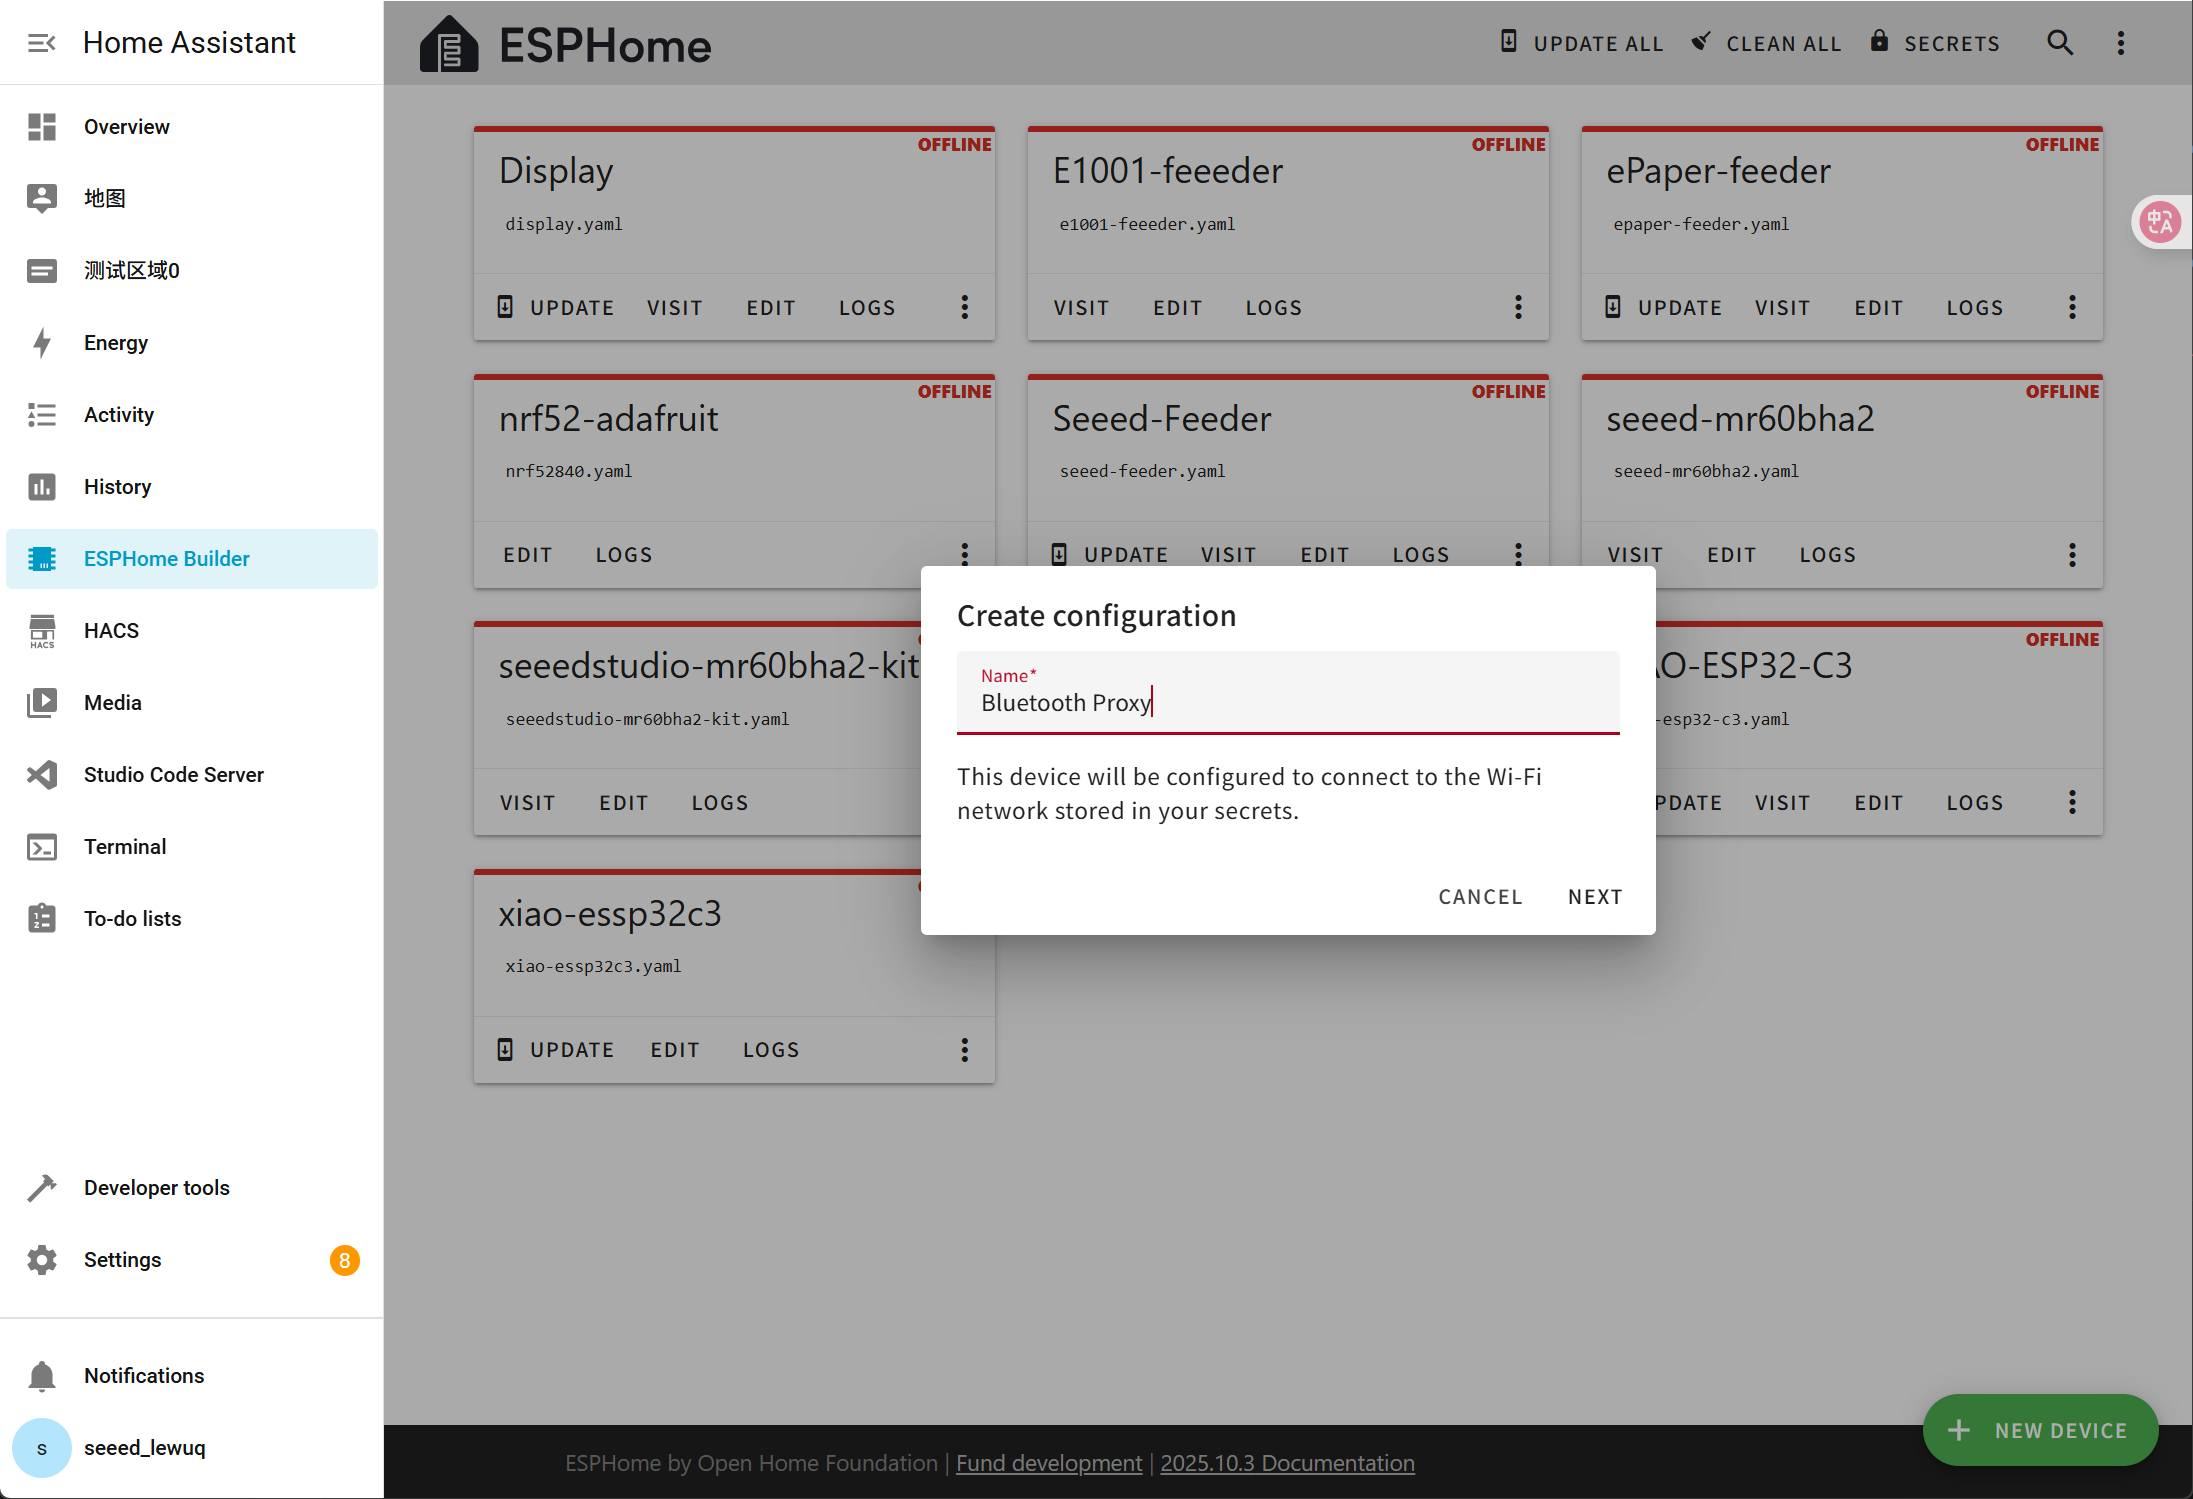
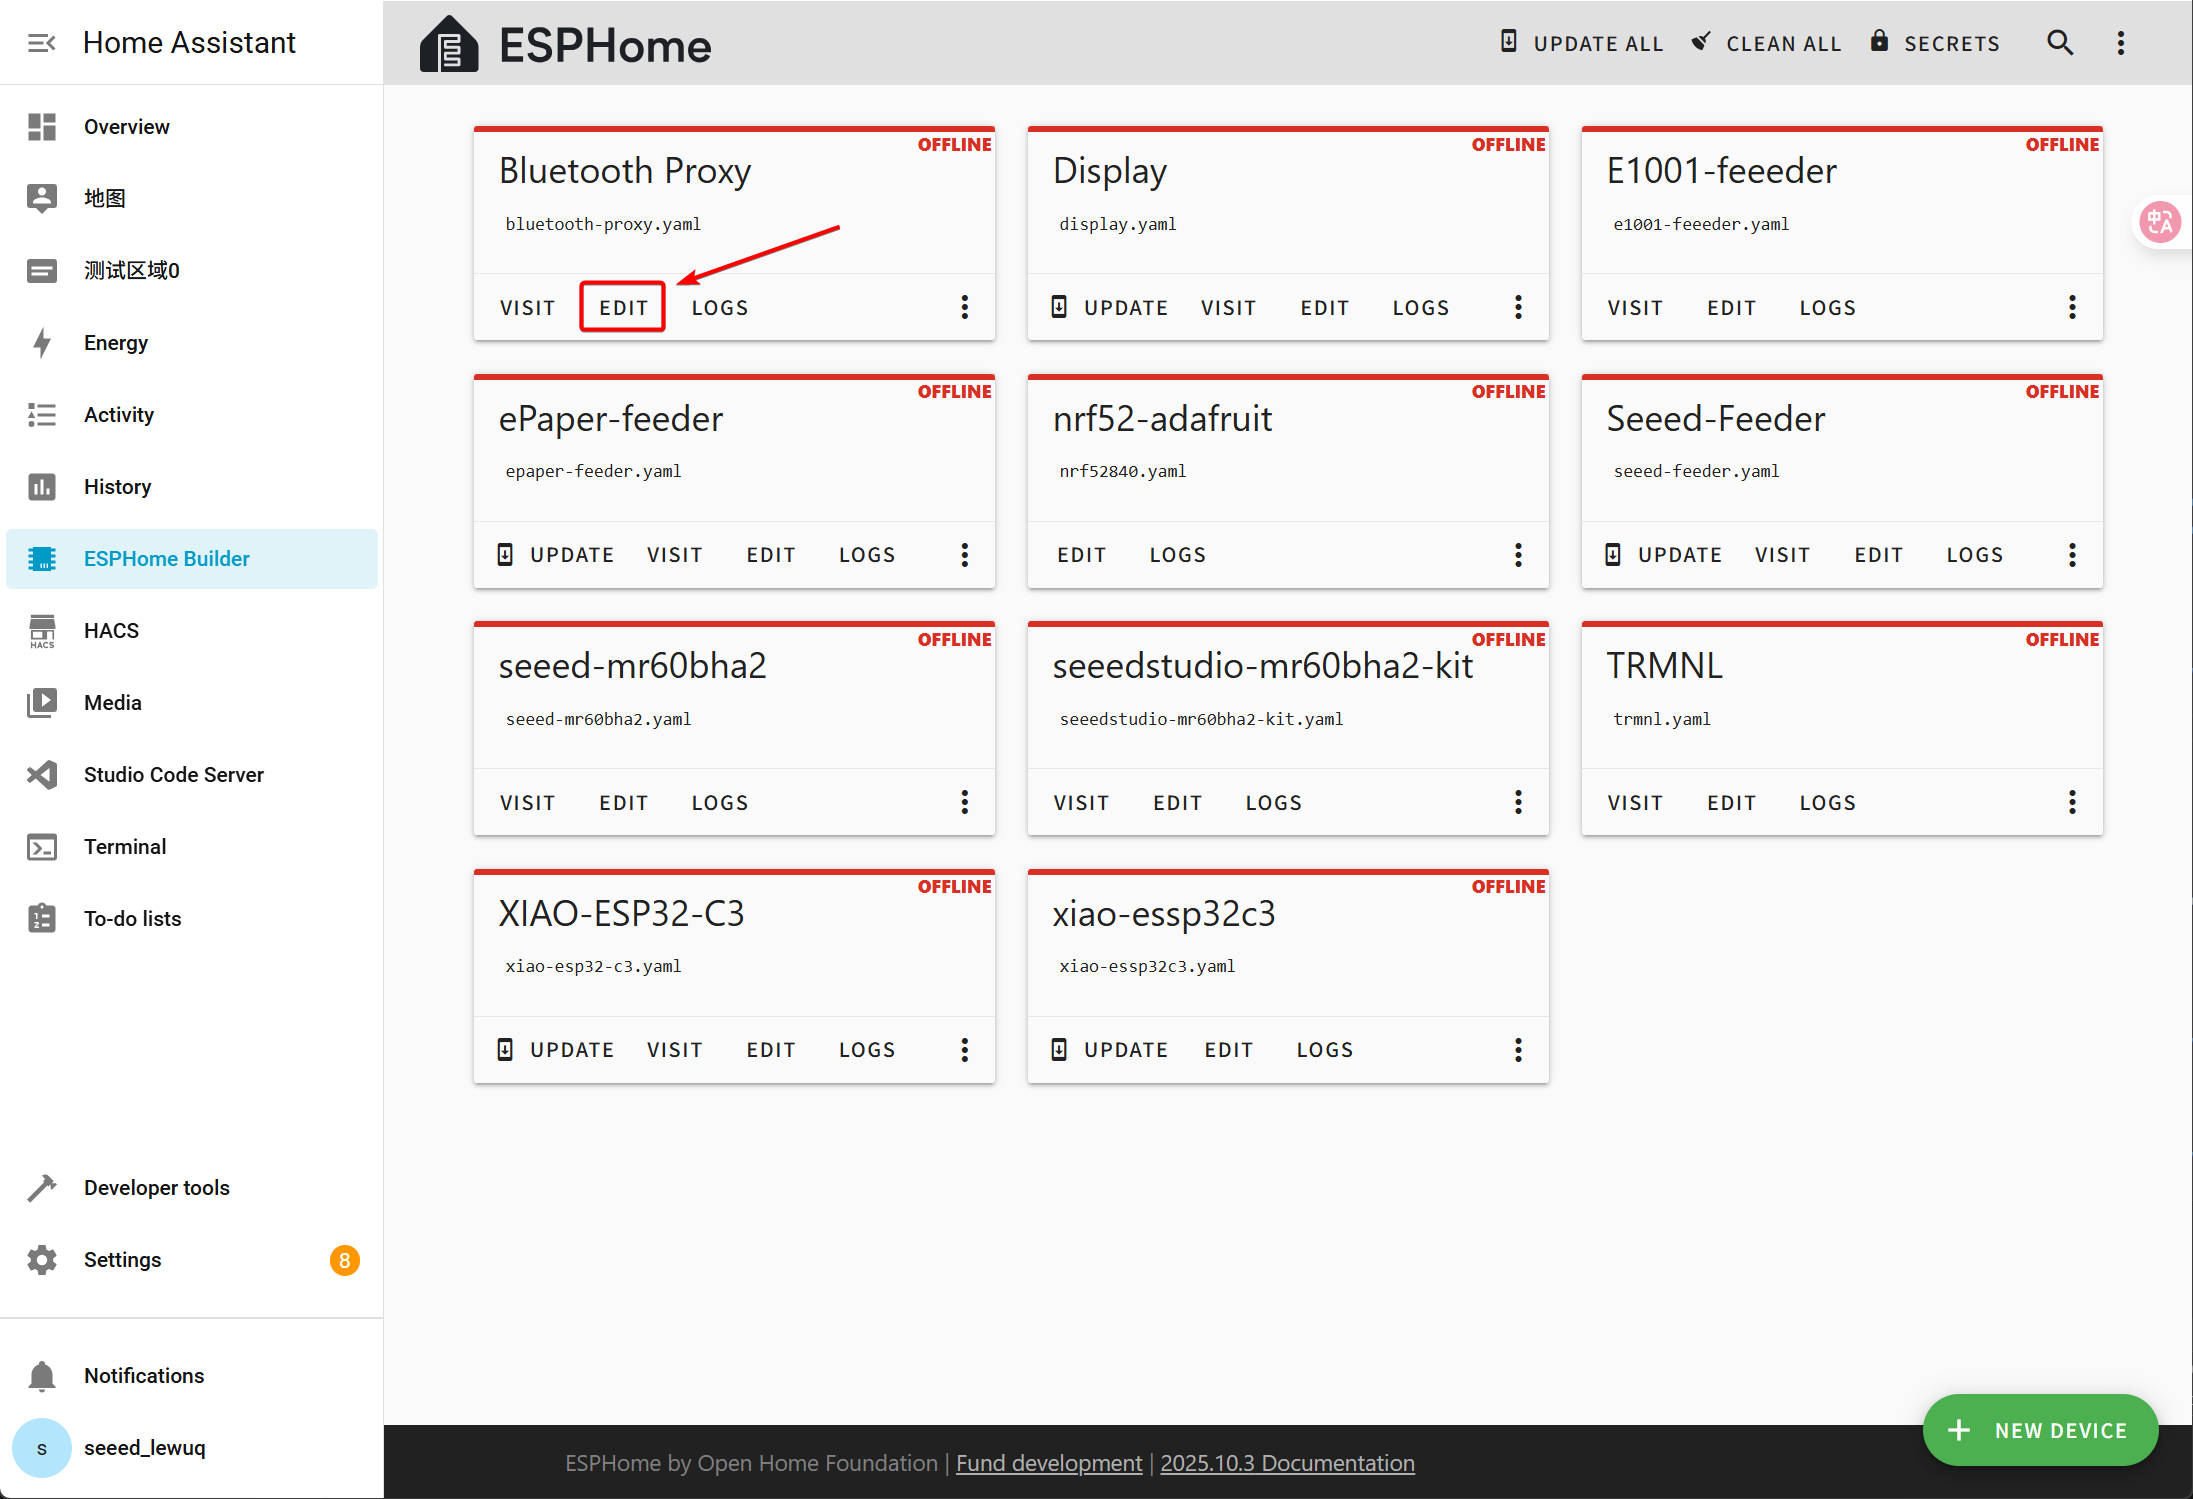
Go to ESPHome, and click on the Add New Device button at the bottom right.
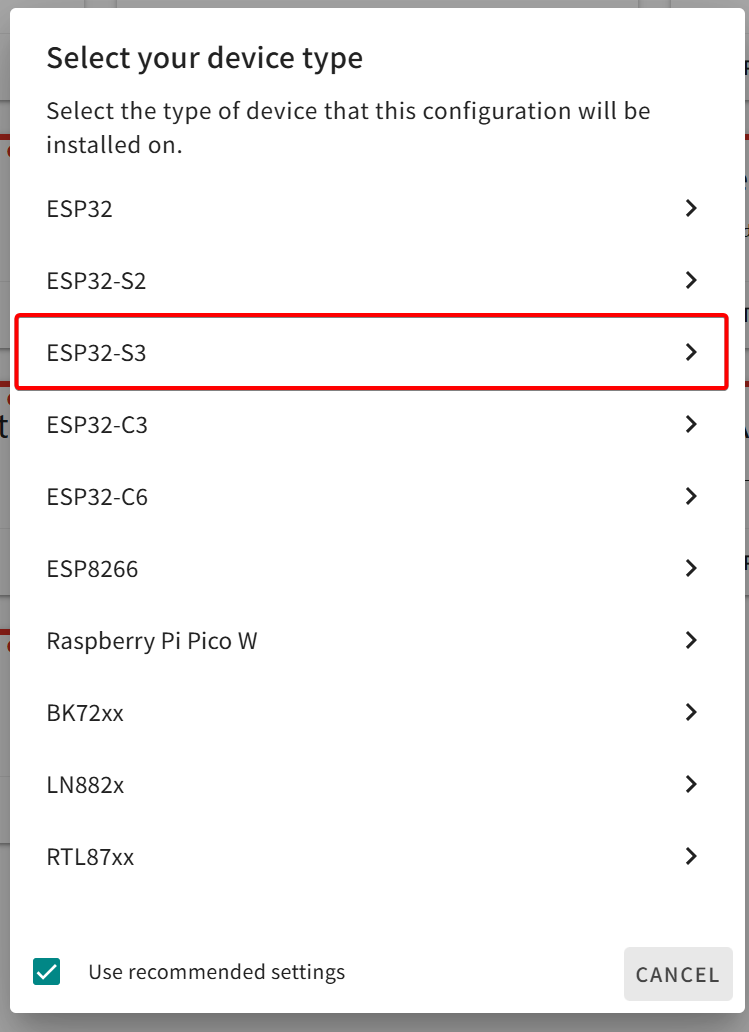
Name the equipment and select the corresponding main control chip. The XIAO W5500 is designed based on XIAO ESP32-S3.

Step 3. Install firwmare
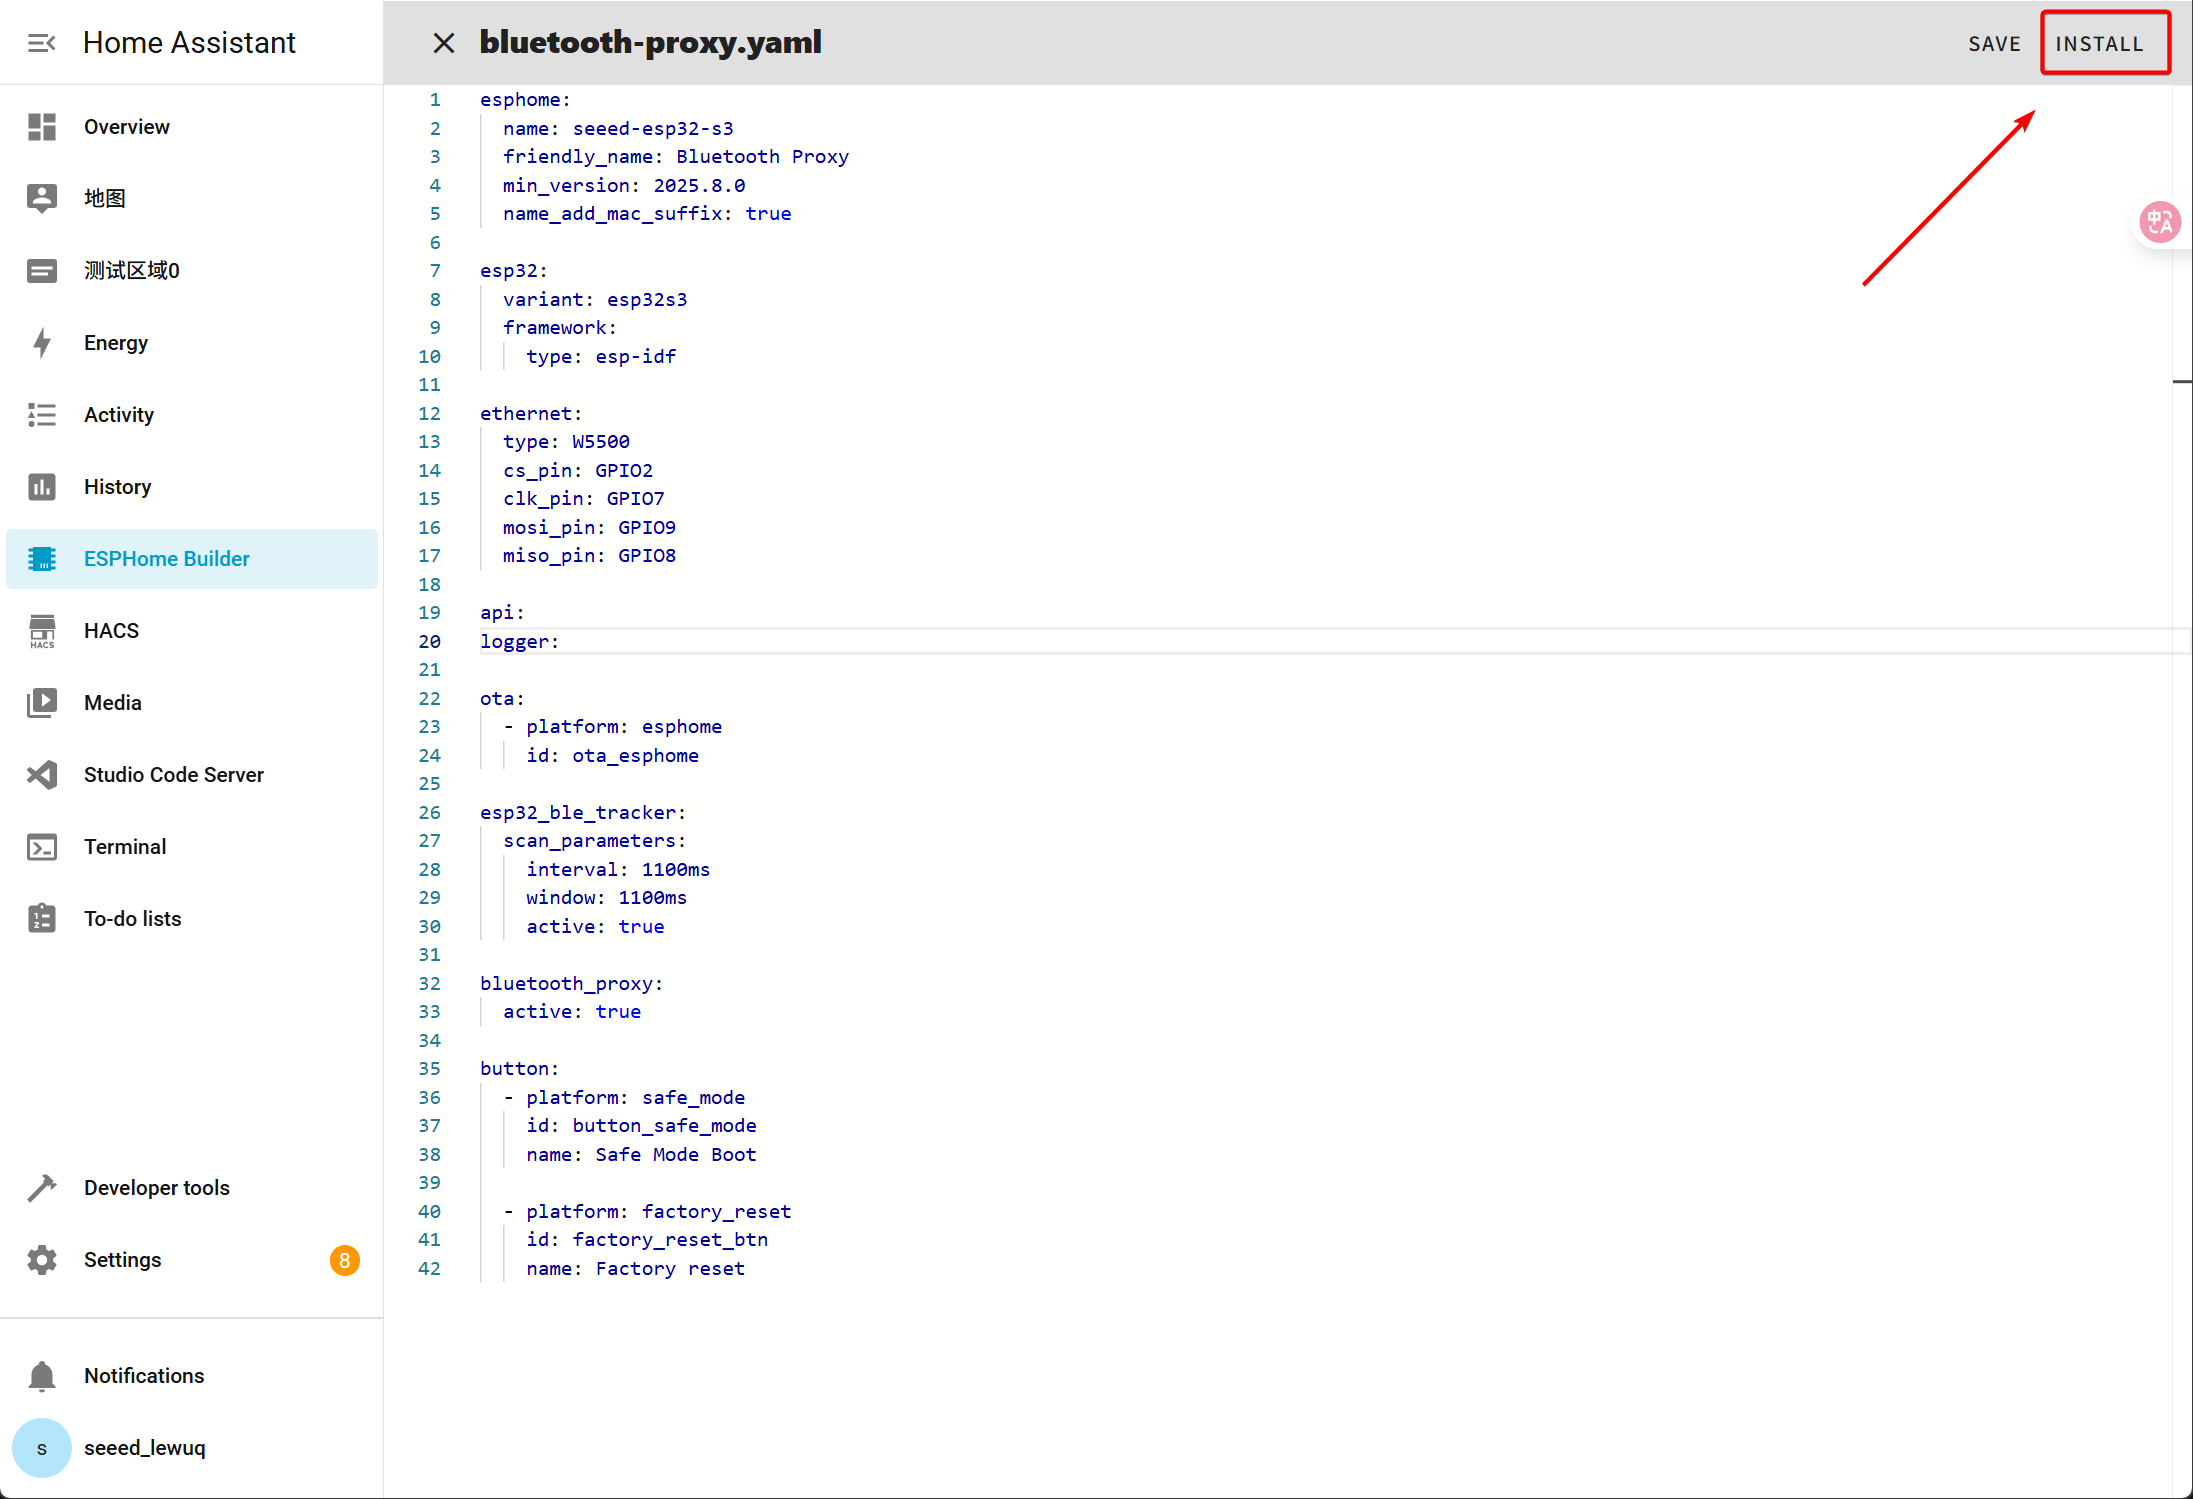
Click here to copy the yaml file
# Only boards produced after November 1, 2025 are supported
# ==== AUTO-SYNC START: xiao-w5500-ethernet-adapter/xiao-w5500-ethernet-adapter.yaml ====

# Only boards produced after November 1, 2025 are supported
esphome:
  name: seeed-esp32-poe
  friendly_name: "XIAO W5500 Ethernet Adapter V1.2"
  min_version: 2025.11.0
  name_add_mac_suffix: true

esp32:
  variant: esp32s3
  framework:
    type: esp-idf

ethernet:
  type: W5500
  clk_pin: GPIO7
  mosi_pin: GPIO9
  miso_pin: GPIO8
  cs_pin: GPIO2
  interrupt_pin: GPIO10

api:
logger:

ota:
  - platform: esphome
    id: ota_esphome

esp32_ble:
  max_connections: 4

esp32_ble_tracker:

bluetooth_proxy:
  active: true
  connection_slots: 4

button:
  - platform: safe_mode
    id: button_safe_mode
    name: Safe Mode Boot

  - platform: factory_reset
    id: factory_reset_btn
    name: Factory reset
# ==== AUTO-SYNC END ====
Click INSTALL to install the code to the device and you will see the following image.
- Install through browser
- Install through host
- Install through Wi-Fi
If your Home Assistant Host (Raspberry PI/Green/Yellow etc.) is far away from you, we recommend using this method. You can install it with the computer you have on hand.
First, you need to click Manual download to download the compiled firmware.

Open this website where we will upload the firmware to the XIAO(ESP32-S3) W5500 Ethernet Adapter.
Go back to ESPHome to download the firmware.

Select Factory format.

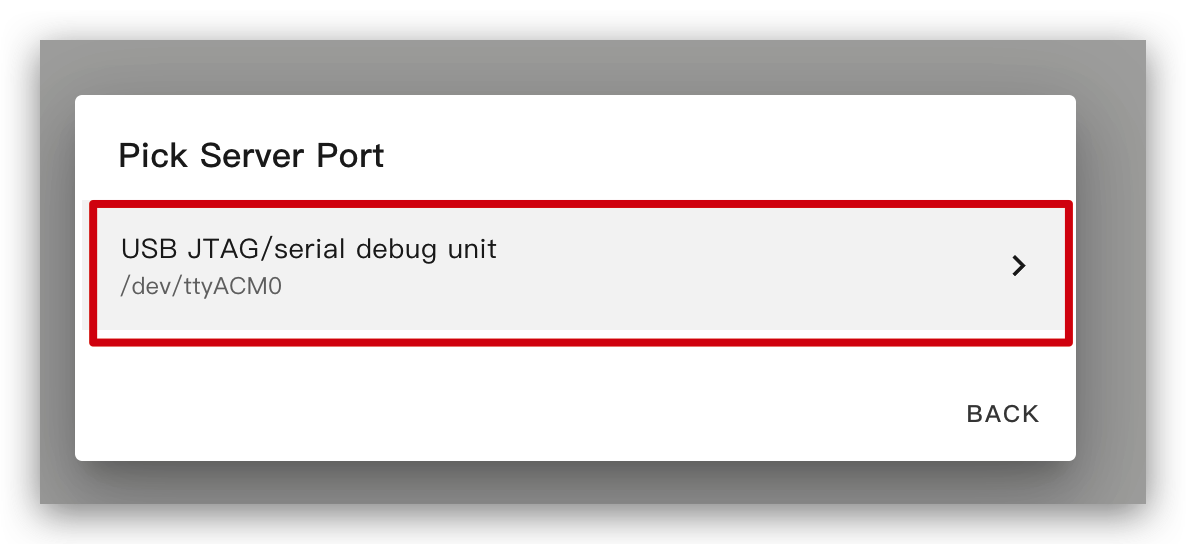
Use USB cable to connect the device to your computer and click CONNECT.

Select usbmodemxxx(Windows is COMxxx) and click connect.

Click INSTALL and select the firmware you just downloaded.

If your Home Assistant Host (Raspberry PI/Green/Yellow etc.) is nearby, we recommend using this method as it is simpler.
Before you install the code to the device, you need to use USB cable to connect this device to your Raspberry Pi or HA Green(Yellow) etc which is running Home Assistant.
Click the options following the image to install the code to the device.

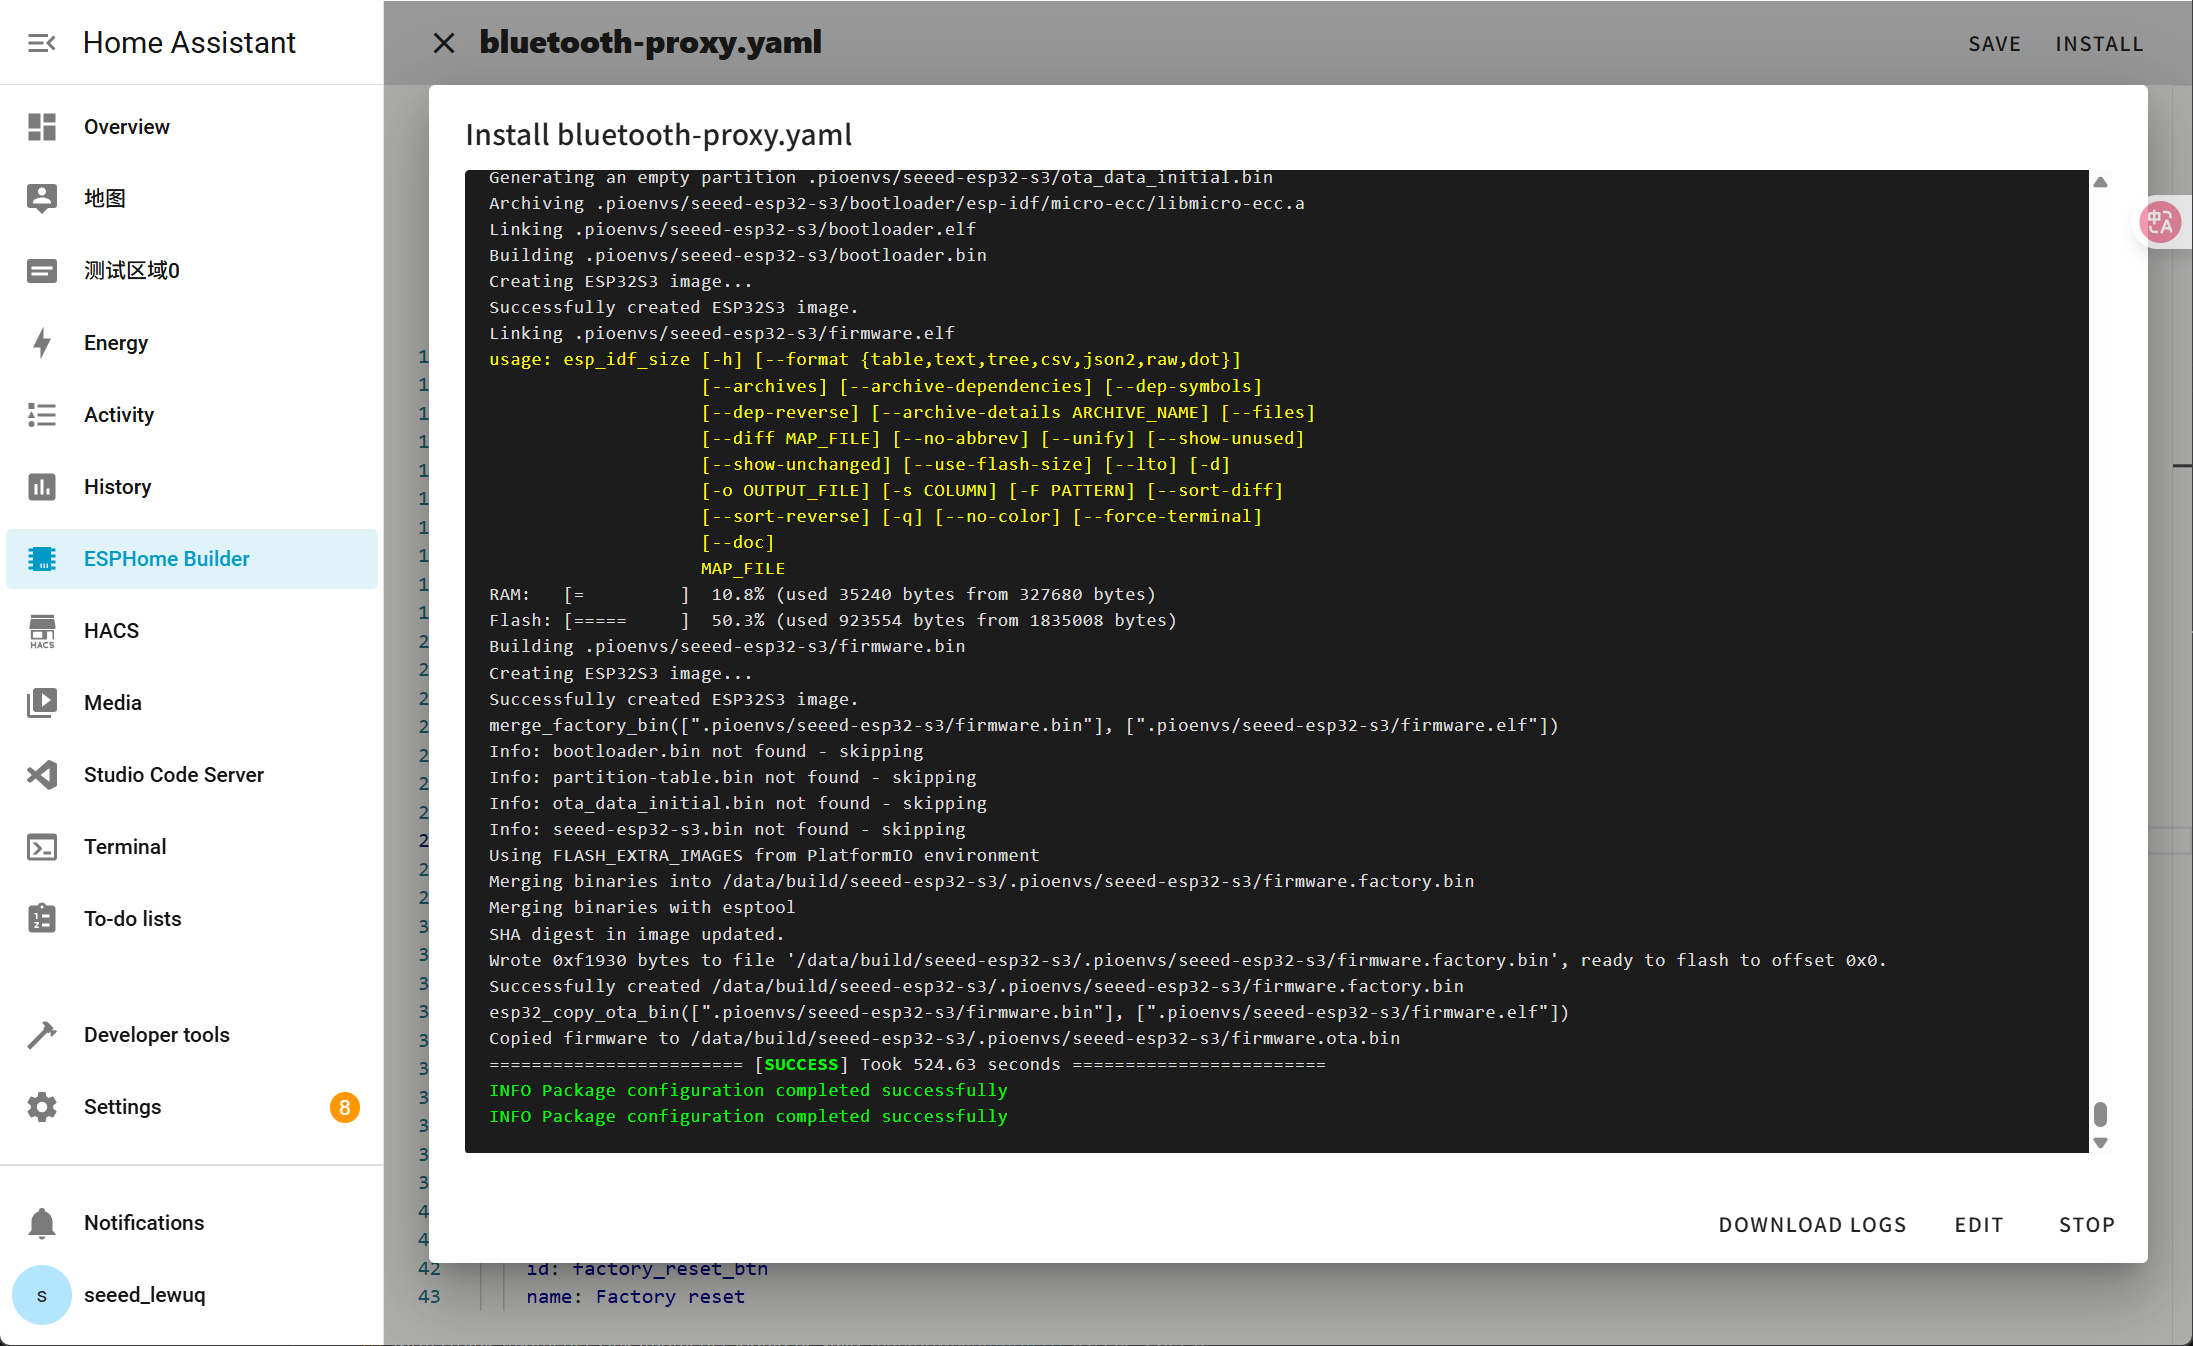
Wait a moment and you will see the feedback like the following image. It means the code is running successfully.
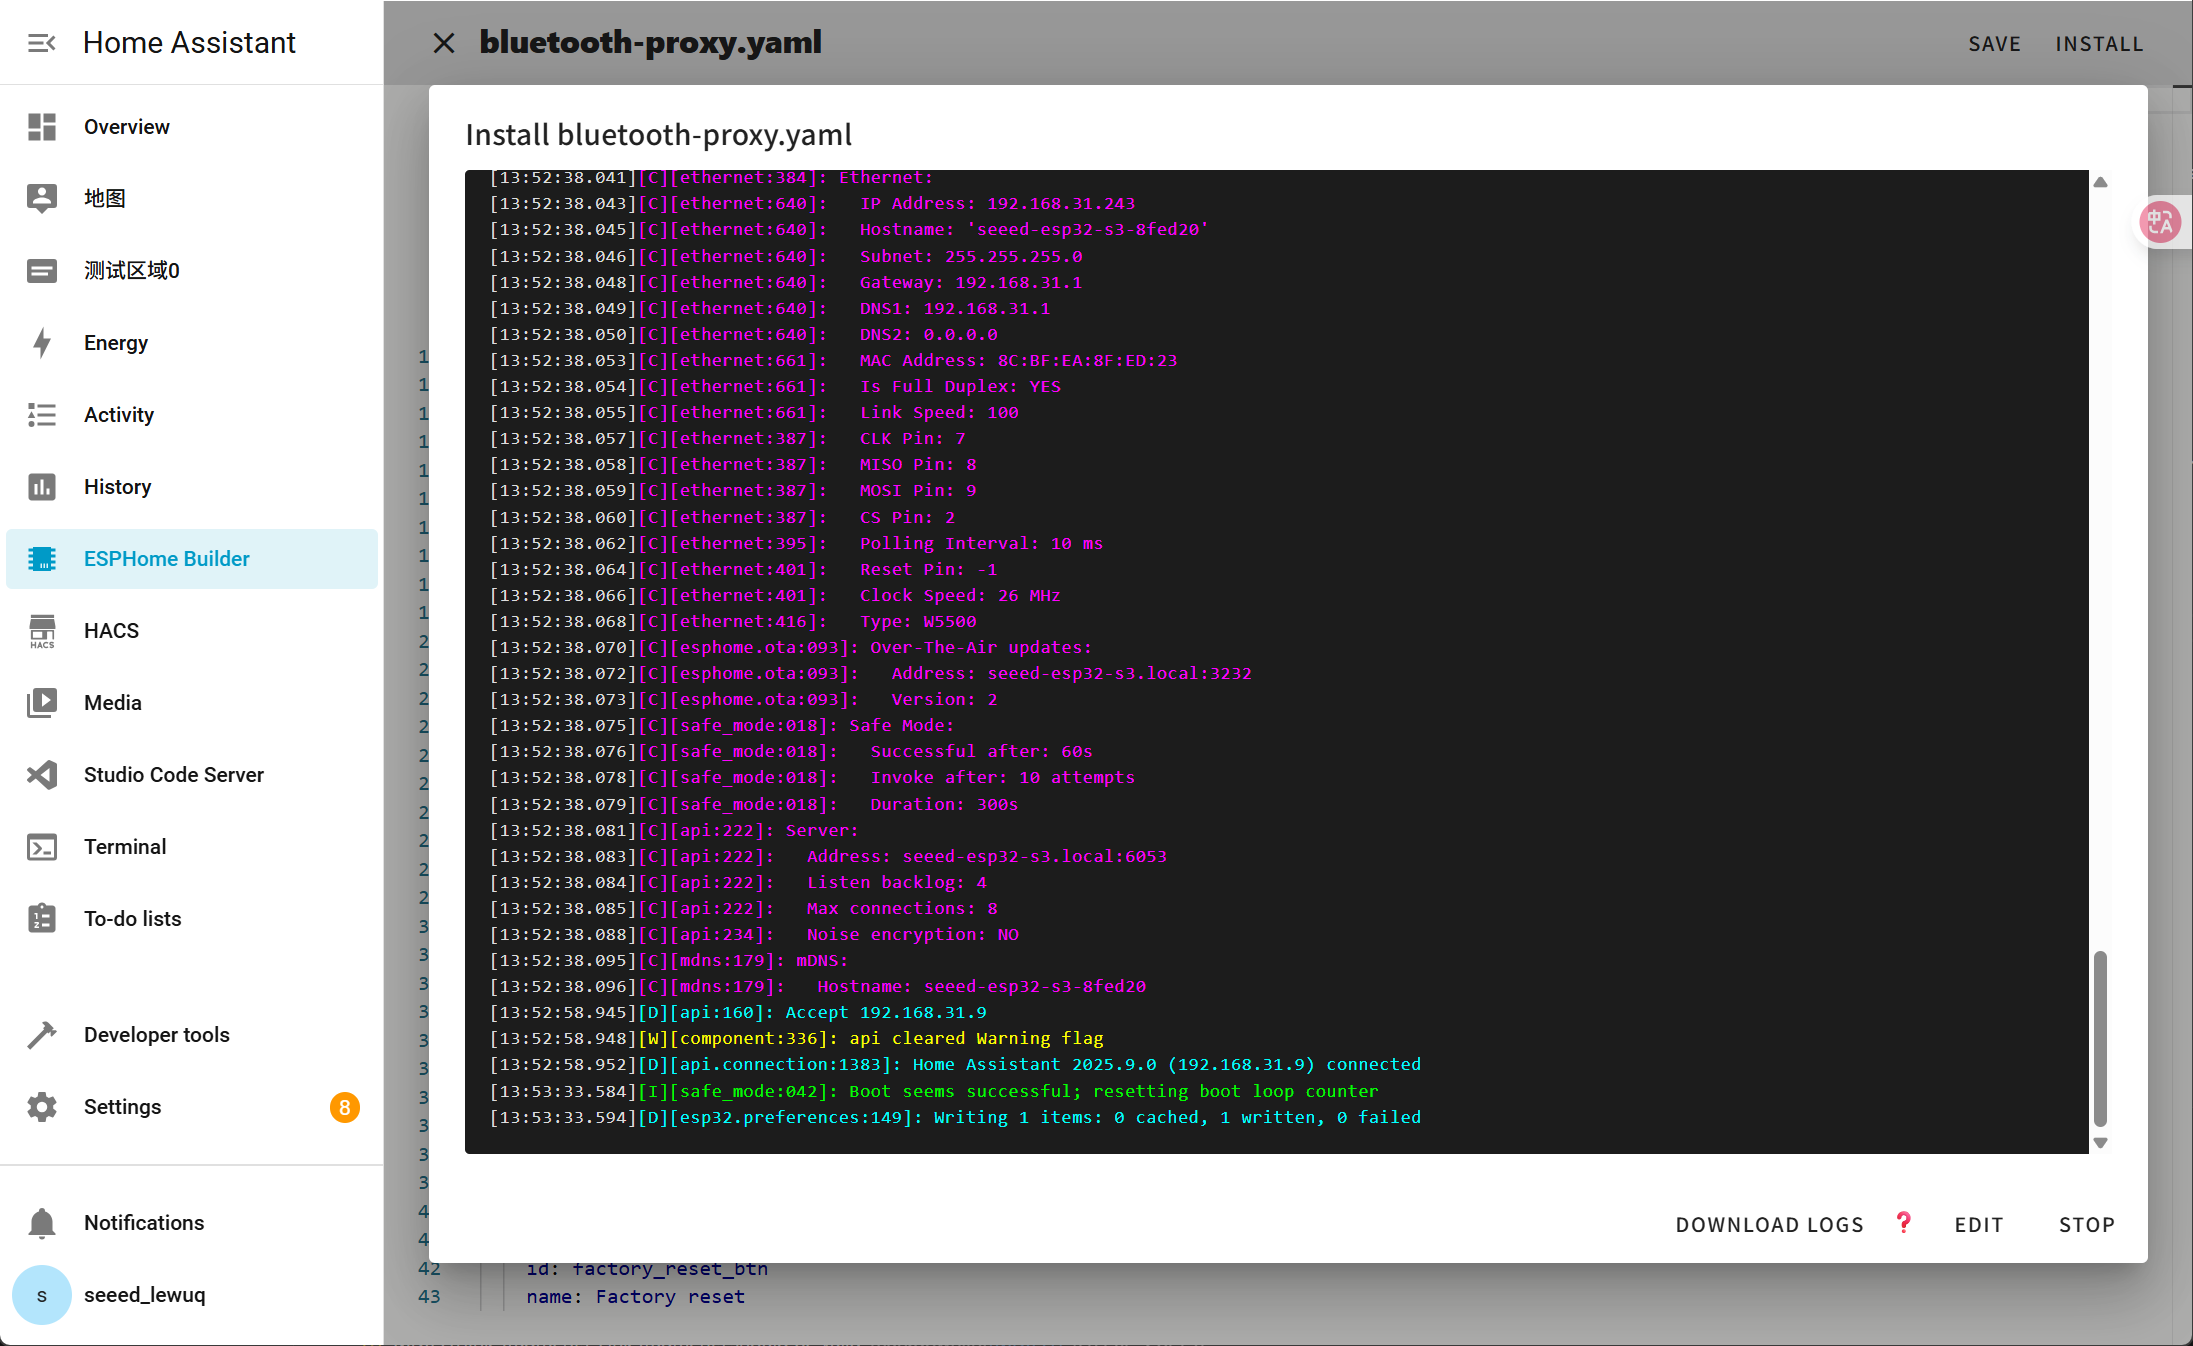
This is the simplest way, but on the premise that when installing the program for the first time, you should first upload the program to the ePaper Panel using the method on the left. After that, you can upload it via wifi. Also, make sure your YAML configuration includes properly configured ota and api sections with valid encryption keys for this method to work.
In this way, you don't need to connect the ePaper panel to anything, just make sure it is online.
Click the option and then the firmware will be installed to ePaper penal automatically.

Wait a moment and you will see the feedback like the following image. If it fails, it may be due to a weak signal. Please move the device closer to your router.
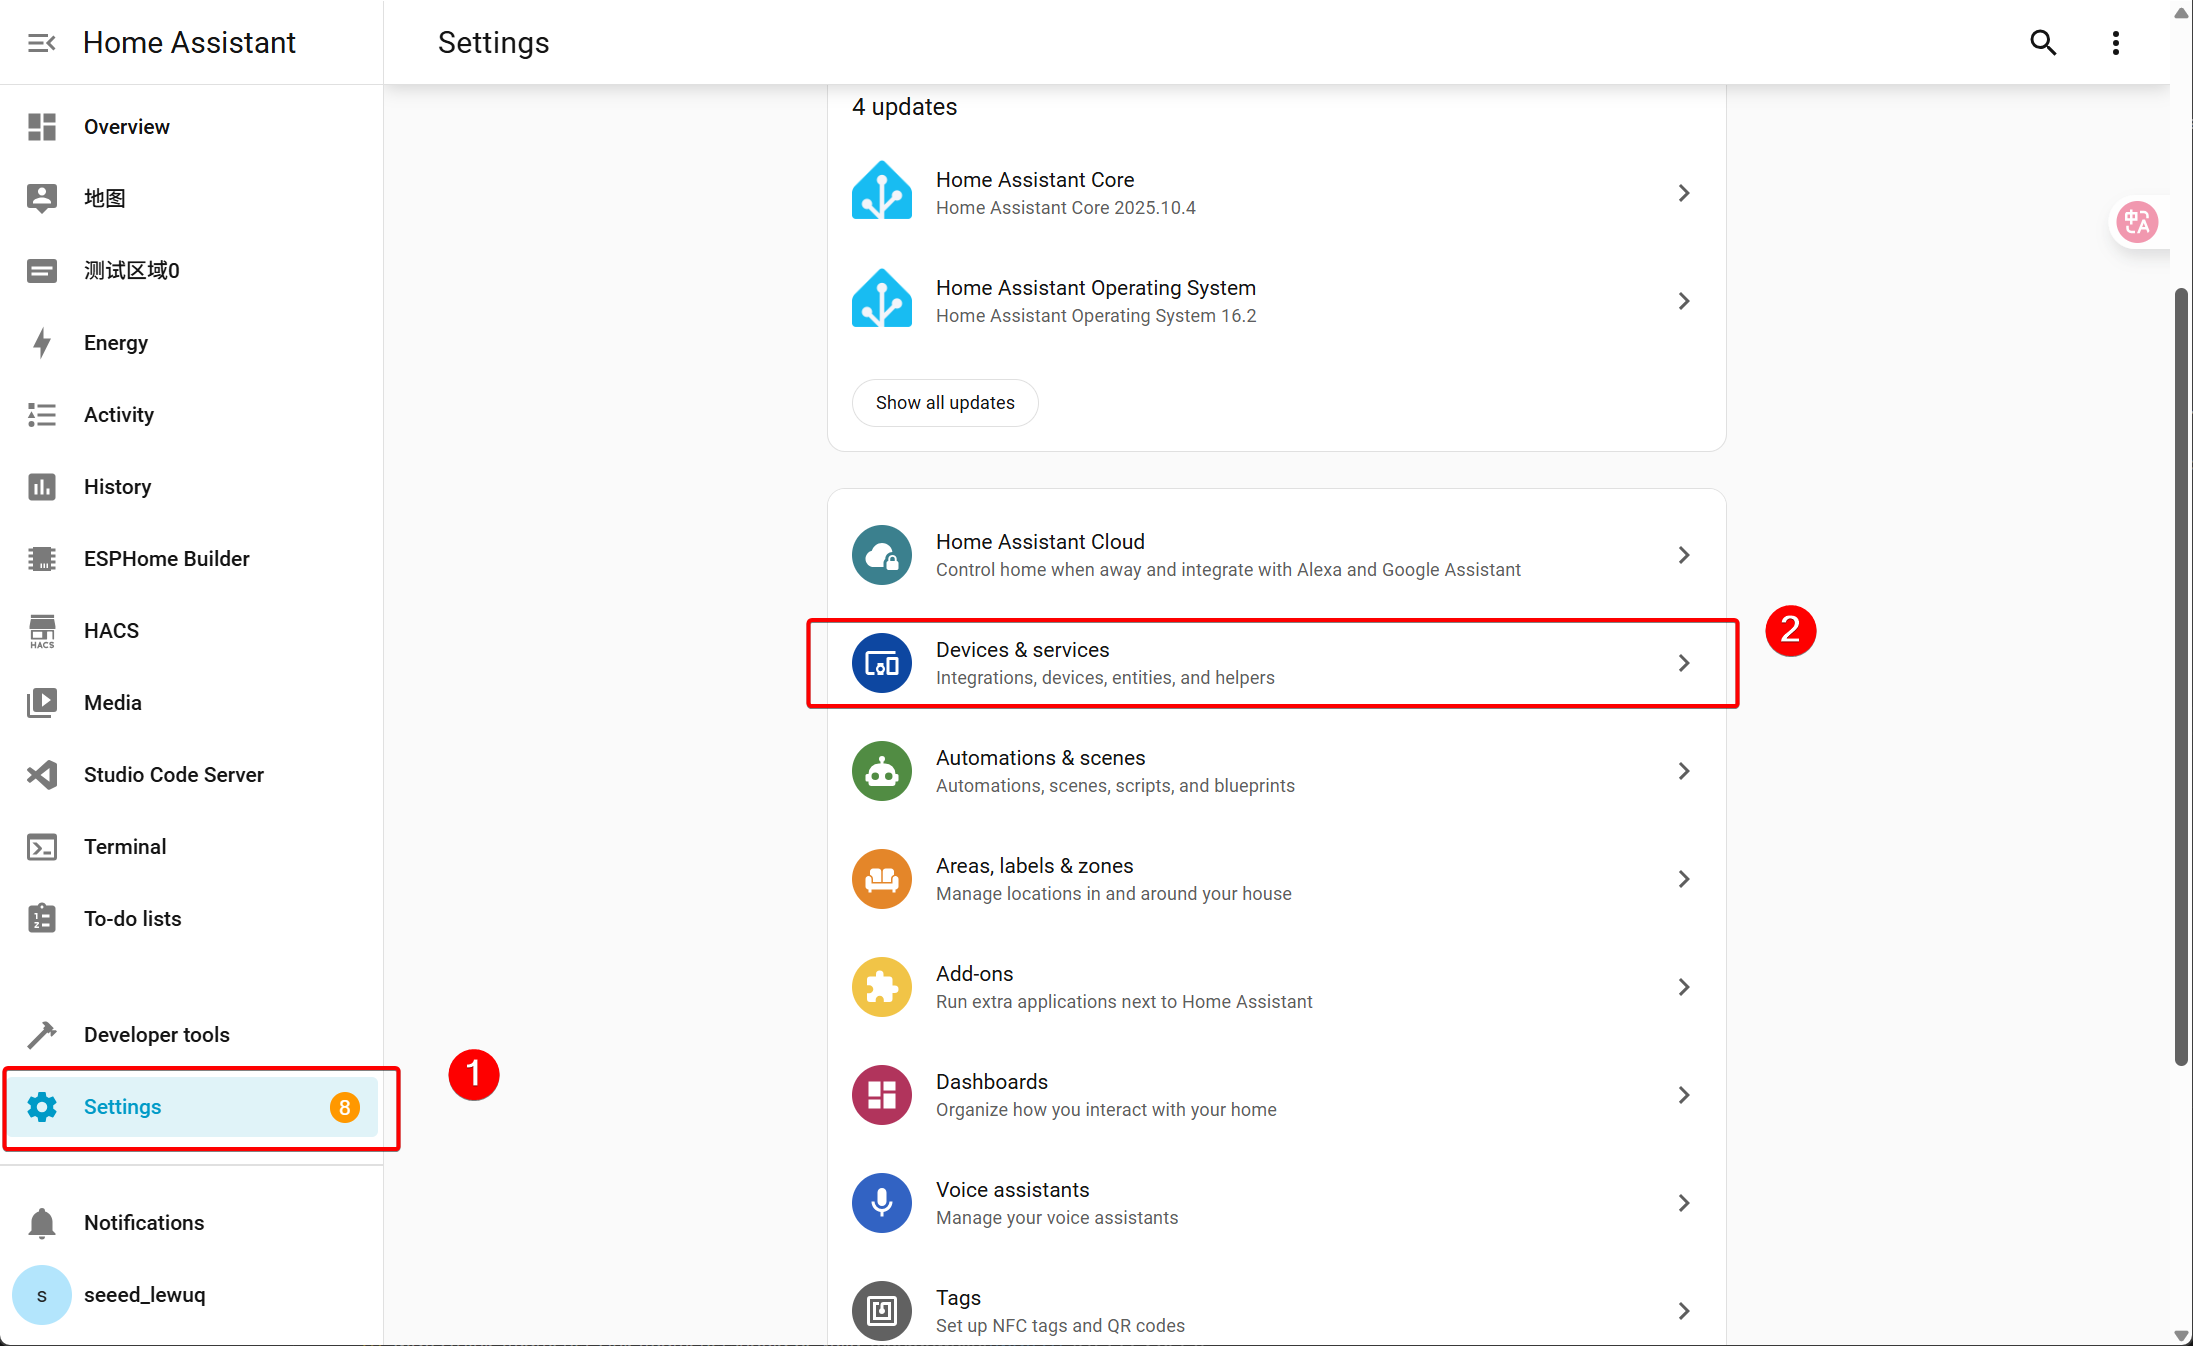
Step 4. View the scanning results
-
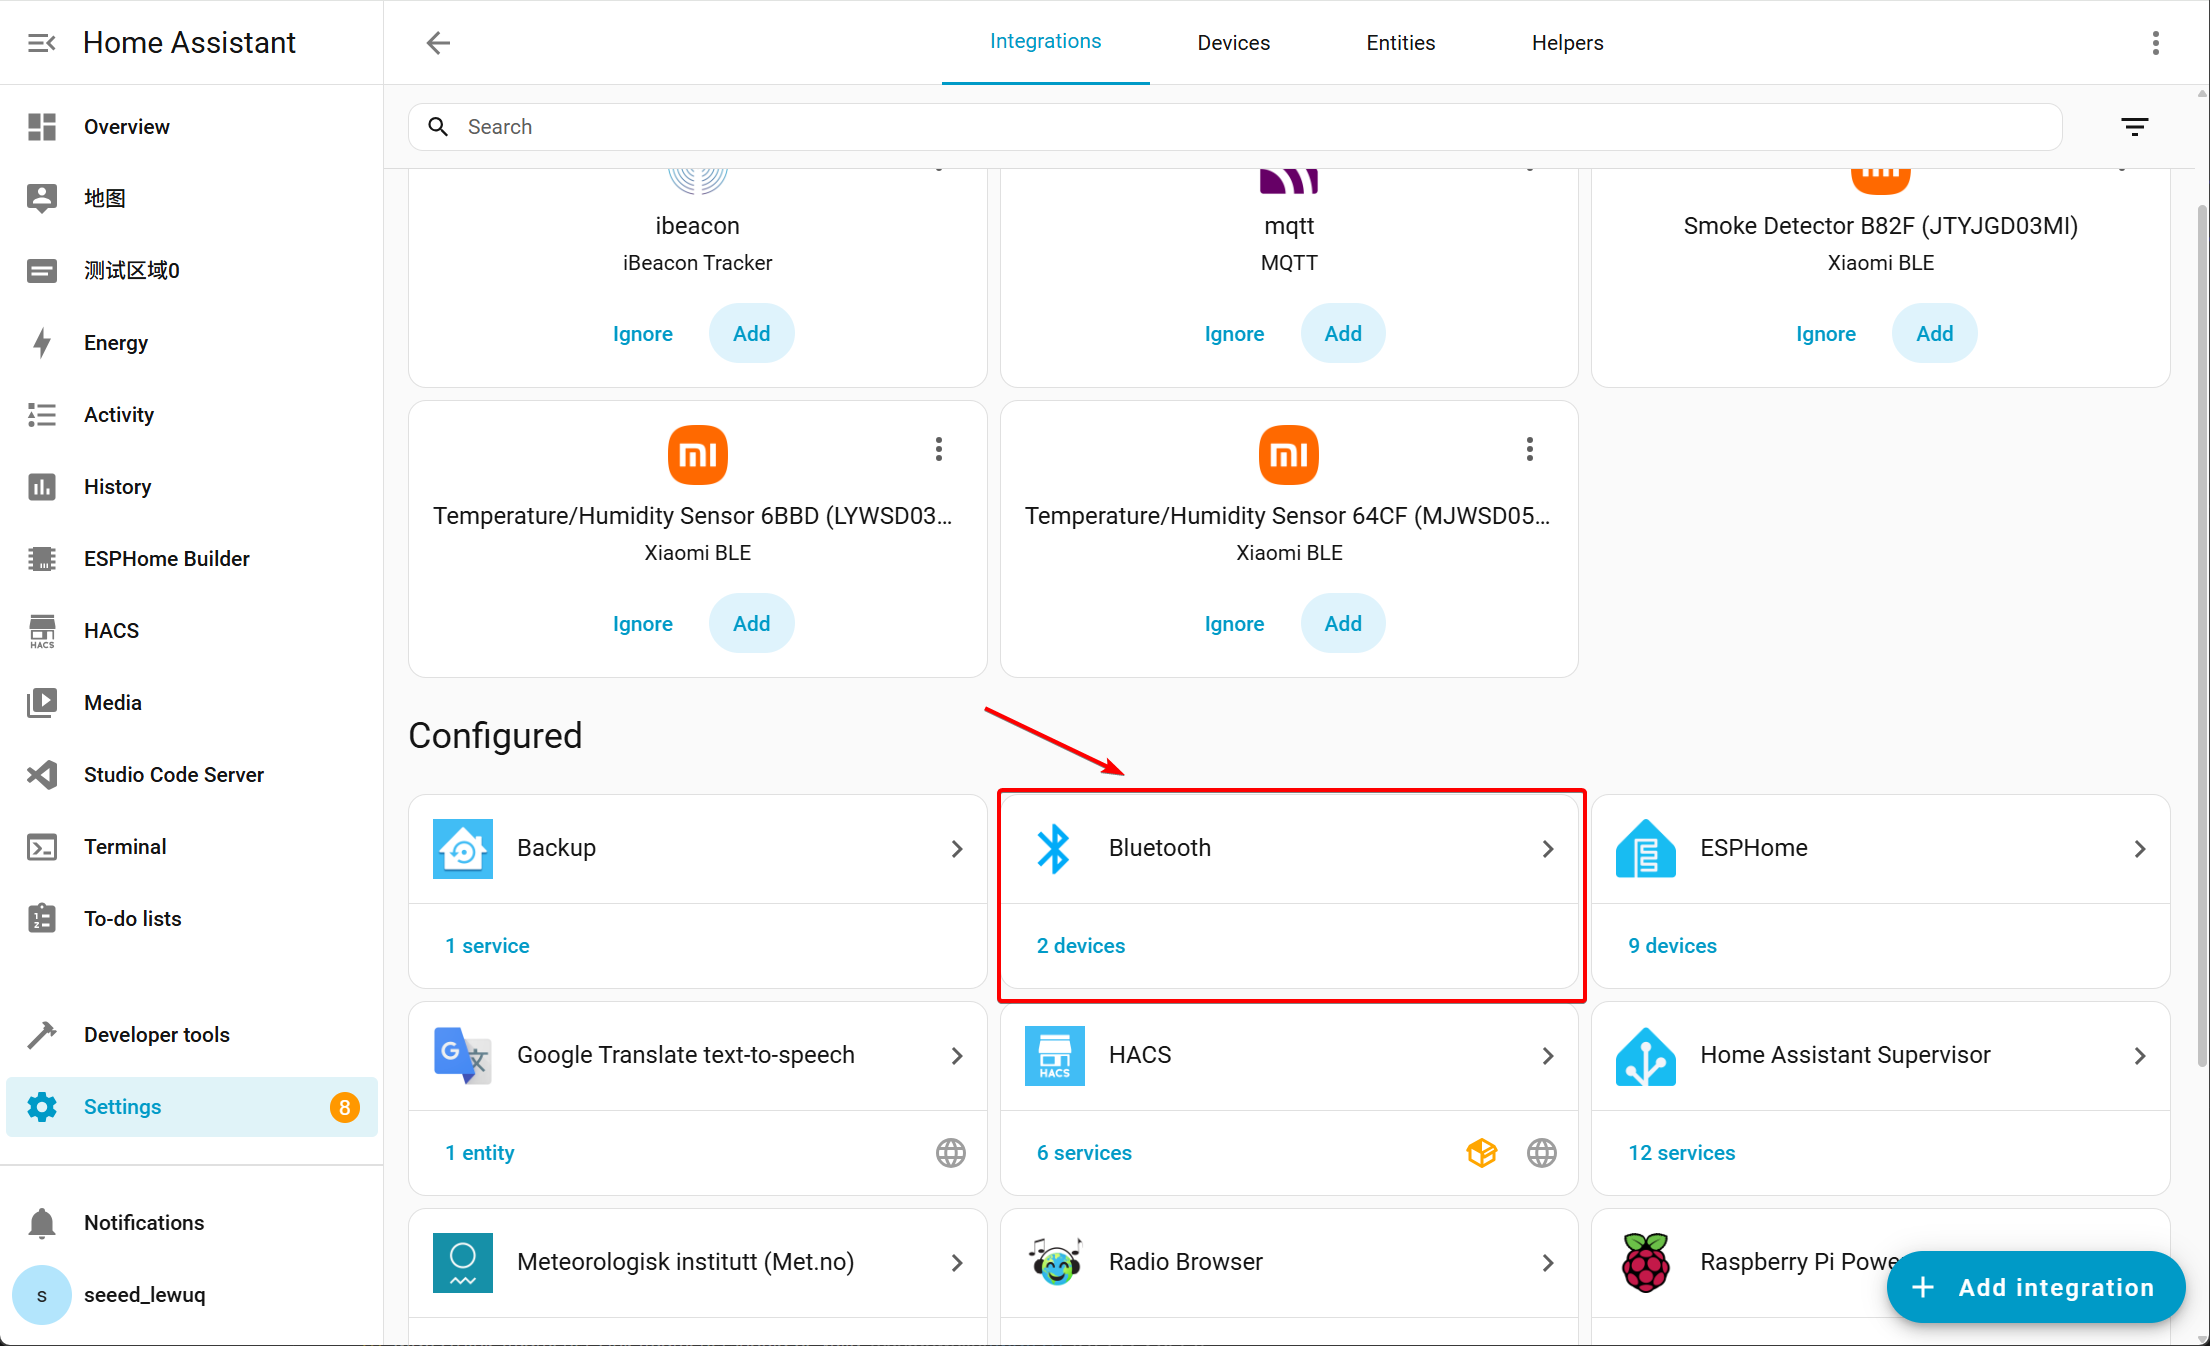
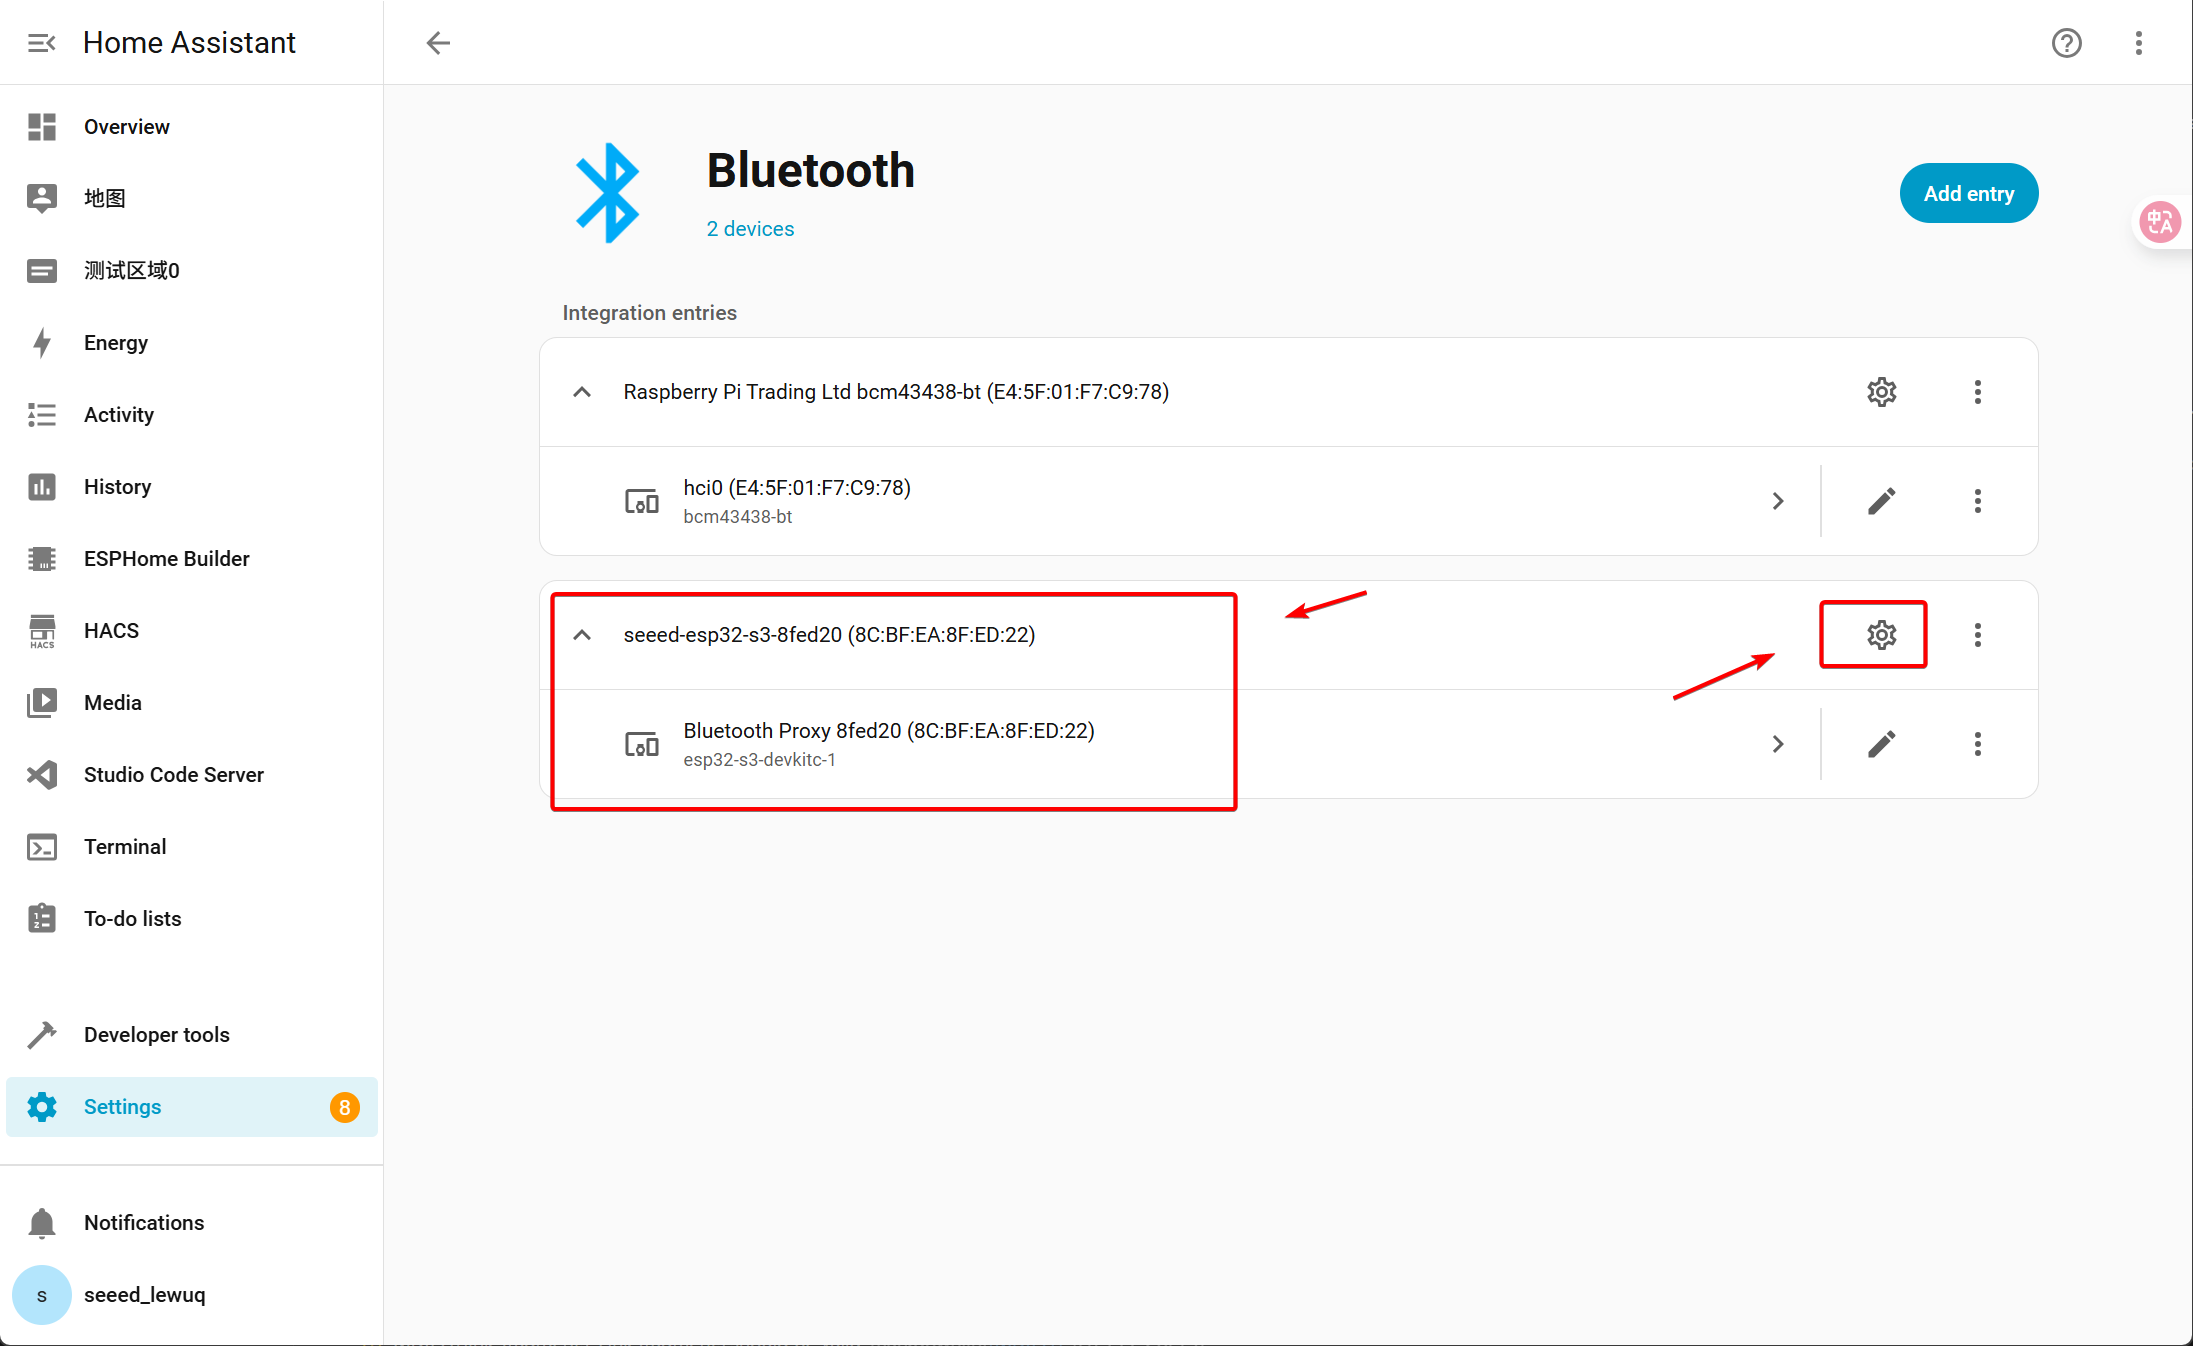
Navigate to Settings → Devices & services → Bluetooth and select the Bluetooth Proxy device.
-
Select Advertisement Monitor to view the scanned Bluetooth device information.
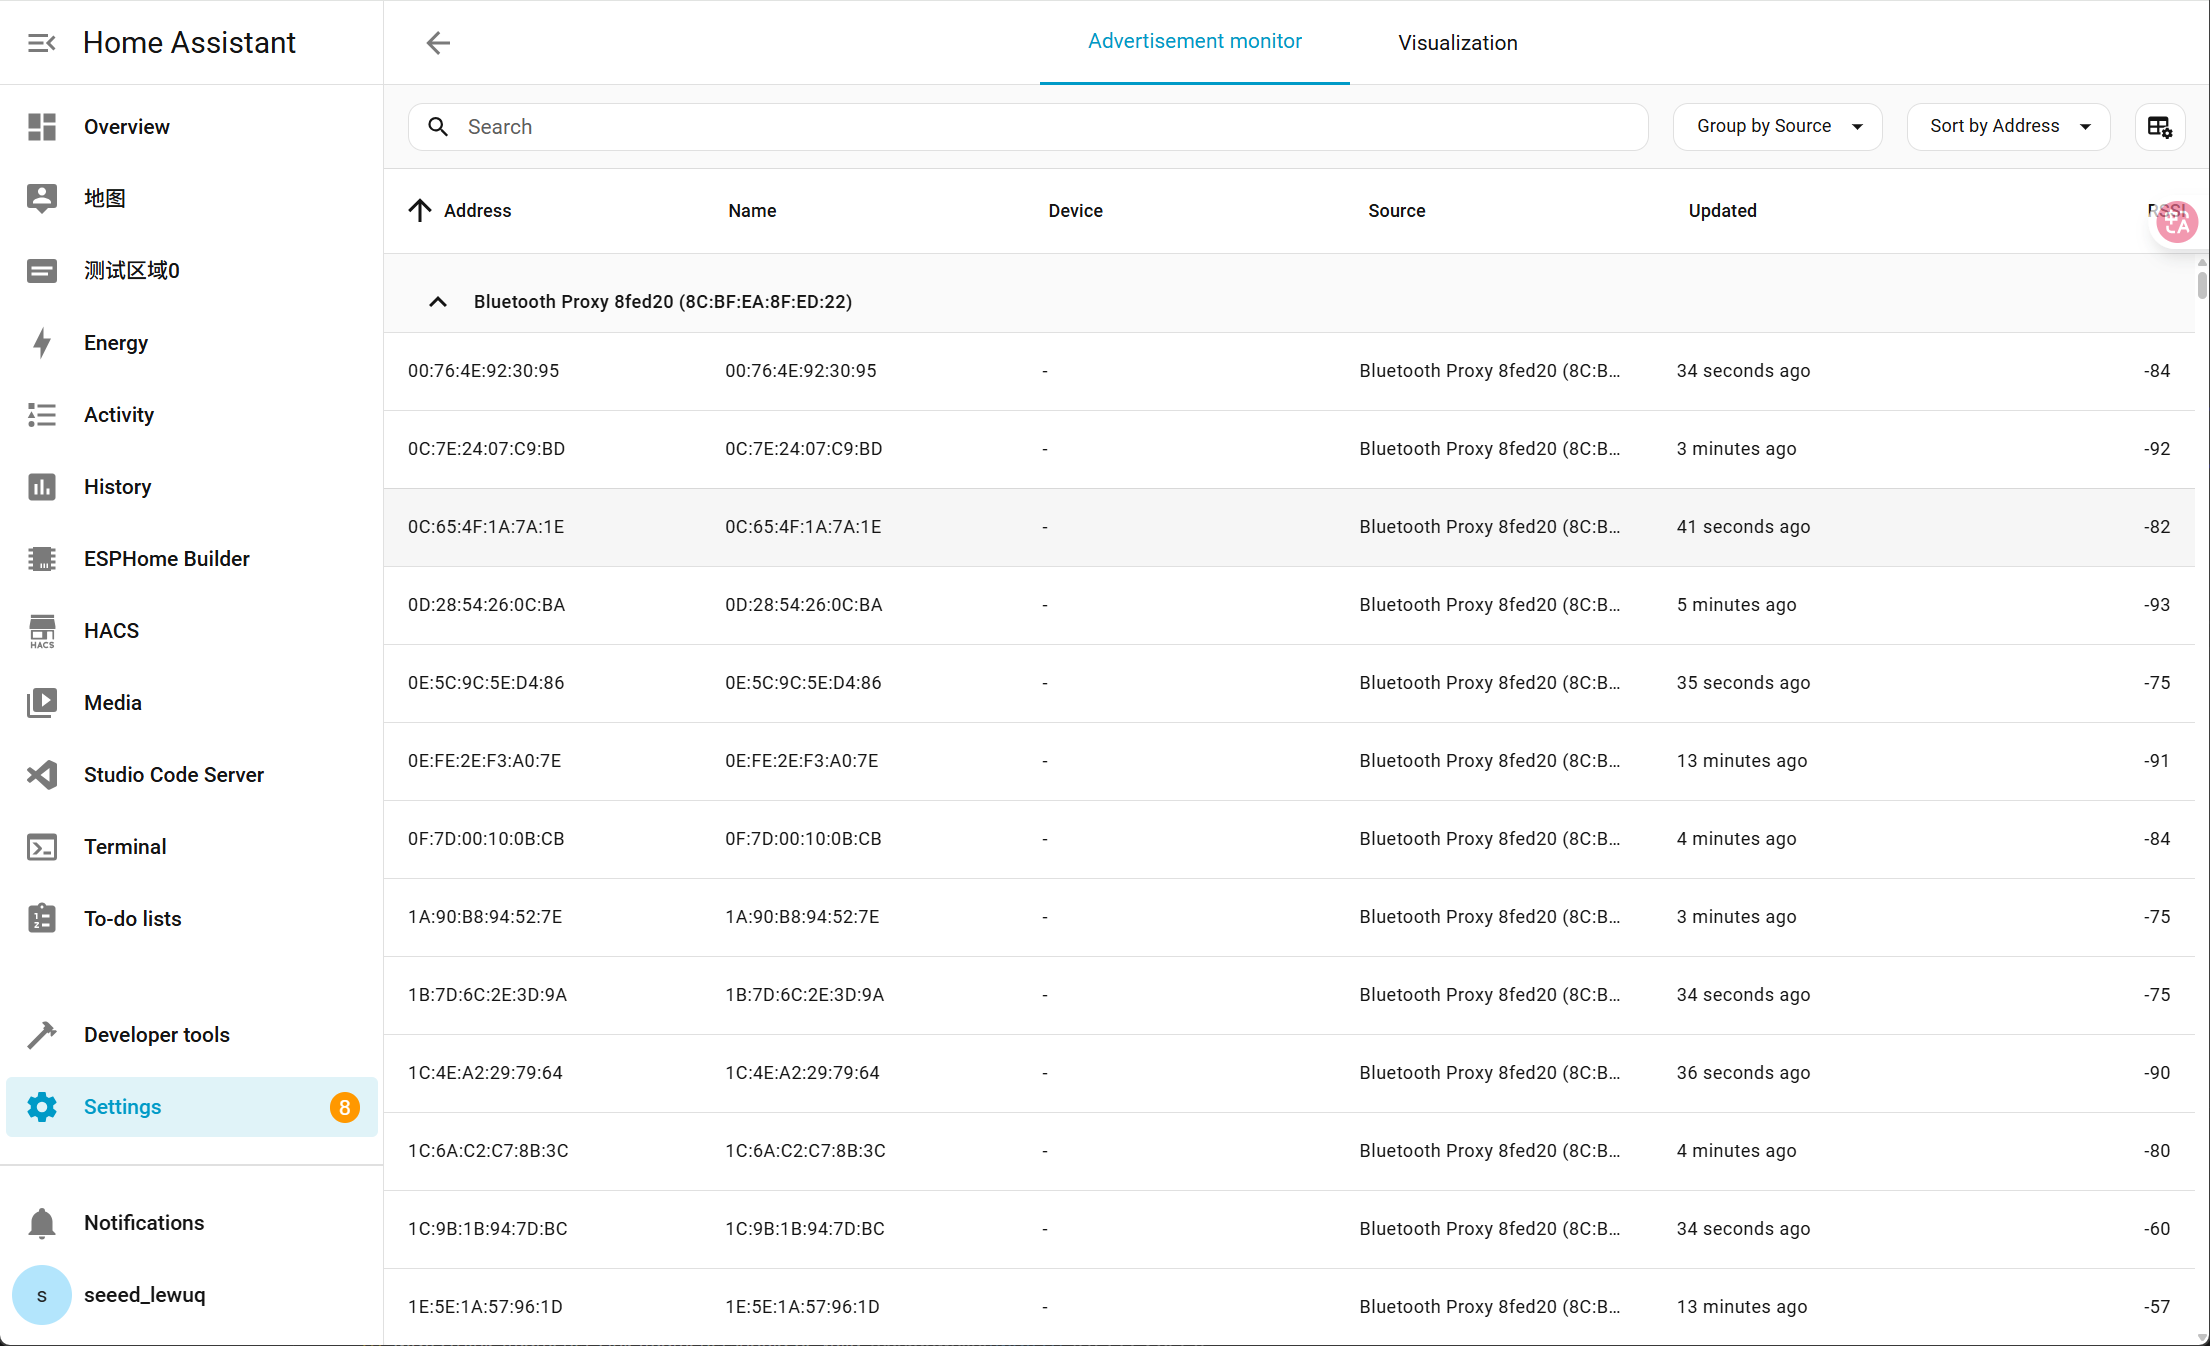
- Addresss: The Bluetooth device’s broadcast address (in MAC-like format). Note that this is not the actual physical MAC address — it is a randomized private address generated by the BLE privacy mechanism, which changes periodically.
- Name: The advertised name of the Bluetooth device. If the device broadcasts its name, this field helps identify it.
- Device: The recognized Bluetooth entity in Home Assistant. If the device has not yet been paired or identified, this field remains empty.
- Source: Indicates the scanning source, i.e., the specific Bluetooth Proxy node (e.g., Bluetooth Proxy 8fed20). This helps distinguish data from multiple proxy nodes.
- RRSI: Received Signal Strength Indicator (in dBm). The closer the value is to 0, the stronger the signal.
-
Alternatively, select Visualization to access the view.
The figure shows the Bluetooth Advertisement Visualization in Home Assistant, illustrating the topology of the Bluetooth proxy network.
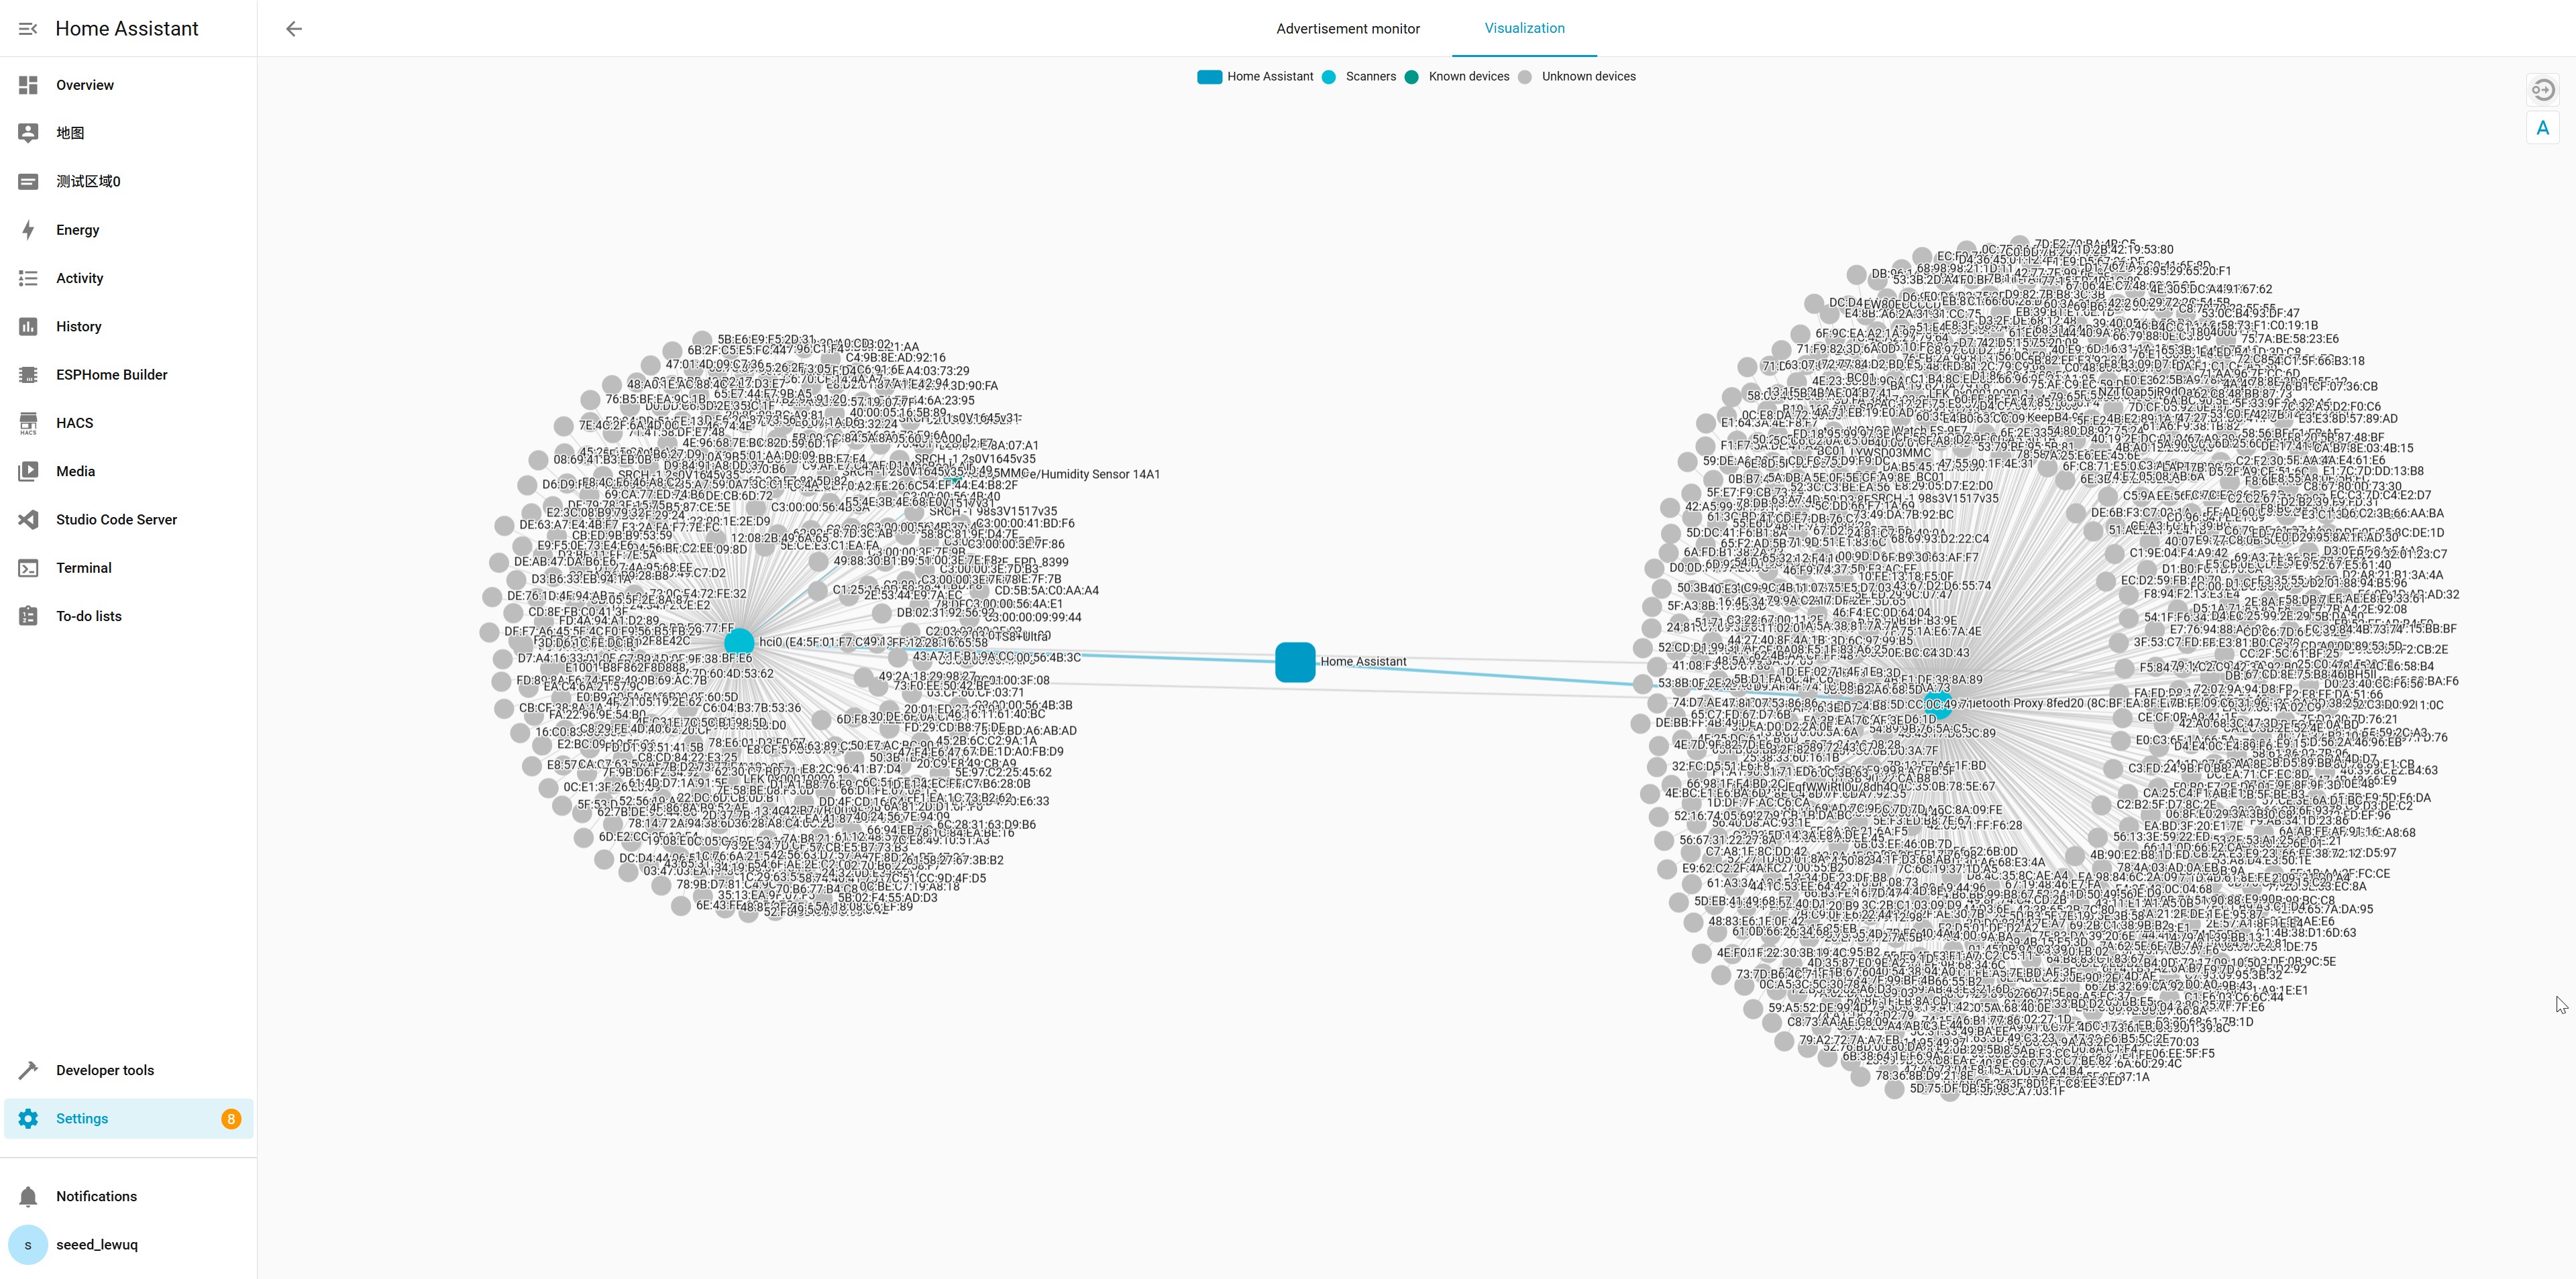
Many BLE devices use privacy addresses for security, meaning that their broadcasted address is randomized and periodically updated. As a result, the same physical device may appear with different addresses in Home Assistant’s advertisement list. To identify a device reliably, use its advertised name or other characteristics such as service UUIDs or signal strength patterns.
Application
By leveraging the Bluetooth proxy implemented on the XIAO(ESP32-S3) W5500 Ethernet Adapter, you can significantly extend Bluetooth coverage to connect Bluetooth devices. Specifically, this can be achieved based on different Bluetooth protocols. Below, taking the existing integrations of Home Assistant (HA) as examples, we demonstrate the implementation methods tailored for smart home application scenarios.
BTHome
BTHome is an energy efficient but flexible BLE format for devices to broadcast their sensor data and button presses.
Taking reading data from a DHT11 temperature and humidity sensor as an example, add the corresponding integration in Home Assistant (HA), read the data via a Bluetooth proxy, and achieve a stable
In addition to the XIAO(ESP32-S3) W5500 Ethernet Adapter, you will also need to prepare a XIAO ESP32-C3 and a DHT11 temperature and humidity sensor.
- Add Arduino code
You also need to add the BTHome files and DHT files to the directory you created. The specific files can be accessed at: DHT&BTHome.zip
#include "BTHome.h"
#include "DHT.h"

#define DHTTYPE DHT11   // DHT 11
#define DHTPIN D0     // what pin we're connected to(DHT10 and DHT20 don't need define it)
DHT dht(DHTPIN, DHTTYPE);   //   DHT11 DHT21 DHT22

#define DEVICE_NAME "DIY-sensor"
#define ENABLE_ENCRYPT

String BIND_KEY = "231d39c1d7cc1ab1aee224cd096db912"; // Change this key with a string containing 32 of: a-f and 0-9 characters (hex) this will be asked in HA
BTHome bthome;

void setup() {
  Serial.begin(115200);
#ifdef ENABLE_ENCRYPT
  bthome.begin(DEVICE_NAME, true, BIND_KEY, false);
#else
  bthome.begin(DEVICE_NAME, false, "", false);
#endif
  Wire.begin();
  dht.begin();
}

void loop() {
  float temp_hum_val[2] = {0};
  if (!dht.readTempAndHumidity(temp_hum_val))
  {
    Serial.print("Humidity: ");
    Serial.print(temp_hum_val[0]);
    Serial.print(" %\t");
    Serial.print("Temperature: ");
    Serial.print(temp_hum_val[1]);
    Serial.println(" *C");
  }
  else
  {
    Serial.println("Failed to get temprature and humidity value.");
  }

  bthome.resetMeasurement();

  bthome.addMeasurement(ID_TEMPERATURE_PRECISE, temp_hum_val[1]);//3
  bthome.addMeasurement(ID_HUMIDITY_PRECISE, temp_hum_val[0]);//3

  bthome.sendPacket();
  bthome.stop();
  delay(500);
}
- Add Integration
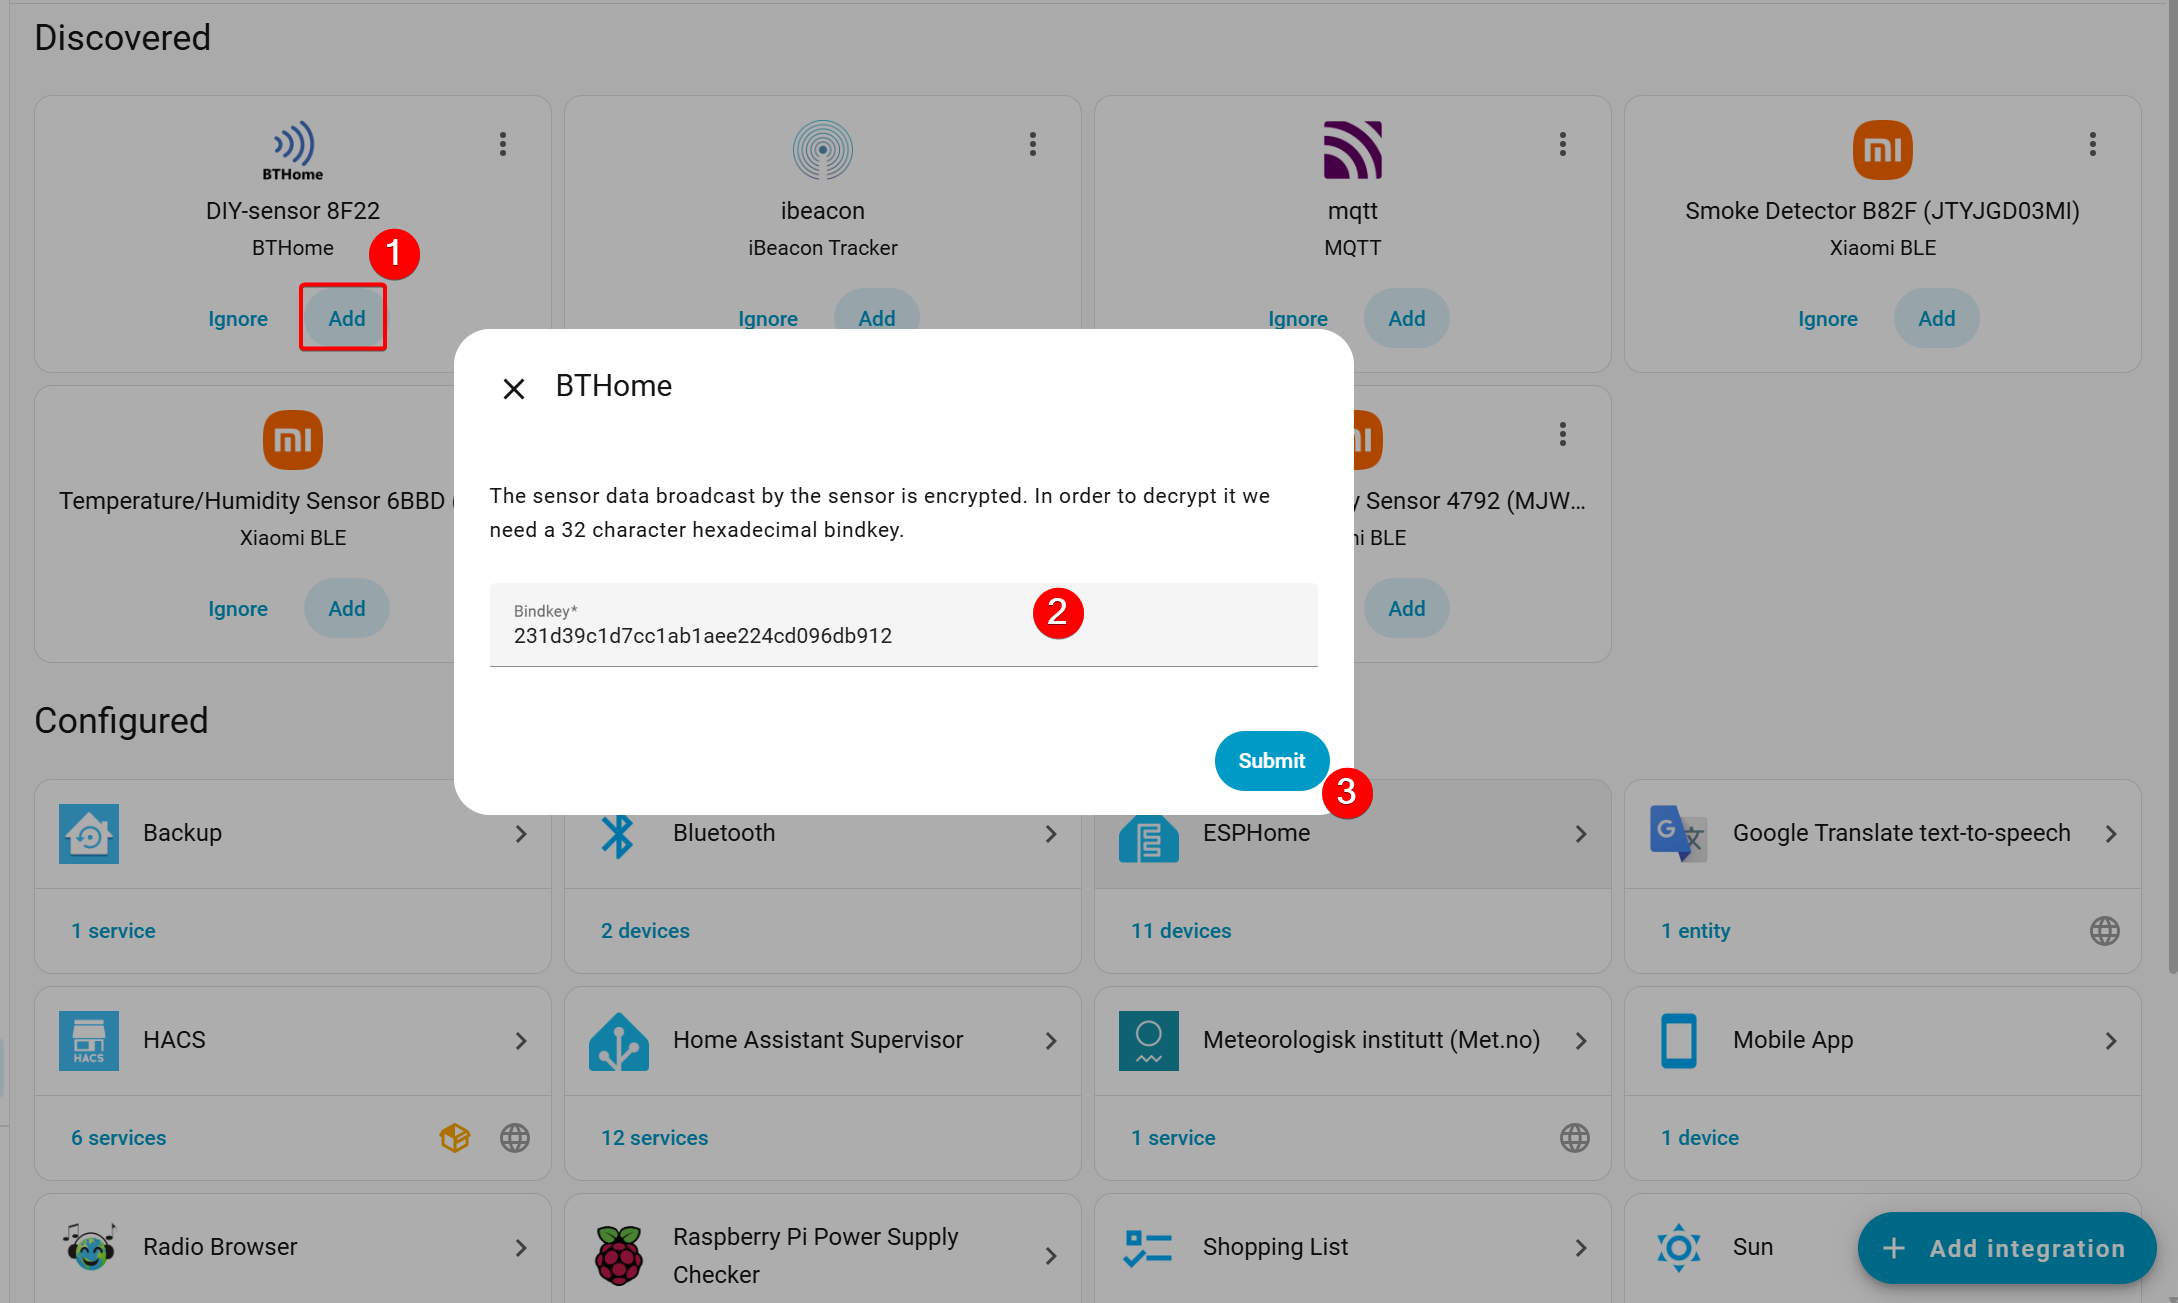
- Open Home Assistant and navigate to Settings. A BTHome device will be discovered under Devices & Services. Click Add, enter the key (paste the 32-character BIND_KEY from the code), and select Submit.
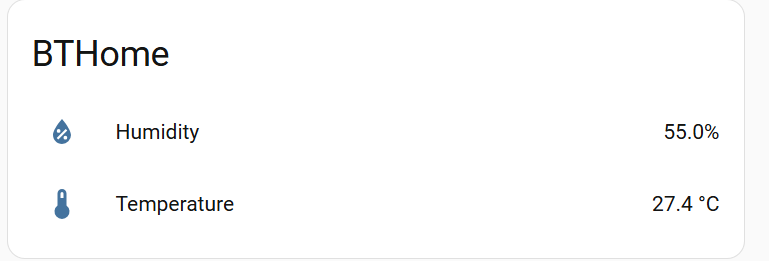
- After submission, you will be redirected to a page where you can view the transmitted temperature and humidity data as well as the Bluetooth MAC address. You also select Add to dashboard.
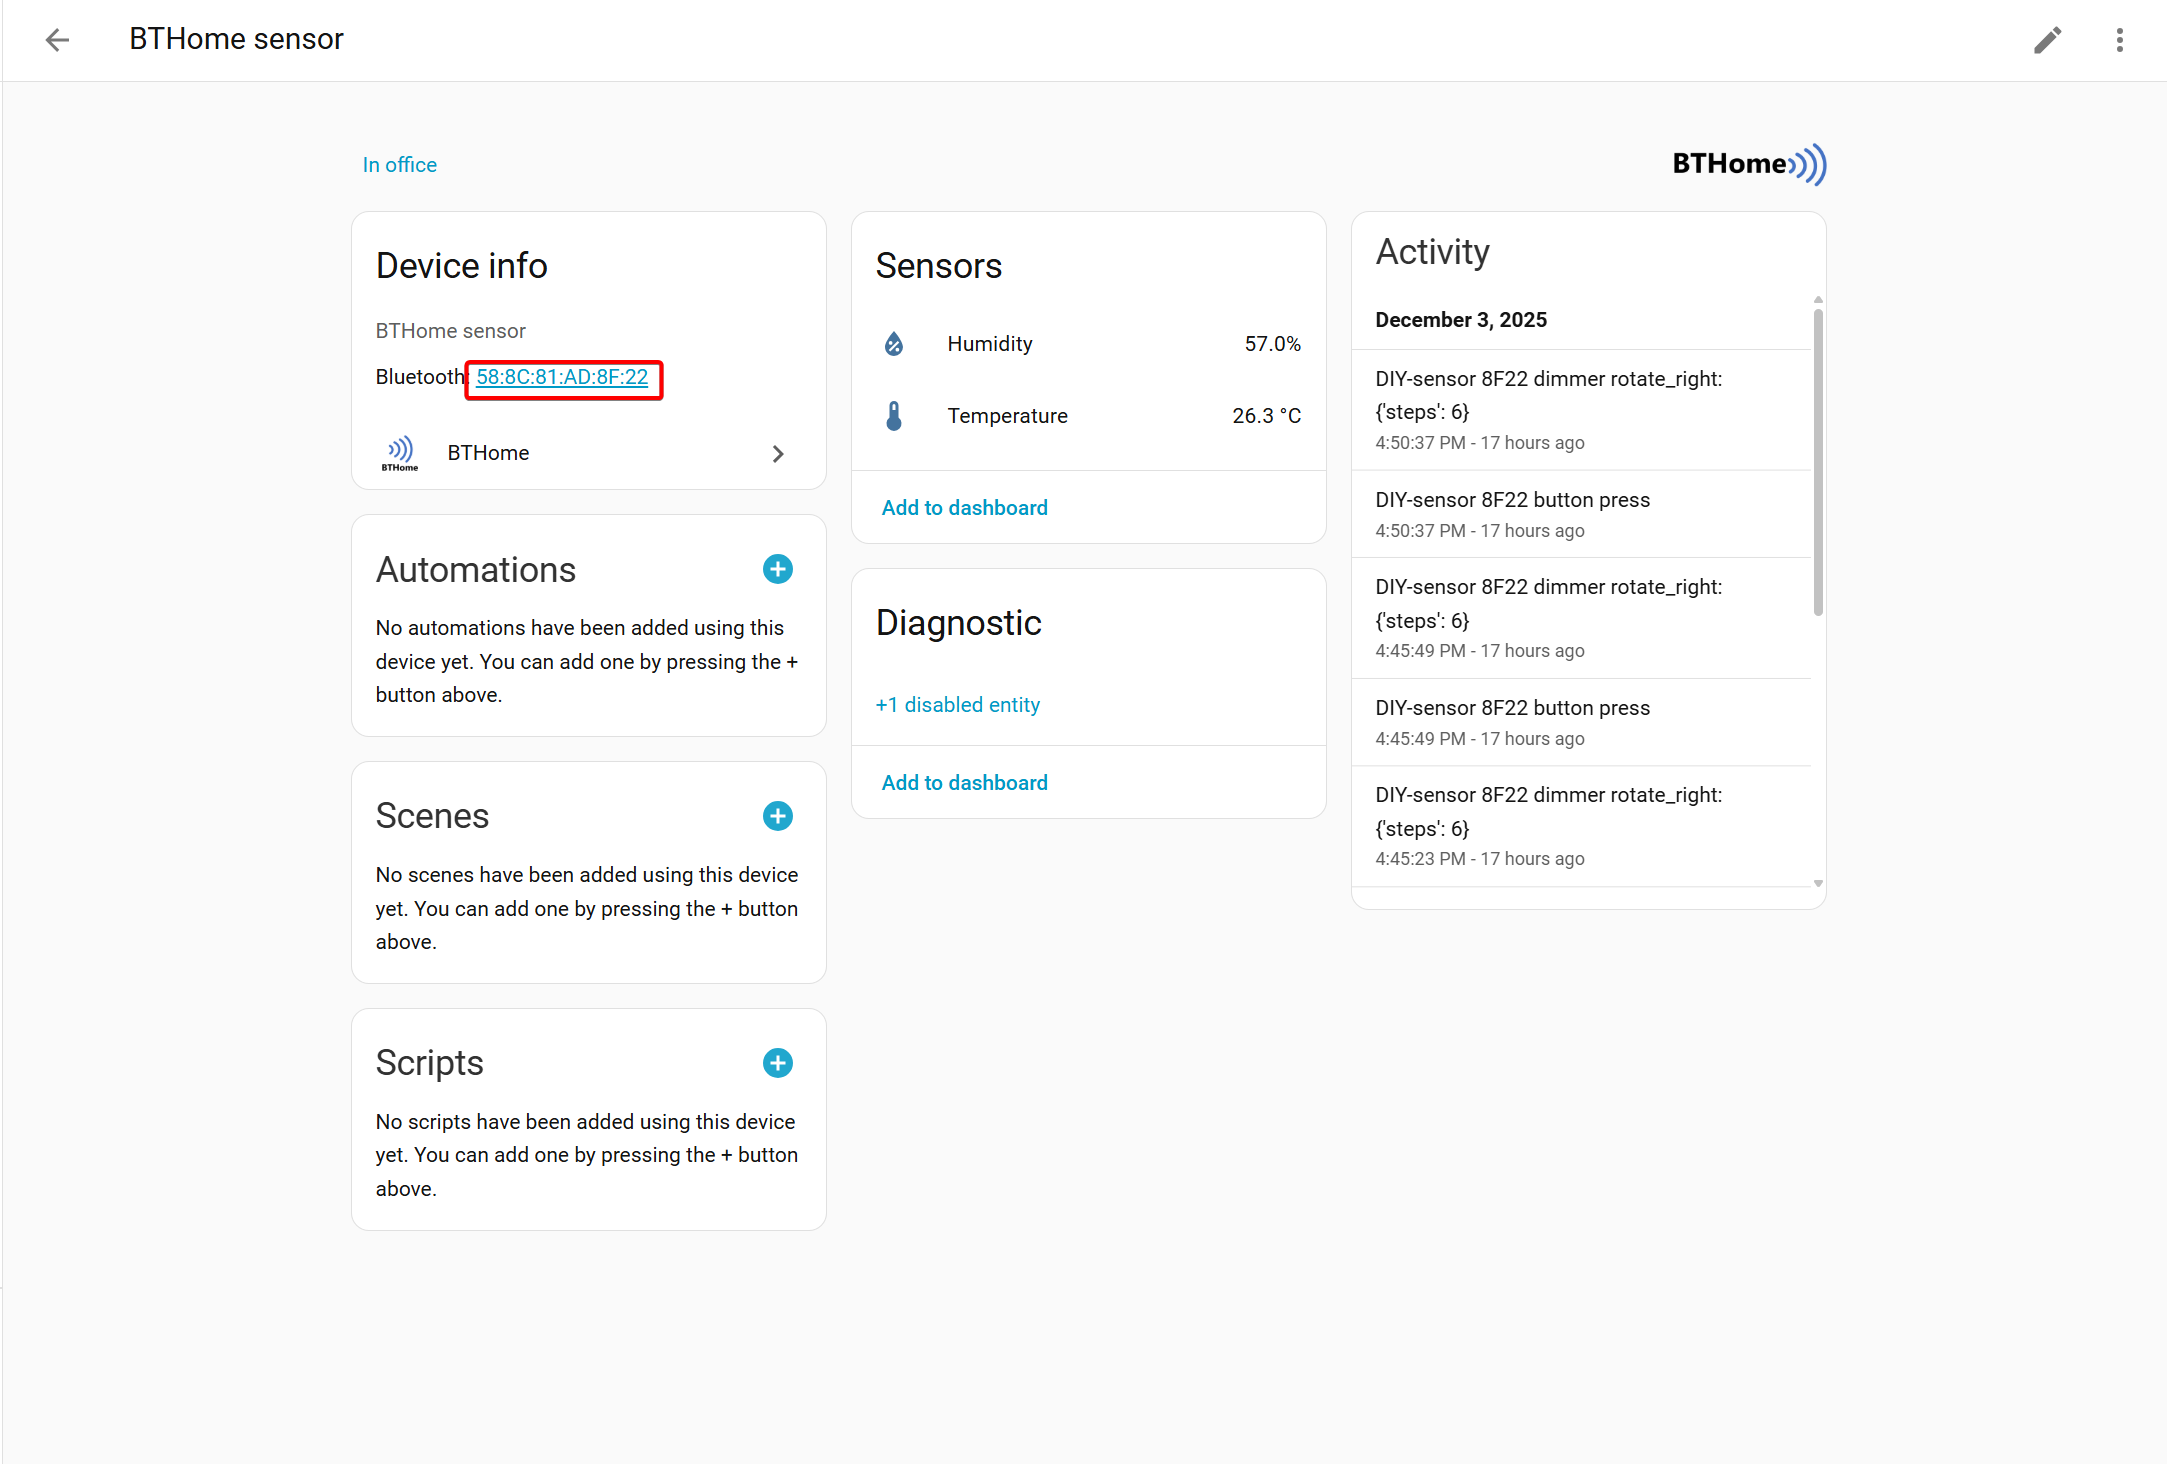
- Clicking on the MAC address reveals that the device was discovered by the Bluetooth proxy implemented on the XIAO(ESP32-S3) W5500 Ethernet Adapter. This confirms that the Bluetooth proxy is functioning as intended.

The BTHome protocol only supports one-way data transmission to Home Assistant, and each piece of transmitted data corresponds to a unique ID. If you wish to add more devices, please refer to BThome Format
Tech Support & Product Discussion
Thank you for choosing our products! We are here to provide you with different support to ensure that your experience with our products is as smooth as possible. We offer several communication channels to cater to different preferences and needs.