Fine-tune GR00T N1.5 for LeRobot SO-101 Arm and Deploy on Jetson AGX Thor
Introduction
This wiki explains how to fine-tune NVIDIA Isaac GR00T N1.5 for the LeRobot SO-101 arm and deploy it on NVIDIA Jetson Thor. It covers:
- Hardware preparation for LeRobot SO-101 and Jetson AGX Thor
- Software environment setup for GR00T N1.5 on Jetson Thor
- Using the LeRobot training platform: data collection, dataset formatting, and fine-tuning for the SO-101 arm
- Example workflows for deploying the trained GR00T N1.5 policy (LeRobot + SO-101) on Jetson Thor
- Troubleshooting tips and common pitfalls
Detailed, step-by-step instructions and reference documentation are provided to help you go from initial setup to full deployment.
Getting Started with NVIDIA Jetson Thor Developer Kit
Overview of Jetson Thor
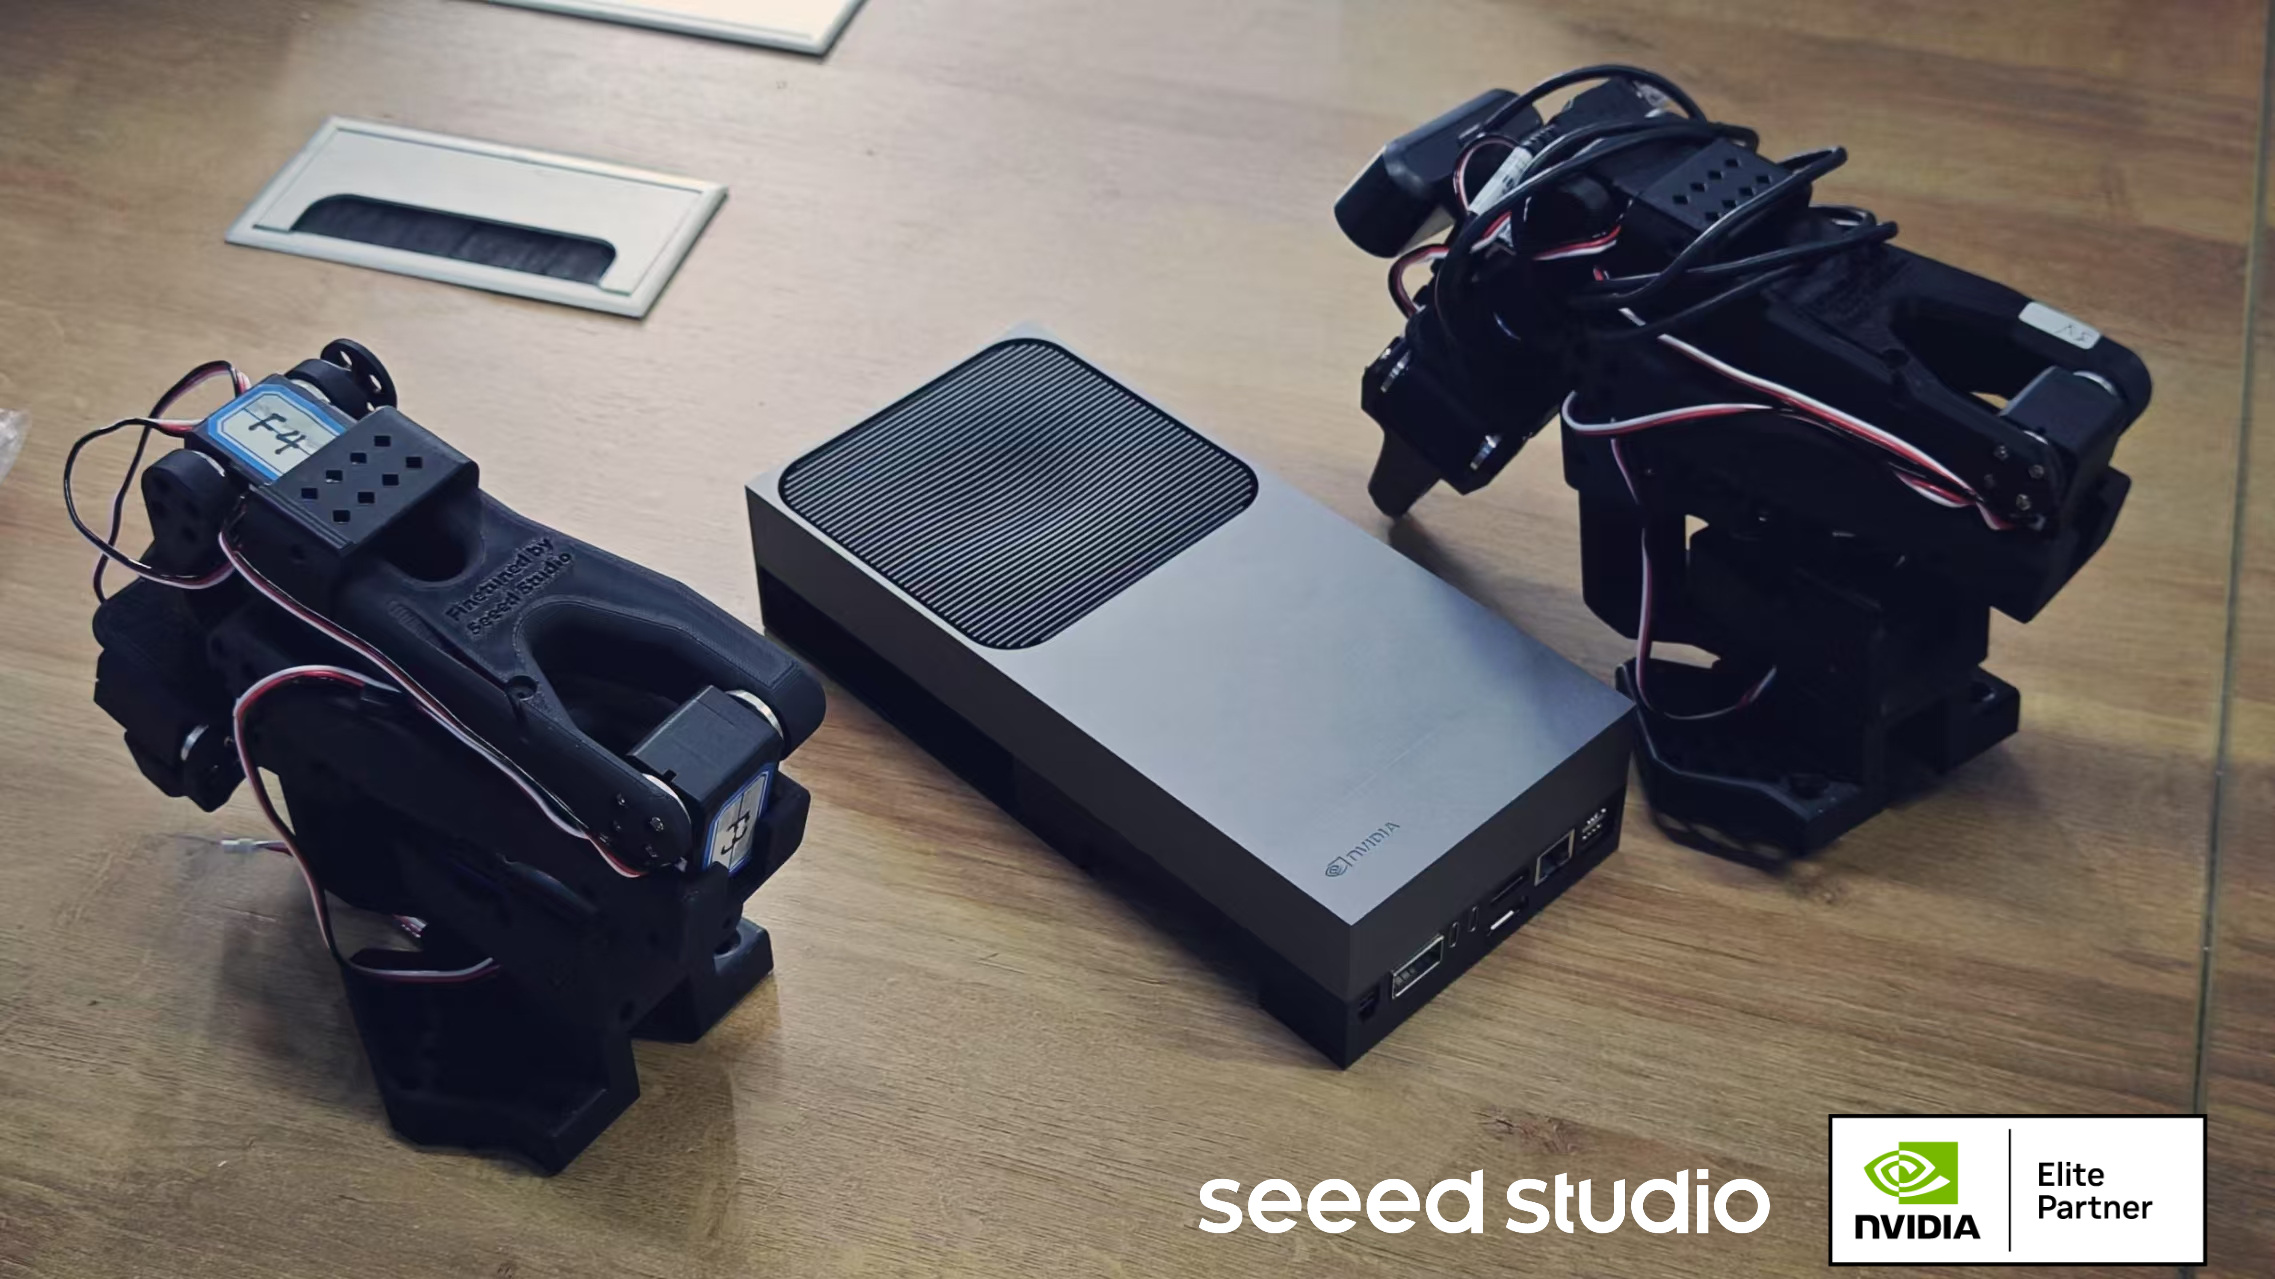
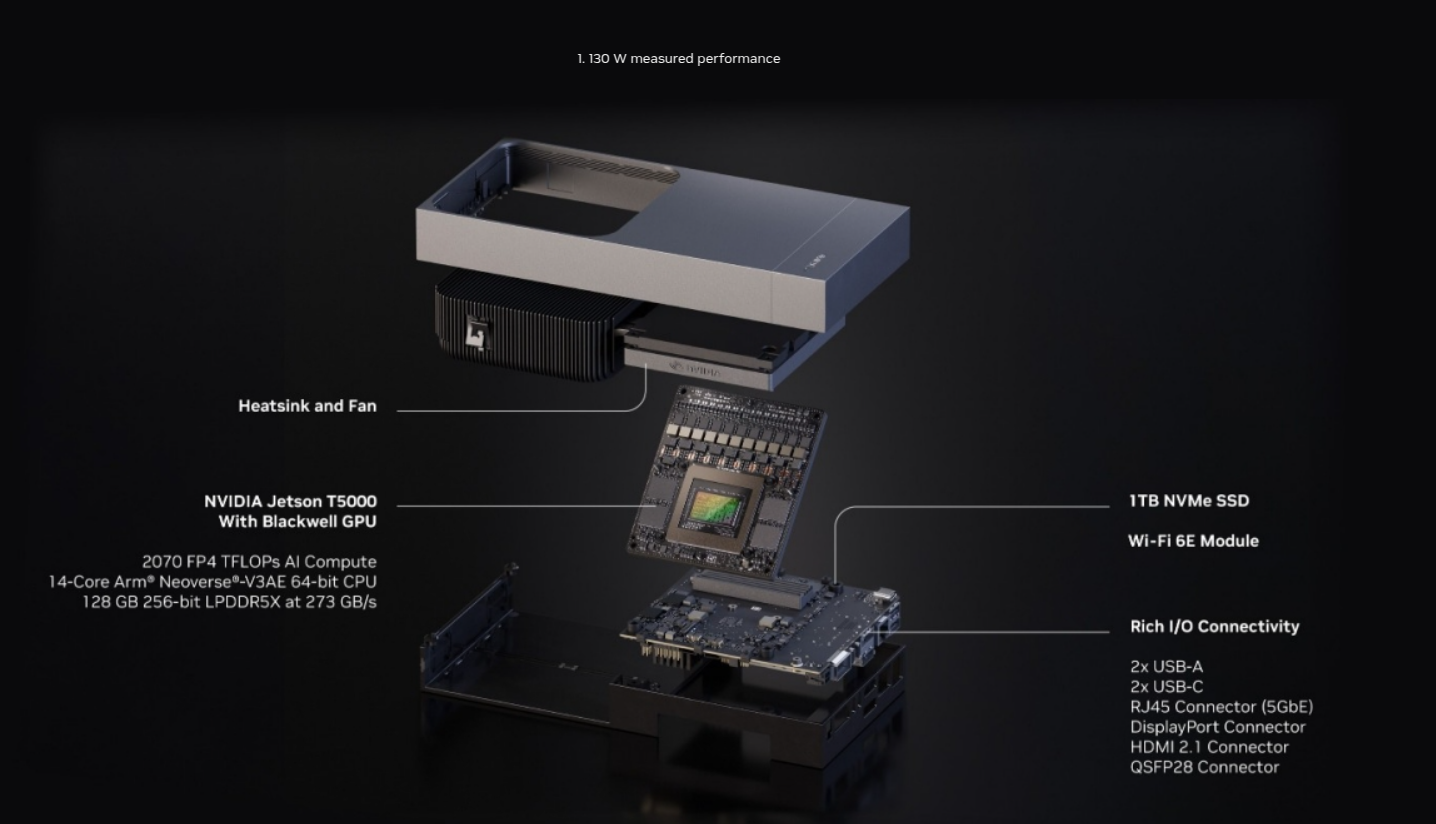
The NVIDIA® Jetson AGX Thor™ Developer Kit is a powerhouse for physical AI and humanoid robotics. It’s built around the NVIDIA Blackwell GPU and includes 128 GB high-speed memory, delivering up to 2,070 FP4 TFLOPS of AI compute while operating within a 40-130 W (common usage up to 130 W) power envelope.
You can get the Jetson AGX Thor Developer Kit from Seeed Studio here: Seeed – NVIDIA Jetson AGX Thor™ Developer Kit
The hardware items included in the box are one Thor unit and a power adapter:

Flashing the Thor System Image
As of September 10, 2025, the latest available system image version for Thor is 38.2. If you need to re-flash the system for Thor, please follow the instructions in this section. Required Items for Flashing:
- A host device with more than 25 GB of available disk space (Ubuntu or Windows OS supported)
- A USB drive with a capacity of at least 16 GB
- A monitor and DP/HDMI display cable
- A power supply environment capable of delivering over 240 W
- A keyboard with USB interface
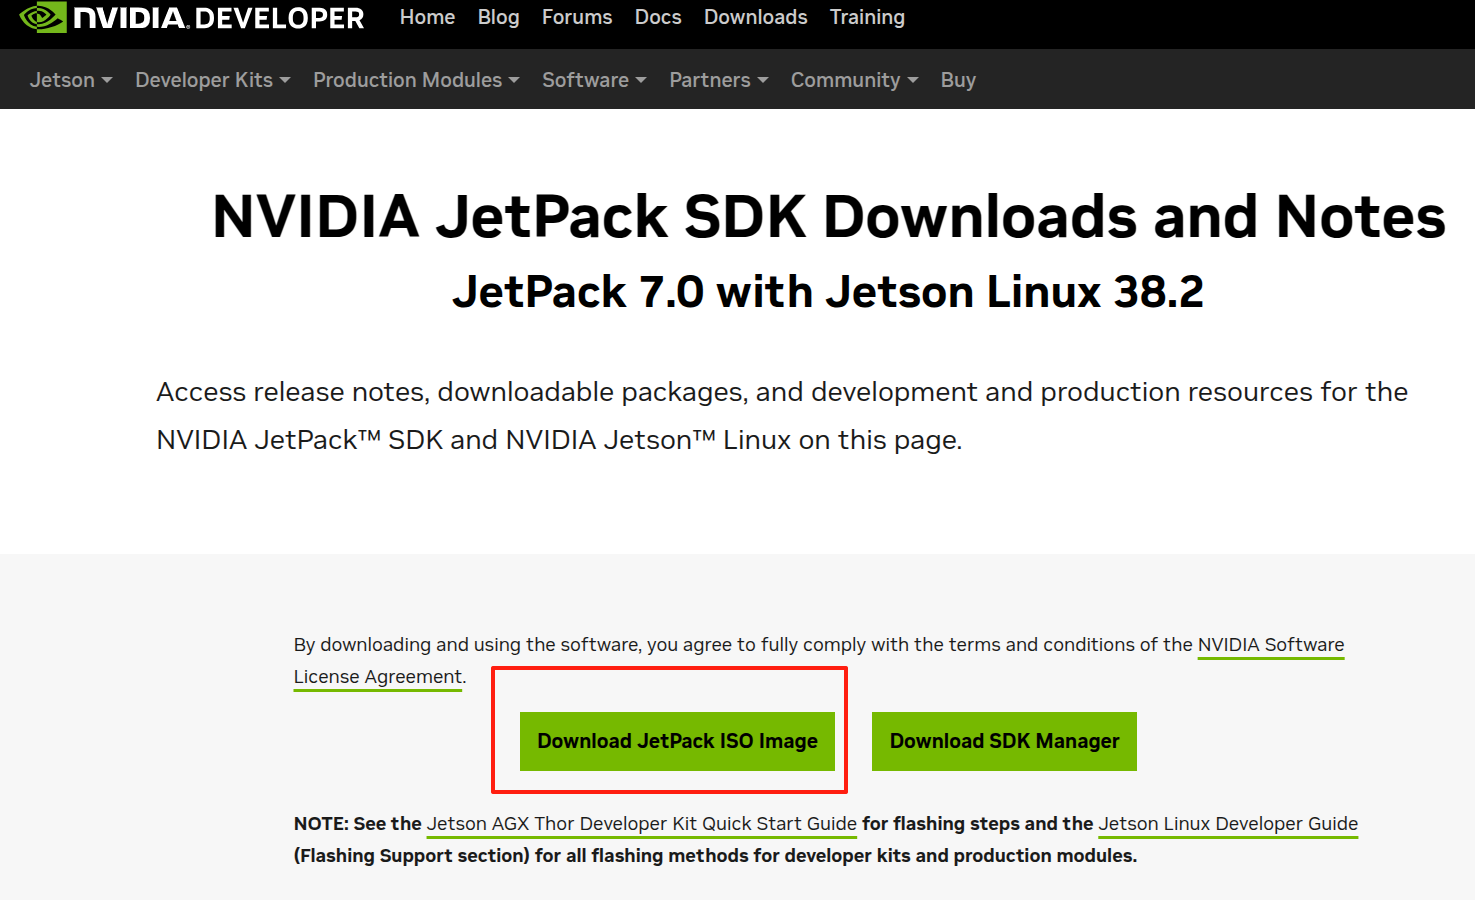
First, download the ISO-format system image for Thor from the official NVIDIA website. Click here to visit the download page:
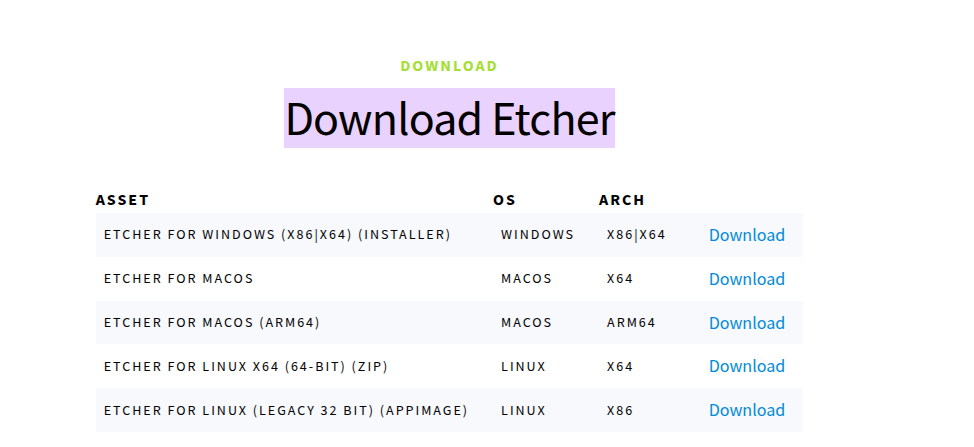
Install Balena Etcher on the host machine. To download the installer, click here and select the appropriate version based on your host operating system:
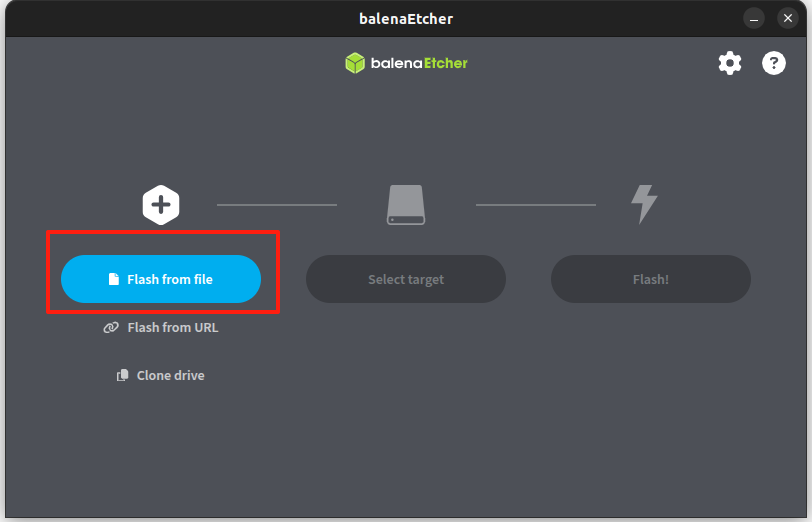
After downloading the ISO image file and successfully installing Balena Etcher, insert the USB drive into the host machine. Then, launch Balena Etcher to create a bootable USB drive for flashing Thor:
This process will format the USB drive. Please make sure to back up any important data beforehand.
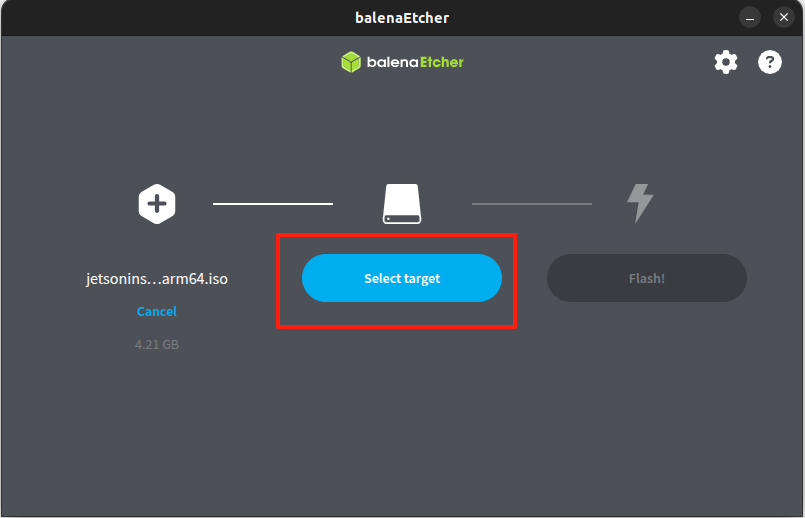
Select the downloaded ISO image file from your local storage, then choose the target device—i.e., your USB drive.
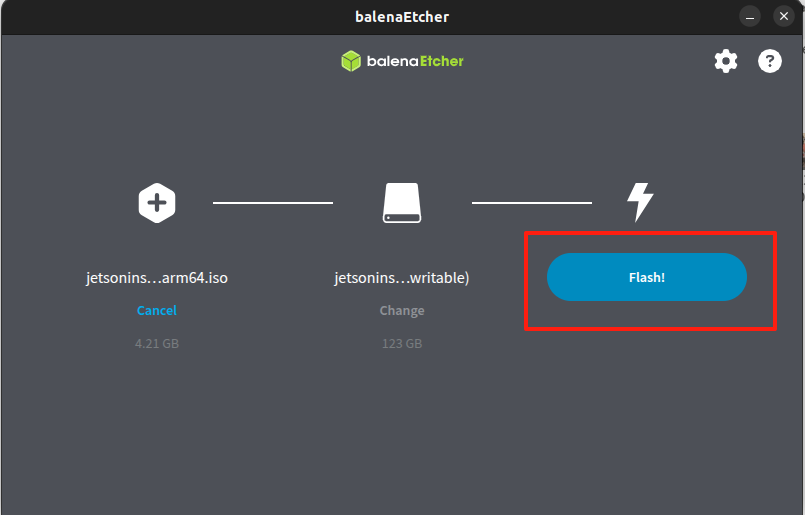
Be sure to verify the target device name and mount directory carefully! Click Flash! and wait for the process to complete. Once finished, the USB drive for flashing the system onto Thor is ready:
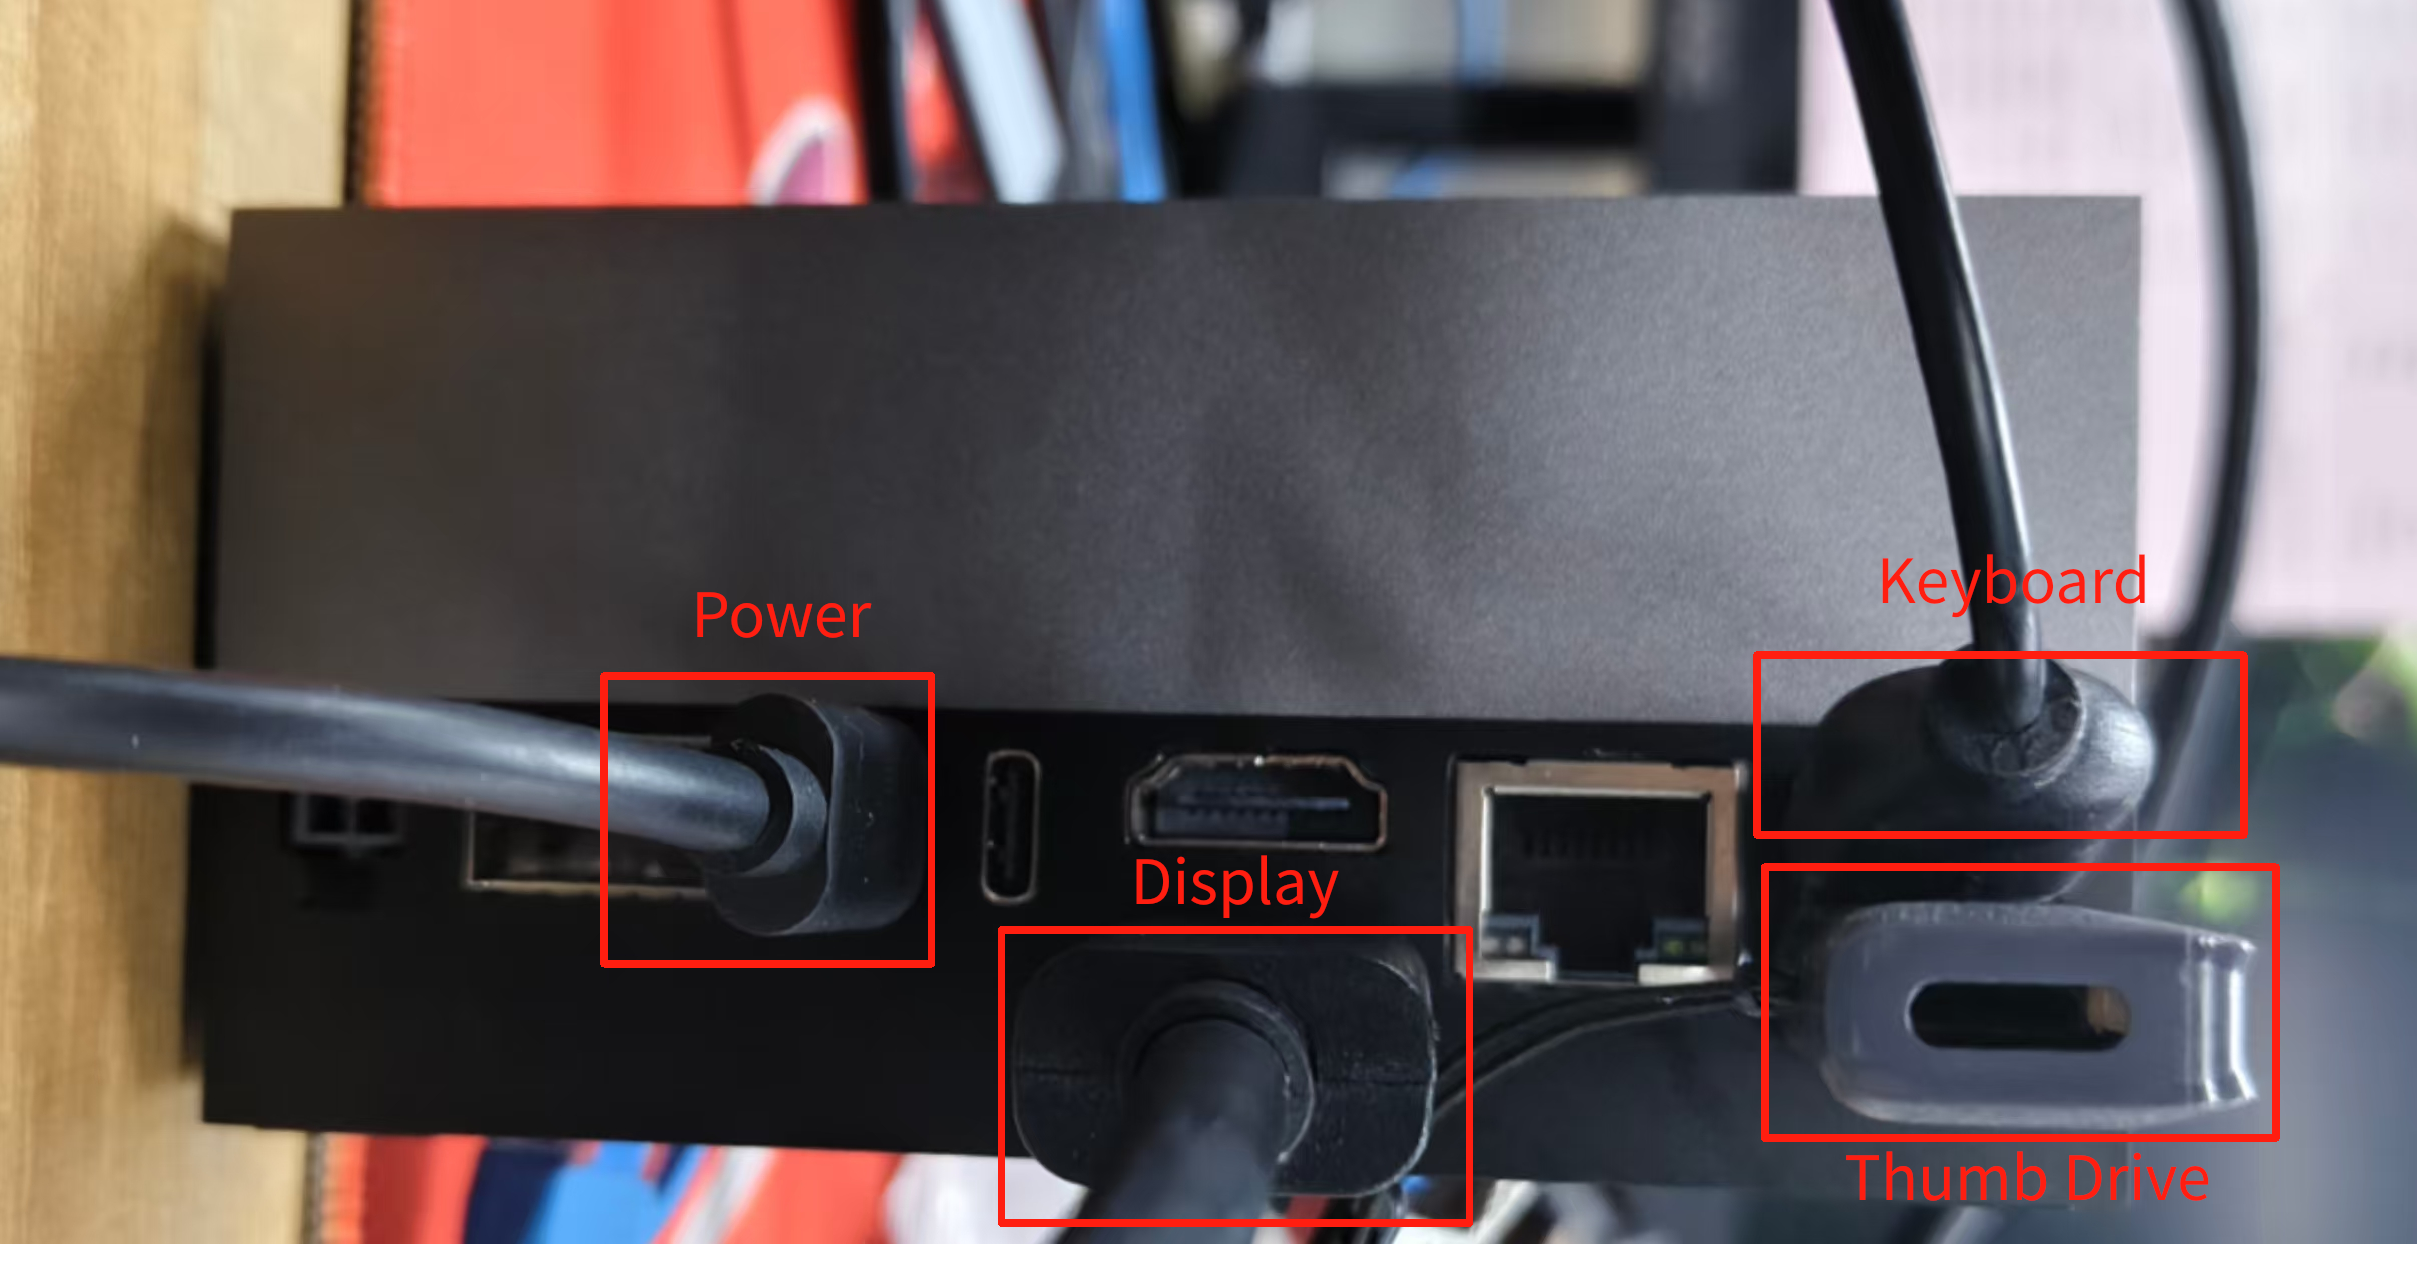
Next, insert the prepared USB drive, keyboard, display cable (DP/HDMI), and power supply (Type-C) into the Thor board to begin the flashing process.
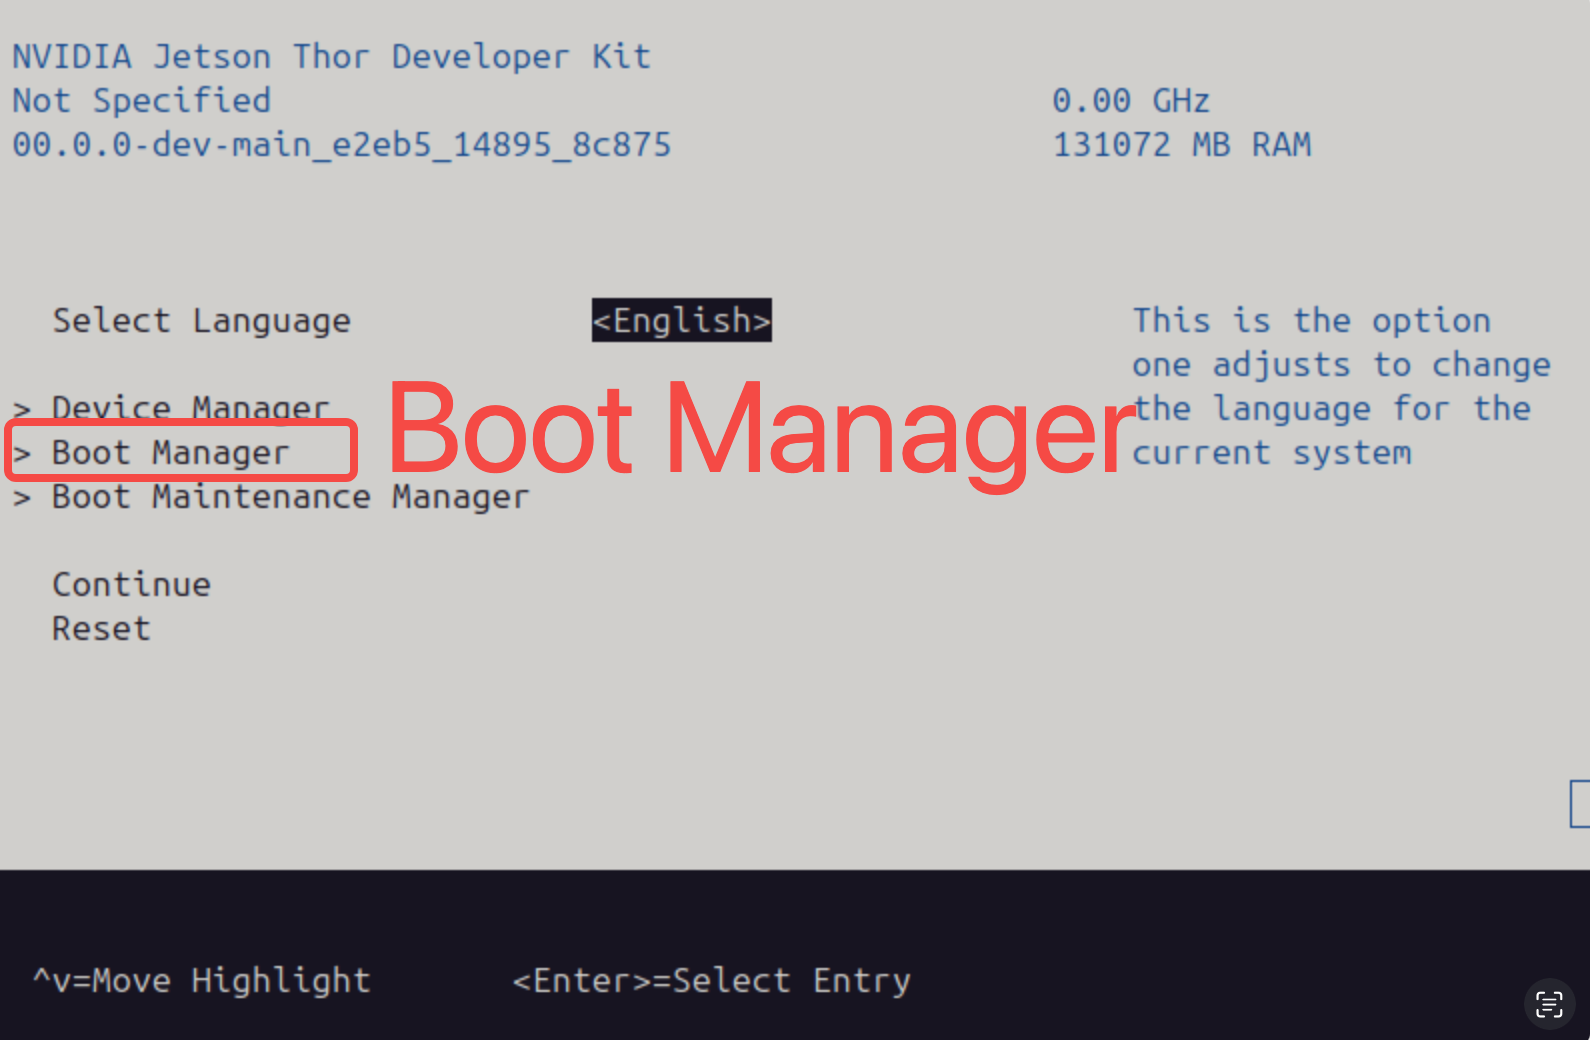
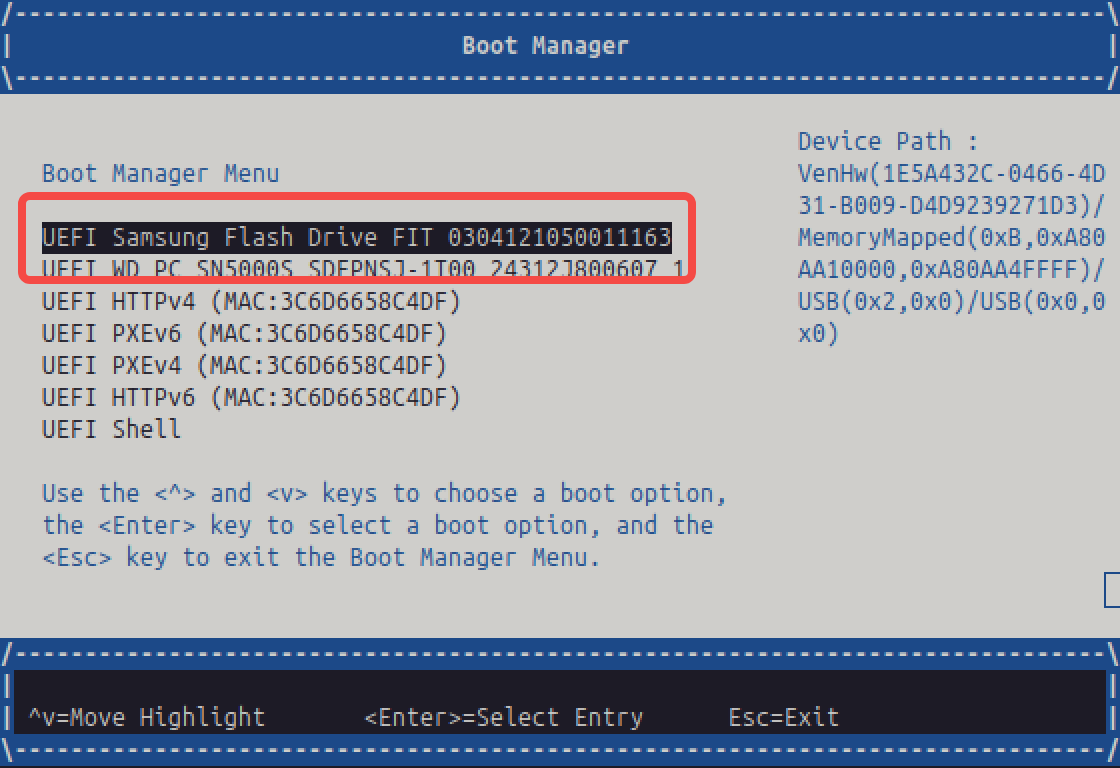
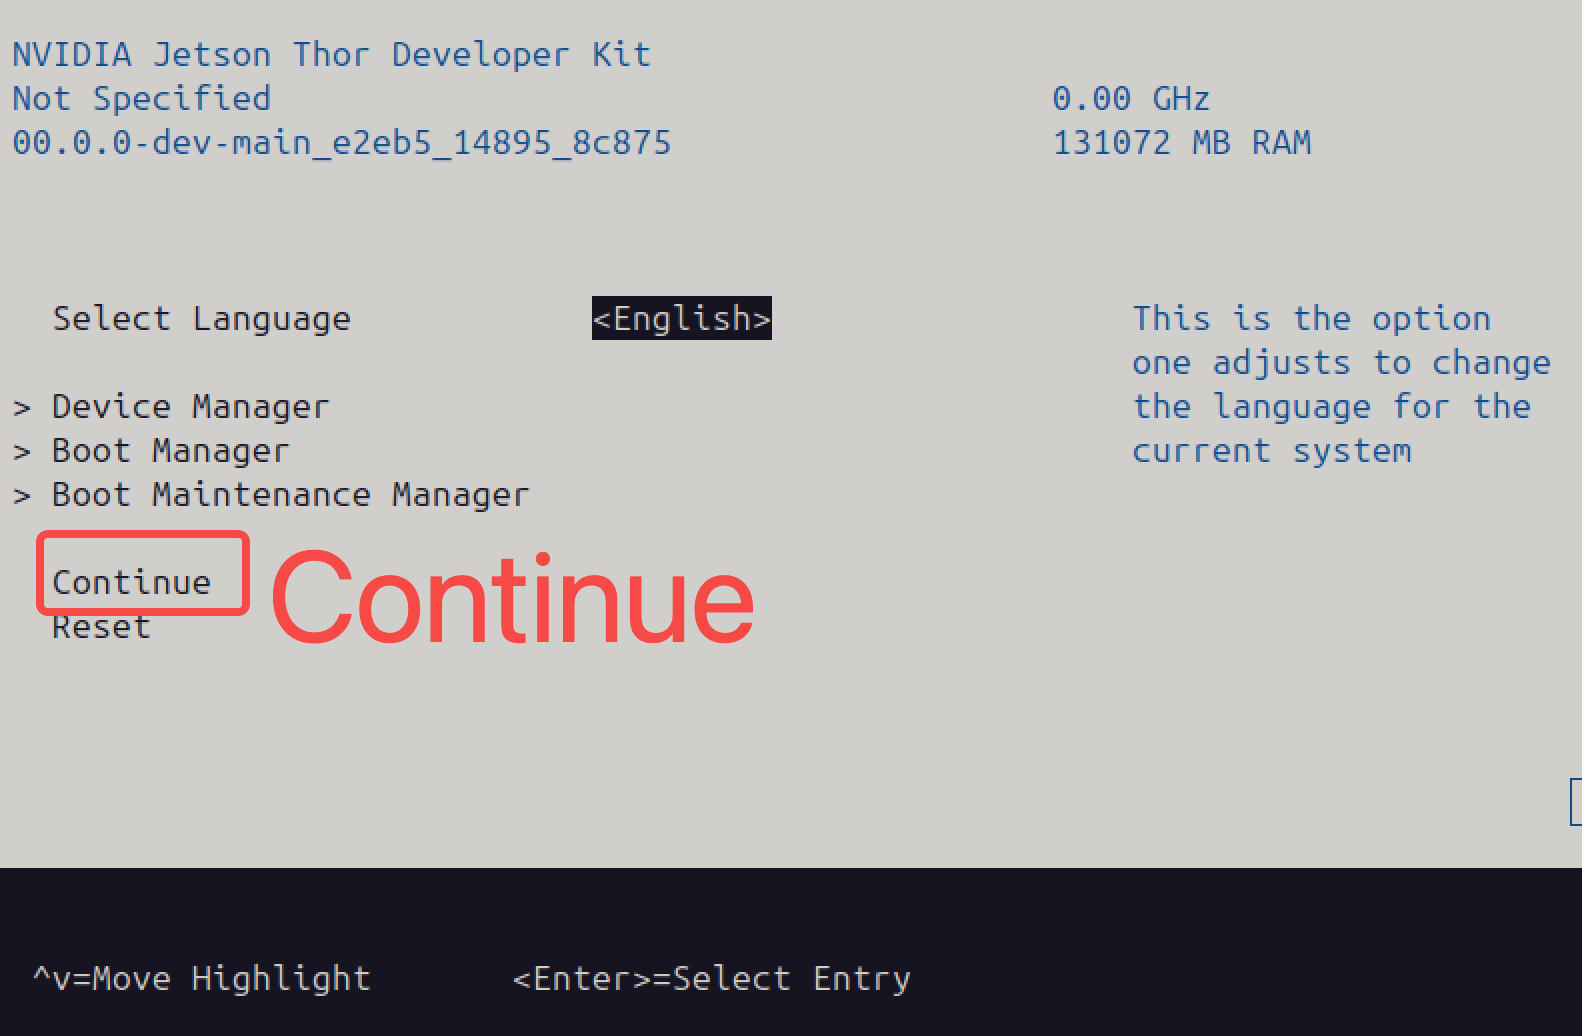
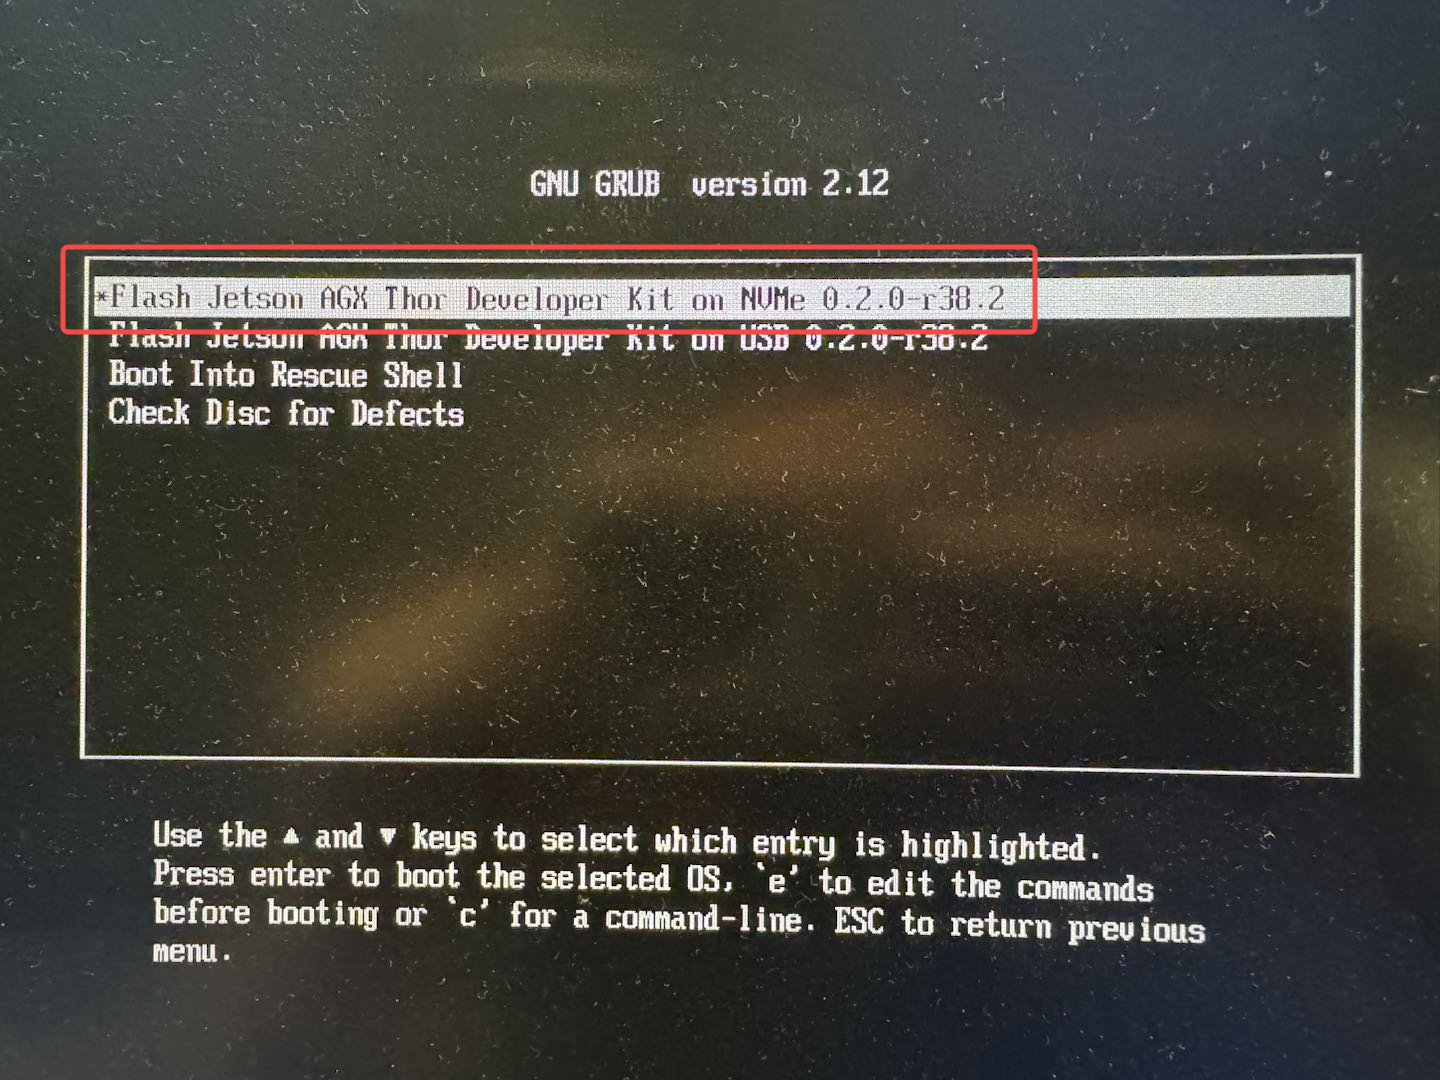
Power on the Thor and enter the boot interface. Select Boot Manager, then choose the USB drive that was inserted into Thor (based on your USB drive name). Press Esc to return to the previous menu, and select Continue:
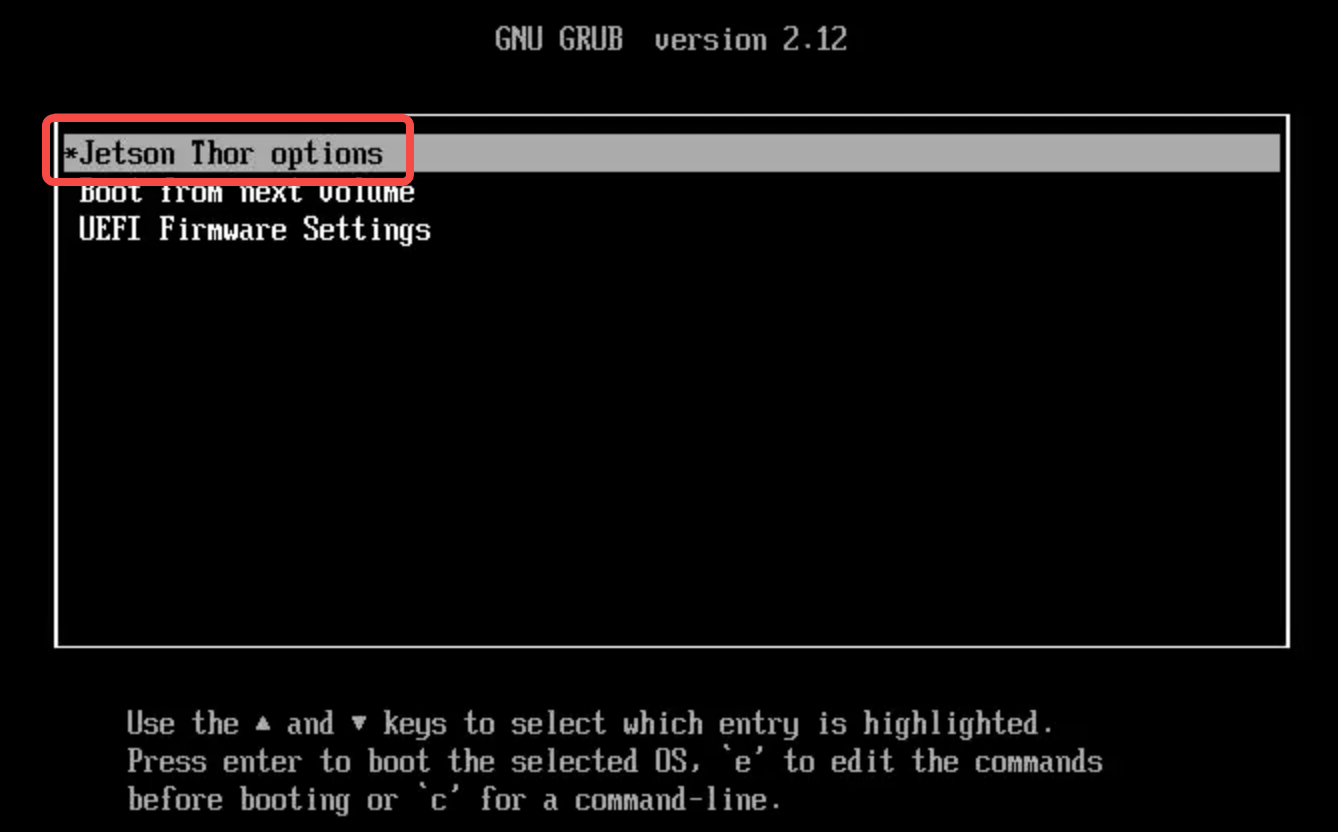
After a brief black screen, the following interface will appear. Select Jetson Thor options and press Enter. Then, choose the option
Flash Jetson AGX Thor Developer Kit on NVMe 0.2.0-r38.2 to flash the system image onto Thor’s NVMe solid-state drive:
A large amount of log information will be displayed on the screen. Wait for approximately 15 minutes. Once this stage is complete, the device will automatically reboot and proceed to the next interface. Wait until the Update Progress bar reaches 100%, which indicates the flashing process has been successfully completed:
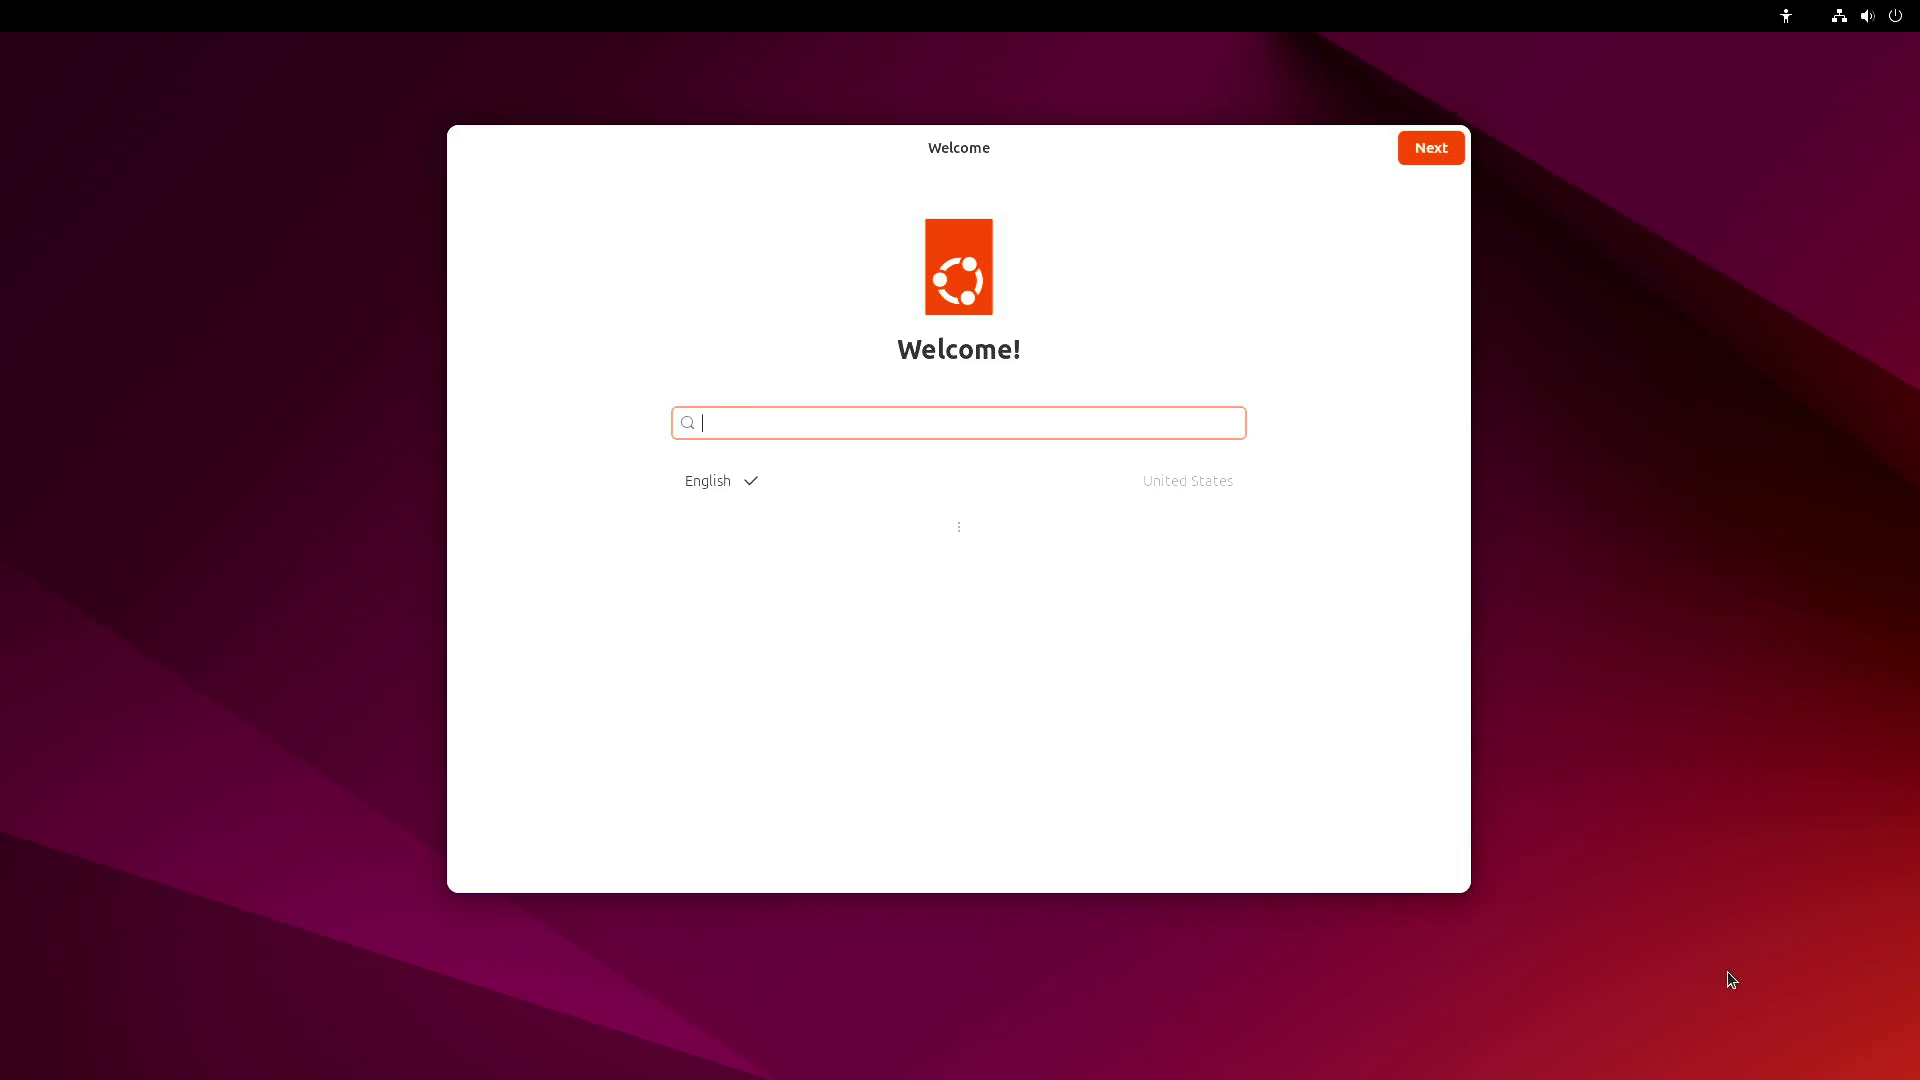
After flashing, you can proceed with the initial system configuration:
This system image does not include CUDA, TensorRT, or other SDK components from JetPack.
Basic Development Environment Setup on Thor
This section provides examples of how to install commonly used software dependencies on Thor for development purposes. These dependencies aim to facilitate subsequent development.
Please note that the listed dependencies are for reference only—please install additional packages according to their individual project requirements.
Installing Essential Development Dependencies
JetPack SDK Installation
Open the terminal and run the following command. After a short wait, CUDA, TensorRT, and other SDK components will be installed:
sudo apt update
sudo apt install nvidia-jetpack
Browser Installation
Firefox has been tested and verified to run stably on Ubuntu 24.04:
sudo apt update
sudo apt install firefox
Jtop Installation
To install jtop, refer to the following instructions.
sudo apt update
sudo apt install python3
sudo apt install python3-pip

sudo pip3 install -U pip
sudo pip3 install jetson-stats
Miniconda Installation
Miniconda is used to isolate development environments. To install miniconda, refer to the following instructions:
wget https://repo.anaconda.com/miniconda/Miniconda3-latest-Linux-aarch64.sh
chmod +x Miniconda3-latest-Linux-aarch64.sh
./Miniconda3-latest-Linux-aarch64.sh
source ~/.bashrc
conda --version
Installing the GPU Version of PyTorch
Compiling the GPU version of PyTorch from source on Thor may result in compatibility issues. For convenience, we provide a precompiled .whl file to help developers quickly set up a PyTorch-enabled development environment on Thor.
Here, a pre-compiled wheel file is provided for installing PyTorch 2.9 on Thor. This file was compiled in a Python 3.10 + CUDA 13 environment.
click Python 3.10 + CUDA 13 pytorch2.9 to download the .whl file.
click Python 3.10 + CUDA 13 torchvision0.24 to download the .whl file.
click Python 3.10 + CUDA 13 torchvision0.23 to download the .whl file.
Other Python 3.12 + CUDA 13 precompiled dependency .whl files for thor can be found :
https://pypi.jetson-ai-lab.io/sbsa/cu130.
If the expected wheel file is not available, developer will need to build the required dependencies themselves to complete the setup of the development environment.
Installing Additional Dependencies
This document provides a reference Docker image to help developers quickly adapt to the Jetson AGX Thor development environment. This image is for reference only, and developers are free to choose whether to use it based on their specific needs.
Since the image size exceeds 40 GB, downloading it from the server is relatively slow.
This Docker image can stably run GR00T N1.5 inference. The output of the pip list command in the image is as follows:
pip.list
Package Version Location Installer Editable project location
------------------------- ----------------- ---------------- -------------------------------------- -------------------------
absl-py 2.3.1 /opt/venv/lib/python3.12/site-packages pip
accelerate 1.2.1 /opt/venv/lib/python3.12/site-packages pip
aiohappyeyeballs 2.6.1 /opt/venv/lib/python3.12/site-packages pip
aiohttp 3.12.15 /opt/venv/lib/python3.12/site-packages pip
aiosignal 1.4.0 /opt/venv/lib/python3.12/site-packages pip
albucore 0.0.17 /opt/venv/lib/python3.12/site-packages pip
albumentations 1.4.18 /opt/venv/lib/python3.12/site-packages pip
annotated-types 0.7.0 /opt/venv/lib/python3.12/site-packages pip
antlr4-python3-runtime 4.9.3 /opt/venv/lib/python3.12/site-packages pip
anyio 4.10.0 /opt/venv/lib/python3.12/site-packages pip
argon2-cffi 25.1.0 /opt/venv/lib/python3.12/site-packages pip
argon2-cffi-bindings 25.1.0 /opt/venv/lib/python3.12/site-packages pip
arrow 1.3.0 /opt/venv/lib/python3.12/site-packages pip
asttokens 3.0.0 /opt/venv/lib/python3.12/site-packages pip
astunparse 1.6.3 /opt/venv/lib/python3.12/site-packages pip
async-lru 2.0.5 /opt/venv/lib/python3.12/site-packages pip
attrs 23.2.0 /usr/lib/python3/dist-packages debian
av 12.3.0 /opt/venv/lib/python3.12/site-packages pip
babel 2.17.0 /opt/venv/lib/python3.12/site-packages pip
beautifulsoup4 4.13.5 /opt/venv/lib/python3.12/site-packages pip
bleach 6.2.0 /opt/venv/lib/python3.12/site-packages pip
blessings 1.7 /opt/venv/lib/python3.12/site-packages pip
blinker 1.9.0 /opt/venv/lib/python3.12/site-packages pip
certifi 2025.8.3 /opt/venv/lib/python3.12/site-packages pip
cffi 2.0.0 /opt/venv/lib/python3.12/site-packages pip
charset-normalizer 3.4.3 /opt/venv/lib/python3.12/site-packages pip
click 8.2.1 /opt/venv/lib/python3.12/site-packages pip
cloudpickle 3.1.1 /opt/venv/lib/python3.12/site-packages pip
cmake 3.31.6 /opt/venv/lib/python3.12/site-packages pip
comm 0.2.3 /opt/venv/lib/python3.12/site-packages pip
contourpy 1.3.3 /opt/venv/lib/python3.12/site-packages pip
cramjam 2.11.0 /opt/venv/lib/python3.12/site-packages pip
cryptography 41.0.7 /usr/lib/python3/dist-packages debian
cuda-bindings 13.0.0 /opt/venv/lib/python3.12/site-packages pip
cuda-core 0.3.2 /opt/venv/lib/python3.12/site-packages pip
cuda-pathfinder 1.2.2 /opt/venv/lib/python3.12/site-packages pip
cycler 0.12.1 /opt/venv/lib/python3.12/site-packages pip
Cython 3.1.3 /opt/venv/lib/python3.12/site-packages pip
datasets 4.0.0 /opt/venv/lib/python3.12/site-packages pip
dbus-python 1.3.2 /usr/lib/python3/dist-packages
debugpy 1.8.16 /opt/venv/lib/python3.12/site-packages pip
decorator 5.2.1 /opt/venv/lib/python3.12/site-packages pip
decord 0.6.0 /opt/venv/lib/python3.12/site-packages pip
deepdiff 8.6.1 /opt/venv/lib/python3.12/site-packages pip
defusedxml 0.7.1 /opt/venv/lib/python3.12/site-packages pip
devscripts 2.23.7 /usr/lib/python3/dist-packages
diffusers 0.36.0.dev0 /opt/venv/lib/python3.12/site-packages pip
dill 0.3.8 /opt/venv/lib/python3.12/site-packages pip
distro 1.9.0 /usr/lib/python3/dist-packages debian
dm-tree 0.1.8 /opt/venv/lib/python3.12/site-packages pip
docker-pycreds 0.4.0 /opt/venv/lib/python3.12/site-packages pip
docstring_parser 0.17.0 /opt/venv/lib/python3.12/site-packages pip
docutils 0.22 /opt/venv/lib/python3.12/site-packages pip
draccus 0.11.5 /opt/venv/lib/python3.12/site-packages pip
einops 0.8.1 /opt/venv/lib/python3.12/site-packages pip
eval_type_backport 0.2.2 /opt/venv/lib/python3.12/site-packages pip
evdev 1.9.2 /opt/venv/lib/python3.12/site-packages pip
executing 2.2.1 /opt/venv/lib/python3.12/site-packages pip
Farama-Notifications 0.0.4 /opt/venv/lib/python3.12/site-packages pip
fastjsonschema 2.21.2 /opt/venv/lib/python3.12/site-packages pip
fastparquet 2024.11.0 /opt/venv/lib/python3.12/site-packages pip
feetech-servo-sdk 1.0.0 /opt/venv/lib/python3.12/site-packages pip
filelock 3.19.1 /opt/venv/lib/python3.12/site-packages pip
flash_attn 2.8.4 /opt/venv/lib/python3.12/site-packages pip
Flask 3.1.2 /opt/venv/lib/python3.12/site-packages pip
flatbuffers 25.2.10 /opt/venv/lib/python3.12/site-packages pip
fonttools 4.59.2 /opt/venv/lib/python3.12/site-packages pip
fqdn 1.5.1 /opt/venv/lib/python3.12/site-packages pip
frozenlist 1.7.0 /opt/venv/lib/python3.12/site-packages pip
fsspec 2025.3.0 /opt/venv/lib/python3.12/site-packages pip
gast 0.6.0 /opt/venv/lib/python3.12/site-packages pip
gitdb 4.0.12 /opt/venv/lib/python3.12/site-packages pip
GitPython 3.1.45 /opt/venv/lib/python3.12/site-packages pip
google-pasta 0.2.0 /opt/venv/lib/python3.12/site-packages pip
grpcio 1.74.0 /opt/venv/lib/python3.12/site-packages pip
gymnasium 1.0.0 /opt/venv/lib/python3.12/site-packages pip
h11 0.16.0 /opt/venv/lib/python3.12/site-packages pip
h5py 3.12.1 /opt/venv/lib/python3.12/site-packages pip
hf-xet 1.1.9 /opt/venv/lib/python3.12/site-packages pip
httpcore 1.0.9 /opt/venv/lib/python3.12/site-packages pip
httplib2 0.20.4 /usr/lib/python3/dist-packages
httpx 0.28.1 /opt/venv/lib/python3.12/site-packages pip
huggingface-hub 0.34.4 /opt/venv/lib/python3.12/site-packages pip
hydra-core 1.3.2 /opt/venv/lib/python3.12/site-packages pip
id 1.5.0 /opt/venv/lib/python3.12/site-packages pip
idna 3.10 /opt/venv/lib/python3.12/site-packages pip
imageio 2.34.2 /opt/venv/lib/python3.12/site-packages pip
importlib_metadata 8.7.0 /opt/venv/lib/python3.12/site-packages pip
iniconfig 2.1.0 /opt/venv/lib/python3.12/site-packages pip
inquirerpy 0.3.4 /opt/venv/lib/python3.12/site-packages pip
iopath 0.1.9 /opt/venv/lib/python3.12/site-packages pip
ipykernel 6.30.1 /opt/venv/lib/python3.12/site-packages pip
ipython 9.5.0 /opt/venv/lib/python3.12/site-packages pip
ipython_pygments_lexers 1.1.1 /opt/venv/lib/python3.12/site-packages pip
ipywidgets 8.1.7 /opt/venv/lib/python3.12/site-packages pip
isoduration 20.11.0 /opt/venv/lib/python3.12/site-packages pip
itsdangerous 2.2.0 /opt/venv/lib/python3.12/site-packages pip
jaraco.classes 3.4.0 /opt/venv/lib/python3.12/site-packages pip
jaraco.context 6.0.1 /opt/venv/lib/python3.12/site-packages pip
jaraco.functools 4.3.0 /opt/venv/lib/python3.12/site-packages pip
jedi 0.19.2 /opt/venv/lib/python3.12/site-packages pip
jeepney 0.9.0 /opt/venv/lib/python3.12/site-packages pip
Jinja2 3.1.6 /opt/venv/lib/python3.12/site-packages pip
json5 0.12.1 /opt/venv/lib/python3.12/site-packages pip
jsonlines 4.0.0 /opt/venv/lib/python3.12/site-packages pip
jsonpointer 3.0.0 /opt/venv/lib/python3.12/site-packages pip
jsonschema 4.25.1 /opt/venv/lib/python3.12/site-packages pip
jsonschema-specifications 2025.9.1 /opt/venv/lib/python3.12/site-packages pip
jupyter 1.1.1 /opt/venv/lib/python3.12/site-packages pip
jupyter_client 8.6.3 /opt/venv/lib/python3.12/site-packages pip
jupyter-console 6.6.3 /opt/venv/lib/python3.12/site-packages pip
jupyter_core 5.8.1 /opt/venv/lib/python3.12/site-packages pip
jupyter-events 0.12.0 /opt/venv/lib/python3.12/site-packages pip
jupyter-lsp 2.3.0 /opt/venv/lib/python3.12/site-packages pip
jupyter_server 2.17.0 /opt/venv/lib/python3.12/site-packages pip
jupyter_server_terminals 0.5.3 /opt/venv/lib/python3.12/site-packages pip
jupyterlab 4.4.7 /opt/venv/lib/python3.12/site-packages pip
jupyterlab_myst 2.4.2 /opt/venv/lib/python3.12/site-packages pip
jupyterlab_pygments 0.3.0 /opt/venv/lib/python3.12/site-packages pip
jupyterlab_server 2.27.3 /opt/venv/lib/python3.12/site-packages pip
jupyterlab_widgets 3.0.15 /opt/venv/lib/python3.12/site-packages pip
keras 3.11.3 /opt/venv/lib/python3.12/site-packages pip
keyring 25.6.0 /opt/venv/lib/python3.12/site-packages pip
kiwisolver 1.4.9 /opt/venv/lib/python3.12/site-packages pip
kornia 0.7.4 /opt/venv/lib/python3.12/site-packages pip
kornia_rs 0.1.9 /opt/venv/lib/python3.12/site-packages pip
lark 1.2.2 /opt/venv/lib/python3.12/site-packages pip
launchpadlib 1.11.0 /usr/lib/python3/dist-packages
lazr.restfulclient 0.14.6 /usr/lib/python3/dist-packages
lazr.uri 1.0.6 /usr/lib/python3/dist-packages
lazy_loader 0.4 /opt/venv/lib/python3.12/site-packages pip
lerobot 0.3.4 /opt/lerobot /opt/venv/lib/python3.12/site-packages pip
libclang 18.1.1 /opt/venv/lib/python3.12/site-packages pip
llvmlite 0.44.0 /opt/venv/lib/python3.12/site-packages pip
lockfile 0.12.2 /opt/venv/lib/python3.12/site-packages pip
Mako 1.3.10 /opt/venv/lib/python3.12/site-packages pip
Markdown 3.9 /opt/venv/lib/python3.12/site-packages pip
markdown-it-py 4.0.0 /opt/venv/lib/python3.12/site-packages pip
MarkupSafe 3.0.2 /opt/venv/lib/python3.12/site-packages pip
matplotlib 3.10.0 /opt/venv/lib/python3.12/site-packages pip
matplotlib-inline 0.1.7 /opt/venv/lib/python3.12/site-packages pip
mdurl 0.1.2 /opt/venv/lib/python3.12/site-packages pip
mergedeep 1.3.4 /opt/venv/lib/python3.12/site-packages pip
mistune 3.1.4 /opt/venv/lib/python3.12/site-packages pip
ml_dtypes 0.5.3 /opt/venv/lib/python3.12/site-packages pip
more-itertools 10.8.0 /opt/venv/lib/python3.12/site-packages pip
mpmath 1.3.0 /opt/venv/lib/python3.12/site-packages pip
msgpack 1.1.1 /opt/venv/lib/python3.12/site-packages pip
multidict 6.6.4 /opt/venv/lib/python3.12/site-packages pip
multiprocess 0.70.16 /opt/venv/lib/python3.12/site-packages pip
mypy_extensions 1.1.0 /opt/venv/lib/python3.12/site-packages pip
namex 0.1.0 /opt/venv/lib/python3.12/site-packages pip
nbclient 0.10.2 /opt/venv/lib/python3.12/site-packages pip
nbconvert 7.16.6 /opt/venv/lib/python3.12/site-packages pip
nbformat 5.10.4 /opt/venv/lib/python3.12/site-packages pip
nest-asyncio 1.6.0 /opt/venv/lib/python3.12/site-packages pip
networkx 3.5 /opt/venv/lib/python3.12/site-packages pip
nh3 0.3.0 /opt/venv/lib/python3.12/site-packages pip
ninja 1.13.0 /opt/venv/lib/python3.12/site-packages pip
notebook 7.4.5 /opt/venv/lib/python3.12/site-packages pip
notebook_shim 0.2.4 /opt/venv/lib/python3.12/site-packages pip
numba 0.61.2 /opt/venv/lib/python3.12/site-packages pip
numpy 2.3.3 /opt/venv/lib/python3.12/site-packages pip
numpydantic 1.6.7 /opt/venv/lib/python3.12/site-packages pip
nvtx 0.2.13 /opt/venv/lib/python3.12/site-packages pip
oauthlib 3.2.2 /usr/lib/python3/dist-packages
omegaconf 2.3.0 /opt/venv/lib/python3.12/site-packages pip
onnx 1.17.0 /opt/venv/lib/python3.12/site-packages pip
opencv-contrib-python 4.13.0 /opt/venv/lib/python3.12/site-packages pip
opencv-python 4.11.0.86 /opt/venv/lib/python3.12/site-packages pip
opencv-python-headless 4.11.0.86 /opt/venv/lib/python3.12/site-packages pip
opt_einsum 3.4.0 /opt/venv/lib/python3.12/site-packages pip
optimum 1.27.0 /opt/venv/lib/python3.12/site-packages pip
optree 0.17.0 /opt/venv/lib/python3.12/site-packages pip
orderly-set 5.5.0 /opt/venv/lib/python3.12/site-packages pip
packaging 25.0 /opt/venv/lib/python3.12/site-packages pip
pandas 2.2.3 /opt/venv/lib/python3.12/site-packages pip
pandocfilters 1.5.1 /opt/venv/lib/python3.12/site-packages pip
parso 0.8.5 /opt/venv/lib/python3.12/site-packages pip
peft 0.17.0 /opt/venv/lib/python3.12/site-packages pip
pettingzoo 1.25.0 /opt/venv/lib/python3.12/site-packages pip
pexpect 4.9.0 /opt/venv/lib/python3.12/site-packages pip
pfzy 0.3.4 /opt/venv/lib/python3.12/site-packages pip
pid 3.0.4 /opt/venv/lib/python3.12/site-packages pip
pillow 11.3.0 /opt/venv/lib/python3.12/site-packages pip
pip 25.2 /opt/venv/lib/python3.12/site-packages pip
pkginfo 1.12.1.2 /opt/venv/lib/python3.12/site-packages pip
platformdirs 4.4.0 /opt/venv/lib/python3.12/site-packages pip
pluggy 1.6.0 /opt/venv/lib/python3.12/site-packages pip
portalocker 3.2.0 /opt/venv/lib/python3.12/site-packages pip
prometheus_client 0.22.1 /opt/venv/lib/python3.12/site-packages pip
prompt_toolkit 3.0.52 /opt/venv/lib/python3.12/site-packages pip
propcache 0.3.2 /opt/venv/lib/python3.12/site-packages pip
protobuf 6.32.0 /opt/venv/lib/python3.12/site-packages pip
psutil 7.0.0 /opt/venv/lib/python3.12/site-packages pip
ptyprocess 0.7.0 /opt/venv/lib/python3.12/site-packages pip
pure_eval 0.2.3 /opt/venv/lib/python3.12/site-packages pip
pyarrow 21.0.0 /opt/venv/lib/python3.12/site-packages pip
pycparser 2.23 /opt/venv/lib/python3.12/site-packages pip
pycuda 2025.1.1 /opt/venv/lib/python3.12/site-packages pip
pydantic 2.10.6 /opt/venv/lib/python3.12/site-packages pip
pydantic_core 2.27.2 /opt/venv/lib/python3.12/site-packages pip
Pygments 2.19.2 /opt/venv/lib/python3.12/site-packages pip
PyGObject 3.48.2 /usr/lib/python3/dist-packages
PyJWT 2.7.0 /usr/lib/python3/dist-packages debian
pynput 1.8.1 /opt/venv/lib/python3.12/site-packages pip
pyparsing 3.1.1 /usr/lib/python3/dist-packages debian
pyrsistent 0.20.0 /usr/lib/python3/dist-packages
pyserial 3.5 /opt/venv/lib/python3.12/site-packages pip
pytest 8.4.2 /opt/venv/lib/python3.12/site-packages pip
python-apt 2.7.7+ubuntu5 /usr/lib/python3/dist-packages
python-daemon 3.1.2 /opt/venv/lib/python3.12/site-packages pip
python-dateutil 2.9.0.post0 /opt/venv/lib/python3.12/site-packages pip
python-json-logger 3.3.0 /opt/venv/lib/python3.12/site-packages pip
python-xlib 0.33 /opt/venv/lib/python3.12/site-packages pip
pytools 2025.2.4 /opt/venv/lib/python3.12/site-packages pip
pytorch3d 0.7.8 /opt/venv/lib/python3.12/site-packages pip
pytz 2025.2 /opt/venv/lib/python3.12/site-packages pip
PyYAML 6.0.2 /opt/venv/lib/python3.12/site-packages pip
pyyaml-include 1.4.1 /opt/venv/lib/python3.12/site-packages pip
pyzmq 27.1.0 /opt/venv/lib/python3.12/site-packages pip
ray 2.40.0 /opt/venv/lib/python3.12/site-packages pip
readme_renderer 44.0 /opt/venv/lib/python3.12/site-packages pip
referencing 0.36.2 /opt/venv/lib/python3.12/site-packages pip
regex 2025.9.1 /opt/venv/lib/python3.12/site-packages pip
requests 2.32.3 /opt/venv/lib/python3.12/site-packages pip
requests-toolbelt 1.0.0 /opt/venv/lib/python3.12/site-packages pip
rerun-sdk 0.24.1 /opt/venv/lib/python3.12/site-packages pip
rfc3339-validator 0.1.4 /opt/venv/lib/python3.12/site-packages pip
rfc3986 2.0.0 /opt/venv/lib/python3.12/site-packages pip
rfc3986-validator 0.1.1 /opt/venv/lib/python3.12/site-packages pip
rfc3987-syntax 1.1.0 /opt/venv/lib/python3.12/site-packages pip
rich 14.1.0 /opt/venv/lib/python3.12/site-packages pip
rpds-py 0.27.1 /opt/venv/lib/python3.12/site-packages pip
safetensors 0.6.2 /opt/venv/lib/python3.12/site-packages pip
scikit-build 0.18.1 /opt/venv/lib/python3.12/site-packages pip
scikit-image 0.25.2 /opt/venv/lib/python3.12/site-packages pip
scipy 1.16.1 /opt/venv/lib/python3.12/site-packages pip
SecretStorage 3.4.0 /opt/venv/lib/python3.12/site-packages pip
semantic-version 2.10.0 /opt/venv/lib/python3.12/site-packages pip
Send2Trash 1.8.3 /opt/venv/lib/python3.12/site-packages pip
sentencepiece 0.2.1 /opt/venv/lib/python3.12/site-packages pip
sentry-sdk 2.37.1 /opt/venv/lib/python3.12/site-packages pip
service 0.6.0 /opt/venv/lib/python3.12/site-packages pip
setproctitle 1.3.7 /opt/venv/lib/python3.12/site-packages pip
setuptools 80.9.0 /opt/venv/lib/python3.12/site-packages pip
setuptools-rust 1.12.0 /opt/venv/lib/python3.12/site-packages pip
shtab 1.7.2 /opt/venv/lib/python3.12/site-packages pip
siphash24 1.8 /opt/venv/lib/python3.12/site-packages pip
six 1.16.0 /usr/lib/python3/dist-packages
smmap 5.0.2 /opt/venv/lib/python3.12/site-packages pip
sniffio 1.3.1 /opt/venv/lib/python3.12/site-packages pip
soupsieve 2.8 /opt/venv/lib/python3.12/site-packages pip
stack-data 0.6.3 /opt/venv/lib/python3.12/site-packages pip
sympy 1.14.0 /opt/venv/lib/python3.12/site-packages pip
tensorboard 2.20.0 /opt/venv/lib/python3.12/site-packages pip
tensorboard-data-server 0.7.2 /opt/venv/lib/python3.12/site-packages pip
tensorflow 2.20.0 /opt/venv/lib/python3.12/site-packages pip
tensorrt 10.13.2.6 /opt/venv/lib/python3.12/site-packages pip
termcolor 3.1.0 /opt/venv/lib/python3.12/site-packages pip
terminado 0.18.1 /opt/venv/lib/python3.12/site-packages pip
tf_keras 2.20.1 /opt/venv/lib/python3.12/site-packages pip
tianshou 0.5.1 /opt/venv/lib/python3.12/site-packages pip
tifffile 2025.9.9 /opt/venv/lib/python3.12/site-packages pip
timm 1.0.14 /opt/venv/lib/python3.12/site-packages pip
tinycss2 1.4.0 /opt/venv/lib/python3.12/site-packages pip
tokenizers 0.21.4 /opt/venv/lib/python3.12/site-packages pip
toml 0.10.2 /opt/venv/lib/python3.12/site-packages pip
torch 2.9.0 /opt/venv/lib/python3.12/site-packages pip
torchvision 0.24.0 /opt/venv/lib/python3.12/site-packages pip
tornado 6.5.2 /opt/venv/lib/python3.12/site-packages pip
tqdm 4.67.1 /opt/venv/lib/python3.12/site-packages pip
traitlets 5.14.3 /opt/venv/lib/python3.12/site-packages pip
transformers 4.51.3 /opt/venv/lib/python3.12/site-packages pip
triton 3.5.0+gite3b8f77a /opt/venv/lib/python3.12/site-packages pip
twine 6.2.0 /opt/venv/lib/python3.12/site-packages pip
typeguard 4.4.2 /opt/venv/lib/python3.12/site-packages pip
types-python-dateutil 2.9.0.20250822 /opt/venv/lib/python3.12/site-packages pip
typing_extensions 4.12.2 /opt/venv/lib/python3.12/site-packages pip
typing-inspect 0.9.0 /opt/venv/lib/python3.12/site-packages pip
tyro 0.9.17 /opt/venv/lib/python3.12/site-packages pip
tzdata 2025.2 /opt/venv/lib/python3.12/site-packages pip
uri-template 1.3.0 /opt/venv/lib/python3.12/site-packages pip
urllib3 2.5.0 /opt/venv/lib/python3.12/site-packages pip
uv 0.8.16 /opt/venv/lib/python3.12/site-packages pip
wadllib 1.3.6 /usr/lib/python3/dist-packages
wandb 0.18.0 /opt/venv/lib/python3.12/site-packages pip
wcwidth 0.2.13 /opt/venv/lib/python3.12/site-packages pip
webcolors 24.11.1 /opt/venv/lib/python3.12/site-packages pip
webencodings 0.5.1 /opt/venv/lib/python3.12/site-packages pip
websocket-client 1.8.0 /opt/venv/lib/python3.12/site-packages pip
Werkzeug 3.1.3 /opt/venv/lib/python3.12/site-packages pip
wheel 0.45.1 /opt/venv/lib/python3.12/site-packages pip
widgetsnbextension 4.0.14 /opt/venv/lib/python3.12/site-packages pip
wrapt 1.17.3 /opt/venv/lib/python3.12/site-packages pip
xxhash 3.5.0 /opt/venv/lib/python3.12/site-packages pip
yarl 1.20.1 /opt/venv/lib/python3.12/site-packages pip
zipp 3.23.0 /opt/venv/lib/python3.12/site-packages pip
The image can be pulled directly from Docker Hub and includes commonly used dependencies such as PyTorch, TensorRT, and FlashAttention:
docker pull johnnync/isaac-gr00t:r38.2.arm64-sbsa-cu130-24.04
This Docker image does not support invoking LeRobot scripts for ACT model inference. If you need to run the full LeRobot script suite, please use an environment outside this image.
To run Docker on Thor, refer to the following command. Replace your_docker_img:tag with your Docker image name and tag, or use the image ID:
sudo docker run --rm -it \
  --network=host \
  -e NVIDIA_DRIVER_CAPABILITIES=compute,utility,video,graphics \
  --runtime nvidia \
  --privileged \
  -v /tmp/.X11-unix:/tmp/.X11-unix \
  -v /etc/X11:/etc/X11 \
  --device /dev/nvhost-vic \
  -v /dev:/dev \
  your_docker_img:tag
Data Collection Using the SO-ARM
For a detailed tutorial on data collection, please refer to the following link:
https://wiki.seeedstudio.com/lerobot_so100m_new/#record-the-dataset
This link contains a complete tutorial for the SO-ARM, covering configuration, assembly, calibration, data collection, training, and inference.
Data collection for the lerobot robotic arm can be performed either on a PC or directly on a Jetson device.
- Method 1: Collect data using Jetson
- Method 2: Collect data using an Ubuntu PC
The data collection procedures are essentially the same for both methods.
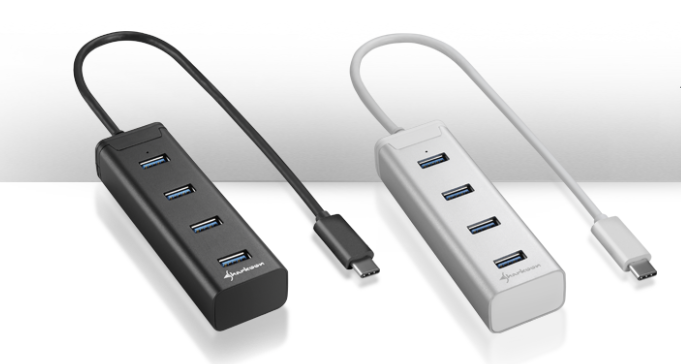
Jetson may not be able to simultaneously stream two USB cameras with the same bandwidth requirements. If you connect two USB cameras, they must be attached to different USB hub chips!
To stream two USB cameras simultaneously on Thor, after connecting one camera to the USB-A port, you’ll also need to use an external USB hub connected via the USB Type-C port. This ensures that the second USB camera is mounted to a different USB hub controller within Thor. An example of a compatible USB Type-C hub is shown below:
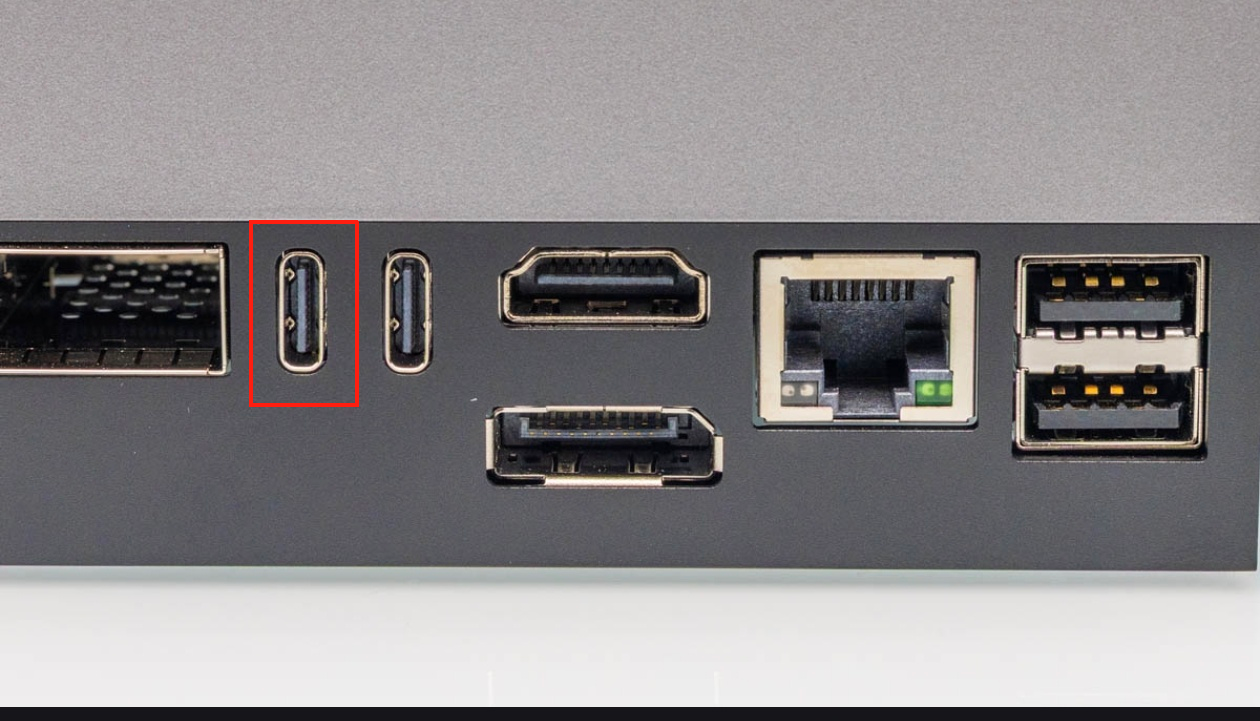
The USB Type-C dock must be connected to specific ports on Thor to ensure peripherals function properly, as shown below:
Lerobot Environment Setup (optinal)
The development environment setup process for Lerobot can be found in the subsection of the following link:
https://wiki.seeedstudio.com/lerobot_so100m_new/#install-lerobot
Configure the motors
The motors on each joint of the SO-ARM need to be configured before assembly. The configuration steps can be found in the subsection of the following link:
https://wiki.seeedstudio.com/lerobot_so100m_new/#configure-the-motors
Assembly
The installation process of the SO-ARM’s master and follower arms can be found in the subsection of the following link:
https://wiki.seeedstudio.com/lerobot_so100m_new/#assembly
SO-ARM Calibration
After the SO-ARM has been fully assembled, calibration is required. Please refer to the subsection of the following link for the calibration procedure:
https://wiki.seeedstudio.com/lerobot_so100m_new/#calibrate
When calibrating the robotic arms, please do NOT connect any USB cameras, as this may cause port conflicts or incorrect port assignments.
After running the calibration script, manually move each joint of the robotic arm to ensure that it reaches its full range of motion! Failure to do so may result in a mismatch between the poses of the leader and follower arms during teleoperation.
Camera Add
It is generally recommended to install one camera on the wrist/gripper of the robotic arm, and another camera on the desktop surface, to ensure proper coverage of the arm’s posture. The specific installation approach depends on your application scenario; the example shown below is for reference only.
For details, please refer to the subsection of the following link:
https://wiki.seeedstudio.com/lerobot_so100m_new/#add-cameras
Data Collection
After completing both the camera installation and the robotic arm calibration, the dataset collection procedure can be found in the subsection of the following link:
https://wiki.seeedstudio.com/lerobot_so100m_new/#record-the-dataset
Visualizing Collected Data
To visualize the data collected on the SO-ARM, please refer to the subsection of the following link:
https://wiki.seeedstudio.com/lerobot_so100m_new/#visualize-the-dataset
Policy Training
Based on the collected data, the procedure for training a Policy can be found in the subsection of the following link:
https://wiki.seeedstudio.com/lerobot_so100m_new/#train-a-policy
In the following sections, we will introduce a cloud-based training platform and demonstrate basic usage. You may choose to complete training more efficiently on the remote server.
If you choose to train the policy in the cloud, make sure that your dataset is uploaded to the cloud server in advance, or downloaded from the Hugging Face Hub. However, due to potential network issues when downloading directly from the Hugging Face Hub, it is strongly recommended to manually upload the dataset to your cloud server.
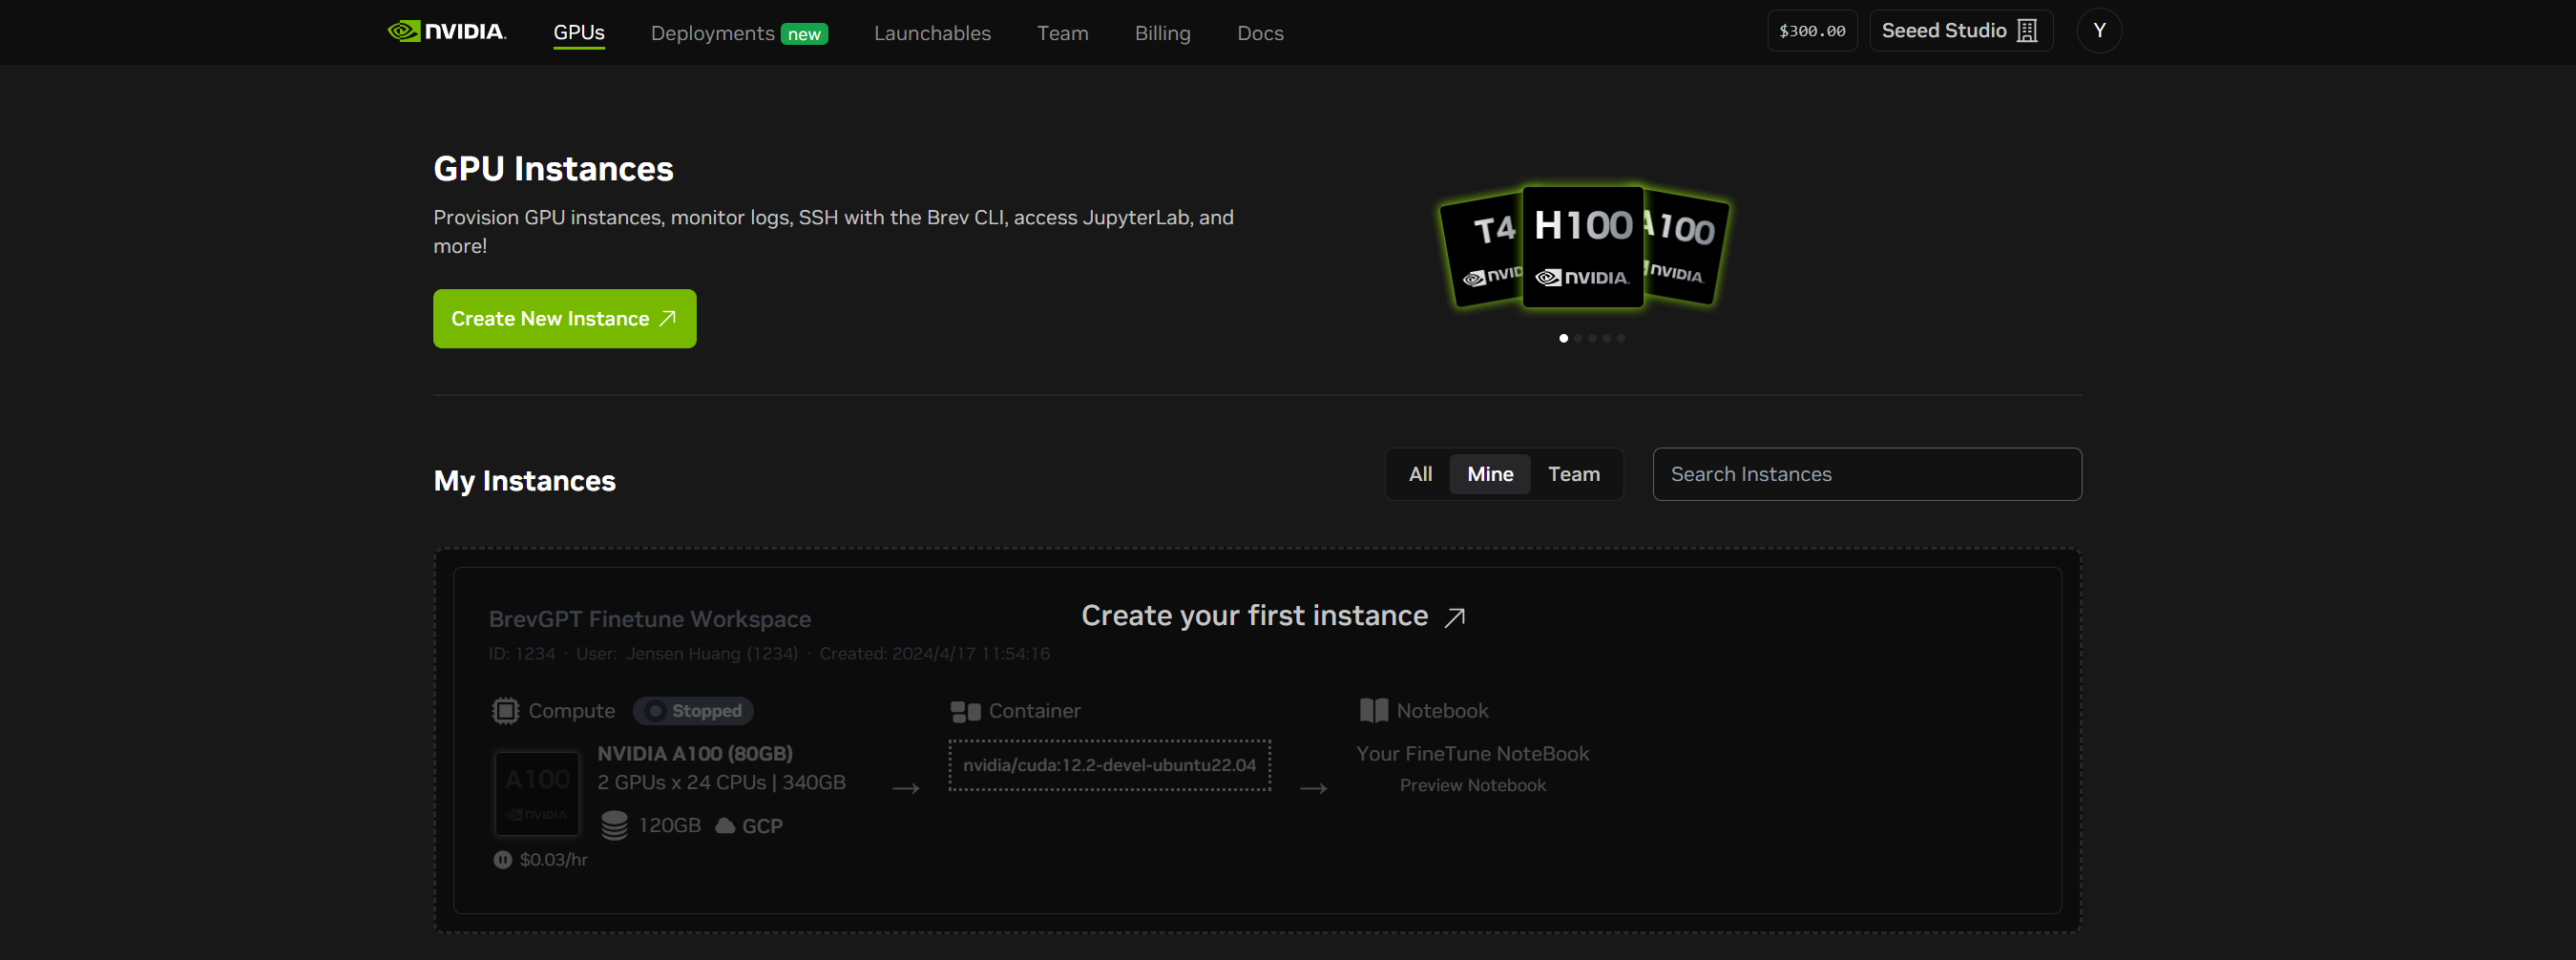
Use NVIDIA Brev for training policies
NVIDIA Brev provides streamlined access to NVIDIA GPU instances on popular cloud platforms, automatic environment setup, and flexible deployment options, enabling developers to start experimenting instantly.
Platform access URL: https://login.brev.nvidia.com/signin
You will need to register an account to use the platform. This section introduces the basic usage of the training platform.
Enabling the Cloud-Based Training Platform
Step-by-Step Instructions
- Create a Cloud Server Instance -step 1
- Create a Cloud Server Instance -step 2
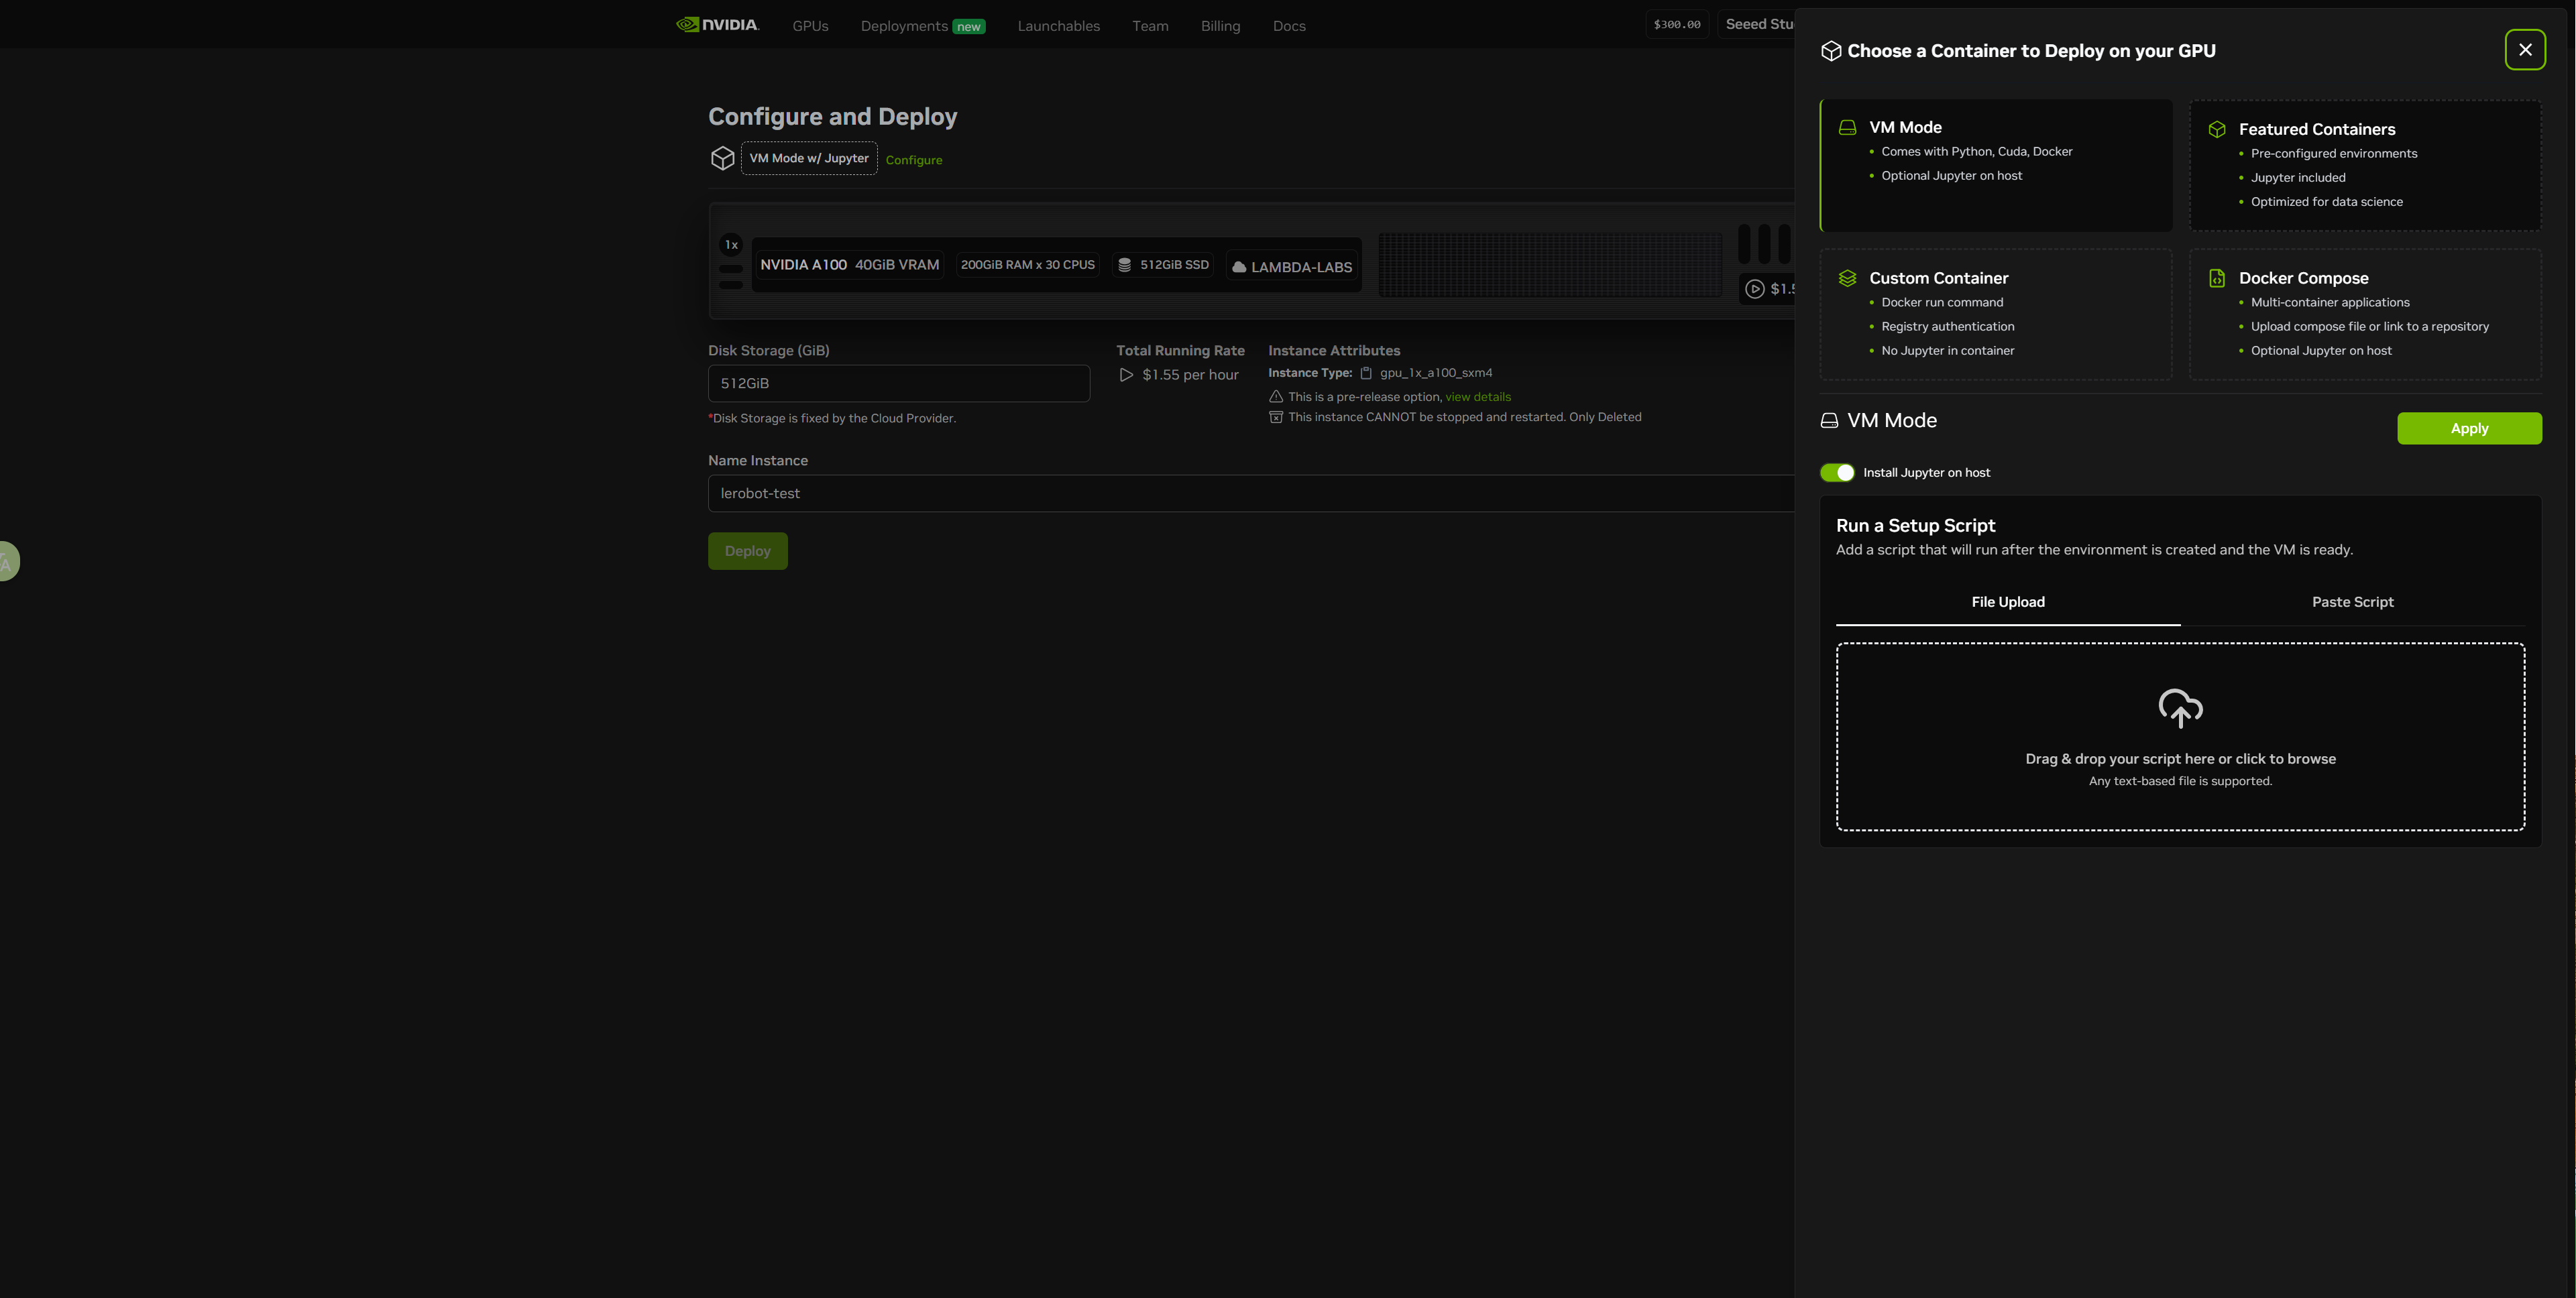
- Create a Cloud Server Instance -step 3
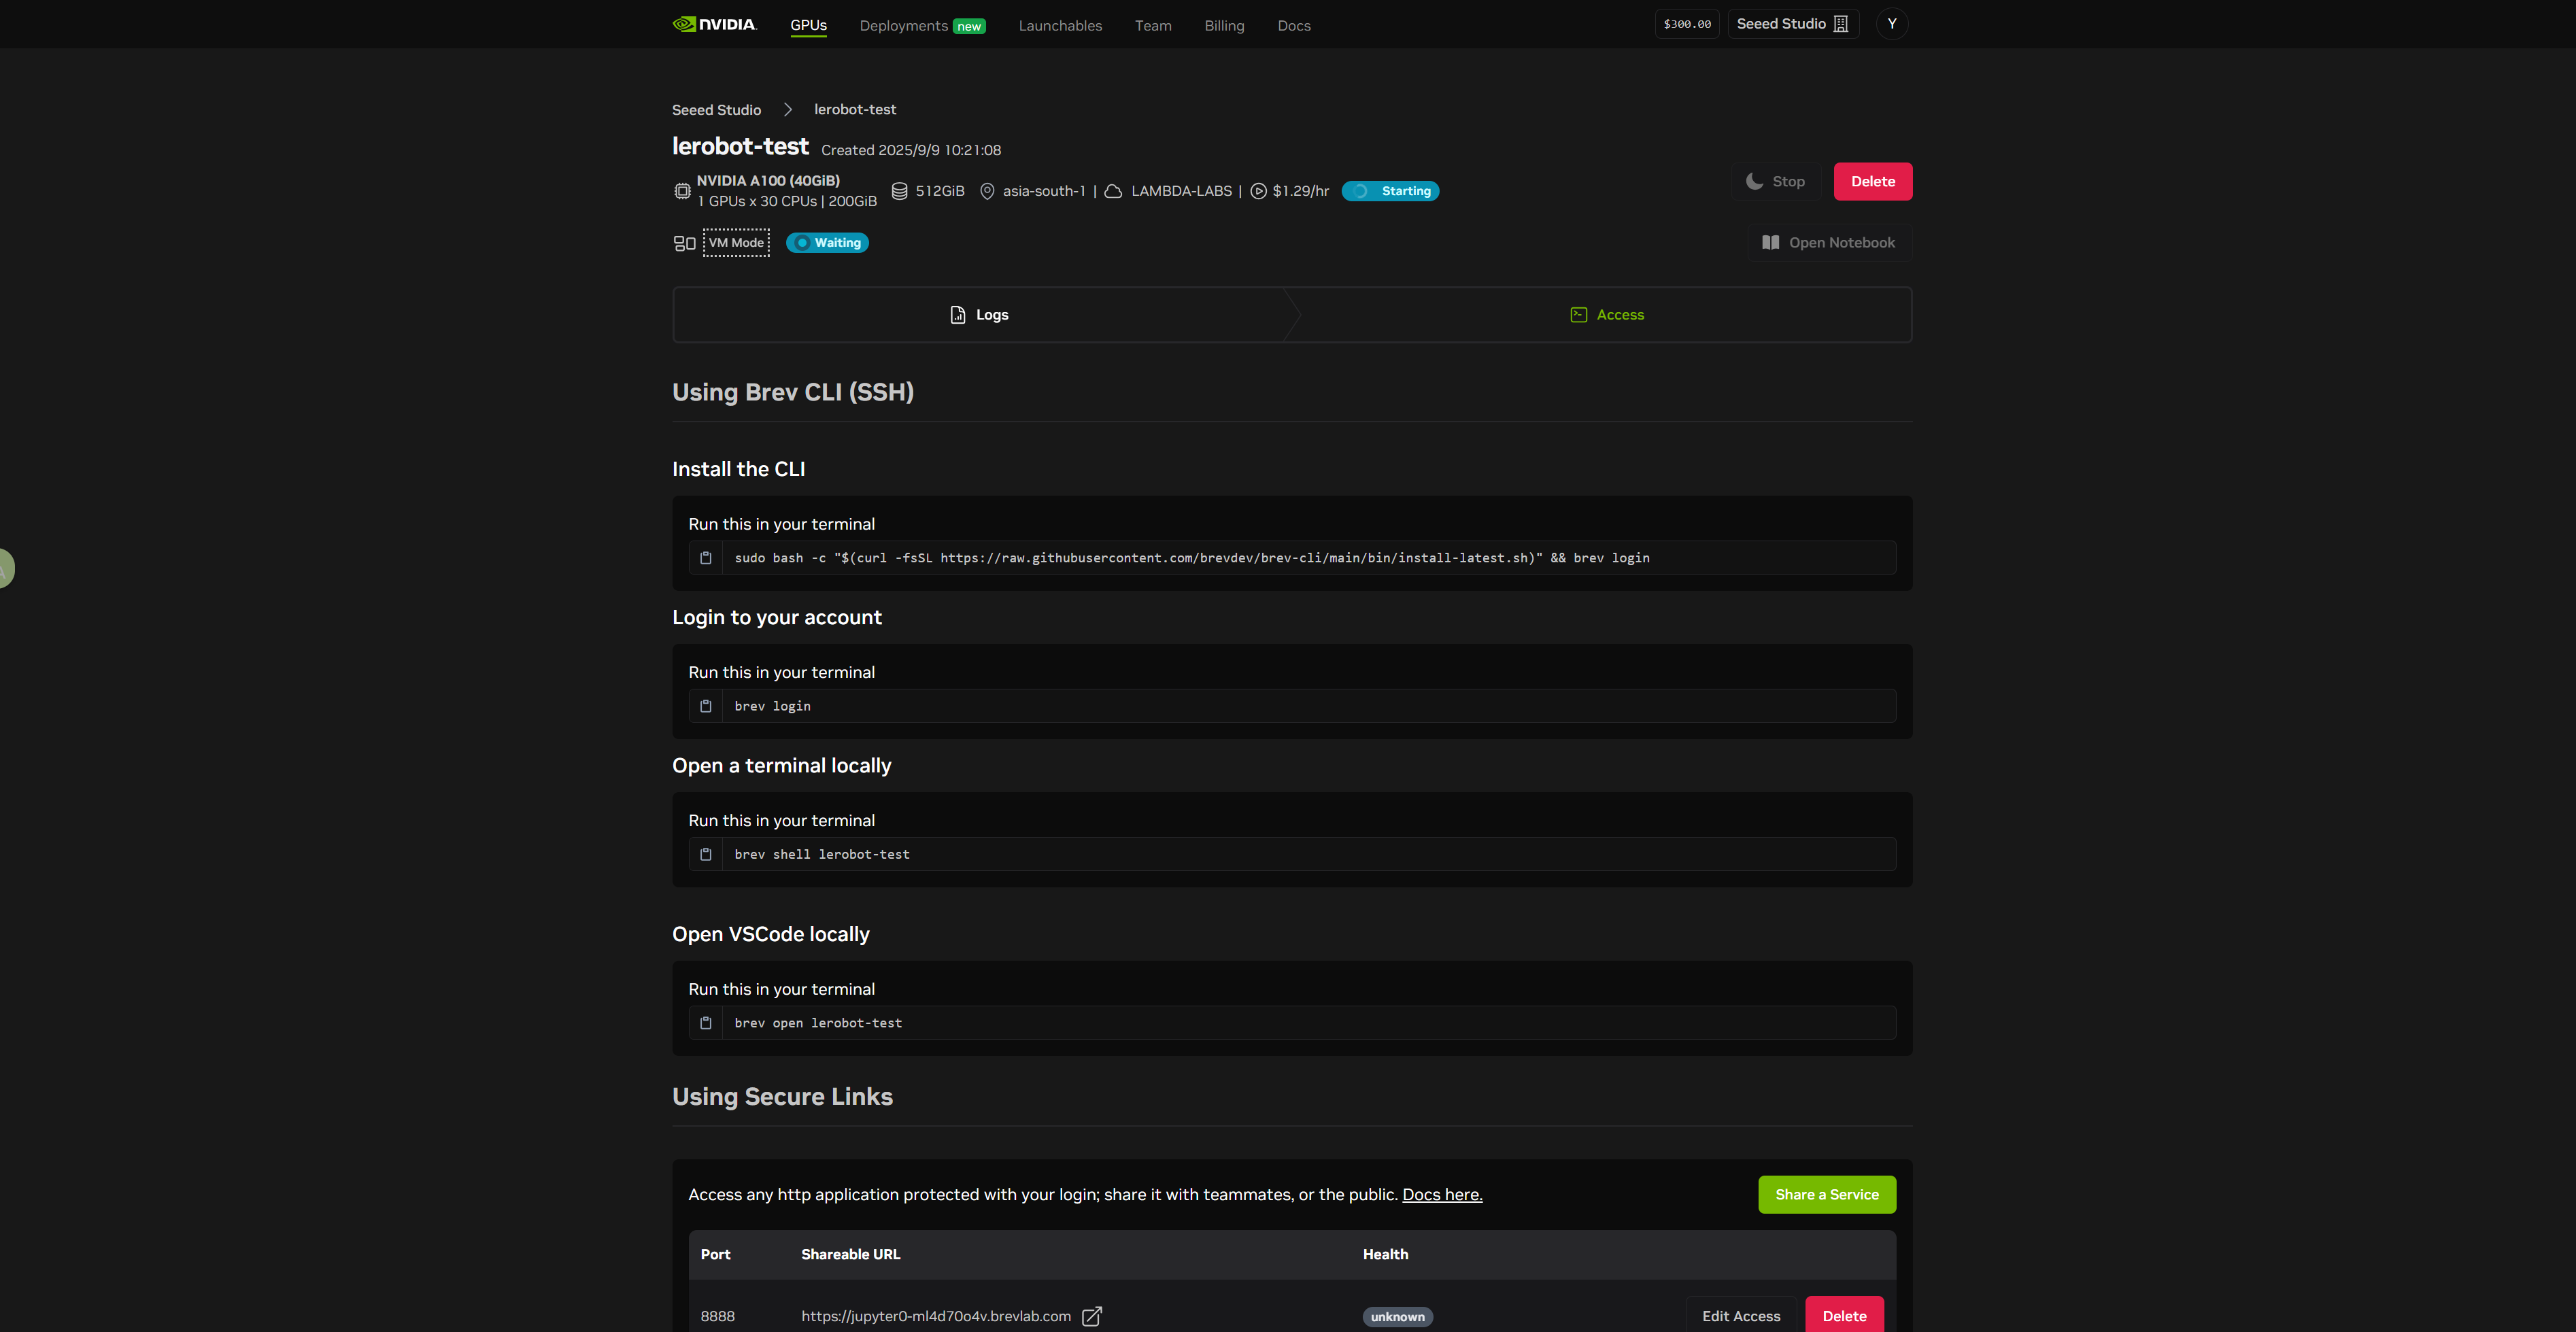
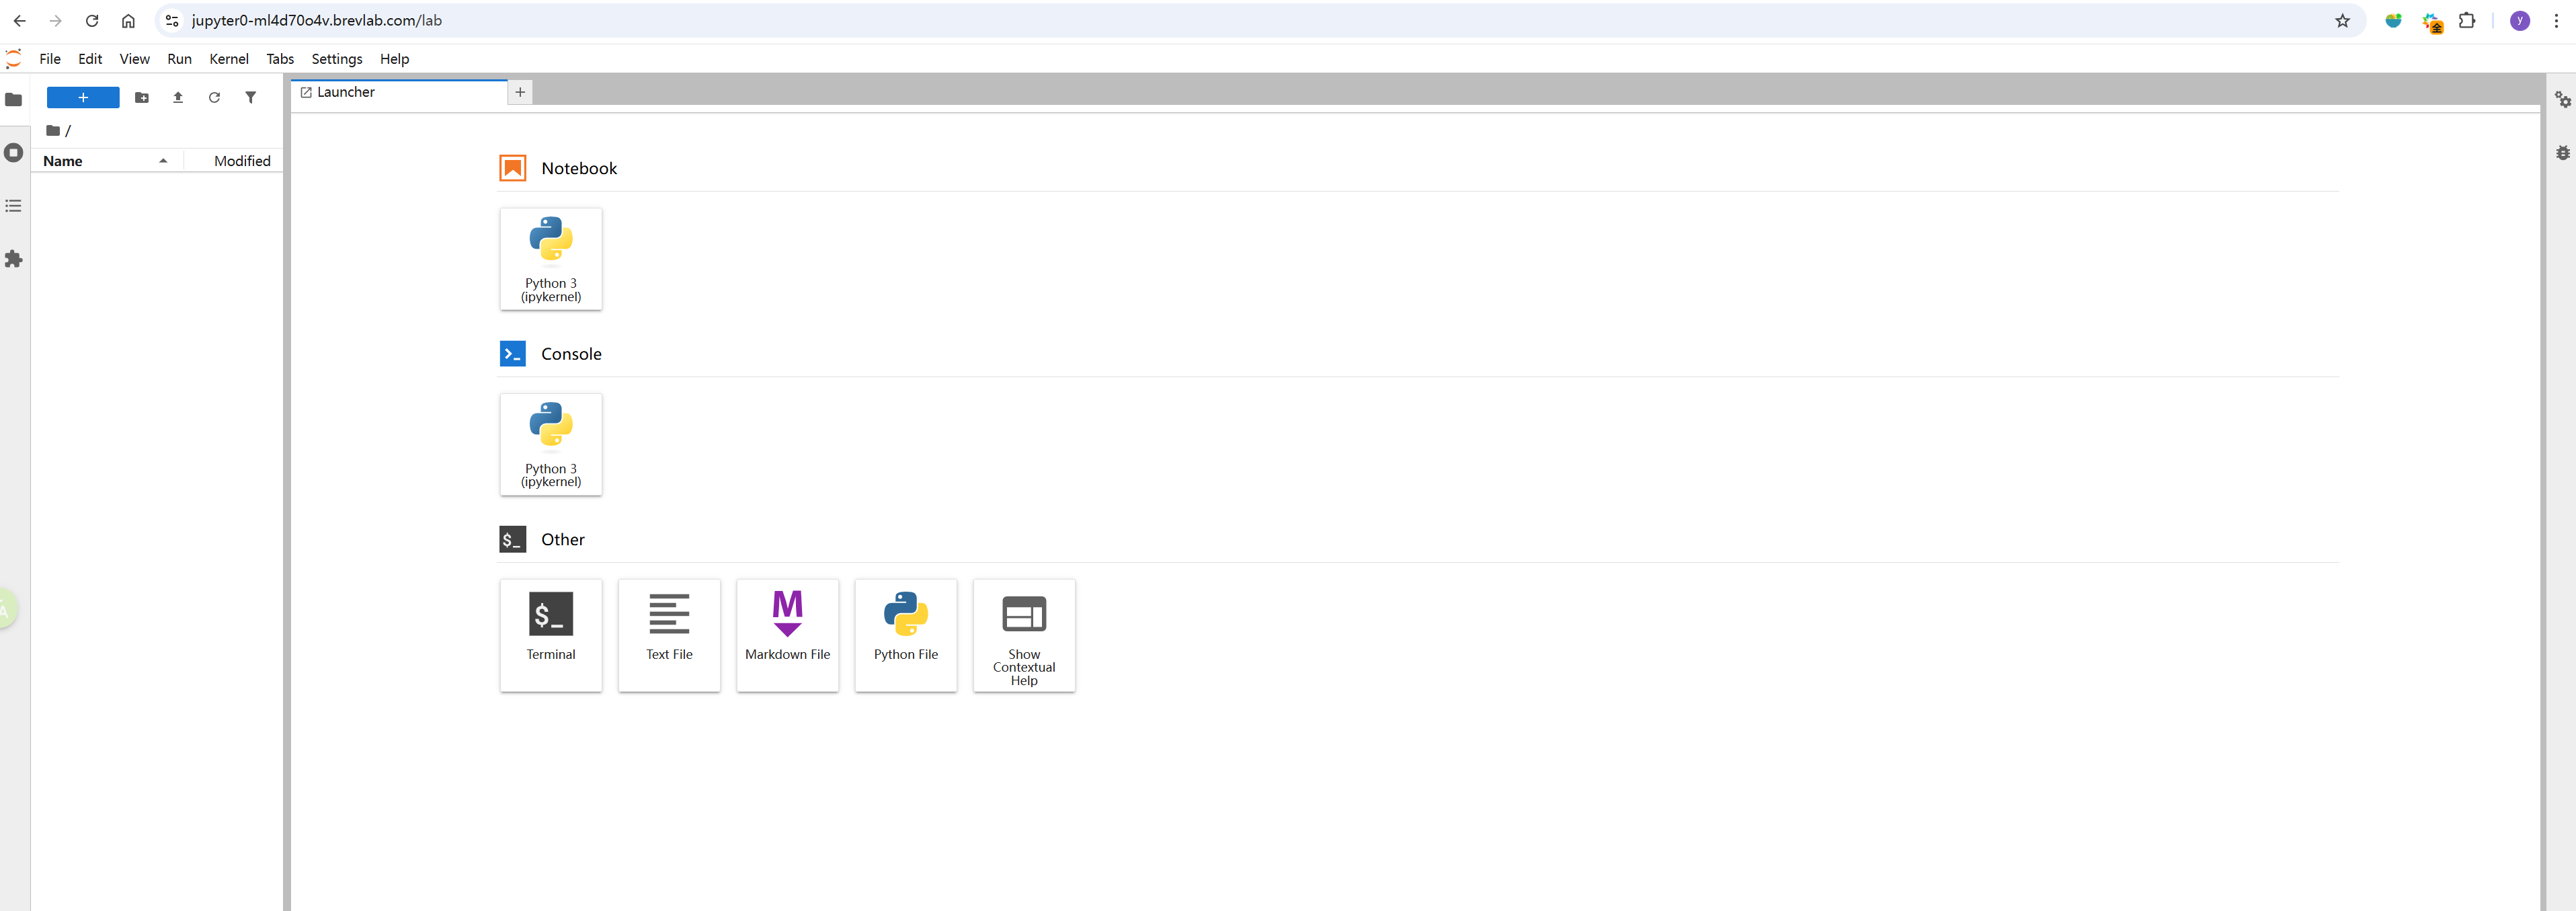
Launch the Web-Based Jupyter Notebook:

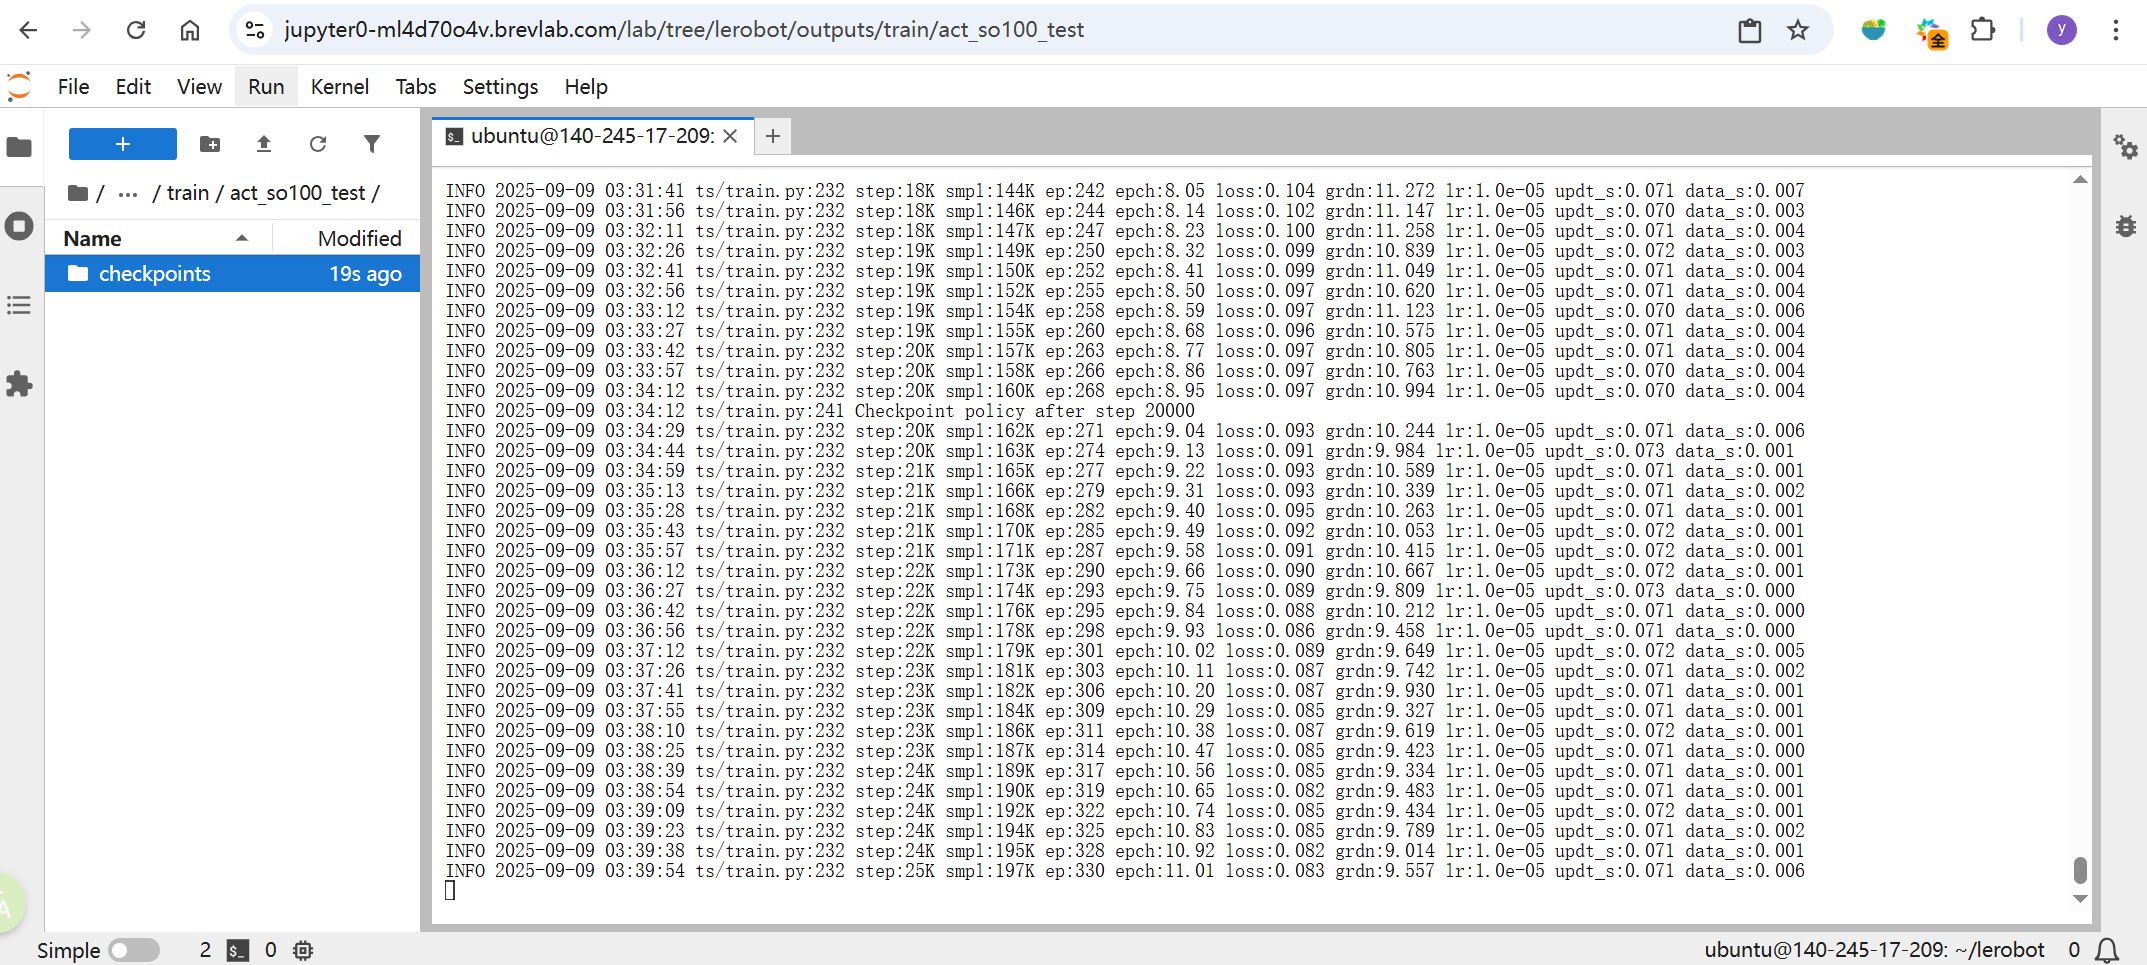
Training the Model and Exporting from the Server
Developers can train models directly within the notebook terminal. Below is an example for training an GR00T N1.5 and exporting it from the server afterward.
Install Conda on the server:
mkdir -p ~/miniconda3
cd miniconda3
wget https://repo.anaconda.com/miniconda/Miniconda3-latest-Linux-x86_64.sh -O ~/miniconda3/miniconda.sh
bash ~/miniconda3/miniconda.sh -b -u -p ~/miniconda3
source ~/miniconda3/bin/activate
conda init --all
Clone the Isaac-GR00T Repo:
git clone https://github.com/NVIDIA/Isaac-GR00T
cd Isaac-GR00T
Create the gr00t environment:
conda create -n gr00t python=3.10
conda activate gr00t
pip install --upgrade setuptools
pip install -e .[base]
pip install --no-build-isolation flash-attn==2.7.1.post4
If you train or fine-tune GR00T on a cloud platform, you must use a GPU with Ampere or newer architecture (e.g., RTX A6000 or GeForce RTX 4090). V100 (Volta) is not supported for GR00T training or fine-tuning.
For more details on fine-tuning the model, please refer to: https://huggingface.co/blog/nvidia/gr00t-n1-5-so101-tuning#:~:text=1.2%20Configure%20Modality%20File
Fine-tuning GR00T N1.5 model:
python scripts/gr00t_finetune.py \
   --dataset-path ./demo_data/so101-table-cleanup/ \
   --num-gpus 1 \
   --output-dir ./so101-checkpoints  \
   --max-steps 10000 \
   --data-config so100_dualcam \
   --video-backend torchvision_av
The default fine-tuning settings require ~25G of VRAM. If you don't have that much VRAM, try adding the --no-tune_diffusion_model flag to the gr00t_finetune.py script.
If you want to train or fine-tune Gr00t on a server, you can refer to this link.
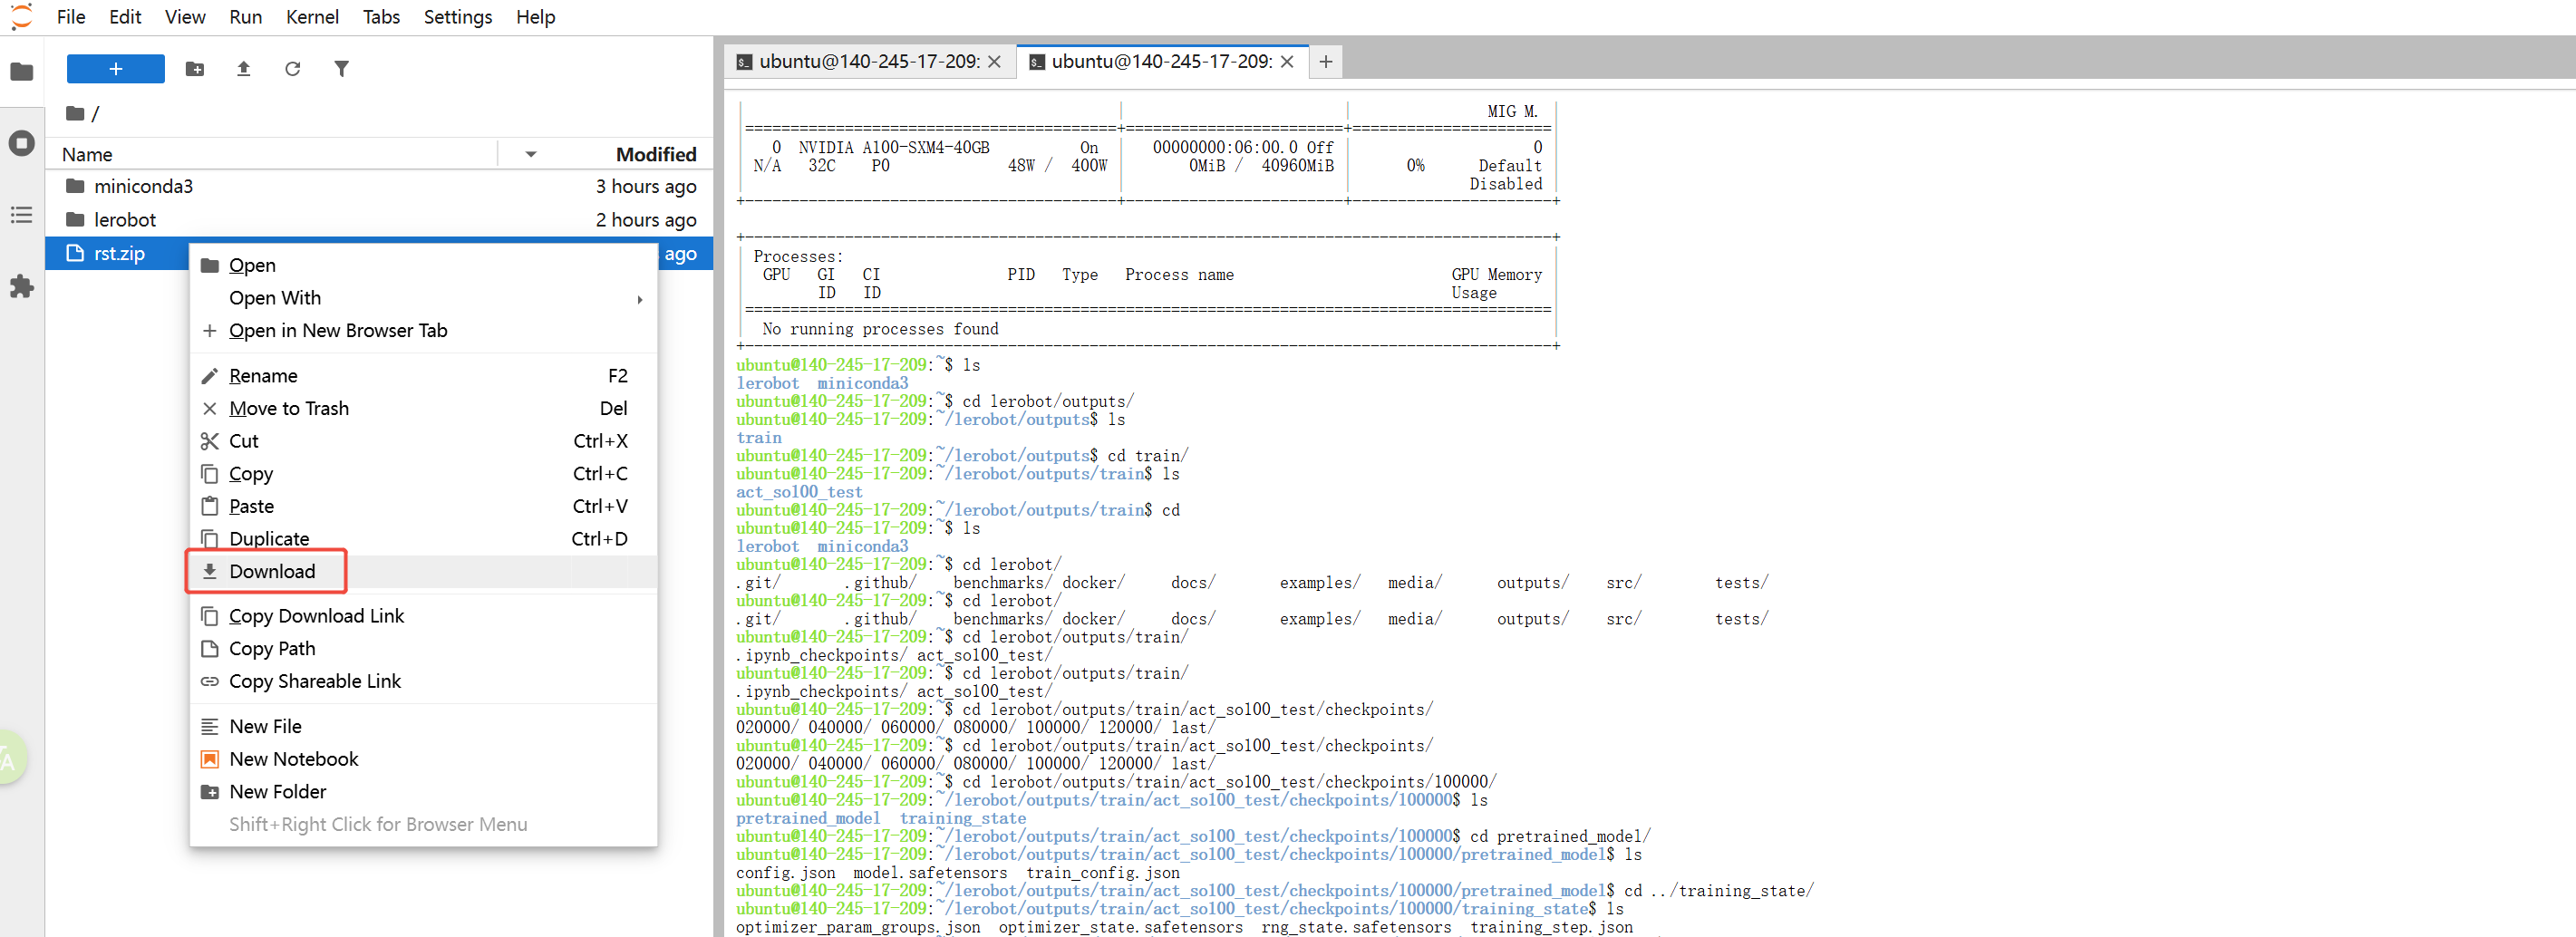
After training is completed, you may want to download the model to your local machine. But he Jupyter Notebook sidebar does not support direct navigation into model training folders.
Solution is that: First compress the target folder into a .zip or .tar.gz archive, then download the archive file through the notebook interface. Refer to the figure below for an example.
Isaac GR00T N1.5 Inference on Thor
Jetson AGX Thor, as a powerful edge computing and deployment platform, provides sufficient resources to support large-scale model inference. In this section, building upon the previously introduced content, we demonstrate how to run inference for GR00T N1.5 on Thor.
GR00T N1.5 is an open-source baseline system released by NVIDIA Research in the field of robot learning. It aims to provide a unified framework for embodied AI training and inference, particularly focusing on imitation learning and policy learning driven by large-scale models.
Preparation
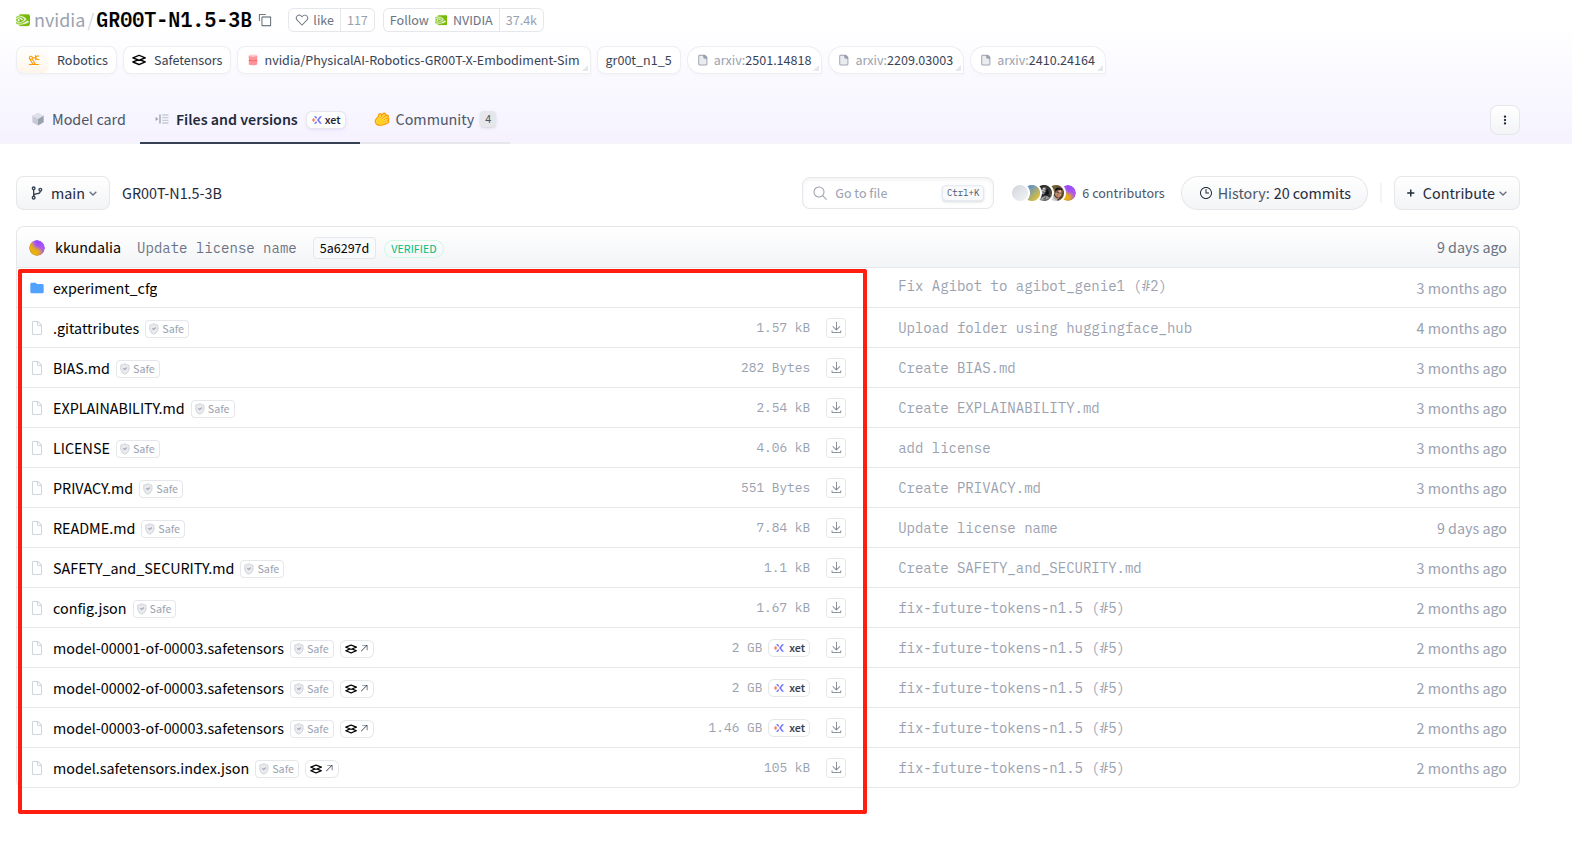
The pre-trained models of GR00T N1.5 are available via Hugging Faces. You can download them from the following link:
https://huggingface.co/nvidia/GR00T-N1.5-3B/tree/main
All dependencies required for GR00T inference have been pre-configured in a dedicated Docker image.
Use the following command to start the container:
sudo docker run --rm -it \
  --network=host \
  -e NVIDIA_DRIVER_CAPABILITIES=compute,utility,video,graphics \
  --runtime nvidia \
  --privileged \
  -v /tmp/.X11-unix:/tmp/.X11-unix \
  -v /etc/X11:/etc/X11 \
  --device /dev/nvhost-vic \
  -v /dev:/dev \
  lerobot:r38.2.aarch64-cu130-24.04
Git clone the source code of Gr00t,and install it:
git clone https://github.com/NVIDIA/Isaac-GR00T.git
cd Isaac-GR00T
pip install --upgrade setuptools
pip install -e .[thor]
Gr00t is fully compatible with the datasets collected using the lerobot framework. Refer to the previous "Data Collection" section to prepare your dataset for fine-tuning the Gr00t model.
Model Fine-Tuning (optional)
If you’ve already fine-tuned GR00T N1.5 in NVIDIA Brev, you can skip this step on Thor.
The fine-tuning process can be executed either on the provided cloud training platform or directly inside the Docker container on Thor.
If you have not downloaded any pretrained GR00T model and do not plan to use a custom version, you may use the following command to fine-tune based on the Hugging Face weights:
python scripts/gr00t_finetune.py \
   --dataset-path ./demo_data/so101-table-cleanup/ \
   --num-gpus 1 \
   --output-dir ./so101-checkpoints  \
   --max-steps 10000 \
   --data-config so100_dualcam \
   --video-backend torchvision_av
This script will automatically download the pretrained GR00T model from Hugging Face and begin the fine-tuning process.
If you wish to use a locally stored pretrained GR00T model, modify the command as follows:
python scripts/gr00t_finetune.py \
   --dataset-path ./demo_data/so101-table-cleanup/ \
   --num-gpus 1 \
   --output-dir ./so101-checkpoints \
   --max-steps 10000 \
   --data-config so100_dualcam \
   --video-backend torchvision_av \
   --base-model-path ./pretrained/GR00T-N1.5-3
--dataset-path is the file path of collection data from SO-ARM.
The default fine-tuning settings require ~25G of VRAM. If you don't have that much VRAM, try adding the --no-tune_diffusion_model flag to the gr00t_finetune.py script.
Running Inference with GR00T N1.5
To achieve optimal performance, it is recommended to replicate the real-world setup used during data collection as closely as possible when deploying fine-tuned GR00T models. This is because the model's generalization capabilities are limited.
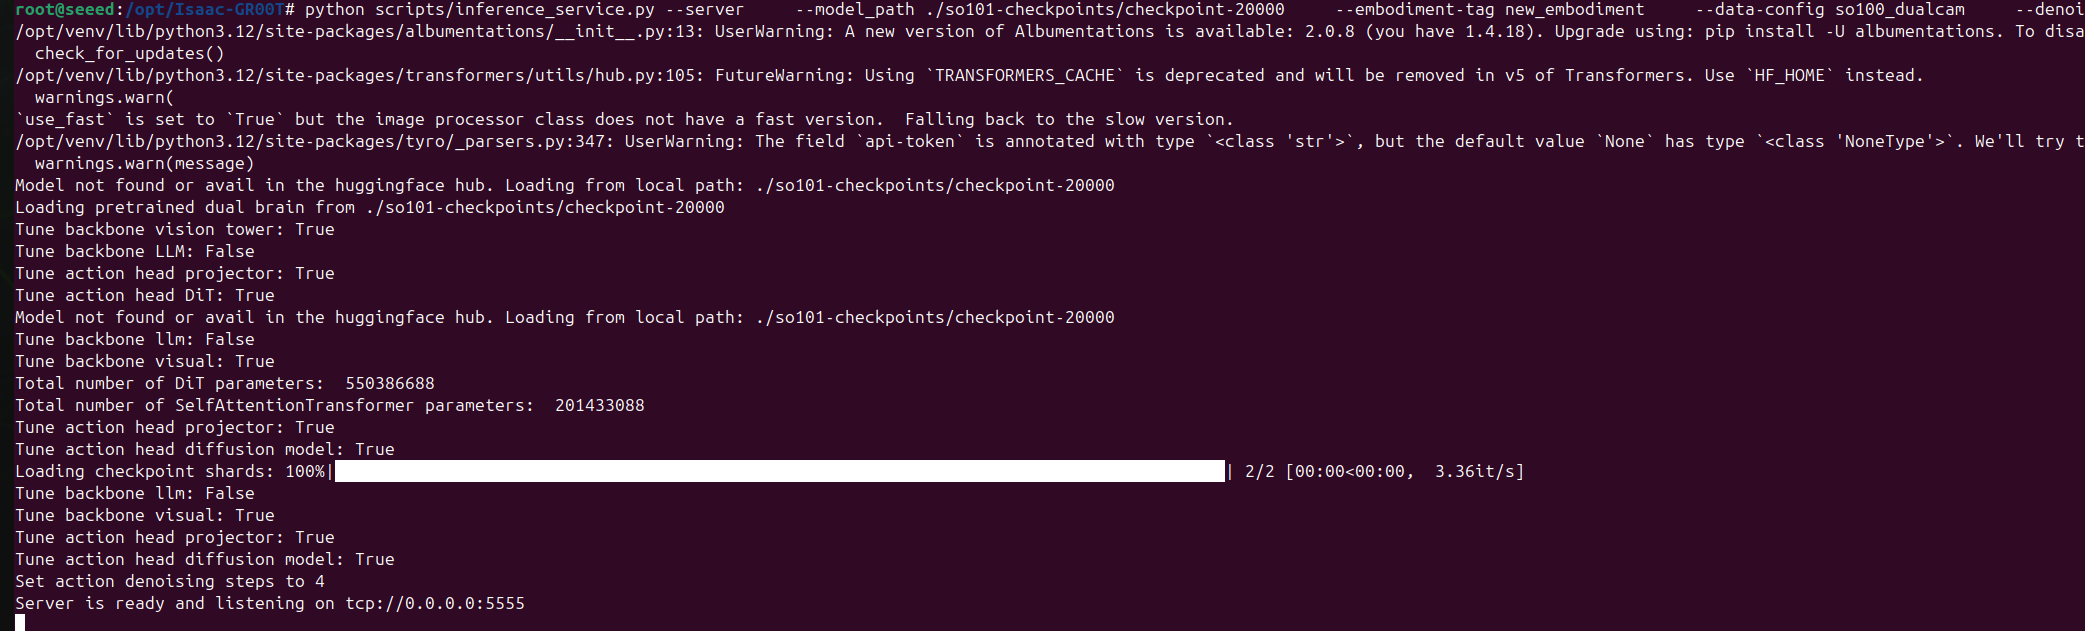
Inside the Docker container, open a terminal and launch the GR00T inference service:
python scripts/inference_service.py --server \
    --model_path ./so101-checkpoints \
    --embodiment-tag new_embodiment \
    --data-config so100_dualcam \
    --denoising-steps 4
Upon successful launch, the terminal should display logs similar to:
Open another terminal, and use the following command to enter the same container from a different shell:
sudo docker exec -it <container id> /bin/bahs
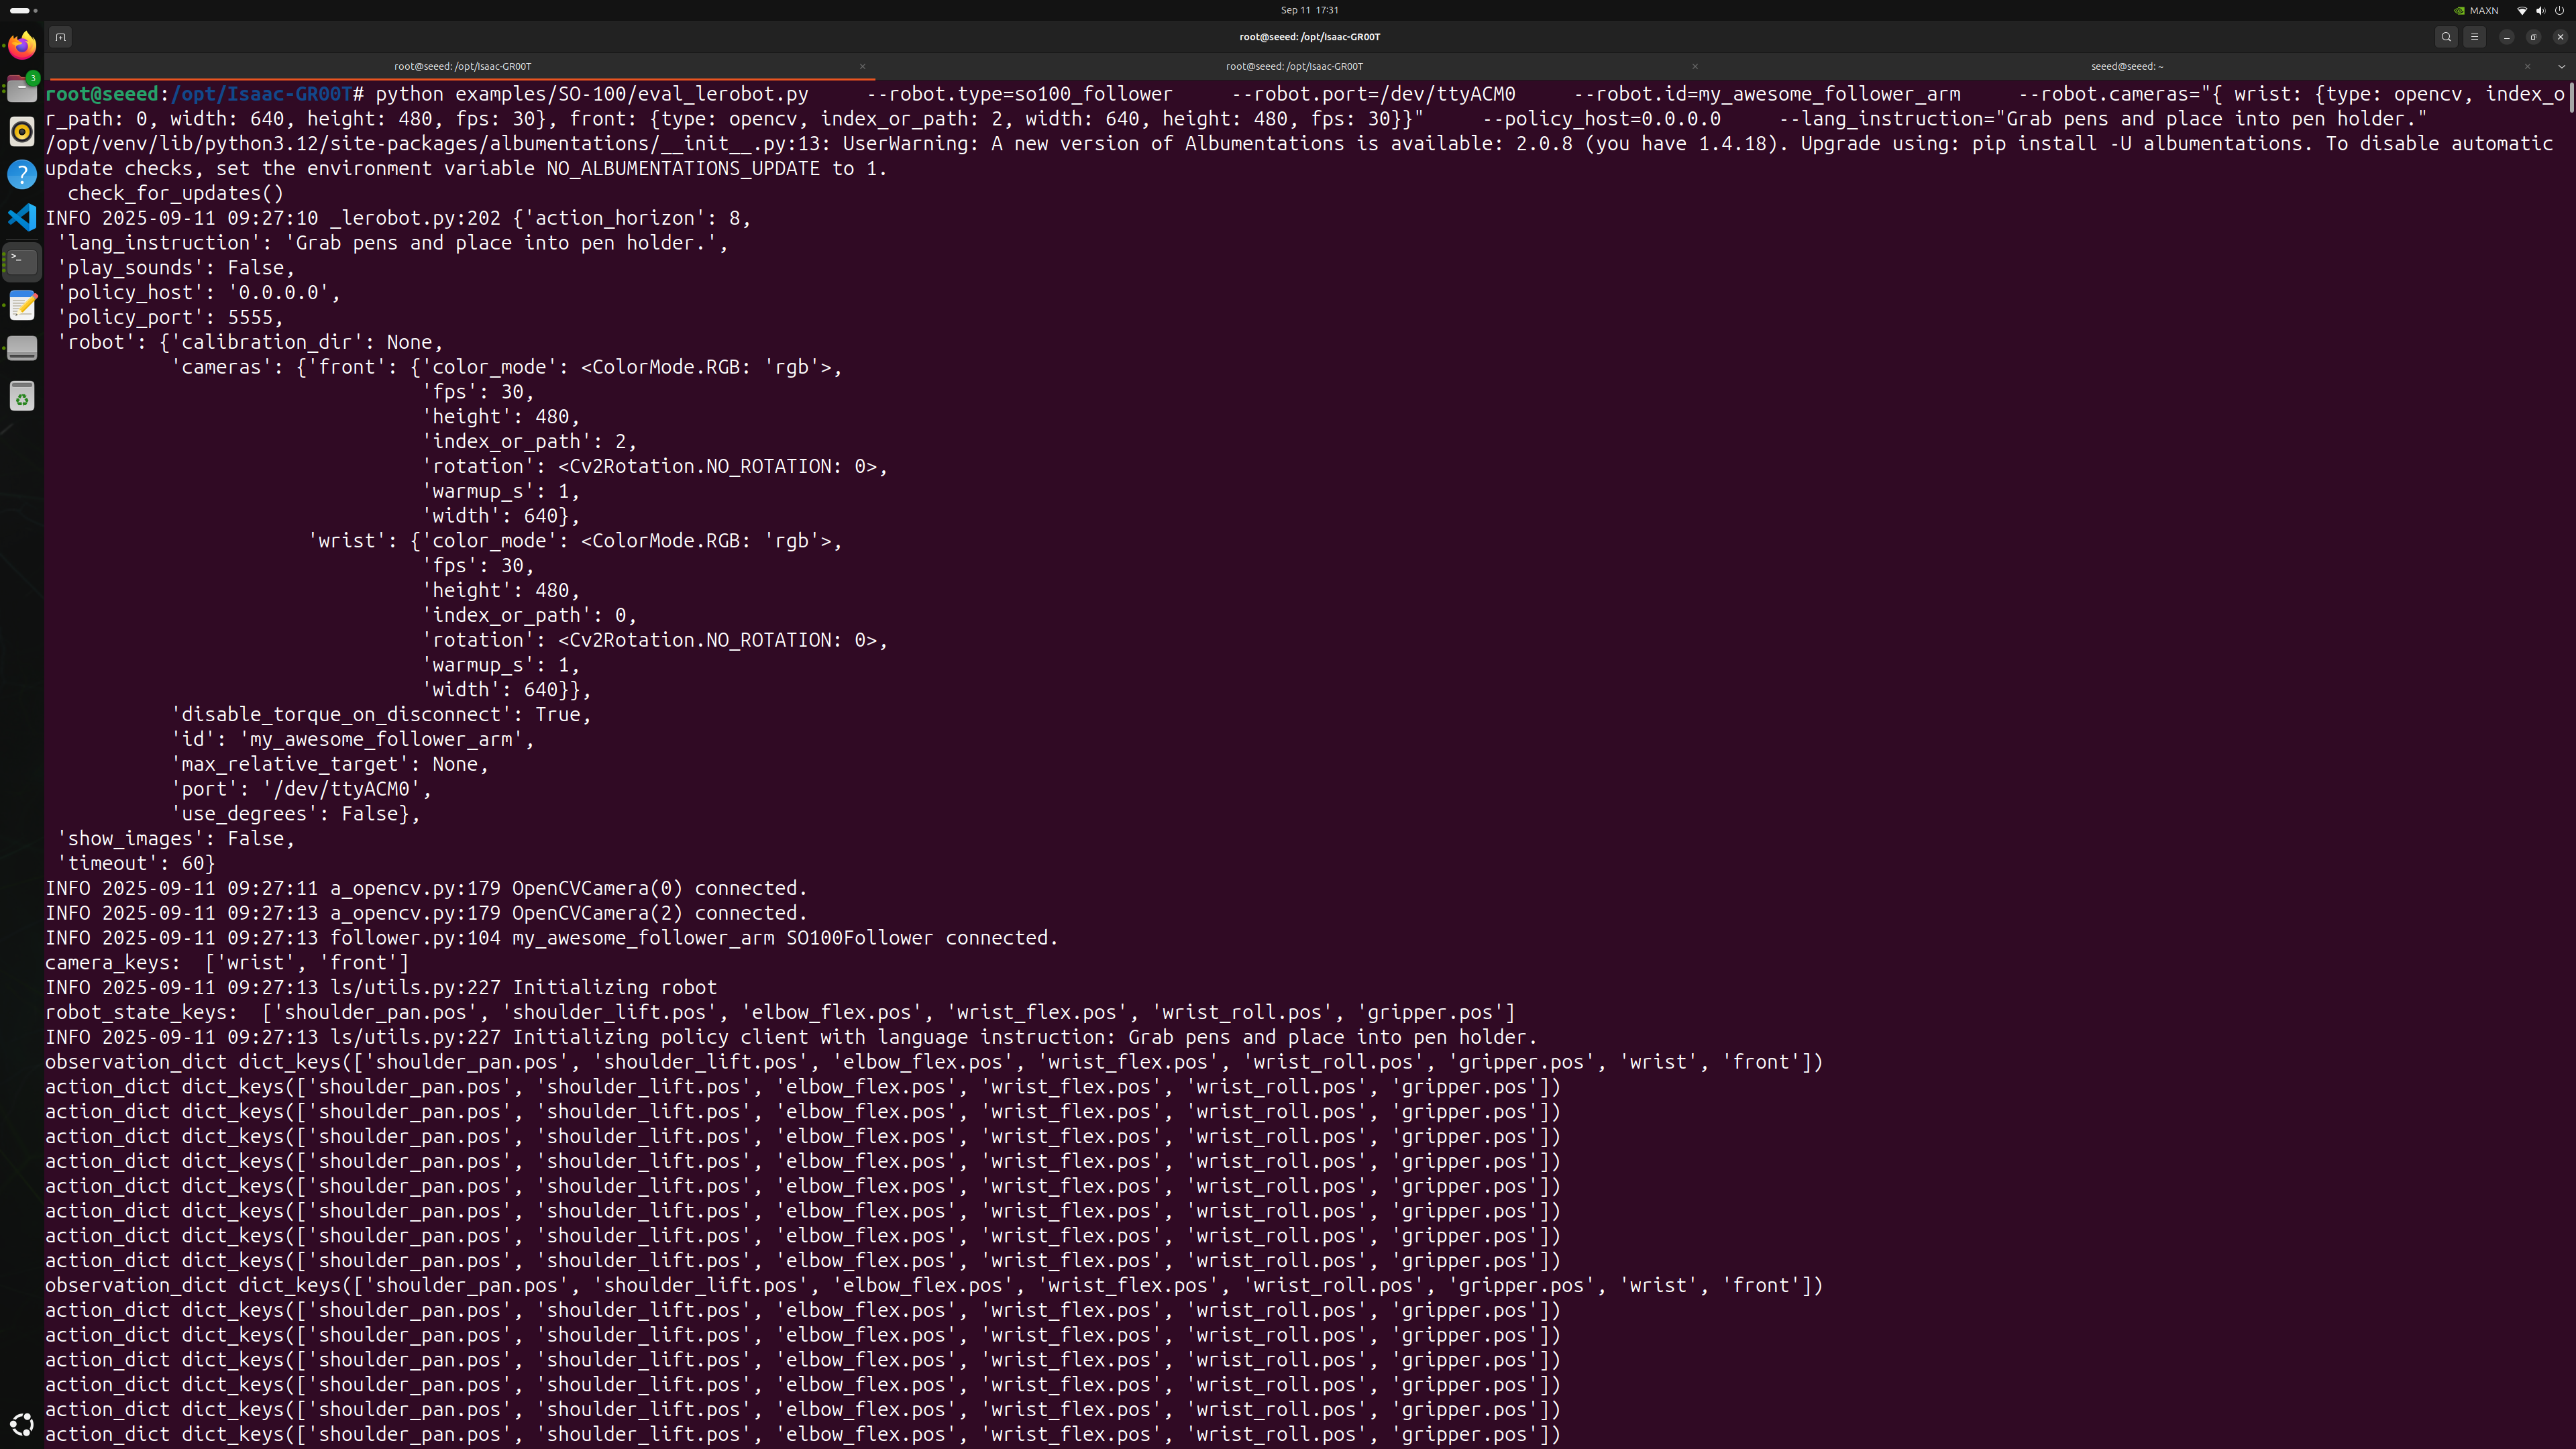
Then, in this second shell, start the inference client:
python examples/SO-100/eval_lerobot.py \
--robot.type=so100_follower \
--robot.port=/dev/ttyACM0 \
--robot.id=my_awesome_follower_arm \
--robot.cameras="{ wrist: {type: opencv, index_or_path: 0, width: 640, height: 480, fps: 30}, front: {type: opencv, index_or_path: 2, width: 640, height: 480, fps: 30}}" \
--policy_host=0.0.0.0 \
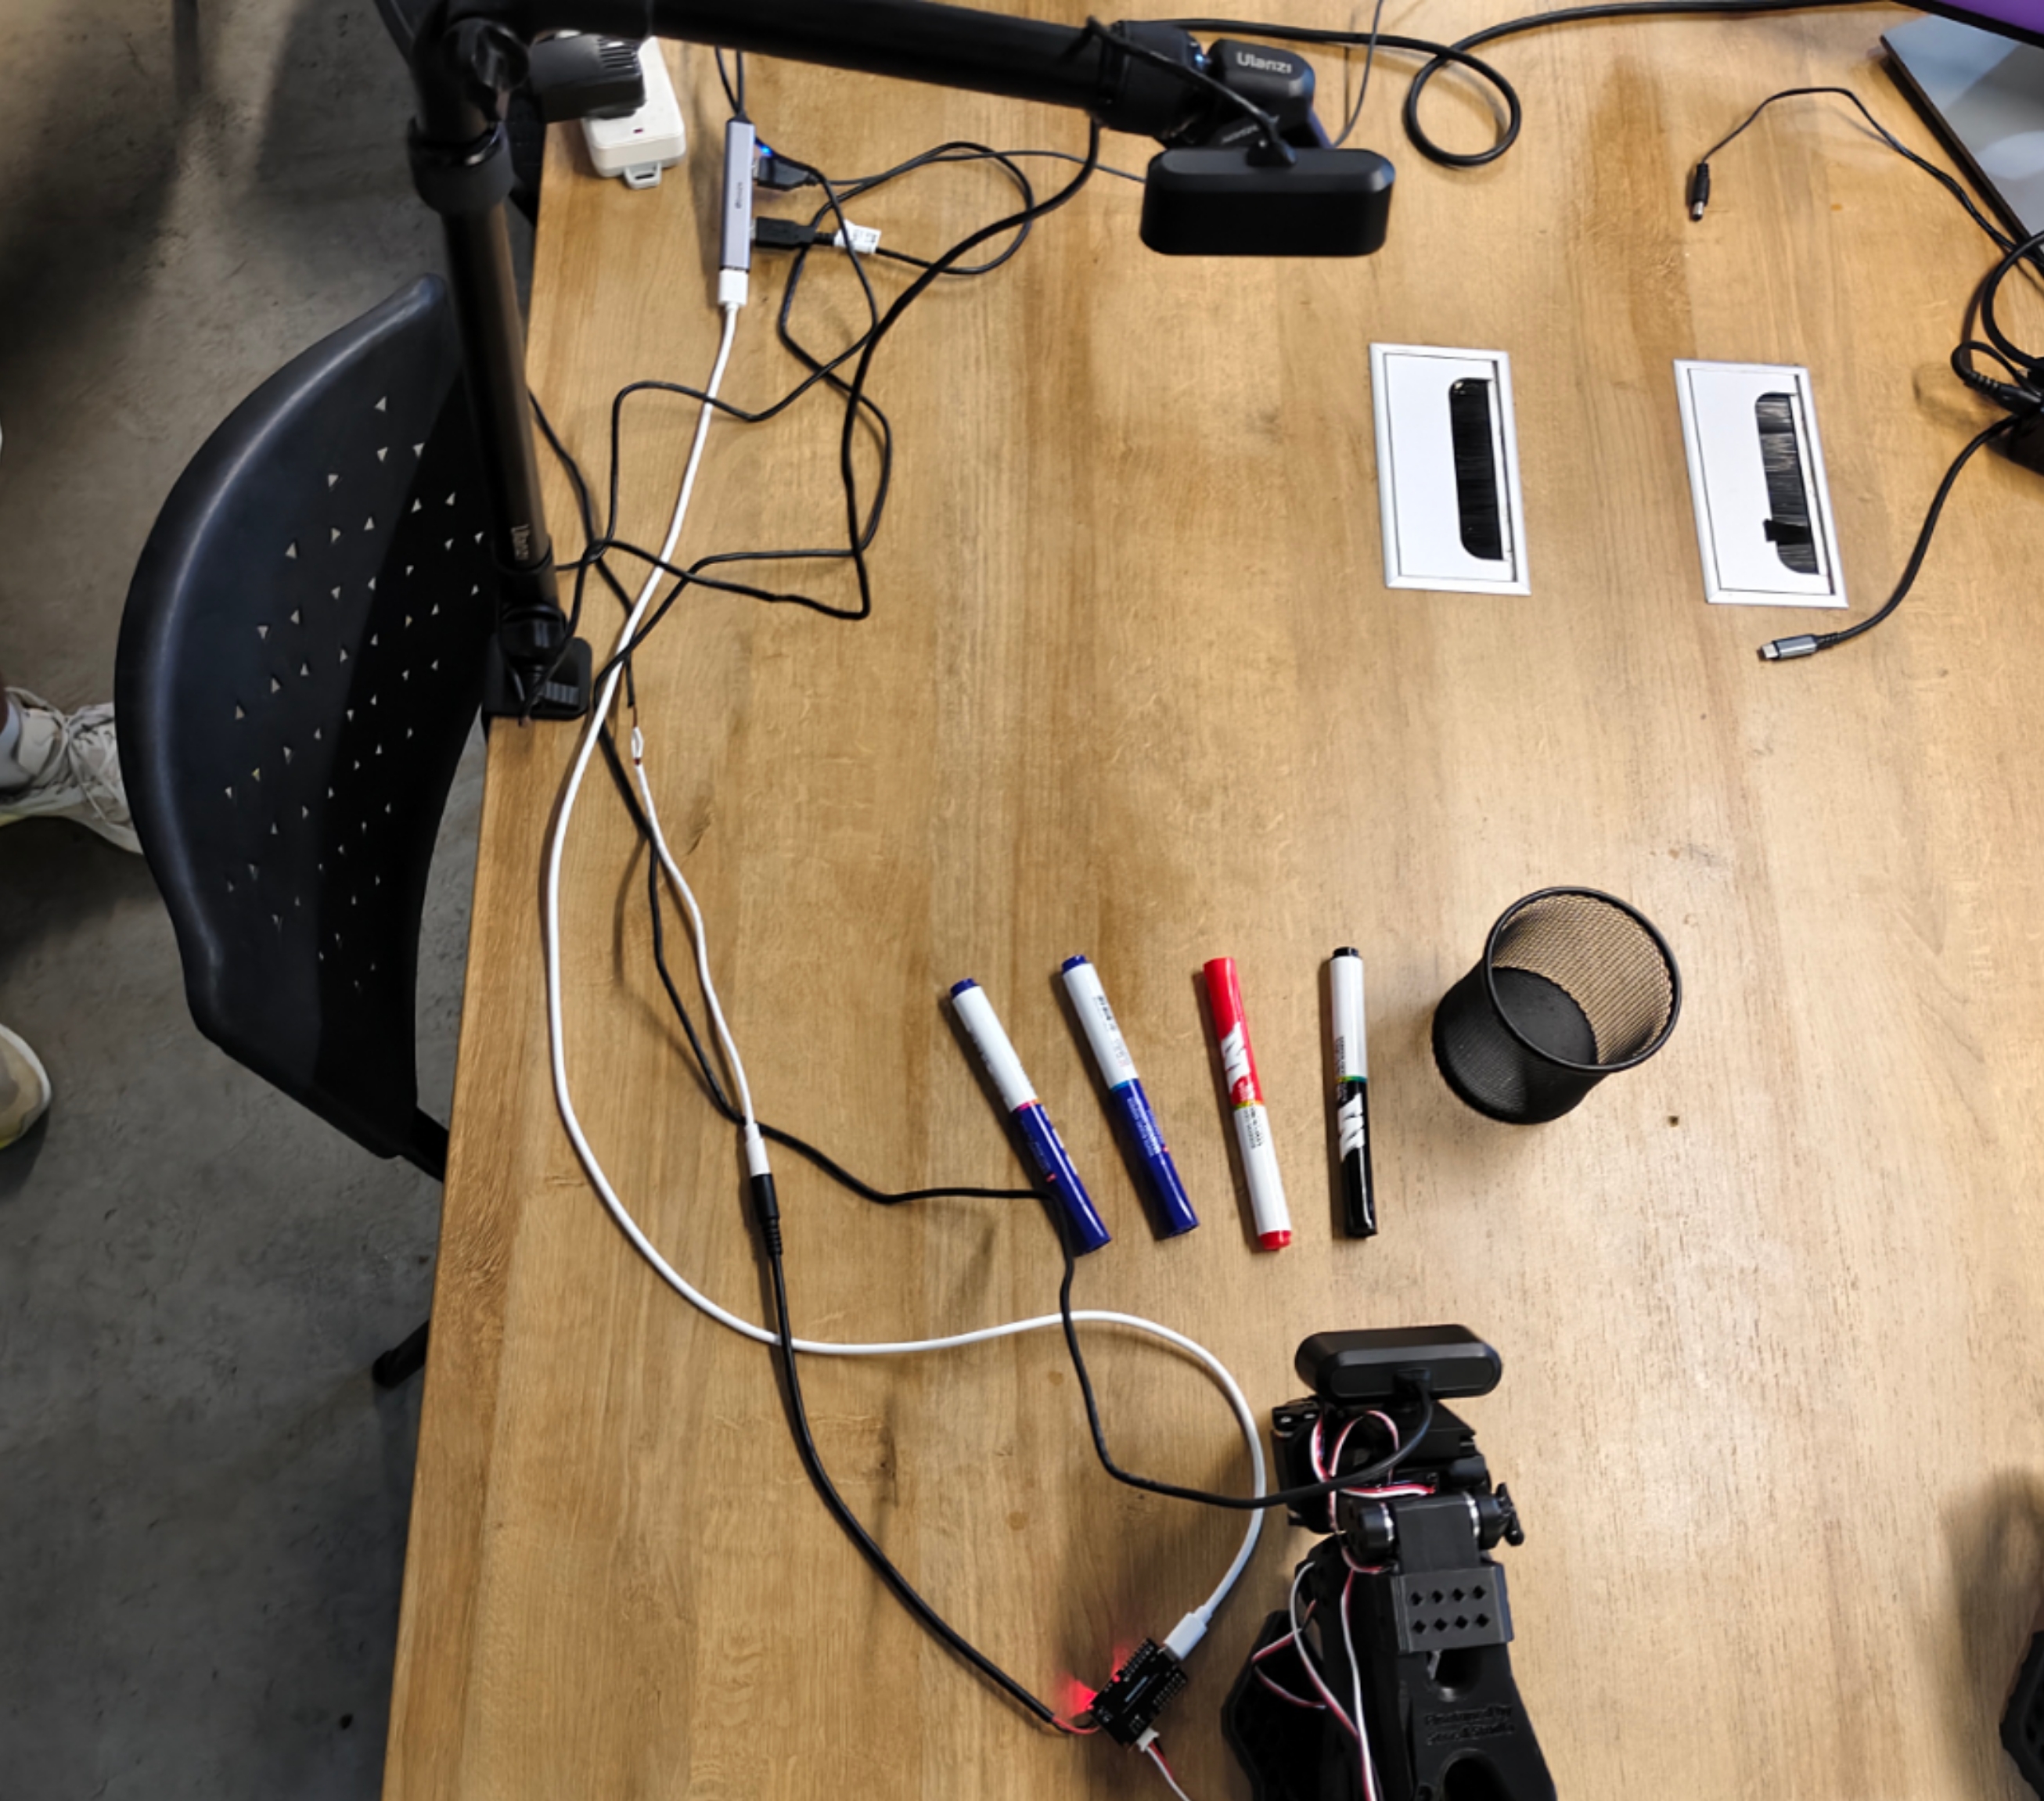
--lang_instruction="Grab pens and place into pen holder."
Replace index_or_path with your camera’s index number; you can find it by running ls /dev/video*.
When the client process starts successfully, the following output should appear:
During the first run of the client process, you must calibrate the arm's servos. The calibration process is the same as described earlier.
Make sure each joint moves to its full range of motion to ensure proper teleoperation and inference behavior.
Once everything is set up, GR00T N1.5 can be successfully deployed on Jetson AGX Thor. The system and hardware environment are now verified to support full inference:
FAQ
Q1: The Brev CLI tool doesn't work on the cloud training platform?
This is often due to network issues.
You may install and log in to Brev CLI on your local Ubuntu host, then attempt to connect to your cloud instance using SSH from your local terminal.
Q2: How do I upload data to the training platform?
Use the following command: scp <local-file-path> <brev-instance-name>:<remote-file-path>,for examplescp -r ./record_2_cameras/ gr00t-trainer:/home/ubuntu/Datasets
Q3: Screen of Thor goes black once installation starts
If you use a Jetson installation USB stick on a Jetson AGX Thor Developer Kit that has been previously used or set up, you need to enable SoC Display Hand-Off in the UEFI setup menu.
In fact, flashing continues in the background during this time; after a while, the Ubuntu desktop will appear.
Q4: I don’t have video output on the monitor (connected through a KVM)
It is known that some KVM switches/devices do not handle video output from the Jetson AGX Thor Developer Kit well. Please connect the monitor directly to the Jetson AGX Thor Developer Kit.
Q5: After flashing Thor, HDMI sometimes shows no signal on subsequent boots
A workaround that has proven effective is to switch to the DisplayPort (DP) connector for display output.
Q6: No keyboard input is detected during Thor image flashing
We recommend using a wired keyboard during flashing. Wireless keyboards may have limited compatibility during the Thor flashing process.
Q7: Cloud fine-tuning of GR00T reports “GPU not supported”
Do not use GPUs older than Ampere architecture for cloud fine-tuning of GR00T. (e.g., RTX A6000 or GeForce RTX 4090). V100 (Volta) is not supported for GR00T training or fine-tuning.
Q8: The serial device name for the robotic arm controller board does not appear under /dev
The stock Thor system does not include CH34x drivers. If they are missing, install them from:
https://github.com/juliagoda/CH341SER
Q9: The Type-C port on Thor does not recognize an external hub
To use an external hub via Thor’s Type-C, plug it into the Type-C port closest to the QSFP28 connector. (Both Type-C ports provide power, but only the specified one supports the hub reliably.)
Q10: When flashing with a capture card, the system later says the user password is incorrect
When using a capture-card desktop during flashing, a keyboard input bug may occur (input not matching what’s typed). Double-check the user password as you set it.
Q11: Where is Thor’s debug port?
Thor’s Type-C debug port is hidden under the magnetic cover. Multiple serial device nodes may be created; use the one with the smallest index to log in to Thor via serial.
Q12: Unable to run LeRobot scripts to infer ACT in the GR00T image
We do not recommend invoking LeRobot APIs for ACT inference in a Python 3.12 environment. Calibration and find port scripts are fine. Note that Ubuntu 24 defaults to Python 3.12 locally.
Q13: How to check GPU SM utilization on Thor?
Run:
nvidia-smi dmon -s puc
Check the sm column in the output.
Q14: Unable to read data from the robotic arm driver’s serial port
Do not plug in the camera before the SO-ARM driver board; doing so can cause incorrect serial device mapping. Also ensure the serial port permissions have been granted.
References
- https://developer.nvidia.com/embedded/jetpack
- https://huggingface.co/blog/nvidia/gr00t-n1-5-so101-tuning
Tech Support & Product Discussion
Thank you for choosing our products! We are here to provide you with different support to ensure that your experience with our products is as smooth as possible. We offer several communication channels to cater to different preferences and needs.