Beta version. Please ignore this wiki.
Please don't follow this wiki, otherwise your watcher will get stuck.
Overview
Special thanks to XiaoZhi AI Chatbot for their open-source contributions that made this project possible.
This guide provides instructions for flashing the Watcher Agent firmware to your SenseCAP Watcher device using Espressif's Flash Download Tool.
The firmware provided in this guide may require authentication information. If needed, please contact [email protected].
Prerequisites
Required Hardware
- SenseCAP Watcher device
- USB Type-C data cable
- Windows PC
Required Software
- Flash Download Tool (3.9.6 or later)
- Watcher Agent firmware binary file
If you already own a Watcher device and its model is not -EN, you will need to manually flash the authentication information after flashing the firmware.
For details, please check Flashing Authentication Info.
Flashing Process
Step 1. Download and Install Flash Download Tool
- Download the Flash Download Tool from Espressif's official website: Flash Download Tool v3.9.6
- Extract the downloaded zip file to a directory of your choice
- No installation is required - simply double-click the executable file to run the tool
Step 2. Prepare the Firmware File
- Download the Watcher Agent firmware binary file
Ensure all path contains no special symbols.
Step 3. Connect the Device
- Connect your Watcher to your computer using the Type-C port on the bottom of the device
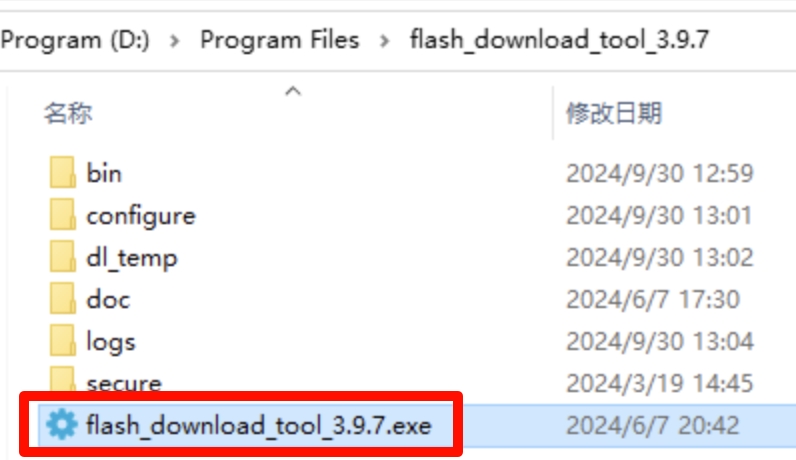
- Double-click
flash_download_tool_3.9.7.exeto launch the tool - Configure the following settings:
- ChipType: Select
ESP32-S3 - WorkMode: Select
Develop - LoadMode: Select
UART
- ChipType: Select

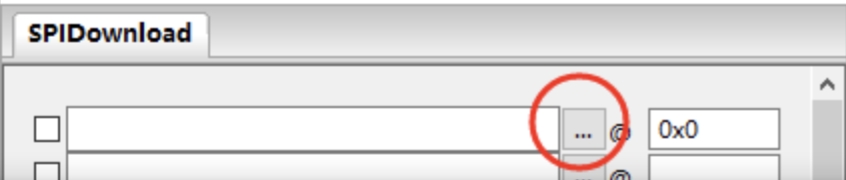
Step 4. Configure Firmware Settings
- Click the "..." button in the first row to browse and select the firmware binary file you download
- Ensure the checkbox next to the firmware file is selected
- Enter
0x0in the address field after the firmware file selection
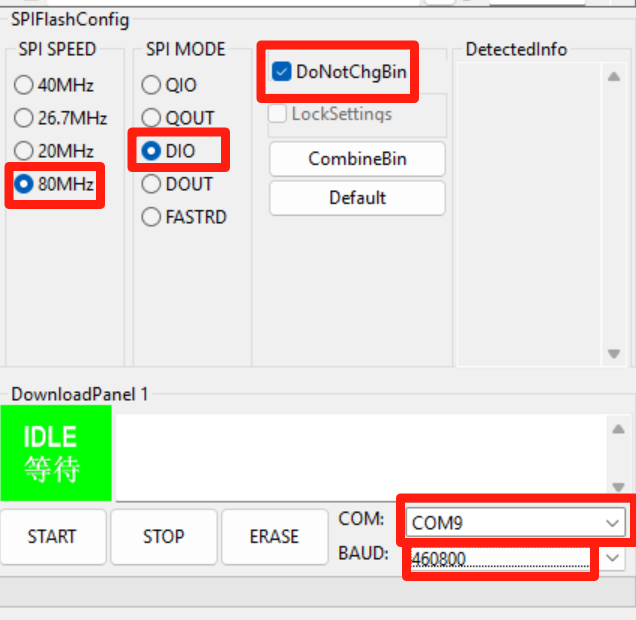
Step 5. Select COM Port and Flash Settings
Configure the following settings:
- SPI SPEED: 80MHz
- SPI MODE: DIO
- FLASH SIZE: 32Mbit
- COM: In Device Manager, find the COM port whose name ends with “B” — select this one for flashing.
If flashing doesn’t start after clicking START, click STOP and confirm you have selected the COM port ending with “B”.

Step 6. Erase Flash
- Click the
ERASEbutton to clear the existing firmware - Wait for the erase process to complete
Step 7. Flash the Firmware
- Click the
STARTbutton to begin flashing - You should see progress information in the log window
- If no progress appears or failed, try the other COM port
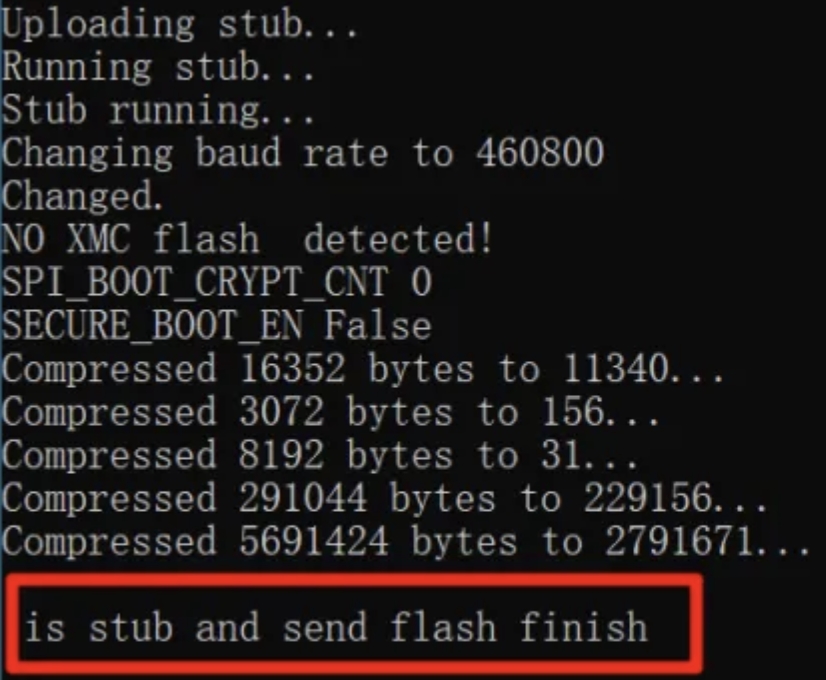
Step 8. Verify Success
The flashing process is complete when you see the success message in the log window.
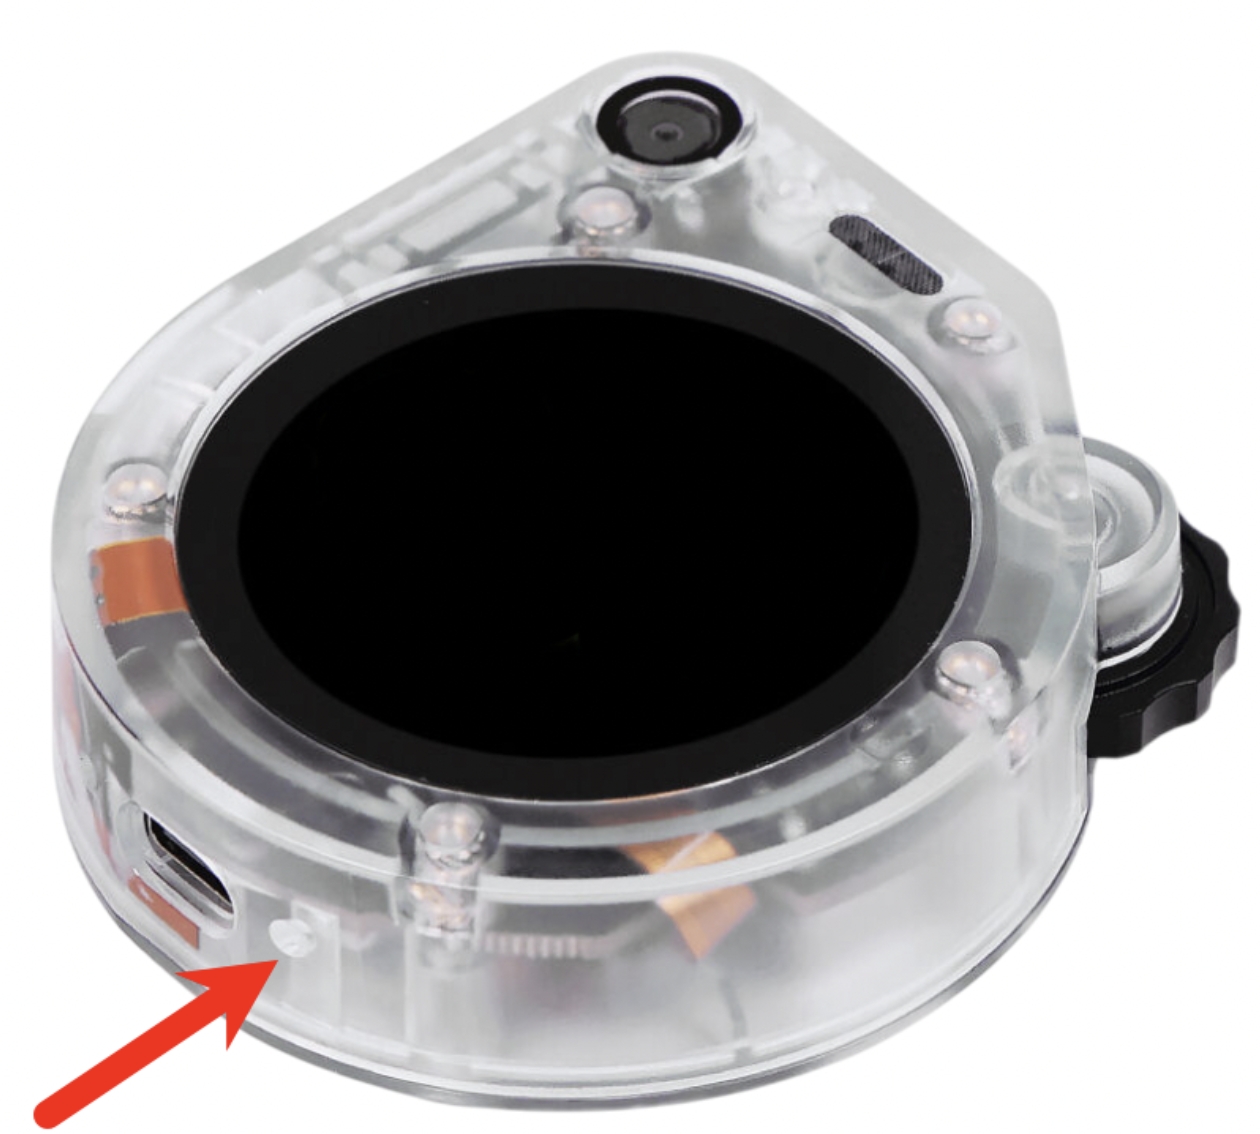
Step 9. Restart the Device
- Locate the reset hole on your Watcher device
- Use a pin to gently press the reset button
- The device will restart with the new firmware
Troubleshooting
Common Issues
-
No COM Port Detected
- Ensure you're using the bottom Type-C port
- Try a different USB cable
- Check if USB drivers are installed properly
-
Flashing Fails
- Try the another COM port
- Check if the address (0x0) is correctly entered
-
Device Not Responding
- Use a pin to gently press the reset button
- Try erasing before flashing
Flashing Authentication Info
If your Watcher model is not -EN, you must manually flash the authentication information after flashing the firmware.
Steps:
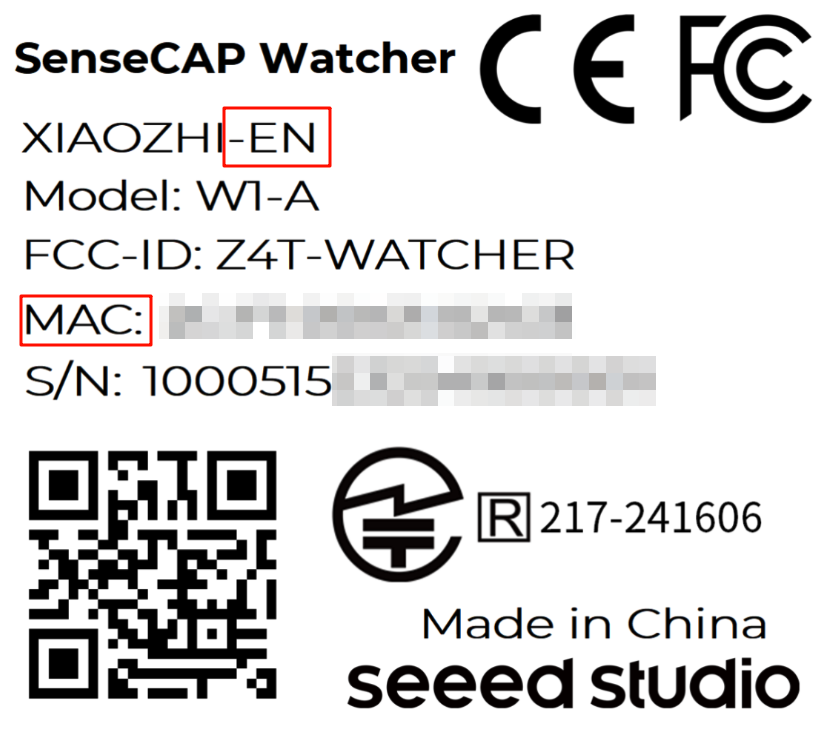
- Check your device MAC address.
- You can find it on the product label or via the serial port.
- If you're using the native firmware, you can also find it in the Settings->About Device->WI-FI Mac of the device.

Please ensure that the STA MAC address you provide is correct.
The authentication file can only be flashed once, and using an incorrect address will prevent the device from binding properly.
Also note that the authentication file only needs to be flashed one time.
- Send an email to [email protected] with your STA MAC address and request the authentication file and flashing tool. This script will be provided in the package we send to you.
- Go to the esp-idf terminal and navigate to the folder we send to you, run the Python flashing script.
If you haven’t installed esp-idf yet, go to ESP-IDF Website and follow the official guide to download and install it.

- Follow the program instructions and enter the corresponding serial port, serialB and enter ""BURN"" to flash.

- Once the process is complete, press the reset button on the device.
- After the above steps, you'll be able to register on the SenseCraft AI-Watcher Agent platform
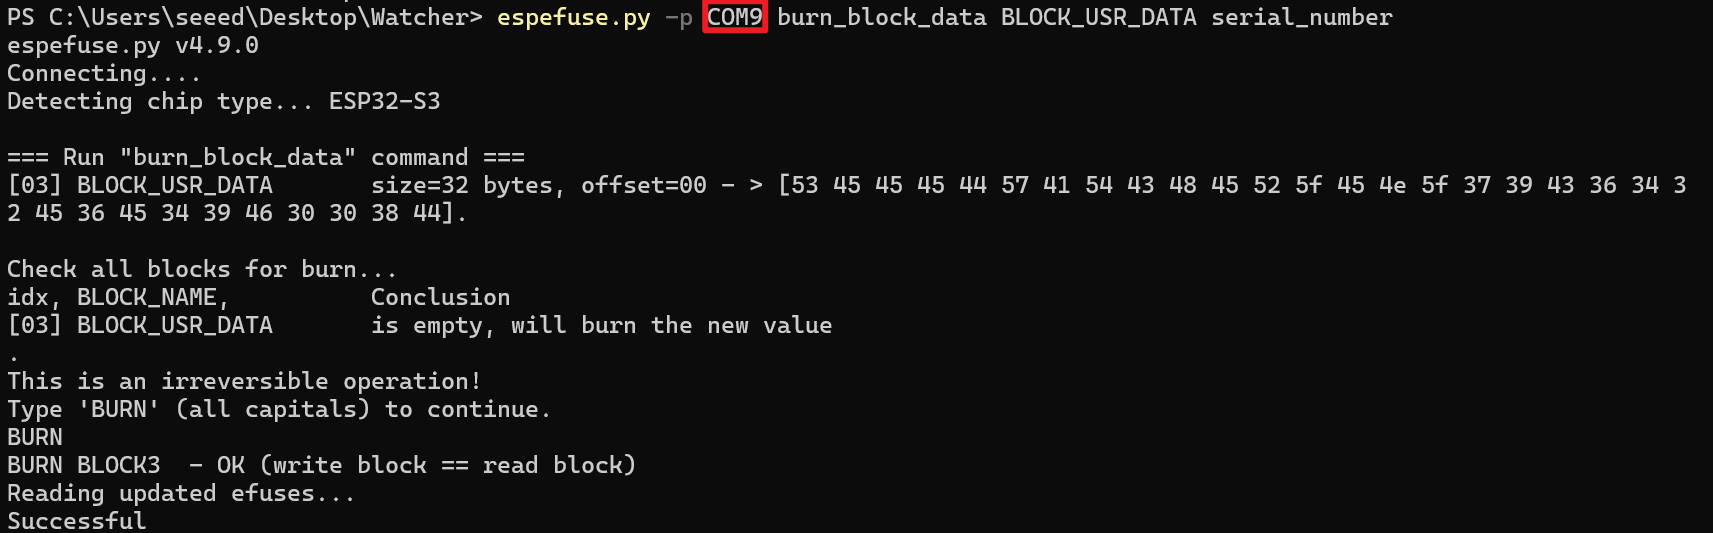
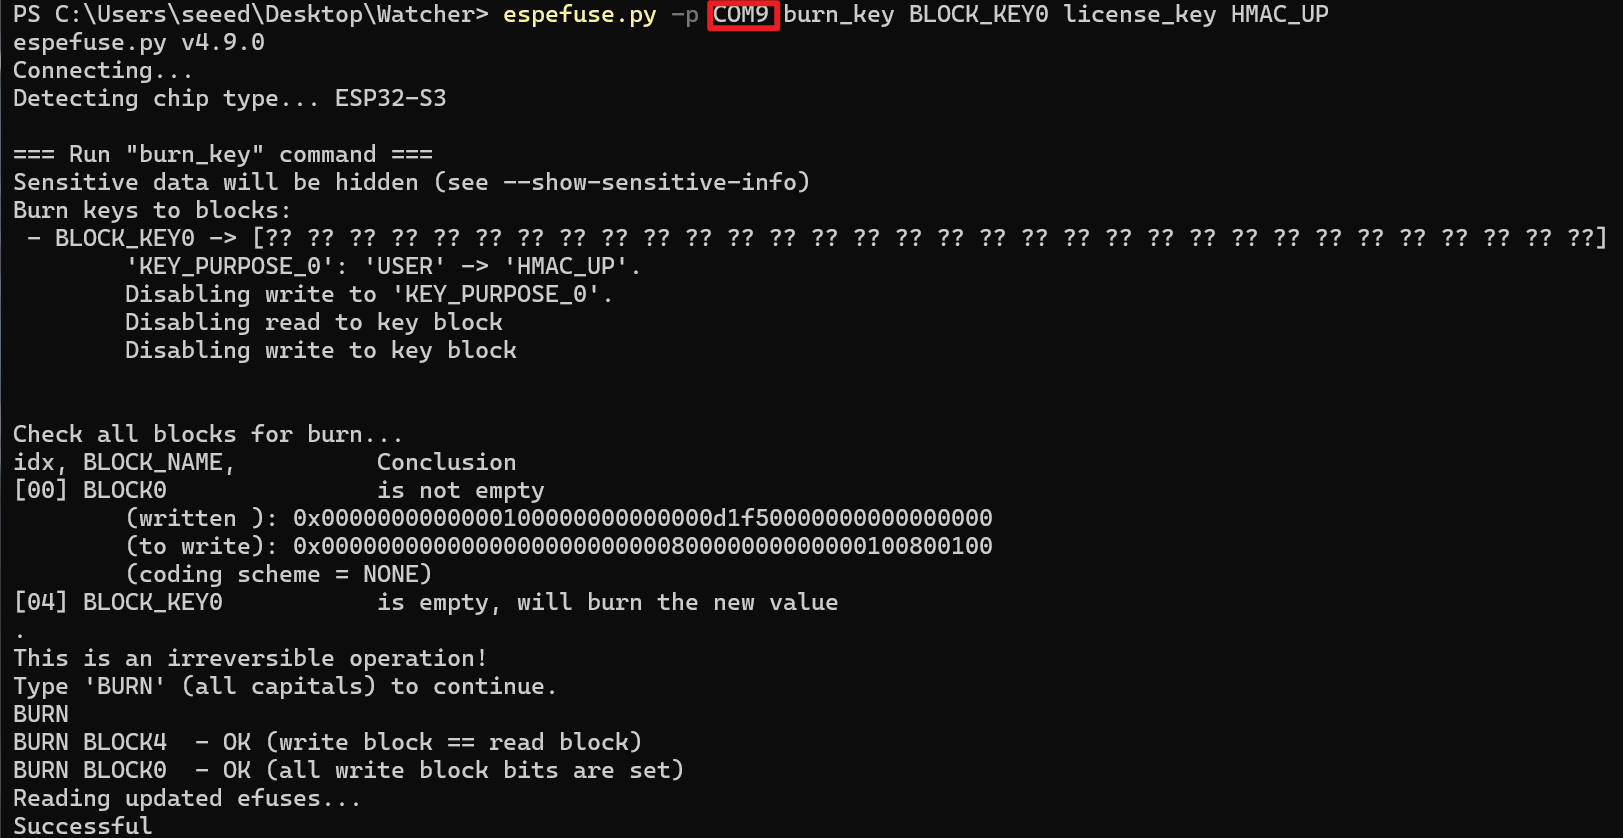
If you encounter the following issue, then go to the esp-idf terminal and navigate to the folder and manually enter the following two commands:

espefuse.py -p <your_correct_serial_port> burn_block_data BLOCK_USR_DATA serial_number
espefuse.py -p <your_correct_serial_port> burn_key BLOCK_KEY0 license_key HMAC_UP