Getting Started with Gapi on NVIDIA® Jetson Devices
Gapi is an embeddable API gateway that creates streaming integrations between AI micro services and the systems that users leverage everyday.
The project's goal is to accelerate the speed of creating pilots and demos of Jetson AI Lab achievements into real world environments. "On Device" generative AI doesn't mean it has to live on an island!

- Workflow engine with low code UI with dozens of open integrations and customizable clients for mobile web and desktop.
- Micro service framework for wrapping Jetson containers (Ollama, Whisper, Piper TTS, etc. are done, with more coming). Or wrap your own models/code and integrate it into Workflows.
- Real-time, hybrid, binary+json messaging smoothens intra-service calls and reduced latency.
- A fast path to proving generative AI value to stakeholders in their actual environment.
Gapi Server
Embeddable API gateway software that runs in the background with a low code workflow UI for testing. The server is a message hub and state machine for workflow 'nodes' that talk to Micro Services. Think of it as connective-tissue for applications.
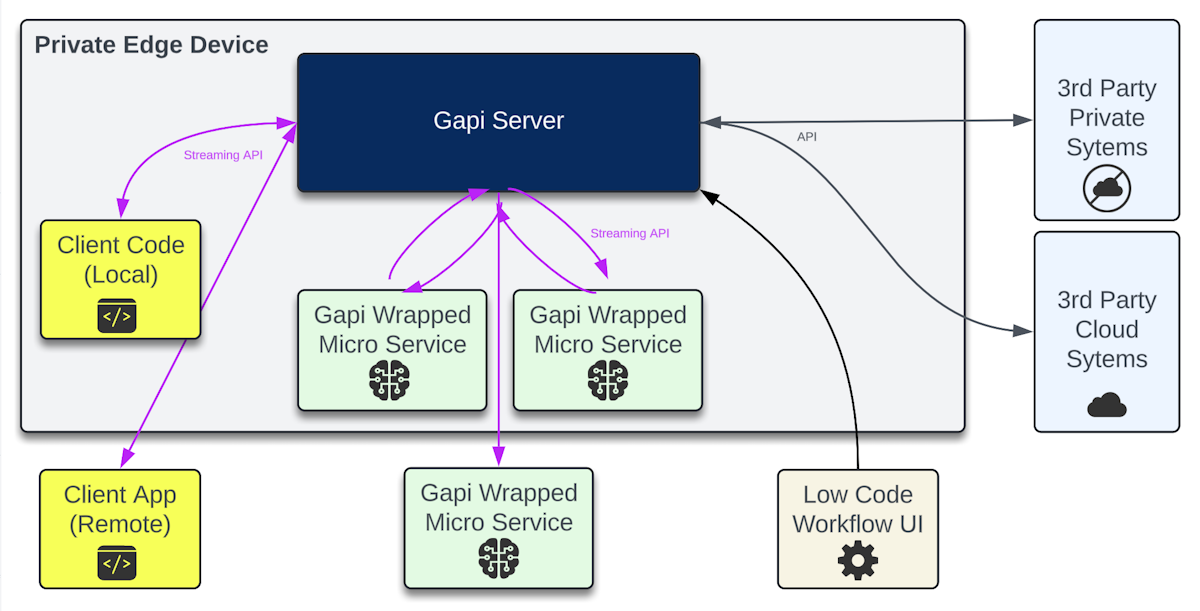
A Micro Service is a process that runs some wrapper python scripts that integrates custom code/models into Workflows using a streaming API.
- Gapi Server can run on any Jetson Orin or really any computer as the Micro Services connect outbound over secure web sockets. It doesn't use any GPU resources. There is also a little demo version to skip the Server install (but you'll still need to run your own Micro Services).
- Gapi Project Page
- Gapi Github
- Gapi Docs
- Gapi Hosted Demo
Requirements
- Any NVIDIA Jetson Orin
- Docker
- Sufficient Storage Space: 1.3GB
Install Gapi on Jetson
Run These Steps to install Gapi on Jetson:
mkdir ~/gapiData && cd ~/gapiData
curl -L https://raw.githubusercontent.com/genai-nerds/Gapi/main/gapiConfigs.zip -o gapiConfigs.zip
unzip -q gapiConfigs.zip
docker run -d --name gapi --network host -v ~/gapiData:/opt/gapi/vdata genainerds/gapi:arm64 /bin/bash -c "cd /opt/gapi/bin && ./startGapi.sh"
echo "You may need to hit Enter now. Afterwards the Docker container 'gapi' s
Log In
- Browse in: http://[host-device-ip]:8090
- User: root
- Pass: !gapi2024
- Change password in Settings! Docs shows how to add SSL cert.
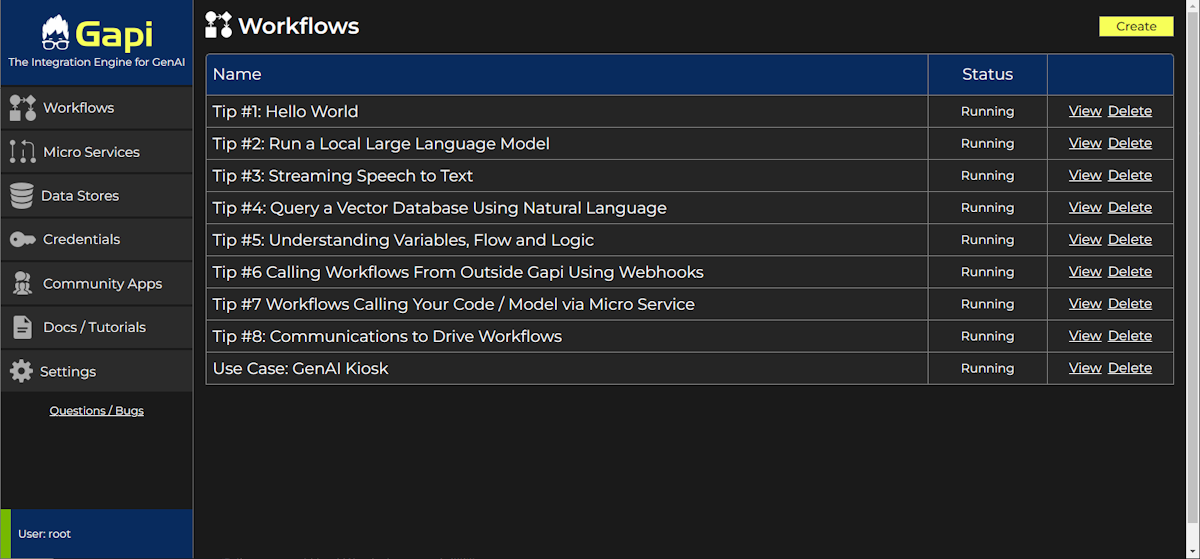
Workflows
Workflows visually connect the execution and flow of data between Nodes.
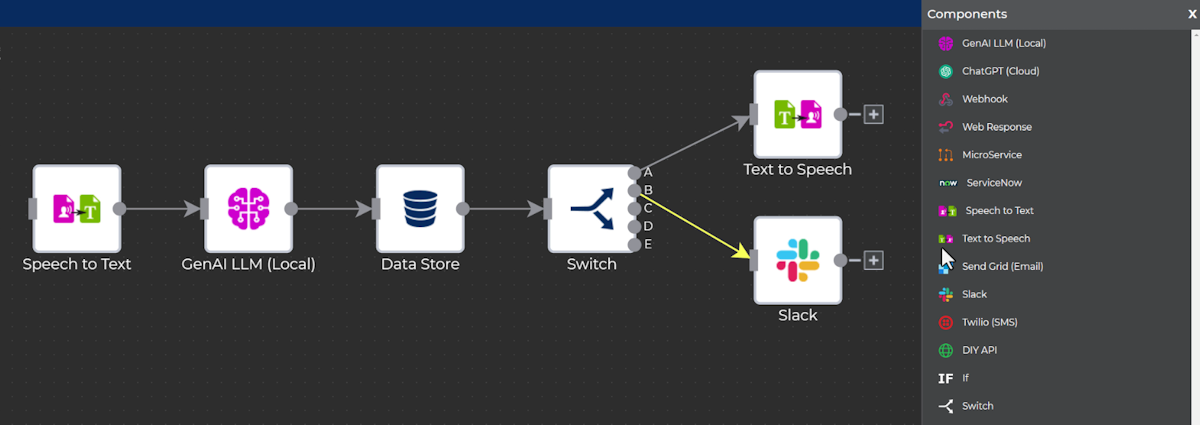
A Transaction (or single firing) has "Rolling Input" data it accumulates as Node to Node steps each talk to Micro Services and APIs. All Nodes enjoy variables and flow control using familiar json and javascript concepts.
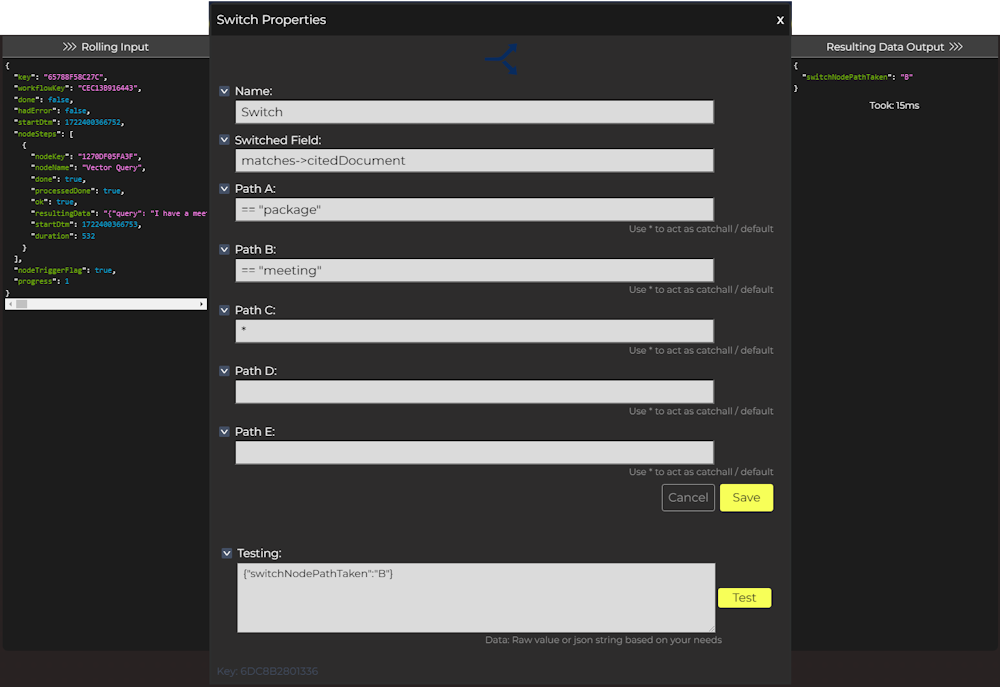
Each Node can append or reference the rolling data in the Transaction while making decisions along the way.
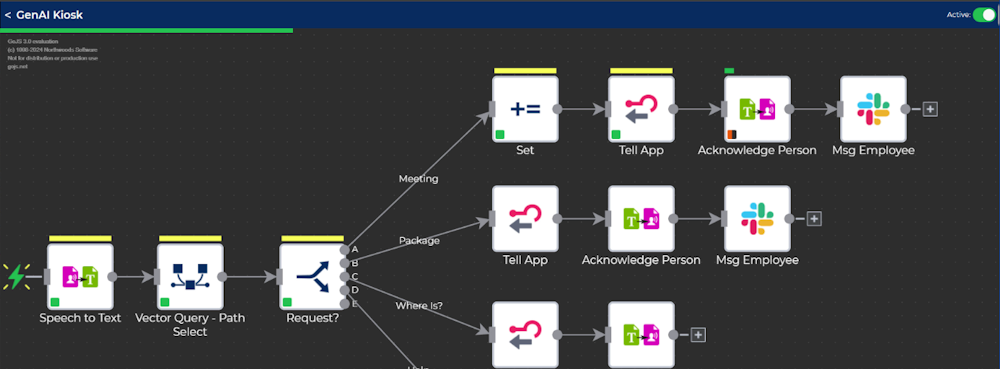
Watch live Transactions as they start from clients, webhooks and published messages from Micro Services with visual feedback and debugging.
Micro Services
A Micro Service is a process that runs a wrapper python script that integrates your custom code/models so they can integrate into Gapi Workflows.
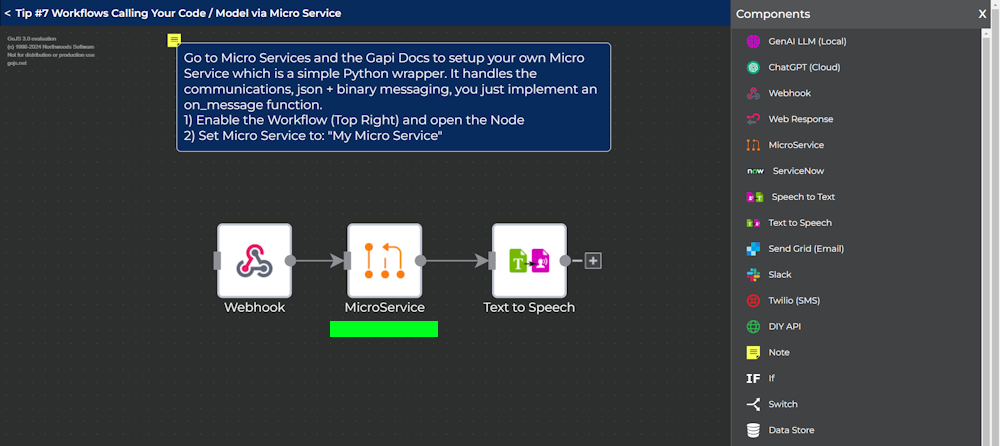
You can run a Micro Service wherever you like and connect it to a Gapi Server via the streaming, hybrid binary+json message protocol.
There are some out-of-the-box “Community Micro Services" that we integrate, test and pack into Docker images. When you run them, they auto integrate, load NVIDIA layers correctly and offer logging to the host system.

Even better, create your own! Just implement an on_message Python handler to process requests and respond. The rest is handled for you.
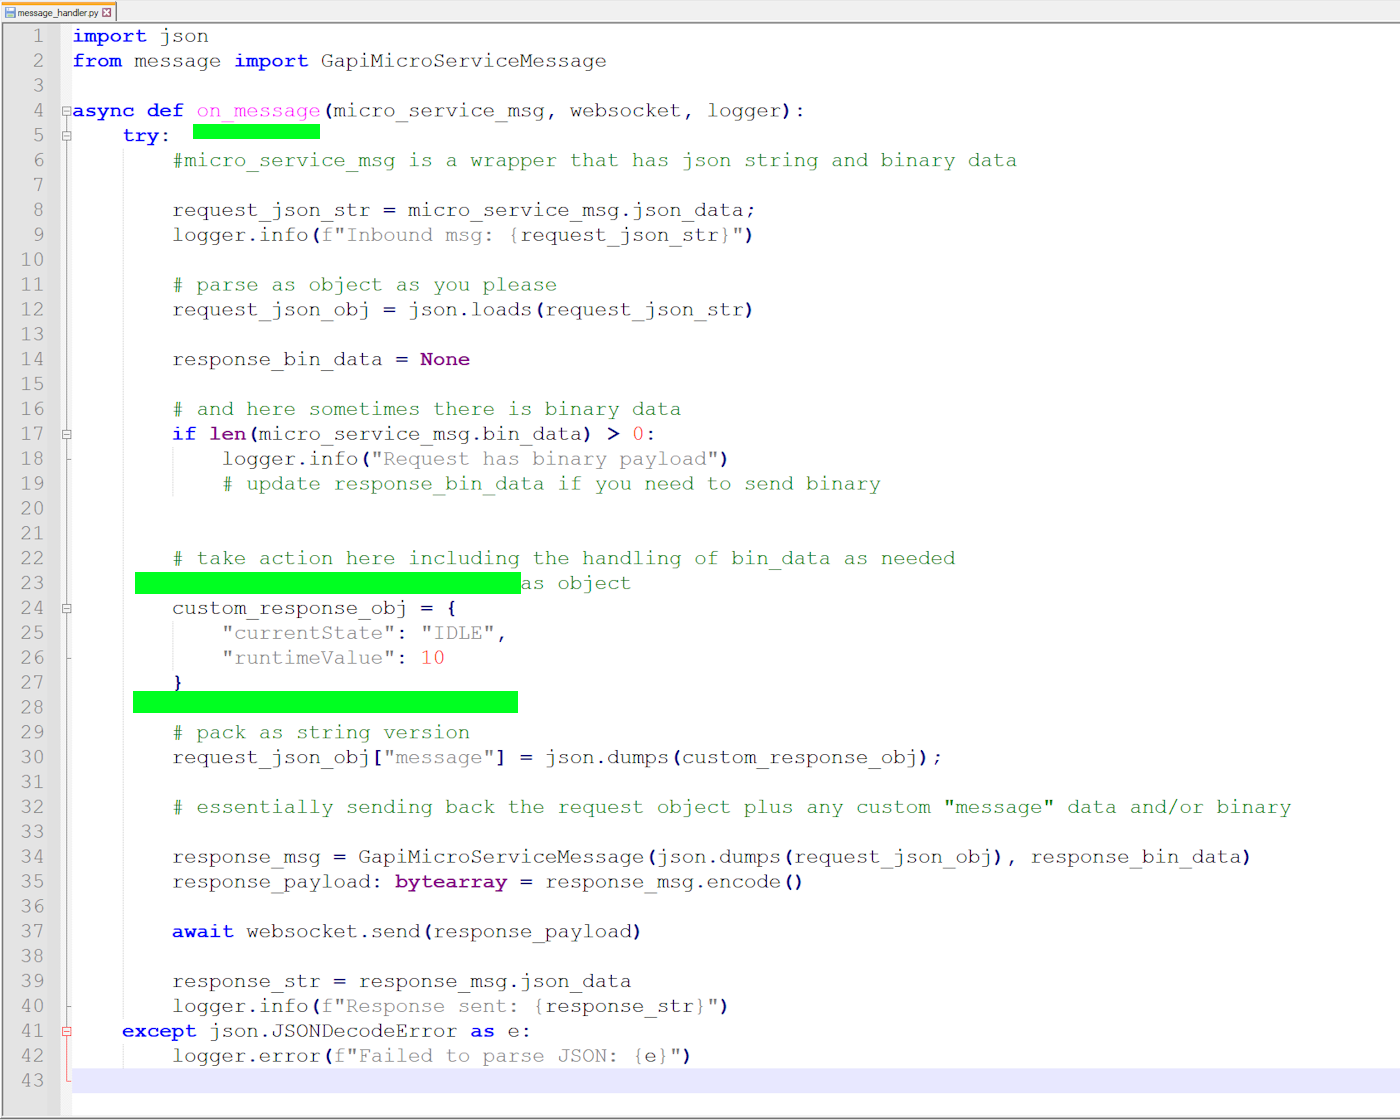
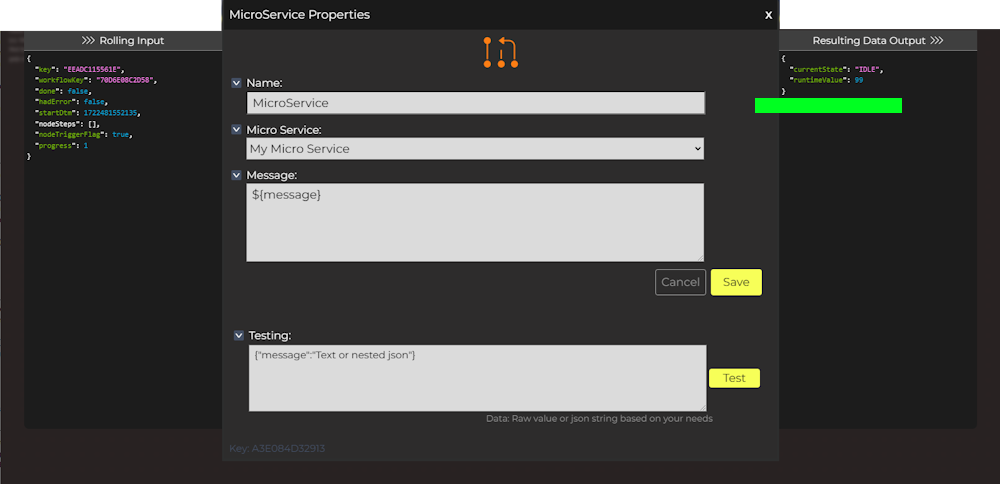
Think of a Micro Service as a simple wrapper to some code or model you have. It works the same as any other Node inside a Workflow. When it's your Micro Service Node's turn your on_message function will be called. Your script gets the rolling Transaction data for context and you then publish your data directly back into the flow.
Running the Community Micro Services
Requirements for Community Micro Services
- Any NVIDIA Jetson Orin
- Sufficient Storage Space:
- Literally 4KB for your own Micro Service
- Anywhere from ~4GB to ~10GB for each Community Micro Service
Steps:
- Login and go to the Micro Services tab
- Follow the instructions in the blue box on that page to download your custom configuration
- Then follow the instructions below that for installing the Micro Service you want
Congrats! You Can Go Through the Workflow Tips Now
Tech Support & Product Discussion
Thank you for choosing our products! We are here to provide you with different support to ensure that your experience with our products is as smooth as possible. We offer several communication channels to cater to different preferences and needs.