Get Started with Ripple
What Is Ripple?
Ripple UI is touchscreen firmware for the L2 Pro. It lets you add contacts, send and receive messages, view maps, and record your GPS tracks directly on the device, without using a phone for these tasks.
How Does Ripple Relate to MeshCore?
MeshCore handles mesh communication. Ripple UI lets you use it directly on the L2 Pro touchscreen.
| Name | Purpose |
|---|---|
| MeshCore | LoRa mesh communication |
| Ripple UI firmware | Standalone touchscreen operation |
| MeshCore Companion firmware | Operation through a phone or other client |
Flash Ripple UI directly; no Companion installation is needed first.
The updated firmware uses MeshCore profiles and no longer offers Ripple in the New Network screen.
Who Is Ripple For?
-
Users who want to chat directly on the device without keeping a phone connected.
-
Outdoor users who want offline maps and a record of their own route.
-
Users who want to switch between different MeshCore network profiles.
-
Advanced users who need to manage MeshCore repeaters, Room Servers, or sensor nodes. Some management features require a paid unlock code.
Features
-
Standalone messaging: Send direct and group messages from the touchscreen.
-
Multiple network profiles: Keep separate radio settings, identities, contacts, and preferences.
-
Customizable home screen: Add shortcuts to contacts, channels, and settings.
-
Maps: Load maps from microSD, drag to pan, and tap buttons to zoom.
-
GPS tracks: Record your position and timestamps, then view your route on the map.
-
Screenshots: Long-press the top-left corner of the screen to capture the current view.
-
Remote administration: Unlock node management features with the target node's authorization.
Flash Firmware
If your device already has the Ripple UI version described here, skip to First-Time Setup.
Two firmware variants are available:
-
Ripple GUI: data on SD card (-SD): Stores configuration and data on a microSD card. Insert a FAT32-formatted card of 32 GB or less before use.
-
Ripple GUI (Internal): Stores configuration and data in the device's internal flash.
Step 1: Open the web flasher
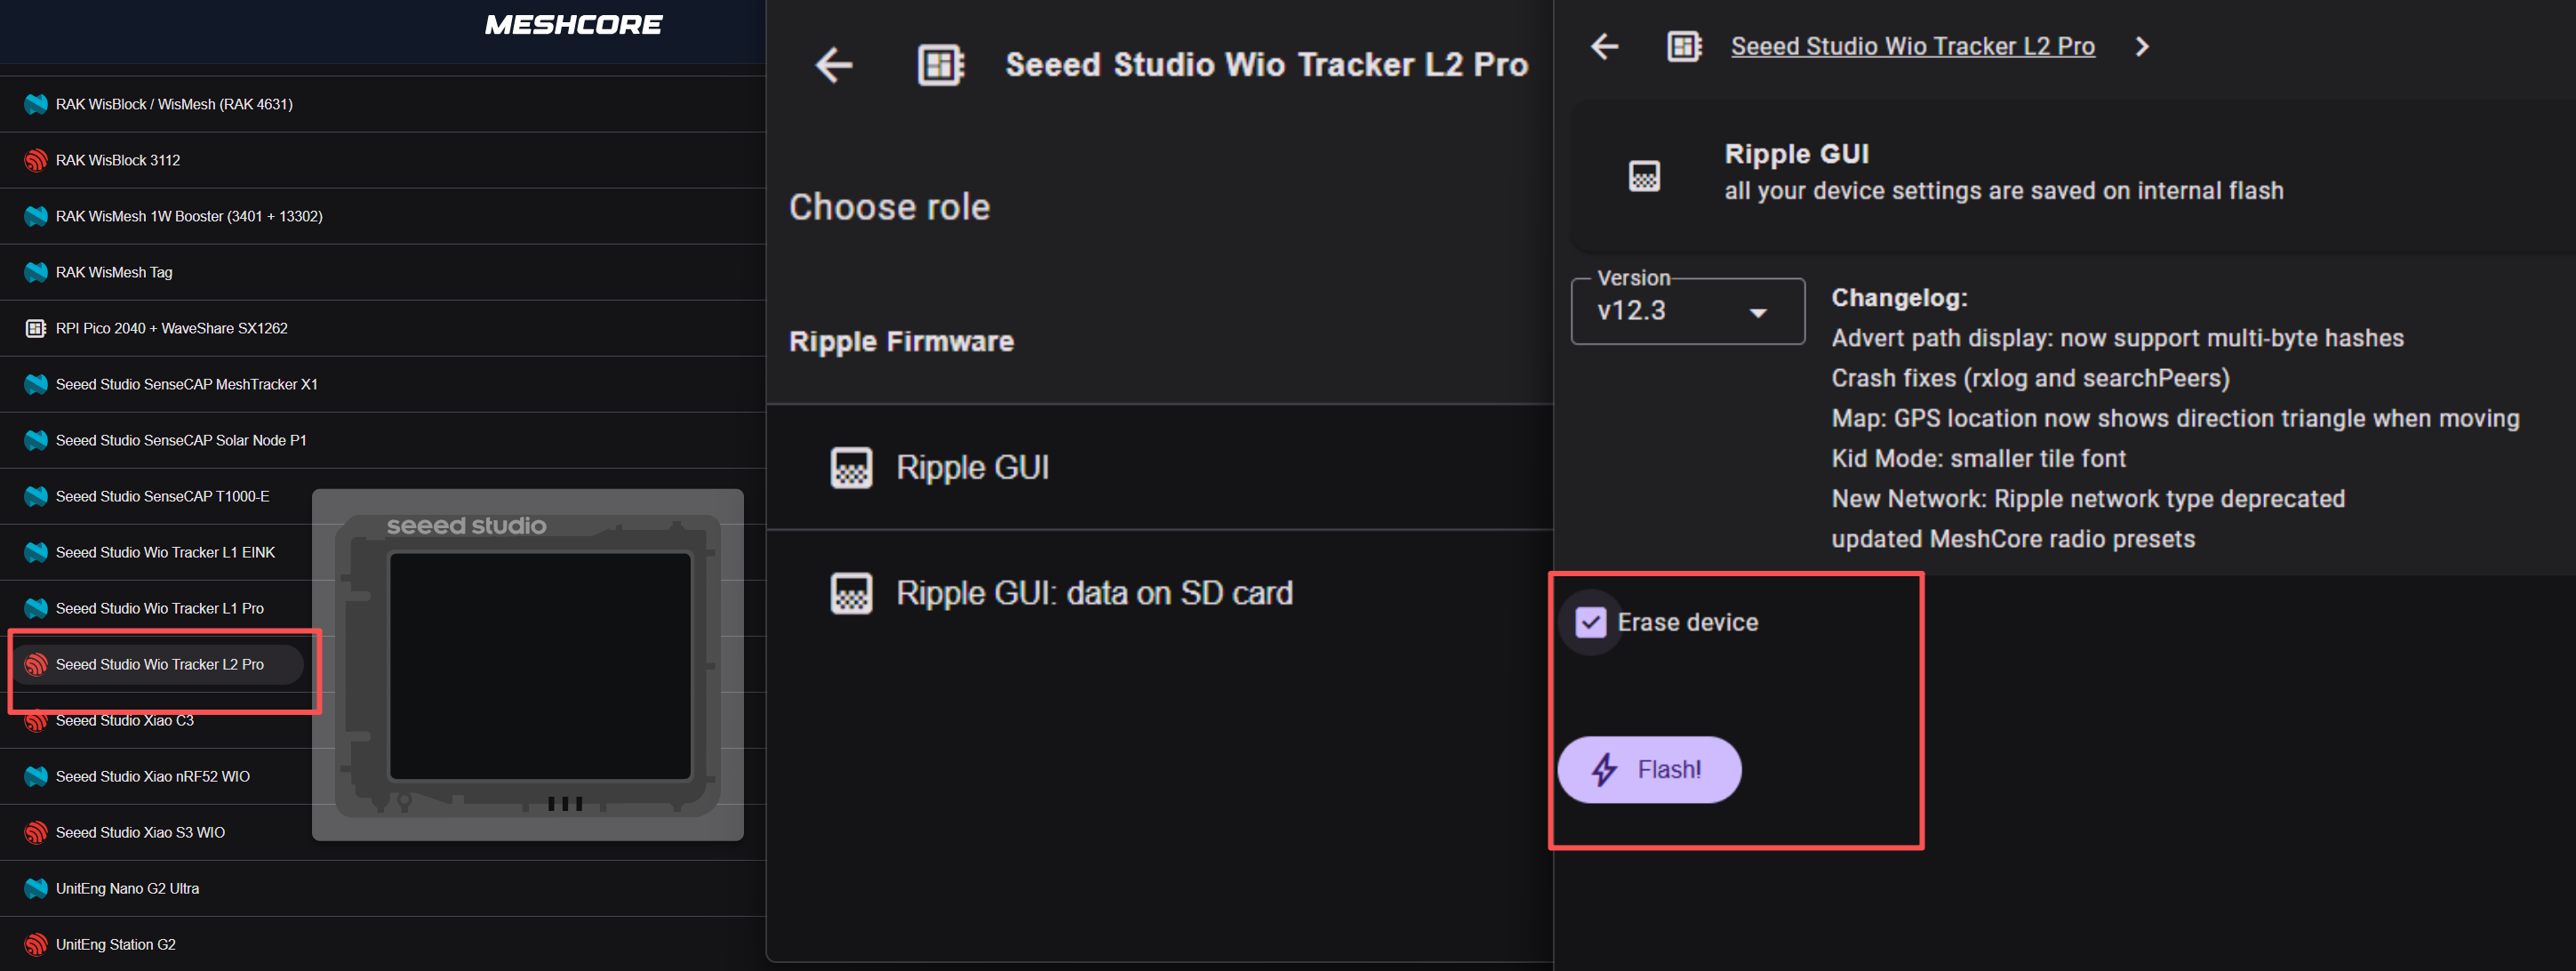
Visit the Wio Tracker L2 Web Flasher and select the Ripple UI firmware and storage variant for the L2. Use a desktop browser that supports serial access, such as Chrome or Edge.
Select Seeed Studio Wio Tracker L2 Pro, choose a Ripple GUI variant, and select the firmware version. The screenshot below shows v12.3.
Step 2: Enter download mode manually
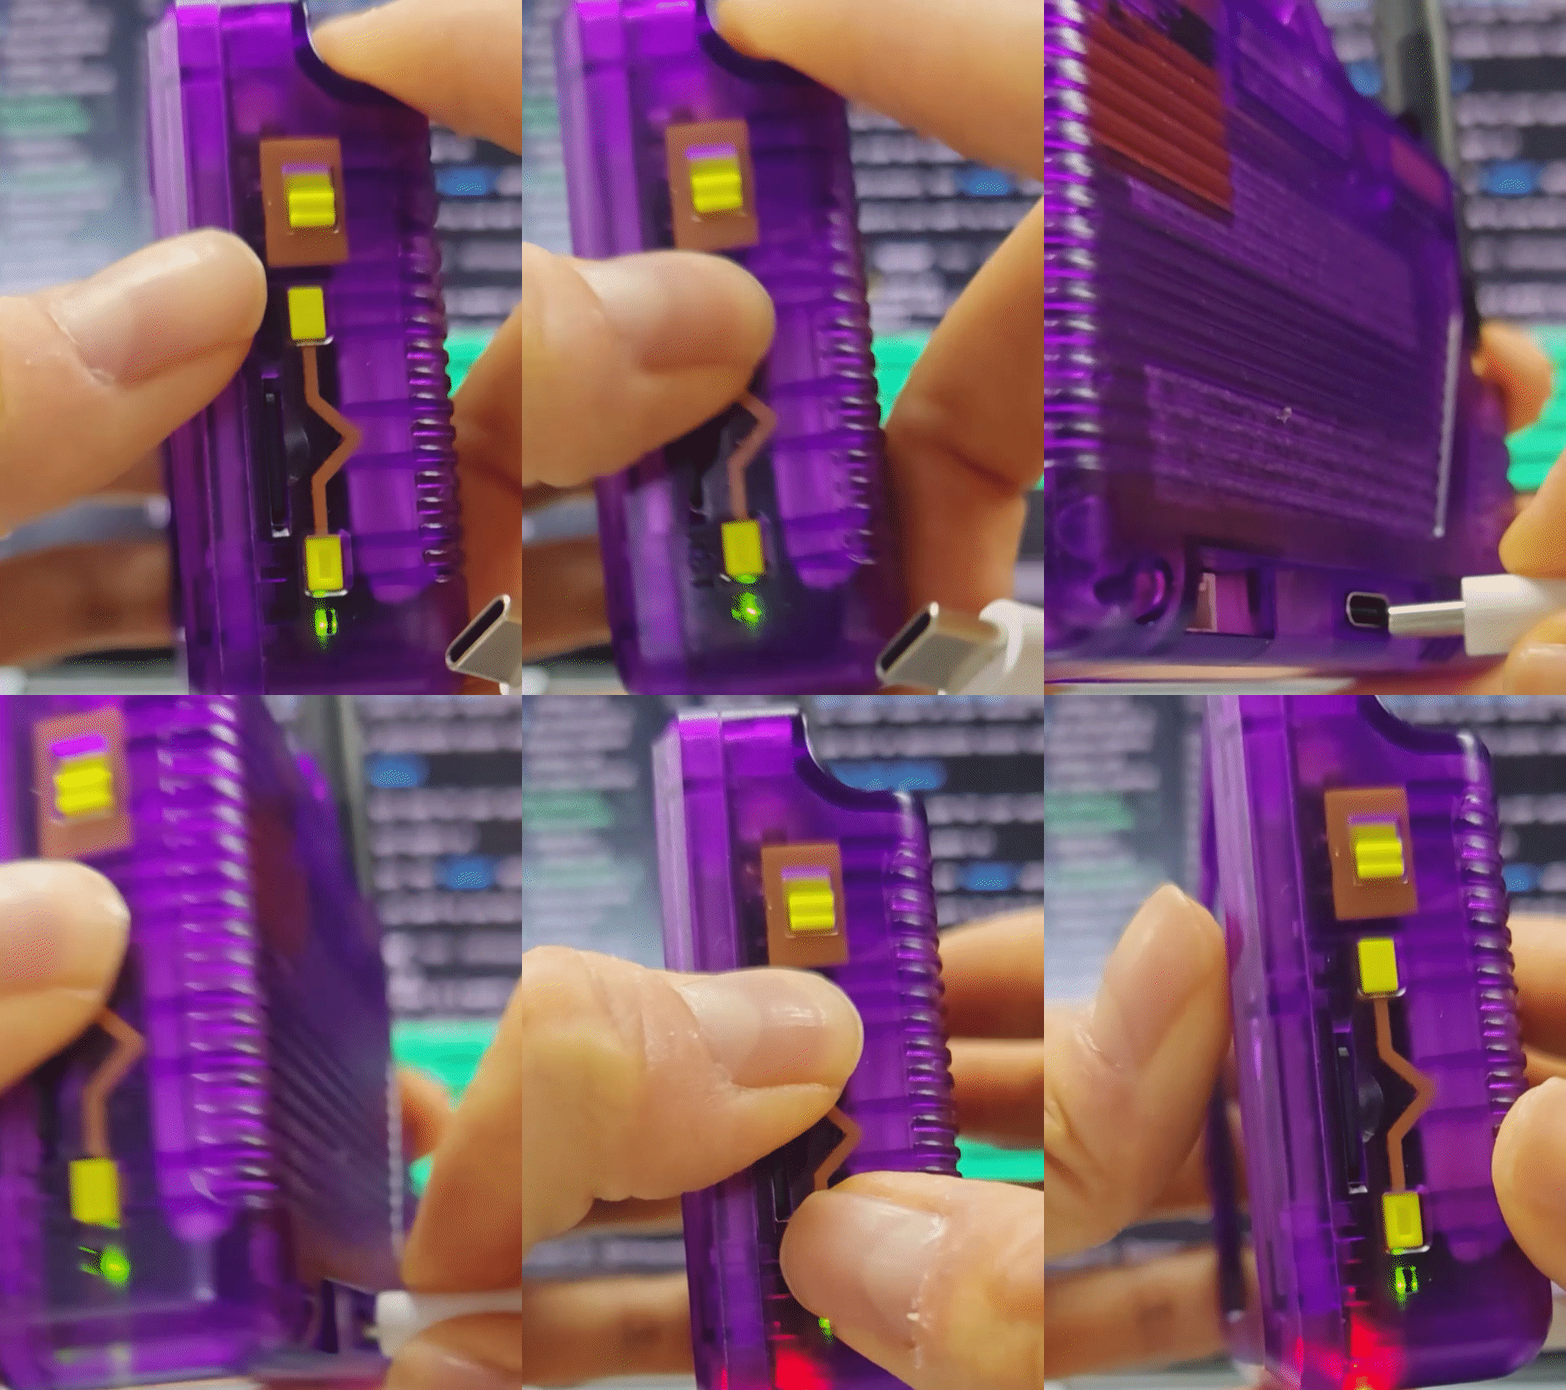
Hold the U/B button while plugging in the USB data cable, then press RST to enter firmware download mode.
Step 3: Select the port and flash
Click Flash!, select your device in the serial port dialog, and connect. Follow the on-screen instructions to complete flashing.
The Erase device option shown above clears data and settings in internal flash, including the unlock state. Back up important data and keep your Unlock Code before erasing.
Step 4: Restart
After flashing finishes, press RST to start Ripple UI.
If you cannot proceed after clicking Flash, confirm that the device is in download mode. Also check the USB data cable, browser serial permissions, and whether another application is using the port.
First-Time Setup
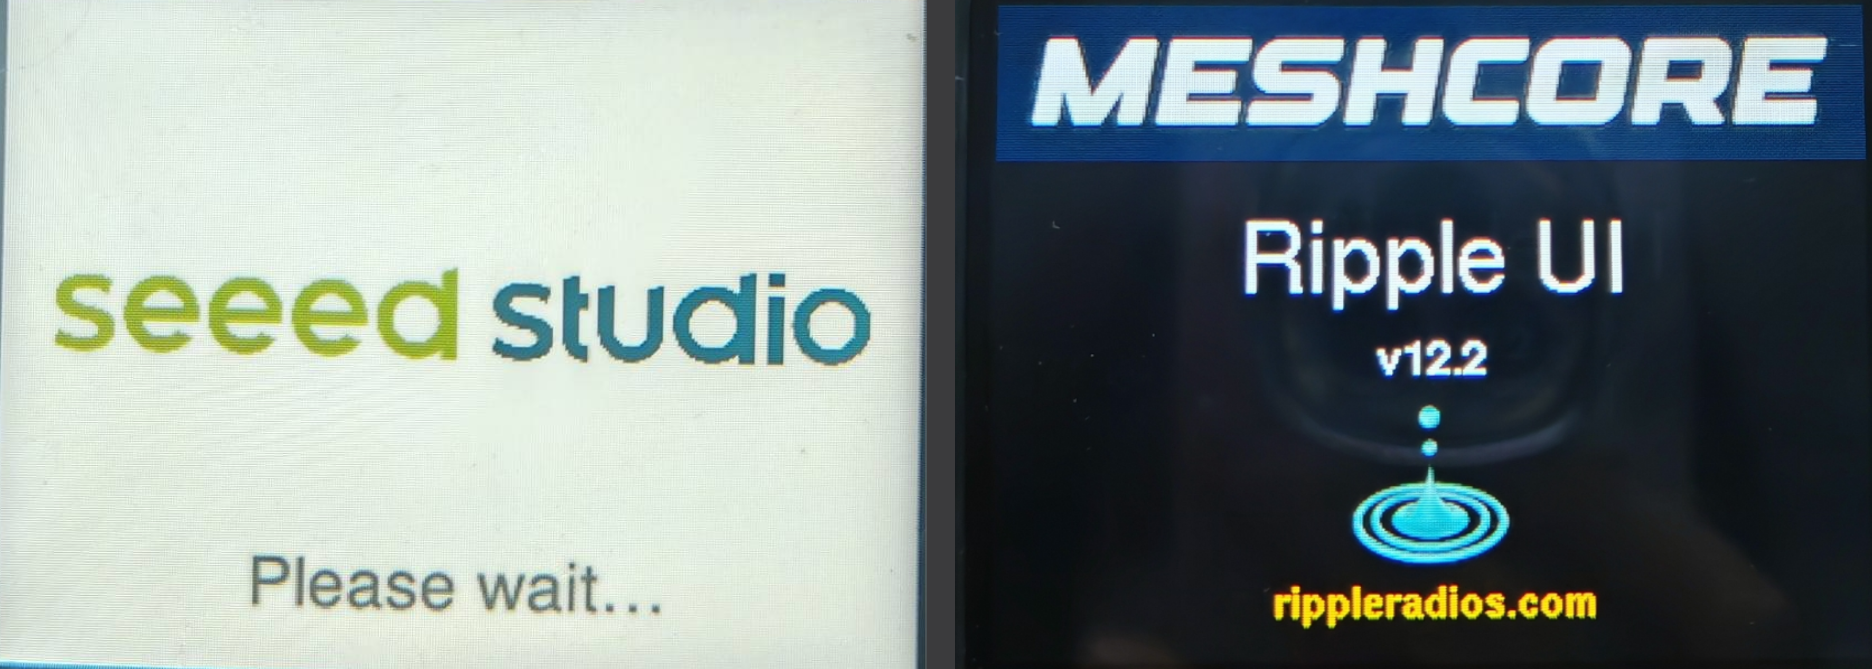
Follow the touchscreen and button tutorials at first startup.
Create a Network Profile
-
Complete the touchscreen and Select button tutorials shown at first startup.
-
Choose a radio preset appropriate for your region, or enter the frequency, spreading factor (SF), and other parameters used by your local network.
-
Name the profile using letters and numbers, without spaces.
-
Save the profile. If prompted, restart the device to apply the settings.
For a two-device test, use matching radio settings on both devices. Selecting the same preset is the simplest option. With custom settings, also check bandwidth, coding rate, and other parameters, rather than matching only frequency and SF.
Set Your Name
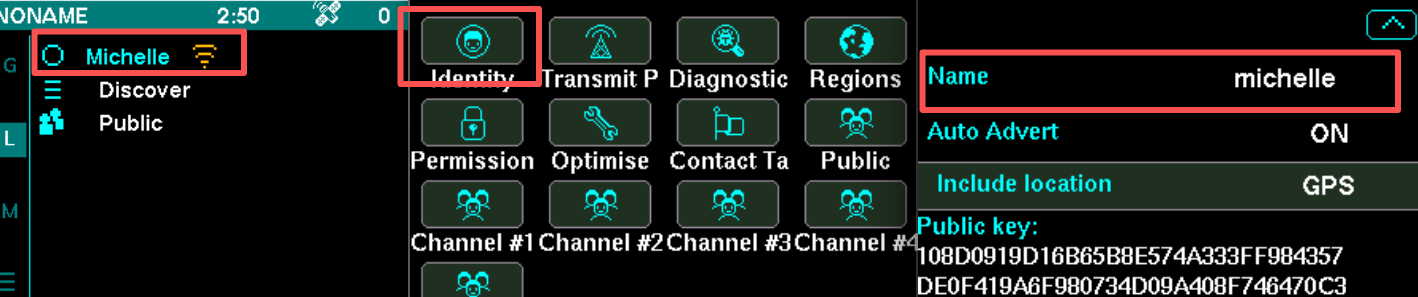
-
Tap
Lon the left, open the current network profile, and selectIdentity. -
Change the default name to something recognizable, such as
michaormichb. Names can contain up to 12 characters.
Explore the Interface
Tap G, L, or M on the left side of the screen to switch between the three home pages.
- G: Grid
- L: List
- M: Map
- Extra
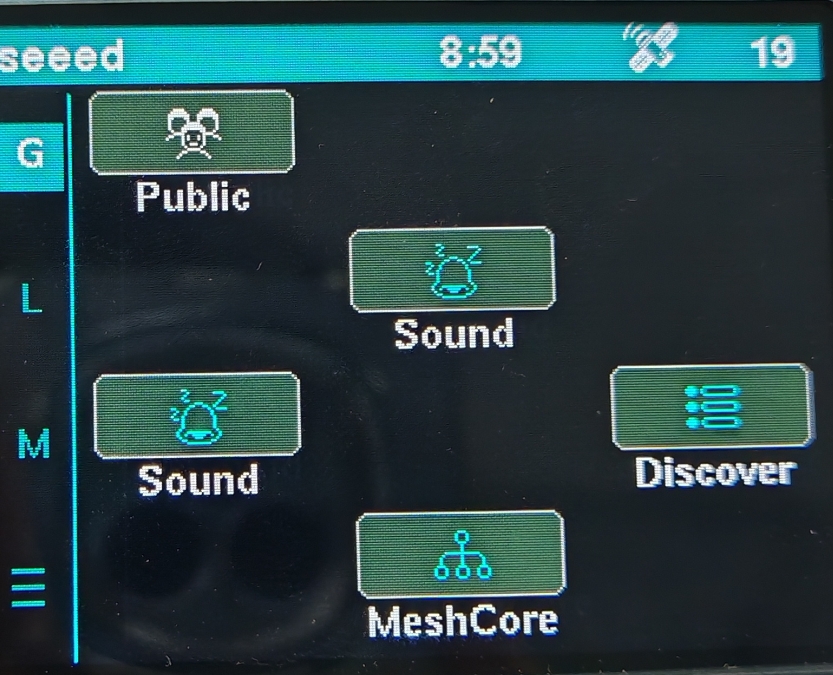
G is a customizable home screen with a 3 × 4 grid.
-
Long-press an empty cell to add a shortcut to a contact, group channel, or setting.
-
Long-press an existing shortcut to remove it.
L lists your network profiles, contacts, group channels, and Discover. Use this page to add contacts, edit your Identity, and open conversations.
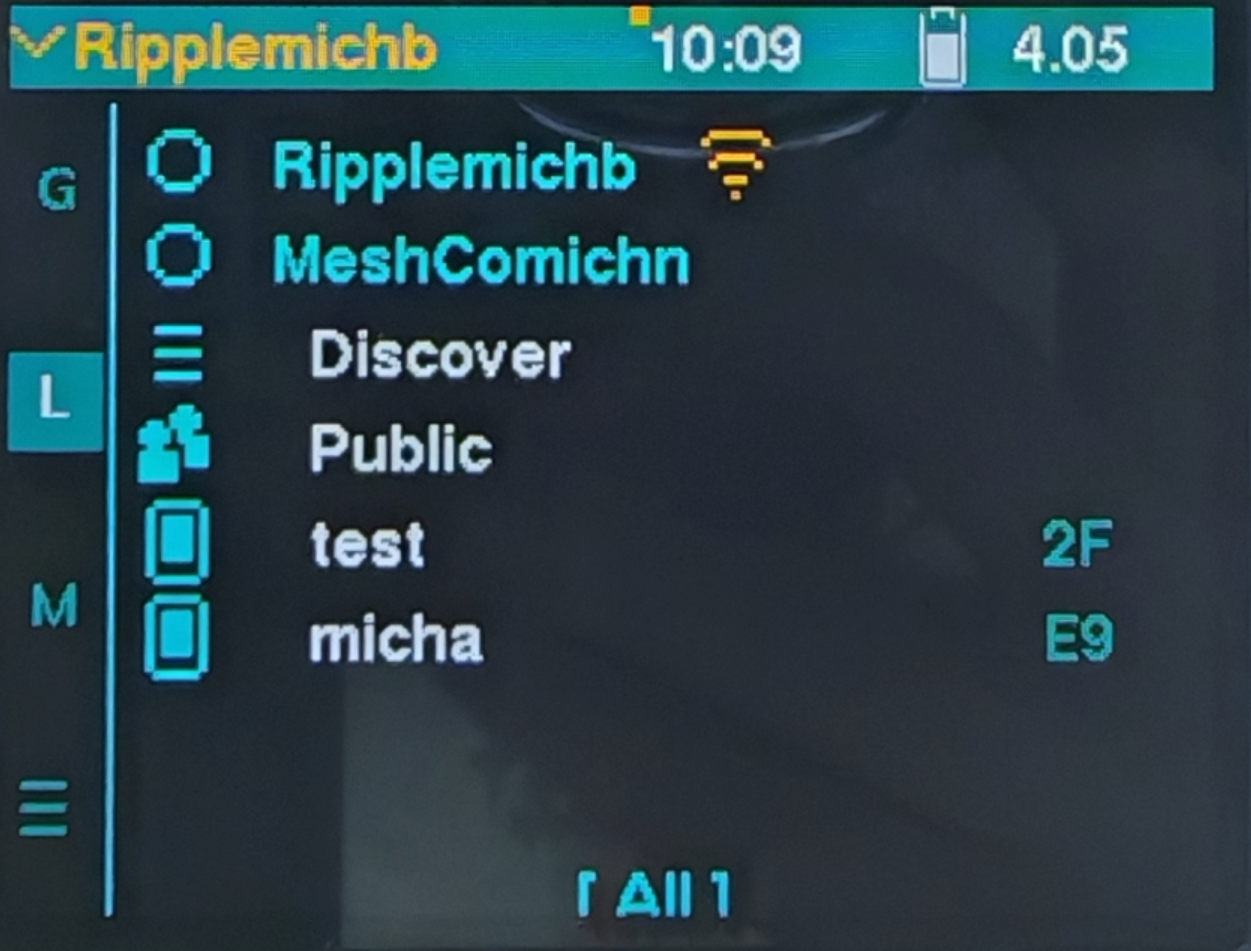
The screenshot shows names used during testing. Your list will depend on your profiles and contacts.
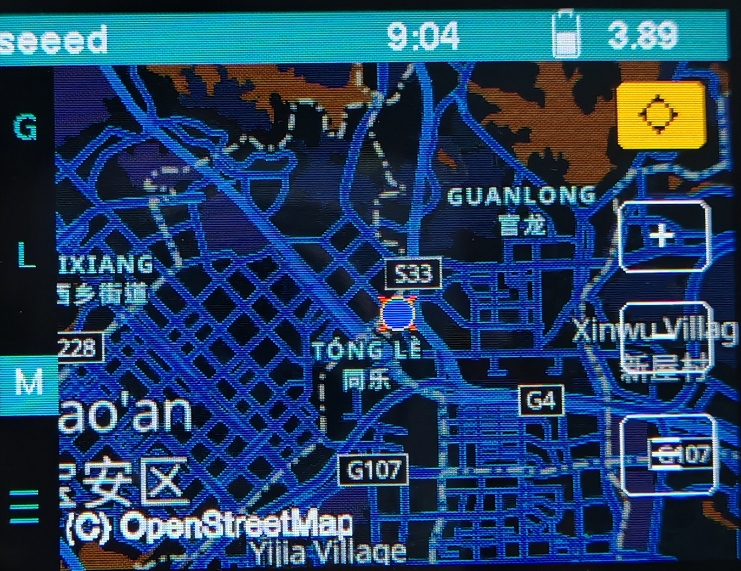
M displays the map, positions, and any loaded GPS track.
-
Drag the screen to pan.
-
Tap
+or−to zoom. Pinch-to-zoom is not supported. -
Tap the location-follow button to keep the map centered on your position. The button turns orange when enabled, and the screen stays on.
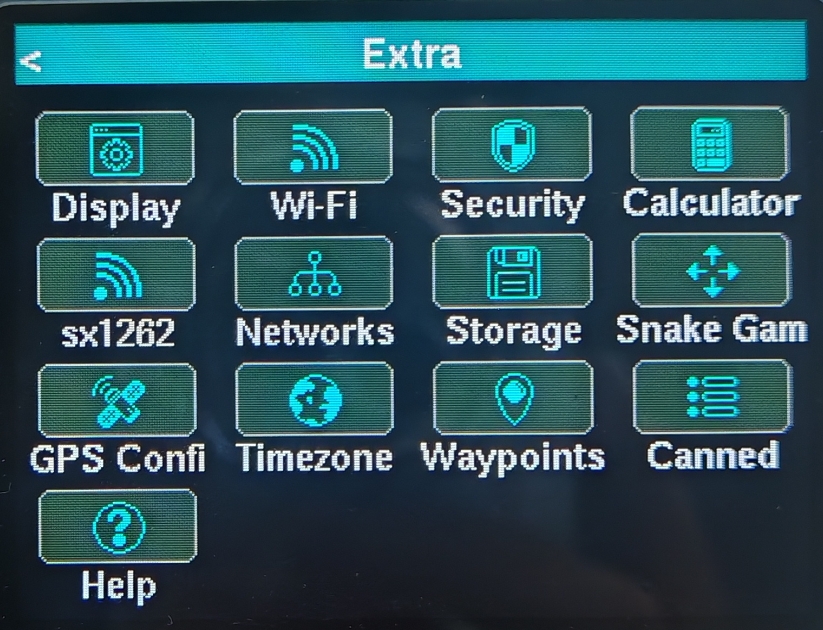
Open the bottom-left home screen menu to access Extra, which contains device settings and tools.
-
Display: Adjust font size, theme, animations, and accent color.
-
Wi-Fi: Configure your connection and map downloads. Map downloading requires an unlock code.
-
Networks: Create and manage network profiles.
-
GPS Config: Configure GPS communication settings; defaults normally work for the L2 Pro.
-
Timezone: Set the local UTC offset.
-
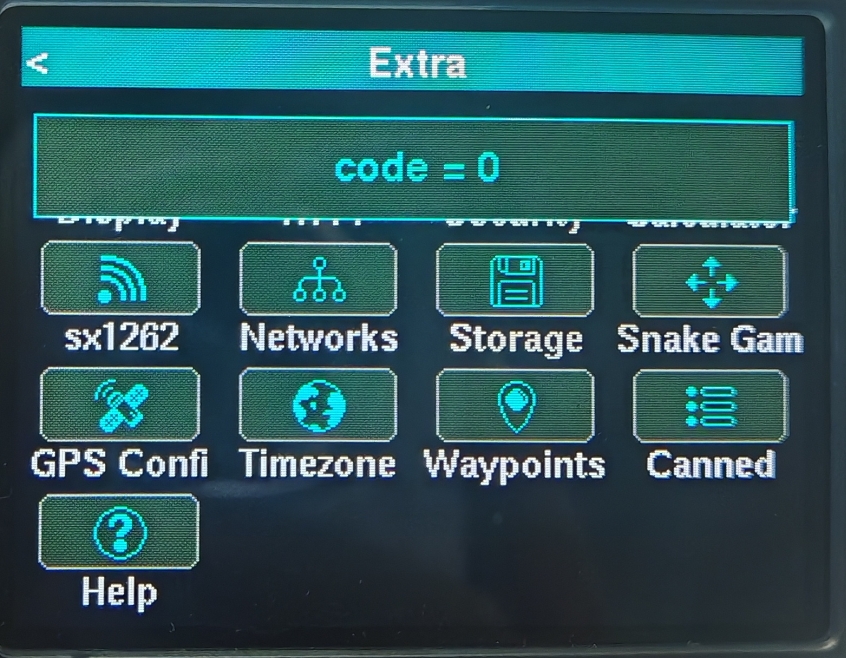
SX1262: Check LoRa radio initialization status.
code=0means success.
Title Bar and System Menu
| Area | Function |
|---|---|
| Tap the left side of the title bar | Opens Switch To to change network profiles |
| Long-press the top-left corner | Captures a screenshot |
| Middle of the title bar | Opens quick switches |
| Right side of the title bar | Opens GPS information |
| Bottom-left menu on the home screen | Opens system settings, including Display, Wi-Fi, Networks, and Timezone |
Take a Screenshot
Long-press the top-left corner of the screen to capture the current view. You can use screenshots to share settings or report an issue.
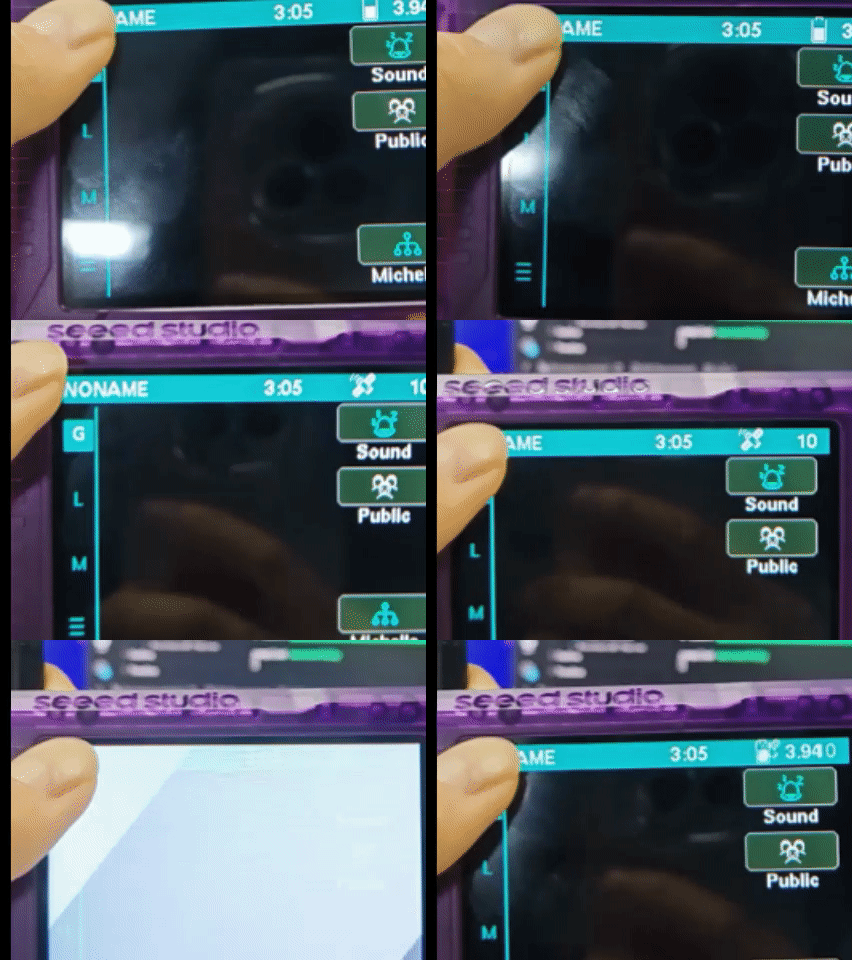
Captured screenshots are BMP files with date-and-time filenames, as shown below.

Send Your First Message
Make Your Devices Discoverable
- Configure both devices with matching MeshCore radio settings.
- Give each device a different
Identityname. - Set
AdverttoOnto allow identity advertisements. - Open
Discoverfrom theLpage and wait for nearby nodes to appear.
To send an identity advertisement immediately, open the Discover menu:
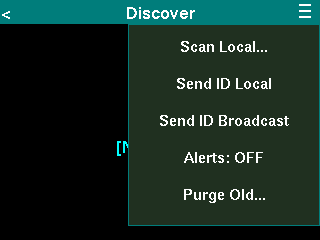
| Option | Function |
|---|---|
Send ID Local | Sends a zero-hop identity advertisement to nearby devices |
Send ID Broadcast | Broadcasts your identity to the mesh |
Scan Local | Requests replies from nearby nodes that support discovery responses; commonly used to discover repeaters |
Scan Local does not list every device. A node must be within range and configured to respond.
Add Contacts
-
Select the target node in
Discover. -
Open the top-right menu and select
Add to Contacts. -
Return to
Land confirm that the contact is listed. -
Repeat on the other device.

Send a Direct Message
-
Open the contact.
-
Tap the input field and type a message.
-
Press
ENTERto send and wait for acknowledgment. -
Open the conversation on the other device and reply.
Direct messages wait for an acknowledgment (ACK) from the recipient. If sending fails, check radio settings and distance, then retry. If the previous route is no longer usable, select Flood (reset) under Path to find a new route.
Maps and GPS Tracks
Prepare Offline Maps
-
Prepare a FAT32-formatted microSD card of 32 GB or less.
-
Save raster map tiles using this folder structure on the card:
/tiles/{zoom}/{x}/{y}.png
-
Insert the card, start the device, and open
M. -
Pan to an area covered by your tiles and select an available zoom level.
zoom is the zoom level; x and y are tile coordinates. Locked devices render only zoom levels 1–9. More detailed zoom levels require an unlock code.
Download Maps over Wi-Fi (Unlock Required)
-
Unlock the device using the instructions below.
-
Open
Wi-Fifrom the home screen system menu. -
Enter your network name and password, and enable map downloading.
-
Press
ENTERto save and restart when prompted. -
Confirm that the Wi-Fi menu shows an orange connection indicator.
-
Open the map and pan or zoom to the required area. Tiles download on demand and are cached on the SD card.
Set the Location Used in Advertisements
| Advert Location setting | Location used |
|---|---|
GPS | The position obtained by the device's GPS |
Manual | A fixed position selected with Advert Loc on the map |
To use a point selected on the map, first set Advert Location to Manual. In GPS mode, advertisements continue to use the GPS position.
Unlock Premium Features
You can try basic messaging before purchasing an unlock code. Unlock the device when you need detailed maps, Wi-Fi map downloads, longer tracks, or advanced administration features.
Find Your Device Serial Number
Find and open Unlock in the device menus. Record the Serial number shown on that screen. Use this complete serial number for your purchase, rather than the last few characters of a MAC address or a Pair Device PIN.
Obtain an Unlock Code
Open Scott's Ripple Ultra Unlock Code page, follow the purchase instructions, and provide the serial number shown on your device. Licenses are issued per device; enter only one device serial number for each license.
If your device came with an applicable unlock code, proceed to the next step.
Enter the Code on Your Device
-
Once you receive the Unlock Code for your serial number, open
Unlockagain. -
Enter the complete code and submit it.
-
After successful activation, the
Unlockoption disappears. -
Open the premium feature you want to use and confirm that it is available.
Keep the code together with its device serial number. In our test, erasing flash with erase_flash and reinstalling firmware required entering the device's unlock code again.
Premium Features
-
Automatic Telemetry: Requests telemetry when you open a conversation with a direct path. Shows location, direction, and distance if the other node allows GPS telemetry.
-
Room Admin CLI: Access the Room Server command line with its administrator password.
-
Repeater Admin: Check repeater status and manage the node remotely.
-
Sensor Admin: Access sensor commands, telemetry, and permission management.
-
More detailed map zoom: Display map tiles above zoom level 9.
-
Wi-Fi Download: Download map tiles on demand and cache them on the SD card.
-
Longer GPS tracks: Record more than the 64 GPS points allowed on locked devices.
Advanced Usage
Create and Switch Network Profiles
-
Open the home screen system menu and select
Networks. -
Select
New Network, configure the radio settings, and name the profile. -
Save and restart if prompted.
-
Tap the left side of the title bar and select a profile in
Switch To.
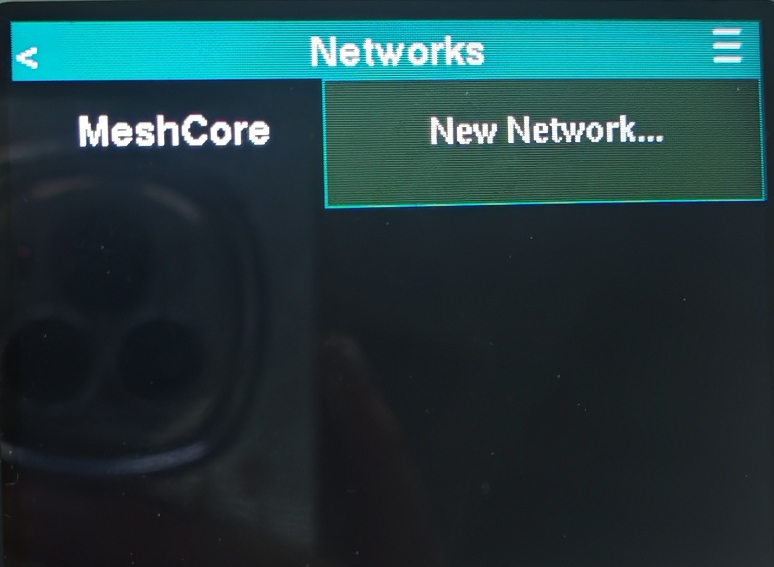
Each profile has its own identity, contacts, and preferences. Opening a contact belonging to another profile can prompt you to switch profiles. This prompt does not indicate that the device has detected which network the other node is currently using.
FAQ
SX1262 status code
This screen shows the RadioLib return code from LoRa radio initialization. 0 means initialization succeeded. The screen is intended for radio diagnostics.
Discover Other device
-
Confirm that both devices use compatible MeshCore profiles with matching radio settings.
-
Enable Advert on the other device, or ask it to send
Send ID Local. -
Start with a short-distance test in an open area.
-
Scan Localonly lists nodes that respond to discovery requests; it does not replace identity advertisements from all devices.
Why is the map blank
Check the SD card format, tile paths, and whether tiles exist for the displayed area. On a locked device, also check that the zoom level is within 1–9. A valid GPS position does not mean map tiles have been downloaded.
Resources
Tech Support & Product Discussion