Get Started with SenseCAP Combo
This chapter shows you how to quickly set up your SenseCAP Combo 5-in-1 Sensor with 4G and connect it to the SenseCAP Cloud Platform.
SenseCAP Combo 5-in-1 Sensor with 4G uses 4G Cat.1 connectivity and the MQTT protocol to upload data to the SenseCAP Cloud Platform or your own third-party MQTT server. Please make sure you have a valid Micro SIM card (3FF) with cellular data coverage in your deployment area.
Operating Environment
SenseCAP Combo is designed to operate reliably within a specific temperature range to ensure stable performance and battery safety. Please make sure the device is used and charged within these temperature ranges to avoid performance degradation or battery issues.
| Parameter | Specification |
|---|---|
| Operating Temperature | 0°C ~ 40°C |
| Charging Temperature | 0°C ~ 40°C |
| Operating Humidity | 0 ~ 100% RH (non-condensing) |
The operating temperature of the device is limited by the included power adapter, which supports an operating temperature range of 0°C to 40°C.
The power adapter is designed for indoor use only. Do not expose the power adapter directly to outdoor environments. The power adapter must be installed inside a waterproof enclosure or electrical cabinet to ensure proper protection.
Install SIM Card
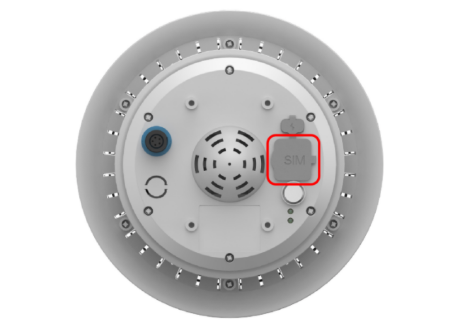
- Open the rubber cover labeled “SIM” and lift the metal holder.
- Insert the SIM card into the slot, secure it with the metal holder, and close the rubber cover tightly.
After installing the SIM card, make sure the rubber cover is fully sealed. Otherwise, the waterproof performance of the device may be affected.
Sensor Connection
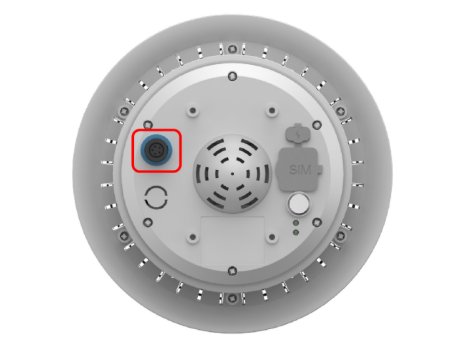
The device provides an RS-485 port for connecting external Modbus-RTU sensors.
- Unscrew the protective cap of the interface and connect the sensor to the RS-485 port.
- After connecting the sensor, make sure the aviation connector is fully tightened. If the connector is not in use, it must also be tightened to prevent water and device damage.
- Connect the sensors before powering on the device. Otherwise may cause them not to be detected. In this case, restart the device.
- When using a splitter, do not connect sensors with the same Modbus address to the RS-485 interface.
- If you connect a 12V sensor, the device must be powered by an external DC power supply.
Configure to the SenseCAP Cloud Platform
Before deployment, make sure the device can operate normally and upload data.
Step 1. Download SenseCraft APP
Download the SenseCraft APP from the App Store or Google Play to manage your device.

Step 2. Create New Account
Please create an account via the SenseCraft APP or PC on the SenseCAP cloud platform: https://sensecap.seeed.cc/portal
- Click "Register", enter your email, and submit. A verification email will be sent.
- Open the email from "SenseCAP", click the link, and complete the registration.
- Open the app, select "Global Server", enter your account and password, and log in.

Step 3. Bind Device
- Go to the "Devices" page. Click the "+" icon in the top right corner.
- Scan the QR code on the device label to bind the device.

Power On the Device (Indicator Status)
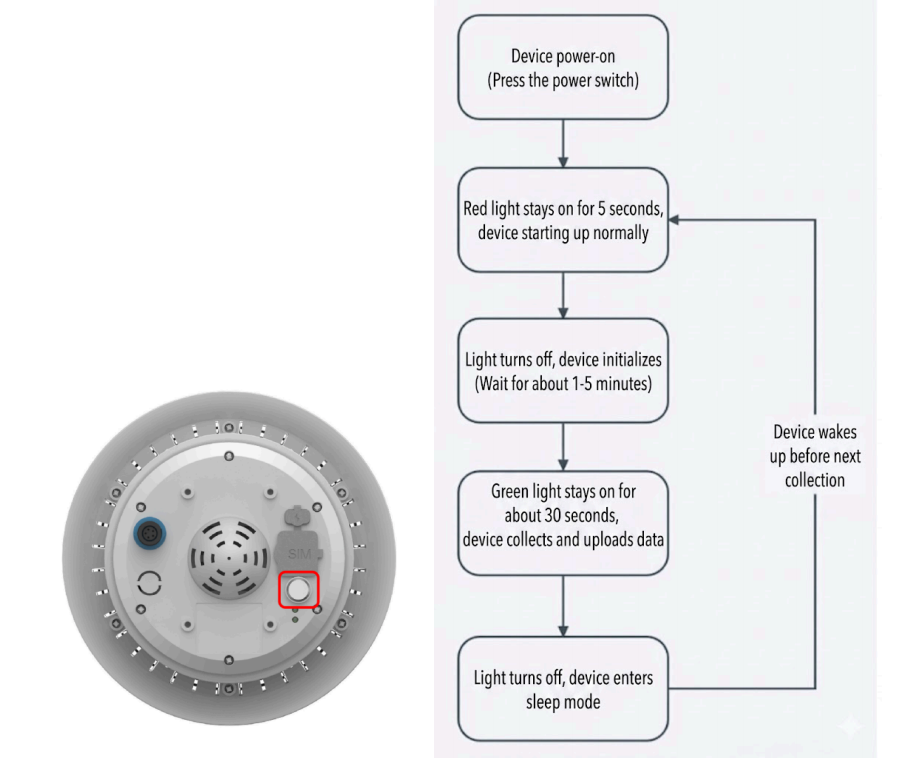
Before powering on, make sure the sensors and SIM card are installed.
When installing sensors, ensure the device is powered off. Otherwise, external sensors may not be detected.
Press the metal button at the bottom of the device. The red indicator will light up. Wait about 3 minutes for the device to come online. (The time depends on the number and type of sensors. More sensors require longer time.)
- The device includes a built-in solar panel for charging.
- When using 12V sensors, an external adapter is required. Ensure proper waterproof protection when using an adapter.
View Data and Status
You can view device data and status via the app or PC.
Via SenseCraft APP
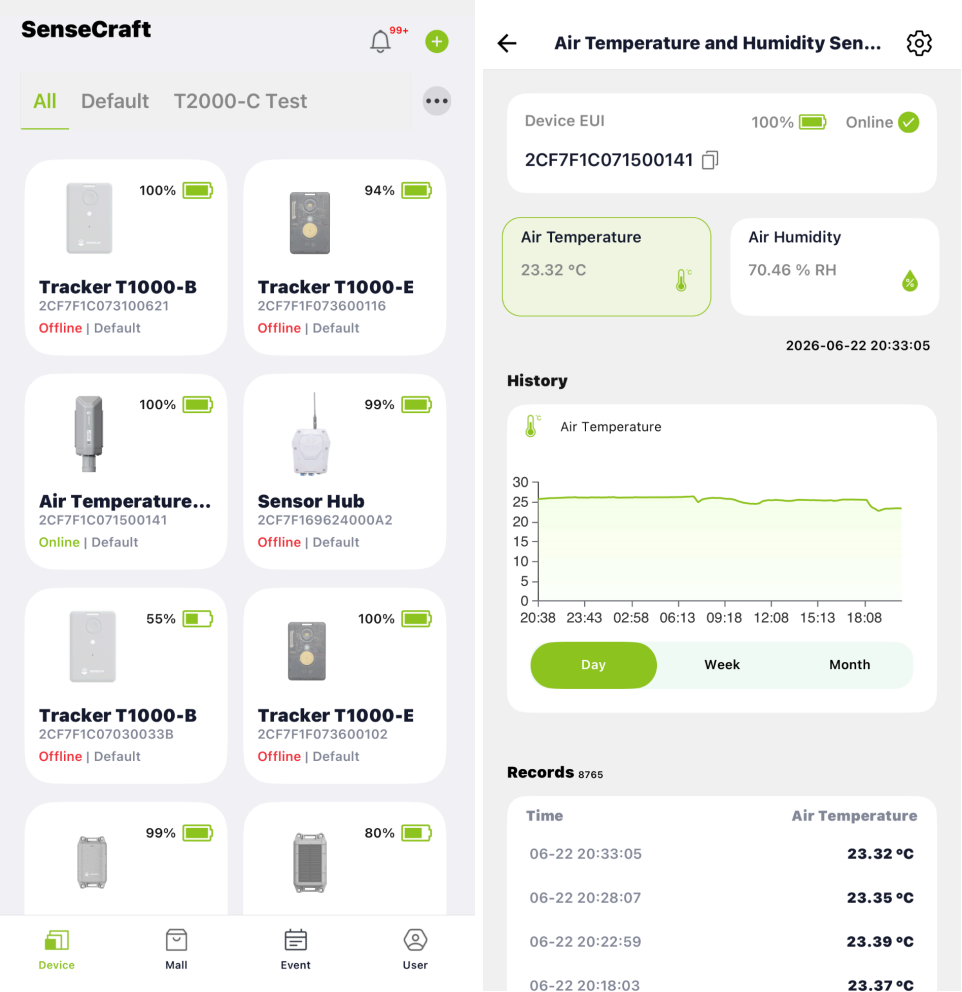
View data directly in the app after the device is bound and online.
Via SenseCAP Portal
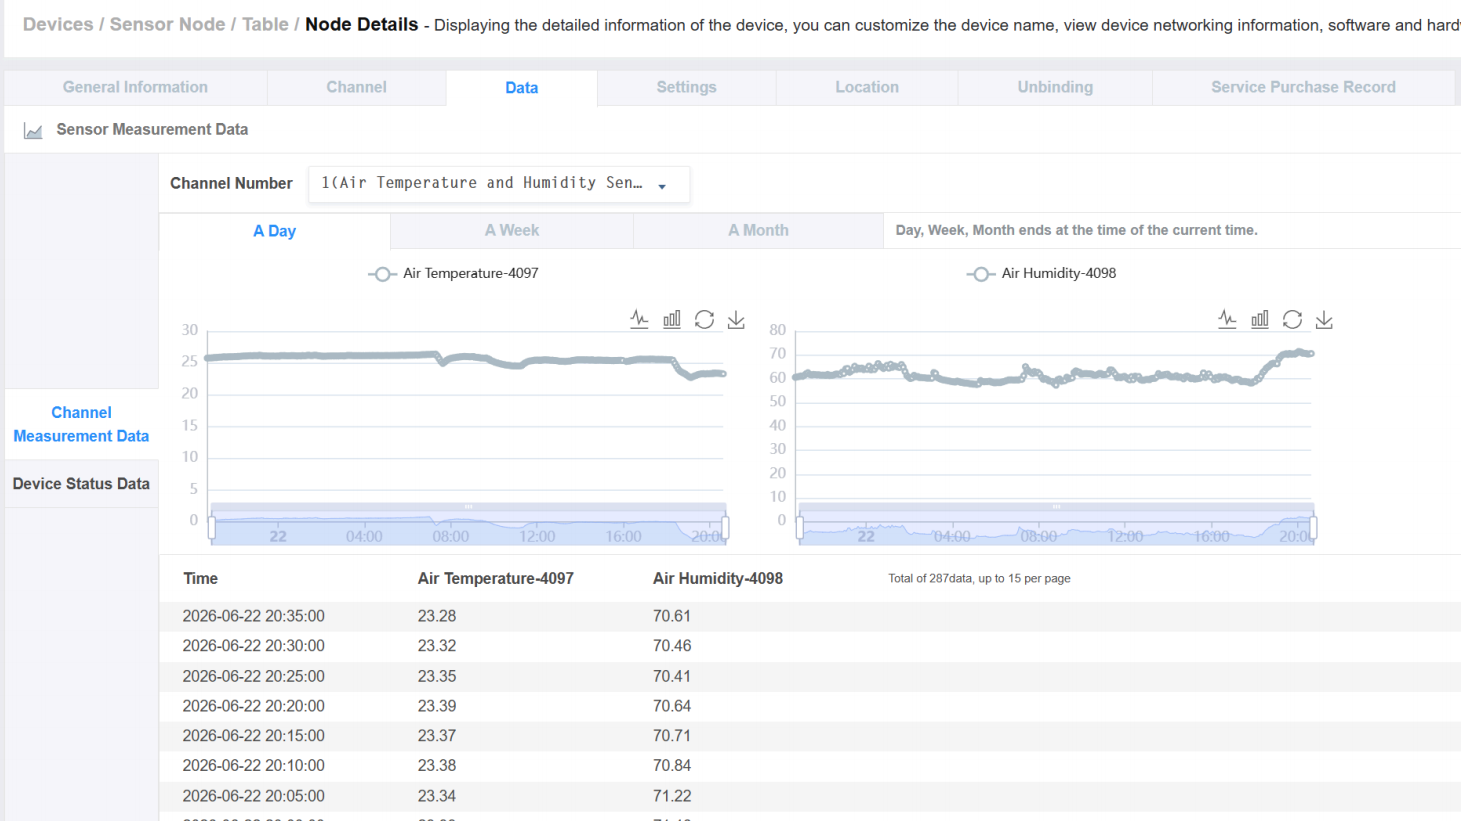
Go to https://sensecap.seeed.cc and log in. Click "Data" to check if data is uploaded successfully.
SenseCAP API
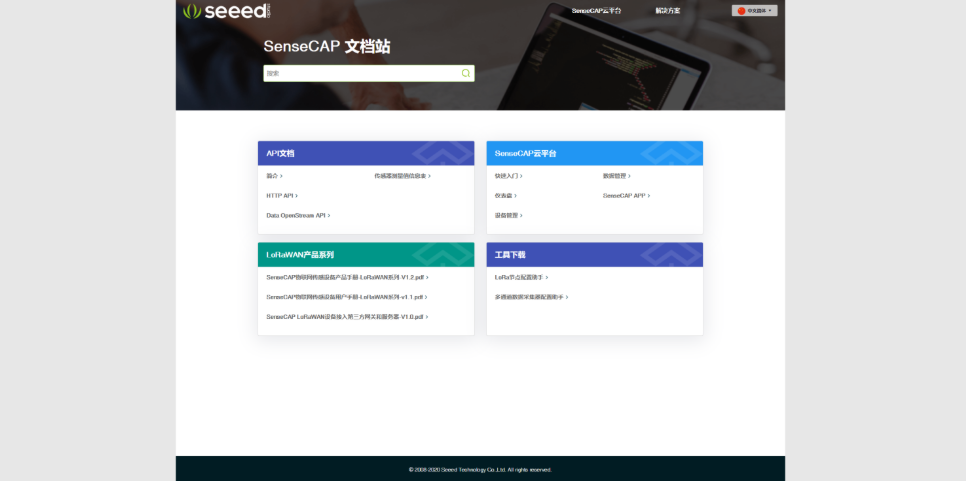
SenseCAP API is for users to manage IoT devices and data. It includes 3 types of API methods: HTTP protocol, MQTT protocol, and Websocket protocol.
- With HTTP API, users can manage LoRa devices, to get raw data or historical data.
- With MQTT API, users can subscribe to the sensor's real-time measurement data through the MQTT protocol.
- With Websocket API, users can get real-time measurement data of sensors through Websocket protocol.
Please check API User Guide for more details.
General Settings
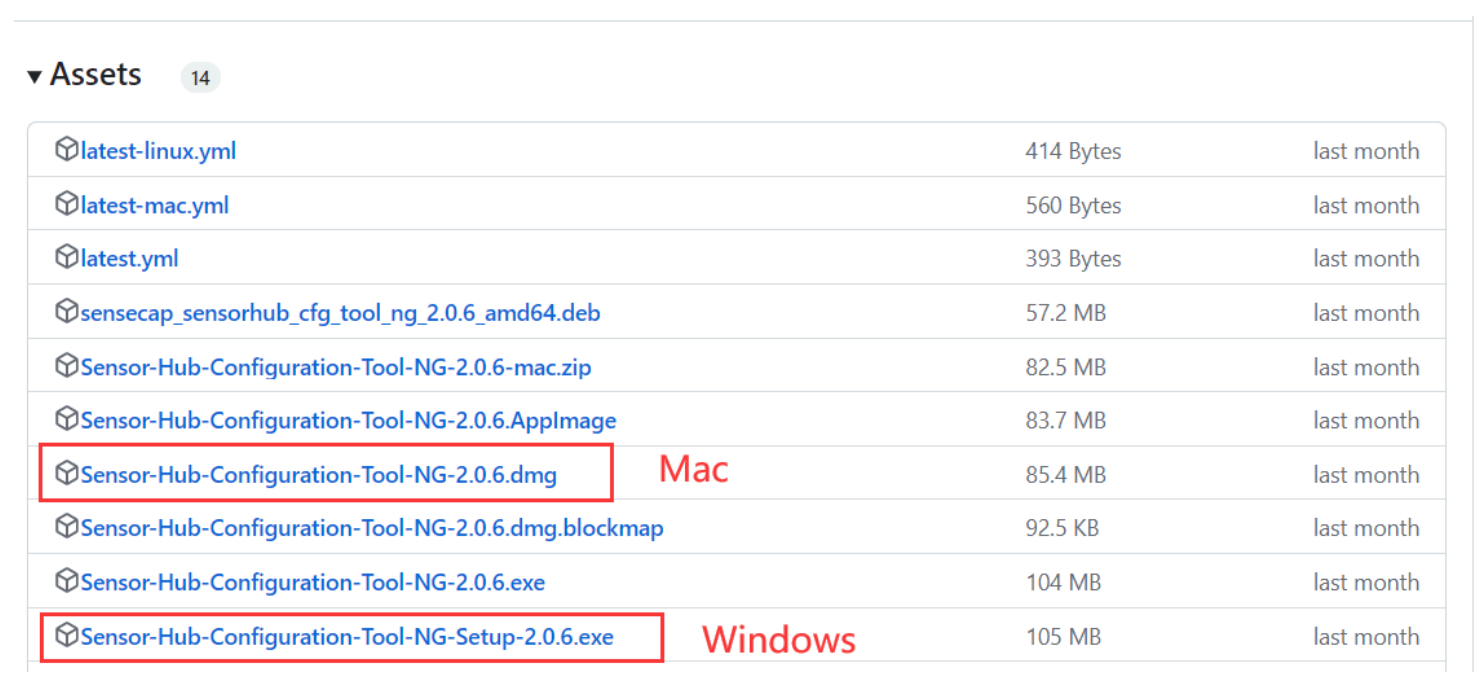
To configure server address, add sensors, or change reporting intervals, use the PC configuration tool:
- Download tool: SenseCAP Sensor Hub Configuration Tool NG
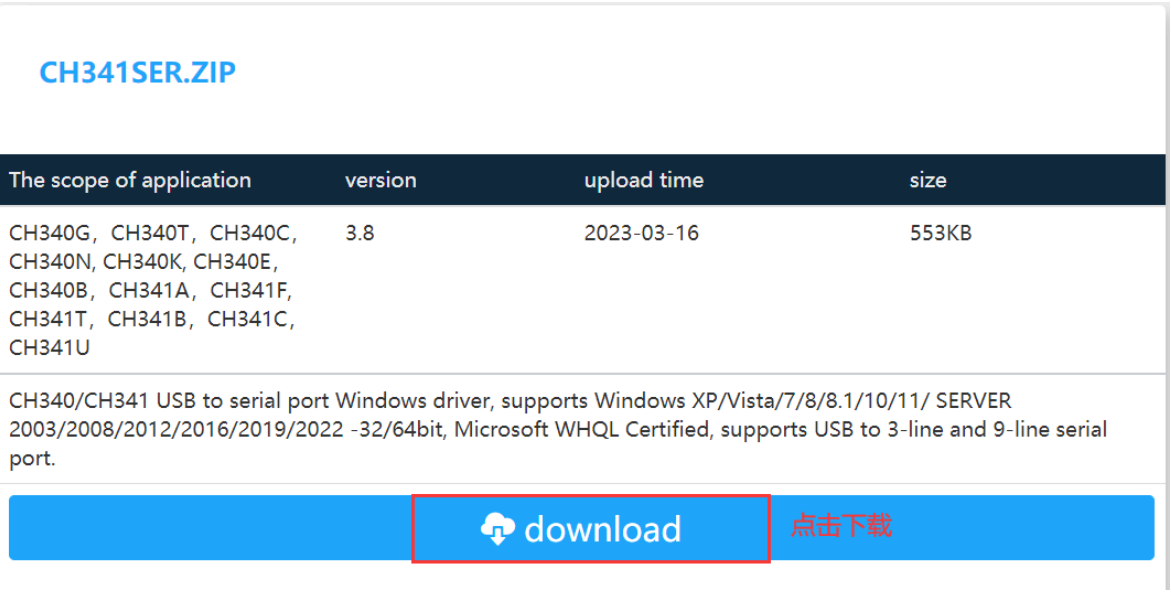
- Driver (first-time use): CH341 USB Driver
MQTT Server Configuration
- Connect the device to a PC using a USB Type-C cable.
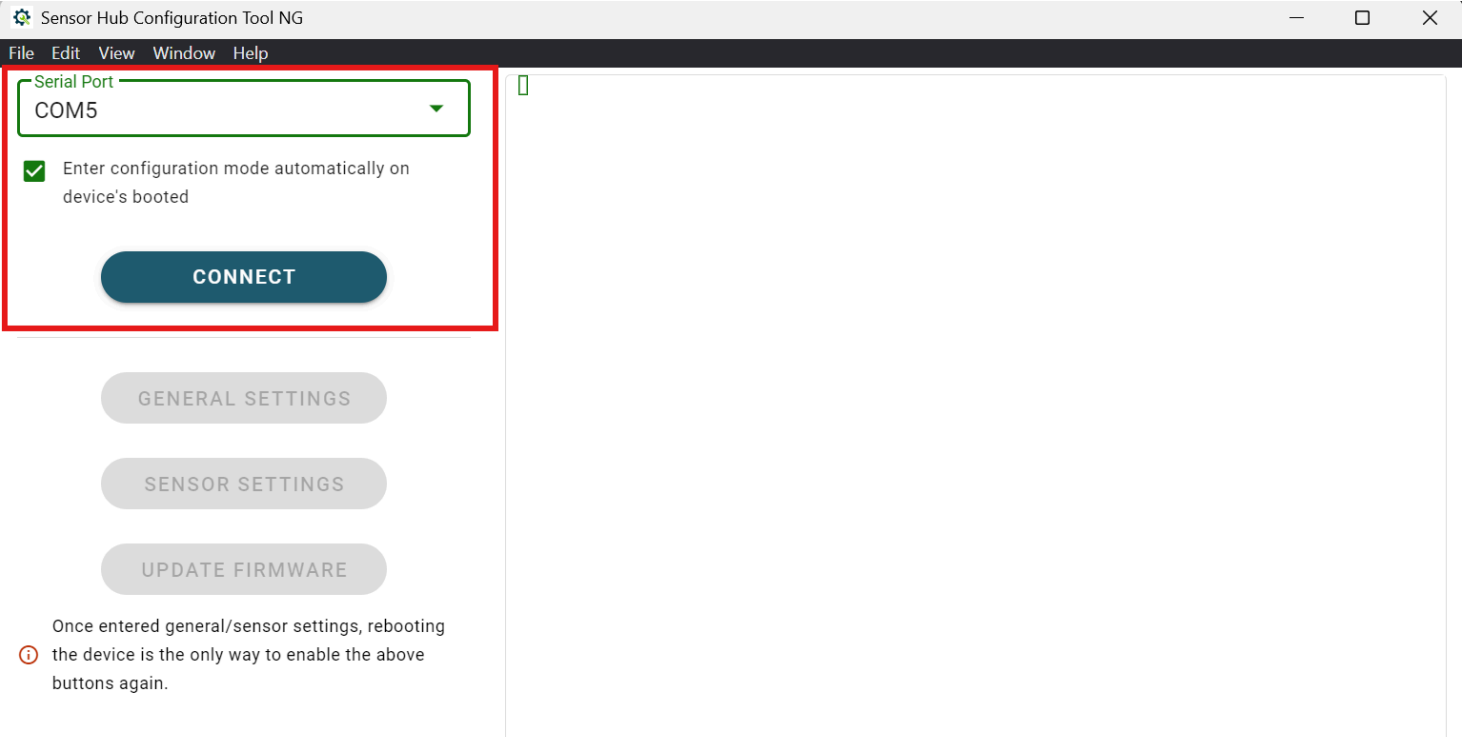
- Open the tool, select the COM port, enable "Enter configuration mode automatically on device's booted", click "Connect" then press the metal button. (The "General Settings" and "Sensor Settings" buttons will turn dark blue.)
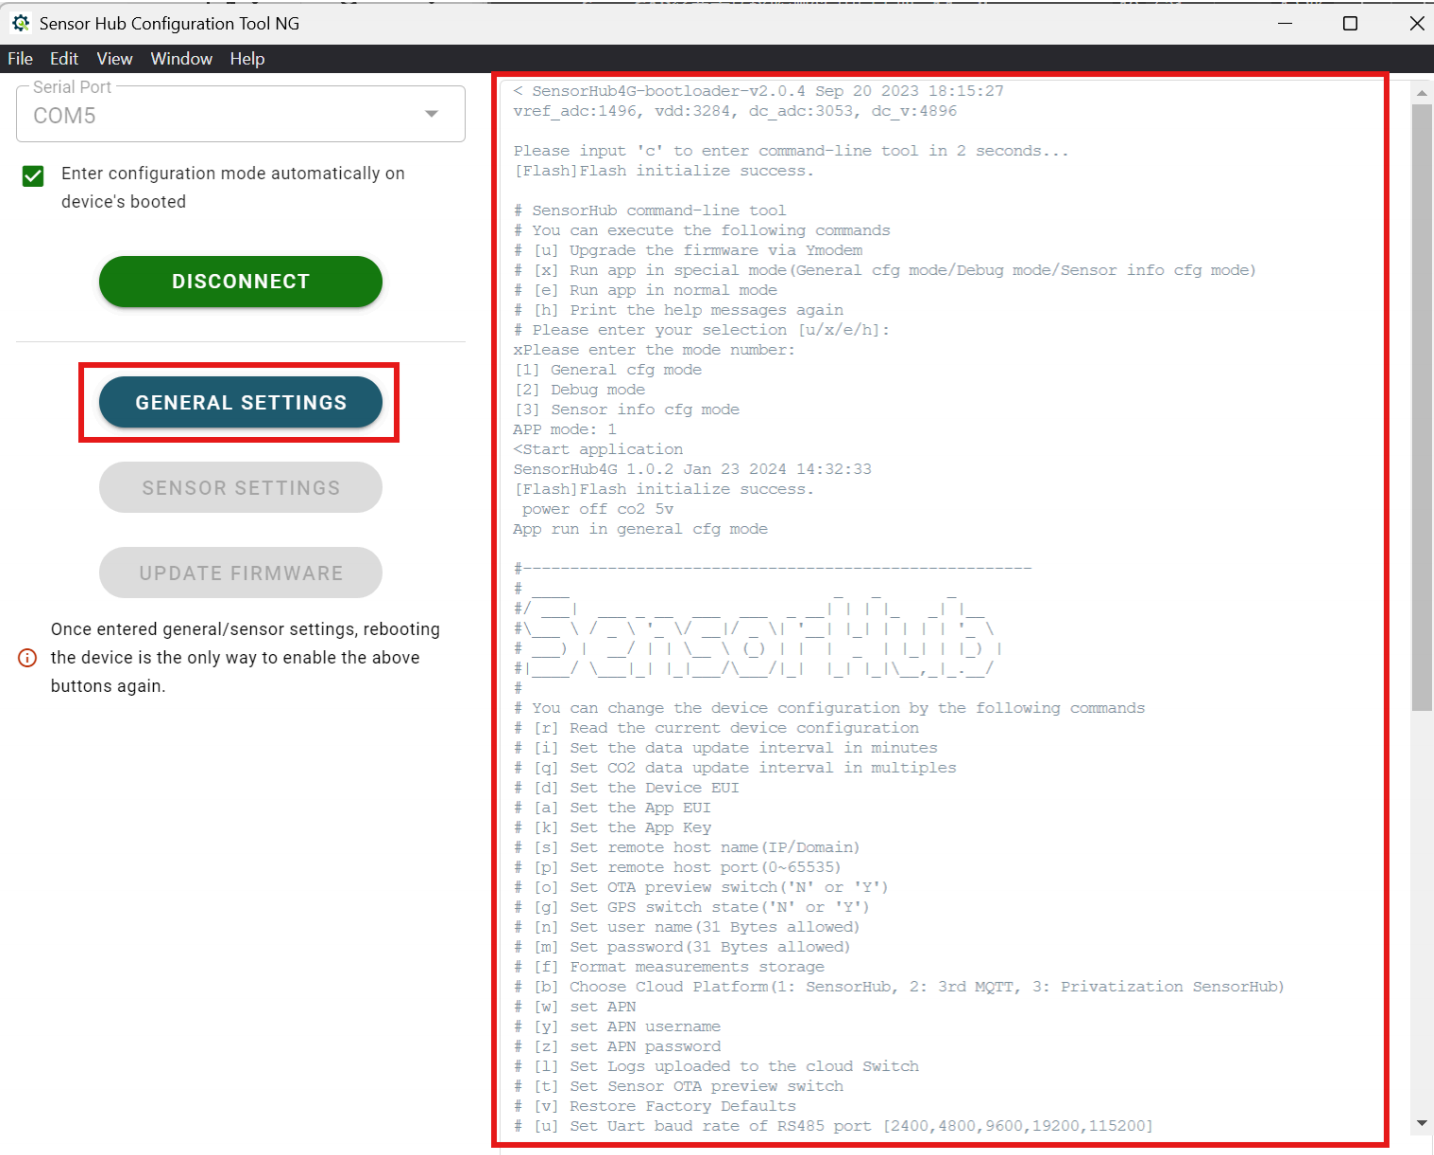
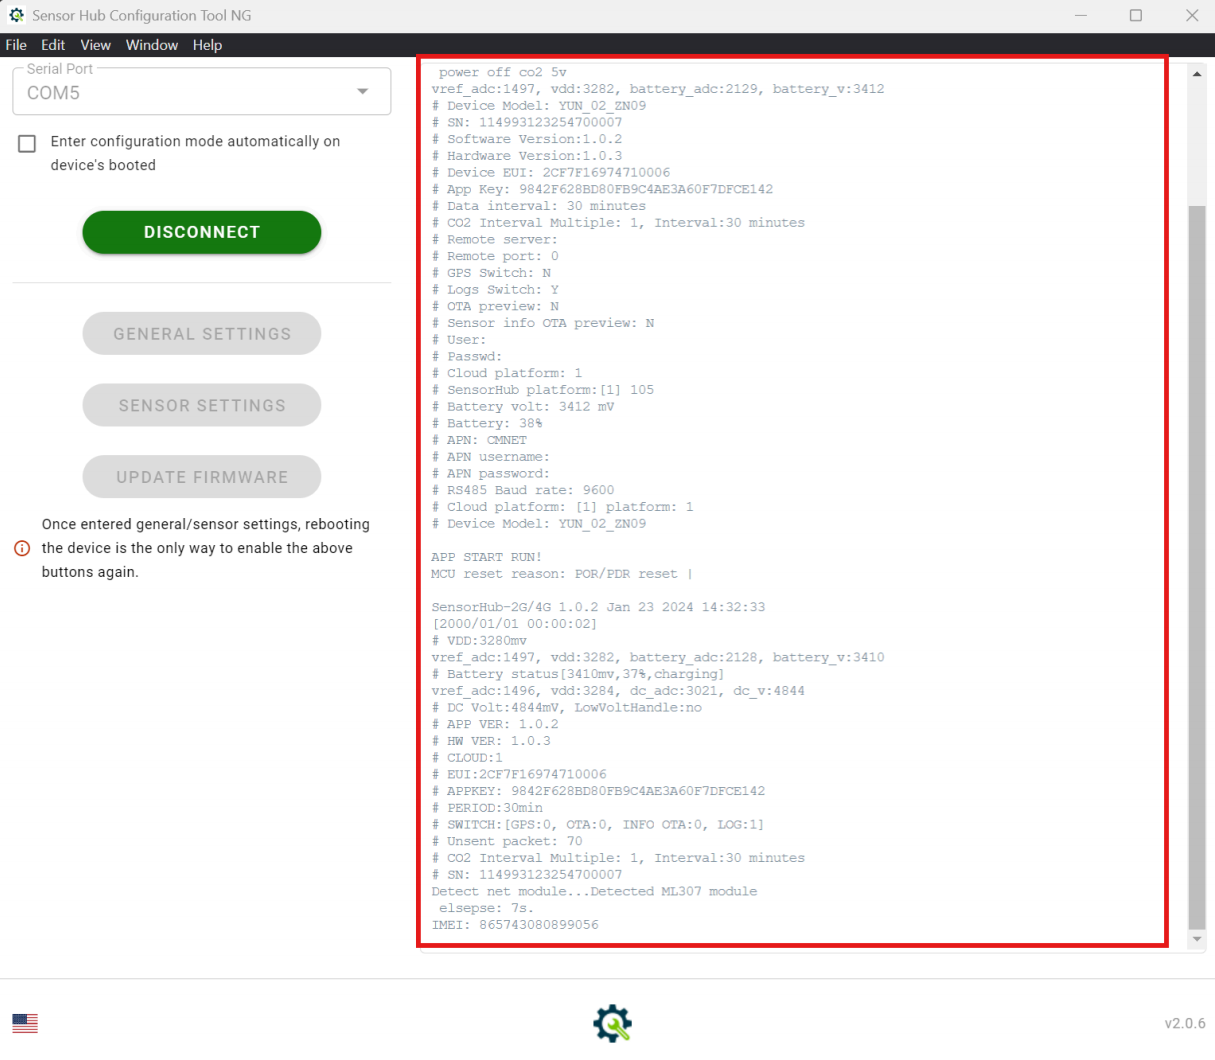
- Click "General Settings". Debug messages will appear on the right panel.
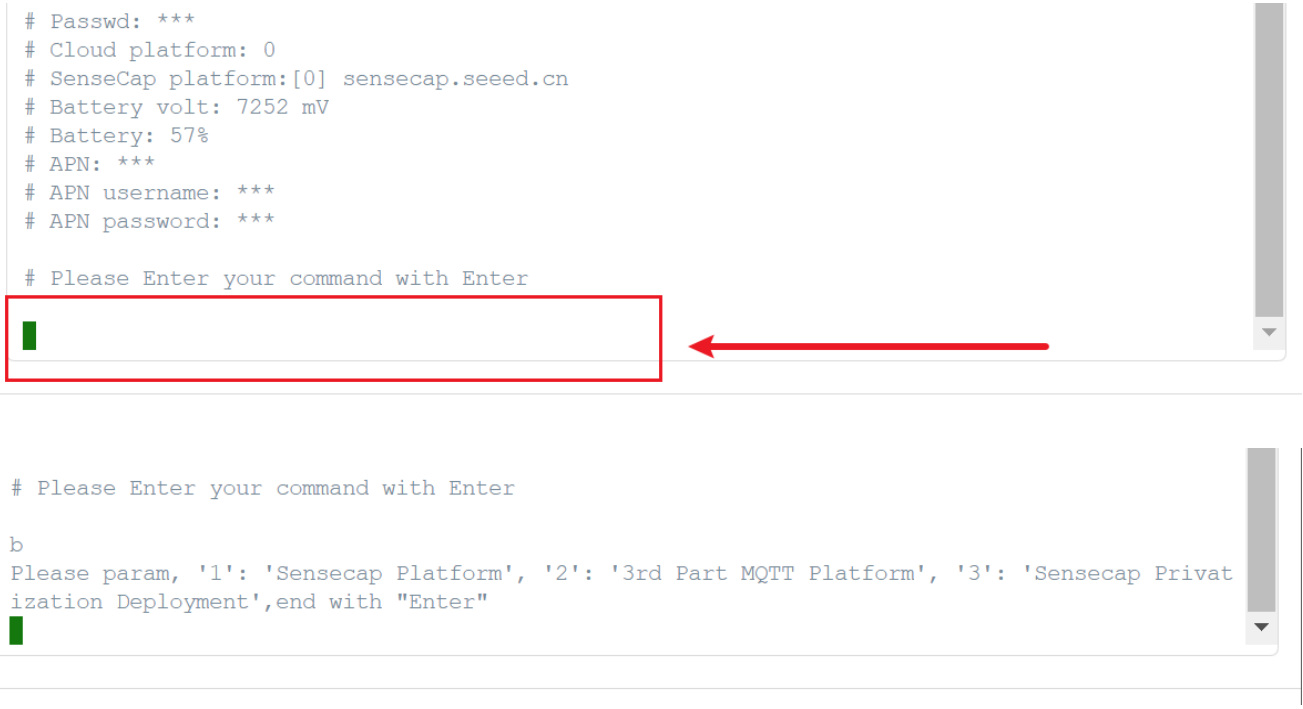
- Click the input area and type: b
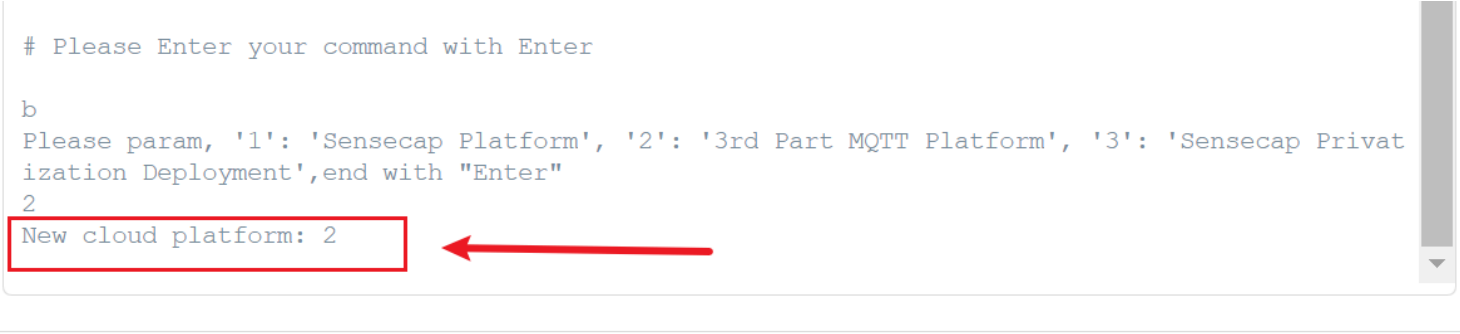
- After entering the command: 2, press Enter. It indicates that you have switched to the new cloud platform 2.
- 1 is the SenseCAP cloud platform (default)
- 2 is the user's third-party MQTT server
- 3 is the SenseCAP private deployment
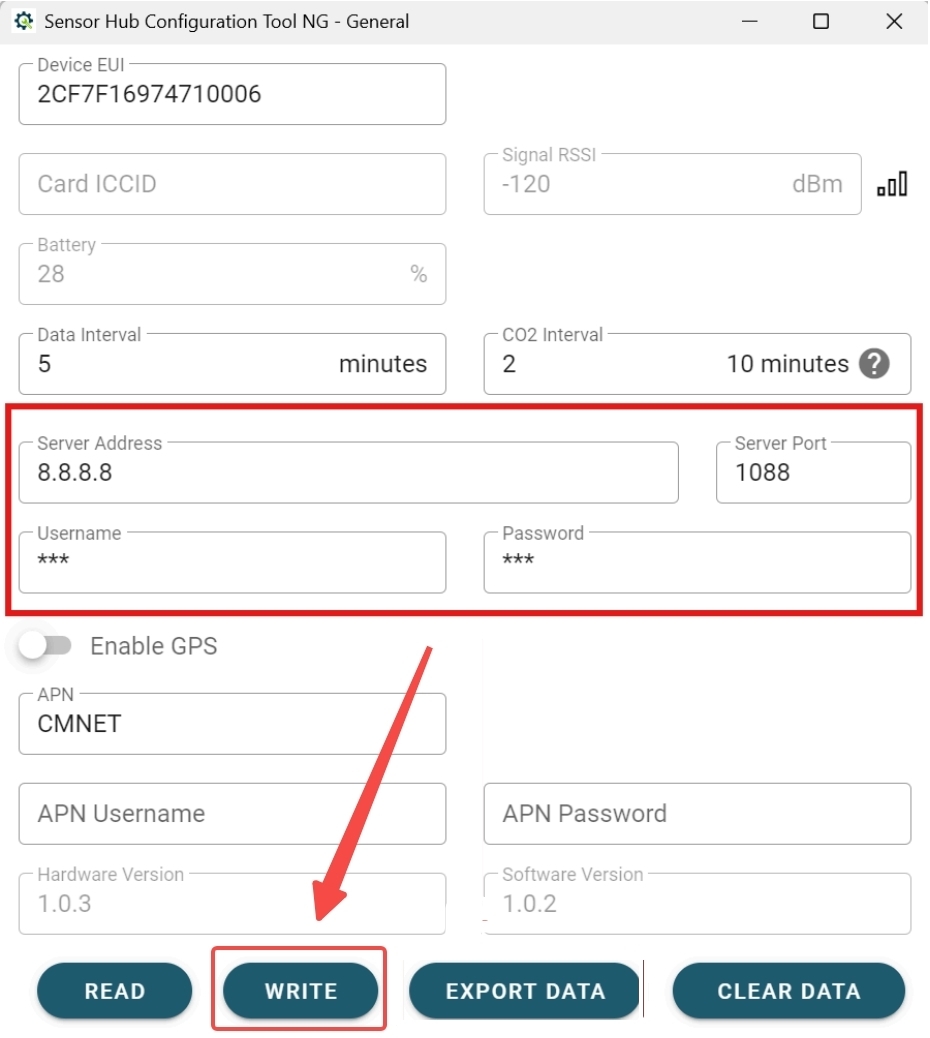
- Click "General Settings". Enter MQTT server address, port, username, and password. Click "Write".
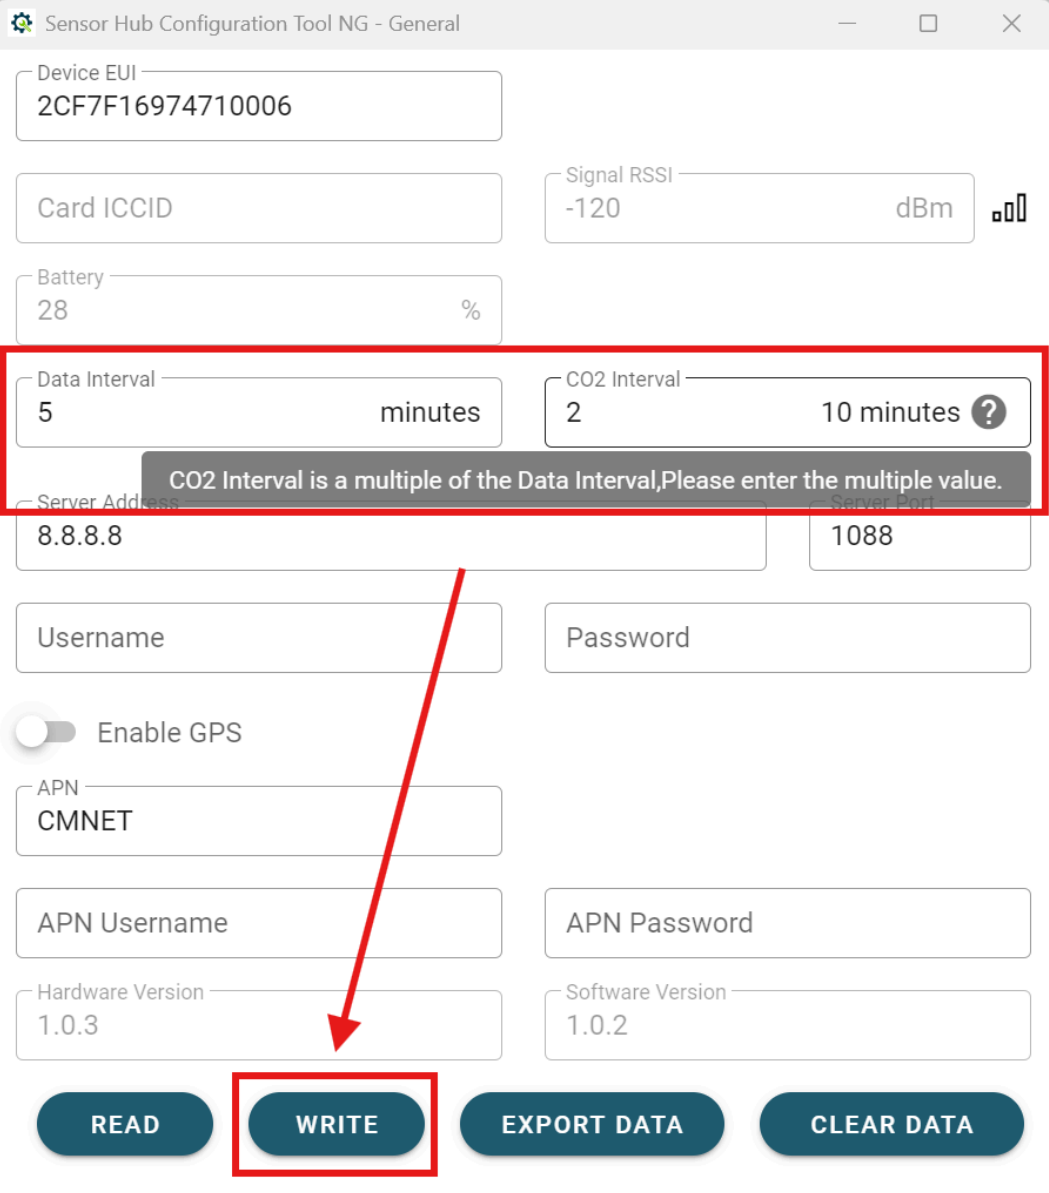
Data Reporting Interval & CO₂ Reporting Interval
- Reporting interval: for all sensors except CO₂
- CO₂ interval: multiple of the reporting interval
Click "Write" after setting.
Short intervals may cause the solar charging rate to be lower than the discharging rate, resulting in the device not being able to charge.
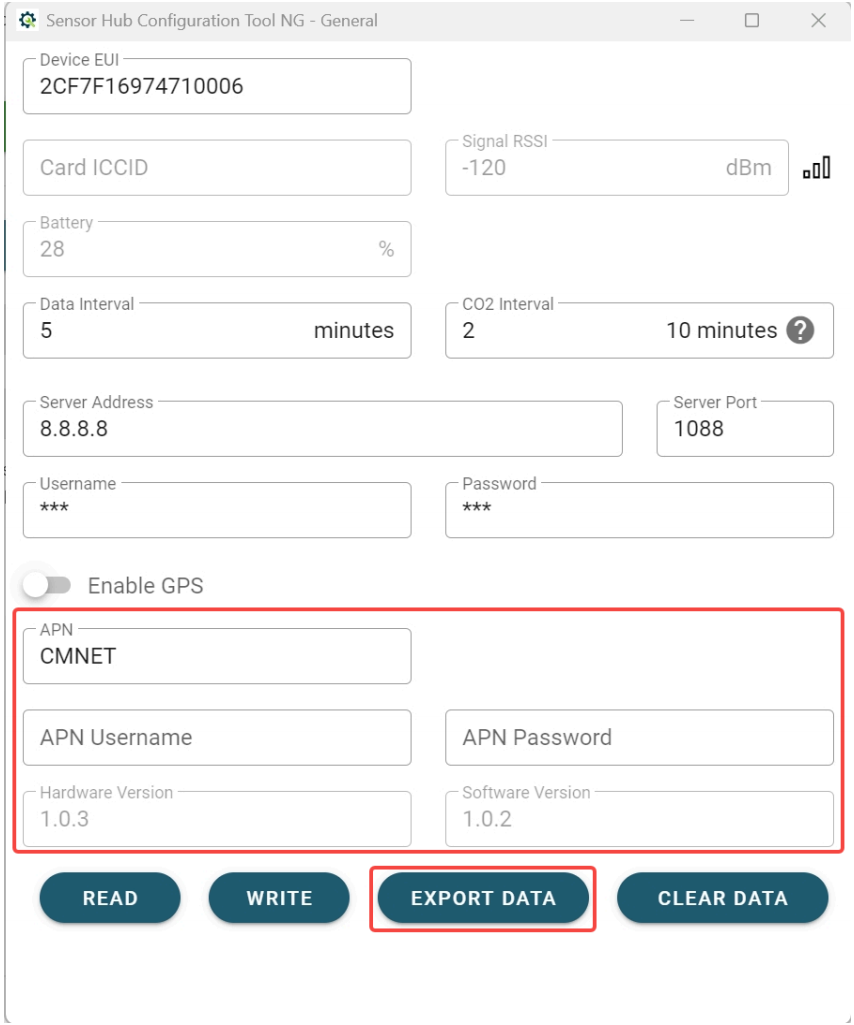
APN Configuration
Enter APN, username, and password if required. Default is automatic.
Export Cache Data
Click "Export Cache Data" to export all historical data.
Verify Data Upload to the Server
After configuring the server:
- Close the tool
- Disconnect the USB cable
- Press the metal button to restart the device
Wait a few minutes, and then subscribe to messages according to the topic format using the MQTT subscription tool to see if you can receive device data.
Troubleshooting
Abnormal Sensor Channel Status on Cloud Platform
- Usually caused by a sensor being disconnected during operation.
[ERROR] No sensor found. Is the sensor connected?
Please check the following:
- Verify that the sensor wiring sequence (positive/negative/RS485 A, B) is correct;
- Ensure that the sensor Modbus address matches the address set in "Sensor Settings";
- Verify that the sensor power supply type is configured correctly;
- Ensure that the warm-up time, startup time, and response timeout time meet the sensor requirements;
- Check that the function code and registers for the measured values are configured correctly;
[ERROR] RS485 err code: XX
Some sensors require a warm-up time. If communication is initiated before this warm-up time is reached, the sensor will return a function code error.
When testing a sensor, the first step is to check if the sensor exists. This check only requires waiting for the startup time, not the warm-up time. For example, if the sensor startup time is 1 second and the warm-up time is 5 minutes, and the data acquisition unit attempts to communicate after powering on the sensor but only waits 1 second, a function code error will be received. The window will display "[ERROR] rs485 err code". When acquiring data, the warm-up time will be waited before communication to ensure data acquisition.
Installation and Notes
Using the Built-in Battery in Low-Temperature Environments
- Discharge range: 0°C ~ 50°C
- Charging range: 0°C ~ 40°C
Please note that because the device has a built-in lithium battery, when using solar power or an adapter:
- If the ambient temperature remains below 0 °C, the battery will remain uncharged until the ambient temperature rises above 0 °C.
- During the period when charging is stopped, if the battery is completely depleted, the device cannot operate using solar power or an adapter. It will require waiting for the ambient temperature to rise above 0 °C and for the li-ion battery to charge to a safe level before the device can function normally.
Tech Support & Product Discussion
Thank you for choosing our products! We are here to provide you with different support to ensure that your experience with our products is as smooth as possible. We offer several communication channels to cater to different preferences and needs.