Seeed Studio XIAO RP2350 With MicroPython
Seeed Studio XIAO RP2350
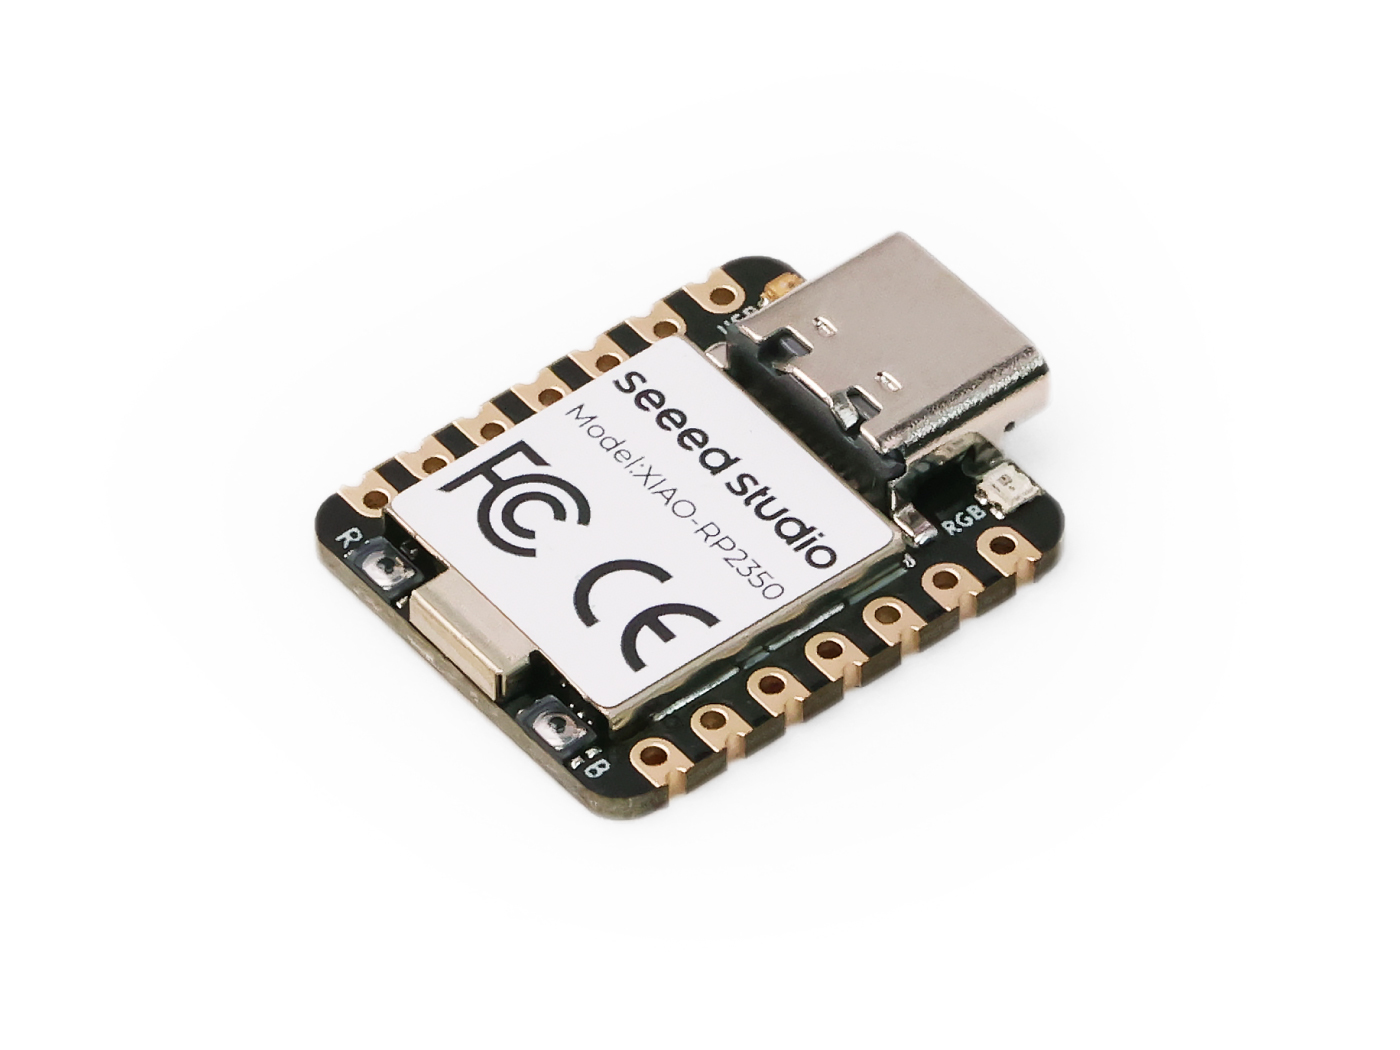
The XIAO RP2350 packs the power of the Raspberry Pi RP2350 (dual Cortex-M33 cores running at 150MHz with FPU, enhanced security and encryption) into the classic XIAO form factor. Measuring just 21x17.8mm, it features 19 multifunction GPIOs, an RGB LED, and a Battery Management System with ultra-low power consumption of 50μA, battery power supply, and direct battery voltage measurement. Thanks to the XIAO ecosystem, the XIAO RP2350 is compatible with a wide range of add-ons, including displays, LED matrix, Grove modules, CAN Bus, Vision AI sensors, and mmWave sensors. With native support for MicroPython, C, and C++, the XIAO RP2350 is perfect for developers of all levels looking to create compact, battery-powered applications for smart control, wearables, DIY keyboards, and more.
Platform Supported
The XIAO RP2350, powered by the RP2350, supports MicroPython and the C/C++ SDK provided by Raspberry Pi. This flexibility allows developers to choose their preferred programming language and environment for prototyping and development.
| C/C++ SDK | MicroPython |
|---|---|
Getting Started▶️
This page primarily focuses on MicroPython users. For those interested in learning SDK programming or for advanced users, you may want to start with the Raspberry Pi Pico-series C/C++ SDK. This guide will help you set up the environment and get started with example code. Additionally, you can visit XIAO RP2350 with C/C++ SDK for more specific instructions related to the XIAO RP2350.
Step 1: Installing MicroPython on XIAO RP2350
To install the MicroPython firmware on the XIAO RP2350, follow these steps:
Step 1.1. Download the MicroPython Firmware:
- Navigate to the MicroPython Downloads page.
- Download the latest
.uf2firmware file compatible with the XIAO RP2350.
-
The default firmware is for ARM architecture, if you want to use RISC-V, please use the corresponding firmware version in the link.
-
Please ensure you are using the latest firmware version, as older firmware may contain various software vulnerabilities.
Step 1.2 Enter BOOTSEL Mode:
You can enter BOOTSEL mode on the XIAO RP2350 using either of the two methods below:
- Method 1: Before Connecting to Computer
- Method 2: While Connected to Computer
- Press and Hold the BOOT Button:
While your XIAO RP2350 is disconnected from your computer, press and hold the BOOT button. - Connect to Your Computer:
While holding the BOOT button, connect the XIAO RP2350 to your computer using a USB cable. - Release the BOOT Button:
After the board is connected to your computer, you can release the BOOT button. The XIAO RP2350 should now be in BOOTSEL mode, and your computer will recognize it as a removable storage device.
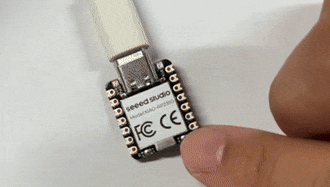
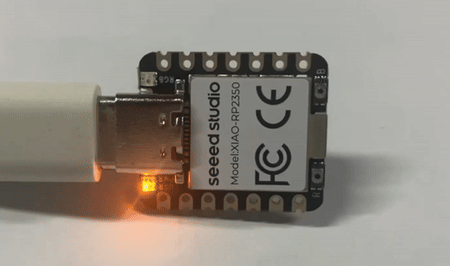
- Press and Hold the BOOT Button:
With the XIAO RP2350 already connected to your computer, press and hold the BOOT button. - Click the RESET Button:
While still holding the BOOT button, press and release the RESET button, which is labeled "B" on the bottom right corner of the board in the image above. - Release the BOOT Button:
After pressing the RESET button, release the BOOT button. The XIAO RP2350 should now be in BOOTSEL mode, and your computer will recognize it as a removable storage device.
Step 1.3. Install the Firmware:
- Drag and drop the downloaded
.uf2file into the XIAO RP2350's removable storage drive. - The board will automatically reboot after the file is copied, completing the firmware installation.
Step 2: Installing Thonny IDE
MicroPython is an interpreted language similar to Python. However, unlike Python, MicroPython runs directly on the hardware (bare-metal), providing an interactive prompt (REPL) to execute commands immediately, as well as the ability to run and import scripts from the built-in filesystem.
To connect to the XIAO RP2350 board and start writing and running your Python code, you can use any terminal tool that supports serial connections, such as minicom, PuTTY, electerm, warp, and more. For a more user-friendly experience, you can use Thonny for its ease of use, integrated features, and beginner-friendly interface. This way, you can enjoy writing and running your Python code directly on the device.
Thonny IDE is a beginner-friendly Python editor that's excellent for MicroPython development. Here's how to install it:
-
Download Thonny:
- Visit the Thonny Download Page.
- Choose the appropriate installer for your operating system (Windows, macOS, or Linux) and download it.
-
Install Thonny:
- Run the downloaded installer.
- Follow the on-screen instructions to complete the installation process.
-
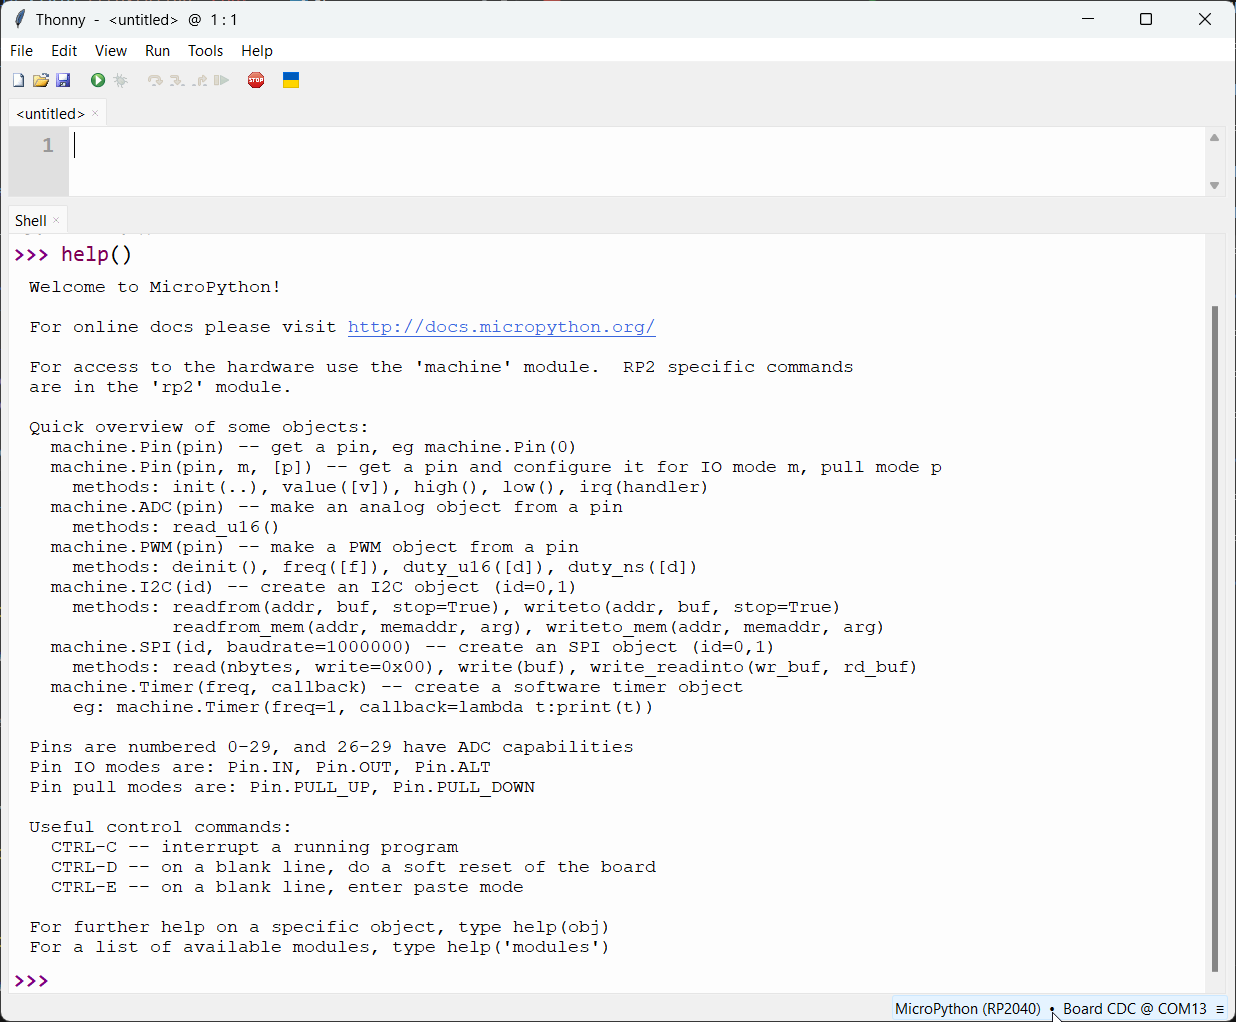
Configure Thonny for MicroPython:
- Open Thonny IDE.
- Look at the bottom-right corner of the Thonny window.
- Click on the interpreter selection area.
- Choose 'MicroPython (RP2040)' from the dropdown.
- Ensure the correct Port is selected—Thonny typically auto-detects it.
You're now ready to write and upload MicroPython code to your XIAO RP2350 using Thonny IDE!
- Thonny IDE
- PuTTY Console
If your device is ready with MicroPython, let's start with a simple project:
Let's Make It Blink! ✨
Getting the board to blink an LED is often the first program everyone runs. The same goes for the XIAO RP2350.
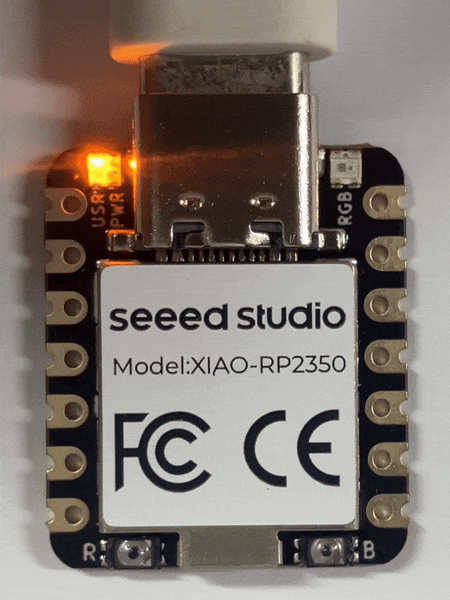
The USER LED, the yellow LED on the XIAO RP2350, is connected to GPIO25/D19 according to the schematic diagram.
For all XIAO family boards, the USER LED will light up when set to a low level and turn off when set to a high level.
- Blink
- Fading a LED
from machine import Pin # Import the Pin class from the machine module
from time import sleep  # Import the sleep function from the time module

# Initialize GPIO25 as an output pin, which controls the USER LED
led = Pin(25, Pin.OUT)

# Turn off the LED initially
led.value(1) # led.on() -> high level -> light off
sleep(0.5) # Wait for 0.5 seconds

# Turn on the LED
led.value(0) # led.off() -> low level -> light on
sleep(0.5) # Wait for 0.5 seconds

# Enter an infinite loop
while True:
    # Toggle the LED state (on to off or off to on)
    led.toggle()
    # Print the current state of the LED
    print(f"LED {'ON' if led.value() == 0 else 'OFF'}")
    sleep(0.5) # Wait for 0.5 seconds before the next toggle
 |  |
# Example using PWM to fade an LED.

import time
from machine import Pin, PWM

# Construct PWM object, with LED on Pin(25).
pwm = PWM(Pin(25))

# Set the PWM frequency.
pwm.freq(1000)

# Fade the LED in and out a few times.
duty = 0
direction = 1
for _ in range(8 * 256):
    duty += direction
    if duty > 255:
        duty = 255
        direction = -1
    elif duty < 0:
        duty = 0
        direction = 1
    pwm.duty_u16(duty * duty)
    time.sleep(0.001)
Once you have copied the code into Thonny IDE, as shown in the image below, simply click the Run current script button or press F5. This will execute the code snippet and you'll see the LED on the XIAO RP2350 start to blink.
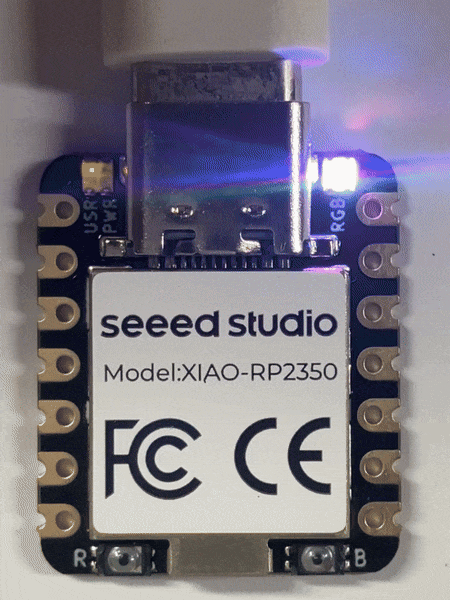
Play with RGB LEDs
The XIAO RP2350 comes with a built-in RGB LED that you can control using MicroPython. Below is an example of how to cycle through different colors:
import array, time, random
from machine import Pin
import rp2

NUM_LEDS = 1
LED_PIN = 22  # PICO_DEFAULT_WS2812_PIN
POWER_PIN = 23  # PICO_DEFAULT_WS2812_POWER_PIN

# Global brightness variable (0.0 to 1.0)
BRIGHTNESS = 0.1

@rp2.asm_pio(sideset_init=rp2.PIO.OUT_LOW, out_shiftdir=rp2.PIO.SHIFT_LEFT, autopull=True, pull_thresh=24)
def ws2812():
    T1 = 2
    T2 = 5
    T3 = 3
    wrap_target()
    label("bitloop")
    out(x, 1)               .side(0)    [T3 - 1]
    jmp(not_x, "do_zero")   .side(1)    [T1 - 1]
    jmp("bitloop")          .side(1)    [T2 - 1]
    label("do_zero")
    nop()                   .side(0)    [T2 - 1]
    wrap()

# Set up the power pin
power_pin = Pin(POWER_PIN, Pin.OUT)
power_pin.value(1)  # Turn on power to the LED

# Create the StateMachine with the ws2812 program, outputting on LED_PIN
sm = rp2.StateMachine(0, ws2812, freq=8_000_000, sideset_base=Pin(LED_PIN))

# Start the StateMachine, it will wait for data on its FIFO.
sm.active(1)

def set_led_color(color):
    sm.put(array.array("I", [color]), 8)

def random_color():
    return random.randint(0, 255) | (random.randint(0, 255) << 8) | (random.randint(0, 255) << 16)

def interpolate(color1, color2, factor):
    r1, g1, b1 = color1 & 255, (color1 >> 8) & 255, (color1 >> 16) & 255
    r2, g2, b2 = color2 & 255, (color2 >> 8) & 255, (color2 >> 16) & 255
    r = int(r1 + factor * (r2 - r1))
    g = int(g1 + factor * (g2 - g1))
    b = int(b1 + factor * (b2 - b1))
    return (b << 16) | (g << 8) | r

def apply_brightness(color, brightness):
    r, g, b = color & 255, (color >> 8) & 255, (color >> 16) & 255
    r = int(r * brightness)
    g = int(g * brightness)
    b = int(b * brightness)
    return (b << 16) | (g << 8) | r

print("Starting random color transitions with adjustable brightness...")

# Main loop
current_color = random_color()
while True:
    next_color = random_color()
    for i in range(100):  # 100 steps for smooth transition
        transition_color = interpolate(current_color, next_color, i / 100)
        final_color = apply_brightness(transition_color, BRIGHTNESS)
        set_led_color(final_color)
        time.sleep_ms(20)  # Adjust this value to change transition speed
    current_color = next_color

    # Optionally, you can change the brightness here for demo purposes
    # BRIGHTNESS = random.random()  # This will set a random brightness each cycle
Battery & Power Management
Is it possible to read the battery voltage without extra components? Yes, with the XIAO RP2350, it’s easier than ever. In previous XIAO family members, such as the XIAO ESP32C3, reading the battery voltage required manually connecting to A0 with a resistor.
But with the XIAO RP2350, this process is simplified. You can now directly use the A3/GPIO29 pin to read the battery voltage level, streamlining your design and development. Just remember to set the GPIO19 pin to high, as it’s necessary to enable battery level reading.
Follow along with this code snippet to read the battery voltage using the Pico SDK:
- MicroPython
- C/C++ SDK
from machine import Pin, ADC
import time

# Function to initialize the GPIO pin for enabling battery voltage reading
def init_gpio():
    enable_pin = Pin(19, Pin.OUT)
    enable_pin.value(1)  # Set the pin to high to enable battery voltage reading

def main():
    print("ADC Battery Example - GPIO29 (A3)")

    init_gpio()  # Initialize the enable pin
    adc = ADC(Pin(29))  # Initialize the ADC on GPIO29

    conversion_factor = 3.3 / (65535)  # Conversion factor for 12-bit ADC and 3.3V reference

    while True:
        result = adc.read_u16()  # Read the ADC value
        voltage = result * conversion_factor * 2  # Calculate the voltage, considering the voltage divider (factor of 2)
        print("Raw value: 0x{:03x}, voltage: {:.2f} V".format(result, voltage))
        time.sleep(0.5)  # Delay for 500 milliseconds

if __name__ == '__main__':
    main()
#include <stdio.h>
#include "pico/stdlib.h"
#include "hardware/gpio.h"
#include "hardware/adc.h"

// Function to initialize the GPIO pin for enabling battery voltage reading
void init_gpio() {
    const int enable_pin = 19; // Pin to enable battery voltage reading

    gpio_init(enable_pin); // Initialize the pin
    gpio_set_dir(enable_pin, GPIO_OUT); // Set the pin as output
    gpio_put(enable_pin, 1); // Set the pin to high to enable battery voltage reading
}

int main() {
    stdio_init_all(); // Initialize standard input/output
    printf("ADC Battery Example - GPIO29 (A3)\n");

    init_gpio(); // Initialize the enable pin
    adc_init(); // Initialize the ADC

    // Initialize the ADC GPIO pin (GPIO29)
    adc_gpio_init(29);
    // Select ADC input 3 (corresponding to GPIO29)
    adc_select_input(3);

    while (1) {
        // 12-bit conversion, assume max value == ADC_VREF == 3.3 V
        const float conversion_factor = 3.3f / (1 << 12); // Conversion factor for 12-bit ADC and 3.3V reference
        uint16_t result = adc_read(); // Read the ADC value
        // Calculate the voltage, considering the voltage divider (factor of 2)
        printf("Raw value: 0x%03x, voltage: %f V\n", result, result * conversion_factor * 2);
        sleep_ms(500); // Delay for 500 milliseconds
    }
}
Expansion and Applications
The XIAO series has a huge range of peripherals and peripheral accessories for you to learn and use, whether you want a colorful screen that allows for perfect interaction, an integrated board with bright and simple RGB lights, and so on, just waiting to be checked out.
As a member of the XIAO family, the XIAO RP2350 does the same. Of course, to make better use of the extra pins drawn out, new peripherals and boards will keep coming along, fully utilizing the performance for which it was created.
- 🌟 Expanding with Accessories
Discover the wide range of add-ons and modules compatible with the XIAO Family, from displays and LED matrices to Grove modules and sensors, and learn how they can enhance your projects.
Community and Learning
Furthermore, dive into the vibrant Raspberry Pi community to expand your knowledge and discover new project ideas. Leverage community-shared resources, forums, and tutorials to enhance your experience with the XIAO RP2350. In addition to the Seeed Studio Wiki, here are a few other recommended places to learn:
- Raspberry Pi Documentation: Get reliable and up-to-date info on the RP2350.
- Raspberry Pi Forums: Engage with other enthusiasts, ask questions, and share your projects.
- XIAO GitHub Repository: Explore the official XIAO repository for more centralized documentation and more interaction with our team, Join Us!
- r/embedded on Reddit: Join the embedded systems community, share insights, and discuss various topics.
- Pico Topic on GitHub: Explore repositories and discussions related to the Pico.
- Hackster.io: Discover projects and tutorials related to various hardware platforms, including XIAO and Raspberry Pi.
- Instructables: Find DIY projects and step-by-step guides for creating with XIAO and other hardware.
- Element14 Community: Participate in discussions, webinars, and projects related to electronics and embedded systems.
And more, you're always welcome to share your projects on our Seeed Studio Discord and Seeed Studio Forum. These platforms provide an excellent opportunity to connect with other makers, get feedback, and find inspiration. Whether you need help troubleshooting an issue, want to show off your latest creation, or simply wish to be part of a supportive community, Seeed Studio's Discord and Forum are the perfect places to engage and collaborate.
Tech Support & Product Discussion
Thank you for choosing our products! We are here to provide you with different support to ensure that your experience with our products is as smooth as possible. We offer several communication channels to cater to different preferences and needs.