Getting started for Home Assistant with reCamera
Introduction
Home Assistant is an open source smart home platform system, and user can easily connect their own Internet of Things devices to the system for unified management. However, the main special point of the Home Assistant is not just to realize the view of various sensing devices, but to realize the automatic linkage of cross-platform device, only such a smart home platform is enough to have vitality.
Hardware Preparation
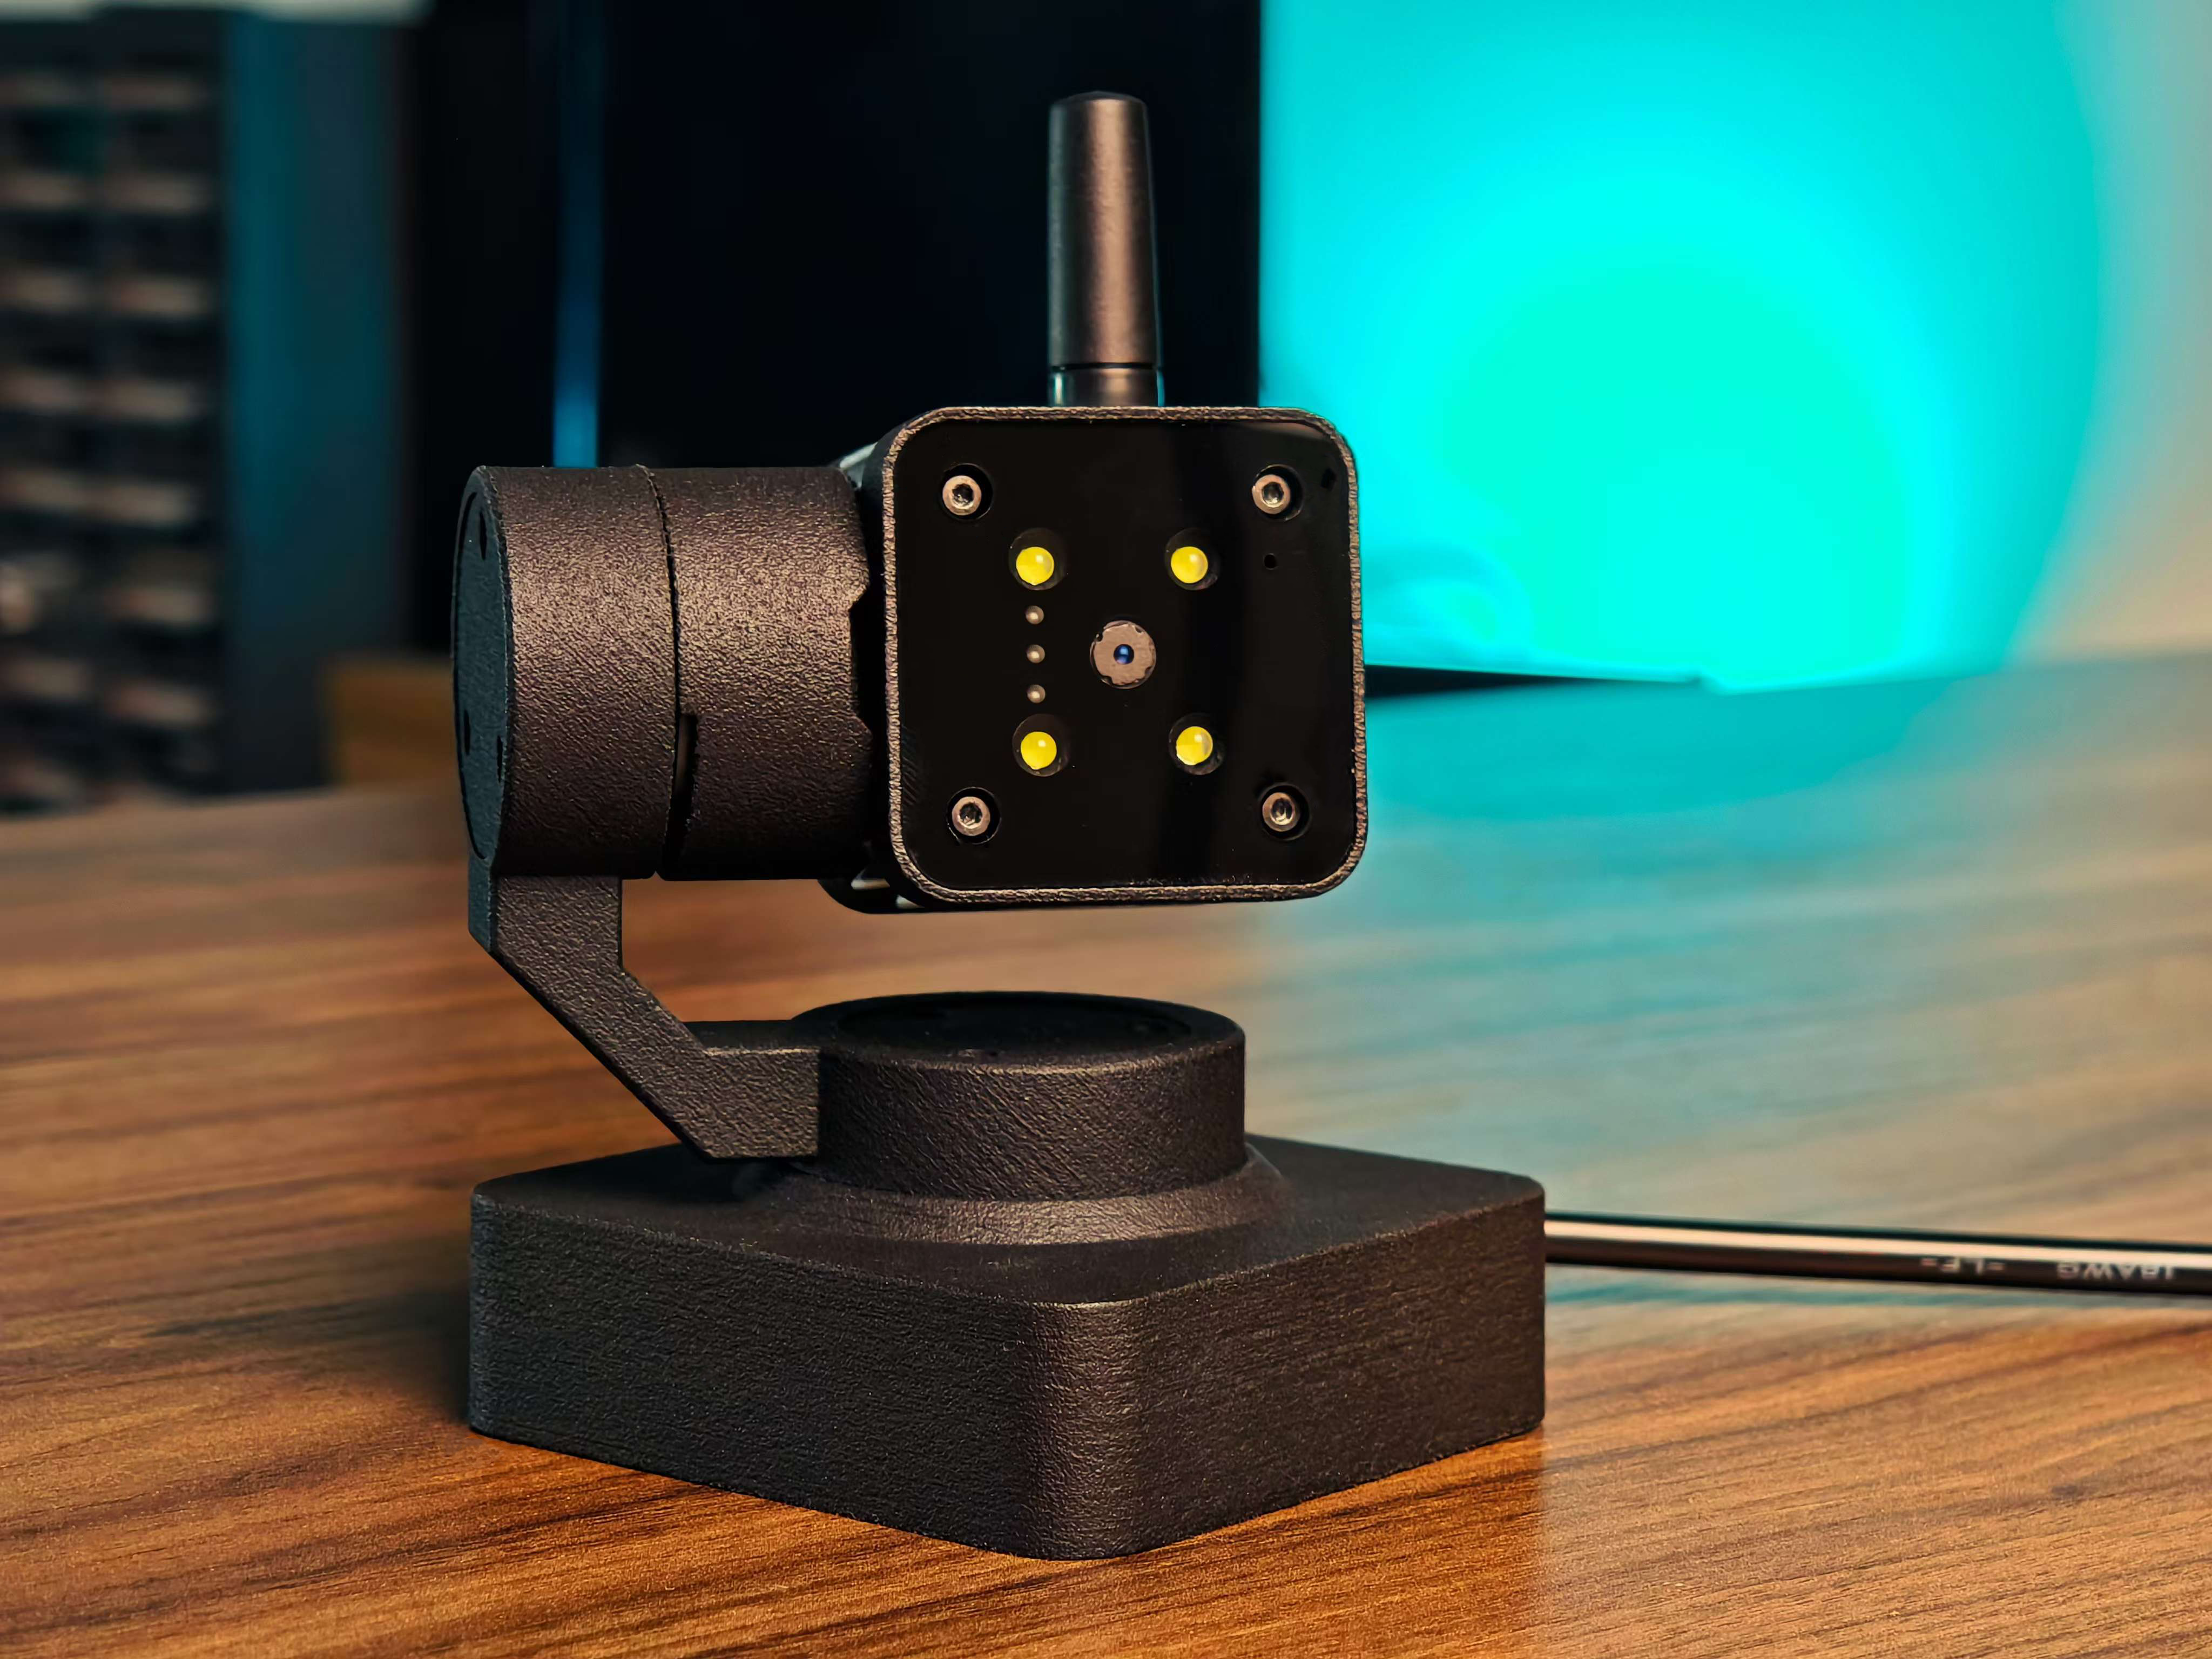
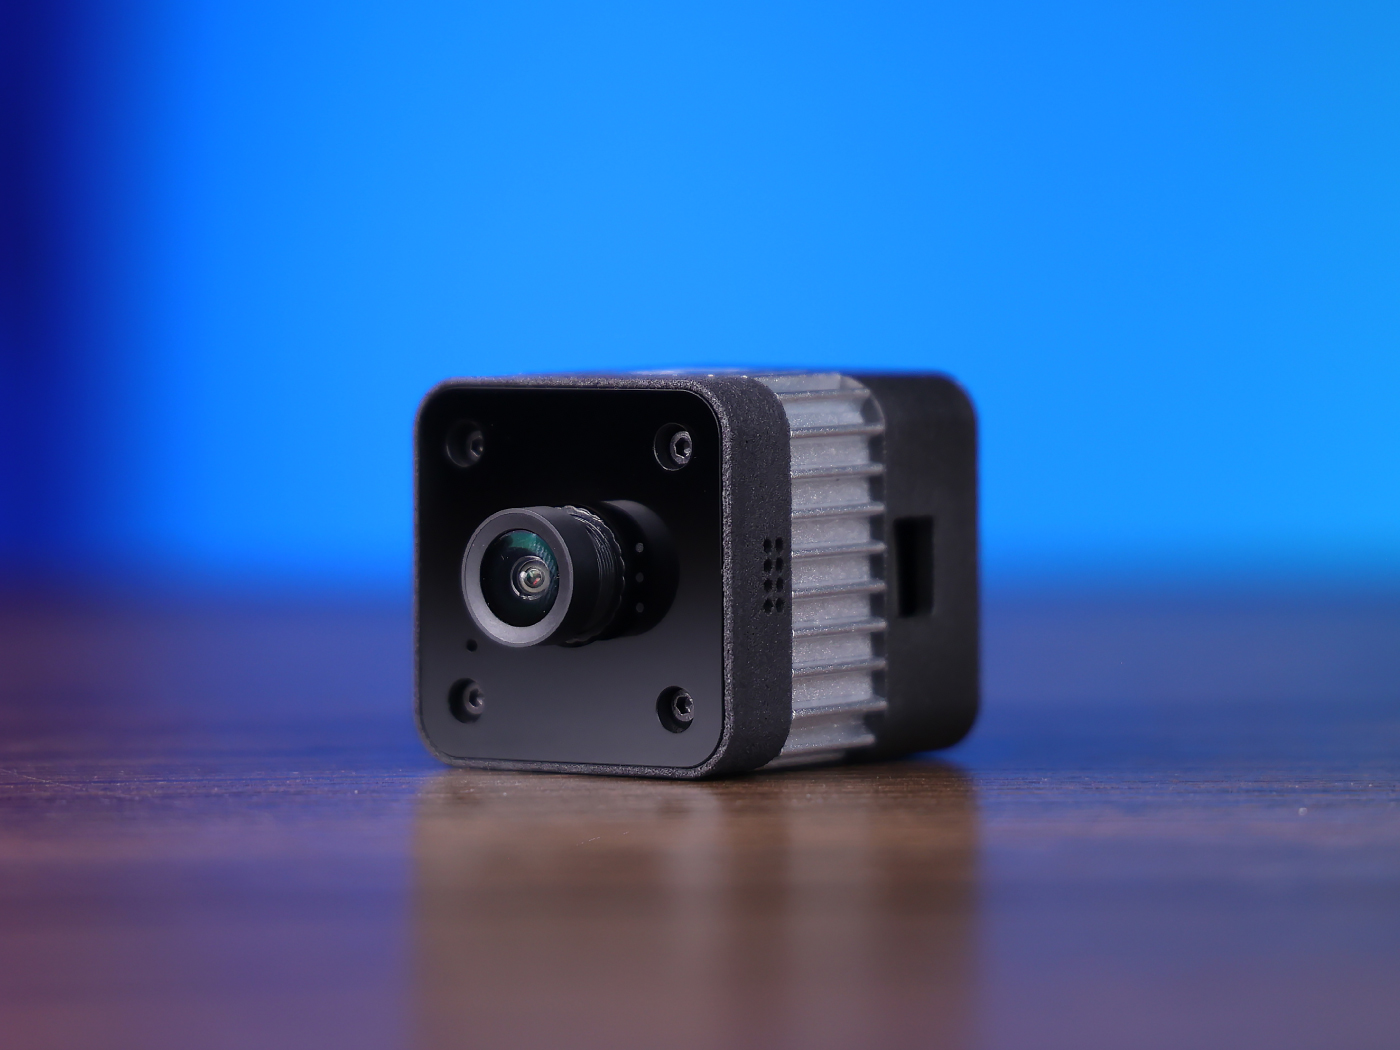
One reCamera (it can be any of the 2002 series, HQ POE version, or pan-tilt version, but note that the POE version does not have WiFi functionality and requires a switch with POE function to be connected in the same network segment)
one reComputer (any version is fine, here I use reComputer AI R2130-12 as an example)
one computer
| reCamera 2002 Series | reCamera Gimbal | reCamera HQ POE | reComputer AI R2000 Series |
|---|---|---|---|
 |  |  |  |
Installation of Home Assistant (taking the reComputer AI R2130-12 as an example)
System preparation
If Home Assistant has already been installed, then please directly proceed to the "Find the path of the configuration file" step for the subsequent configuration.
1.update system
sudo apt update && sudo apt upgrade -y
2.Install necessary dependencies
sudo apt install -y ca-certificates curl gnupg lsb-release
Install Docker
1.Official script installation
curl -fsSL https://get.docker.com | sh
2.Allow the current user to use Docker
sudo usermod -aG docker $USER
3.Restart the system to make the permissions take effect
sudo reboot
4.Verify installation
docker run hello-world
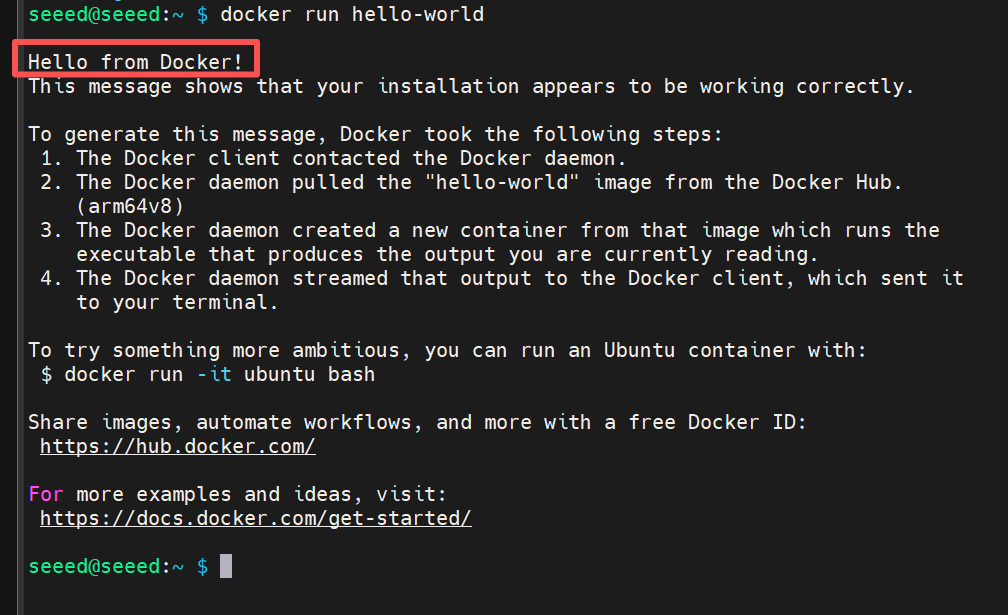
If you see the words "Hello from Docker!", it indicates that the installation was successful.
Install Home Assistant (Container Mode)
- Create the mount directory For the purpose of persisting the configuration file:
mkdir -p ~/homeassistant/config
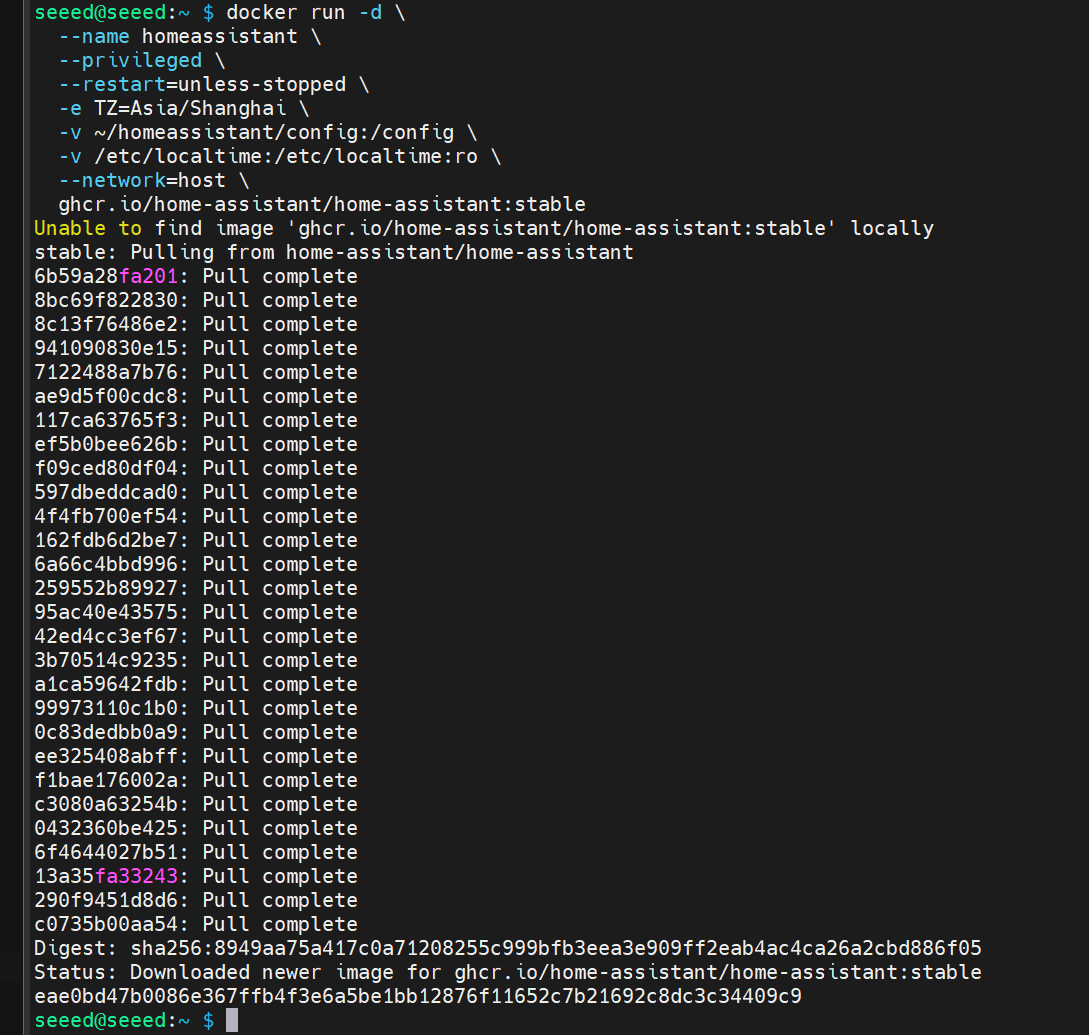
- Start the container
Run the following command to start Home Assistant
(this step may take a while, the speed depends on your network)
docker run -d \
  --name homeassistant \
  --privileged \
  --restart=unless-stopped \
  -e TZ=Asia/Shanghai \
  -v ~/homeassistant/config:/config \
  -v /etc/localtime:/etc/localtime:ro \
  --network=host \
  ghcr.io/home-assistant/home-assistant:stable
Parameter Explanation:
--network=host: Home Assistant can directly access the host network (necessary for automatic device discovery)-v ~/homeassistant/config:/config: Save configuration files--restart=unless-stopped: Automatically restart--privileged: Enable hardware access (USB Zigbee/Z-Wave, etc.)
Access Home Assistant
- Check IP
hostname -I
- Access the browser
After Docker is started, wait for 1 to 2 minutes, and then access it in the browser:
http://<your IP>:8123
eg:
http://192.168.1.88:8123
The initial startup will lead you to the initialization interface. You can then start creating an account and configuring your smart home.
Find the path of the configuration file
All the configurations of Home Assistant are saved in:
/homeassistant/config/
You can view it through the following instructions:
cd /homeassistant/config
ls
You will see these documents:
automations.yaml configuration.yaml scripts.yaml ...
Configure automation to receive ReCamera data
- Install the nano editor
sudo apt install nano -y
- Edit
automations.yaml:
sudo nano /homeassistant/config/automations.yaml
Replace the content with:
- alias: "ReCamera Detection"
  description: "Receive the detection results from ReCamera"
  trigger:
    - platform: webhook
      webhook_id: recamera_detection

  action:
    - service: input_text.set_value
      target:
        entity_id: input_text.recamera_people_raw
      data:
        value: "{{ trigger.json.payload }}"

  mode: single
Save and Exit:
- Ctrl + O → Enter (Save)
- Ctrl + X (Exit)
- Edit configuration.yaml:
sudo nano /homeassistant/config/configuration.yaml
Replace the content with:
# ==========================
# Basic Configuration of Home Assistant
# ==========================

# Load default integration (do not delete)
default_config:

# Load the front-end theme
frontend:
  themes: !include_dir_merge_named themes

# Load the independent configuration file
automation: !include automations.yaml
script: !include scripts.yaml
scene: !include scenes.yaml


# ==========================
# ReCamera Physical Configuration Section
# ==========================

# Define an "input_text" entity to store the latest detection results from ReCamera.
input_text:
  recamera_people_raw:
    name: Original detection result of ReCamera
    max: 255
    icon: mdi:account-group  # Optional: Display as "Group" icon

# Define a template sensor to display the detection results of ReCamera
sensor:
  - platform: template
    sensors:
      recamera_people_count:
        friendly_name: "ReCamera Personnel Counting Function"
        value_template: "{{ states('input_text.recamera_people_raw') }}"
        icon_template: mdi:camera-outline
Save and Exit:
- Ctrl + O → Enter (Save)
- Ctrl + X (Exit)
- After saving and exiting, restart Home Assistant
docker restart homeassistant
The configuration of reCamera (taking the 2002w version as an example)
After inserting the reCamera into the computer, access 192.168.42.1
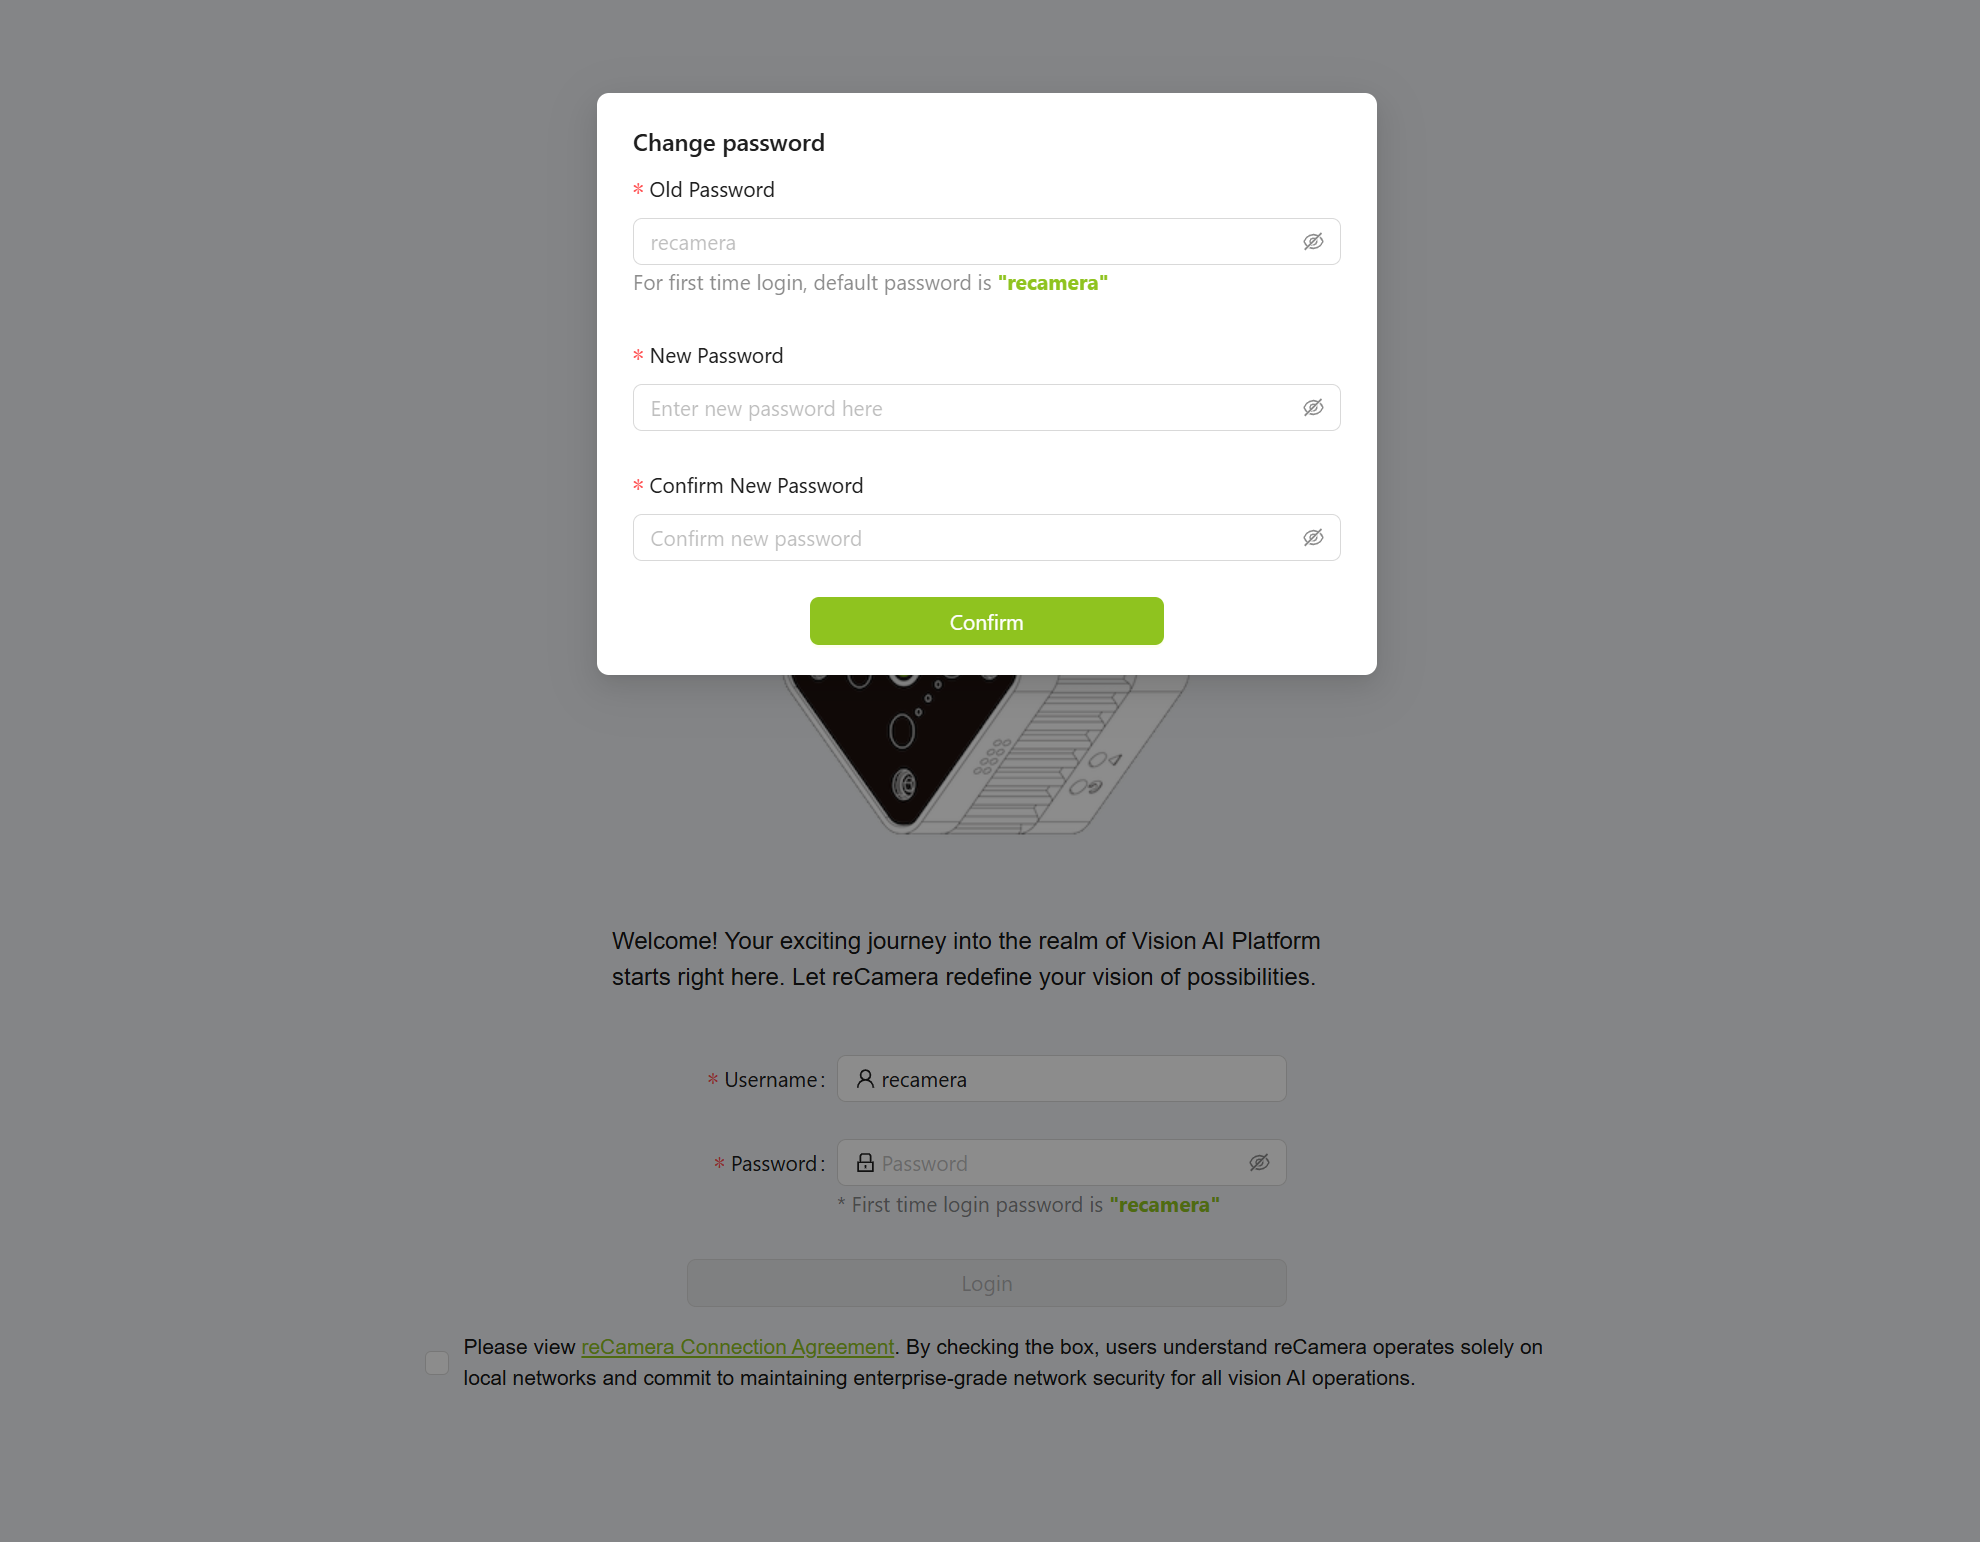
If the interface cannot be opened continuously, please refer to the Factory Reset section to reset the device. After the reset, visit 192.168.42.1 again. After the reset, you will be prompted to change the password.
After logging in, click the bottom right corner to enter "Workspace"
After entering the Workspace, configure the nodes.
Four new nodes have been added: "debug1", "debug2", "function1" and "HTTP request".
debug1 and debug2 are used to observe the output information, optional or not; function1 is used to process data; the HTTP request node is used to send data to Home Assistant

Next, we need to modify the original node "Model Info Handle" so that it only outputs the quantity of a specific detection target.
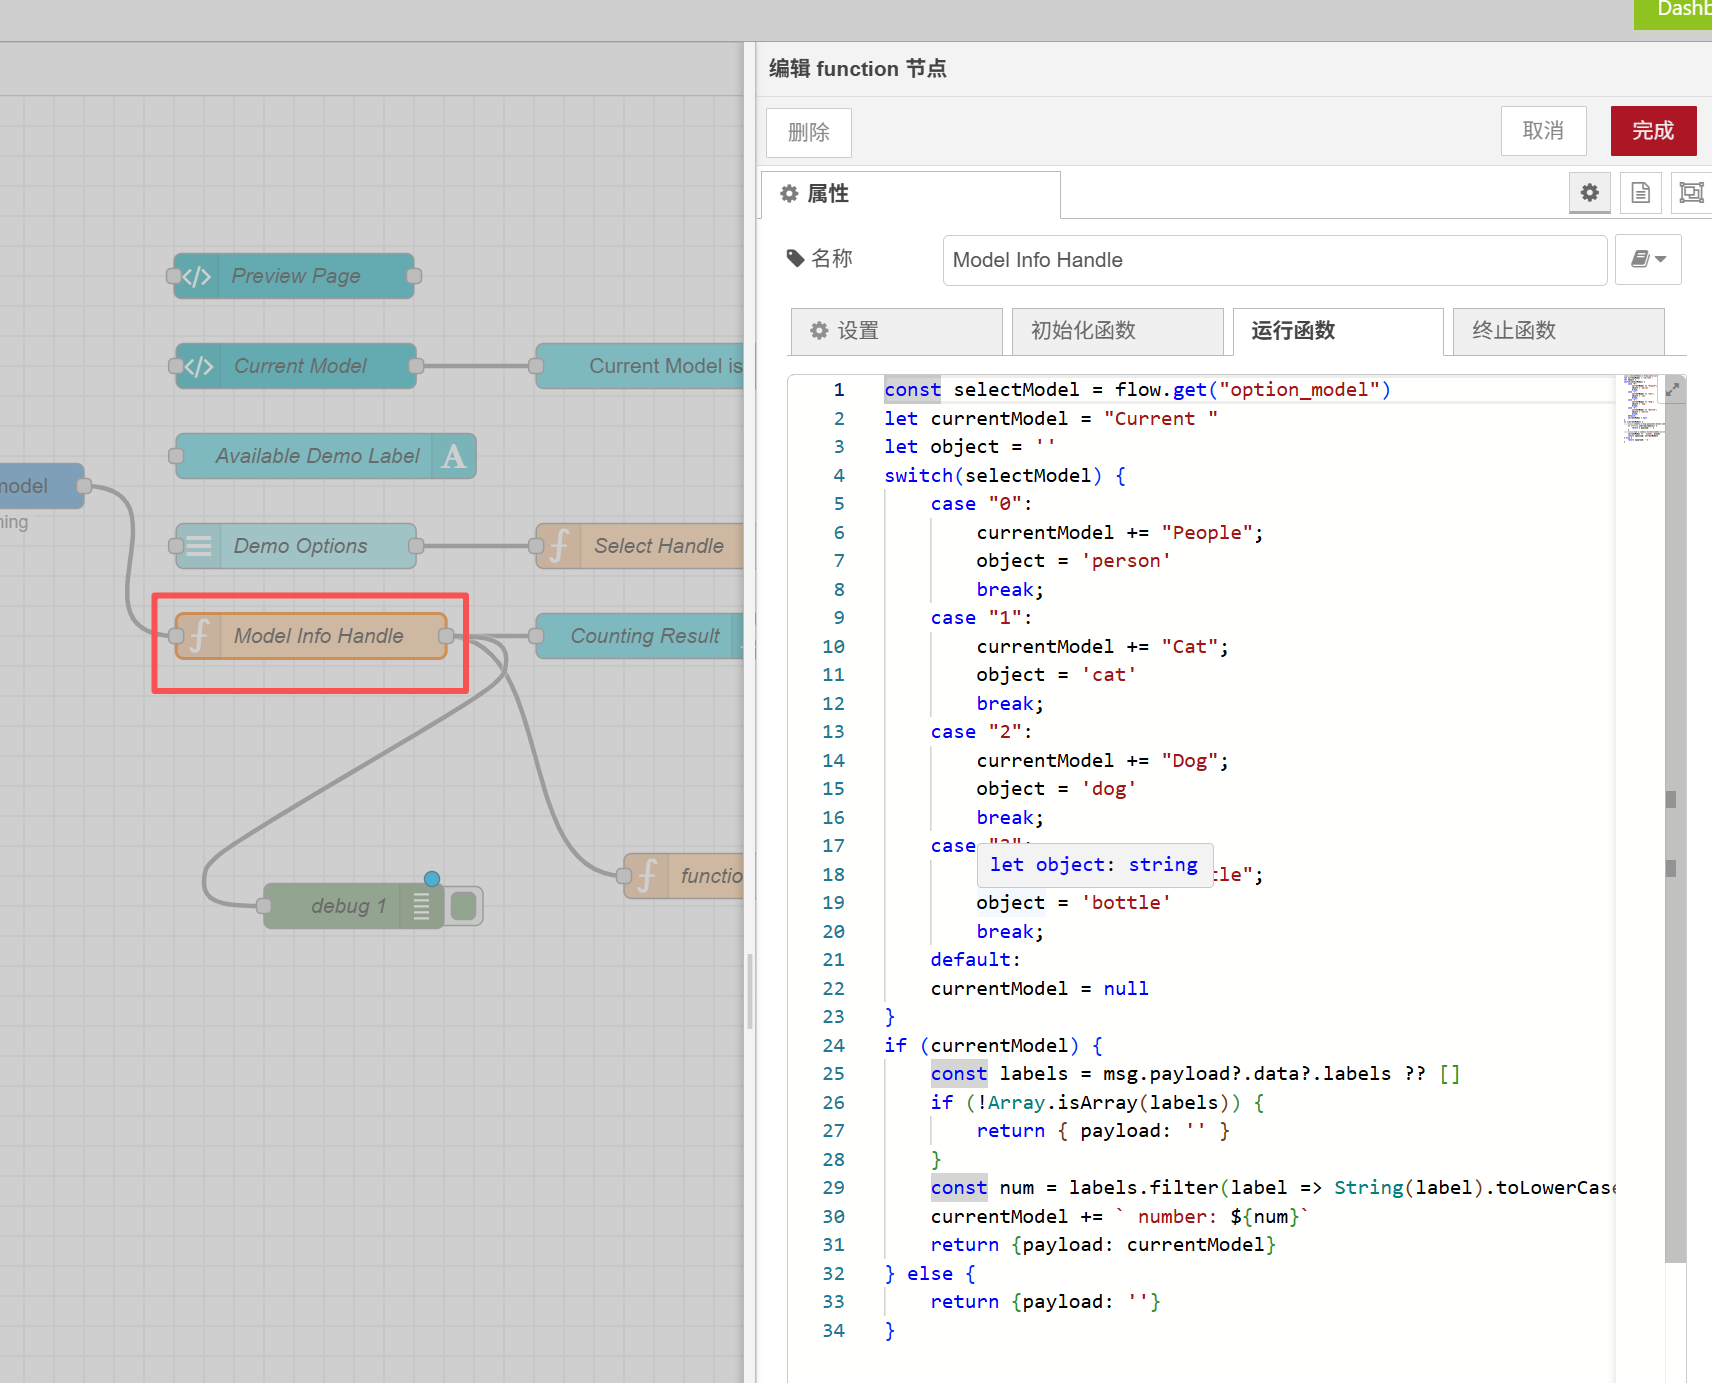
Double-click to open this node and replace the code with the following content:
let currentModel = "Current People";
const object = 'person';

const labels = msg.payload?.data?.labels ?? [];

if (!Array.isArray(labels)) {
    return { payload: '' };
}

const num = labels.filter(label => String(label).toLowerCase() === object).length;
currentModel += ` number: ${num}`;

return { payload: currentModel };
After making the modifications, click the "Finish" button on the top right corner.
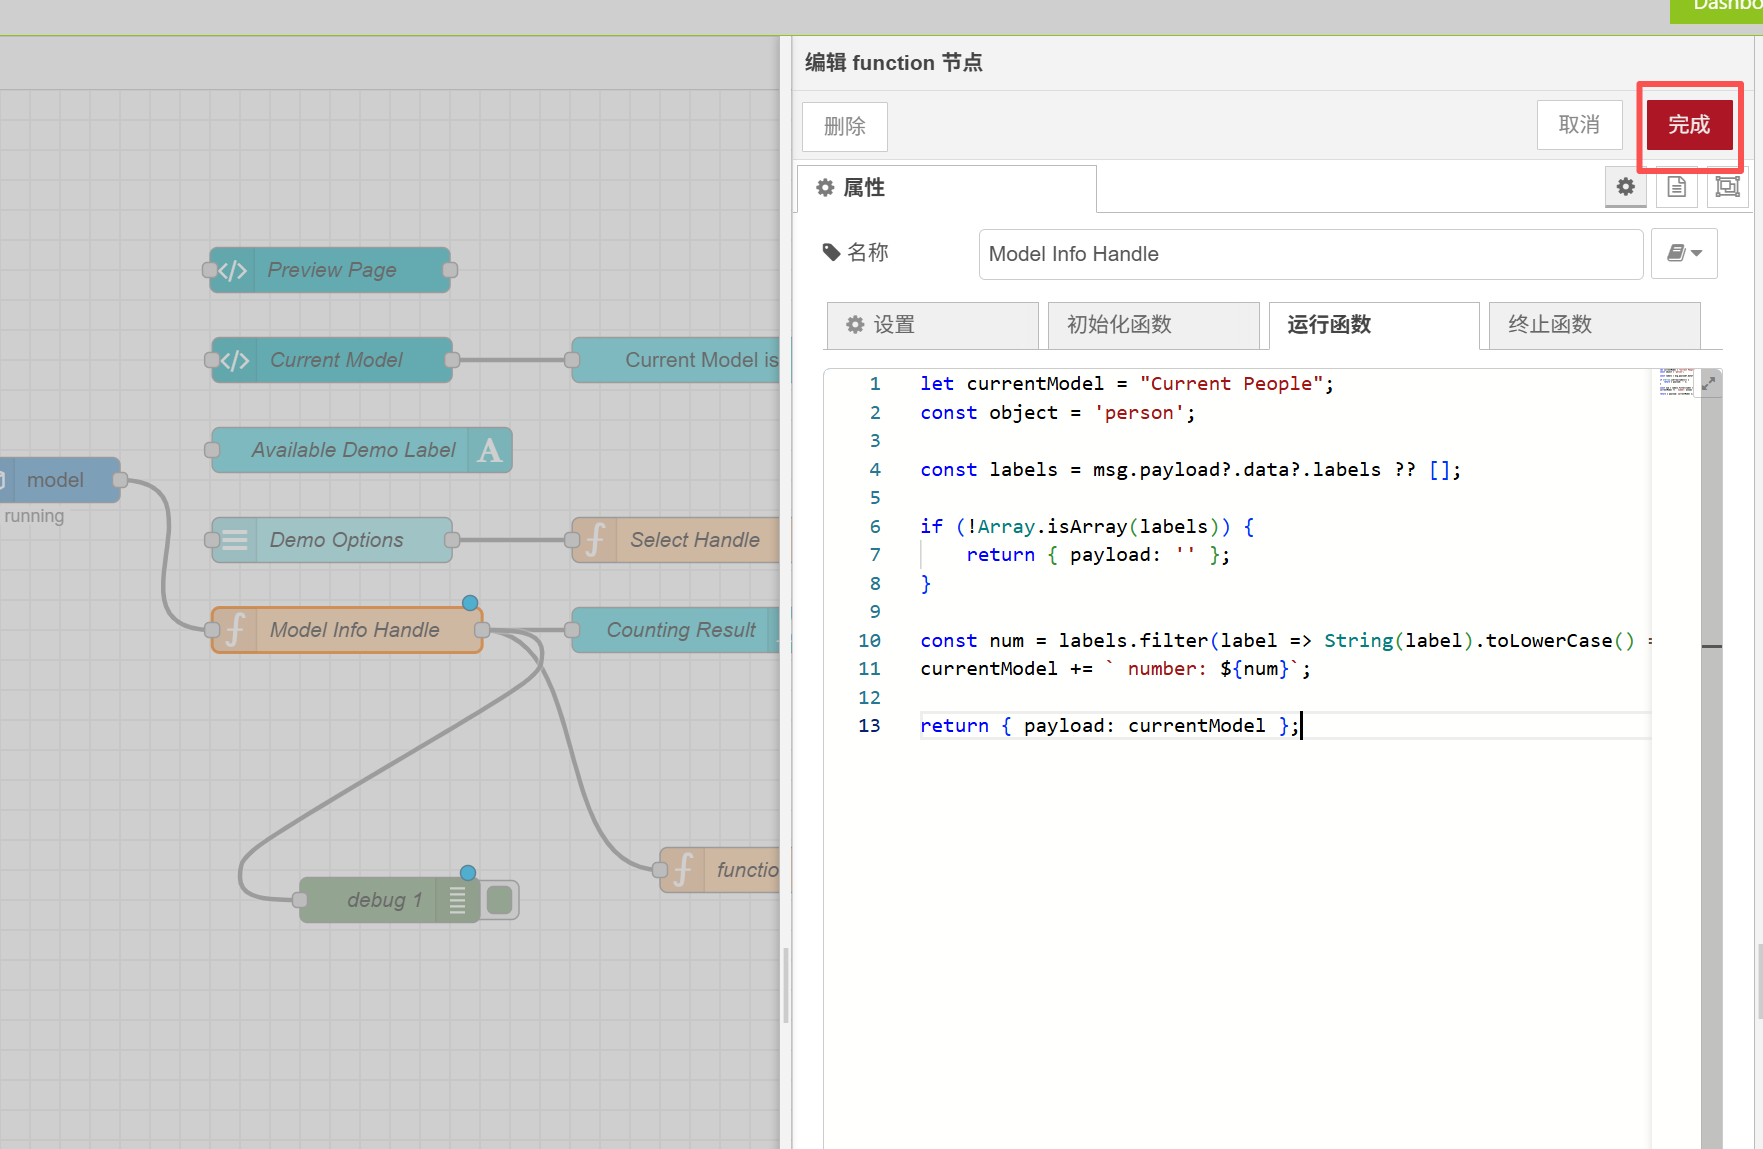
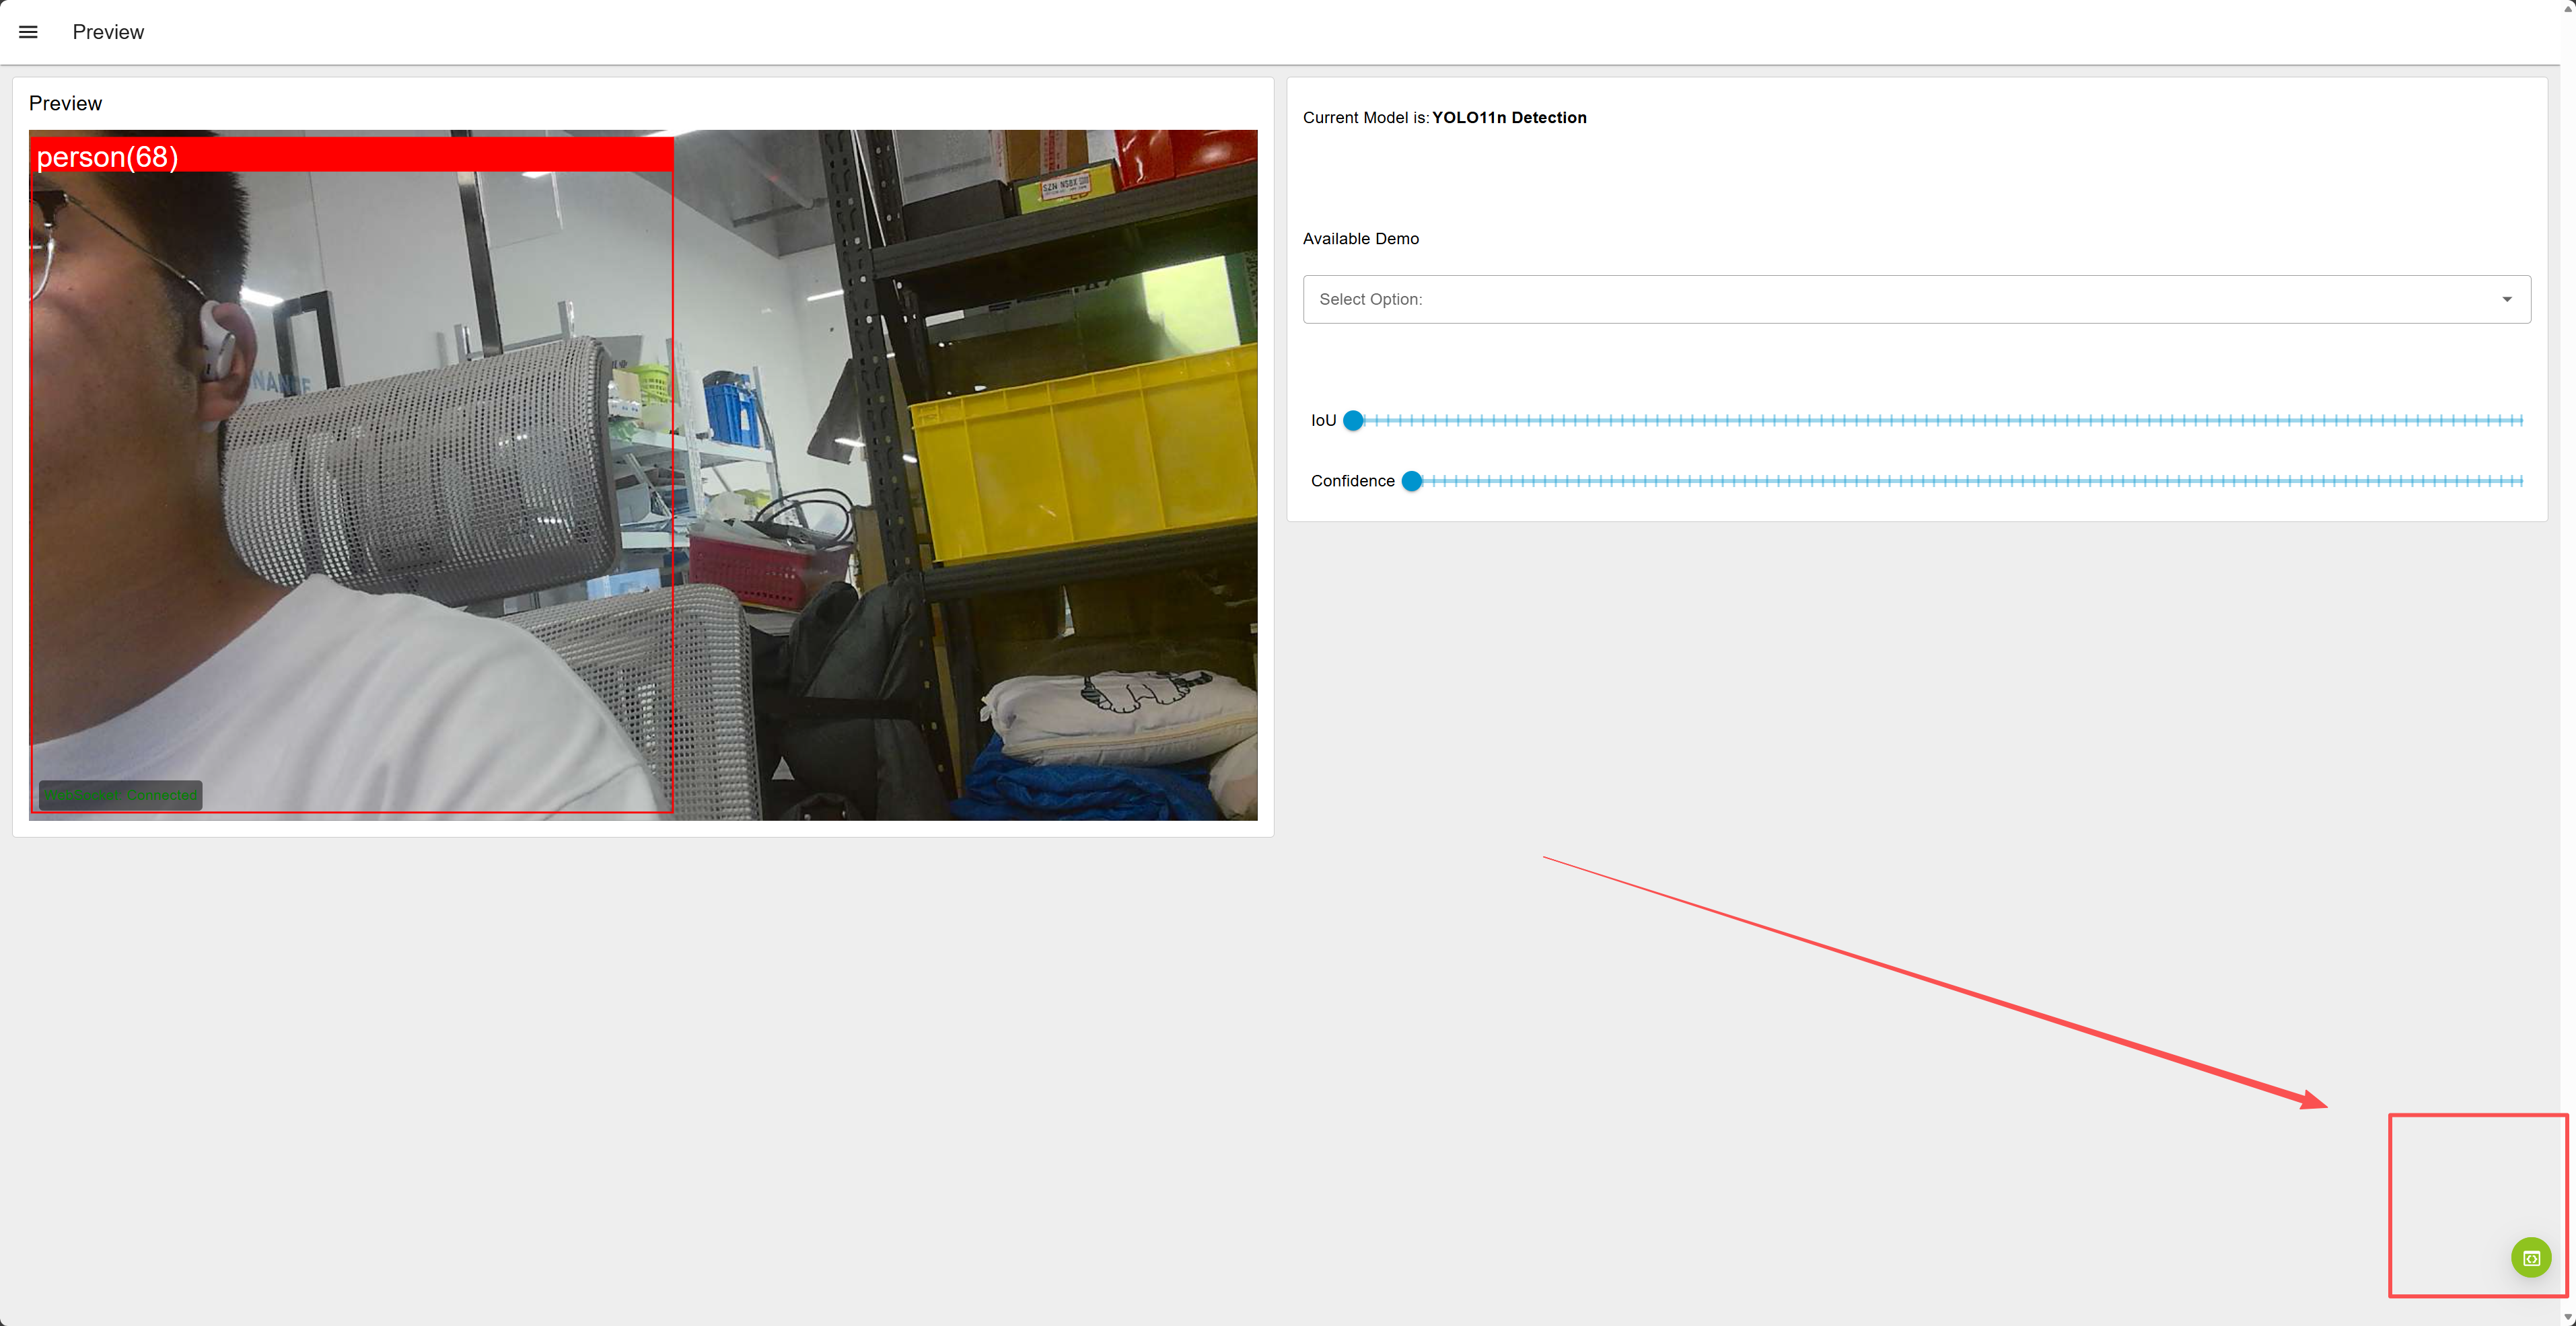
This code only outputs the number of detected persons. If you want to make changes, you can modify the detection object.
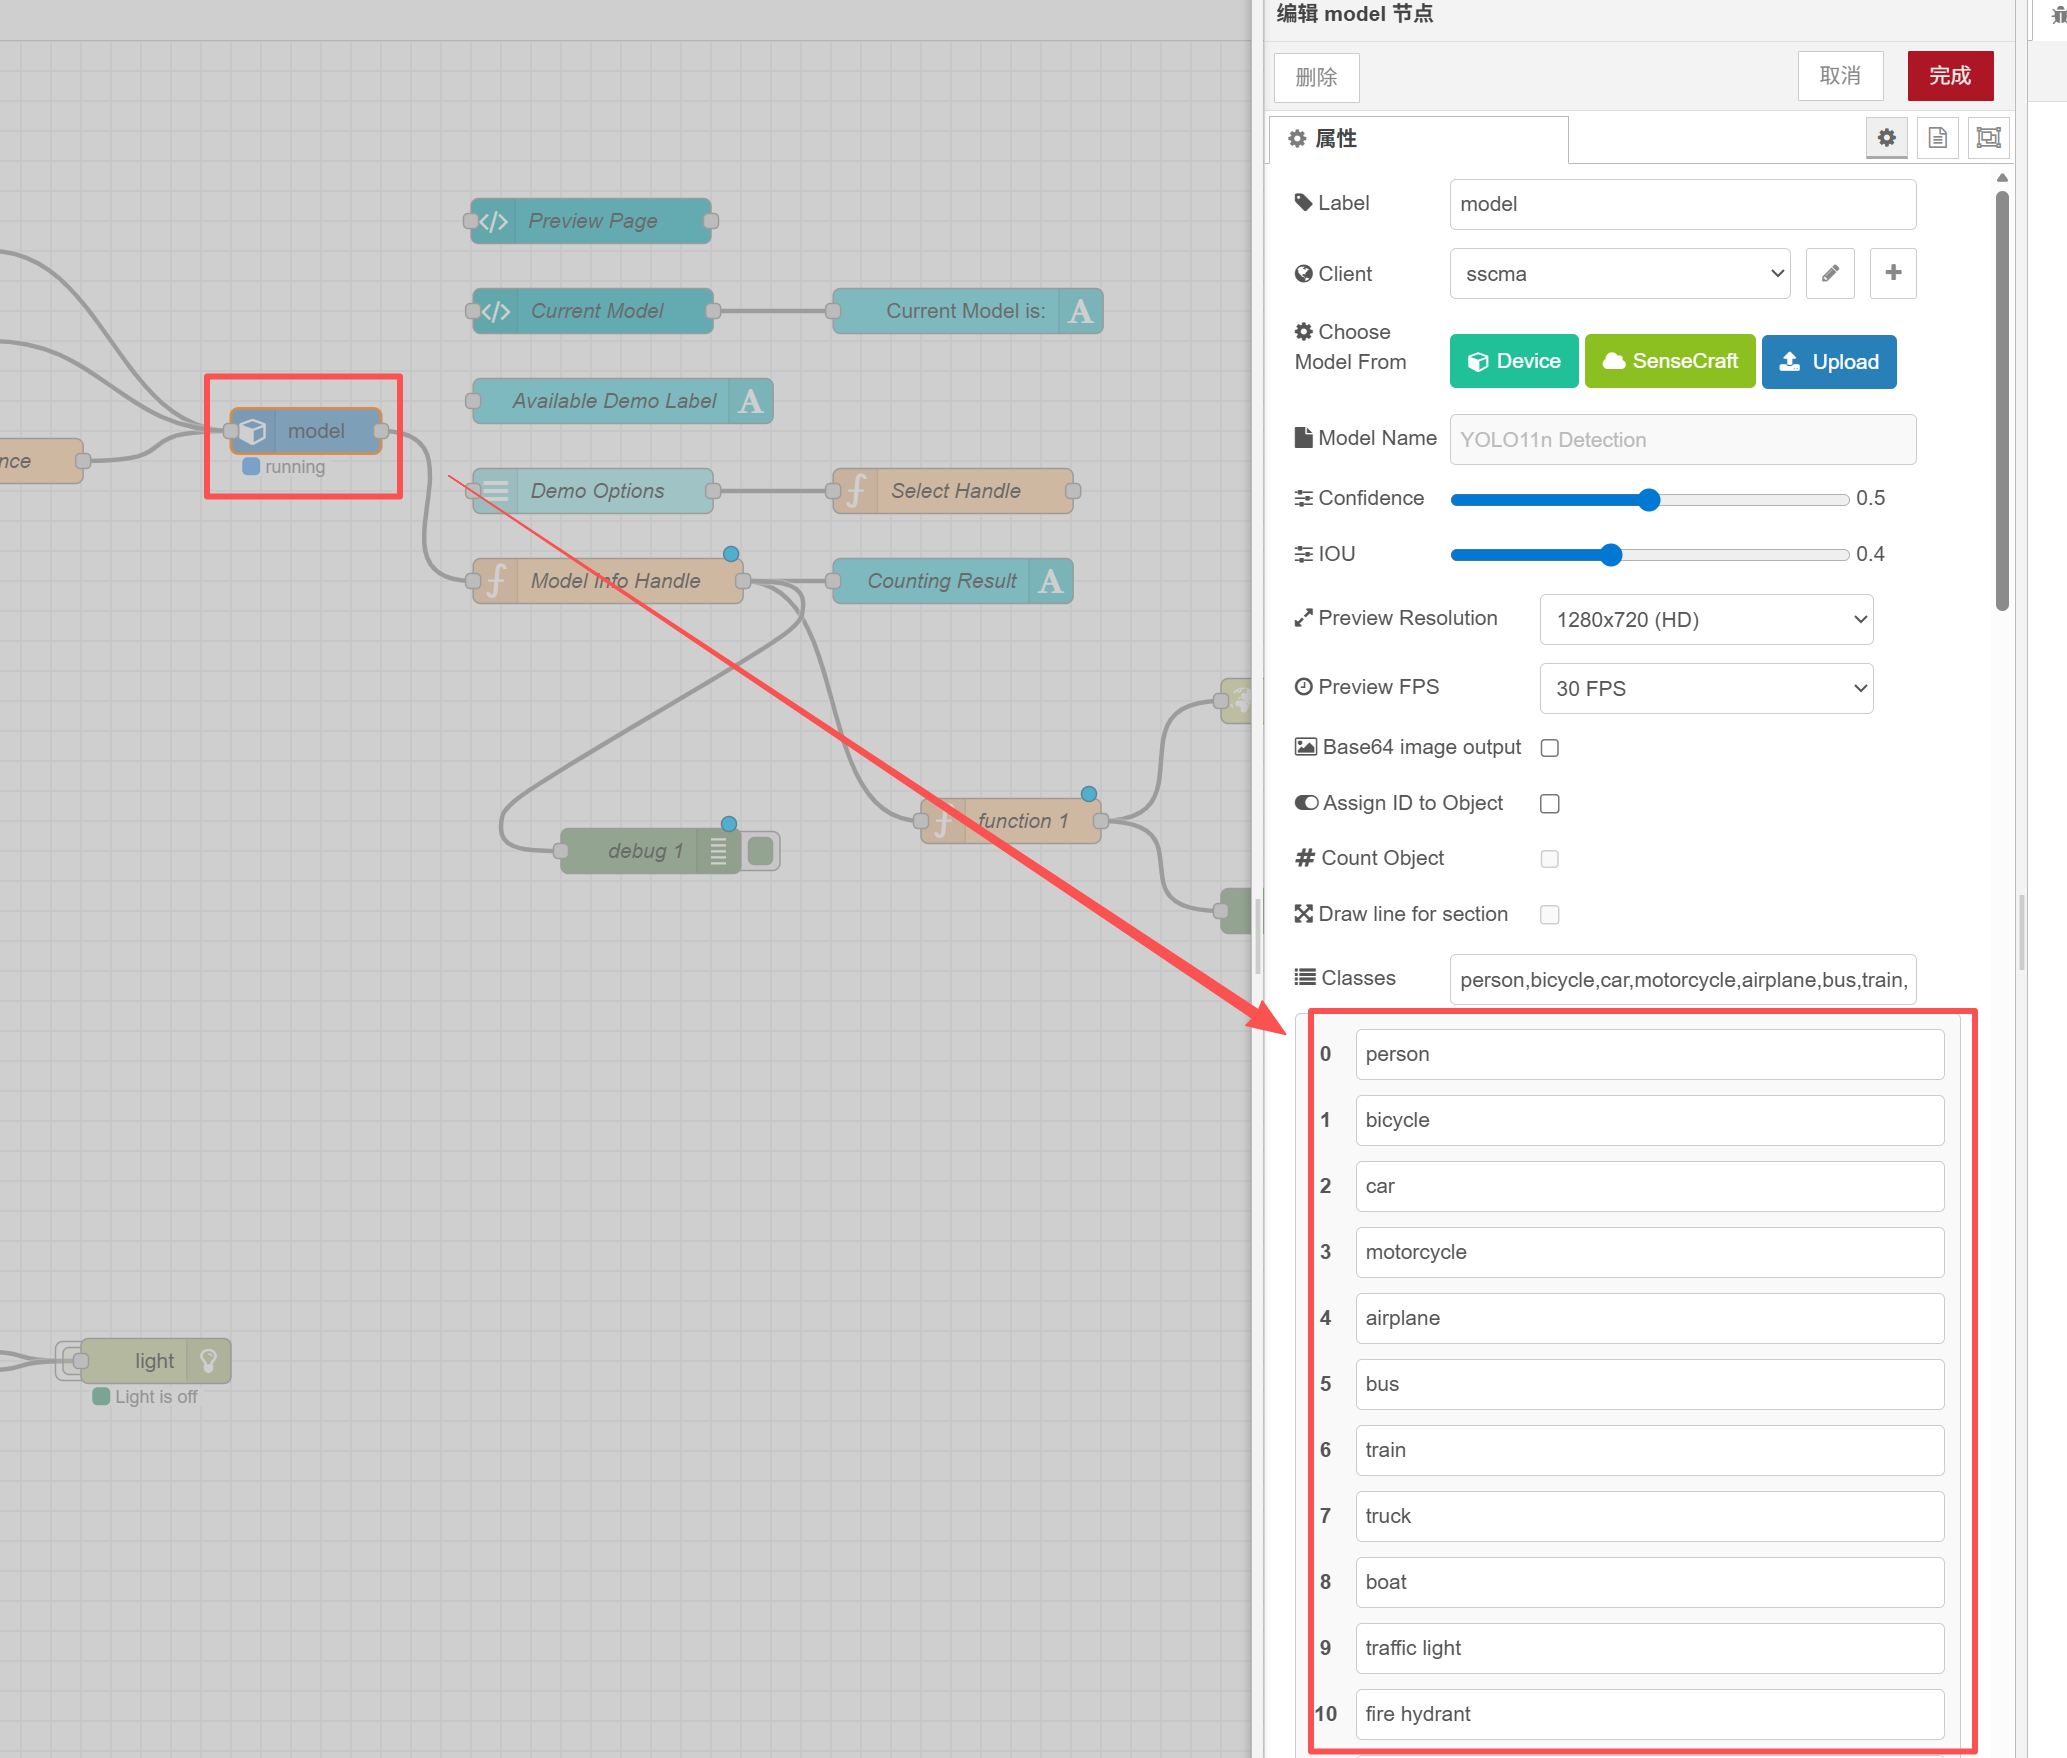
You can learn which types of objects can be detected by checking the model node.
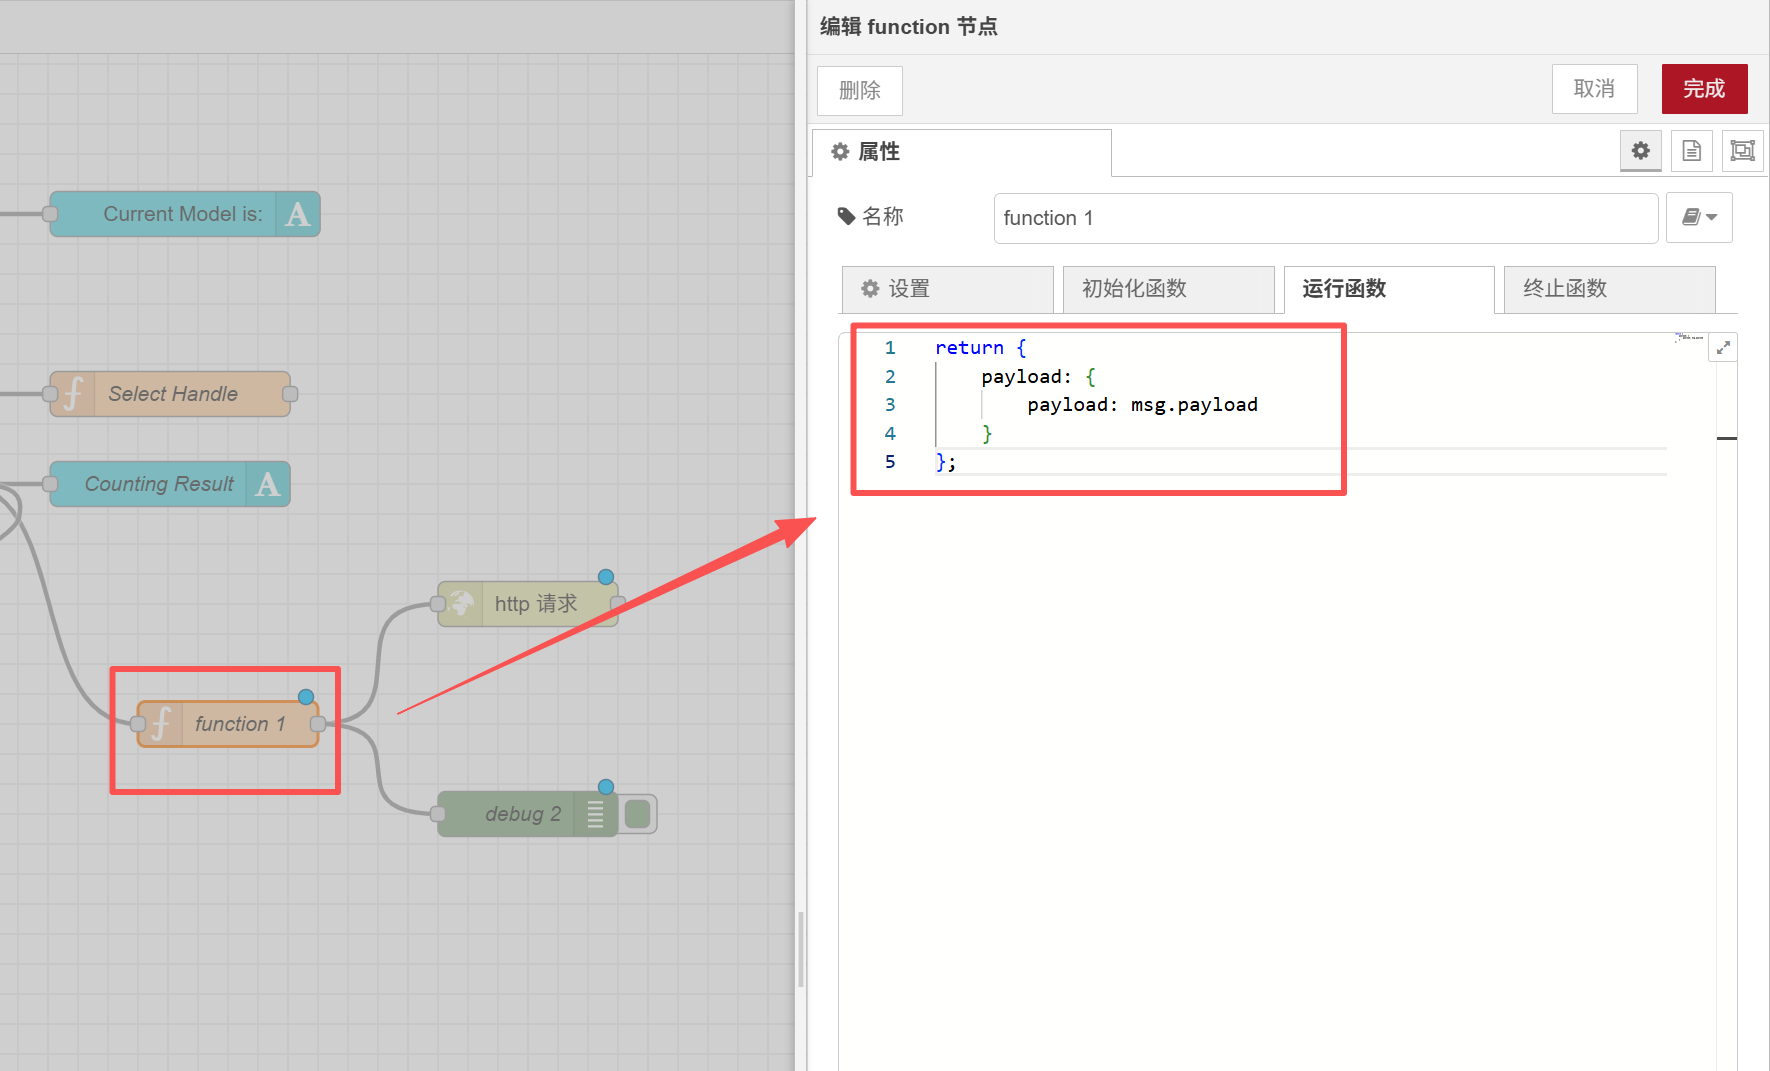
Next, configure the function1 node and replace the original code with the following:
return {
    payload: {
        payload: msg.payload
    }
};
Next, we will configure the HTTP request node. Here, we need to make changes to three areas:
| Option | Setting Value |
|---|---|
| Request Method | POST |
| URL Address | http://<your IP>:8123/api/webhook/recamera_detection |
| Response | JSON Object |

After setting it up, click on the "Deploy" button at the top right corner. Once the deployment is successful, there will be a prompt.

Here, you need to perform one more step, which is to connect WiFi to reCamera. It should be on the same network as the one you set up for reComputer (note that the POE version does not have WiFi functionality and requires the use of a switch with POE function to connect in the same network segment).
Click on the "Network" button in the upper left corner to configure the network.
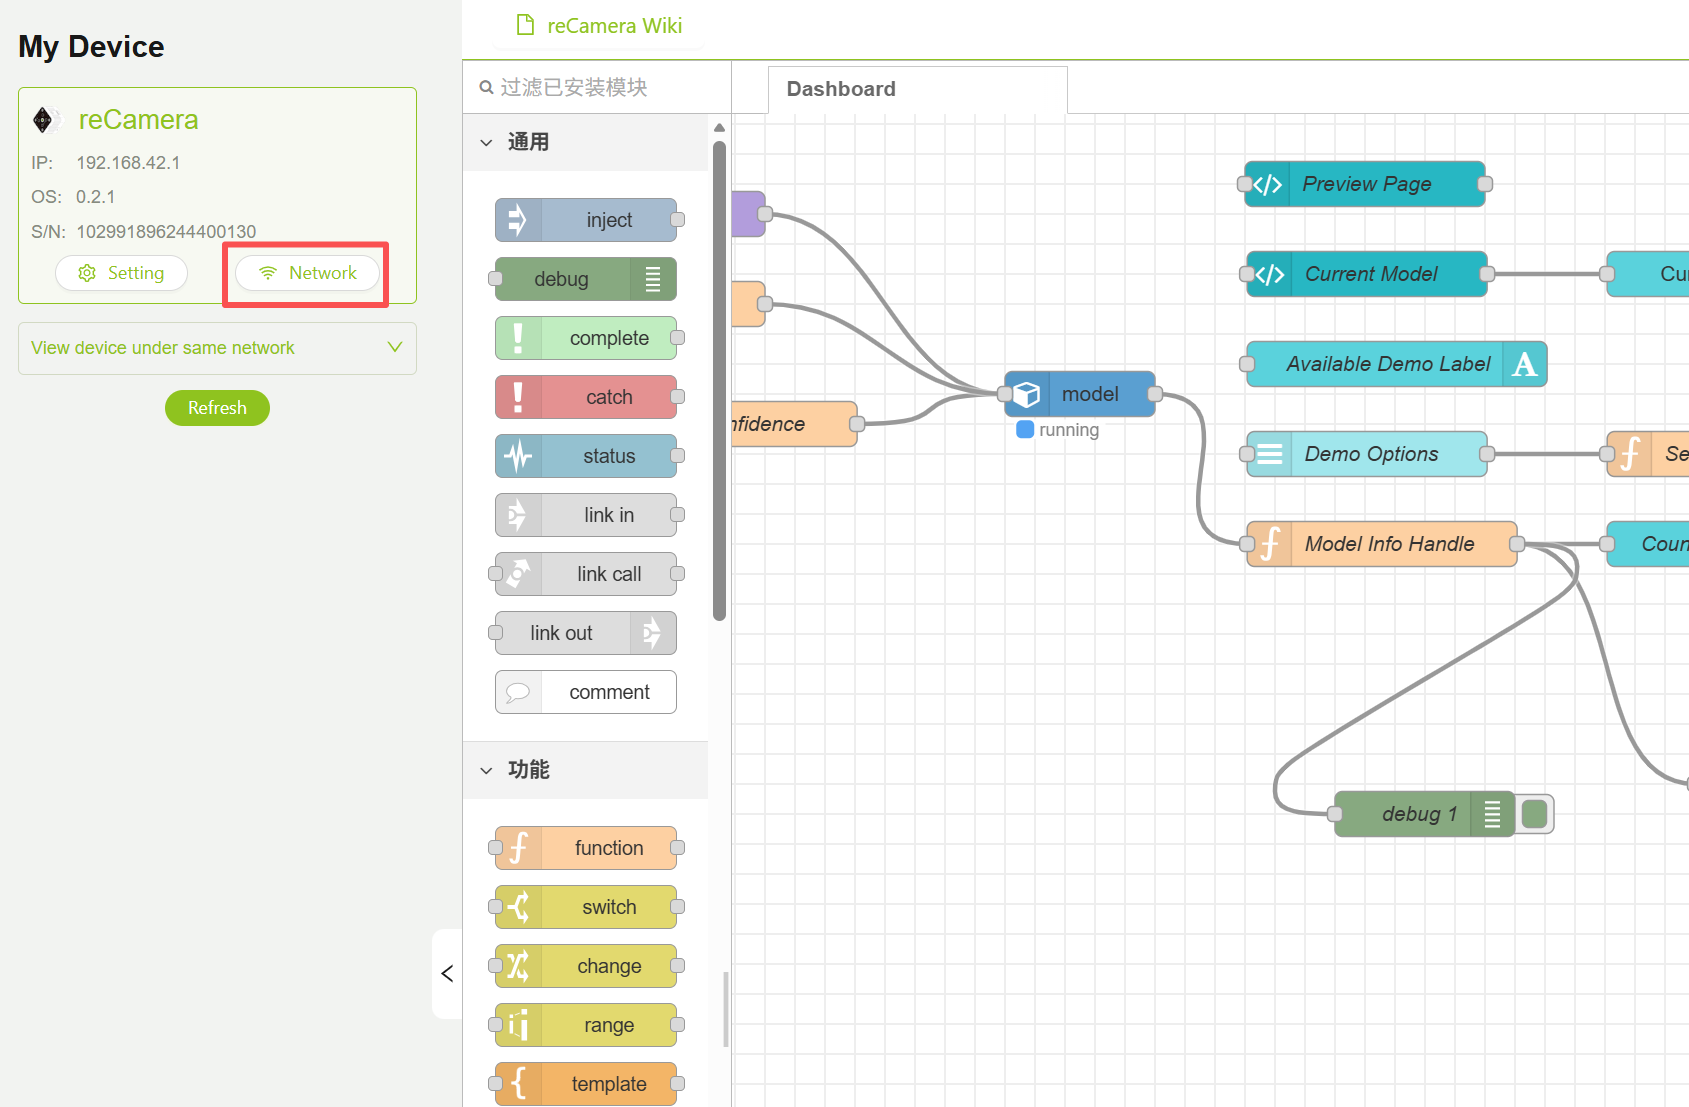
Please remember! Make sure to connect Recamera to the network!!! Otherwise, communication will not be possible.
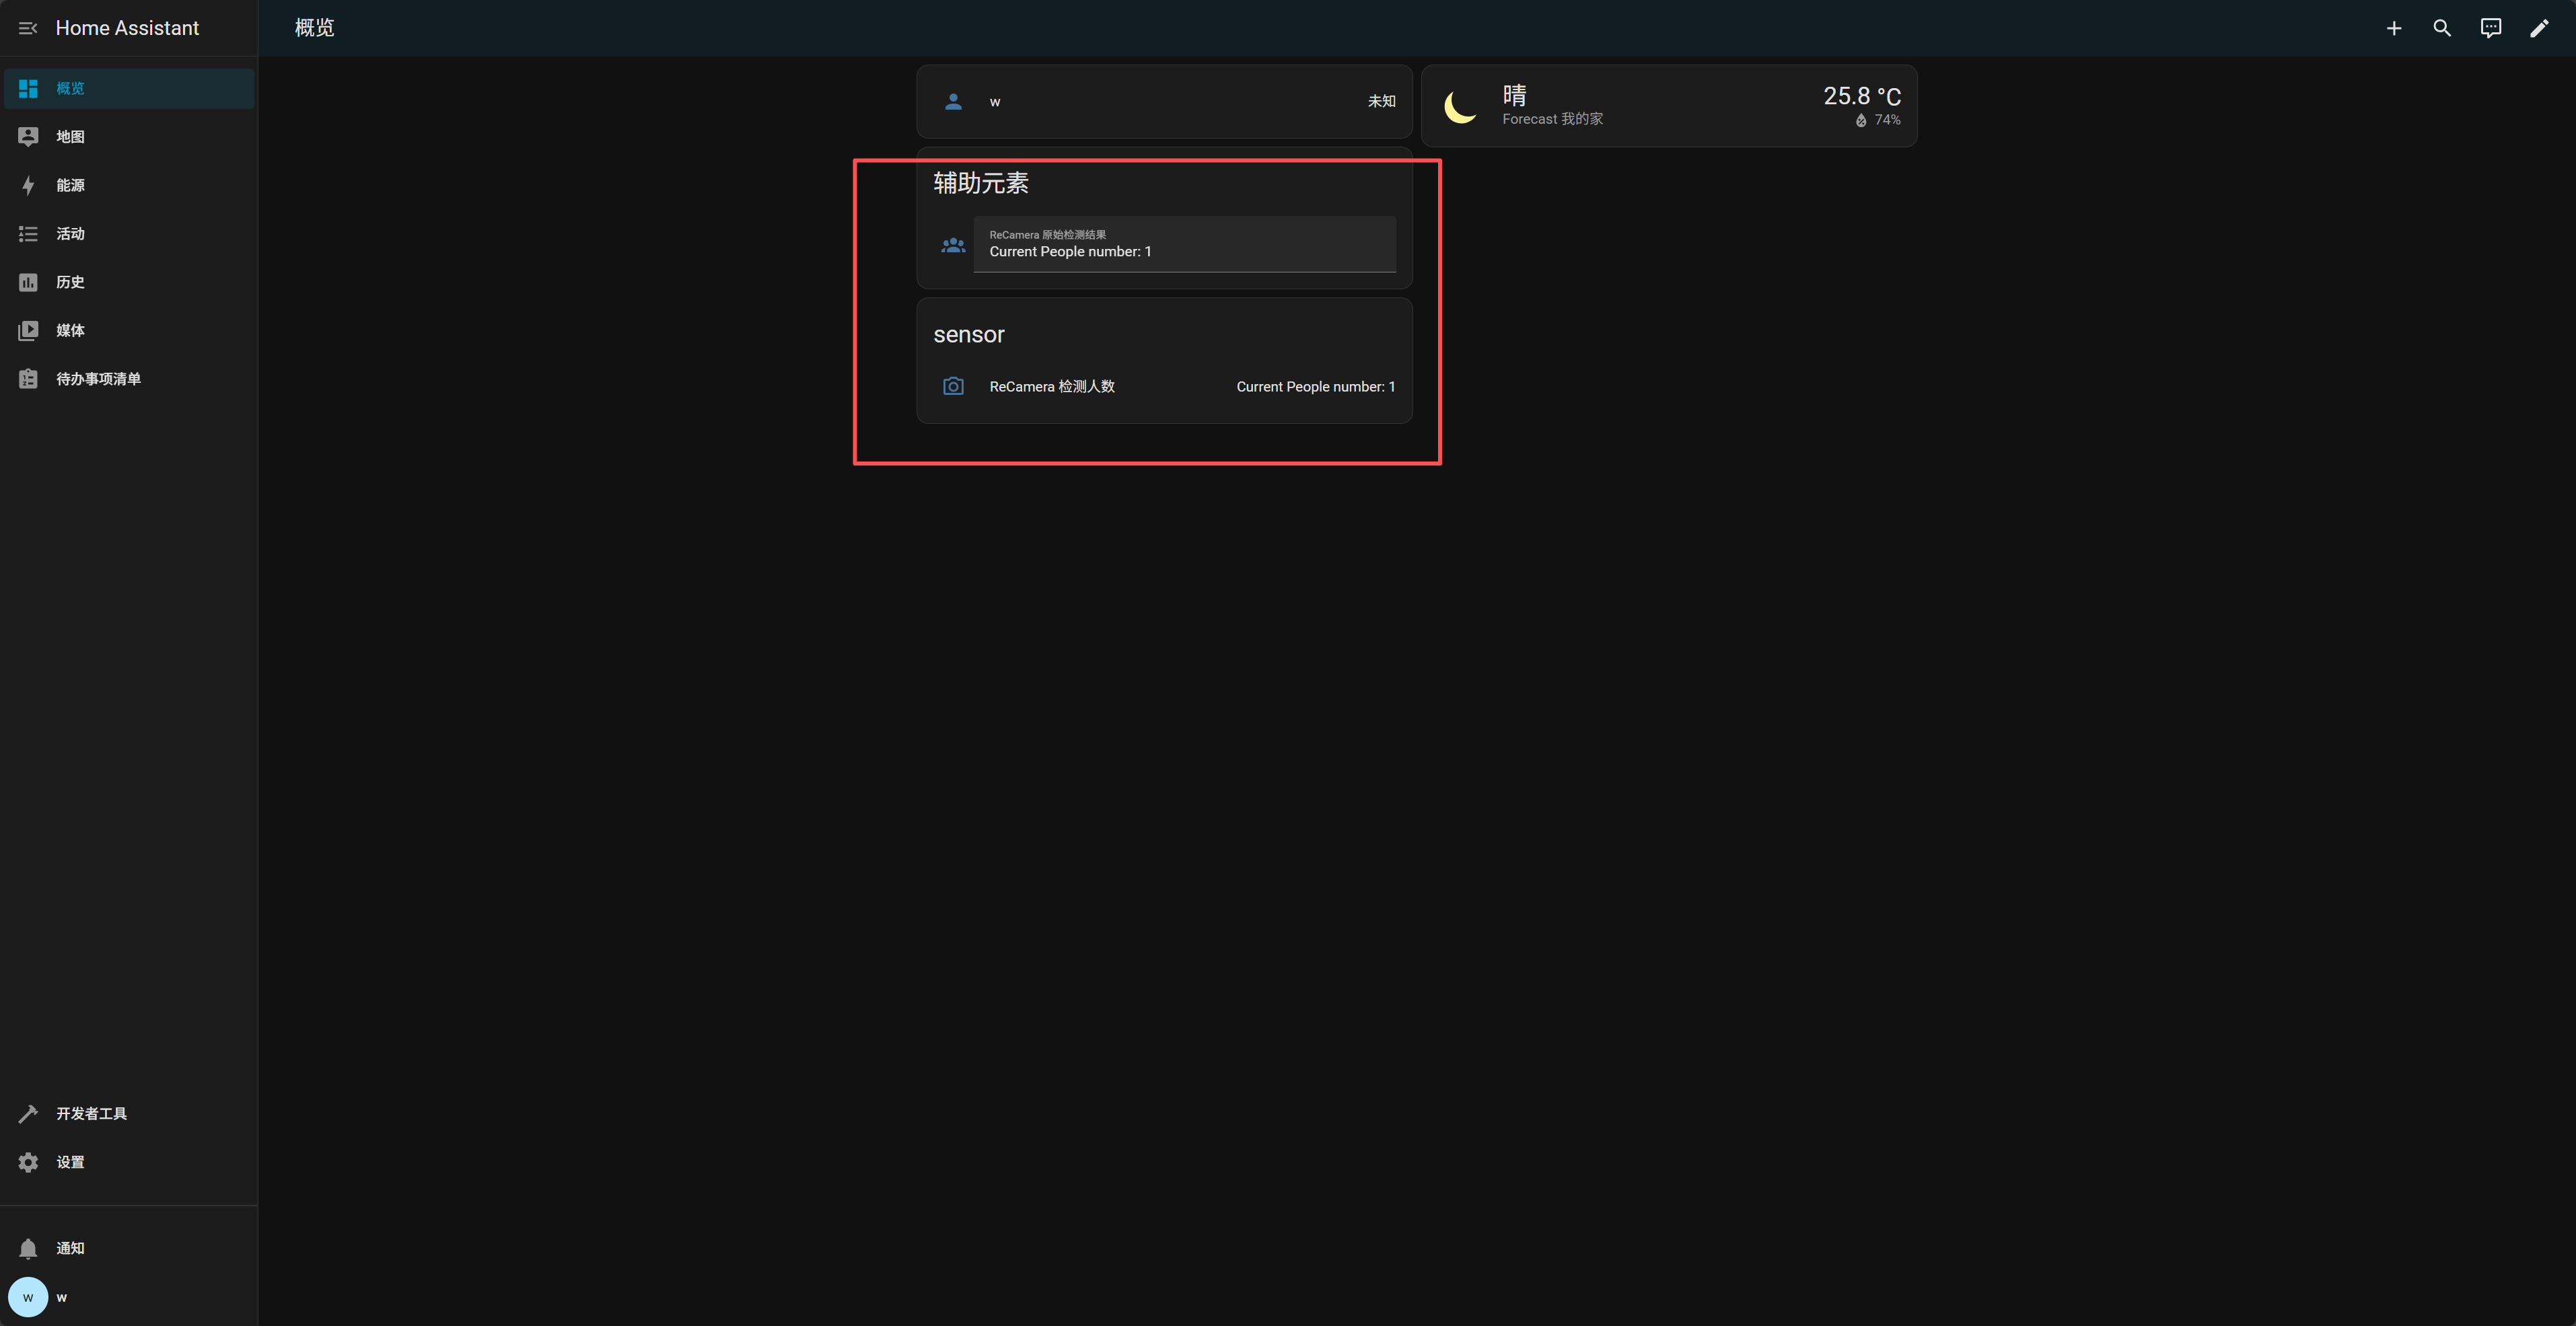
View the overview interface of Home Assistant
If no effect has been observed yet, first check if the link is not connected properly. That is, verify whether the Webhook is functioning correctly:
Execute in the terminal of any device (ReCamera or computer):
curl -X POST http://192.168.100.109:8123/api/webhook/recamera_detection \
-H "Content-Type: application/json" \
-d '{"payload":"Test from curl"}'
If successful, the Home Assistant notification will show:
ReCamera Detection Results
Test from curl
Tech Support & Product Discussion
Thank you for choosing our products! We are here to provide you with different support to ensure that your experience with our products is as smooth as possible. We offer several communication channels to cater to different preferences and needs.