Getting started for n8n with reCamera
Introduction
reCamera is an intelligent camera that supports local visual recognition and can generate detection results in real time on the device. n8n is an open-source automation workflow tool. Users can quickly build various notification, storage or application linkage processes through a visual interface. This tutorial introduces how to push the information recognized by reCamera in text form to n8n, enabling it to serve as the trigger source for the workflow. In this way, users can easily integrate camera detection events into their own automation systems, achieving basic functions such as message alerts, log recording, and third-party service calls, laying the foundation for more complex business logic in the future.
Hardware Preparation
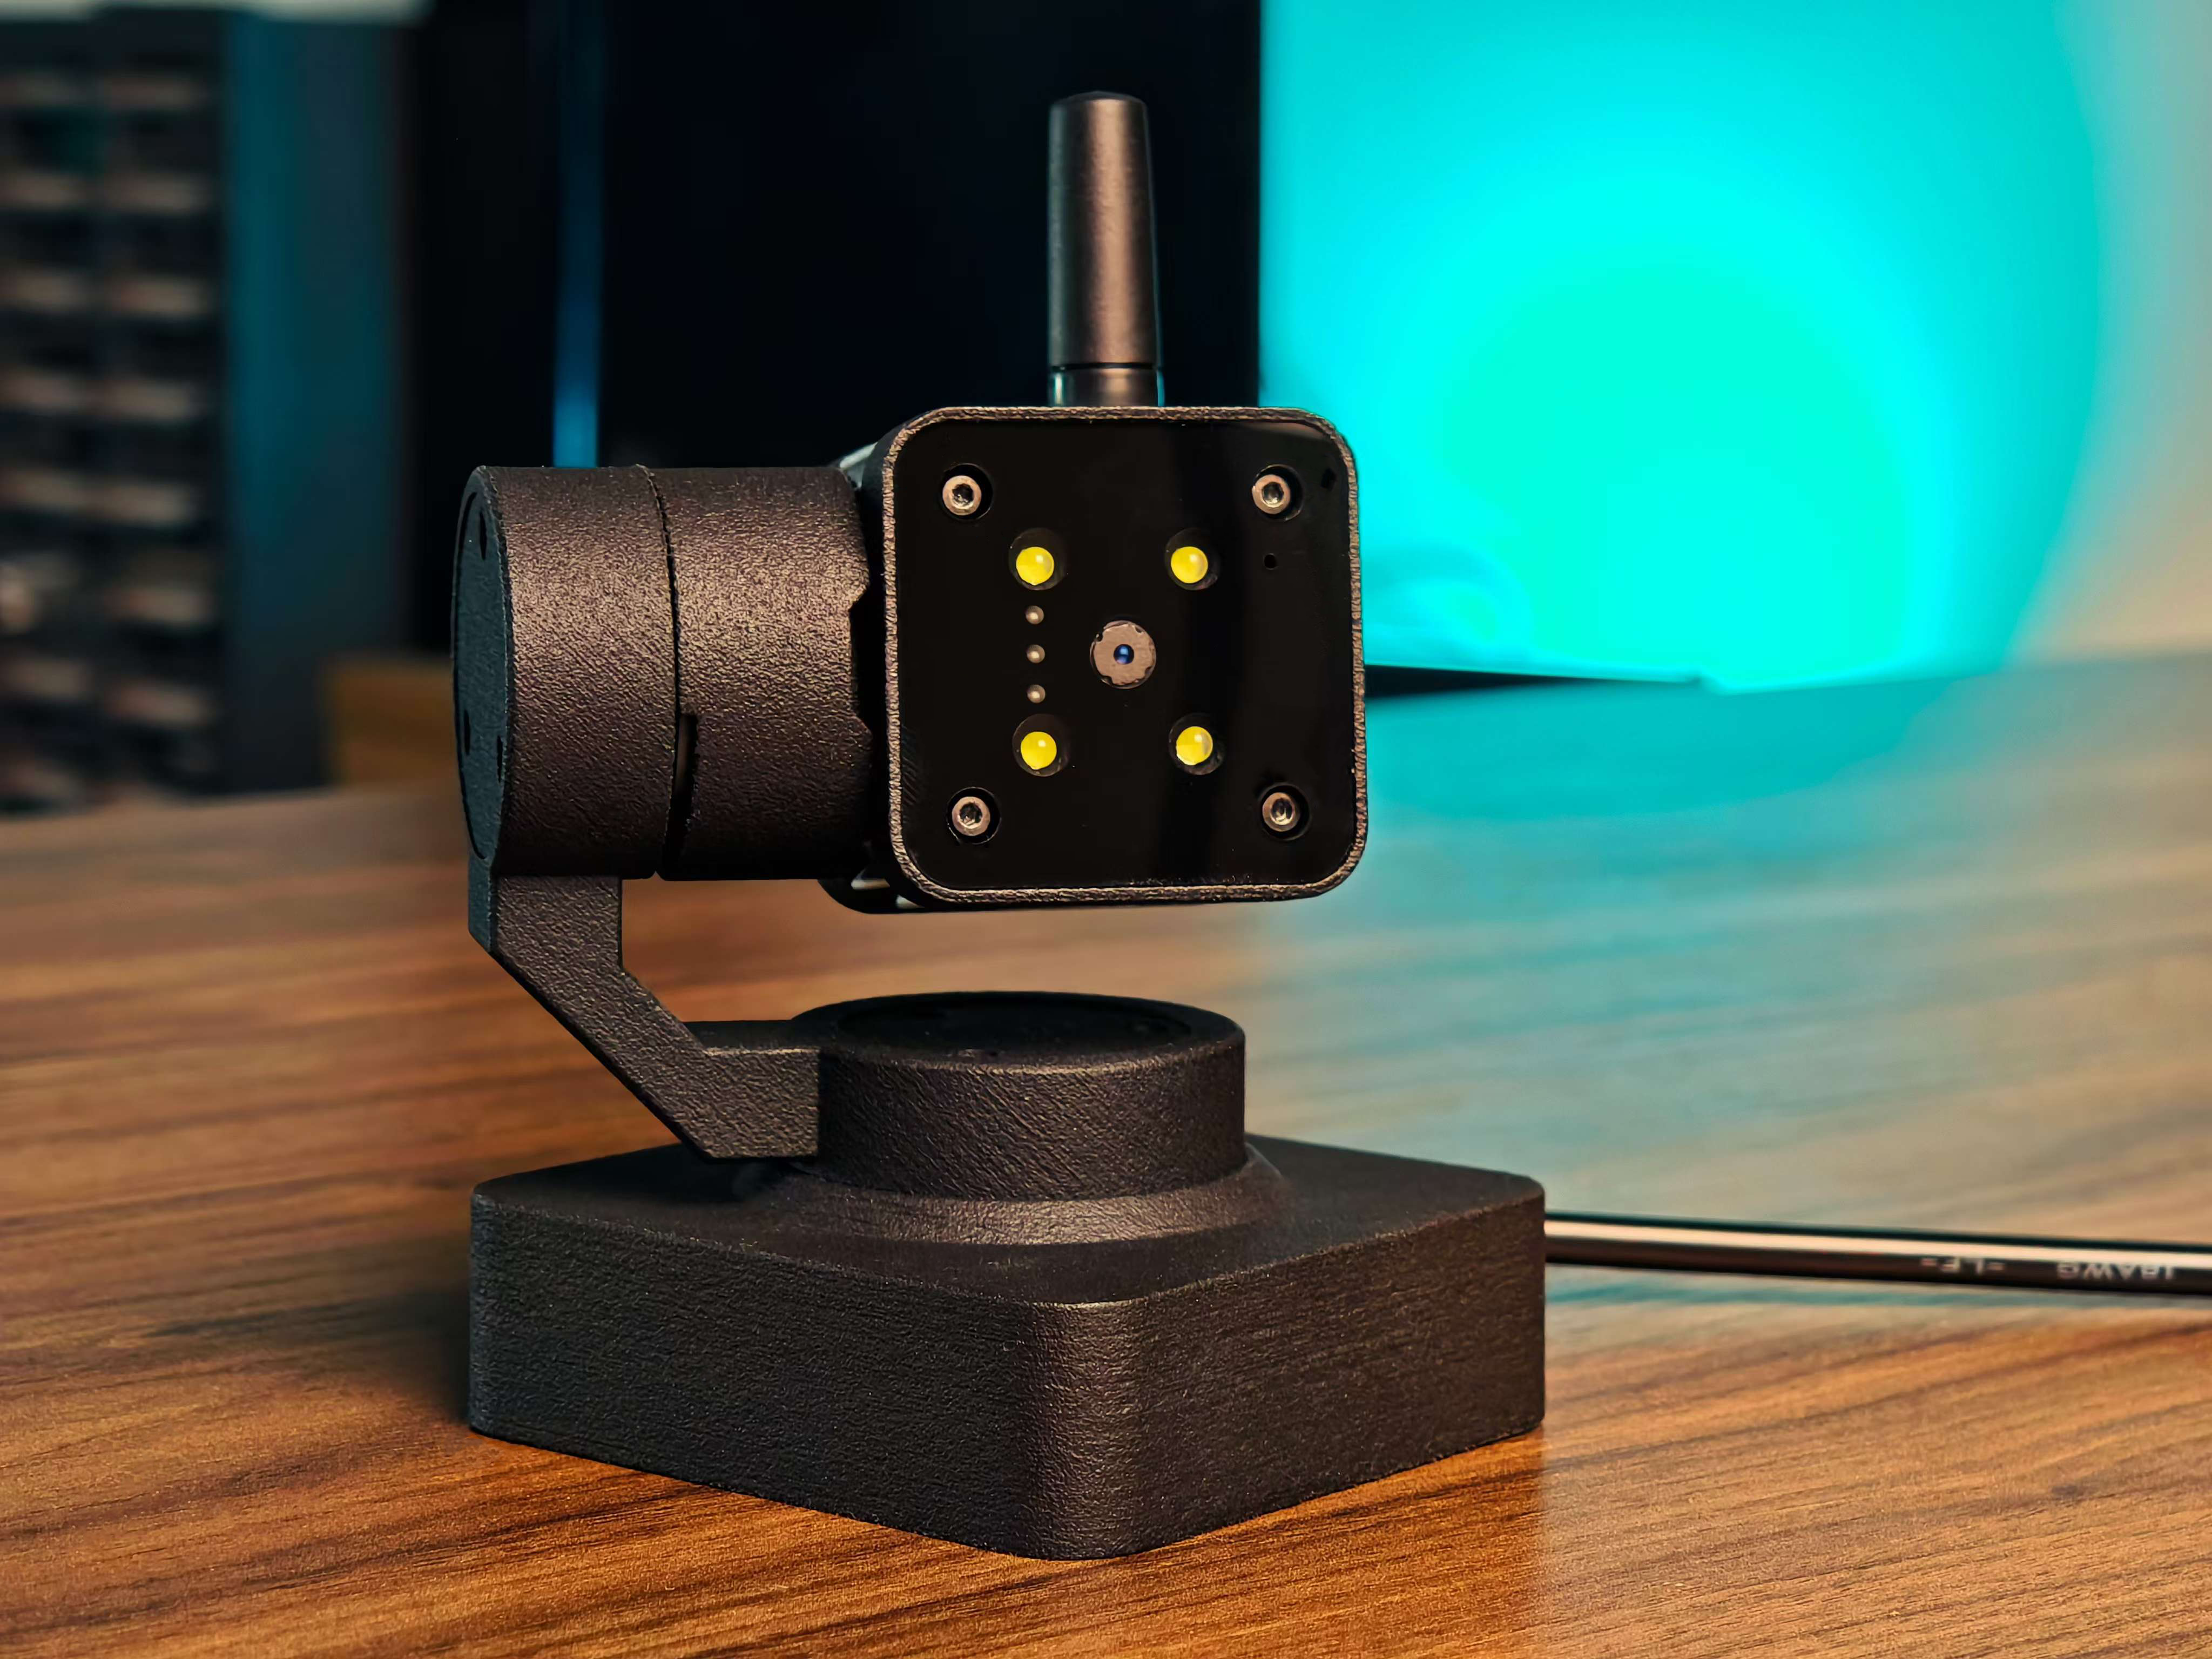
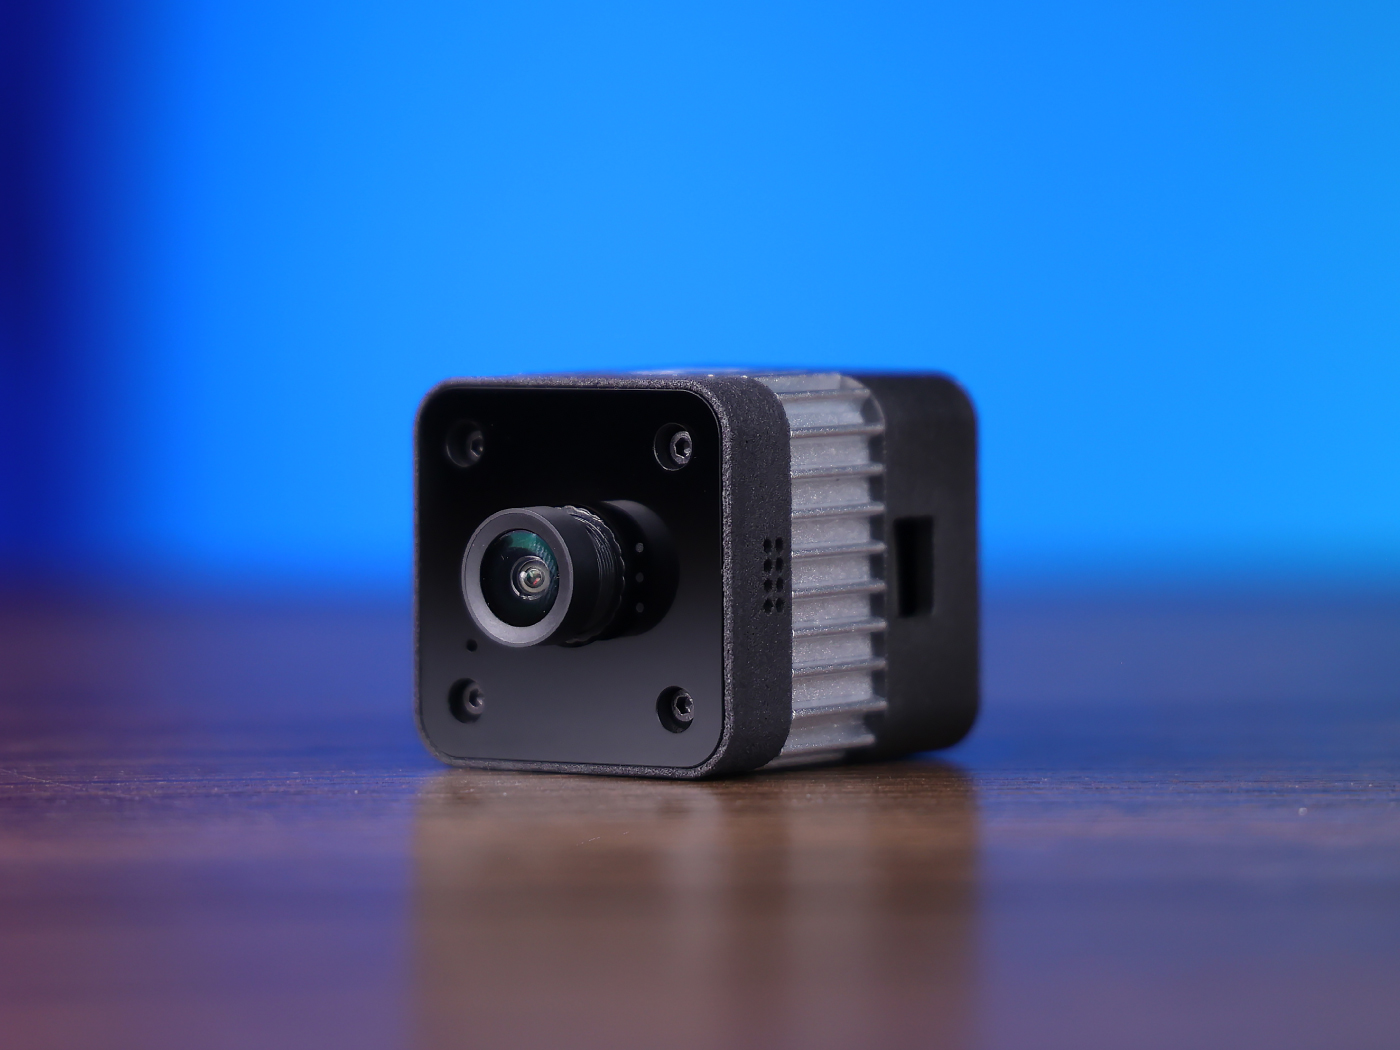
One reCamera (it can be any of the 2002 series, HQ POE version, or pan-tilt version, but note that the POE version does not have WiFi functionality and requires a switch with POE function to be connected in the same network segment)
one computer (A virtual machine configured with Ubuntu 22.04, used for installing n8n)
| reCamera 2002 Series | reCamera Gimbal | reCamera HQ POE |
|---|---|---|
 |  |  |
1. Install n8n (in virtual machine)
(1) Install Docker
sudo apt update
sudo apt install -y docker.io
After the installation is complete, enable and set the boot
sudo systemctl enable docker
sudo systemctl start docker
Verify that the installation was successful:
docker --version
If you see something like:
Docker version 28.2.2, build ...
(2) Let the current user use docker directly (without sudo every time)
sudo usermod -aG docker $USER
Then exit the current terminal and log in again.
docker ps
(3) Run n8n container
sudo docker run -it --rm \
  --name n8n \
  --network host \
  -v ~/.n8n:/home/node/.n8n \
  n8nio/n8n
The first run will automatically pull n8n image, about several hundred MB, a little long
(4) Access n8n
Open a Firefox browser in the virtual machine and enter:
http://localhost:5678
You can enter the n8n interface to create an account.
2. Configure n8n
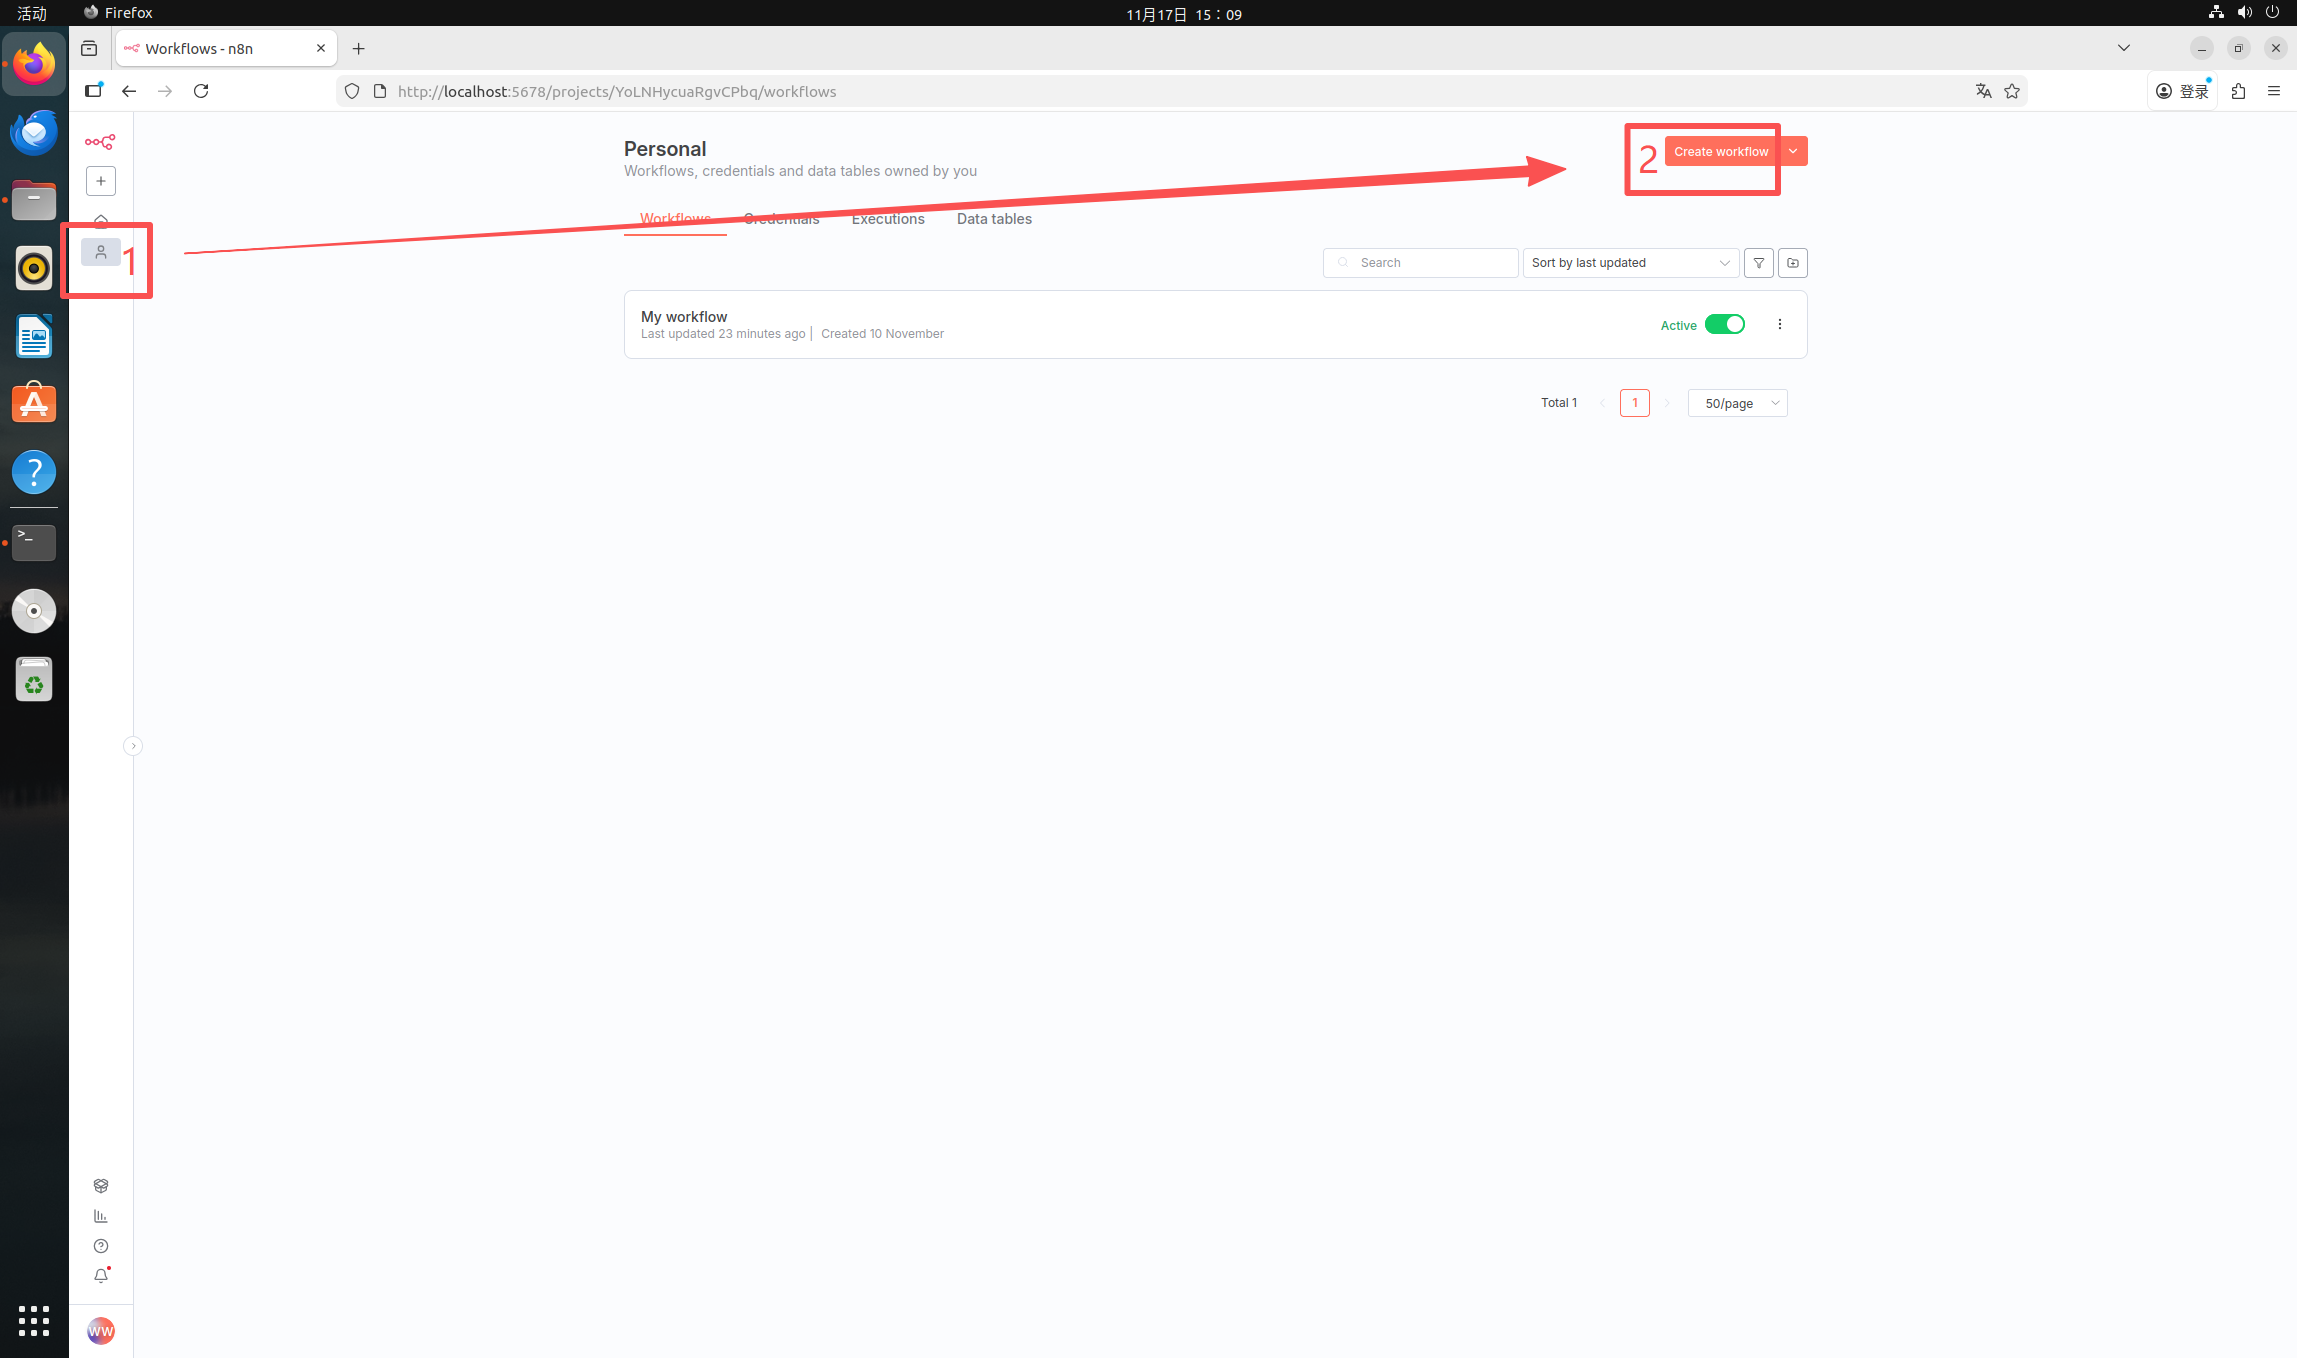
(1) Create a "Webhook" node to receive ReCamera data
Click Personal-Create workflow
Click the plus sign-search box to enter "webhook"-click the first "Webhook" node
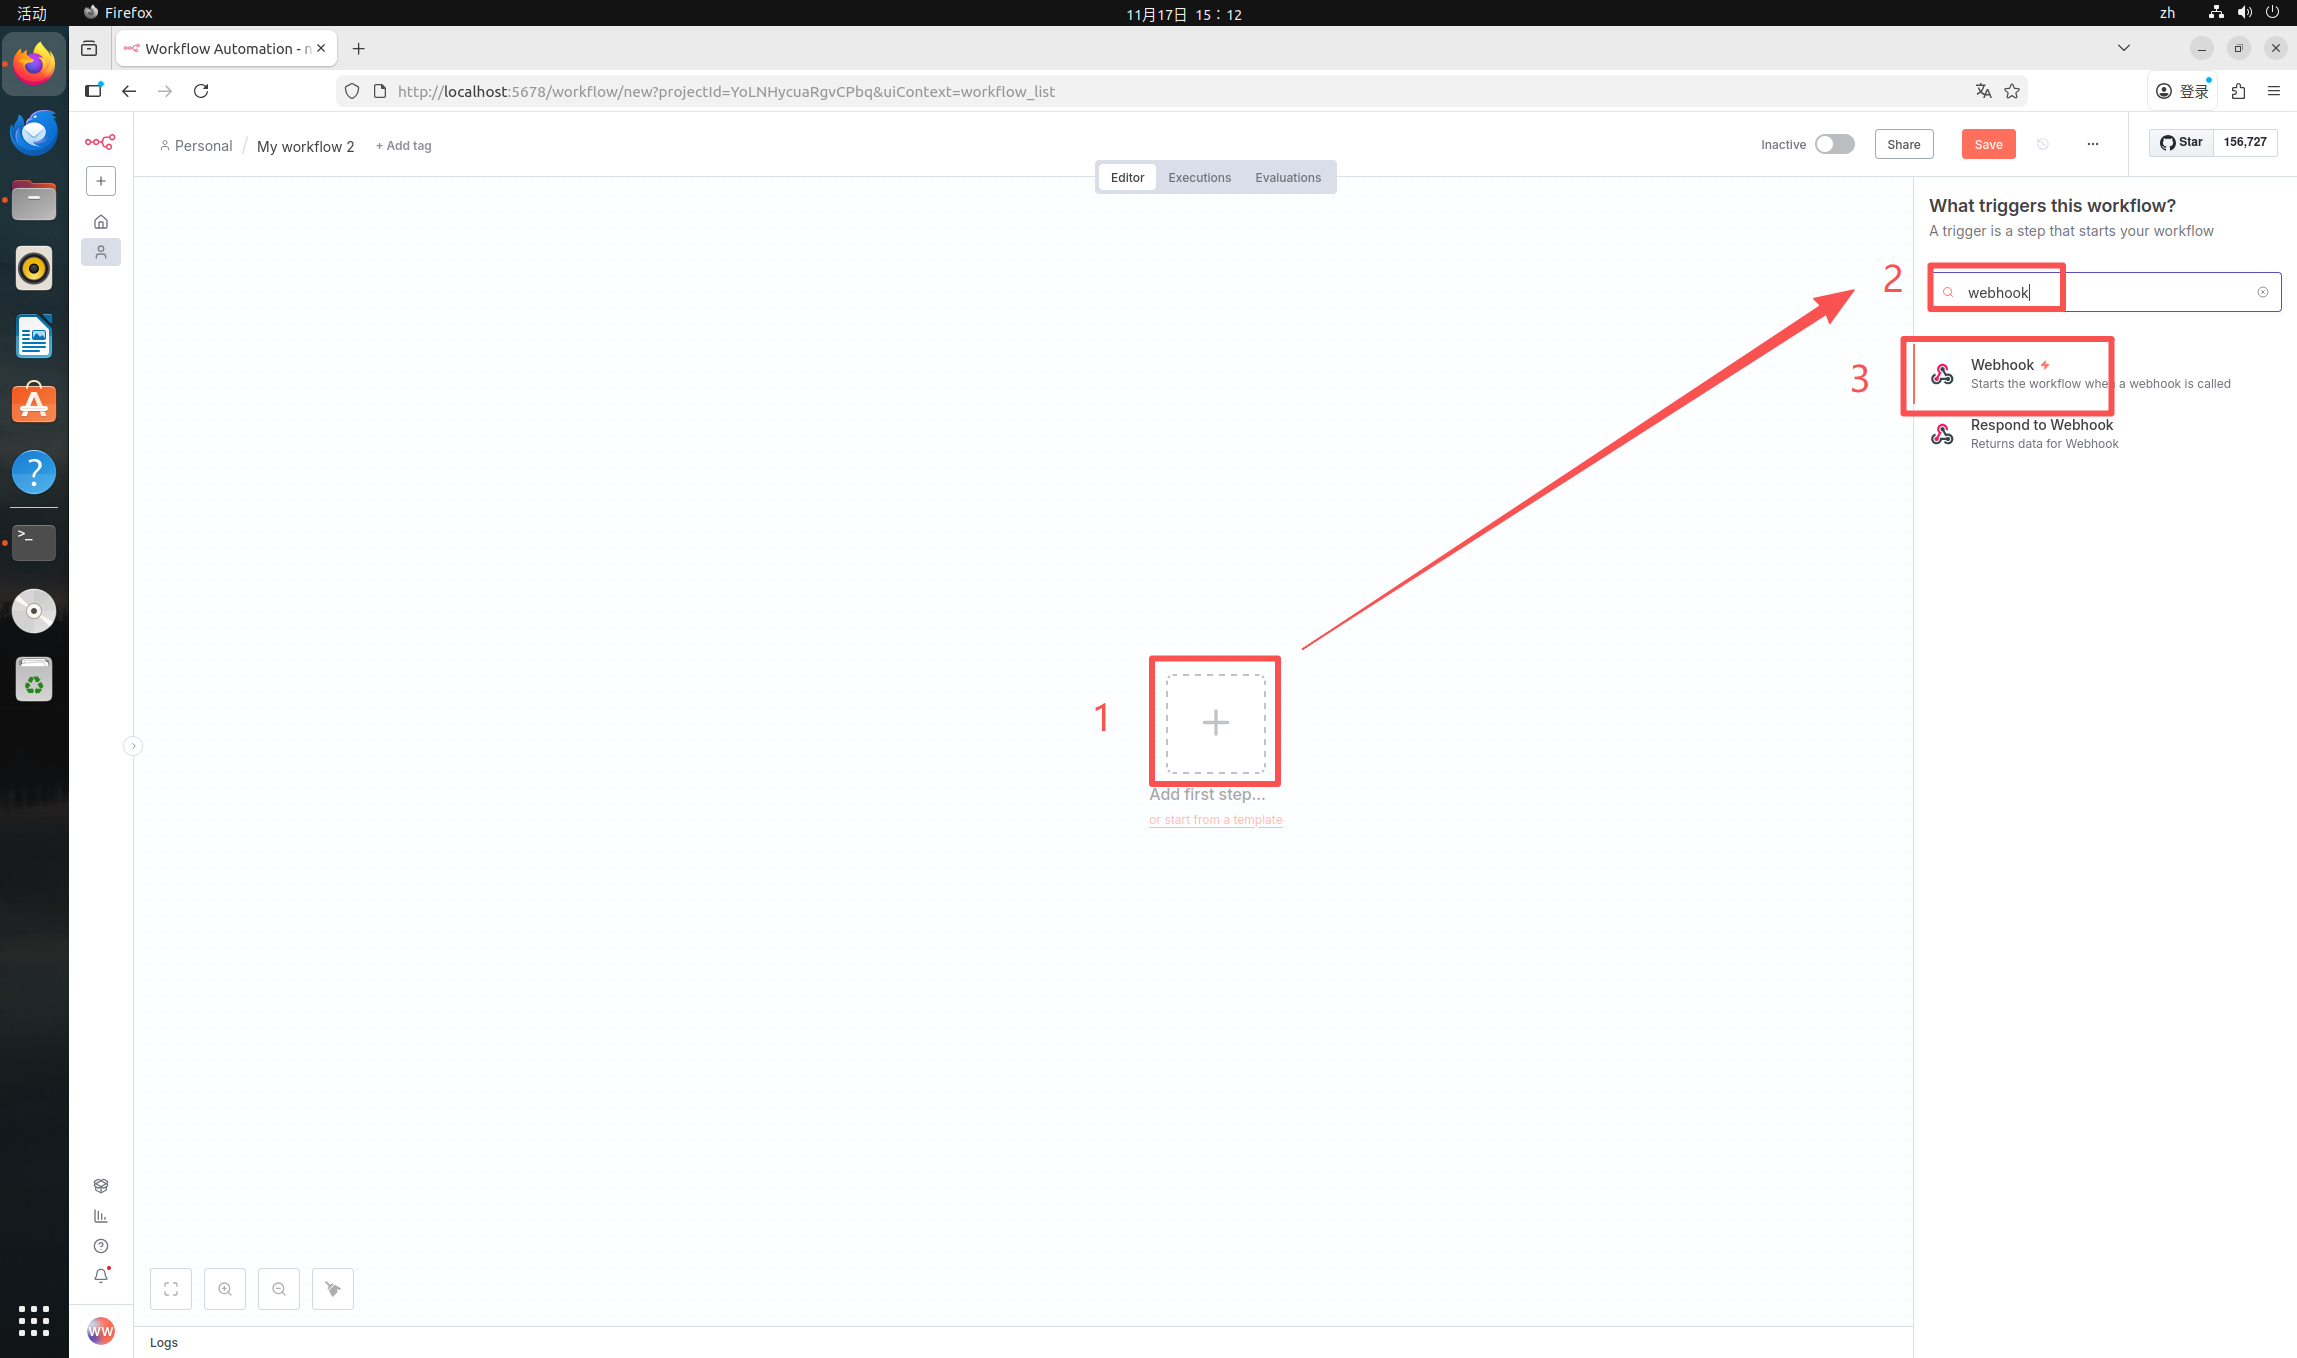
Now we have entered the configuration interface. Here we need to modify two places. First, select "HTTP Method" as "POST". Then, modify "Path" as any name. Here I will take "recamera_detect" as an example.
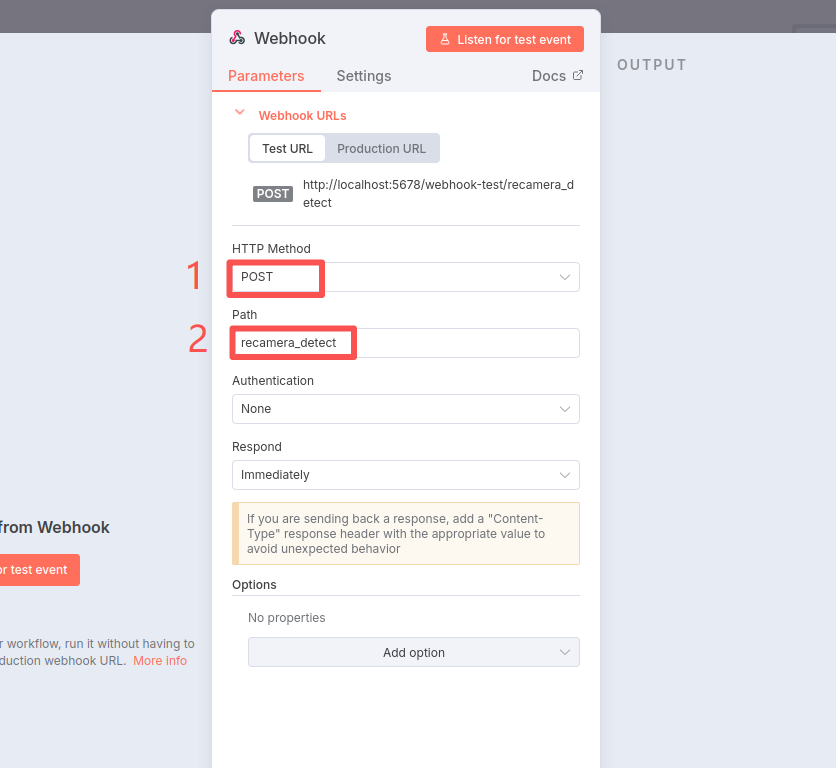
After this step, he has automatically saved it. At this time, click "Back to canvas" in the upper left corner to return to the main interface and prepare to create the next node.

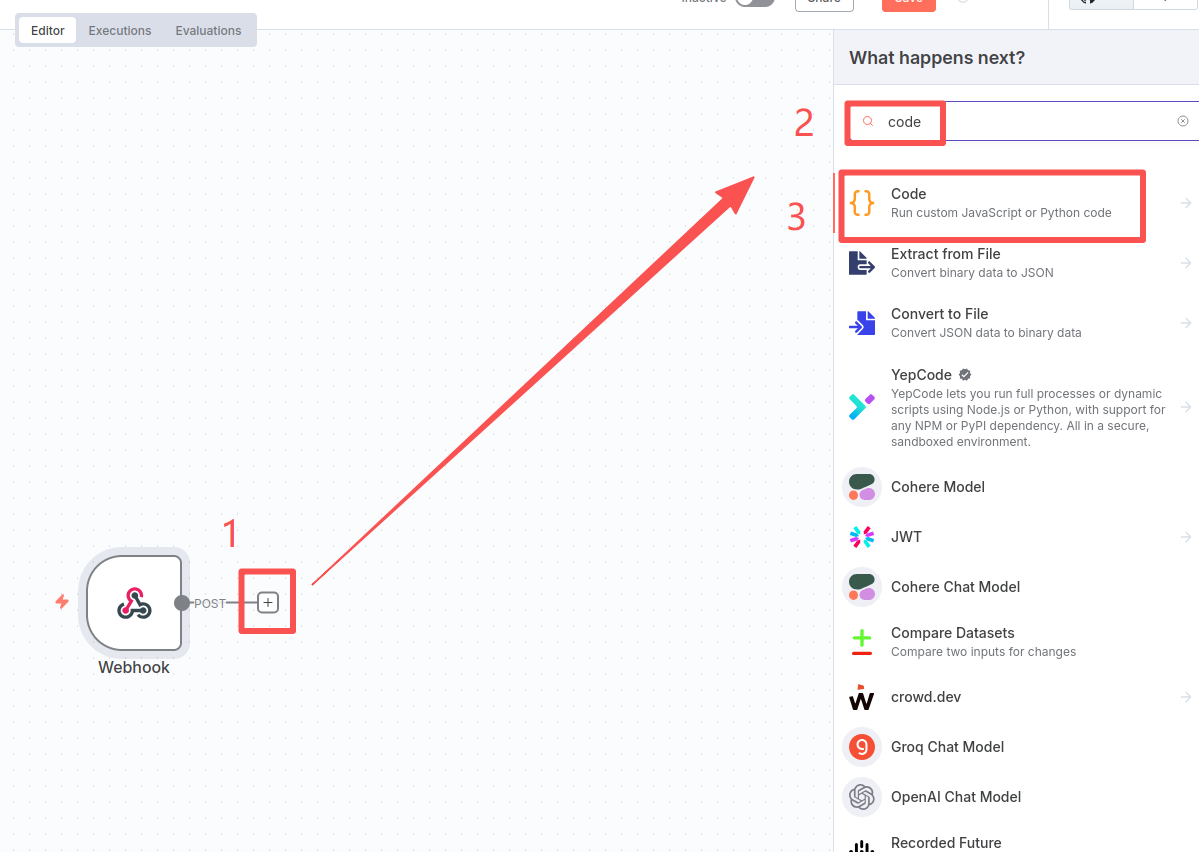
(2) Create "Code" node to process received data
Click the plus sign-enter "code" in the search box-click the first "Code" node
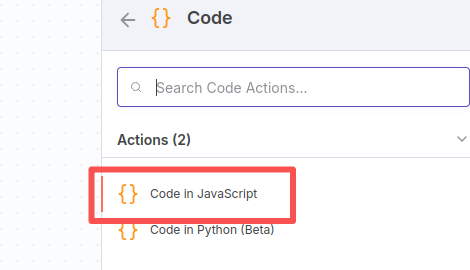
Then select "Code in JavaScript"
Replace the original content with the following code:
const payload = $json.body?.payload || $json.payload || "";
const matches = payload.match(/number\s*:?\s*(\d+)/i);
const peopleCount = matches ? parseInt(matches[1]) : 0;

return [{ json: { peopleCount, raw: payload } }];
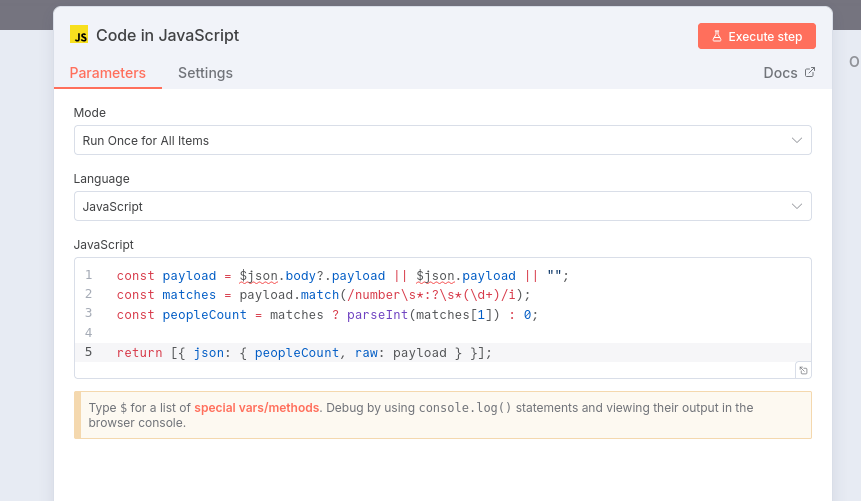
Click "Back to canvas" in the upper left corner to return to the main interface
3. Configure Node-Red
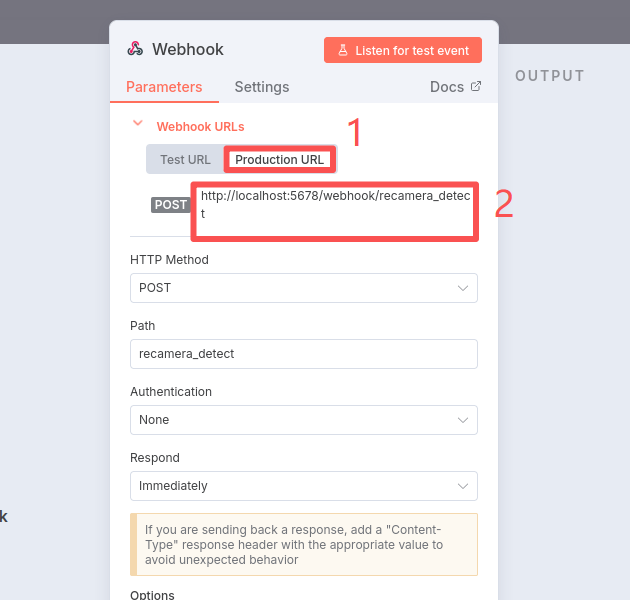
first open the n8n interface of the virtual machine, double-click the "Webhook" node you configured earlier, enter the configuration interface of the Webhook node, and then click "Production URL" to copy the following "POST" address
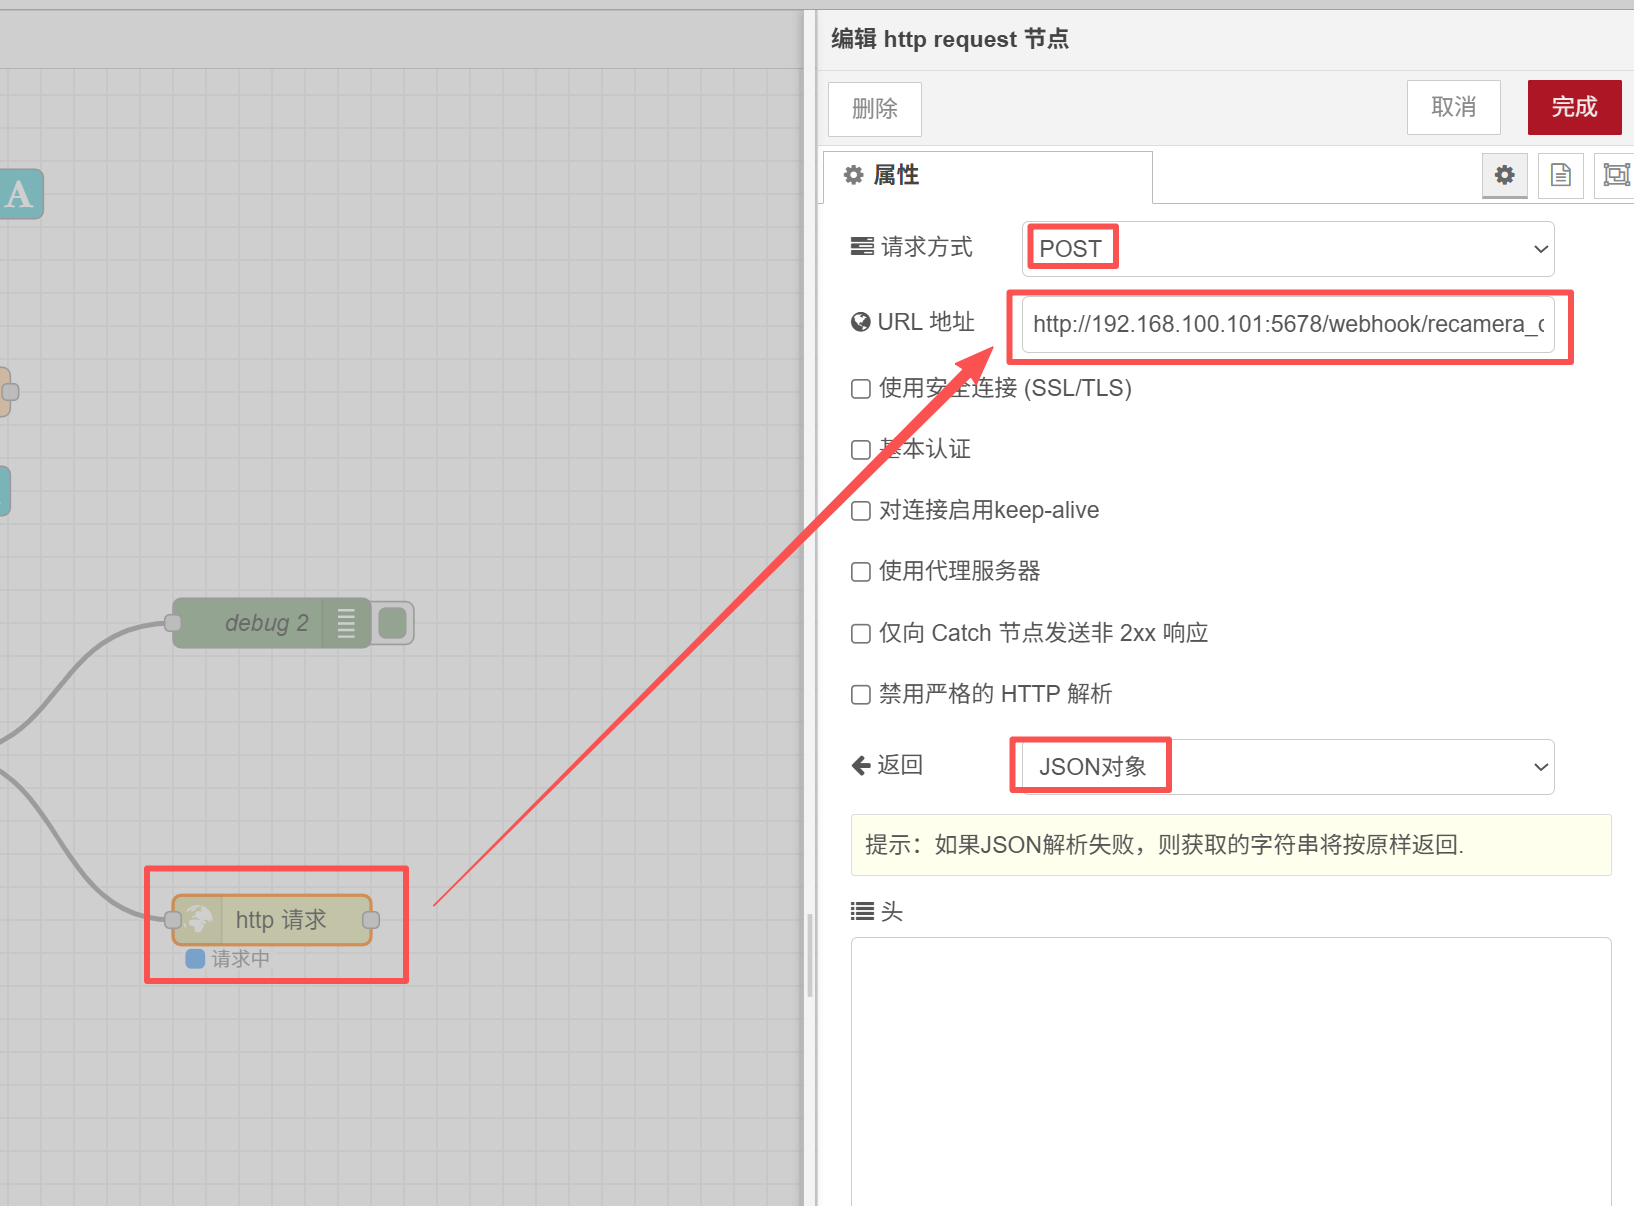
The previous configuration steps are the same as those of Home Assistant, except that when configuring the "http request" node, the URL address needs to be modified, that is, the POST address you just copied in the virtual machine, and then the localhost address needs to be modified to your virtual machine IP address.
View Virtual Machine IP
ifconfig
Please remember! Make sure to connect Recamera to the network!!! Otherwise, communication will not be possible.
4. Open Active and enter the Executions interface to view the message
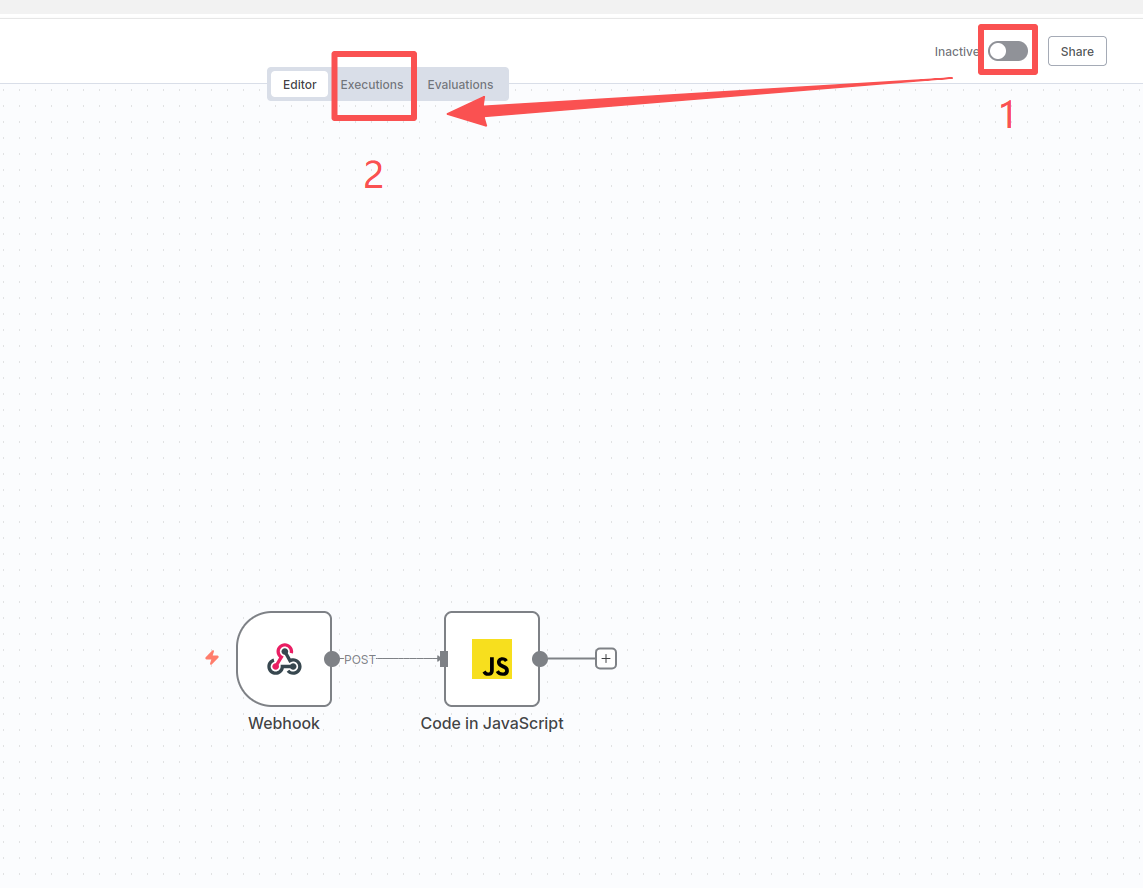
Click the "Inactive" switch in the upper right corner to turn it into green Active, then click "Executions"
At this time, you will see that there are many timestamps on the left that have been refreshing. If you see that the timestamps have been refreshing, it means that your reCamera data has been connected to the n8n platform!
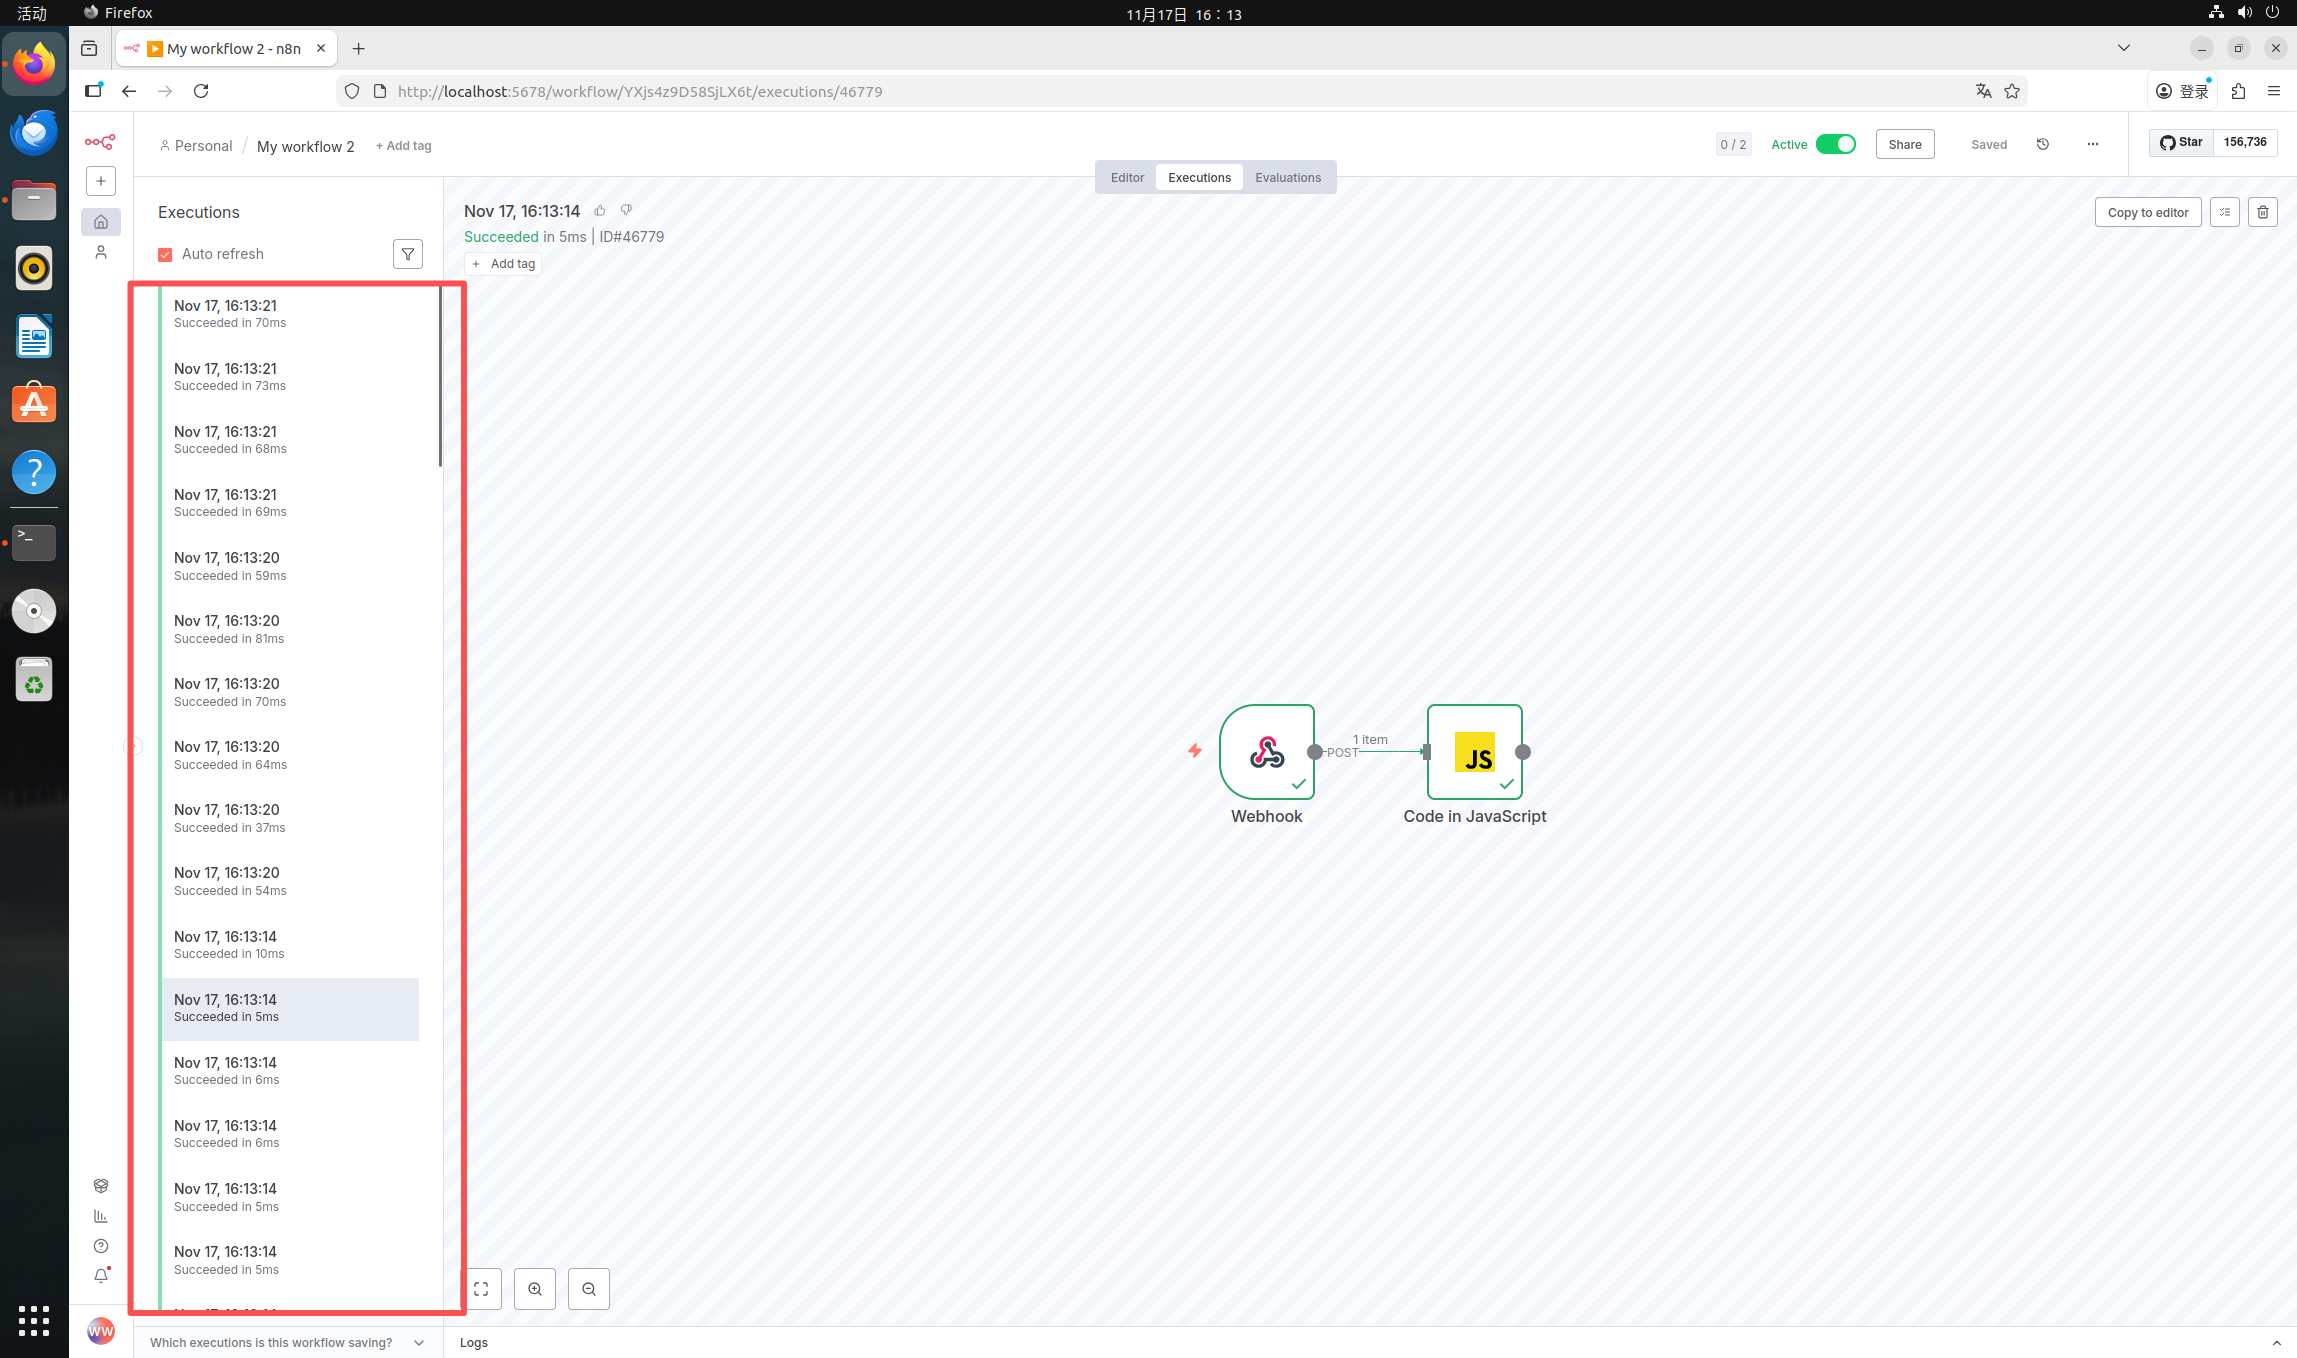
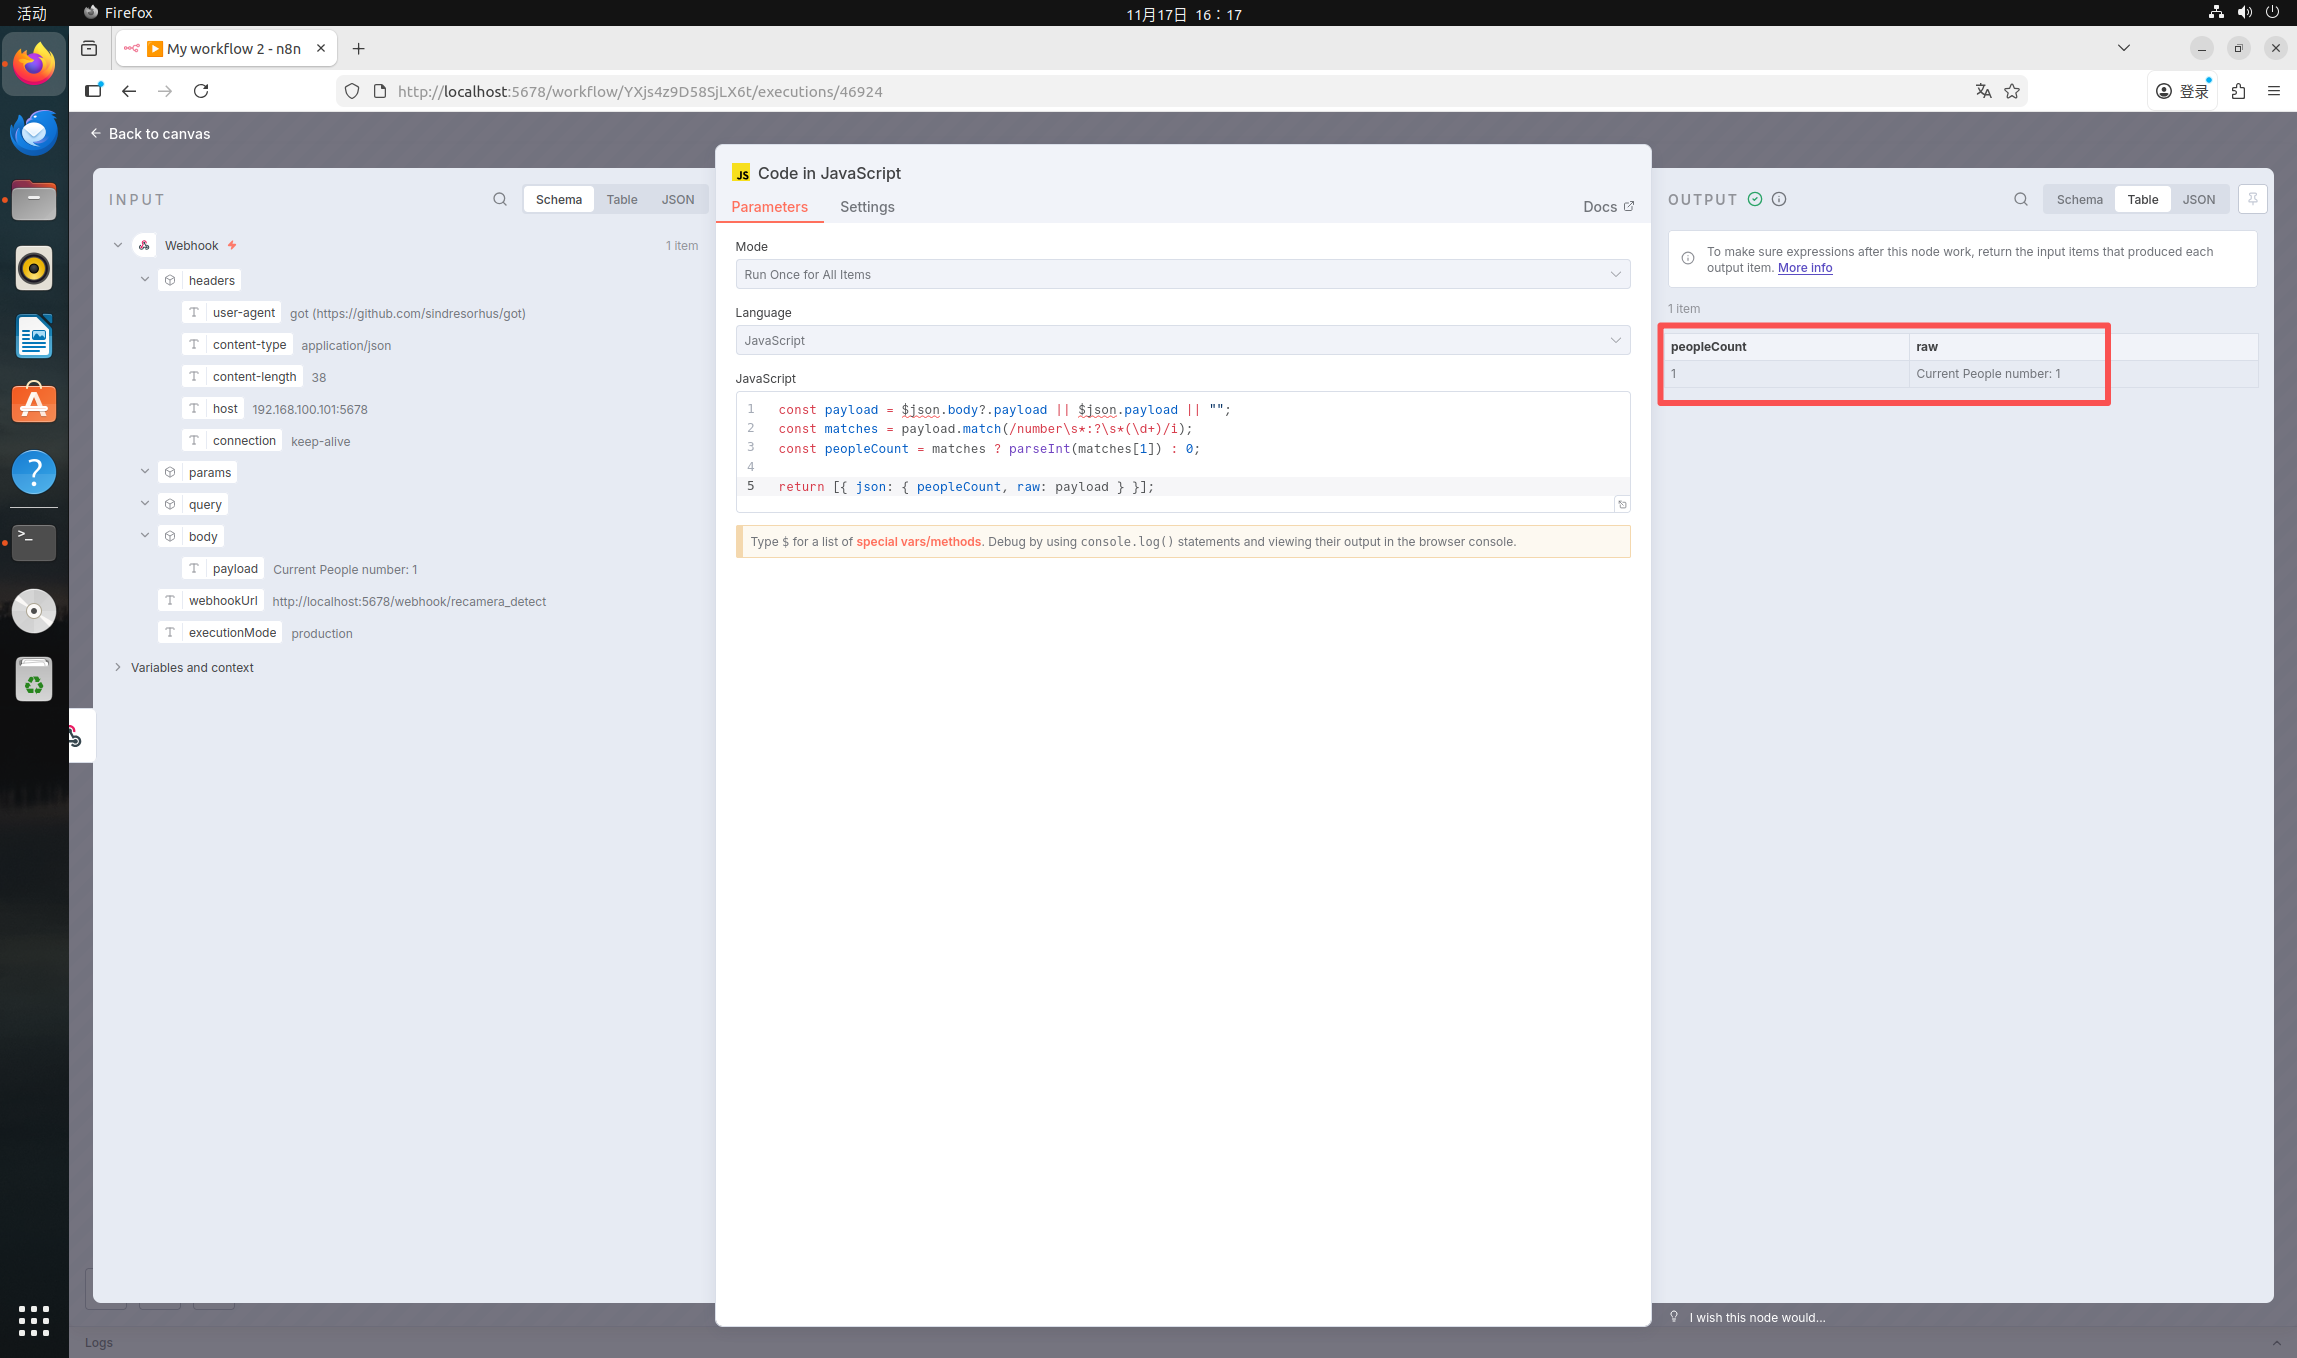
If you want to view the detection content of a certain time, you can double-click that timestamp, and then double-click "Code in JavaScript" to view the OUTPUT on the right.
Tech Support & Product Discussion
Thank you for choosing our products! We are here to provide you with different support to ensure that your experience with our products is as smooth as possible. We offer several communication channels to cater to different preferences and needs.