Coupling reCamera Home Assistant Enterprise WeChat
Introduction
A truly dynamic intelligent system is never merely about "seeing the world", but is capable of understanding events, triggering actions, and achieving cross-platform interconnection. In this solution, we will use AI-based ReCamera as the front-end sensing device, complete data parsing and formatting through Node-RED, and then use Home Assistant as the automation center to present the detection results in real time, make decisions, and further link with the enterprise WeChat robot to achieve immediate notifications. The entire chain forms a set of expandable, observable, and automatically responsive intelligent scene system. ReCamera uses the YOLO model to detect objects such as humans and pets in real time; Node-RED processes the detection results and pushes them to Home Assistant; HA uses Webhook to automate the process of writing data to entities, performing condition judgments, and pushing alarm information to the enterprise WeChat group, achieving cross-platform real-time alerts. This architecture not only demonstrates the deep coupling capability of ReCamera and HA, but also reflects how to combine AI vision, automation rules, and enterprise-level notification systems in practical applications to build a truly "usable and intelligent" IoT integrated solution.
Hardware Preparation
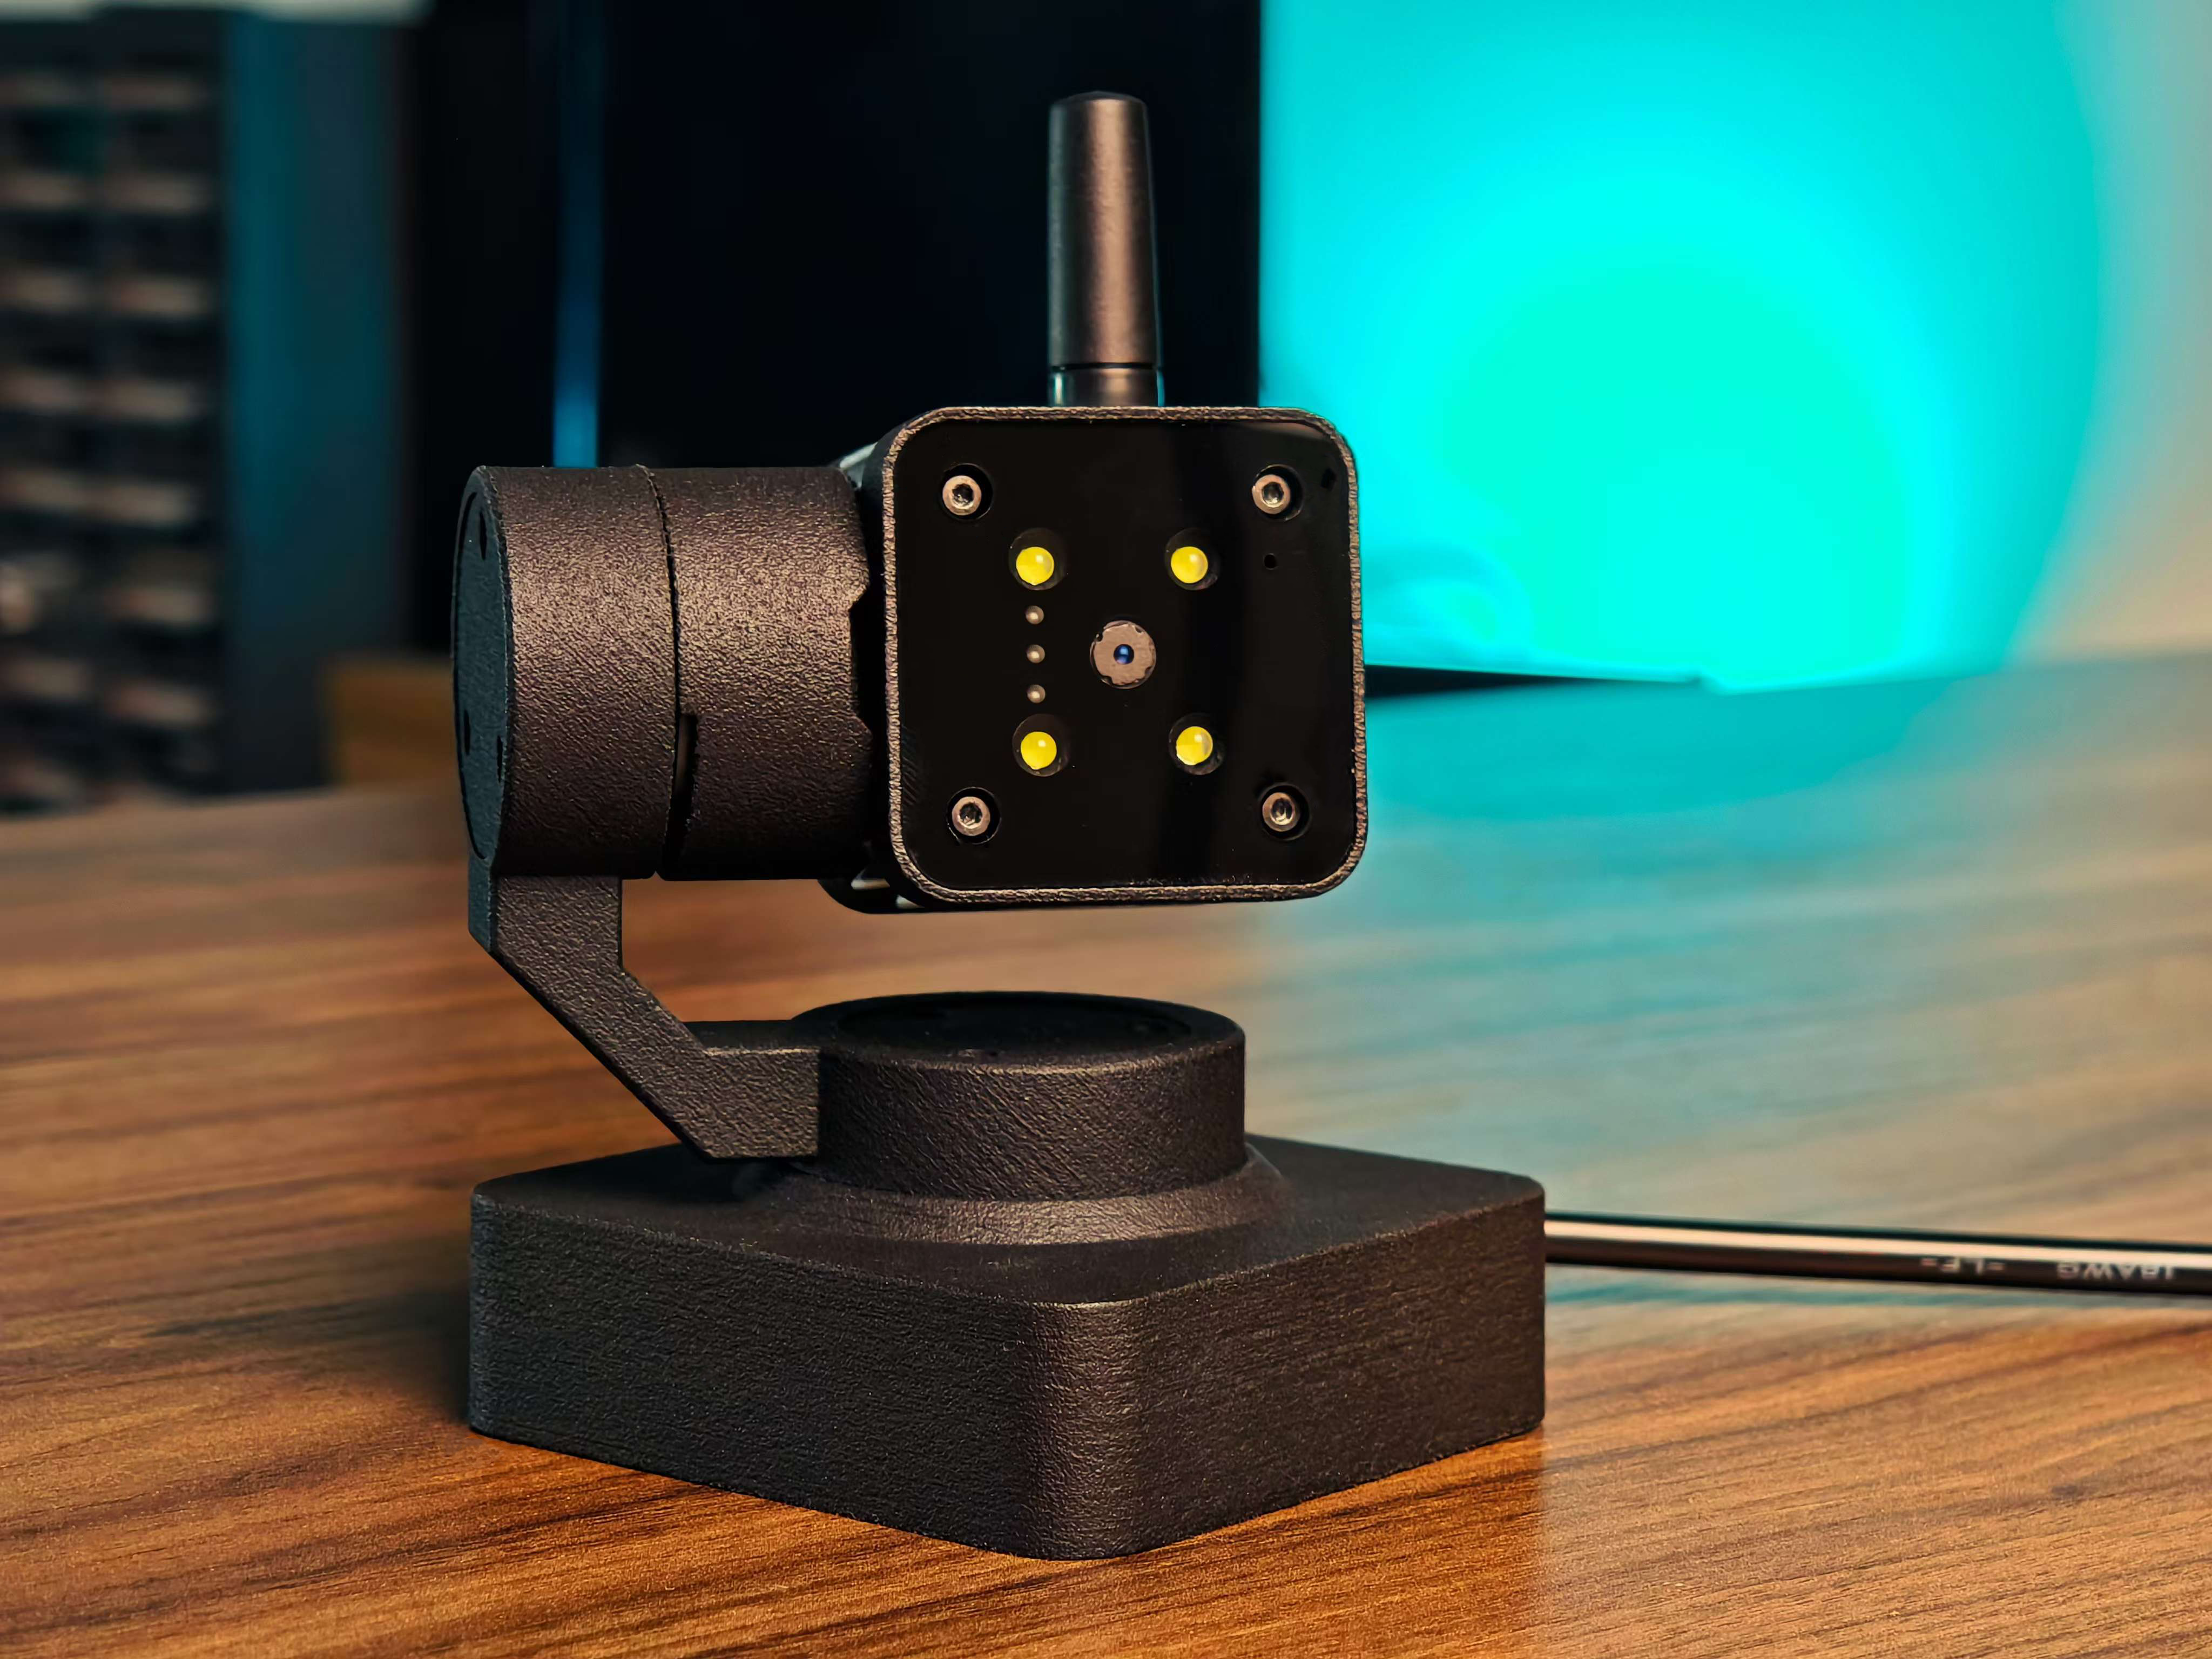
One reCamera (it can be any of the 2002 series, HQ POE version, or pan-tilt version, but note that the POE version does not have WiFi functionality and requires a switch with POE function to be connected in the same network segment)
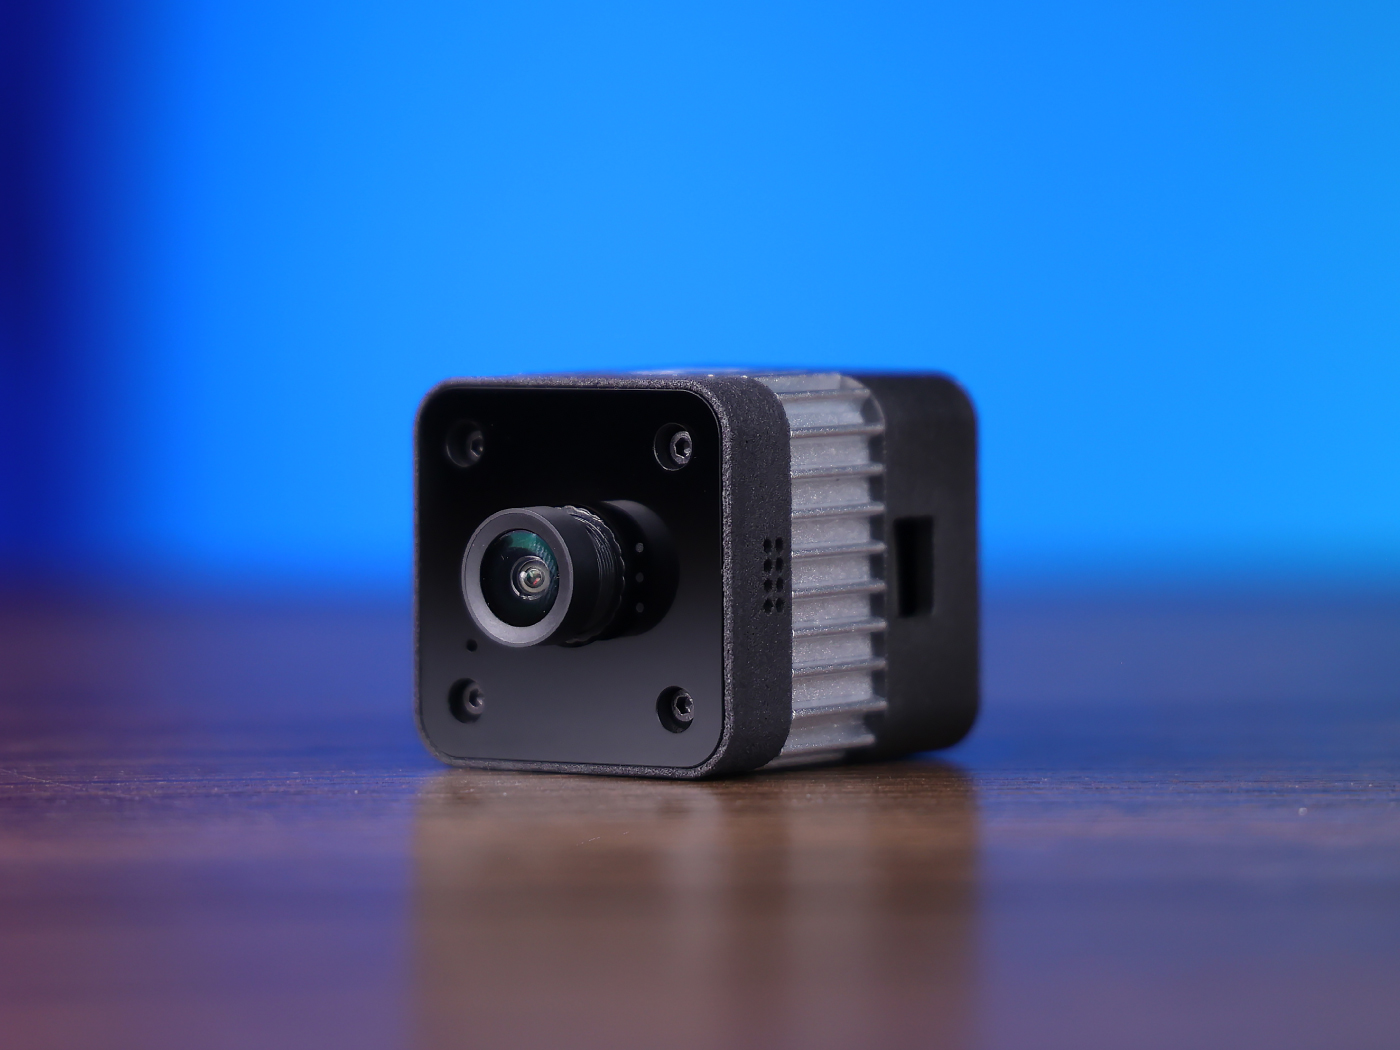
one reComputer (any version is fine, here I use reComputer AI R2130-12 as an example)
one computer (Enterprise WeChat has been installed.)
| reCamera 2002 Series | reCamera Gimbal | reCamera HQ POE | reComputer AI R2000 Series |
|---|---|---|---|
 |  |  |  |
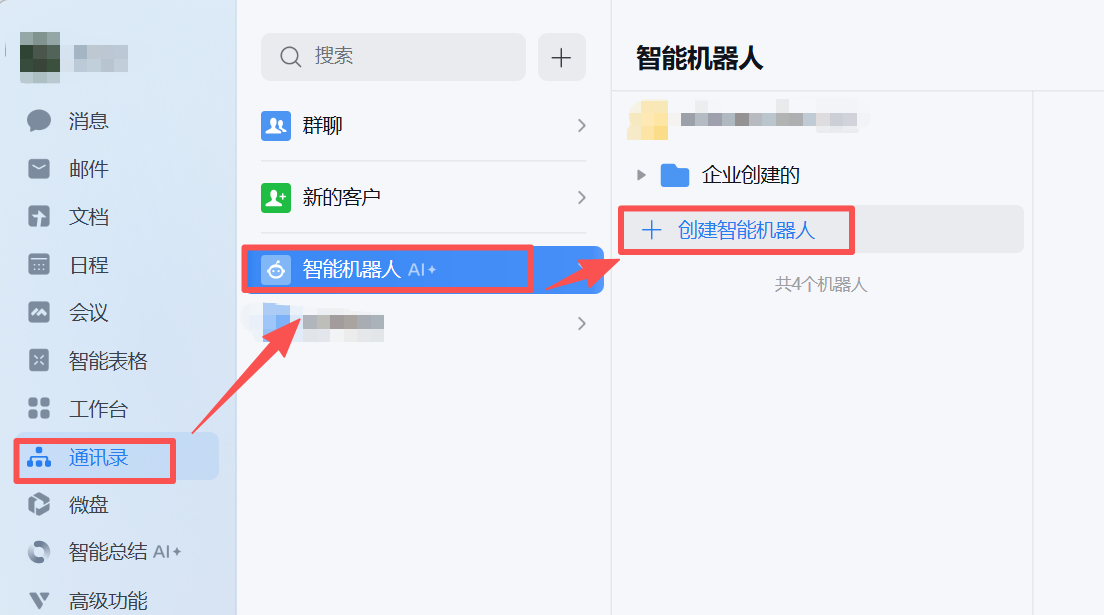
1.Configuration of Enterprise WeChat
(1) Create an intelligent robot
Click Address Book-Intelligent Robot-Create Intelligent Robot
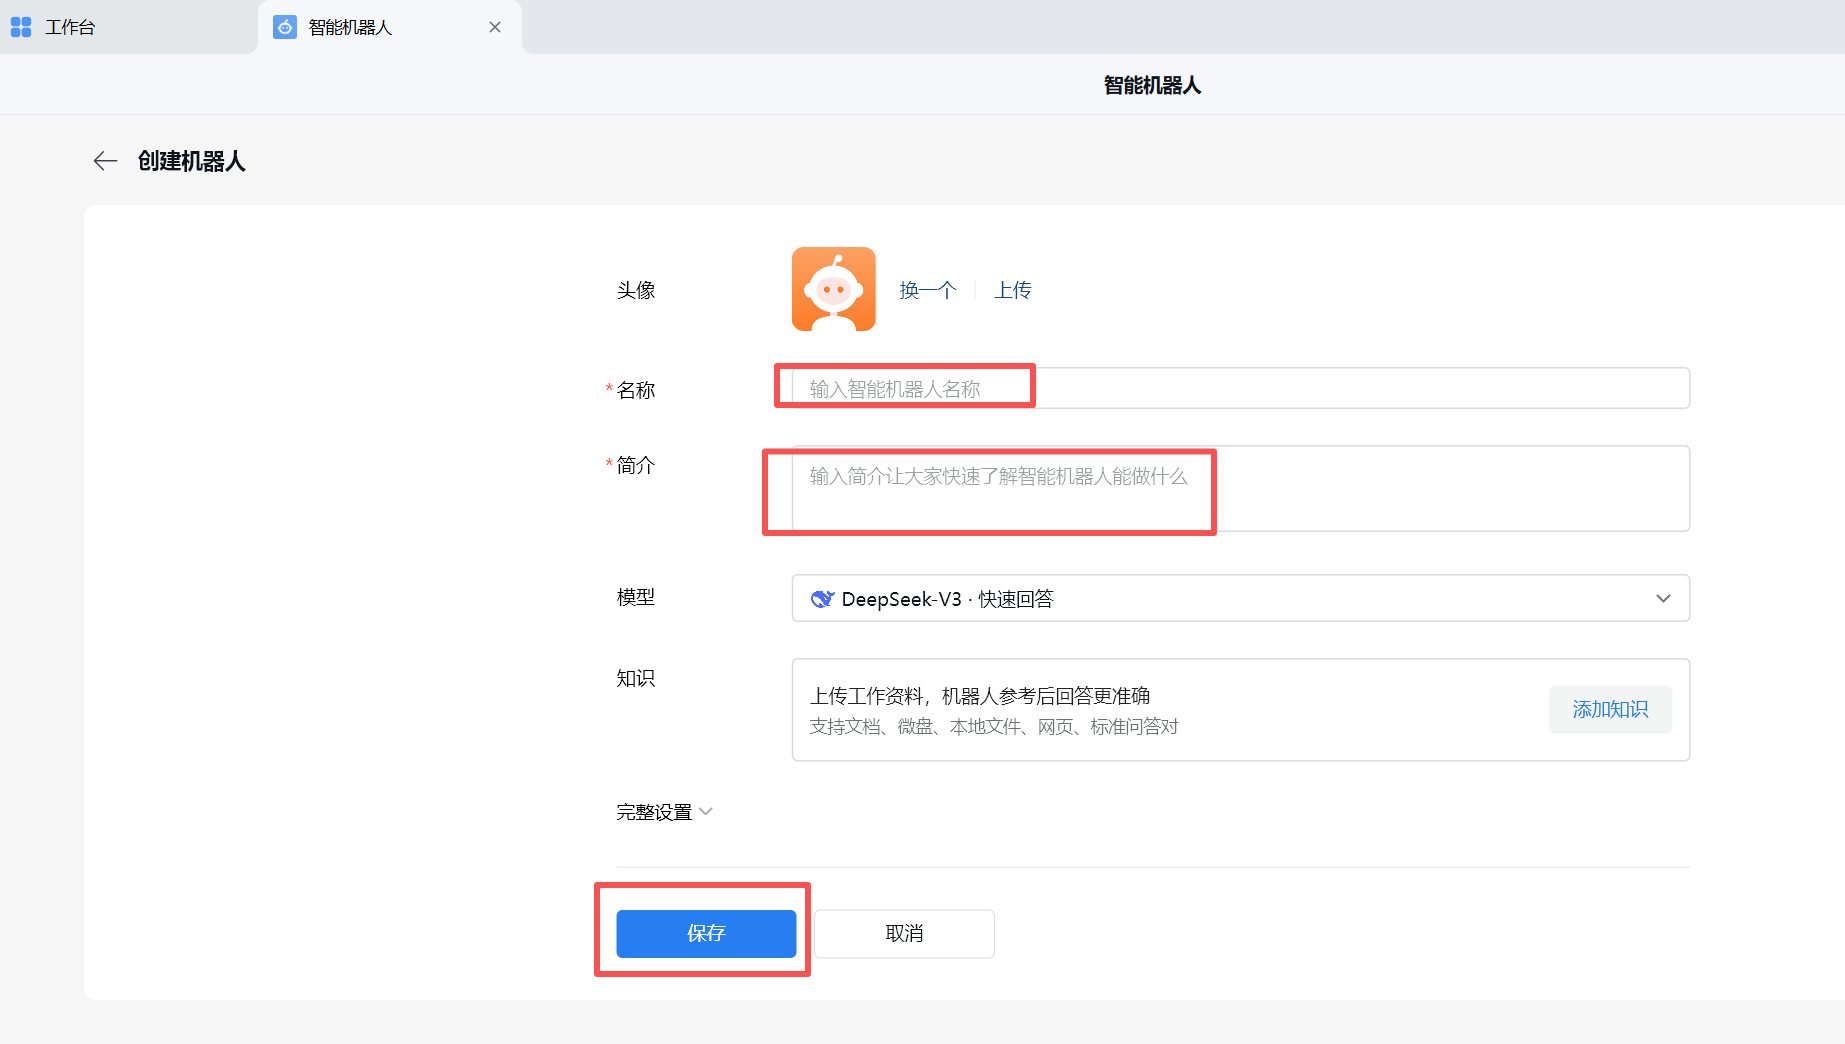
(2) Configure the robot
After completing the required items, click Save
(3) Create a new group chat
Pull the robot you just created and any colleague into the group (because more than 3 people can build the group, and you can move the colleague out of the group chat after the group building is successful)
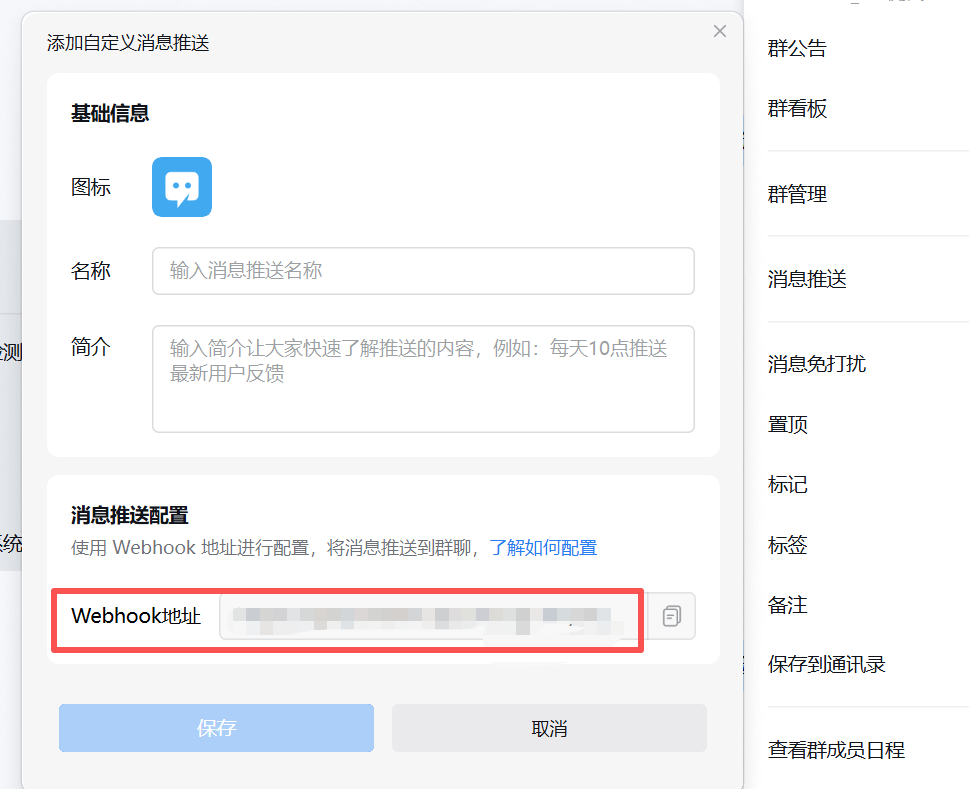
(4) Configure message push
The configuration steps are shown in the following figure. After filling in the name and introduction, click Save.
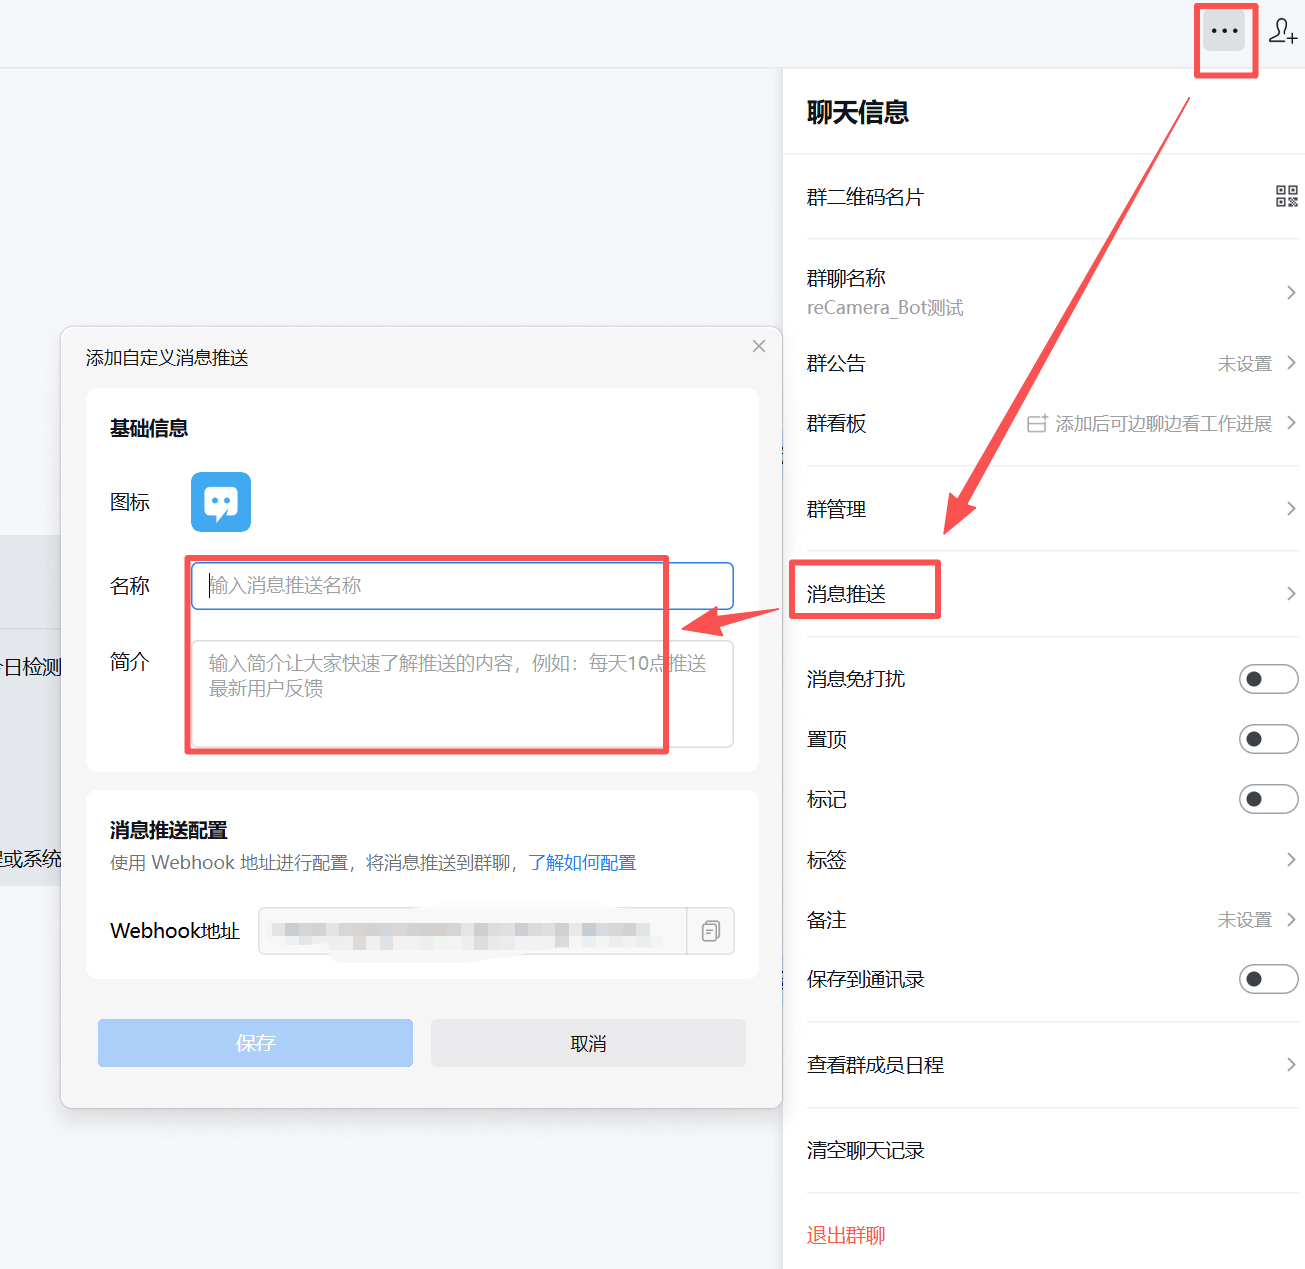
The Webhook address in this step will be useful when editing the configuration.yaml later.
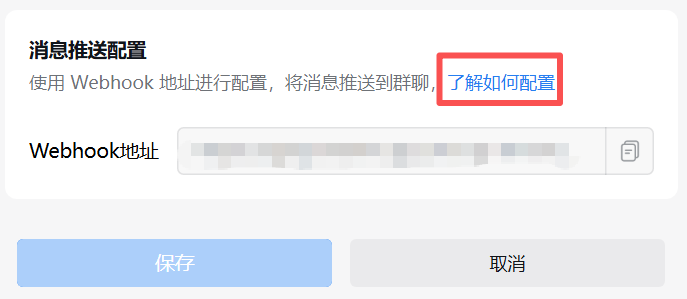
Remember, be sure to protect the webhook address of the good news push to avoid leakage! Don't share to github, blogs and other places that can be publicly consulted, otherwise the bad guys can use your message push to send spam messages.
If you want to see the details of how to configure, please click "know how to configure", enterprise WeChat official provides a message format routine, so that you can better understand
2. reComputer AI R2130-12 configuration
(1) System Preparation
Update the system
sudo apt update && sudo apt upgrade -y
Install necessary dependencies
sudo apt install -y ca-certificates curl gnupg lsb-release
(2) Install Docker
Official Script Installation
curl -fsSL https://get.docker.com | sh

Allow the current user to use docker
sudo usermod -aG docker $USER
Then restart the system to make the permissions take effect
sudo reboot
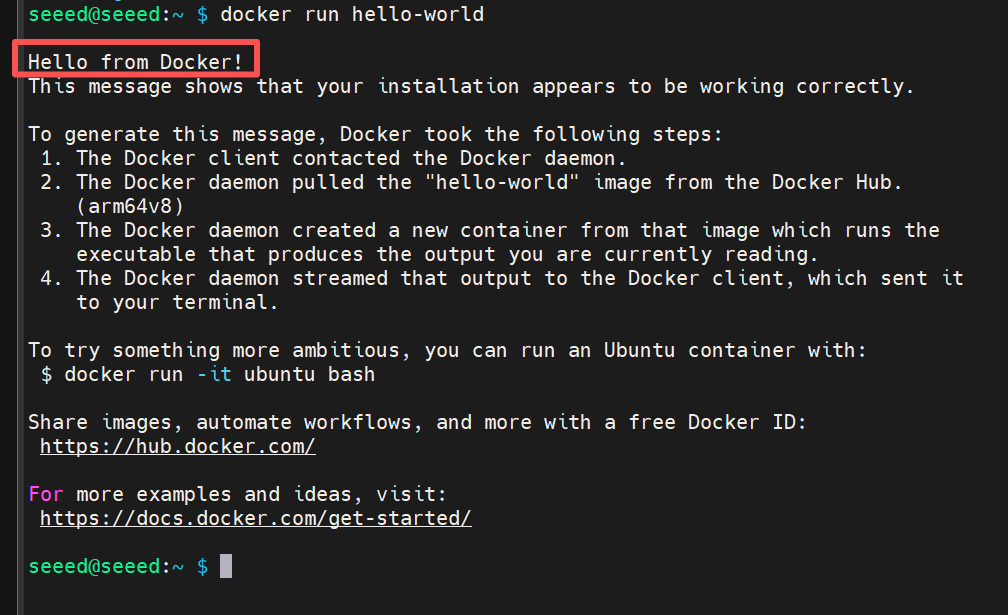
Verify Installation
docker run hello-world
If you see "Hello from Docker!" The words, indicating that the installation was successful
(3) Install Home Assistant(Container Mode)
Create a mount directory
In order to persist the configuration file:
mkdir -p ~/homeassistant/config
Start the container
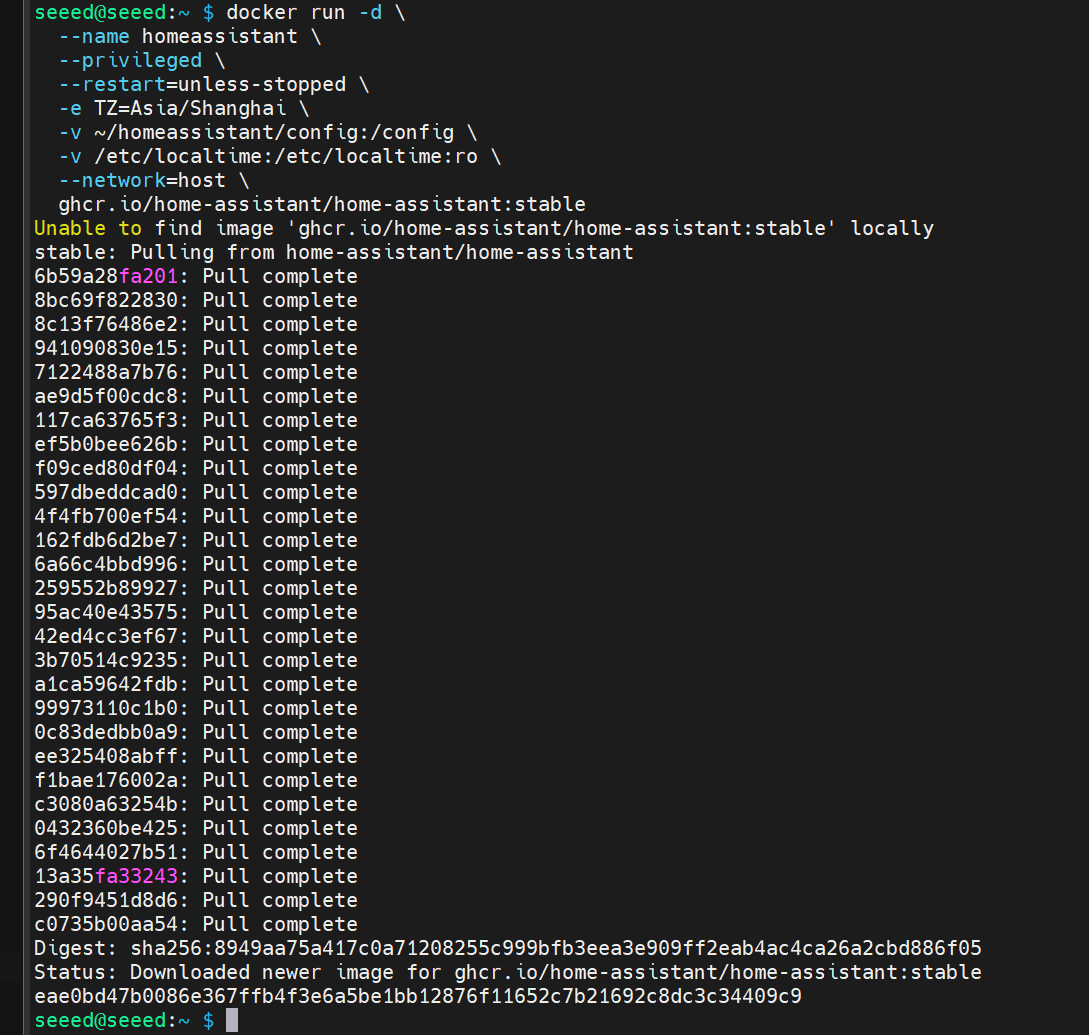
Run the following command to start the Home Assistant (this step will take a long time, depending on your network):
docker run -d \
  --name homeassistant \
  --privileged \
  --restart=unless-stopped \
  -e TZ=Asia/Shanghai \
  -v ~/homeassistant/config:/config \
  -v /etc/localtime:/etc/localtime:ro \
  --network=host \
  ghcr.io/home-assistant/home-assistant:stable
Parameter description:
- '-- network = host':Home Assistant has direct access to the host network (required for automatic device discovery)
- '-v ~/homeassistant/config:/config': save configuration file
- '-- restart = unless-stopped': automatic restart
- '-- privileged': enable hardware access (USB Zigbee/Z-Wave, etc.)
(4) Access Home Assistant
View IP:
hostname -I
Visit the browser
Wait for 1 to 2 minutes after the container starts, and then access it in the browser:
http://<你的IP>:8123
Example:
http://192.168.1.88:8123
The first start will enter the initialization interface, start to create an account and configure smart home
(5) find the configuration file path
Home Assistant All configurations are saved in:
/home/seeed/homeassistant/config/
Available through:
cd /home/seeed/homeassistant/config
ls
See:
automations.yaml configuration.yaml scripts.yaml ...
(6) configuration automation to receive ReCamera data
Install the editor:
sudo apt install nano -y
Edit 'automations.yaml ':
sudo nano /home/seeed/homeassistant/config/automations.yaml
Replace the content:
- alias: "ReCamera Detection"
  description: "接收来自 ReCamera 的检测结果并更新实体和推送企业微信"
  trigger:
    - platform: webhook
      webhook_id: recamera_detection

  action:
    # 1️⃣ 更新 input_text 实体(UI 上显示)
    - service: input_text.set_value
      target:
        entity_id: input_text.recamera_people_raw
      data:
        value: "{{ trigger.json.payload }}"

    # 2️⃣ 条件判断:人数 >= 2 时推送企业微信
    - condition: template
      value_template: >
        {% set payload = trigger.json.payload %}
        {% set num = payload | regex_findall_index('[0-9]+') | first | int %}
        {{ num >= 2 }}

    - service: rest_command.recamera_wechat_notify
      data:
        message: "ReCamera 检测到多人!当前人数:{{ trigger.json.payload }}"

  mode: single
Save and exit:
-Ctrl O → Enter (Save)
-Ctrl X (Exit)
Edit configuration.yaml:
sudo nano /home/seeed/homeassistant/config/configuration.yaml
Replace the content:
# ==========================
# Home Assistant 基础配置
# ==========================

# 加载默认集成(请勿删除)
default_config:

# 加载前端主题
frontend:
  themes: !include_dir_merge_named themes

# 加载独立配置文件
automation: !include automations.yaml
script: !include scripts.yaml
scene: !include scenes.yaml


# ==========================
# ReCamera 实体配置部分
# ==========================

# 1️⃣ 定义一个 input_text 实体,用于保存 ReCamera 最新检测结果
input_text:
  recamera_people_raw:
    name: ReCamera 原始检测结果
    max: 255
    icon: mdi:account-group  # 可选:显示为“多人”图标

# 2️⃣ 定义一个模板传感器,用于展示 ReCamera 检测结果
sensor:
  - platform: template
    sensors:
      recamera_people_count:
        friendly_name: "ReCamera 检测人数"
        value_template: "{{ states('input_text.recamera_people_raw') }}"
        icon_template: mdi:camera-outline


# ==========================
# 企业微信机器人推送
# ==========================
rest_command:
  recamera_wechat_notify:
    url: "https://xxxxxx"  #此处填写你在群聊中配置的Webhook地址
    method: POST
    headers:
      Content-Type: "application/json"
    payload: |
      {
        "msgtype": "text",
        "text": {
          "content": "{{ message }}",
          "mentioned_list": ["@all"]
        }
      }
Save and exit:
-Ctrl O → Enter (Save)
-Ctrl X (Exit)
After saving and exiting, restart the Home Assistant:
docker restart homeassistant
3. reCamera the configuration of 2002w
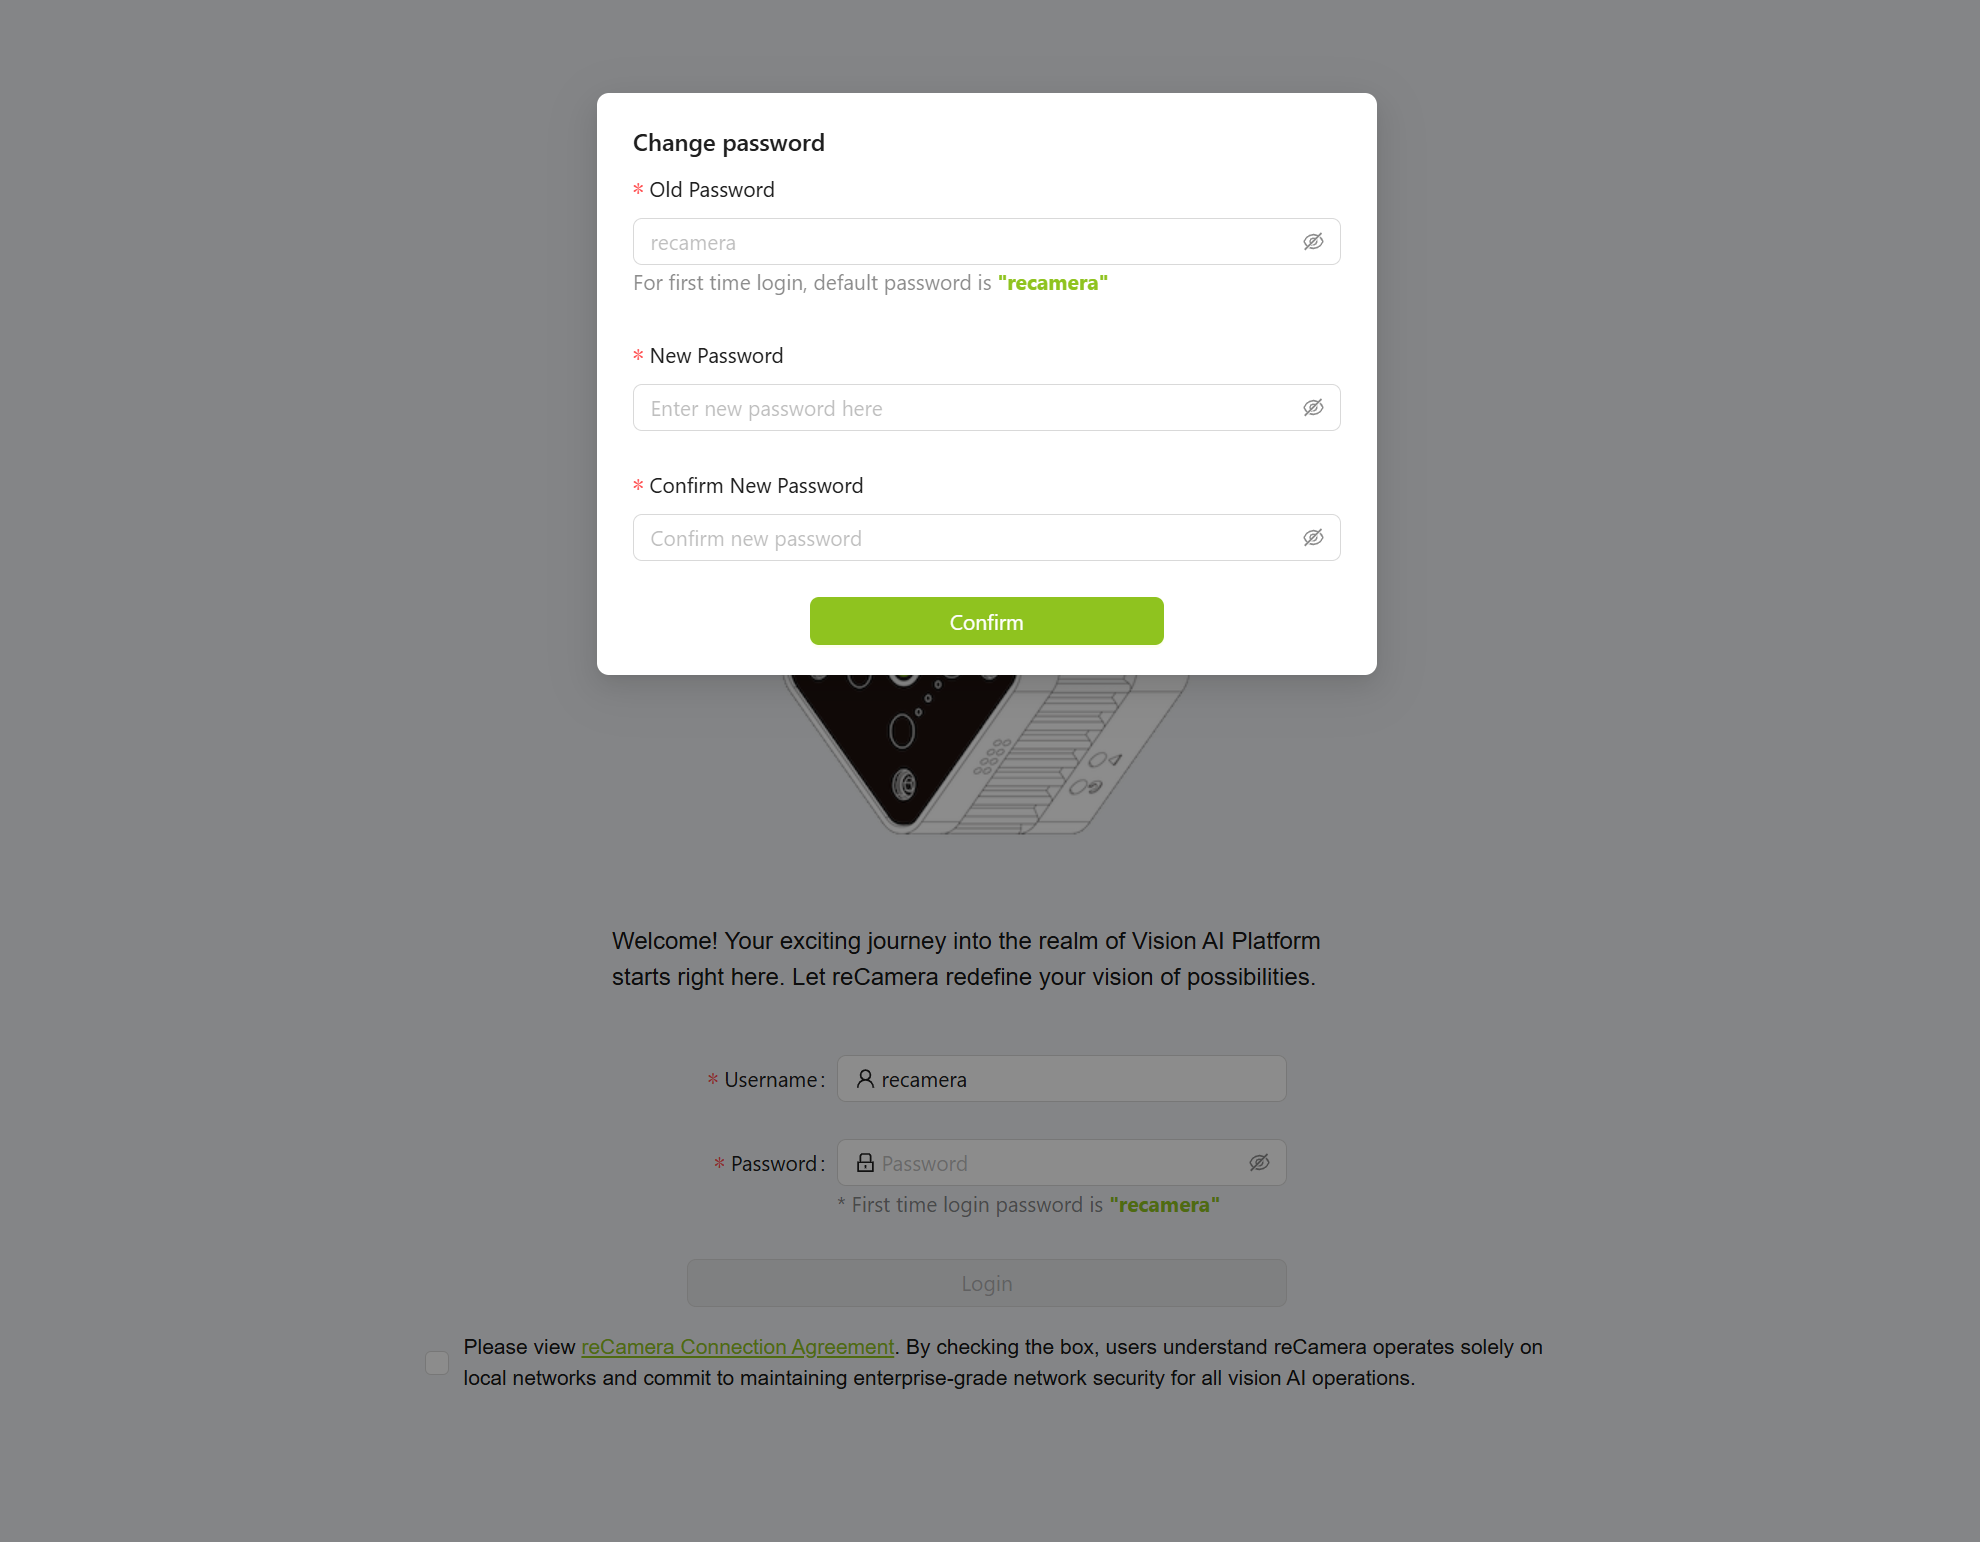
(1) After inserting the reCamera into the computer, access 192.168.42.1
If you have been stuck and cannot open the interface, please refer to the "Restore Factory Settings" section to reset the device. After resetting, visit 192.168.42.1 again. After resetting, you need to modify the password.
(2) After logging in the interface, click the lower right corner to enter "Workspace"
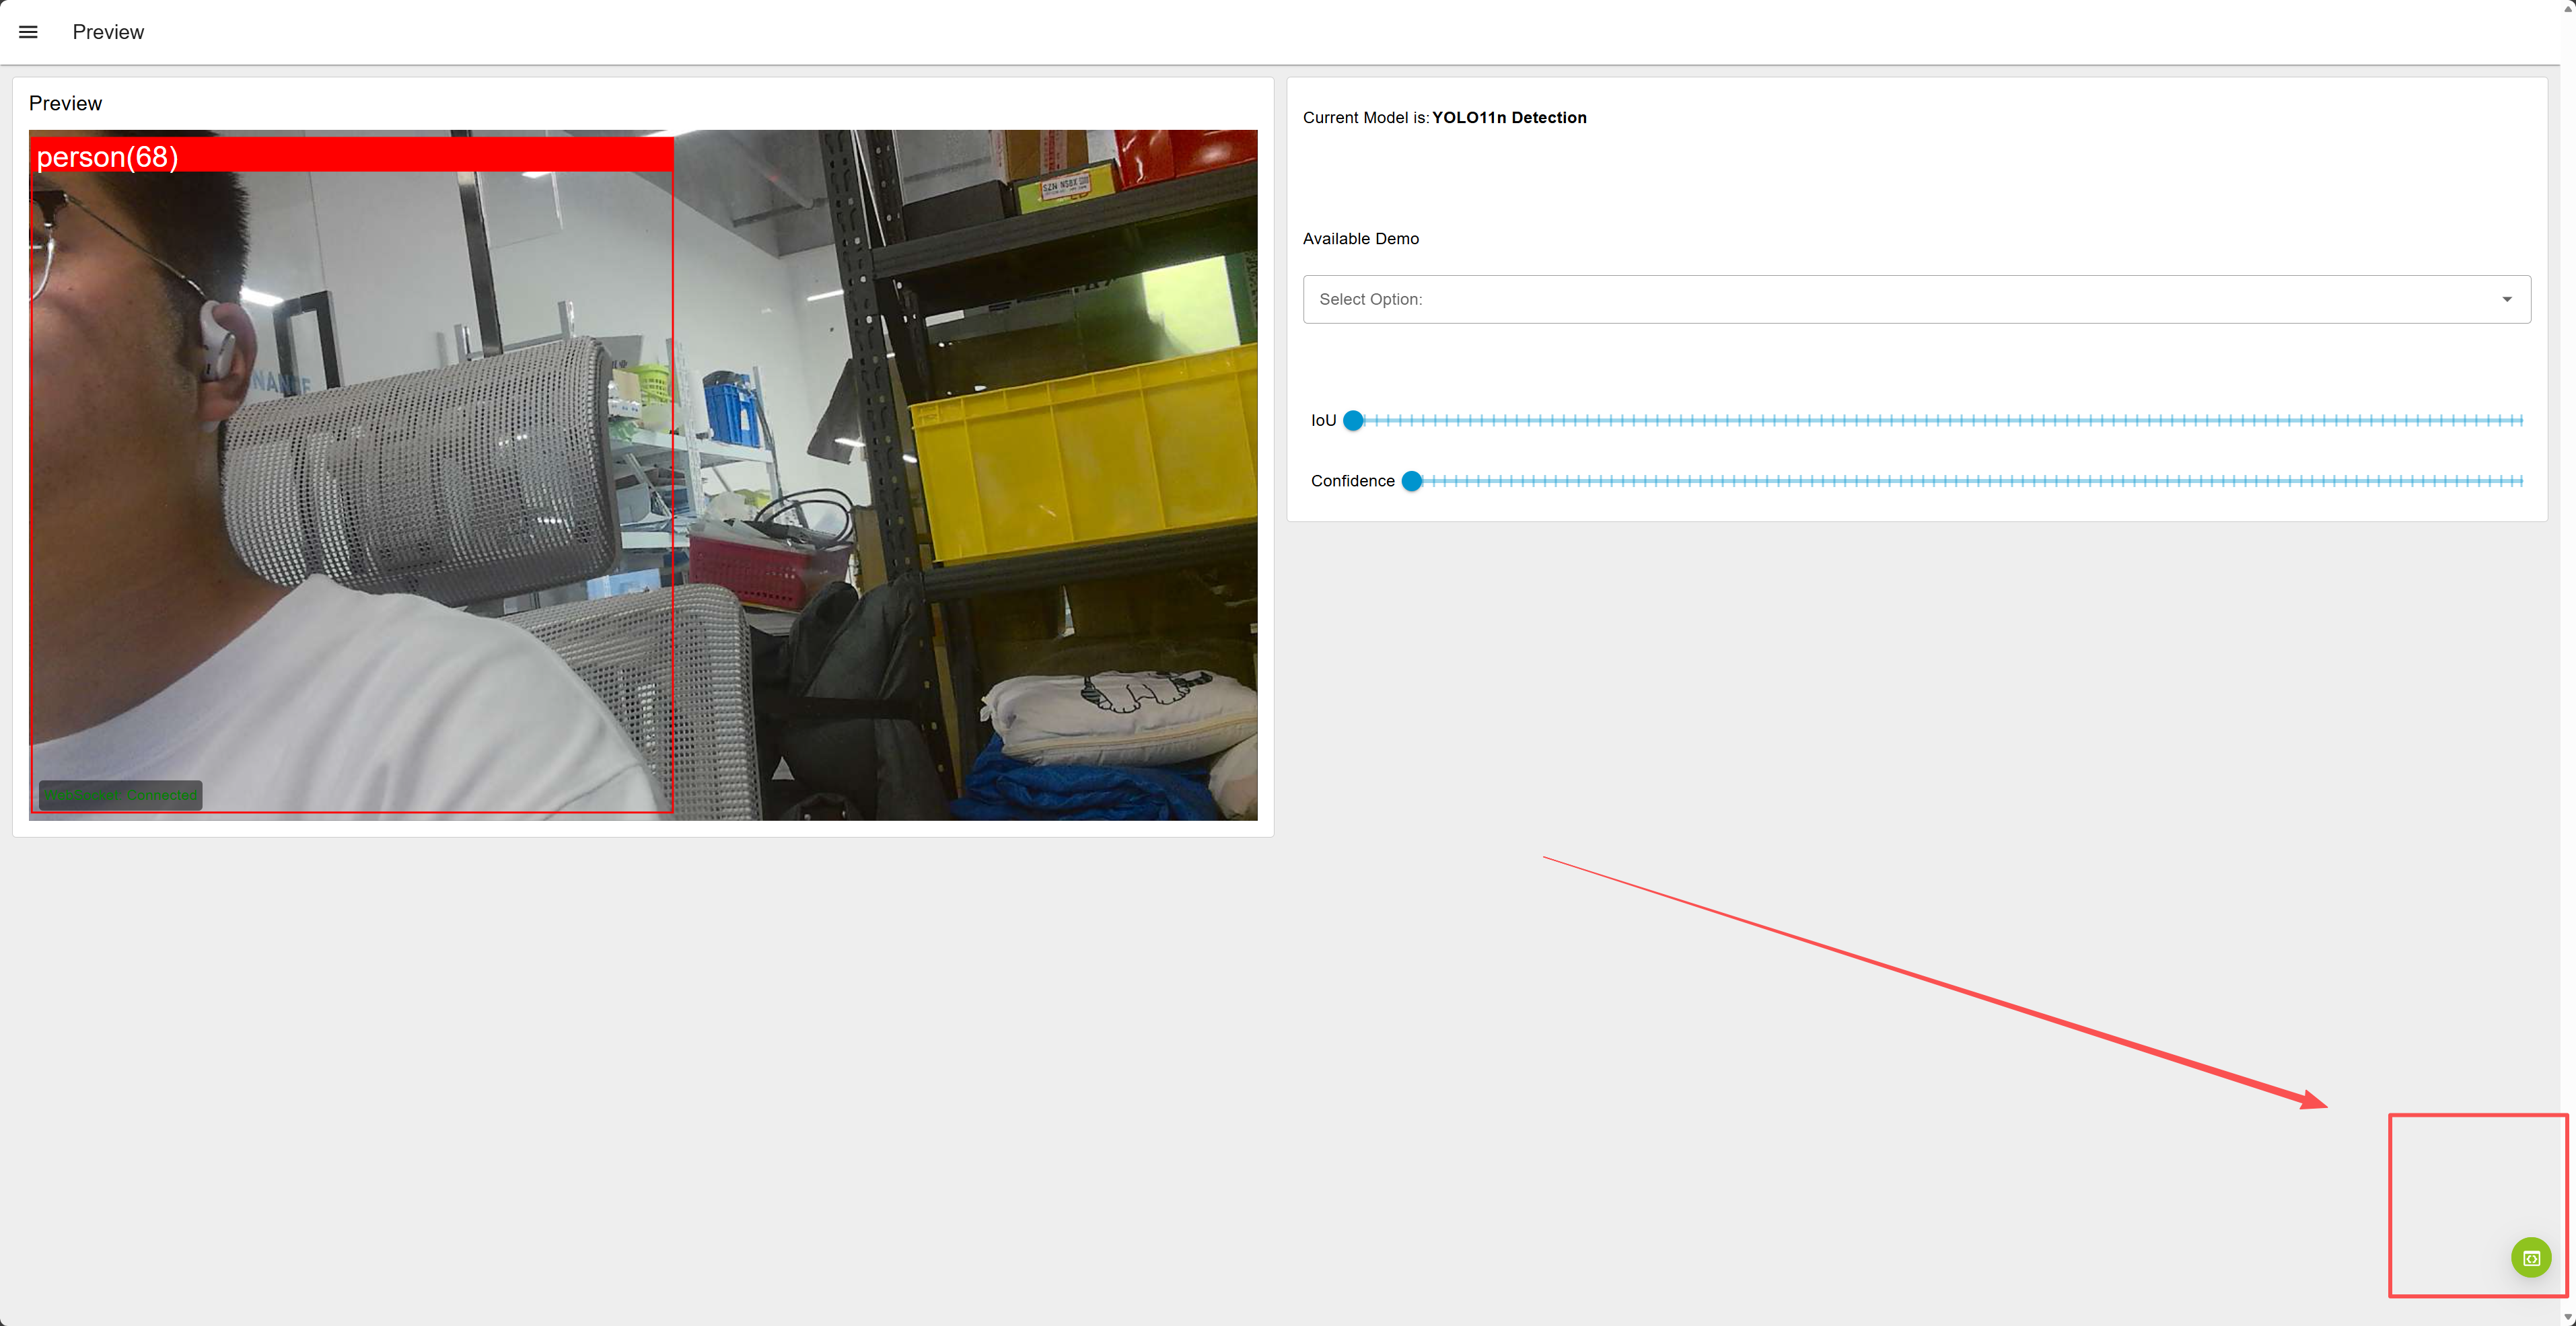
(3) Configure the node after entering the Workspace
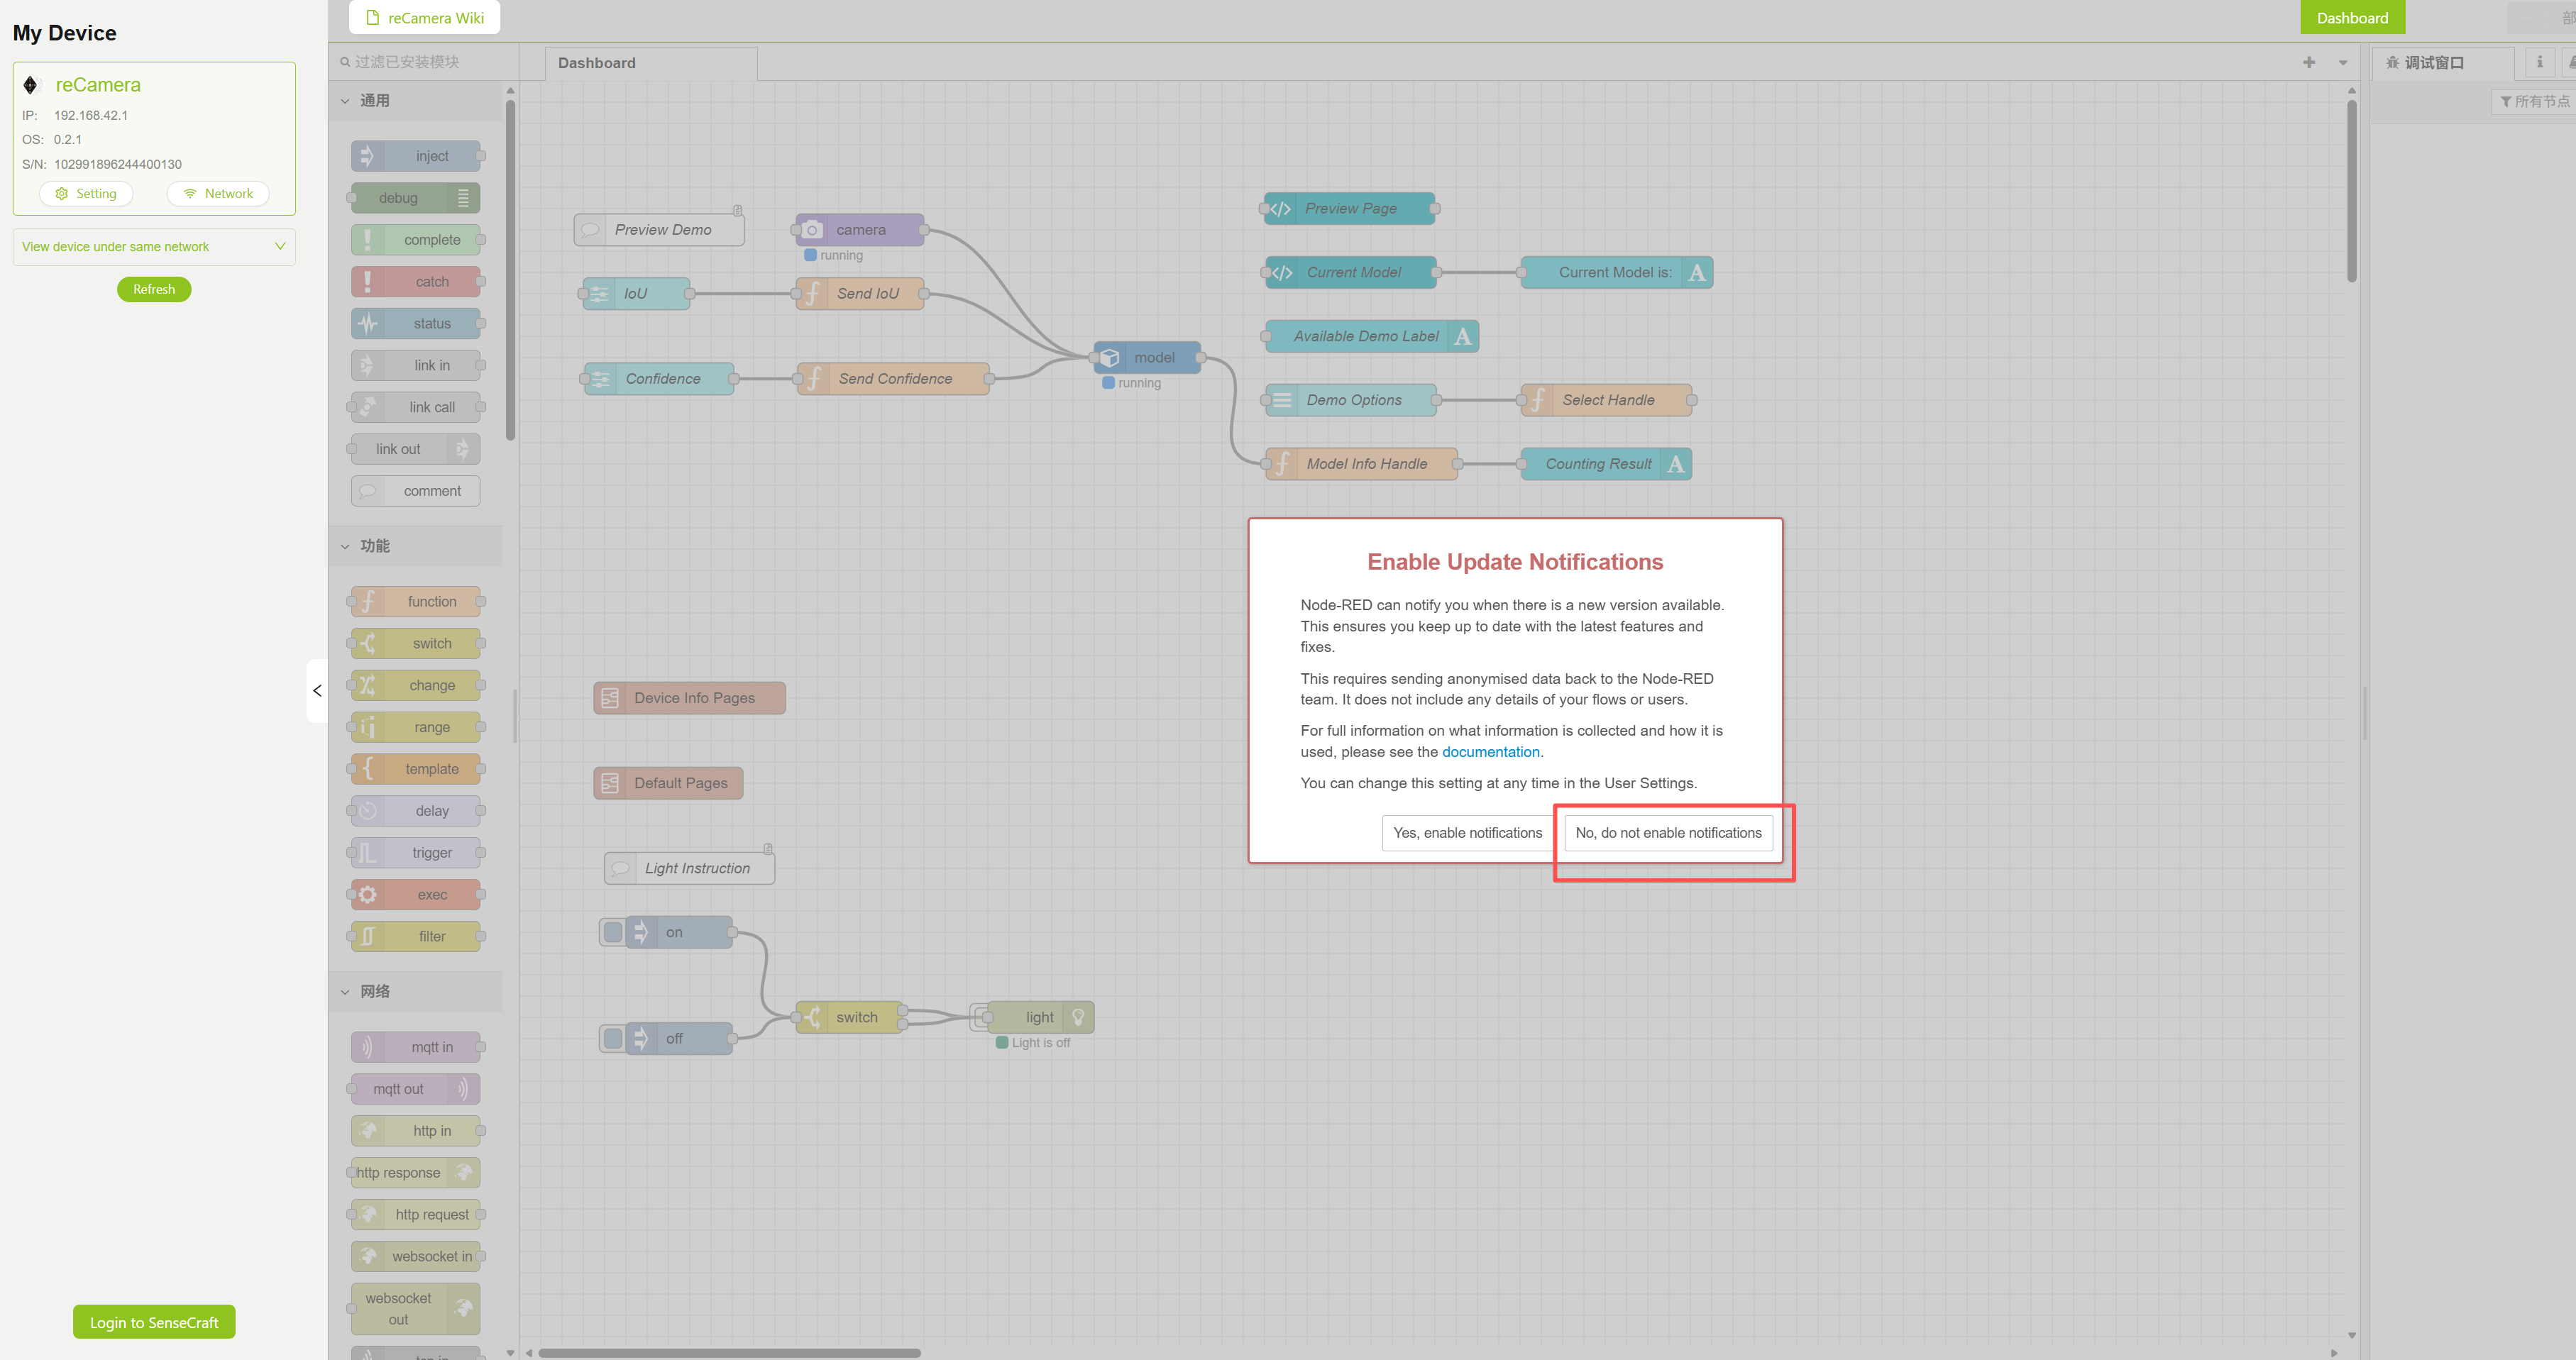
These four new nodes have been added: debug1 and debug2 are used to observe the output information, whether it is necessary or not; function1 is used to process data; Http request node is used to send data to Home Assistant

Next, modify the original node "Model Info Handle" so that it only outputs the number of a certain detection target.
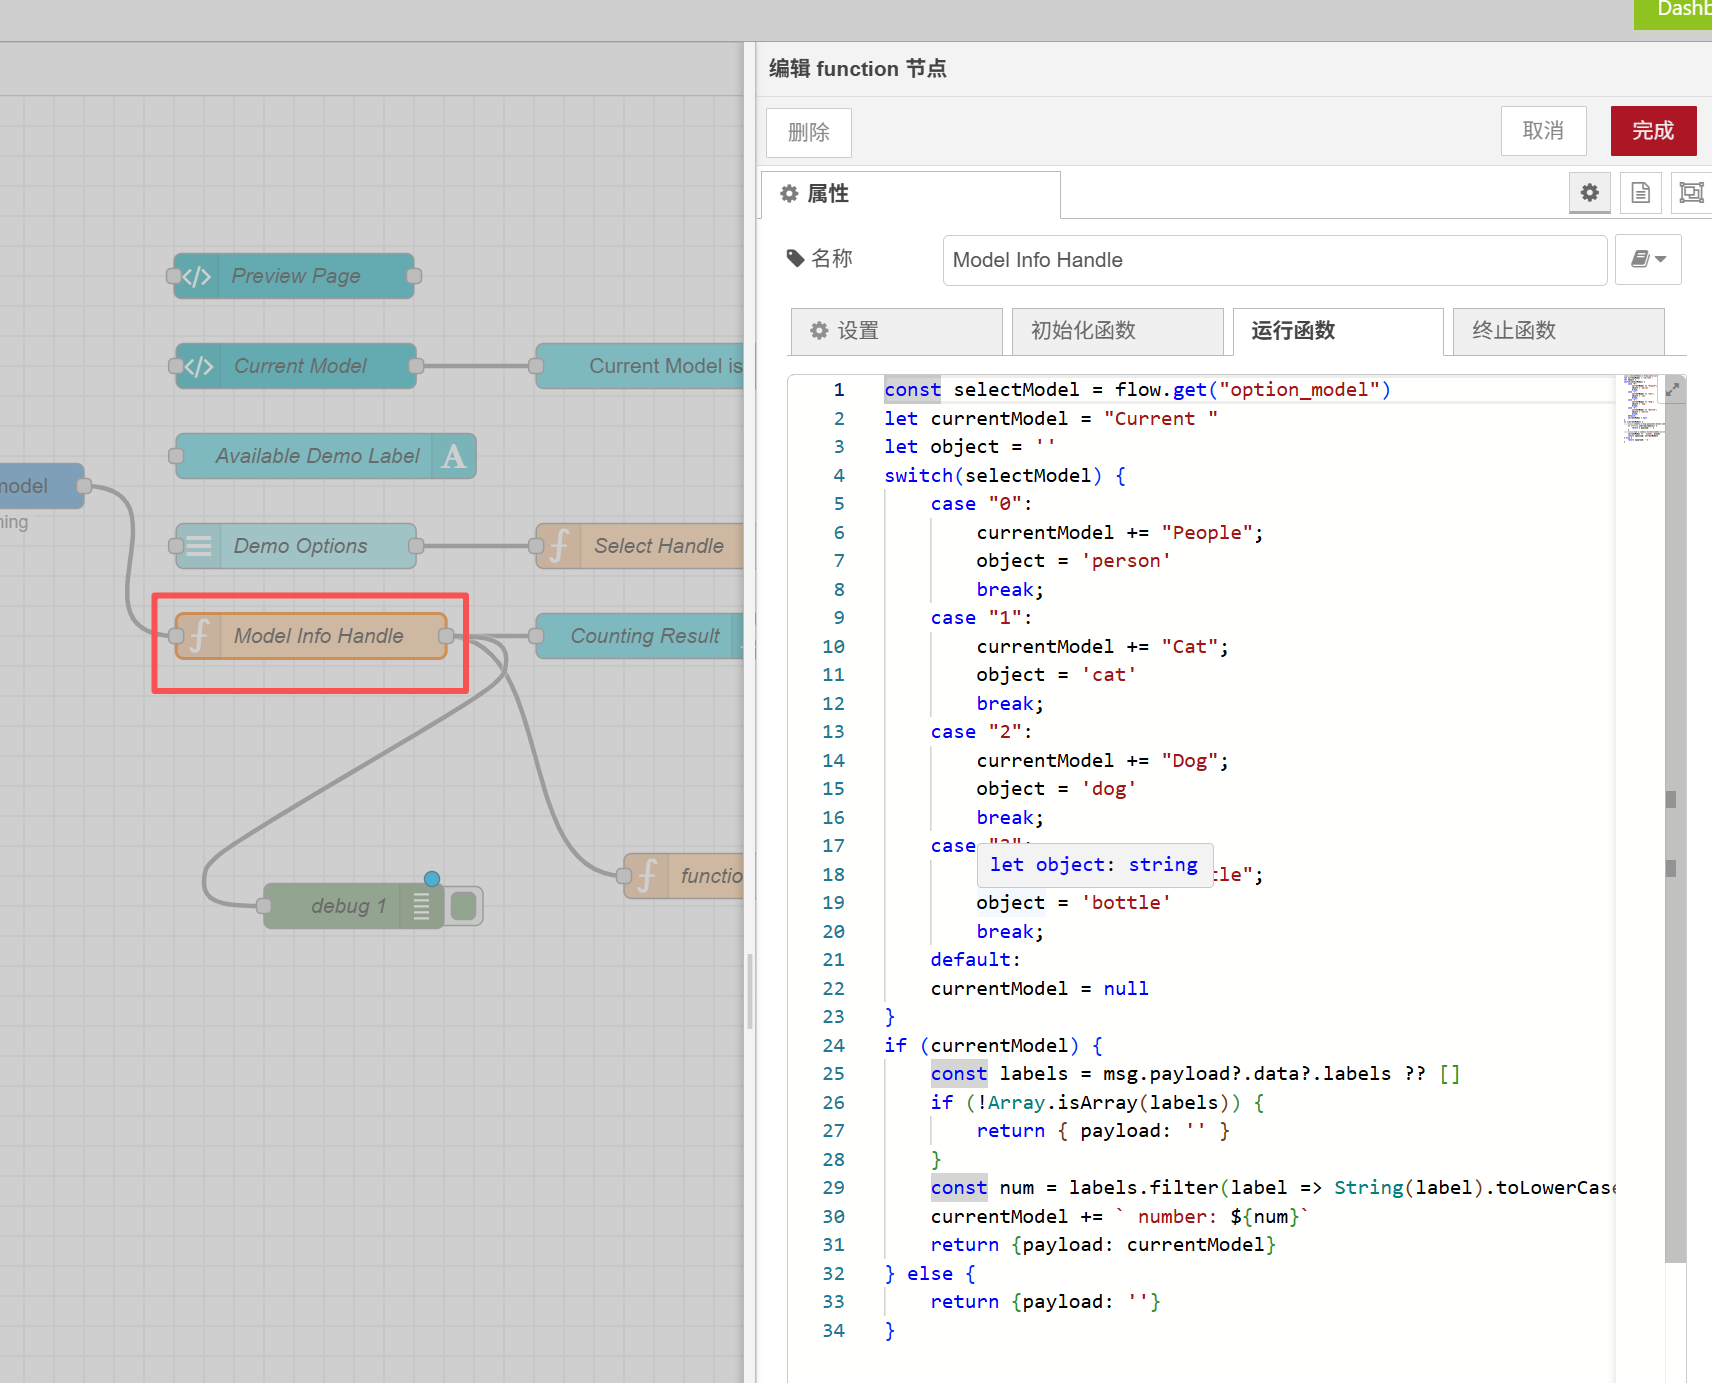
Double-click to open the node and replace the code with the following:
let currentModel = "Current People";
const object = 'person';

const labels = msg.payload?.data?.labels ?? [];

if (!Array.isArray(labels)) {
    return { payload: '' };
}

const num = labels.filter(label => String(label).toLowerCase() === object).length;
currentModel += ` number: ${num}`;

return { payload: currentModel };
Click "Finish" in the upper right corner after modification"
This code only outputs the number of detected persons. If you want to modify it, you can modify the detected object.
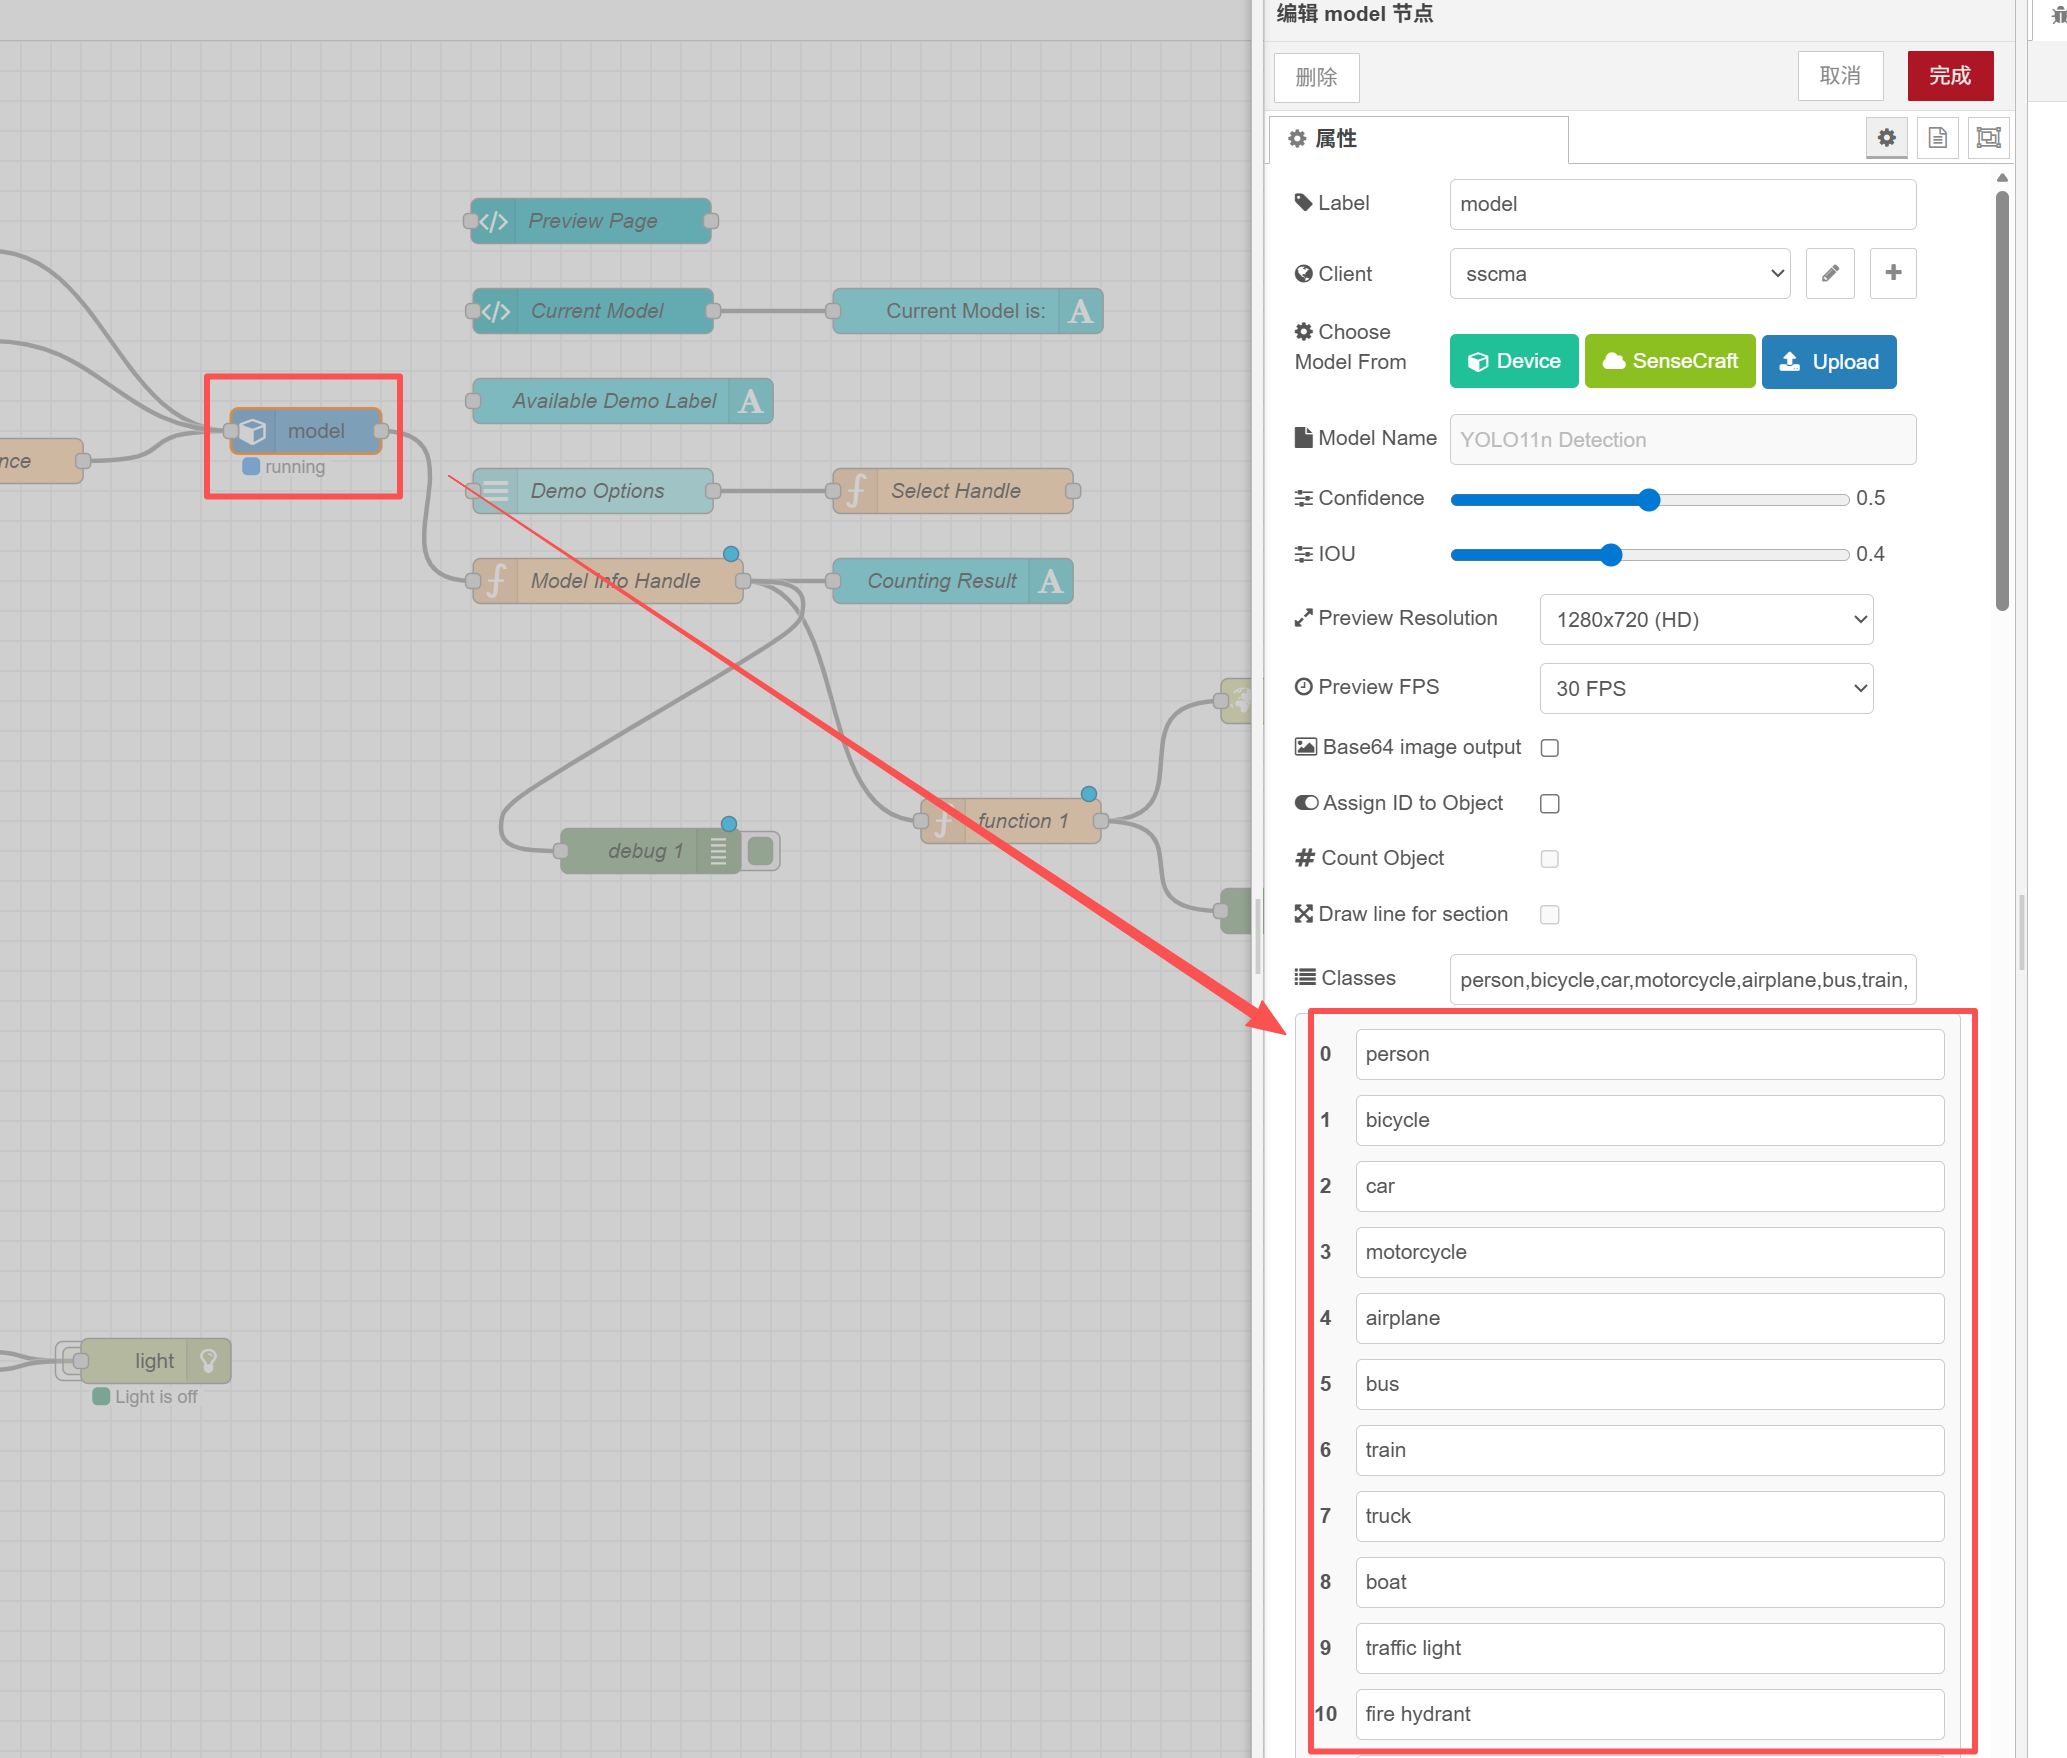
You can see which types of objects can be detected by looking at the model node
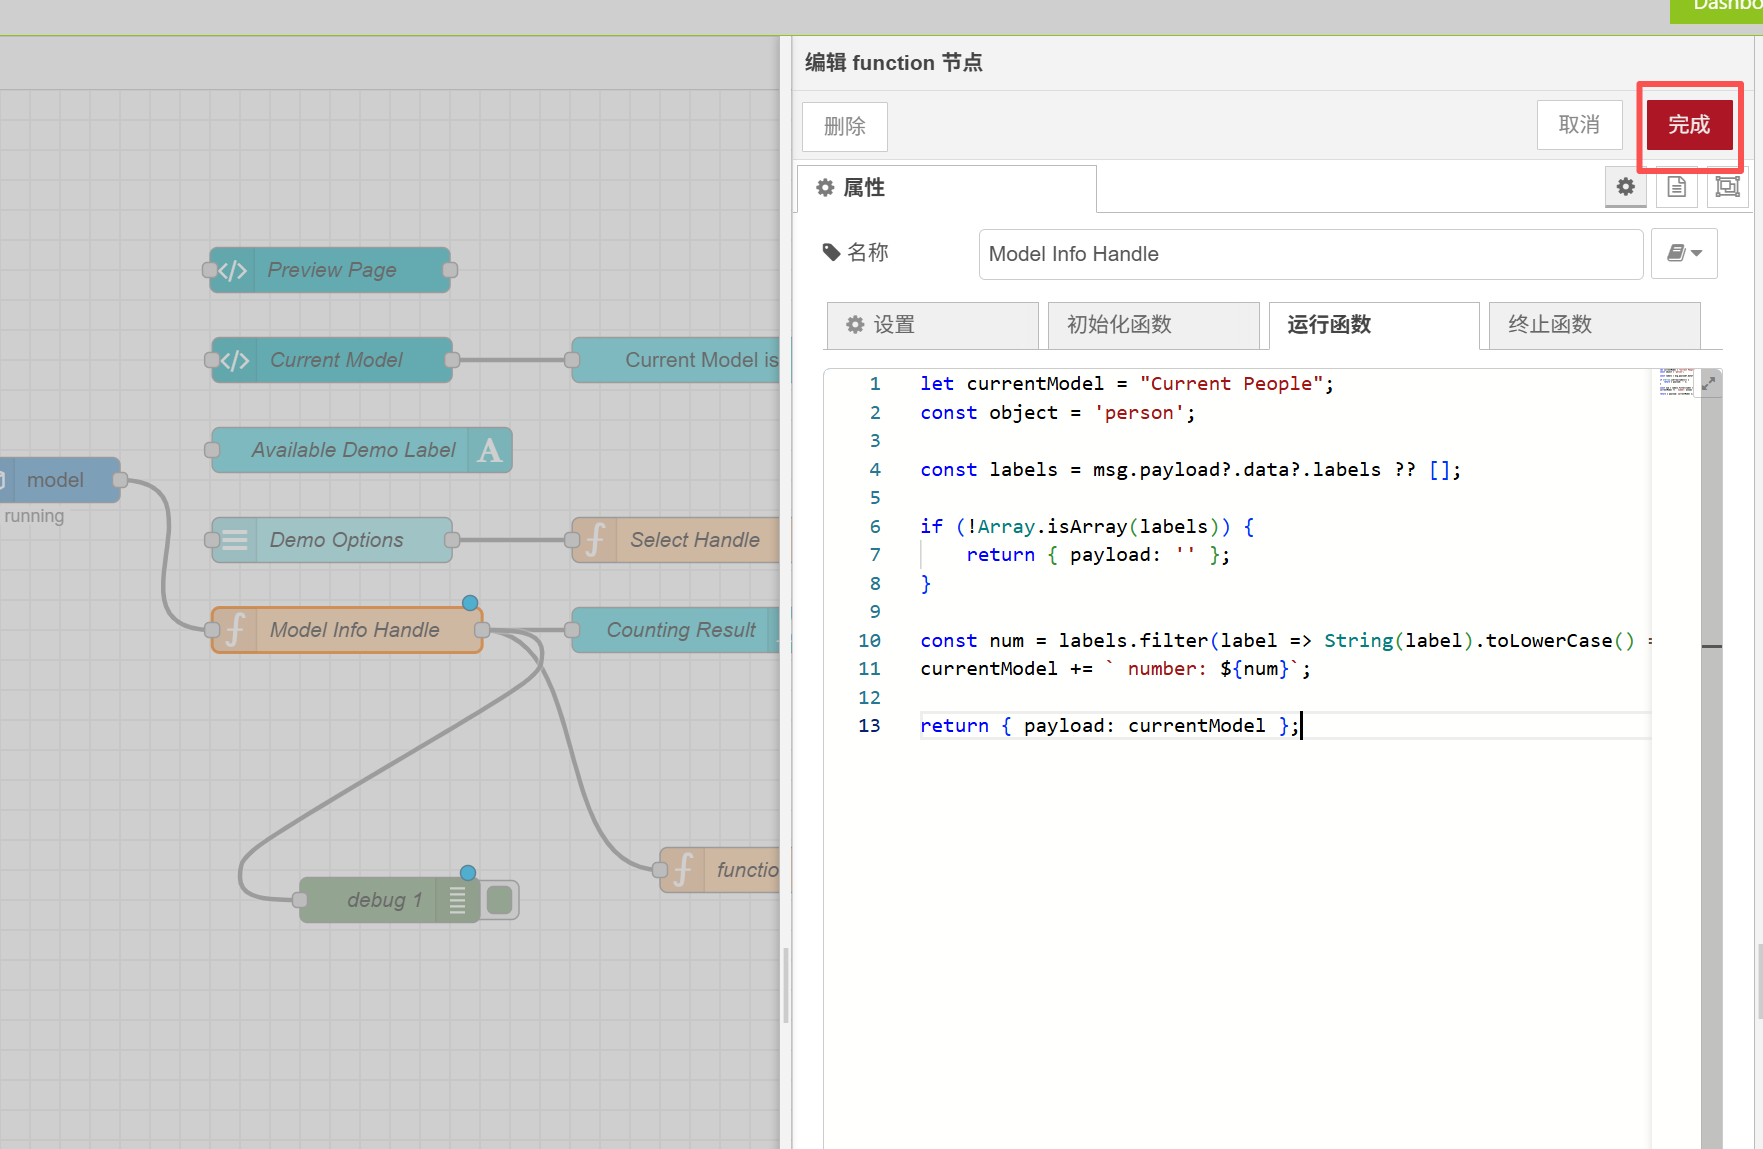
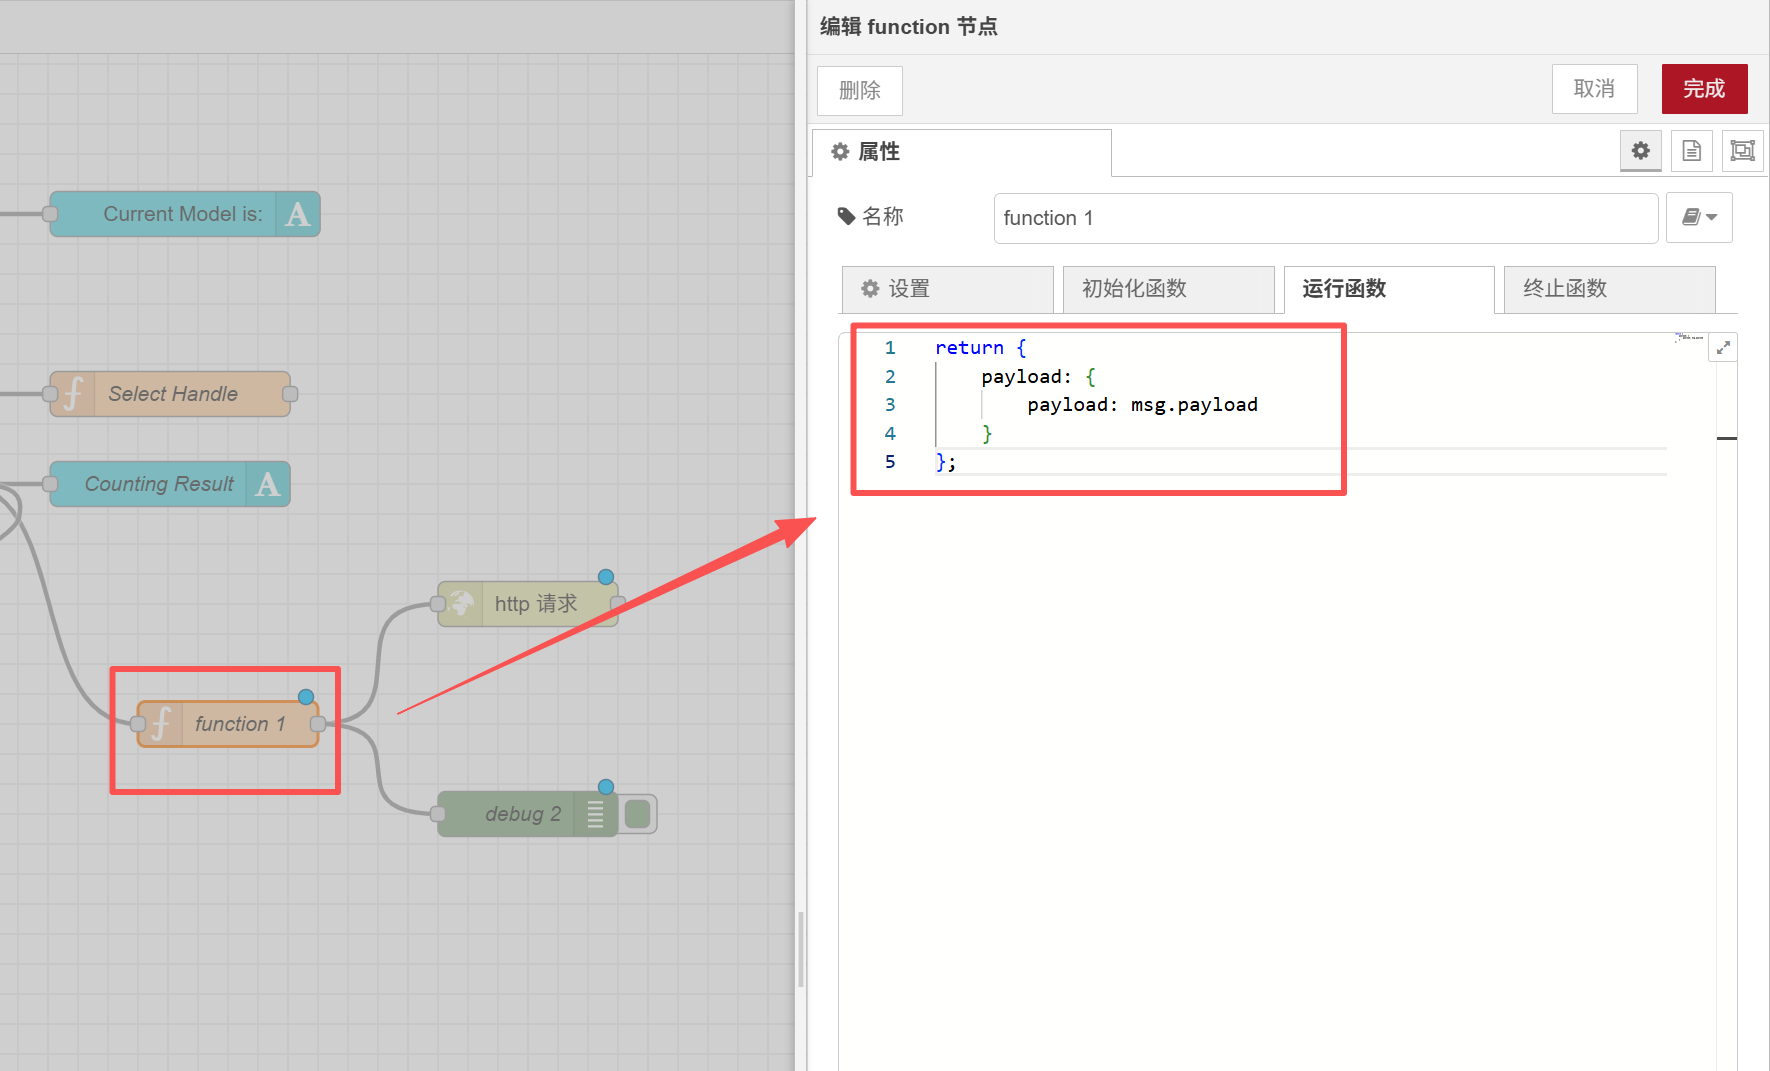
Next, configure the function1 node and replace the original code:
return {
    payload: {
        payload: msg.payload
    }
};
Next, configure the http request node. Here we need to modify three places:
| Options | Set value |
|---|---|
| Request Method | POST |
| URL address | 'http://YOUR_IP:8123/api/webhook/recamera_detection' |
| Return | JSON Object |

After setting, click "Deploy" in the upper right corner, and a prompt will be provided after the deployment is successful.

Here you still need to do one more step, that is, to connect the reCamera to WiFi, and to connect the reComputer to you under the same network.
Click "Network" in the upper left corner to configure the network
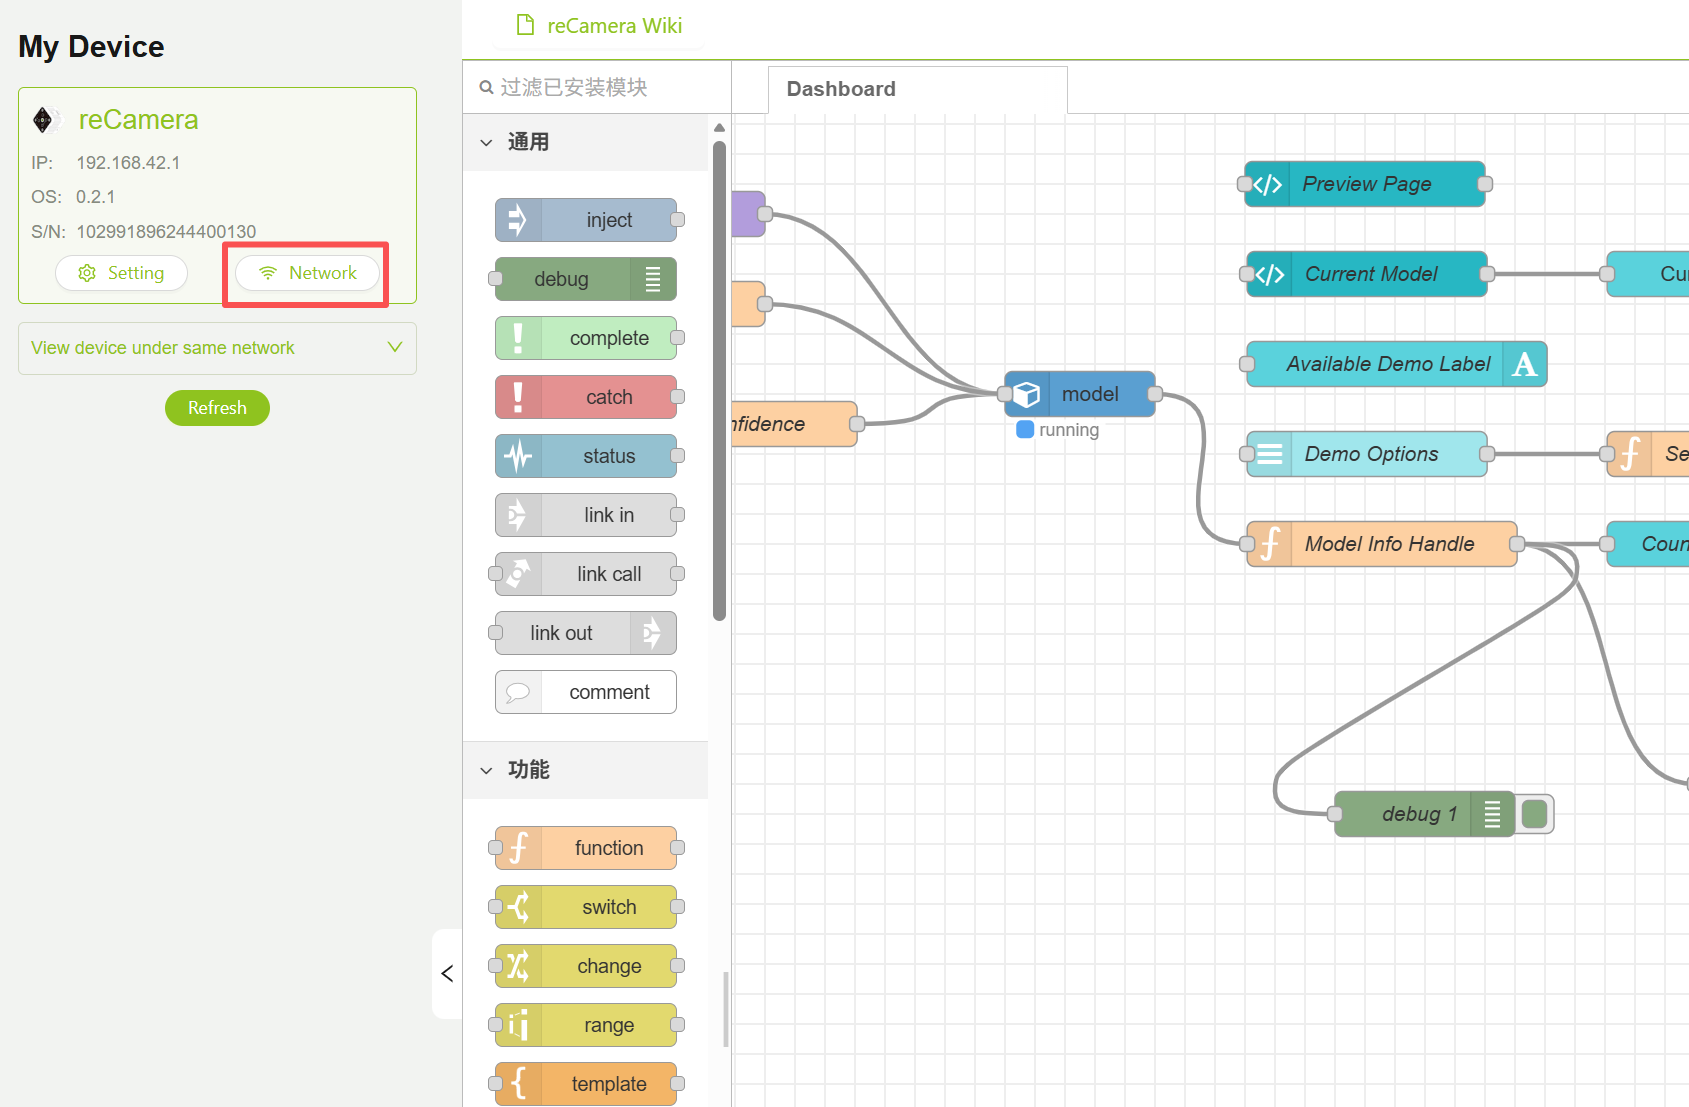
Please remember! Make sure to connect Recamera to the network!!! Otherwise, communication will not be possible.
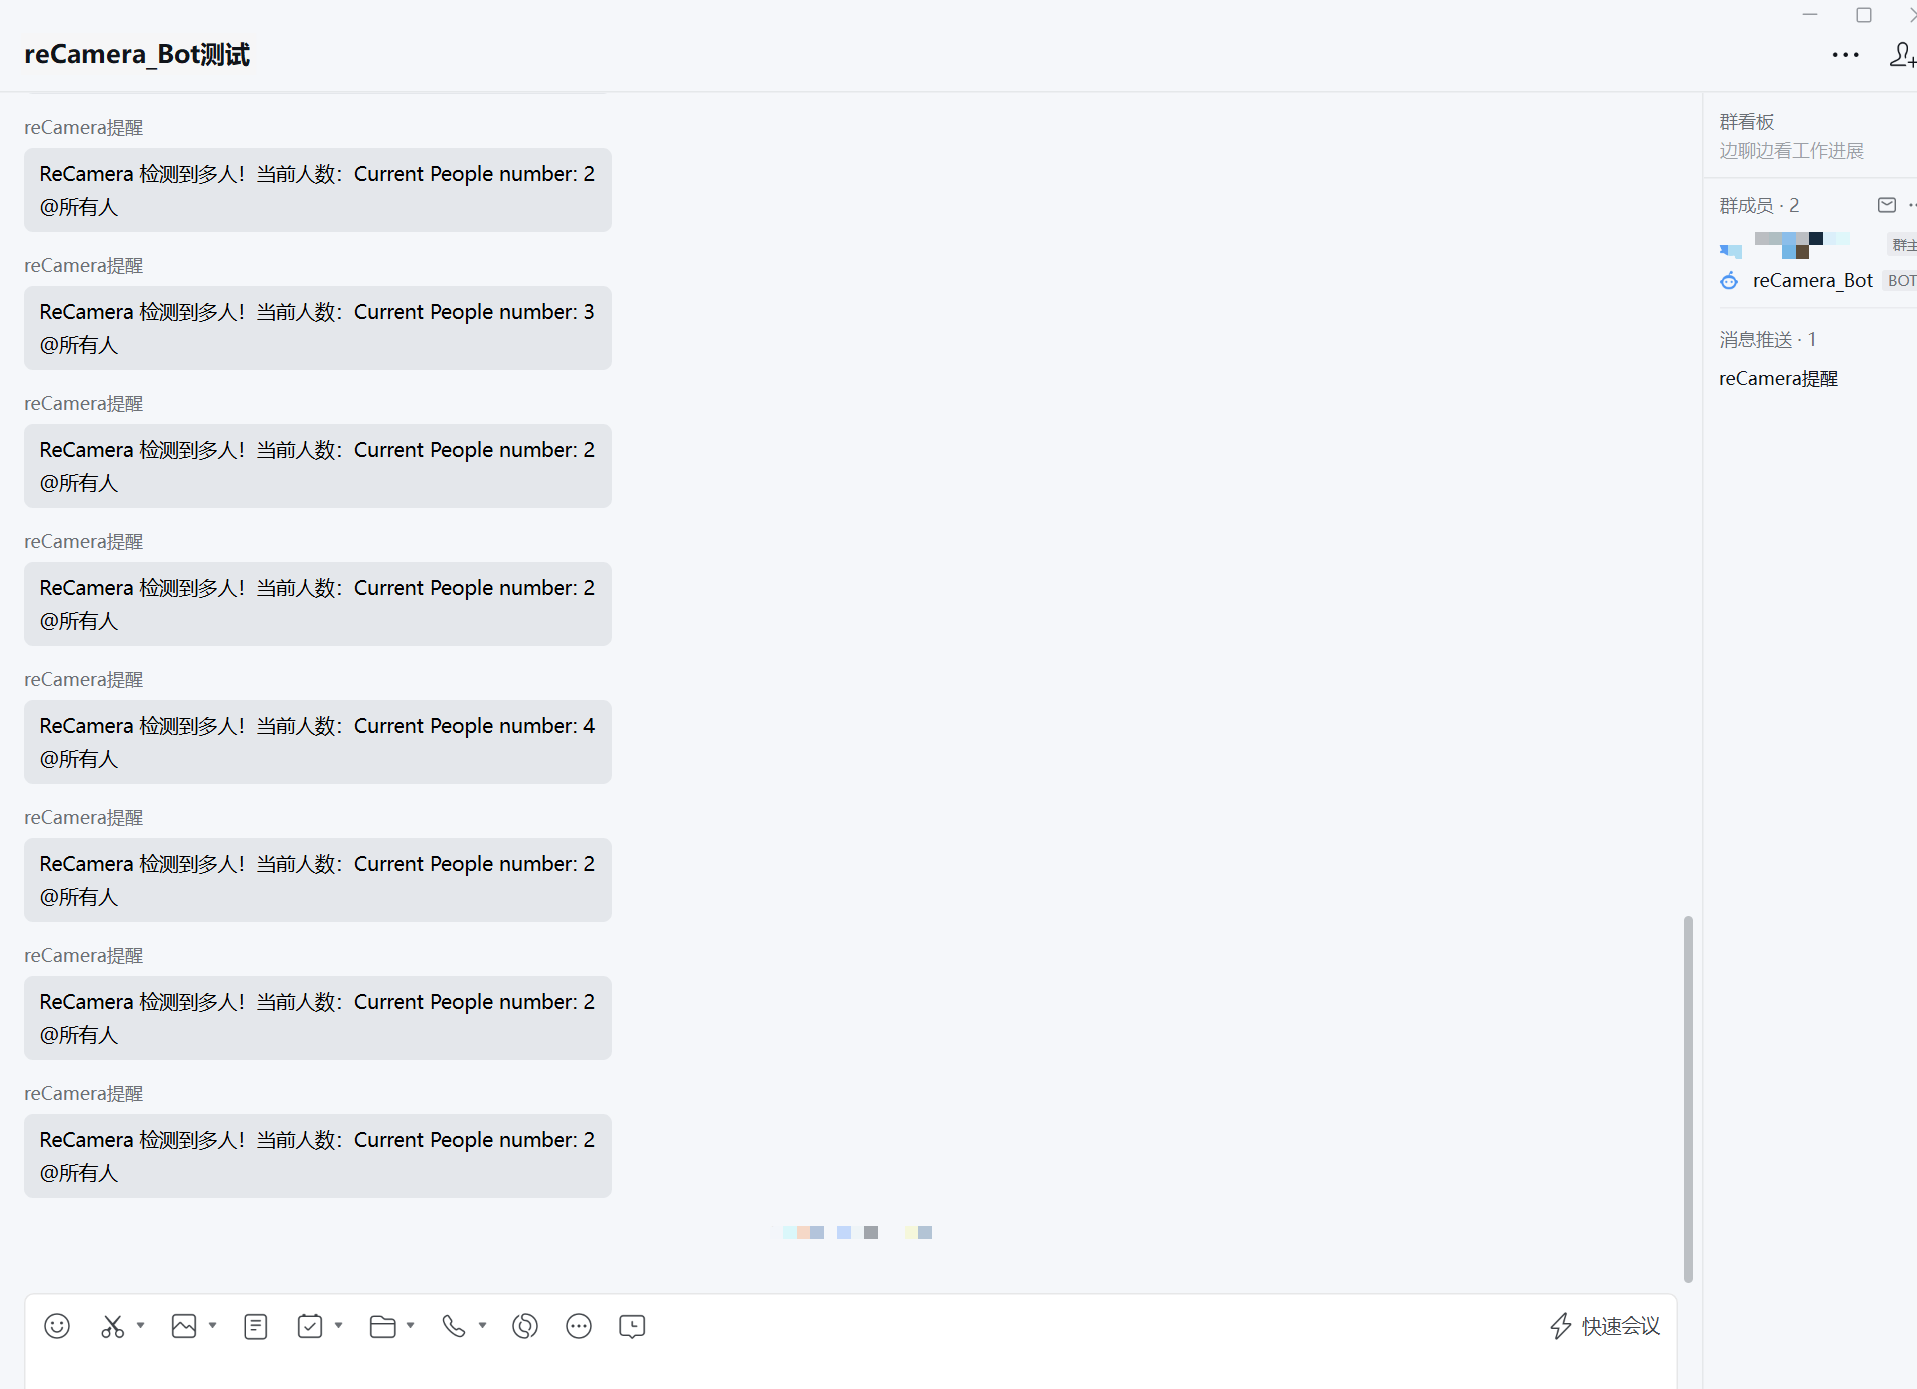
4. To View the Effect
At this time, the following effects should be seen in the enterprise micro:
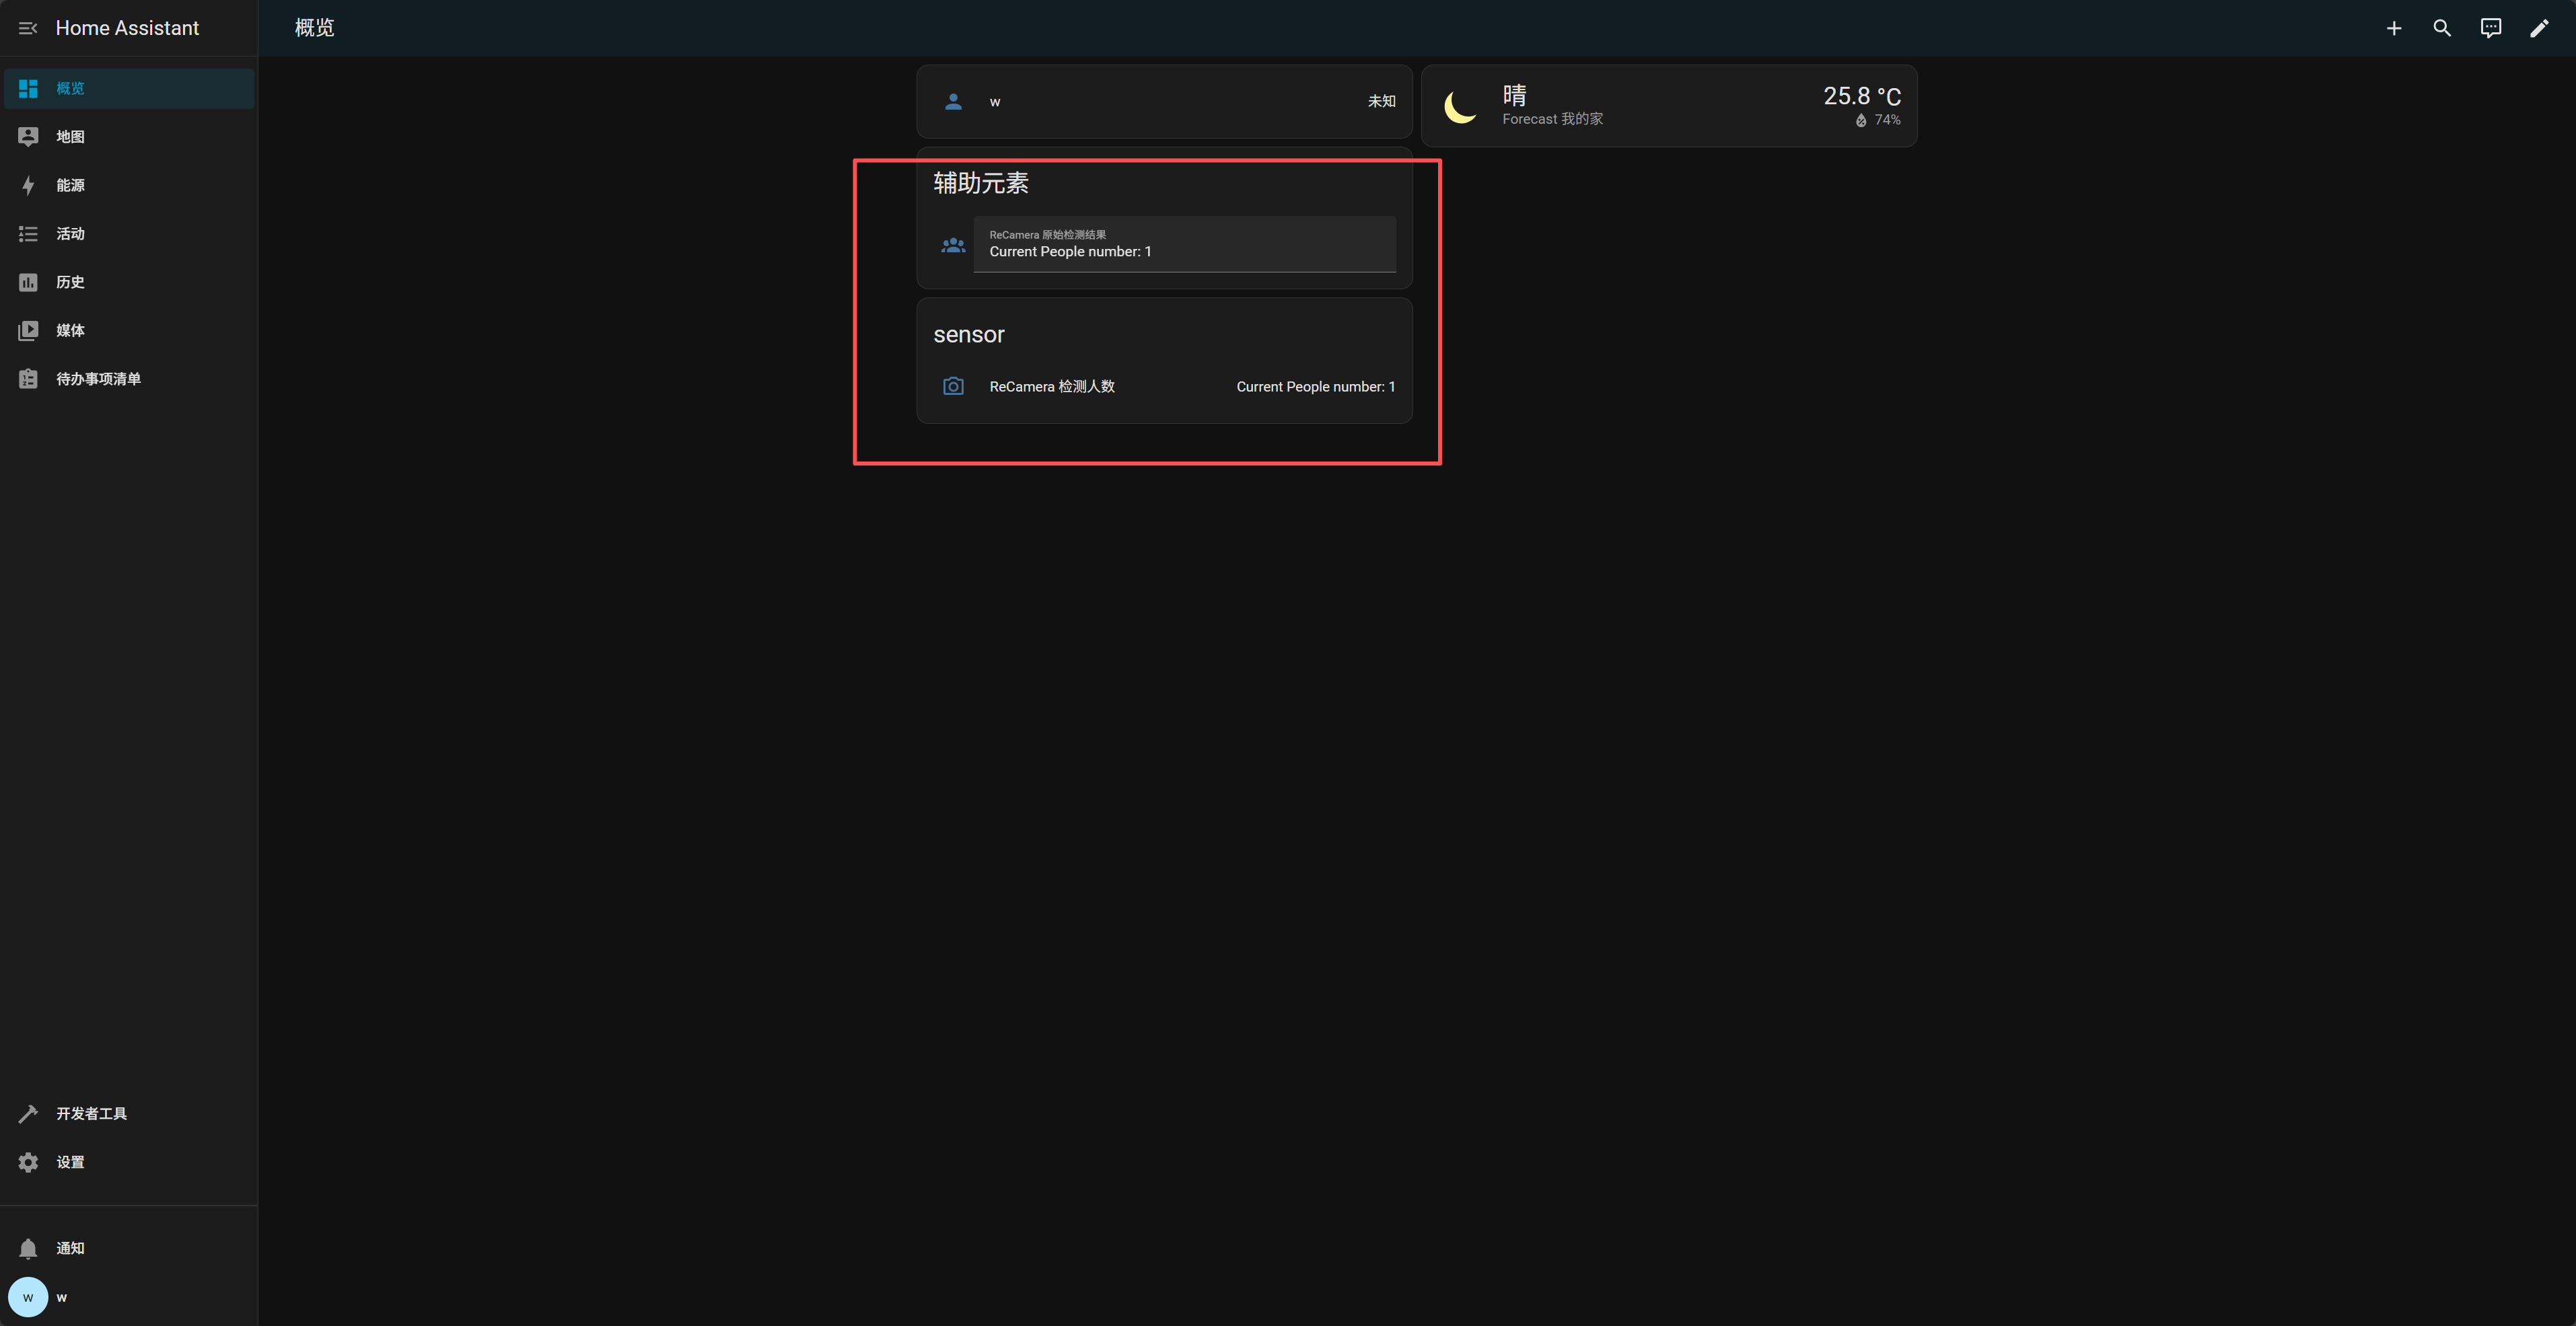
Accordingly, the overview screen of the Home Assistant should display the following:
If you haven't seen the effect, first check whether the link is not working, that is, verify whether the Webhook is normal:
On any device (ReCamera, PC, etc.):
curl -X POST http://192.168.100.109:8123/api/webhook/recamera_detection \
-H "Content-Type: application/json" \
-d '{"payload":"Test from curl"}'
If successful, the following appears in the Home Assistant notification:
ReCamera Test Results
Test from curl
System logic
┌────────────────────────────────────────────────────────────────────────┐
│ ReCamera (AI Camera)                                                   │
│ └─ YOLO Model Detects Objects (e.g., person, cat)                      │
└────────────────────────────────────────────────────────────────────────┘
                                      │
                                      ▼
┌────────────────────────────────────────────────────────────────────────┐
│ Node-RED Flow                                                          │
│                                                                        │
│ [Model Info Handle]                                                    │
│ └─ Parse detection results, count objects                              │
│    Output:                                                             │
│    payload = "Current people number: 1"                                │
│                                                                        │
│ [Function Node]                                                        │
│ └─ Pack into JSON format:                                              │
│    payload = { payload: "Current people number: 1" }                   │
│                                                                        │
│ [HTTP Request Node]                                                    │
│ └─ POST → HA Webhook                                                   │
│    URL: http://<HA_IP>:8123/api/webhook/recamera_detection             │
└────────────────────────────────────────────────────────────────────────┘
                                      │
                                      ▼
┌────────────────────────────────────────────────────────────────────────┐
│ Home Assistant (HA)                                                    │
│                                                                        │
│ [Webhook Trigger]                                                      │
│ └─ Receive data sent from Node-RED                                     │
│                                                                        │
│ [Automation]                                                           │
│ ├─ Write payload into input_text.recamera_people_raw                   │
│ │    → Display detected people count in real time on HA frontend       │
│ │                                                                      │
│ ├─ Condition check: if count ≥ 2                                       │
│ │      → Trigger rest_command to call WeCom Bot                        │
│ │                                                                      │
│ └─ Call rest_command.recamera_wechat_notify                            │
│       POST detection information to WeCom Webhook                      │
└────────────────────────────────────────────────────────────────────────┘
                                      │
                                      ▼
┌────────────────────────────────────────────────────────────────────────┐
│ WeCom Bot (Group Chat)                                                 │
│                                                                        │
│ Message received:                                                      │
│   "ReCamera detected multiple people! Current count:                   │
│    Current people number: 3"                                           │
│                                                                        │
│ → Instant alert to group members                                       │
└────────────────────────────────────────────────────────────────────────┘
Tech Support & Product Discussion
Thank you for choosing our products! We are here to provide you with different support to ensure that your experience with our products is as smooth as possible. We offer several communication channels to cater to different preferences and needs.