Getting Started with Jetson-Claw on Orin Nano / NX 8GB
This wiki walks through a practical Jetson-Claw starter build for Jetson Orin Nano 8GB and Jetson Orin NX 8GB. The whole stack runs locally on Jetson: we install nanobot, expand swap space for safer model loading, compile llama.cpp with CUDA, download a Qwen3.5 4B GGUF model, switch nanobot to a local llama.cpp backend, and finally connect the bot to Feishu so you can control it from chat.
Compared with a larger OpenClaw deployment, nanobot is a better fit for this entry-level Jetson-Claw setup because it is much lighter, starts faster, is easier to read and modify, and already supports Feishu plus OpenAI-compatible local backends. On an 8 GB Jetson, that lower runtime overhead leaves more room for the local model itself. If you later need a larger plugin ecosystem or a heavier multi-component workflow, you can still move up to OpenClaw.
What You Will Build
- A lightweight local AI assistant based on
nanobot - A
llama.cppOpenAI-compatible HTTP server running on Jetson - A local
Qwen3.5 4BGGUF model - A Feishu-connected Jetson bot that can be controlled from private chats or group mentions
Prerequisites
- 1 x Jetson Orin Nano 8GB or Jetson Orin NX 8GB
- JetPack 6.x already installed
- Internet connection for package and model download
- At least 20 GB of free storage recommended
This guide uses reComputer Super J3011 as the reference Jetson platform:

nanobot currently requires Python 3.11 or newer, so this guide uses a Miniconda environment instead of the default system Python on Jetson.
Step 1. Install nanobot
First install system dependencies and Miniconda:
sudo apt update
sudo apt install -y git curl wget build-essential cmake libcurl4-openssl-dev python3-pip

wget https://repo.anaconda.com/miniconda/Miniconda3-latest-Linux-aarch64.sh
chmod +x Miniconda3-latest-Linux-aarch64.sh
./Miniconda3-latest-Linux-aarch64.sh
source ~/.bashrc
Create a clean Python 3.11 environment and install nanobot:
conda create -y -n jetson-claw python=3.11
conda activate jetson-claw
pip install -U pip
pip install nanobot-ai
Initialize the runtime directory:
nanobot onboard
After initialization, the main configuration file is located at:
~/.nanobot/config.json
nanobot is inspired by OpenClaw, but for Orin Nano / NX 8GB it is usually the better starting point: less memory overhead, faster startup, and fewer moving parts to debug.
Step 2. Increase Swap Space
Running a 4B local model on an 8 GB Jetson is much more stable with extra swap. This helps during model loading, compilation, and long-context inference.
sudo fallocate -l 8G /var/swapfile
sudo chmod 600 /var/swapfile
sudo mkswap /var/swapfile
sudo swapon /var/swapfile
echo '/var/swapfile none swap sw 0 0' | sudo tee -a /etc/fstab
swapon --show
If you plan to experiment with larger context sizes or other models, you can increase swap further.
Step 3. Compile llama.cpp with CUDA
Set CUDA paths:
export PATH=/usr/local/cuda/bin${PATH:+:${PATH}}
export LD_LIBRARY_PATH=/usr/local/cuda/lib64${LD_LIBRARY_PATH:+:${LD_LIBRARY_PATH}}
Clone and build llama.cpp:
git clone https://github.com/ggml-org/llama.cpp.git ~/llama.cpp
cd ~/llama.cpp
cmake -B build -DGGML_CUDA=ON -DCMAKE_BUILD_TYPE=Release
cmake --build build --parallel
After compilation, the main executables will be placed under:
~/llama.cpp/build/bin
You can quickly confirm the server binary is ready with:
~/llama.cpp/build/bin/llama-server --help
Step 4. Download Qwen3.5 4B GGUF Weights
This guide uses a Q4_K_M GGUF quantization because it is a practical balance between memory usage and response quality for 8 GB Jetson devices.
Install the Hugging Face CLI:
conda activate jetson-claw
pip install -U "huggingface_hub[cli]"
mkdir -p ~/llama.cpp/models/Qwen3.5-4B-GGUF
Then open the model page below and download the Q4_K_M GGUF file into ~/llama.cpp/models/Qwen3.5-4B-GGUF/:
Choose the Qwen3.5-4B.Q4_K_M.gguf file on the Hugging Face page:
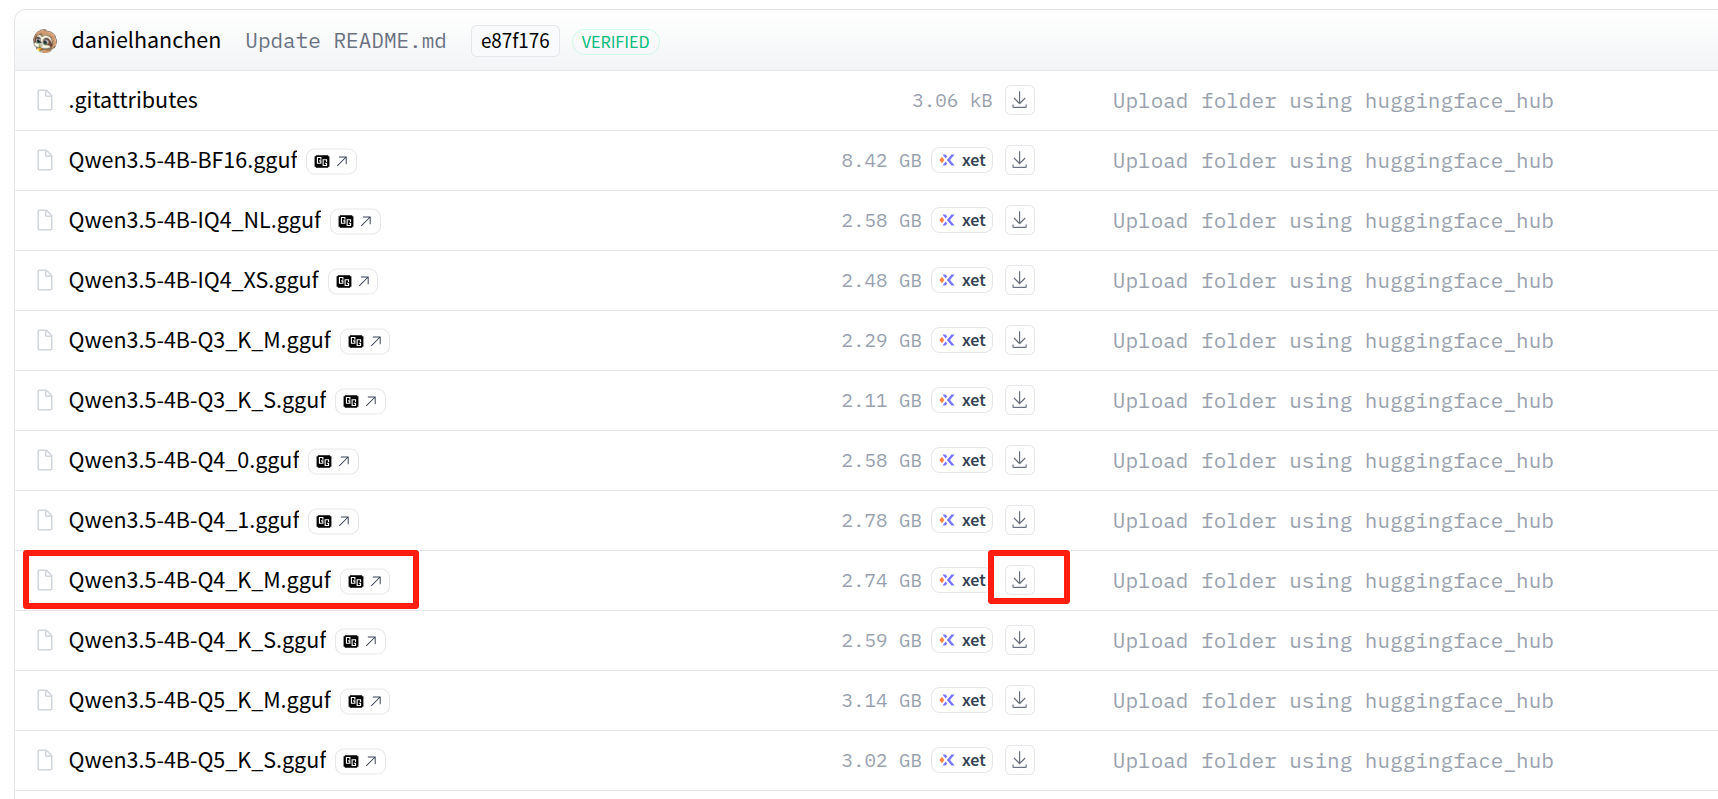
If the repository uses the same filename as the example in this guide, you can also download it with:
huggingface-cli download \
  unsloth/Qwen3.5-4B-GGUF \
  Qwen3.5-4B.Q4_K_M.gguf \
  --local-dir ~/llama.cpp/models/Qwen3.5-4B-GGUF
If your file is named differently, just update the path in the launch command below. In the example here, we assume the model file is:
~/llama.cpp/models/Qwen3.5-4B-GGUF/Qwen3.5-4B.Q4_K_M.gguf
Step 5. Launch llama.cpp as the Local Backend
Start the local OpenAI-compatible API server:
conda activate jetson-claw
cd ~/llama.cpp
./build/bin/llama-server \
  -m ~/llama.cpp/models/Qwen3.5-4B-GGUF/Qwen3.5-4B.Q4_K_M.gguf \
  --alias qwen3.5-4b-local \
  -t 6 \
  -c 40960 \
  --n-gpu-layers 40 \
  --reasoning off \
  --reasoning-format none \
  --host 127.0.0.1 \
  --port 8080
Recommended parameter notes:
--alias qwen3.5-4b-local: gives the local model a clean API model name fornanobot-t 6: uses a moderate number of CPU threads on entry-level Jetson devices-c 40960: provides a large context window, but you can reduce it if memory is tight--n-gpu-layers 40: offloads as many layers as practical to the Jetson GPU--reasoning off: keeps output simpler and lowers unnecessary overhead for a starter setup
If the server fails to start because of memory pressure, try reducing -c to 16384 first, then lower --n-gpu-layers.
In another terminal, verify the API:
curl http://127.0.0.1:8080/v1/models
Step 6. Configure nanobot to Use llama.cpp
Open the configuration file:
nano ~/.nanobot/config.json
Then merge the following sections into your config:
{
  "agents": {
    "defaults": {
      "workspace": "~/.nanobot/workspace",
      "model": "qwen3.5-4b-local",
      "provider": "custom",
      "maxTokens": 8192,
      "contextWindowTokens": 40960,
      "temperature": 0.1,
      "maxToolIterations": 40,
      "reasoningEffort": null
    }
  },
  "channels": {
    "sendProgress": true,
    "sendToolHints": false,
    "feishu": {
      "enabled": true,
      "appId": "cli_xxx",
      "appSecret": "xxx",
      "encryptKey": "",
      "verificationToken": "",
      "allowFrom": ["*"],
      "reactEmoji": "THUMBSUP",
      "groupPolicy": "mention",
      "replyToMessage": false
    }
  },
  "providers": {
    "custom": {
      "apiKey": "no-key",
      "apiBase": "http://127.0.0.1:8080/v1",
      "extraHeaders": null
    }
  },
  "gateway": {
    "host": "0.0.0.0",
    "port": 18790
  }
}
Why this works:
provider: "custom"tellsnanobotto use any OpenAI-compatible backendapiBase: "http://127.0.0.1:8080/v1"points to the localllama-servermodel: "qwen3.5-4b-local"matches the--aliasvalue used when startingllama.cpp
For quick testing, allowFrom: ["*"] is convenient. For production use, replace it with your own Feishu open_id after validation.
Step 7. Connect Feishu to nanobot
Create a Feishu application in the Feishu Open Platform:
- Open https://open.feishu.cn/app
- Create or open your bot application
- Copy the App ID and App Secret
- Paste them into
channels.feishu.appIdandchannels.feishu.appSecret
For Long Connection mode, encryptKey and verificationToken can stay empty.
If you cannot find your credentials later, go to:
- Feishu Open Platform
- Your application
Credentials & Basic Info
Import Feishu Permissions
To make file, image, and rich message handling work correctly, import the permission set below in:
- Feishu Open Platform
- Your application
Permission ManagementBulk Import
{
  "scopes": {
    "tenant": [
      "aily:file:read",
      "aily:file:write",
      "application:application.app_message_stats.overview:readonly",
      "application:application:self_manage",
      "application:bot.menu:write",
      "cardkit:card:write",
      "contact:user.employee_id:readonly",
      "corehr:file:download",
      "docs:document.content:read",
      "event:ip_list",
      "im:chat",
      "im:chat.access_event.bot_p2p_chat:read",
      "im:chat.members:bot_access",
      "im:message",
      "im:message.group_at_msg:readonly",
      "im:message.group_msg",
      "im:message.p2p_msg:readonly",
      "im:message:readonly",
      "im:message:send_as_bot",
      "im:resource",
      "sheets:spreadsheet",
      "wiki:wiki:readonly"
    ],
    "user": [
      "aily:file:read",
      "aily:file:write",
      "im:chat.access_event.bot_p2p_chat:read"
    ]
  }
}
After importing permissions:
- Create a new app version
- Publish the app version
Otherwise the newly added permissions may not take effect.
Step 8. Start nanobot and Test Feishu Control
Keep llama-server running in one terminal, then start nanobot in another:
conda activate jetson-claw
nanobot gateway
Useful checks:
nanobot status
nanobot channels status
Now send a message to the bot from Feishu:
- In a private chat, send a direct message
- In a group chat, mention the bot if you keep
groupPolicy: "mention"
If you used allowFrom: ["*"], the bot should reply immediately. If you later want to lock access down, send one message first, check the nanobot logs for your open_id, and replace ["*"] with that value.
Optional: Add a Sample Jetson-Claw Skill
If you want to turn this starter setup into a more useful Jetson-Claw demo, you can add a sample skill set:
git clone https://github.com/jjjadand/JetsonClaw-SKILLS.git ~/JetsonClaw-SKILLS
mkdir -p ~/.nanobot/workspace/skills
cp -r ~/JetsonClaw-SKILLS/person-detection ~/.nanobot/workspace/skills/
Then restart nanobot gateway, connect a USB camera to Jetson, and ask the bot in Feishu to check whether a person is visible in front of the camera.
Example Feishu Monitoring Flow
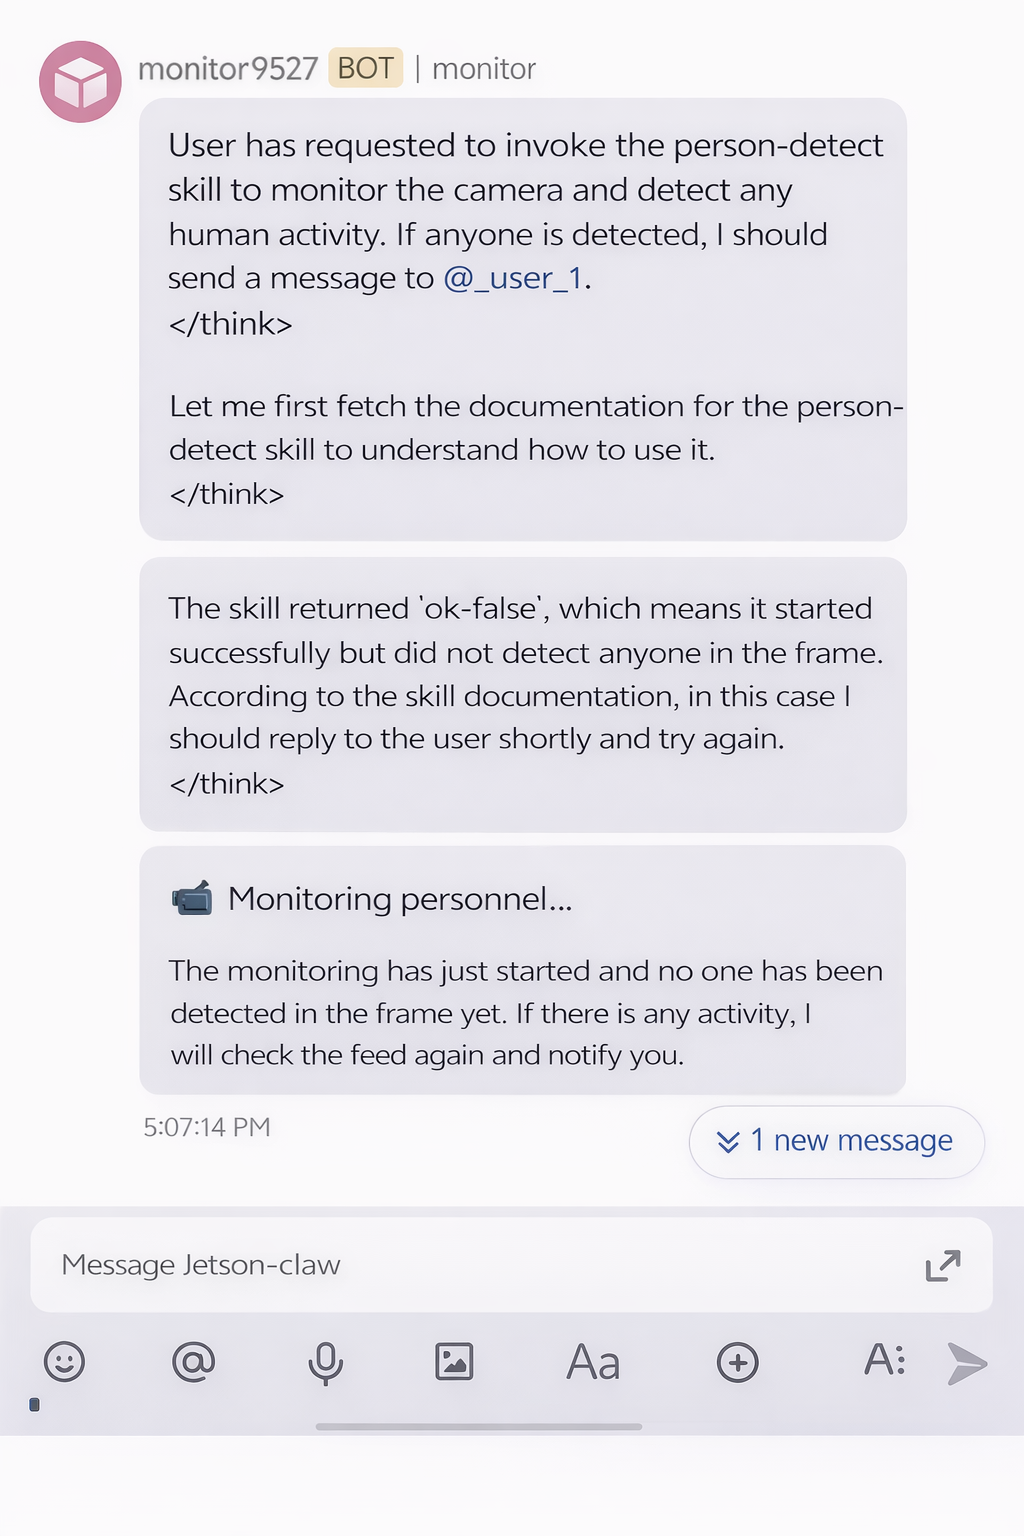
After the skill is installed, you can send a request from the Feishu app to ask Jetson-Claw to check the camera feed:
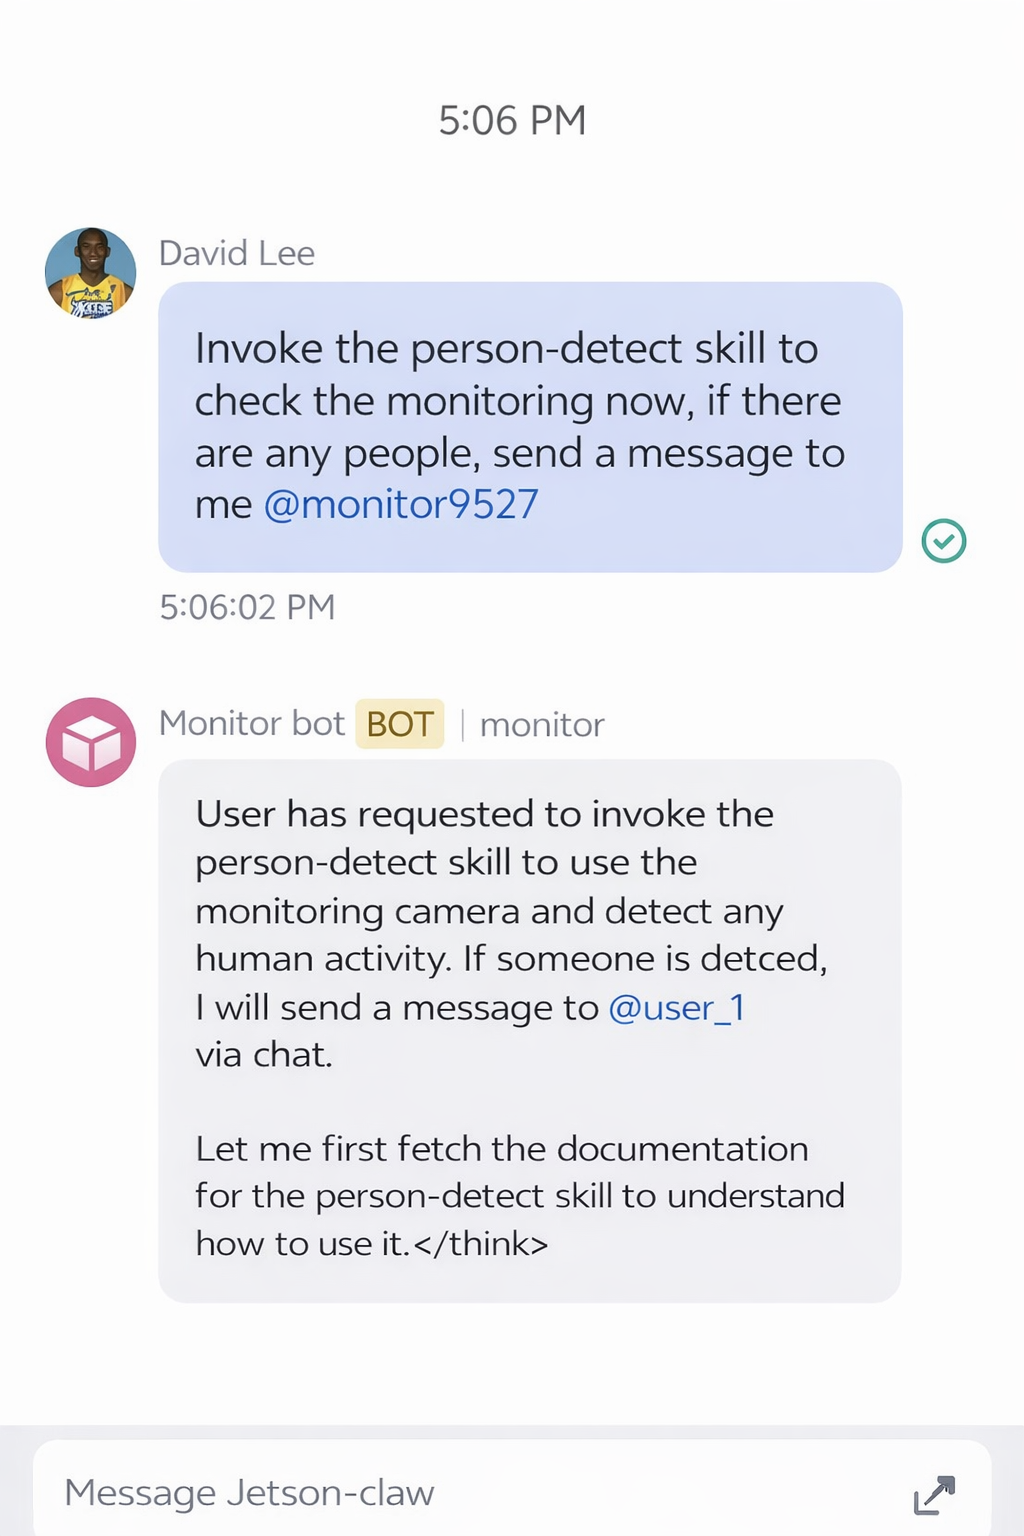
If no person is detected, the monitoring result can look like this:
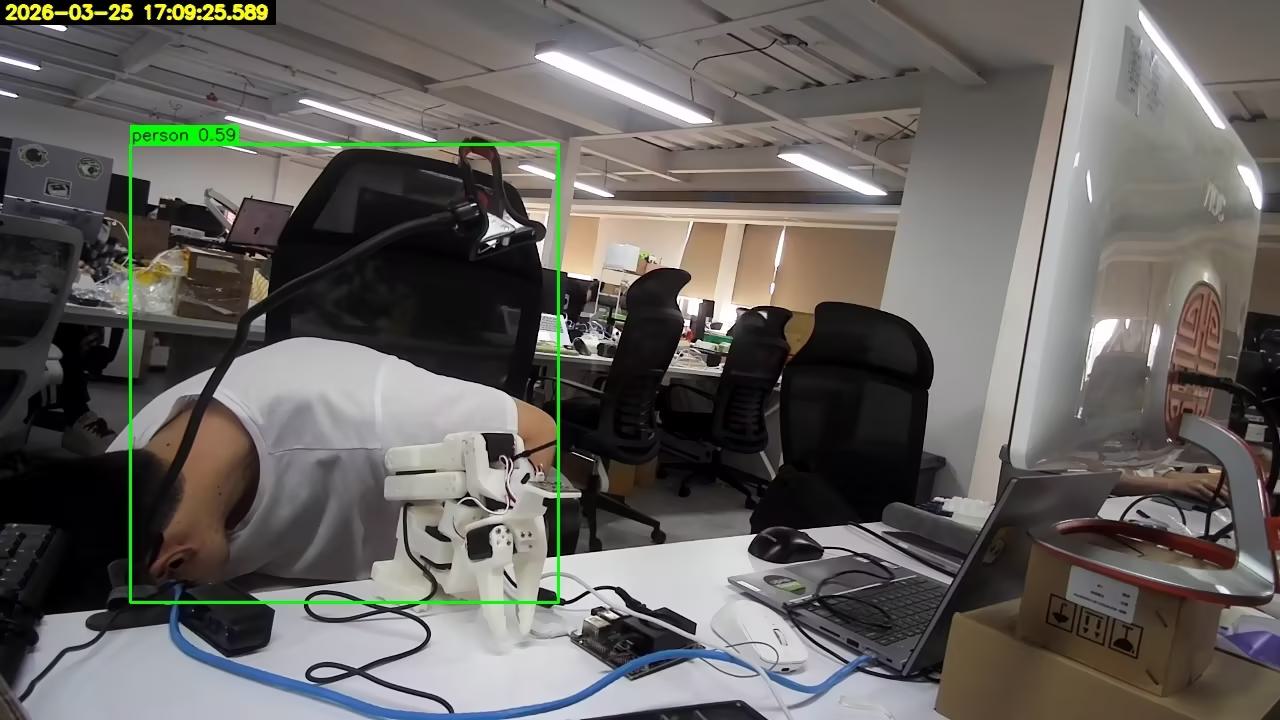
If a person is detected, Jetson-Claw can return an alert through Feishu:
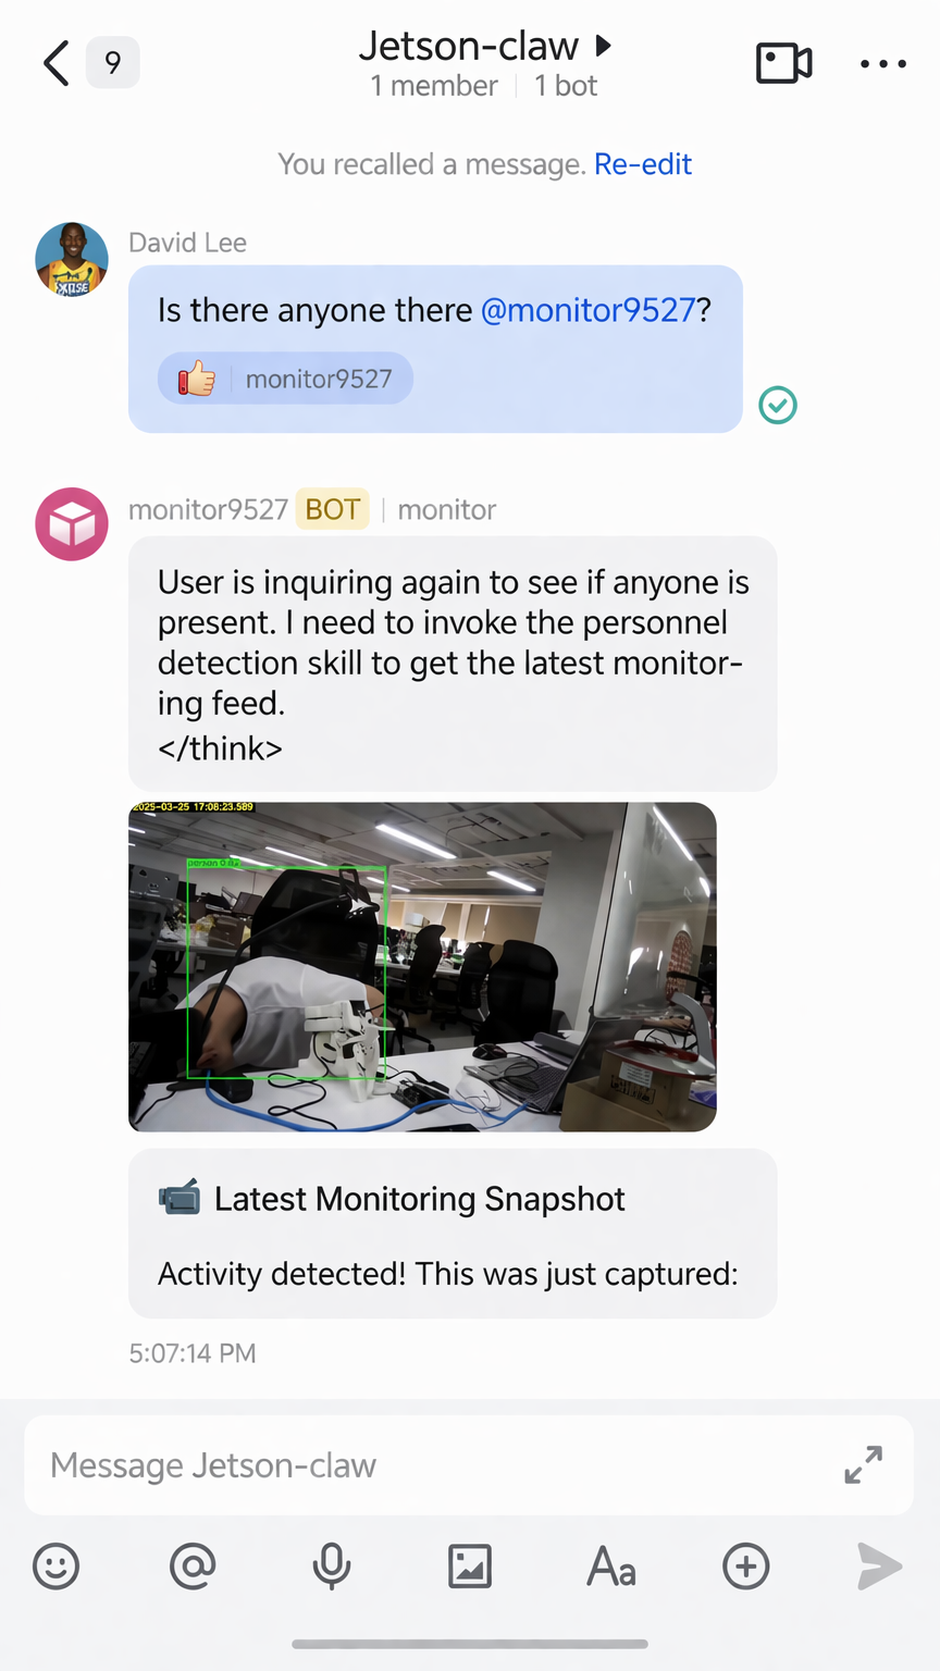
The monitoring skill can also send back the captured result image:
Troubleshooting
nanobotfails to install: make sure you are inside a Python 3.11 environmentllama-serverexits during model load: increase swap or reduce-c- Feishu bot does not reply: verify App ID, App Secret, imported permissions, and published app version
- Group messages do not trigger the bot: check
groupPolicyand make sure you mention the bot - Replies are slow: lower context size, reduce concurrent usage, or use a smaller quantization
References
- https://github.com/HKUDS/nanobot
- https://github.com/ggml-org/llama.cpp
- https://huggingface.co/unsloth/Qwen3.5-4B-GGUF/tree/main
- https://open.feishu.cn/app
- https://github.com/jjjadand/JetsonClaw-SKILLS
- https://wiki.seeedstudio.com/local_openclaw_on_recomputer_jetson/
Tech Support & Product Discussion
Thank you for choosing our products! We are here to provide you with different support to ensure that your experience with our products is as smooth as possible. We offer several communication channels to cater to different preferences and needs.