Getting Started with reTerminal E1001

We recommend that you complete your product's firmware update as soon as you receive it for the best experience.
Introduction
reTerminal E1001 is a 7.5 inch open-source monochrome ePaper display with exceptional 3-month battery life. Powered by ESP32-S3, it natively supports our SenseCraft HMI no-code UI platform for effortless dashboard creation, while supporting Home Assistant, TRMNL E-ink dashboard, Arduino and ESP-IDF for further development. Whether for smart home dashboard visualization, office displays, or educational projects, this ready-to-use HMI device delivers beautiful visuals and flexible customization in one elegant package.
Features
- Beautiful, Ready-to-Use ePaper Display
- Ultra-Low Power with 3-Month Battery Life
- No-Code UI Design & Deployment with SenseCraft HMI
- Works with Popular Software Platforms
- Flexible Hardware & Software Customization
Hardware Overview

The reTerminal E1001 hardware includes:
- 7.5-inch ePaper Display: Monochrome display with 800×480 resolution
- Buttons: Located at the top of the device for manual screen usage
- Microphone
- MicroSD Card Slot: For expandable storage
- Power Switch: Located on the back for powering the device on/off
- Status LED: User indicator (green)
- Power LED: Charge indicator (red)
- USB-C Port: For charging and firmware updates
- Expansion Port: 8-pin expansion header providing VDD, GND, I2C, and GPIO connections
Getting Started
Preliminary
Step 1. Unbox your reTerminal E1001 and ensure all components are included:
- reTerminal E1001 device
- USB-C cable
- Quick start guide
Step 2. (Optional) Insert a microSD card if you plan to use the device as a digital photo frame or need additional storage.

The reTerminal E Series ePaper Display only supports MicroSD cards up to 64GB in Fat32 format.
The 64GB SD card is formatted as exFAT by default. After formatting it to FAT32, it can be successfully mounted and used to store images.
Step 3. (Optional) Install USB drivers if needed:
Depending on your operating system, you may need to install USB drivers to ensure proper communication with your reTerminal E1001:
-
For Mac computers: Download and install the CH34X driver from WCH official website
-
For Windows computers:
- Windows 11 systems typically include the driver by default
- For Windows 10 and earlier versions, you may need to download and install the CH341 driver from WCH official website
-
For Linux systems: Most modern Linux distributions include the necessary drivers by default
Step 4. Update the firmware to ensure your device is running the latest version:
-
Connect your reTerminal E1001 to your computer using the USB-C cable
-
Power on the device using the power switch on the back

- Visit SenseCraft HMI and sign in to your account
-
Navigate to the Workspace section
-
Click on Device Flasher in the upper right corner
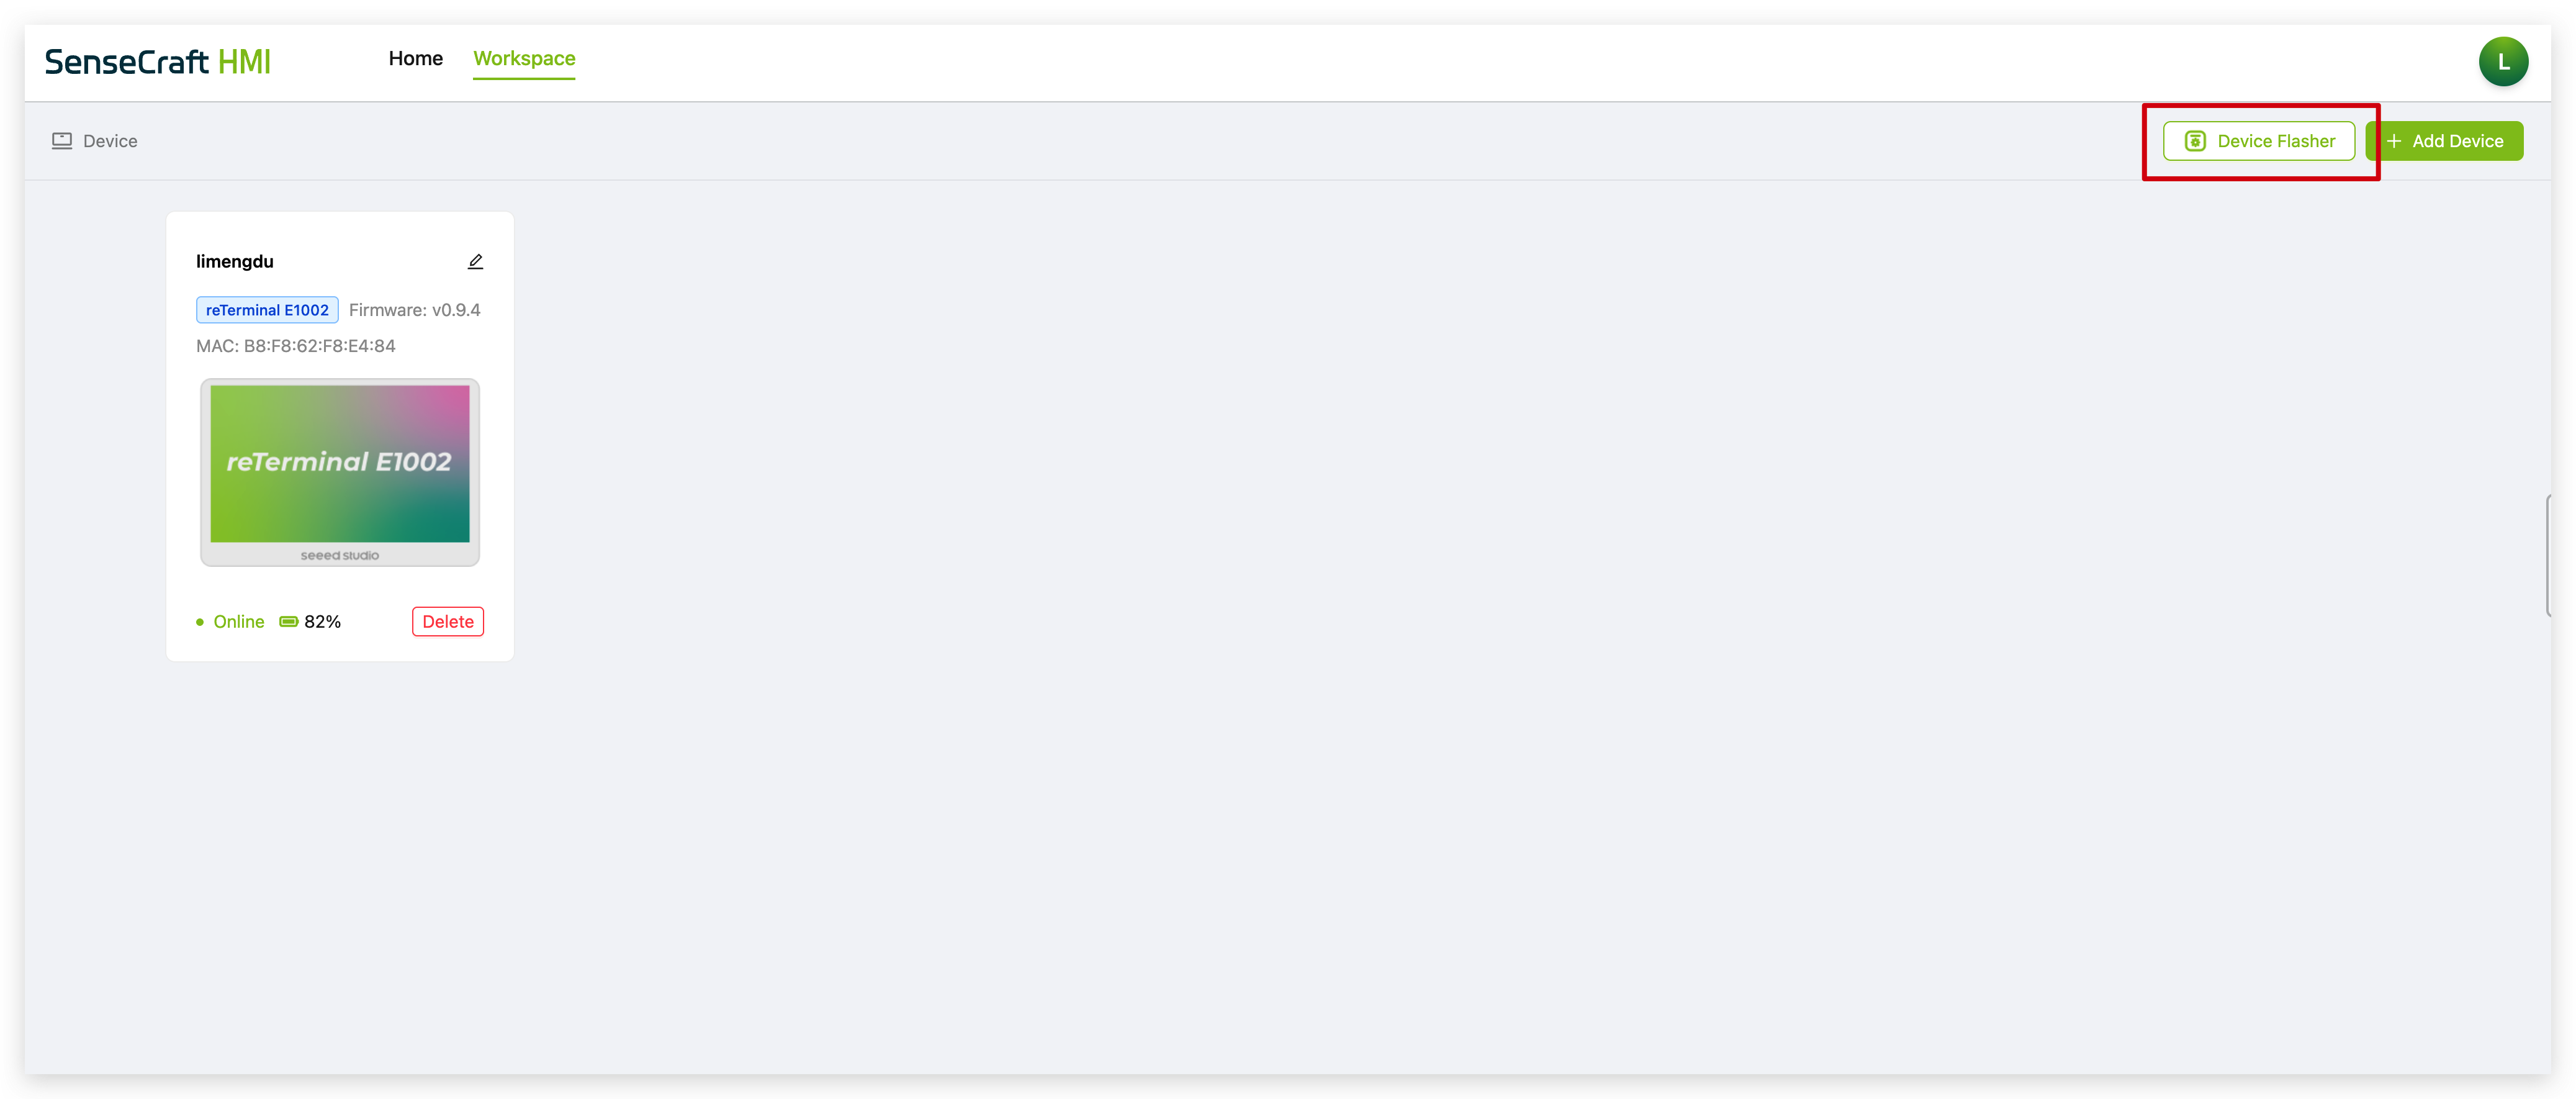
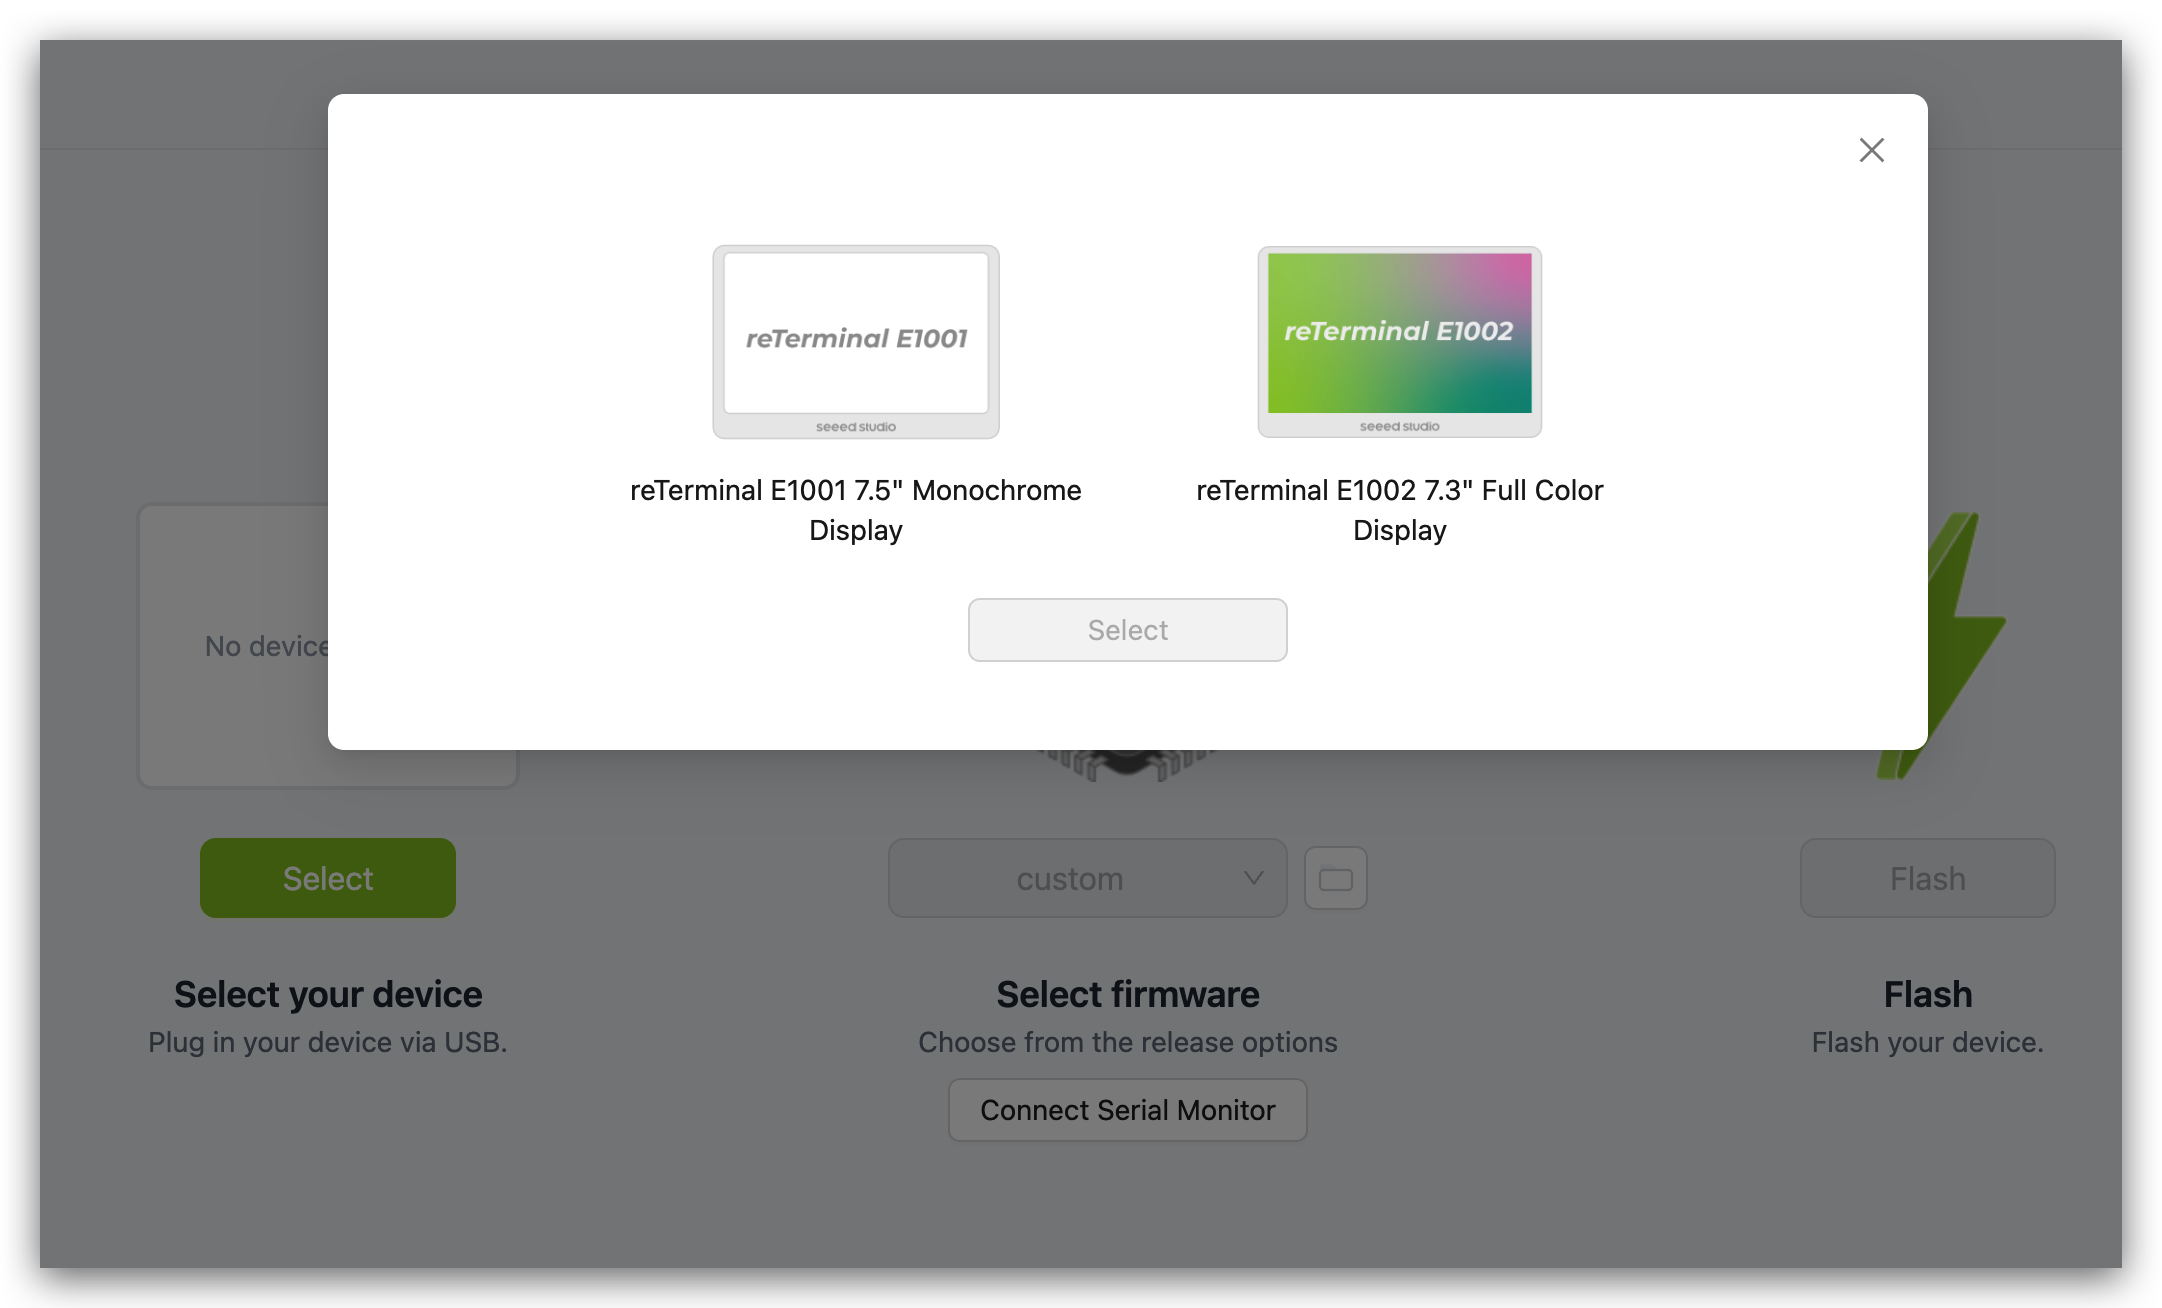
- Select your reTerminal E1001 device from the list. According to this tutorial, you should choose reTerminal E1001 7.5" Monochrome Display.
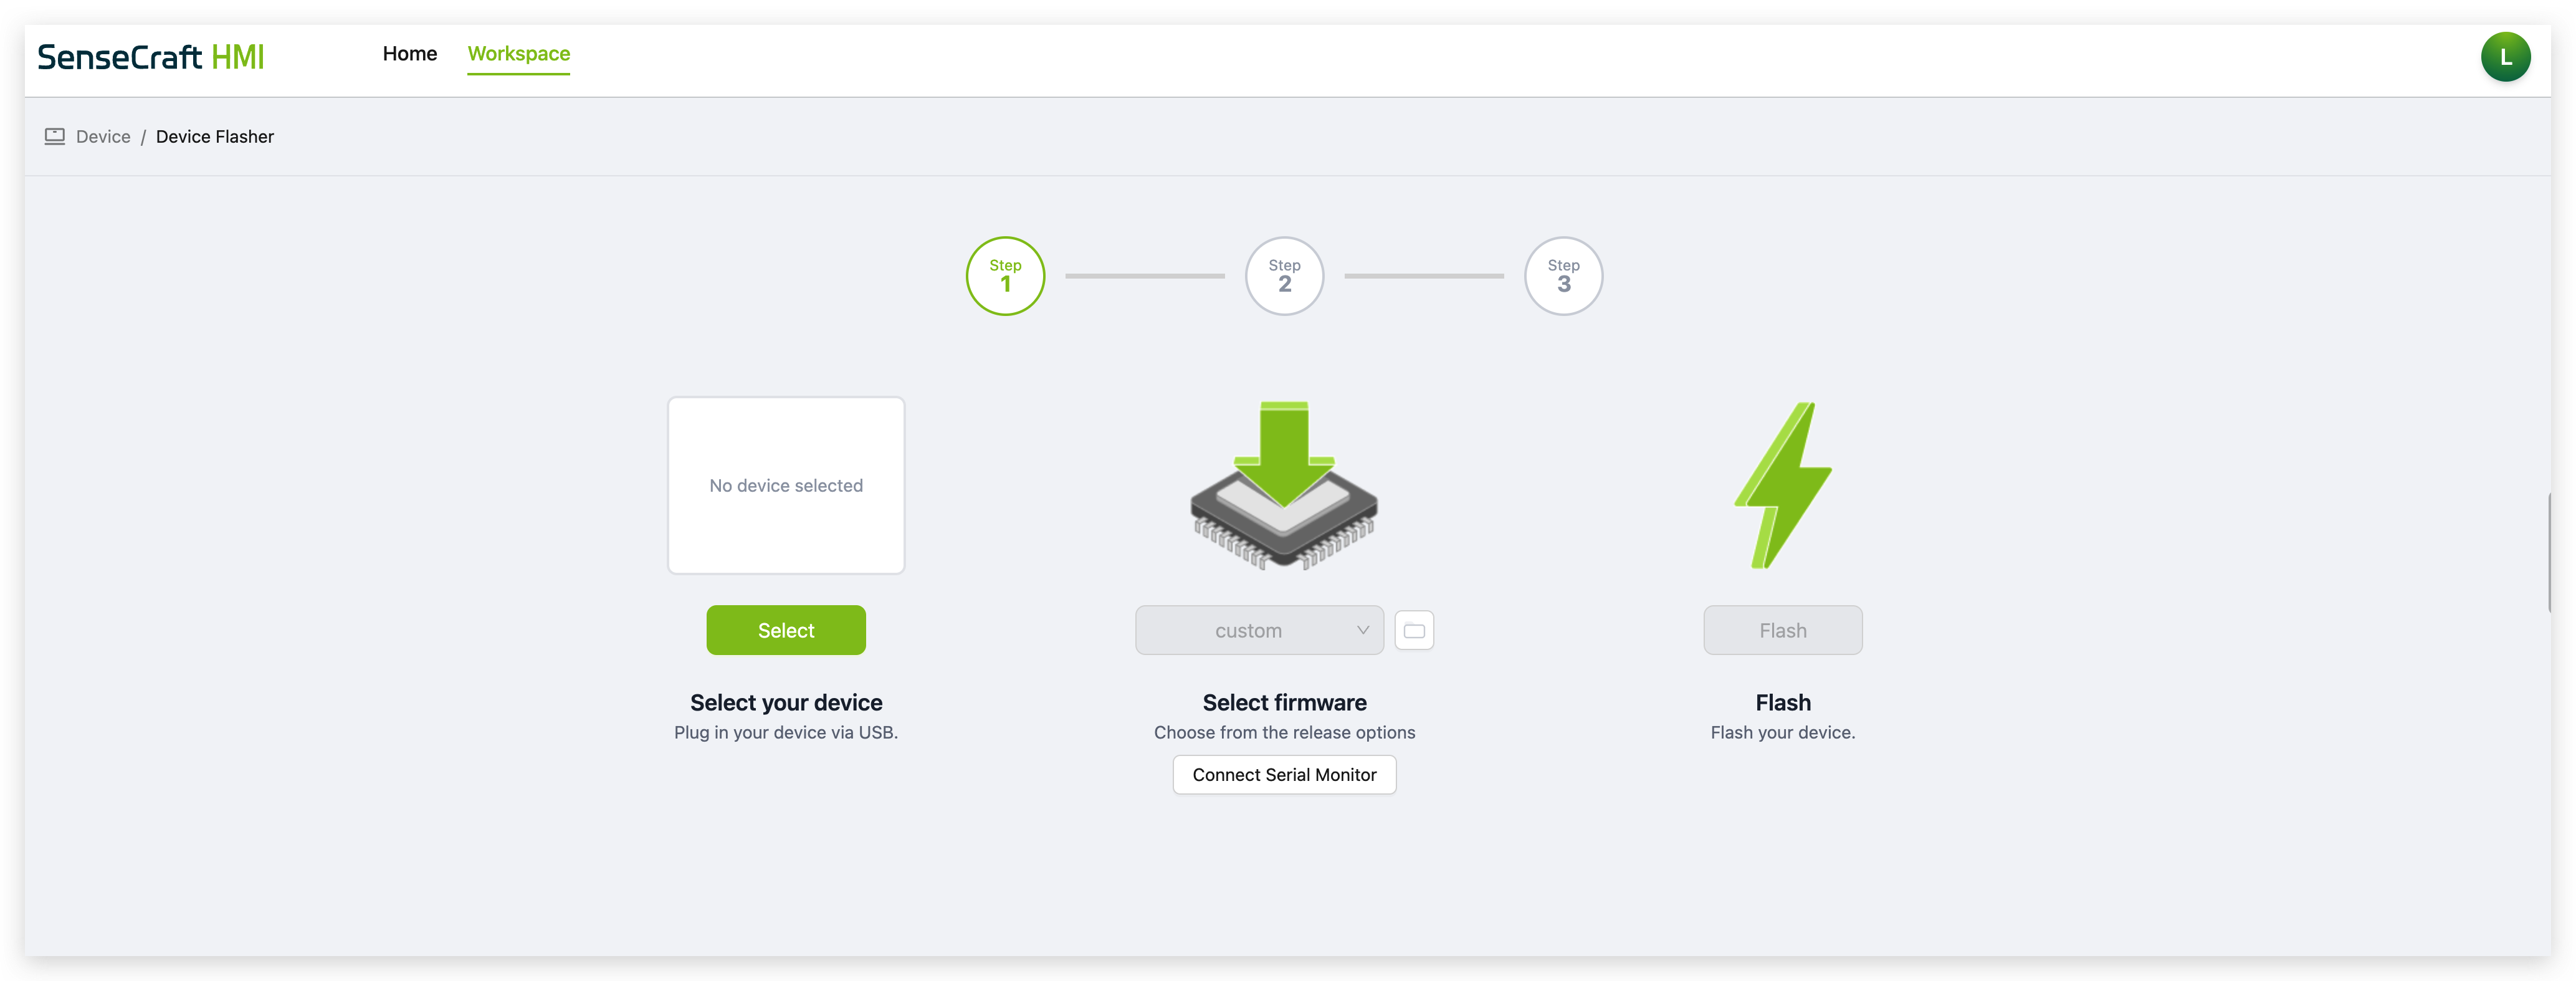
-
Choose the latest firmware version from the dropdown menu
-
Click Flash and wait for the update process to complete
-
Updating the firmware ensures optimal performance and access to the latest features. It's recommended to perform this update before using your device for the first time.
-
It is not possible to flash the firmware properly when the device is in the shutdown or sleep state. If you select the correct port for your device but never see the flash firmware progress, then you may need to wake up the device by pressing the green button on the top of the unit and try again.
Power On
Step 1. Power on the device by sliding the power switch to the ON position. The power switch is located on the back of the unit.
Step 2. On first boot, the device will display product information and network setup instructions.

Step 3. The green user LED will light up for approximately 30 seconds, indicating the device is powered on and initializing. 30 seconds of no operation of the device, in order to ensure the power, the device will automatically enter the sleep mode, the LED light will automatically turn off.
So, we need to complete the next steps of configuring the network during this time. When the device goes to sleep, you will not be able to find the device's hotspot. If this is the case, you can wake up the device by clicking once on the device's green Wake button.
Network Setup
- Network Setup vis PC
- Network Setup vis SenseCraft APP
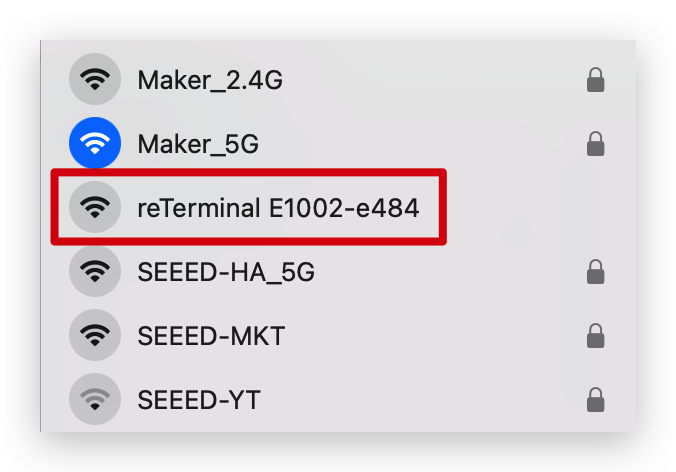
Step 1. Connect to the device's Wi-Fi access point from your smartphone or computer. The AP name will appear on the screen (no password required). The network credentials are reTerminal E1001-{MAC Adress}.
Step 2. Once connected, your phone should automatically redirect to the Wi-Fi configuration page. If not, open a browser and navigate to 192.168.4.1.
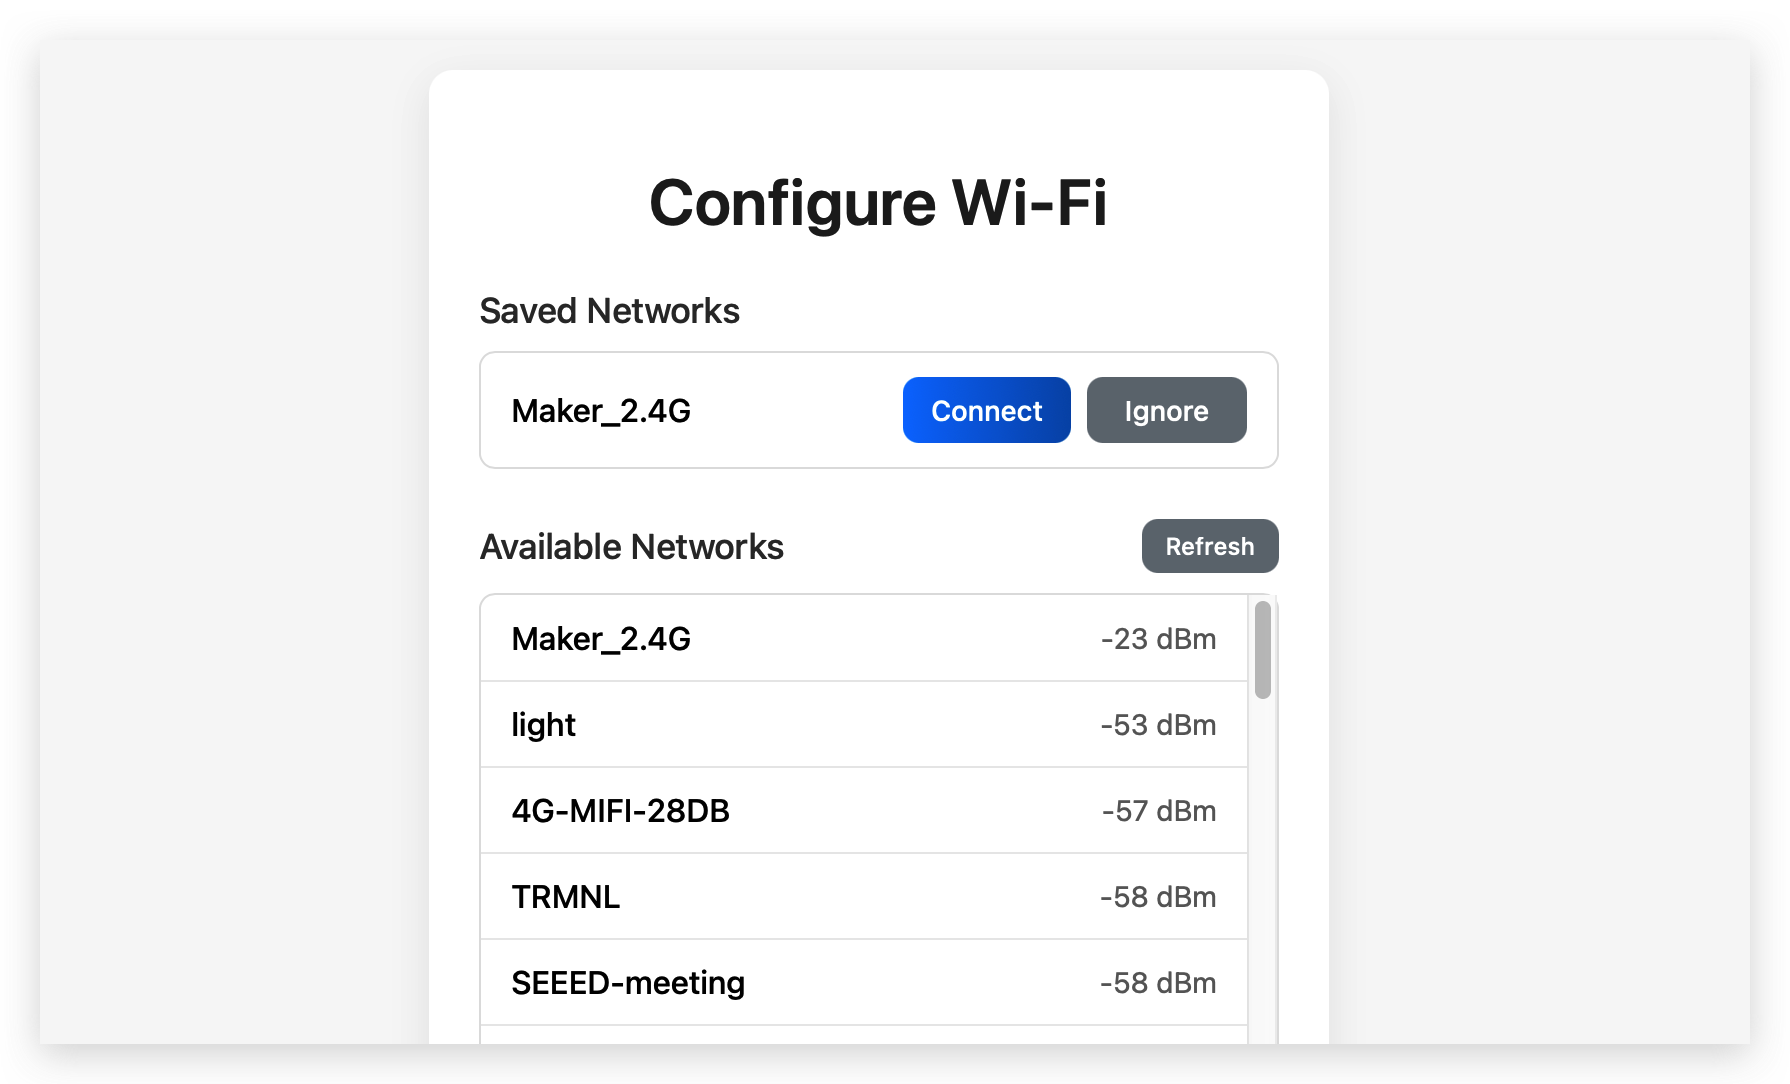
Step 3. Select your local Wi-Fi network and enter the password, then click "Connect".
The reTerminal E Series ePaper Display only supports 2.4GHz WiFi networks, not 5GHz or other bands.
Step 4. Upon successful connection, the device will emit a confirmation beep and display a pairing code screen.

Connecting to SenseCraft Platform
Step 1. Visit SenseCraft HMI in your web browser and create an account or sign in.
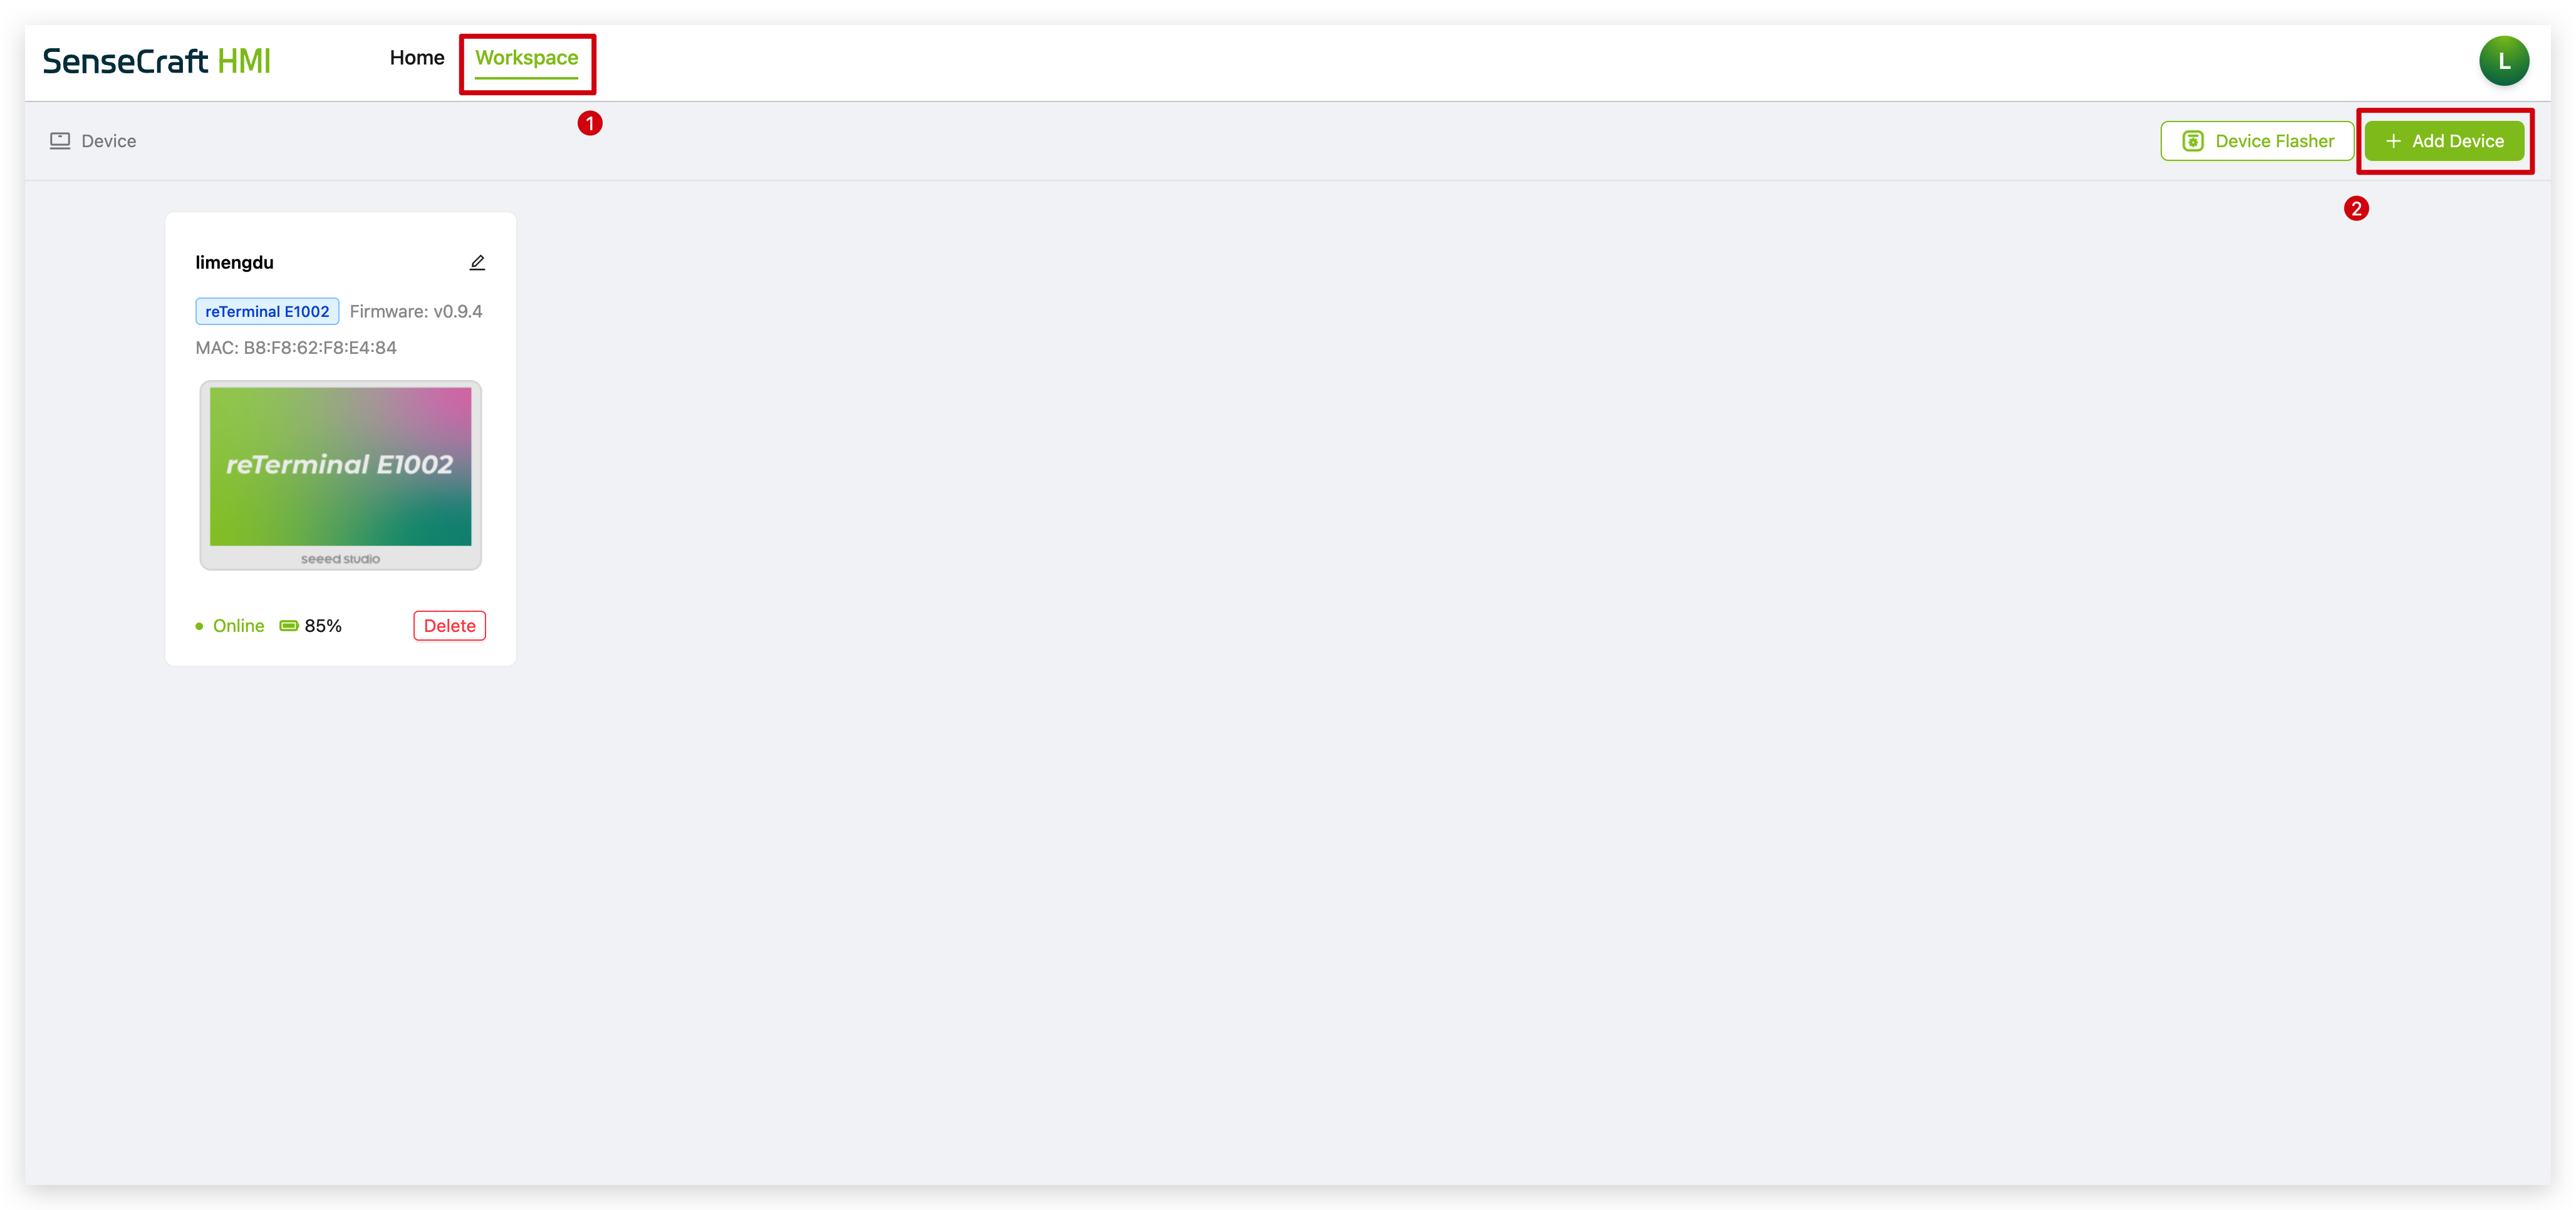
Step 2. Navigate to the Workspace section and click Add Device.
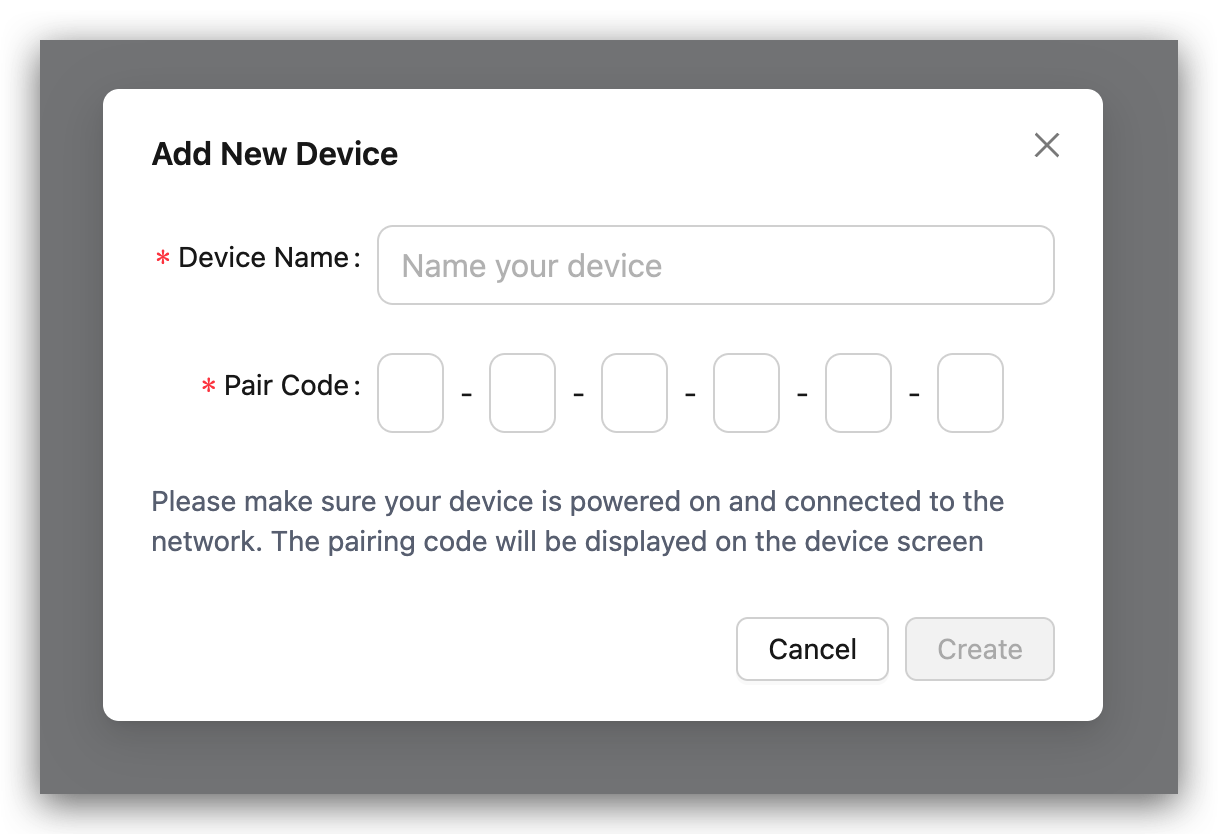
Step 3. Name your device and enter the pairing code displayed on your device's screen and click Create.
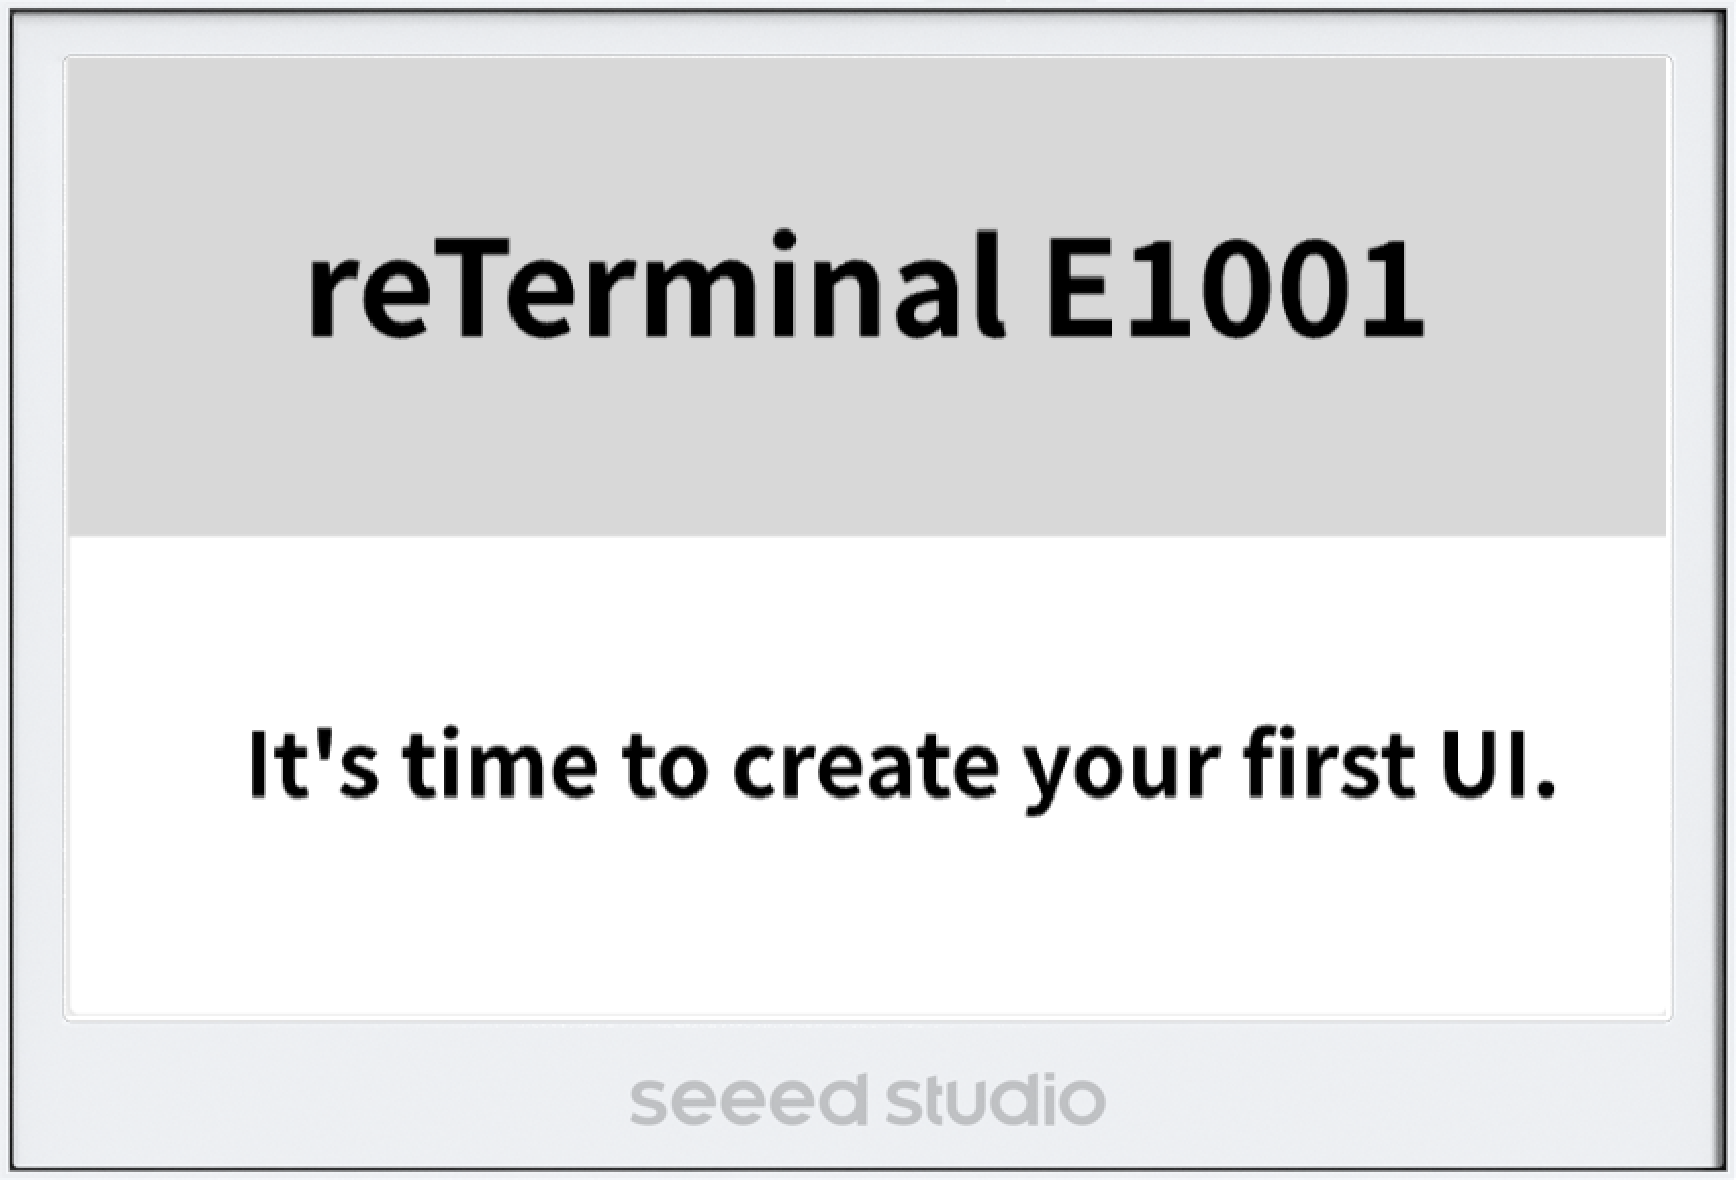
Step 4. Once paired, the device will display a message prompting you to create your first dashboard.
This method uses the SenseCraft mobile app to configure the device's network and add it to your SenseCraft account via Bluetooth.
First, download the SenseCraft App. You can find it by searching "SenseCraft" on the Google Play Store or Apple App Store. Alternatively, you can download it from this website.
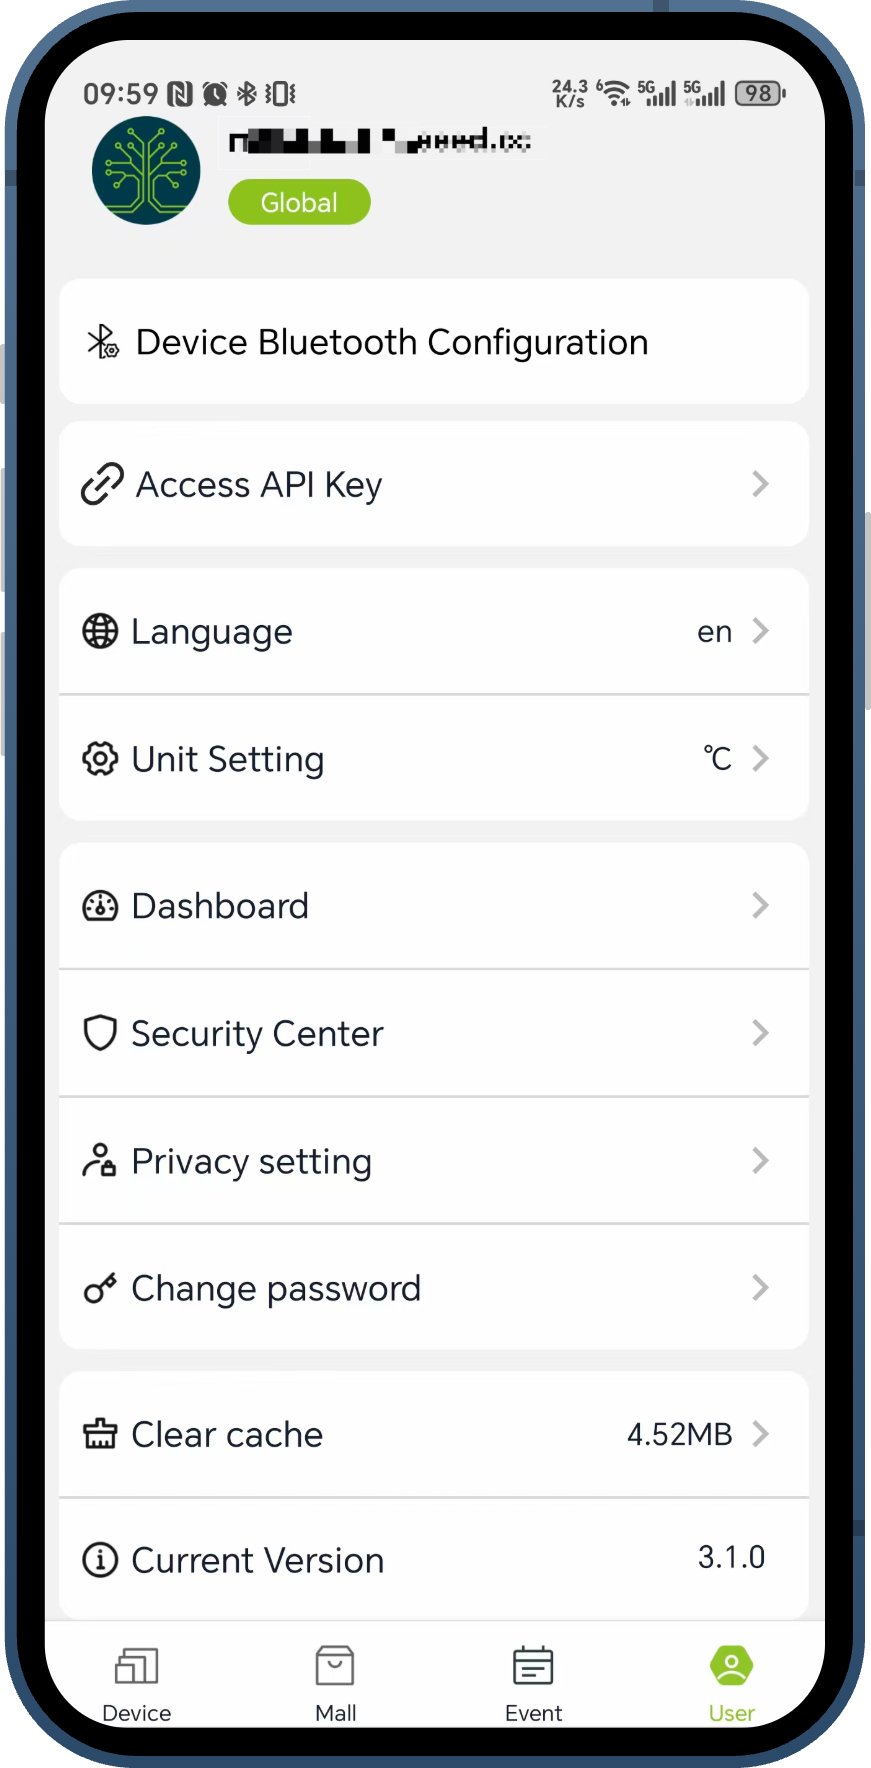
Step 1. Open the SenseCraft App, sign in to your account, and navigate to the User tab. Tap on Device Bluetooth Configuration to begin the process.
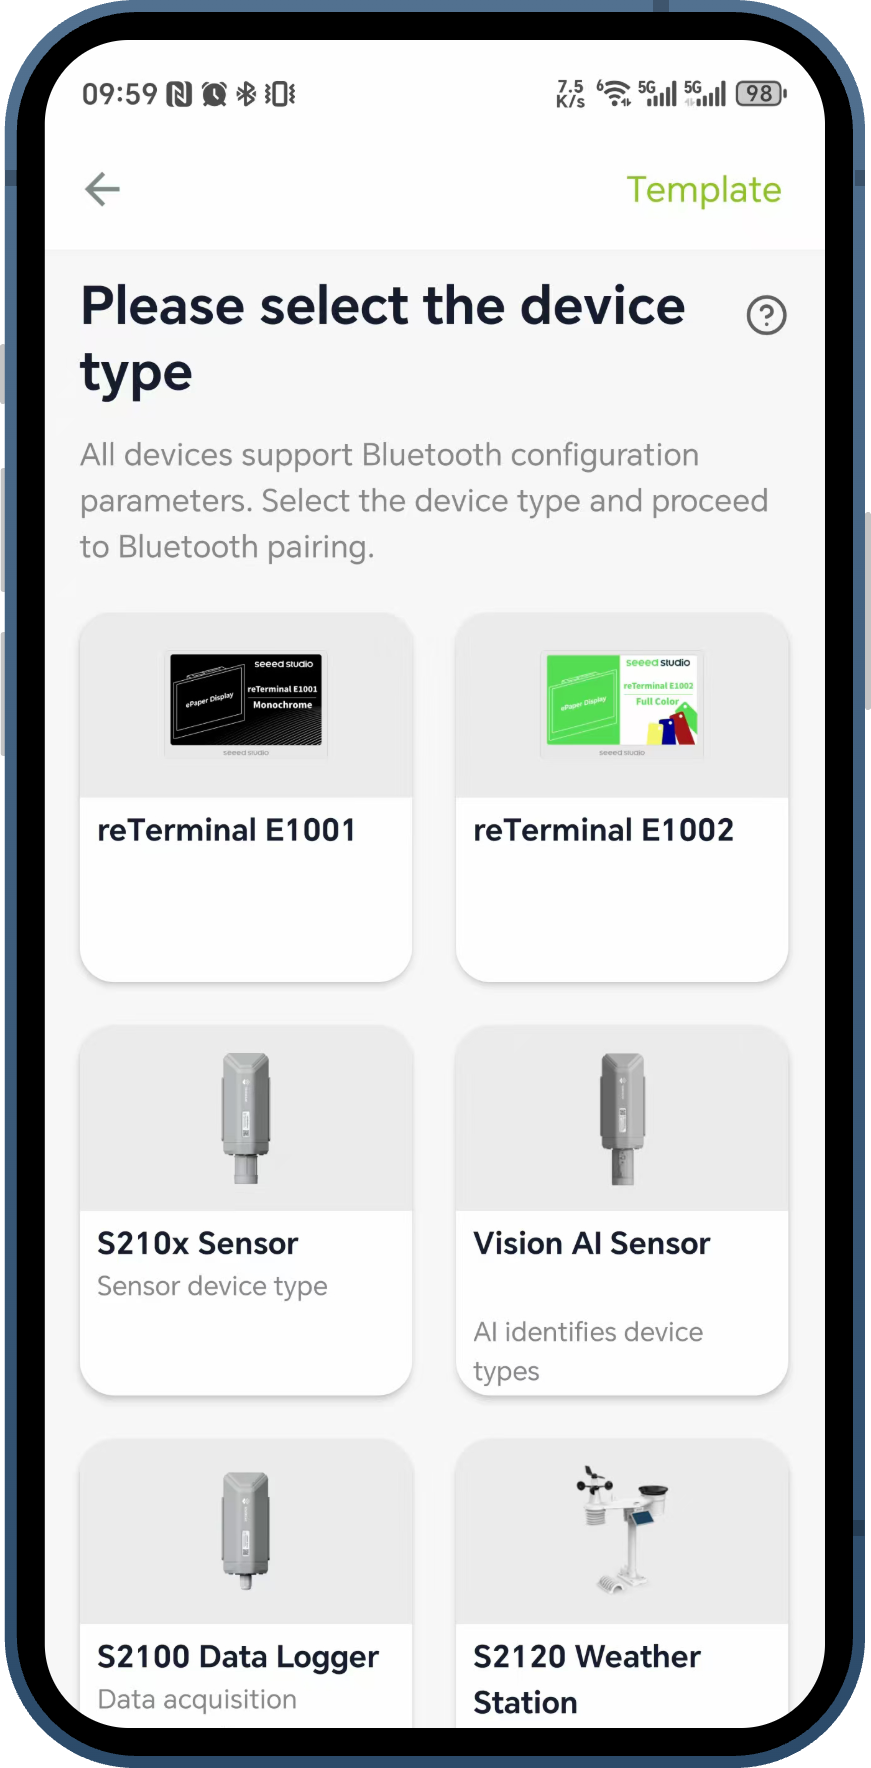
Step 2. On the "Please select the device type" screen, choose your reTerminal model (e.g., reTerminal E1001 or reTerminal E1002).
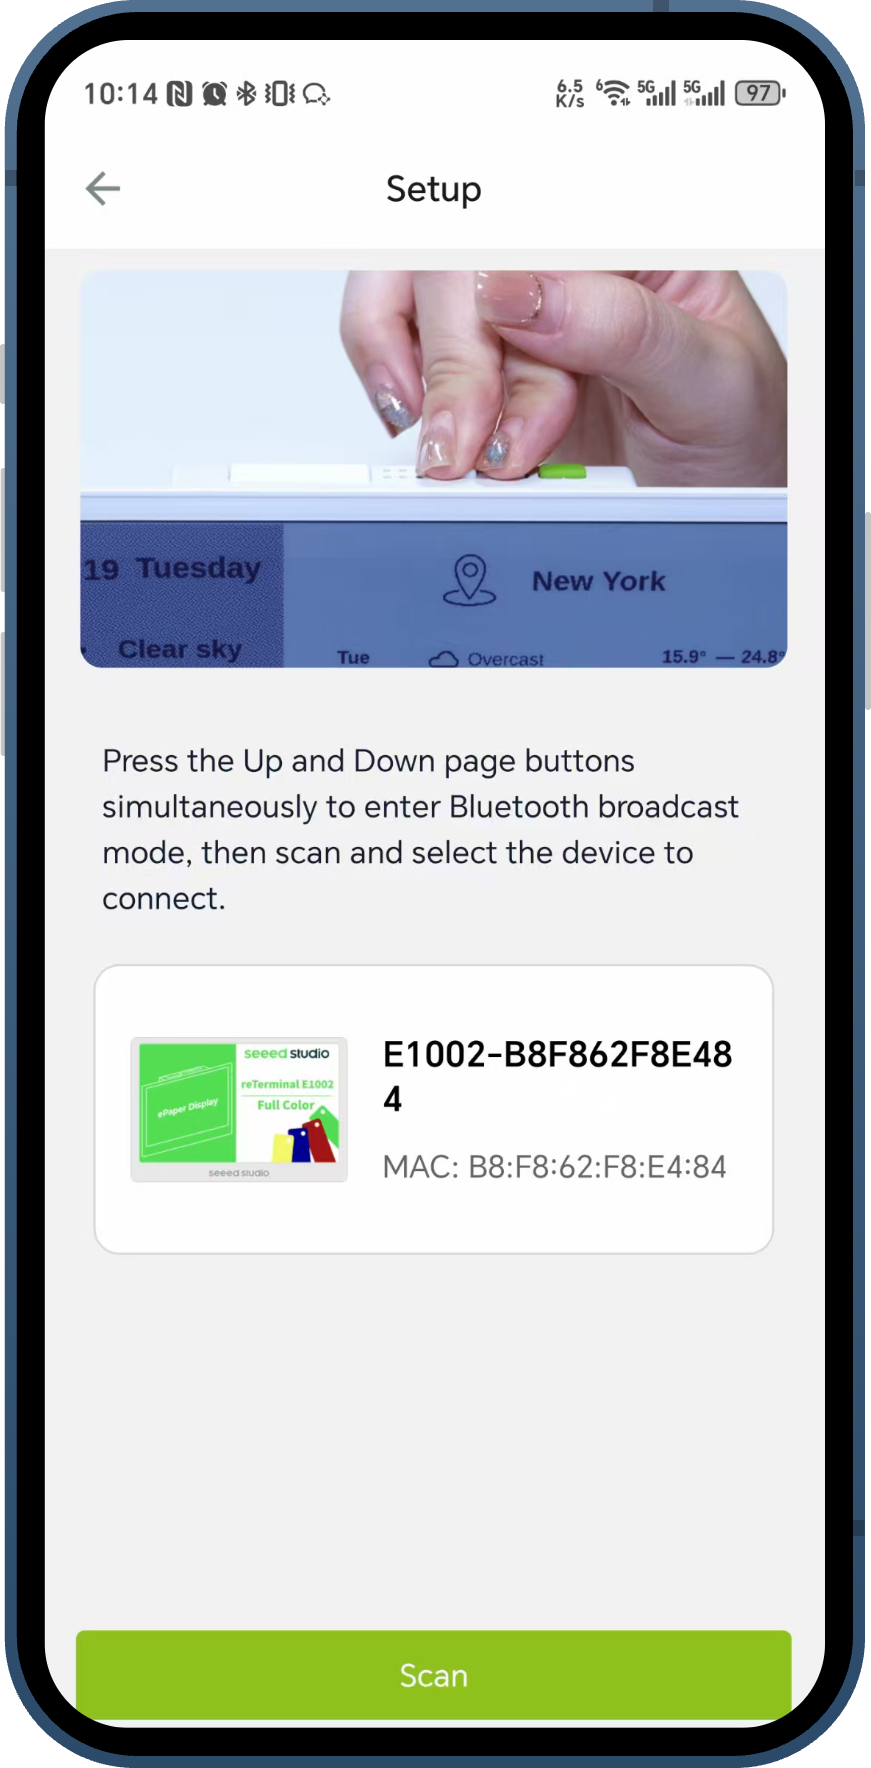
Step 3. Follow the on-screen instructions to put your device into Bluetooth broadcast mode. This is typically done by pressing the Up and Down page buttons simultaneously. Ensure your phone's Bluetooth is enabled. Tap Scan, and the app will discover nearby devices. Select your device from the list to connect.
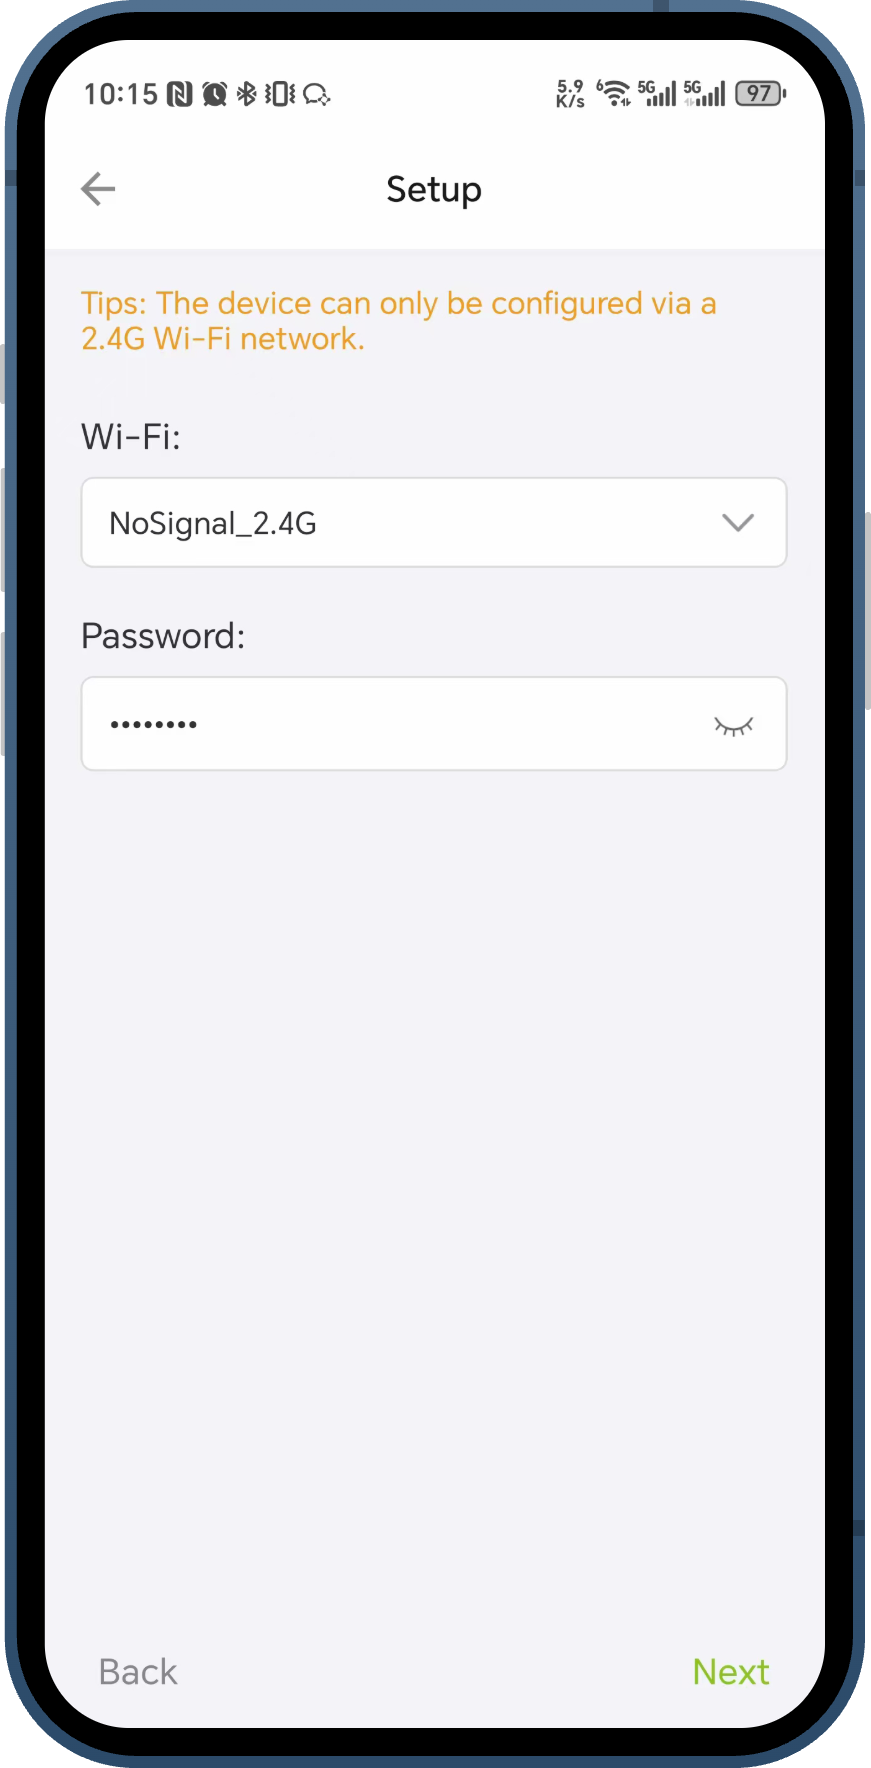
Step 4. Once connected via Bluetooth, the app will prompt you to set up the Wi-Fi connection. Select your local 2.4GHz Wi-Fi network from the dropdown list, enter the password, and tap Next.
The device can only be configured via a 2.4G Wi-Fi network.
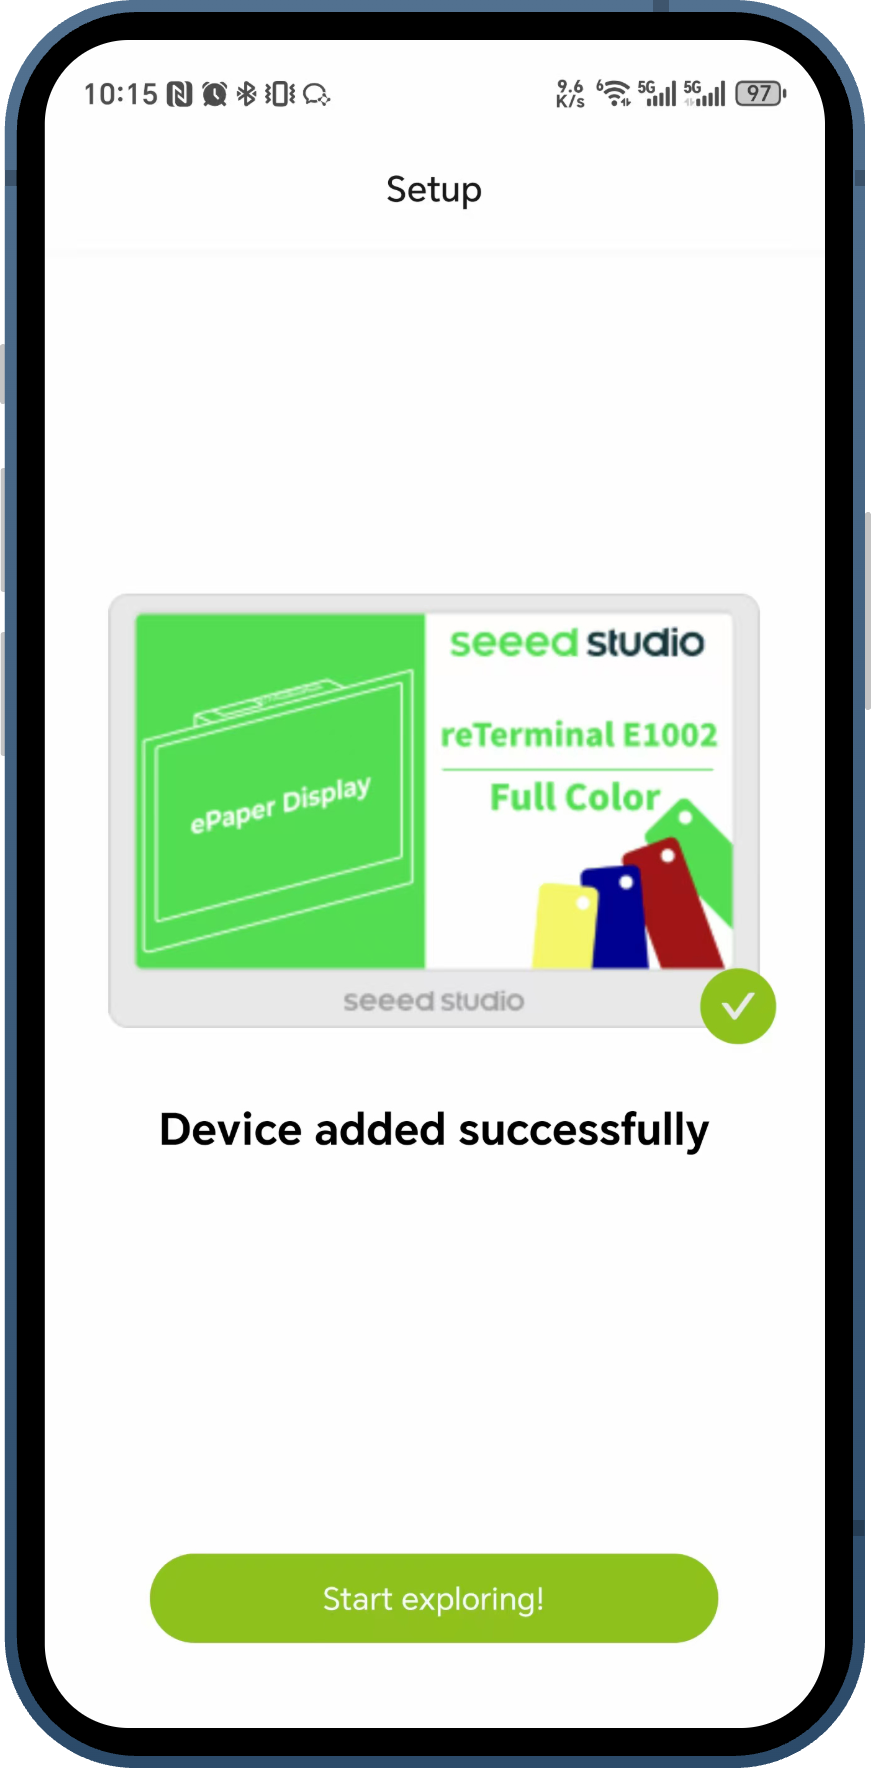
Step 5. The app will send the Wi-Fi credentials to the device and add it to your SenseCraft account. A "Device added successfully" message will appear upon completion. You can now tap Start exploring! to proceed.
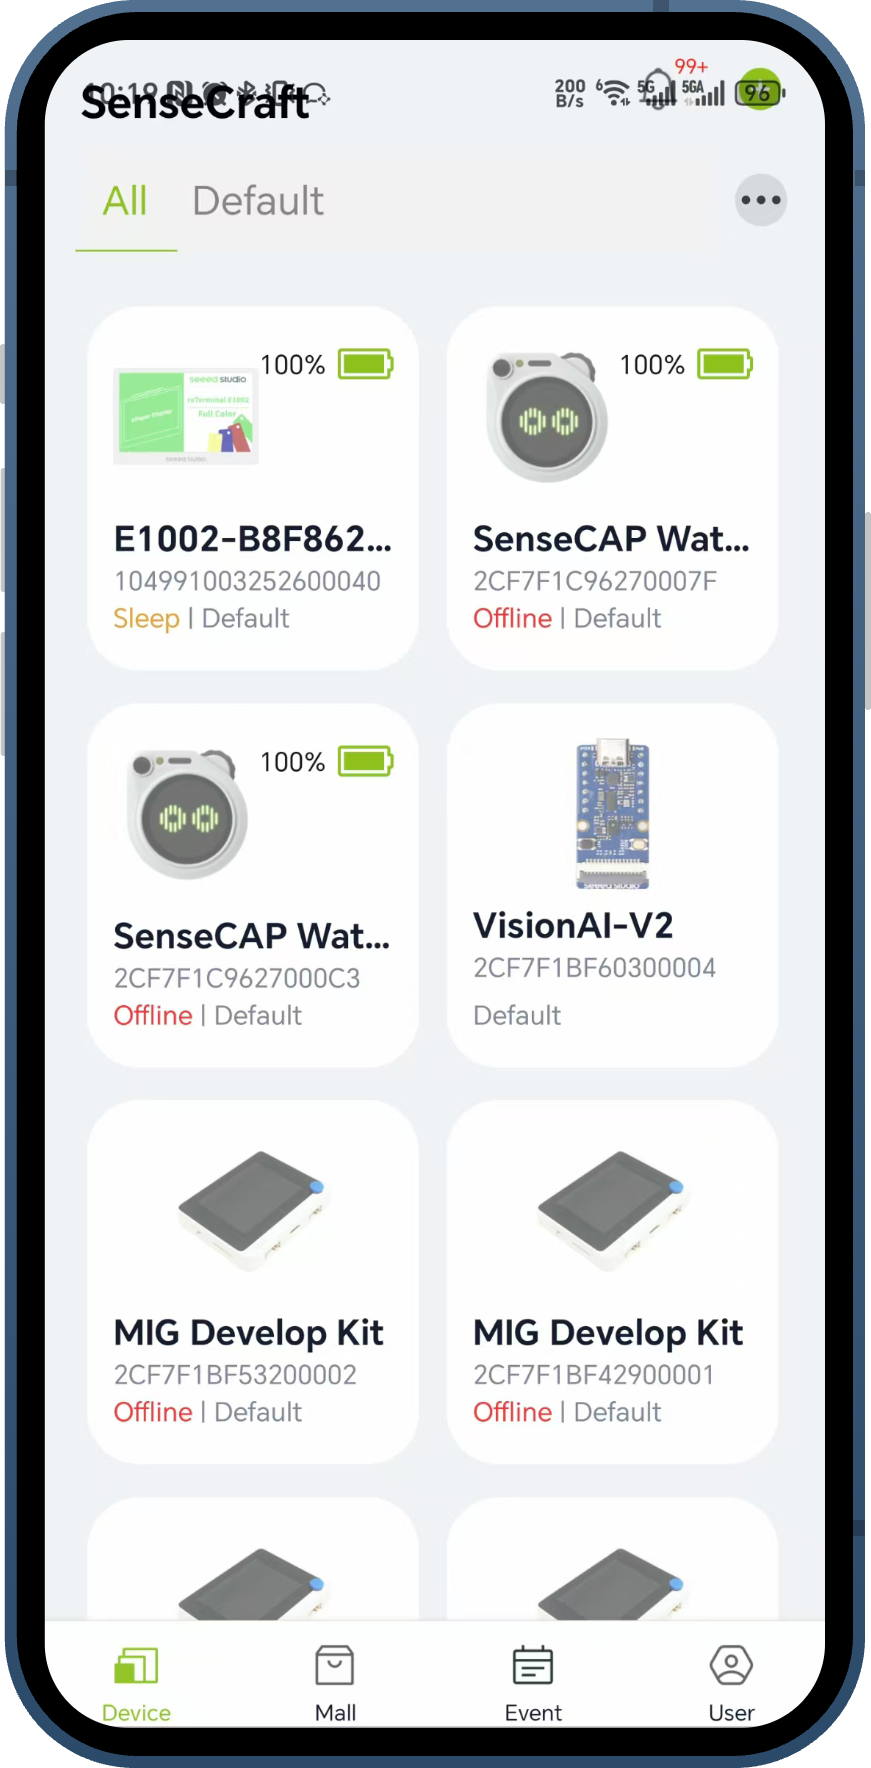
Step 6. Your reTerminal will now appear in your device list on the main Device tab of the app, successfully connected to your SenseCraft account.
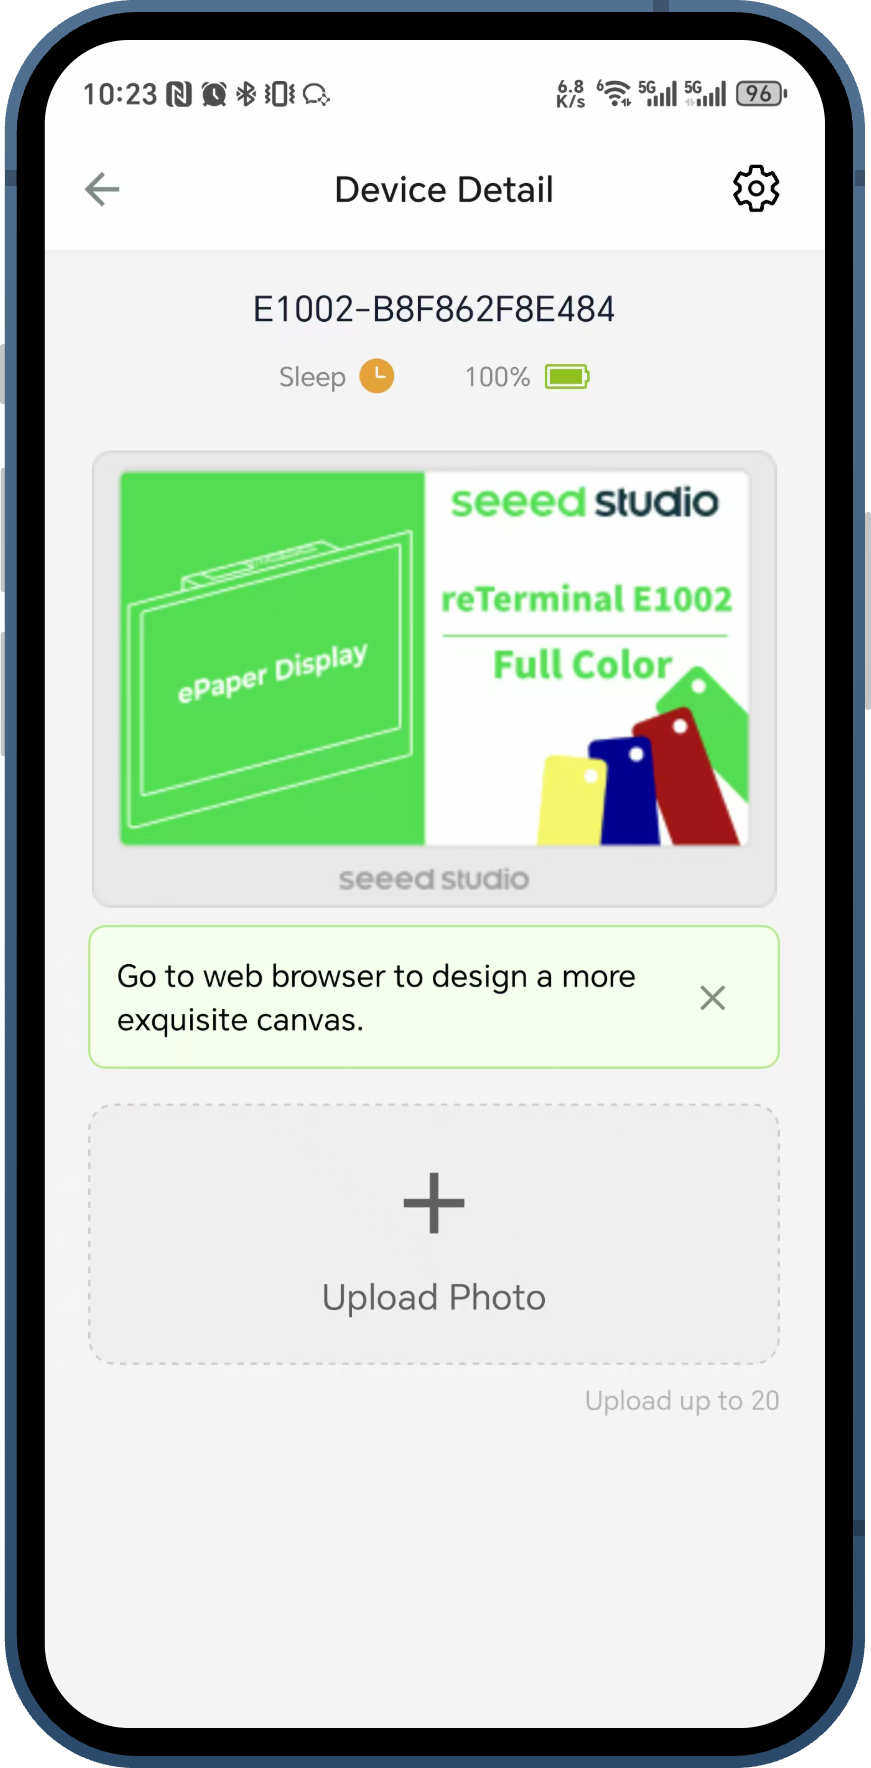
Step 7. You can tap on the device in the list to view its Device Detail page. From here, you can manage the device and upload photos. For more complex dashboard and canvas design, you will be prompted to use the web browser version of SenseCraft.
Creating a Dashboard
The reTerminal E1001 integrates seamlessly with the SenseCraft HMI platform, which provides powerful tools for creating and customizing content for your device. Instead of detailing step-by-step operations here, let's explore the platform's key features to help you understand what's possible.
SenseCraft HMI Features
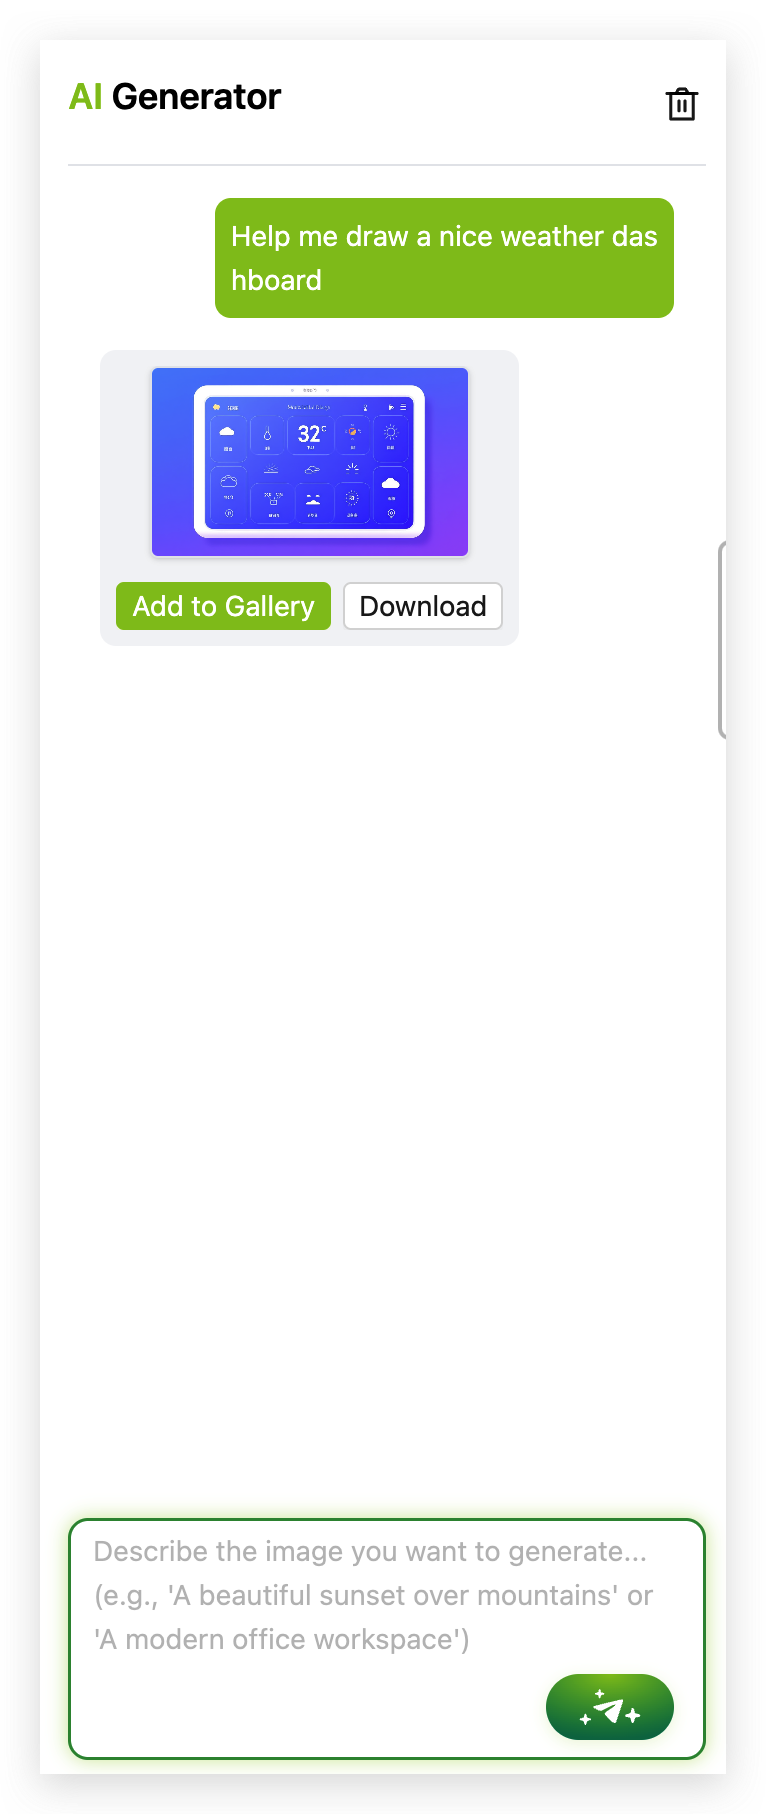
AI Generator
Let artificial intelligence design your dashboard! Simply describe what information you want displayed, and the AI Generator will automatically create an attractive, functional layout. This is perfect for quickly generating weather displays, calendars, to-do lists, or informational panels without manual design work.
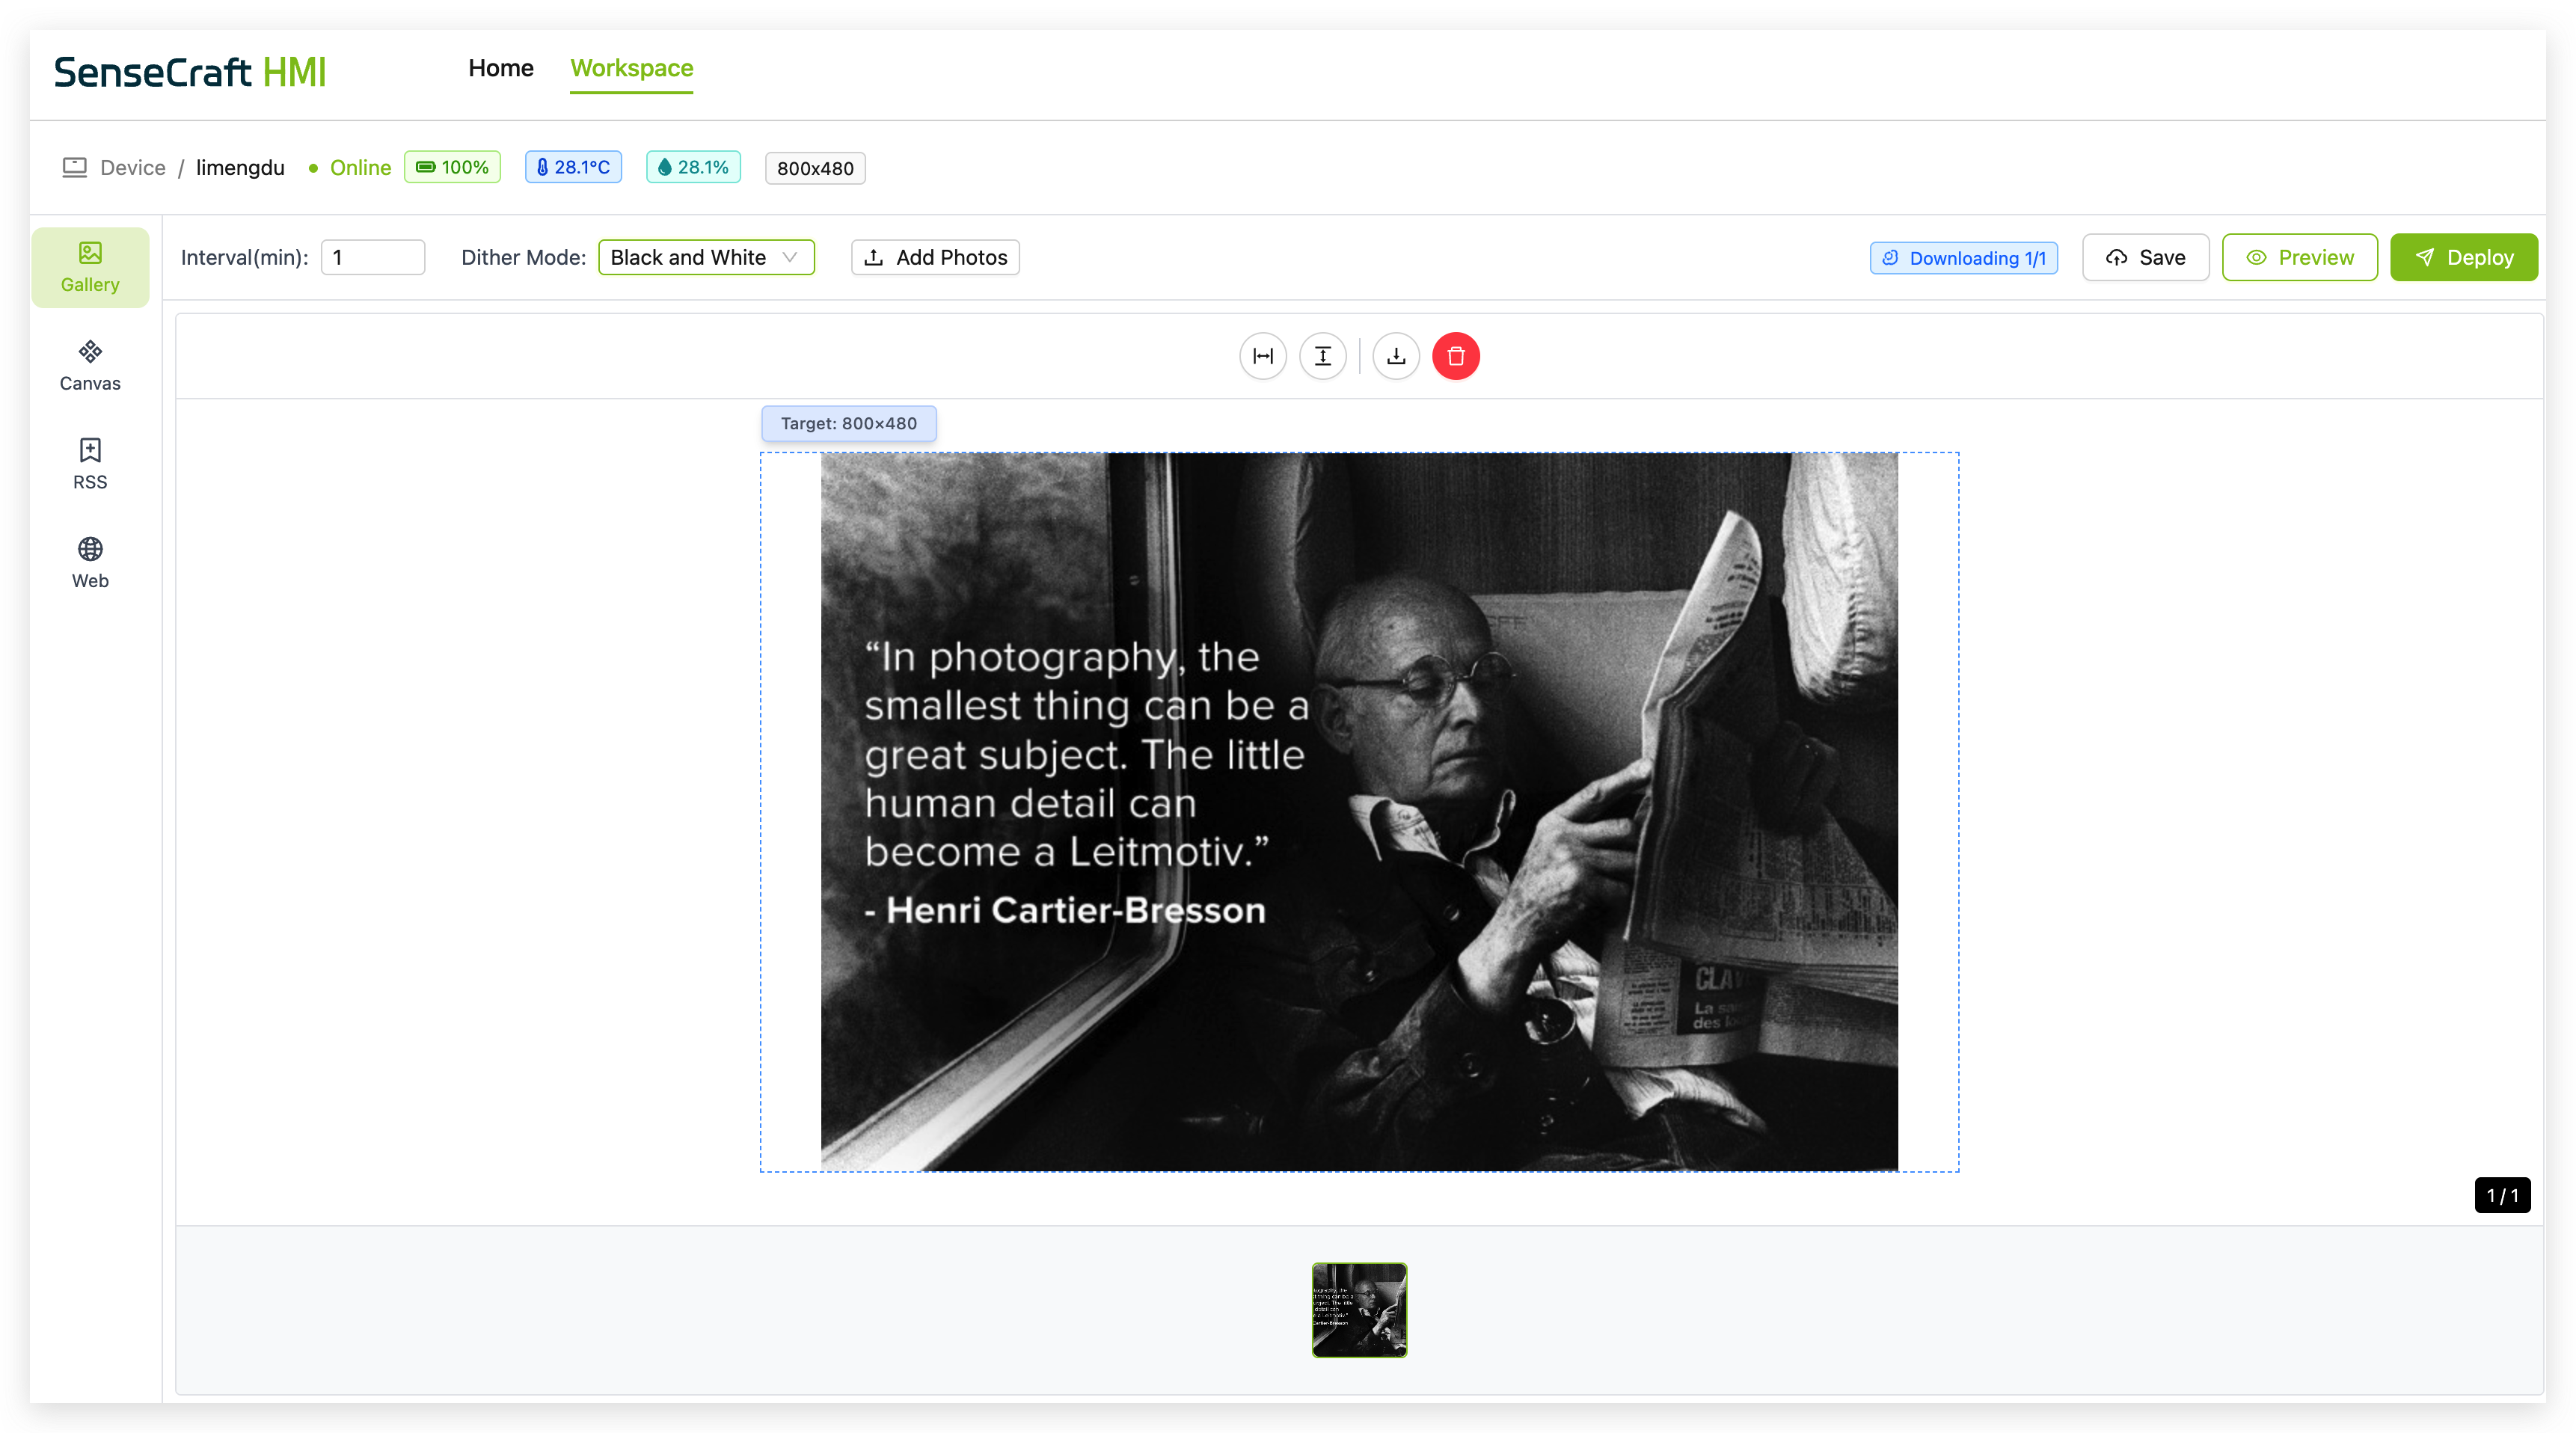
Gallery
Transform your reTerminal E1001 into a digital photo frame with the Gallery feature. Upload your favorite images, and the platform will optimize them for the ePaper display. Create slideshows with custom transition times.
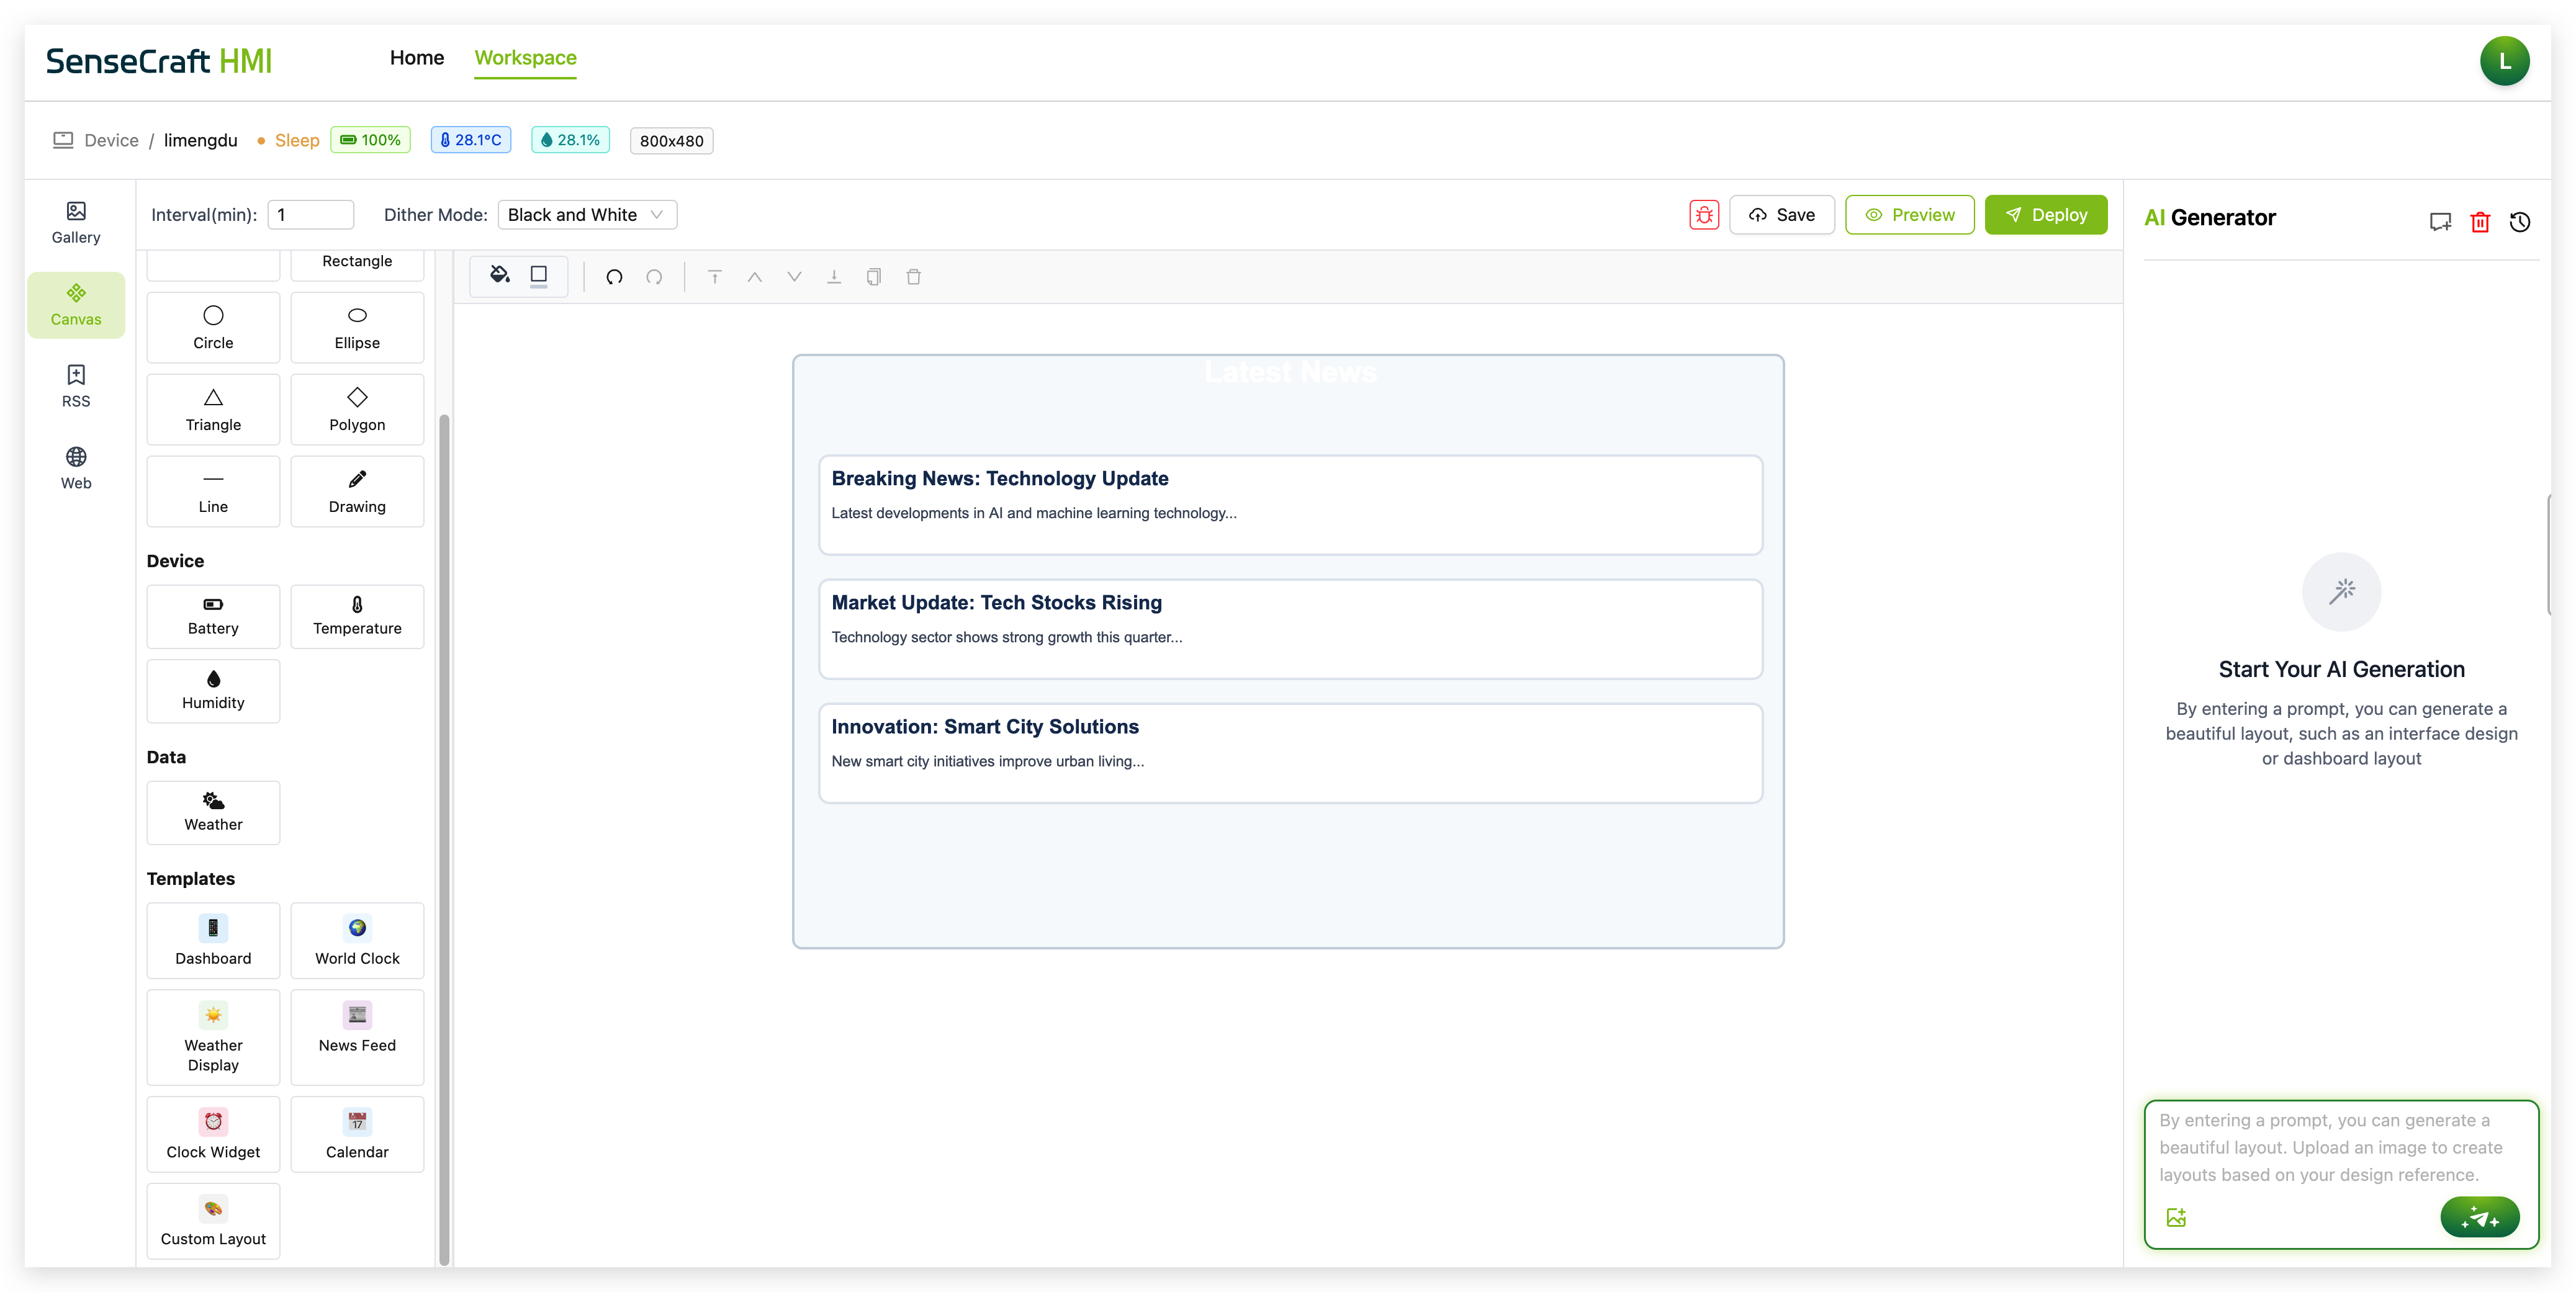
Canvas
Design your dashboard from scratch with Canvas, a drag-and-drop interface offering various elements:
- Text blocks with customizable fonts and sizes
- Image placeholders
- Widgets for time, date, and weather
- Data visualization tools
- Shapes and dividers for layout organization
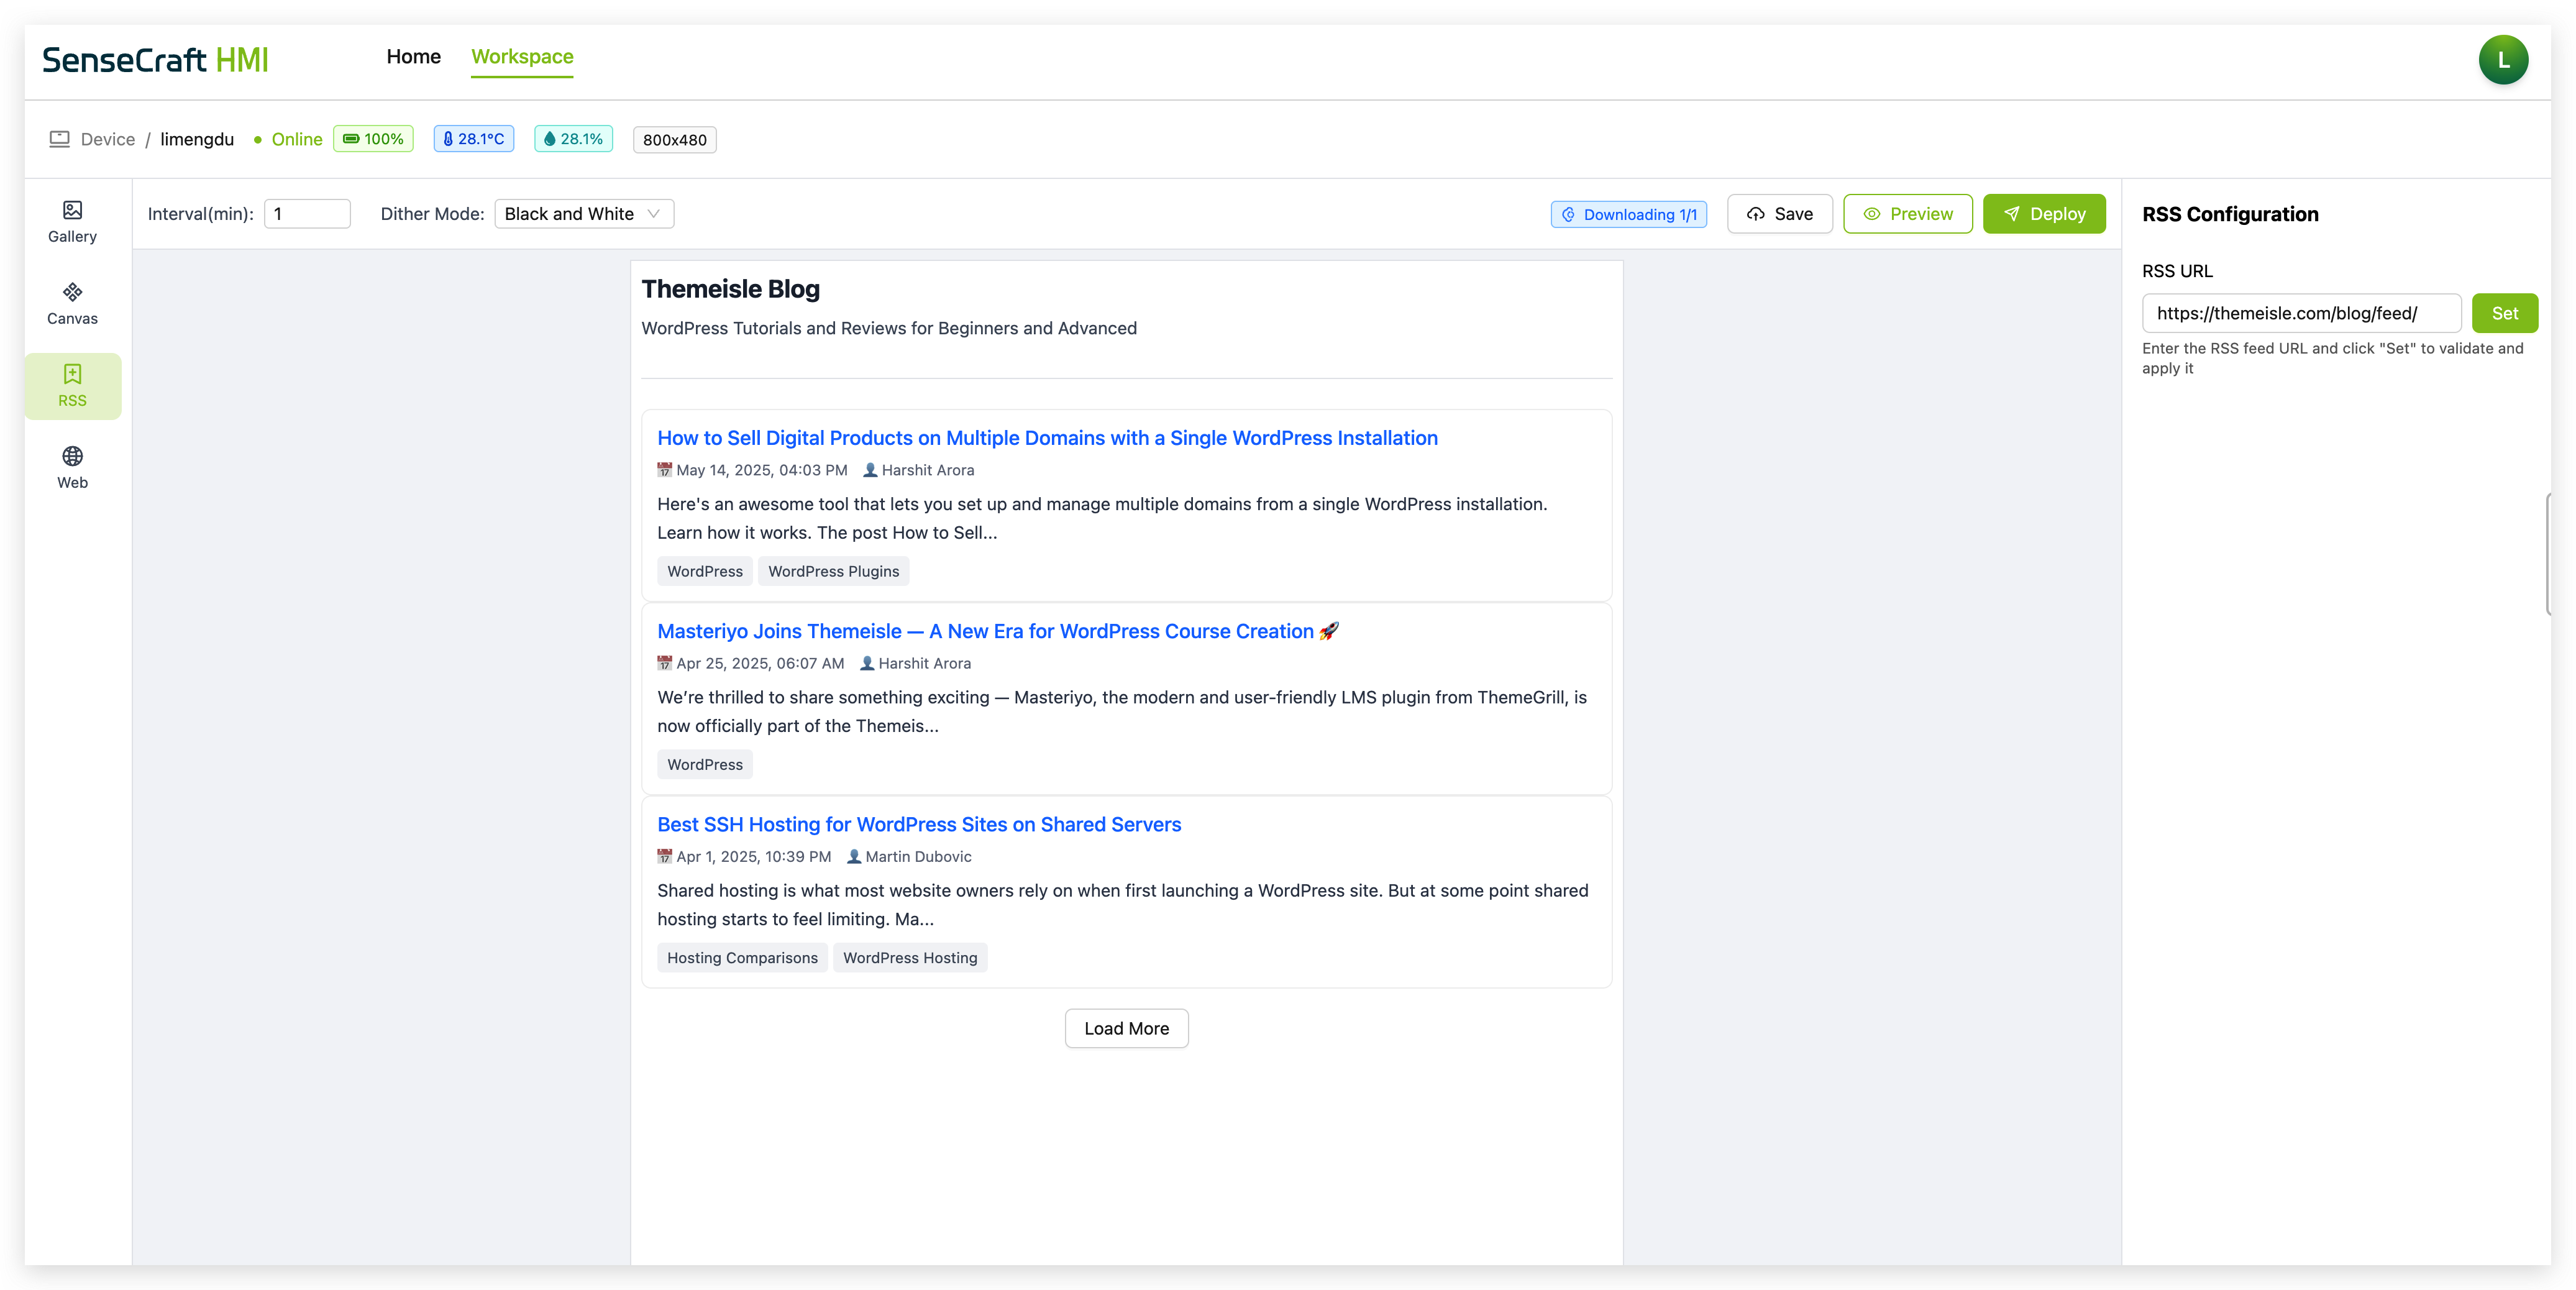
RSS Feed Integration
Stay updated with your favorite news sources, blogs, or websites by adding RSS feeds to your dashboard. The RSS feature allows you to display headlines, summaries, or full articles from multiple sources.
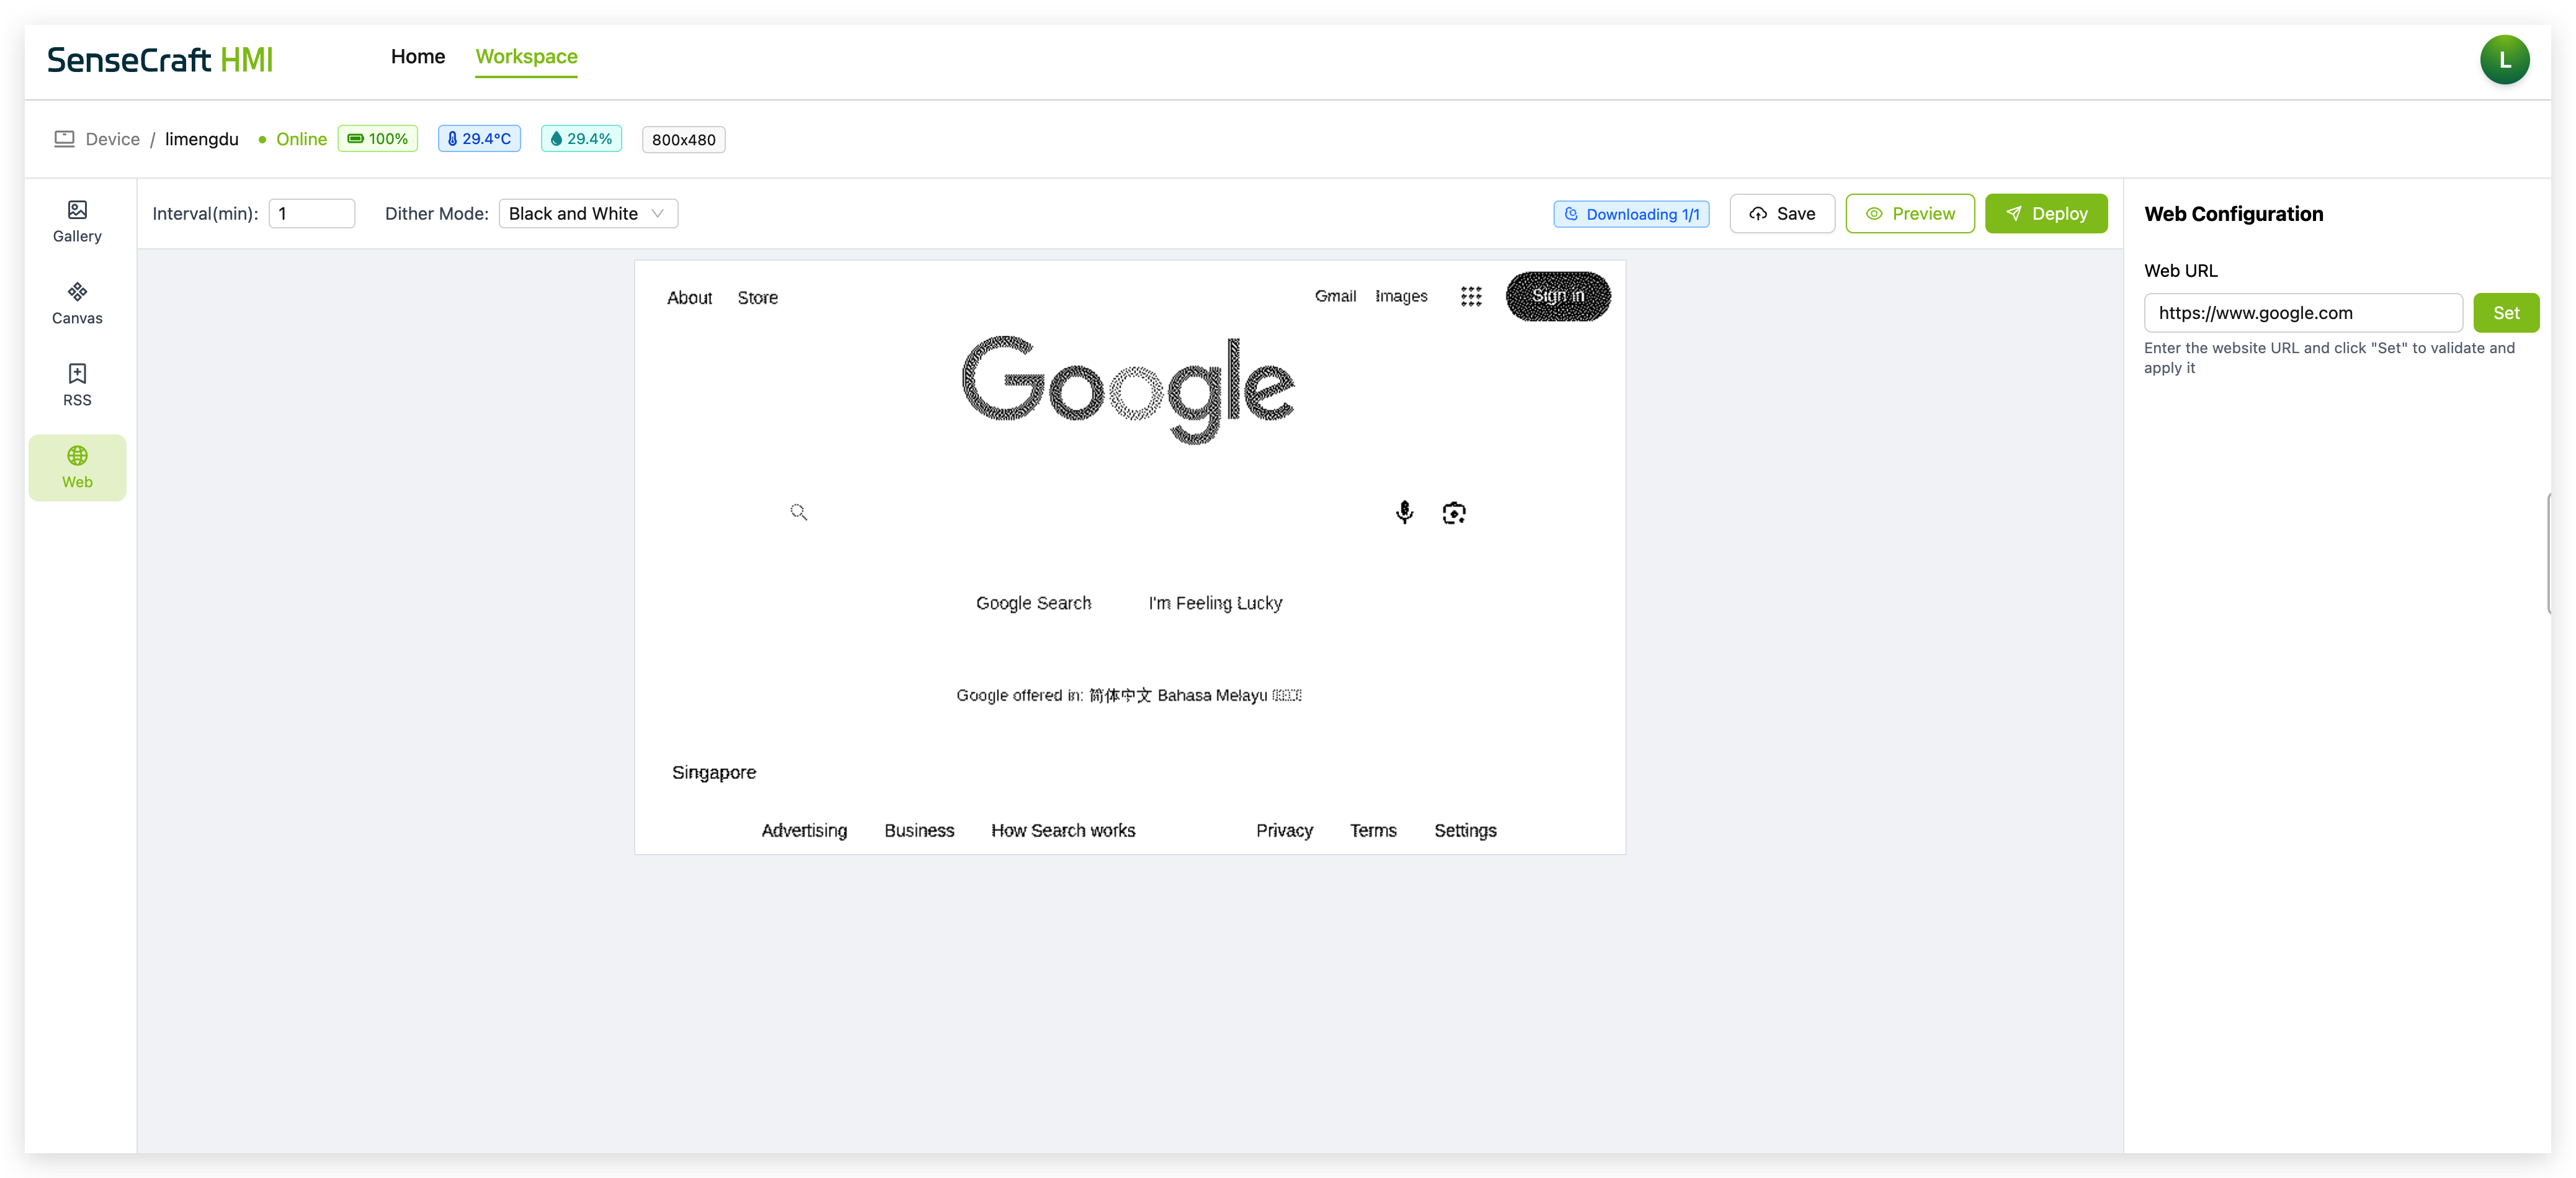
Web Content Display
Capture and display specific web content on your device. The Web feature can render selected portions of websites, allowing you to display information like transit schedules, stock tickers, or other online data sources.
Getting Started with SenseCraft HMI
After pairing your device with the SenseCraft platform as described in the previous section, you'll be ready to create your first dashboard. For detailed instructions on using each feature, please refer to the corresponding Wiki pages:
Once you've created and saved your dashboard in the SenseCraft platform, simply click "Deploy to Device," select your paired reTerminal E1001, and your custom content will be wirelessly transmitted to the device. The ePaper display will update to show your dashboard, and you can use the navigation buttons to switch between multiple pages if you've created them.
Operating the Device
Refresh Button

The refresh button at the top of the device serves several functions:
-
Single Press: Manually refreshes the display and checks for new content from the SenseCraft platform. The buzzer will beep once to confirm the action. This button is also commonly used to wake up the device. You can use this button to wake up a device when it has gone to sleep and a dashboard refresh command is usually not immediately available to the device.
-
Long Press (future functionality): Will activate voice input mode.
Navigation Buttons
The left and right buttons allow you to navigate between multiple pages if your dashboard contains more than one page:
-
Left Button: Navigate to the previous page
-
Right Button: Navigate to the next page
Network Reset

If you need to connect to a different Wi-Fi network:
Step 1. Press and hold both navigation buttons (left and right) simultaneously for 2 seconds.
Step 2. The device will enter Wi-Fi configuration mode, and you can follow the Network Setup steps again to connect to a new network.
LED Indicators
-
Red LED:
- Off: Fully charged or not charging
- Always on: charging
-
Green LED:
- On for 30 seconds at boot: Device is powering on
Battery Operation
When operating on battery power:
-
The device will automatically enter low-power mode between refreshes
-
Battery life depends on refresh frequency (typically 3-month on a full charge with default settings)
-
The device will display a low battery icon in the top-right corner when the battery level is below 20%
If you want to write some code by yourself to read battery voltage, it will be more precise to add 10ms delay before analogRead() function.
Expansion Pins
The reTerminal E1001 features an 8-pin expansion header (J2) that provides connectivity options for adding external sensors, modules, or other hardware to extend the functionality of your device. This expansion header exposes several ESP32-S3 GPIO pins and communication interfaces, making it a versatile connection point for your DIY projects.
Expansion Header Pinout
The 8-pin expansion header (J2) has the following pinout:
| Pin (from top to bottom) | Label | ESP32-S3 Pin | Function | Description |
|---|---|---|---|---|
| 1 | HEADER_3V3 | - | Power | 3.3V power supply for external devices |
| 2 | GND | - | Ground | Common ground reference |
| 3 | ESP_IO46 | GPIO46 | GPIO/ADC | General purpose I/O with analog input capability |
| 4 | ESP_IO2/ADC1_CH4 | GPIO2 | GPIO/ADC | General purpose I/O with analog input capability (ADC1 channel 4) |
| 5 | ESP_IO17/TX1 | GPIO17 | GPIO/UART TX | GPIO or UART transmit (TX) signal |
| 6 | ESP_IO18/RX1 | GPIO18 | GPIO/UART RX | GPIO or UART receive (RX) signal |
| 7 | ESP_IO20/I2C0_SCL | GPIO20 | GPIO/I2C SCL | GPIO or I2C clock signal |
| 8 | ESP_IO19/I2C0_SDA | GPIO19 | GPIO/I2C SDA | GPIO or I2C data signal |
Device Placement
The reTerminal E1001 comes with a 3D-printed support stand accessory that allows you to position the device upright for optimal viewing:
Step 1. Locate the 3D-printed support stand included in the package.
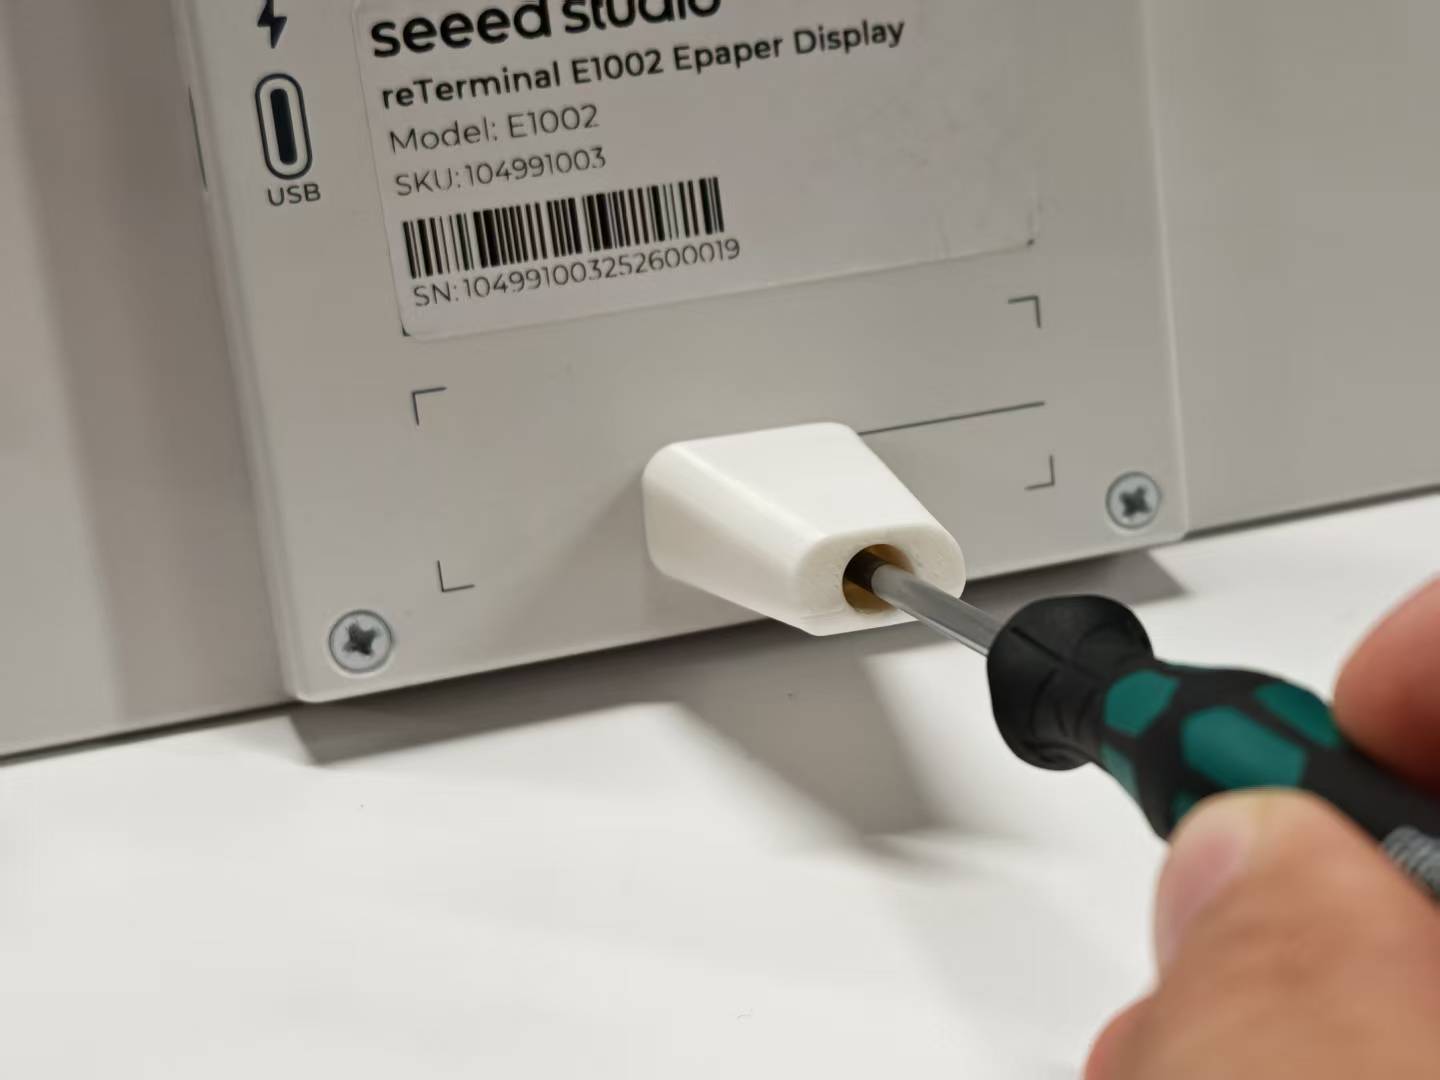
Step 2. Position the support stand against the designated mounting area on the bottom back of the reTerminal E1001 where the embedded nuts are located.
Step 3. Use a long screwdriver to secure the stand to the device by tightening the screws into the embedded nuts on the back of the reTerminal E1001.
Step 4. Once securely attached, place the reTerminal E1001 on a flat surface where the stand will support it in an upright position.
The stand provides a fixed viewing angle and cannot be adjusted. This fixed positioning is designed to offer optimal visibility in most usage scenarios.
The stand allows the device to be placed on desks, countertops, or shelves, making it ideal for use as an information display, control panel, or digital photo frame in various environments.
Troubleshooting
Q1: Device Won't Power On
- Ensure the power switch is in the ON position
- Connect the USB-C cable to charge the device
- Check if the red LED is always on (indicating charging)
- If using battery power, ensure the battery is properly connected and charged
Q2: Can't Connect to Wi-Fi
- Verify you're entering the correct Wi-Fi password
- Ensure your Wi-Fi network is operational
- Check if your Wi-Fi router supports 2.4GHz networks (5GHz is not supported)
- Try positioning the device closer to your Wi-Fi router
Q3: Display Not Updating
- Press the refresh button to manually trigger an update
- Verify the device is connected to Wi-Fi (no disconnection icon in the corner)
- Check your SenseCraft account to ensure the dashboard is properly deployed
- If the problem persists, try restarting the device
- If the device still does not respond after restarting, re-flash the corresponding firmware on the SenseCraft HMI platform and check whether the device can refresh normally
Q4: Network Connection Lost
- The device will automatically attempt to reconnect to known networks
- When reconnected, the Wi-Fi disconnection icon will disappear
- If unable to reconnect, follow the Network Reset procedure above
Resources
- reTerminal E1001 Schematic (PDF)
- ESP32-S3 Datasheet
- SenseCraft HMI Platform Documentation
- Exterior overall 3D model STP file
Tech Support & Product Discussion
Thank you for choosing our products! We are here to provide you with different support to ensure that your experience with our products is as smooth as possible. We offer several communication channels to cater to different preferences and needs.