Getting Started with reTerminal E1004

Introduction
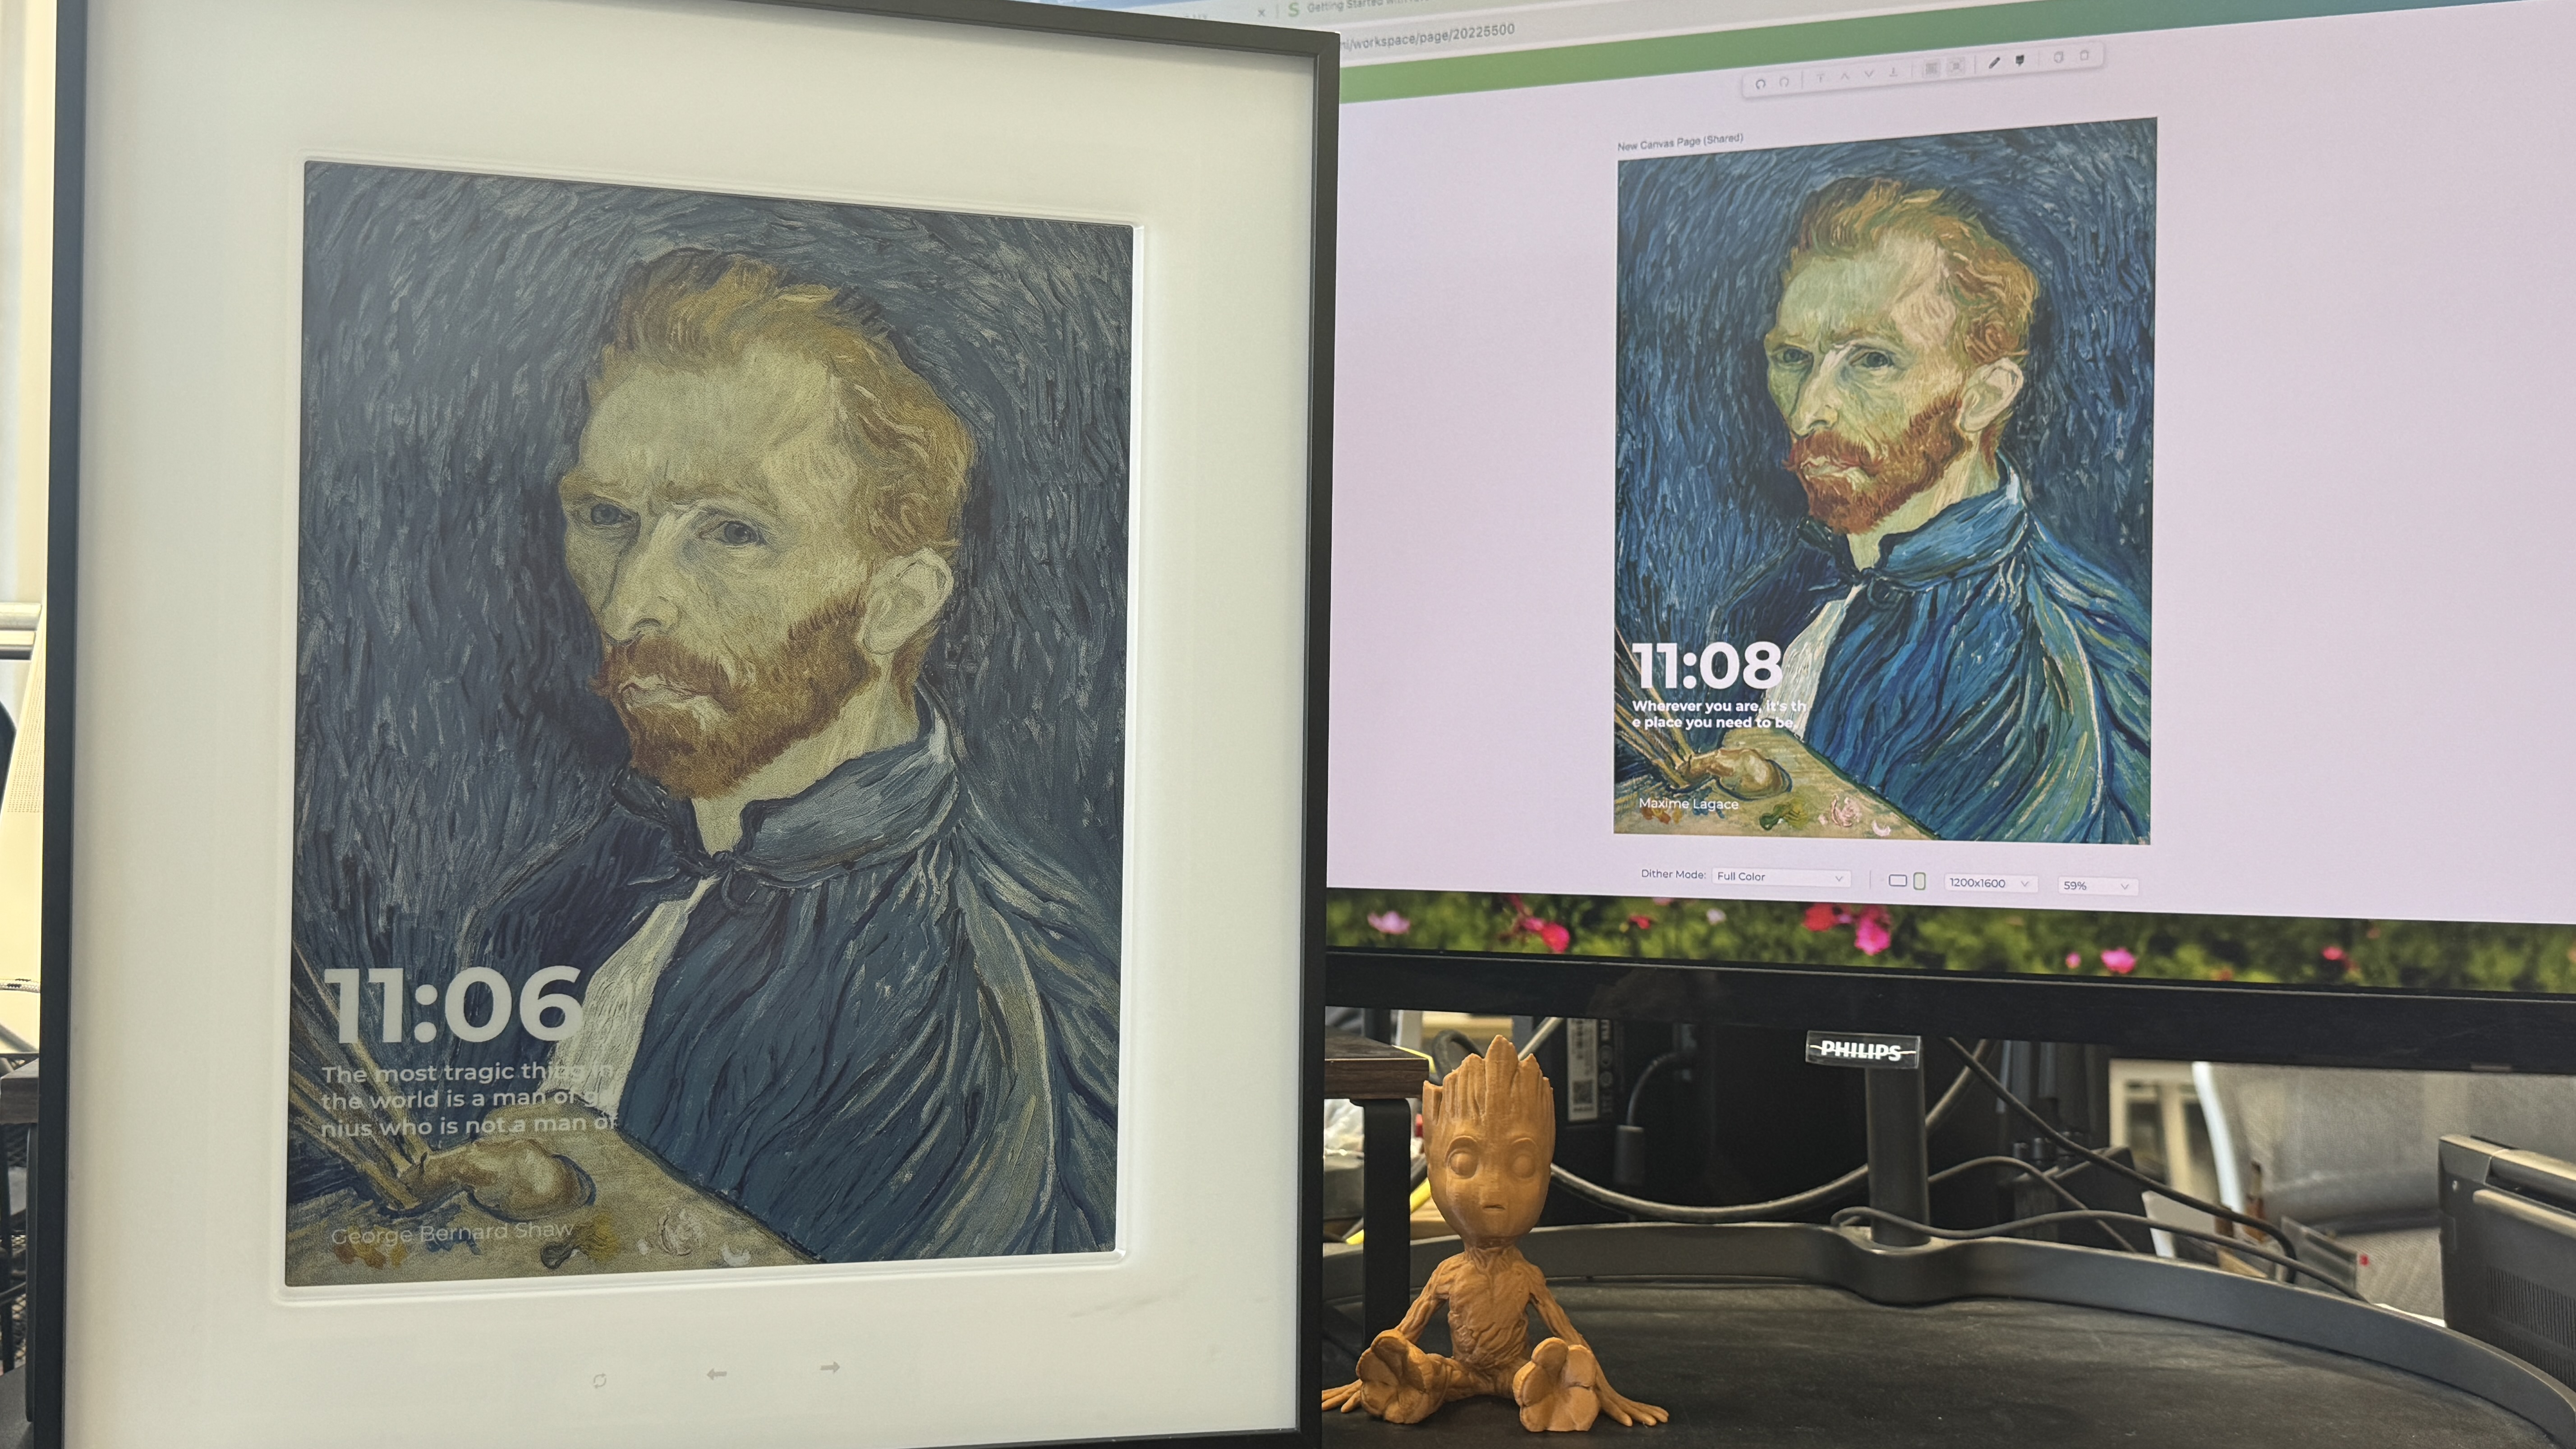
reTerminal E1004 is a 13.3 inch open-source full color ePaper display with up to 6-month battery life. Powered by ESP32-S3, it natively supports our SenseCraft HMI no-code UI platform for effortless dashboard creation, while supporting Home Assistant, Arduino and ESP-IDF for further development. With the E Ink® Spectra™ 6 full-color ePaper Display, it's perfect for digital frame, colorful dashboard visulization.
Features
- High-Definition Color Display: 13.3-inch E Ink® Spectra™ 6 Full Color ePaper Display with a high resolution of 1200x1600 pixels.
- Powerful Processing: Powered by ESP32-S3 with 8MB PSRAM and 32MB Flash for robust performance.
- Ultra-Low Power Consumption: Built-in 5000mAh battery supports up to 6 months of usage on a single charge (refresh every 6 hours).
- No-Code UI Development: Default firmware supports SenseCraft HMI for drag-and-drop dashboard creation and AI-assisted design.
- Wide Compatibility: Supports Home Assistant (ESPHome), Arduino, PlatformIO, and ESP-IDF.
- Rich Connectivity: Integrated 2.4GHz Wi-Fi (802.11 b/g/n) and Bluetooth 5.0.
- Integrated Sensors & Audio: Built-in temperature and humidity sensors, a buzzer for alerts
- Ready-to-Use Storage: Includes a 16GB Micro SD card (supports up to 32GB).
Specification
| Item | Description |
|---|---|
| Product Name | reTerminal E1004 |
| Processor | ESP32-S3 with 8MB PSRAM |
| Storage | 32MB Flash, support Micro SD card (Up to 32GB, 16GB included) |
| Display | 13.3" Spectra™ 6 Full Color ePaper |
| Resolution | 1200 x 1600 Pixels |
| Wireless Connectivity | 2.4GHz 802.11 b/g/n Wi-Fi, Bluetooth 5.0 |
| Sensors | Temperature, Humidity sensors |
| Audio | Buzzer (Sound alert) |
| Battery | 5000mAh |
| Power Input | USB-C 5V/1A |
| Software Support | SenseCraft HMI (Default), ESPHome, Arduino, PlatformIO, ESP-IDF |
| Working Temperature | 0-40°C |
| Dimensions | 376mm x 311mm x 40mm |
Applications
- Low-power Electronic Photo Frame: Display high-resolution family photos or art with paper-like quality without worrying about daily charging.
- Family Information Board: Keep track of calendars, notifications, weather, and news in a stylish, always-on format.
- Home Automation Dashboard: Visualize real-time smart home data (temperature, humidity, air quality) via Home Assistant.
- Smart Office Display: Show meeting room schedules, availability, or directional guidance.
- Retail & Public Signage: Energy-efficient menus, schedules, or occupancy indicators.
- Education & Prototyping: An ideal platform for learning IoT, embedded systems, and UI design.
Hardware Overview
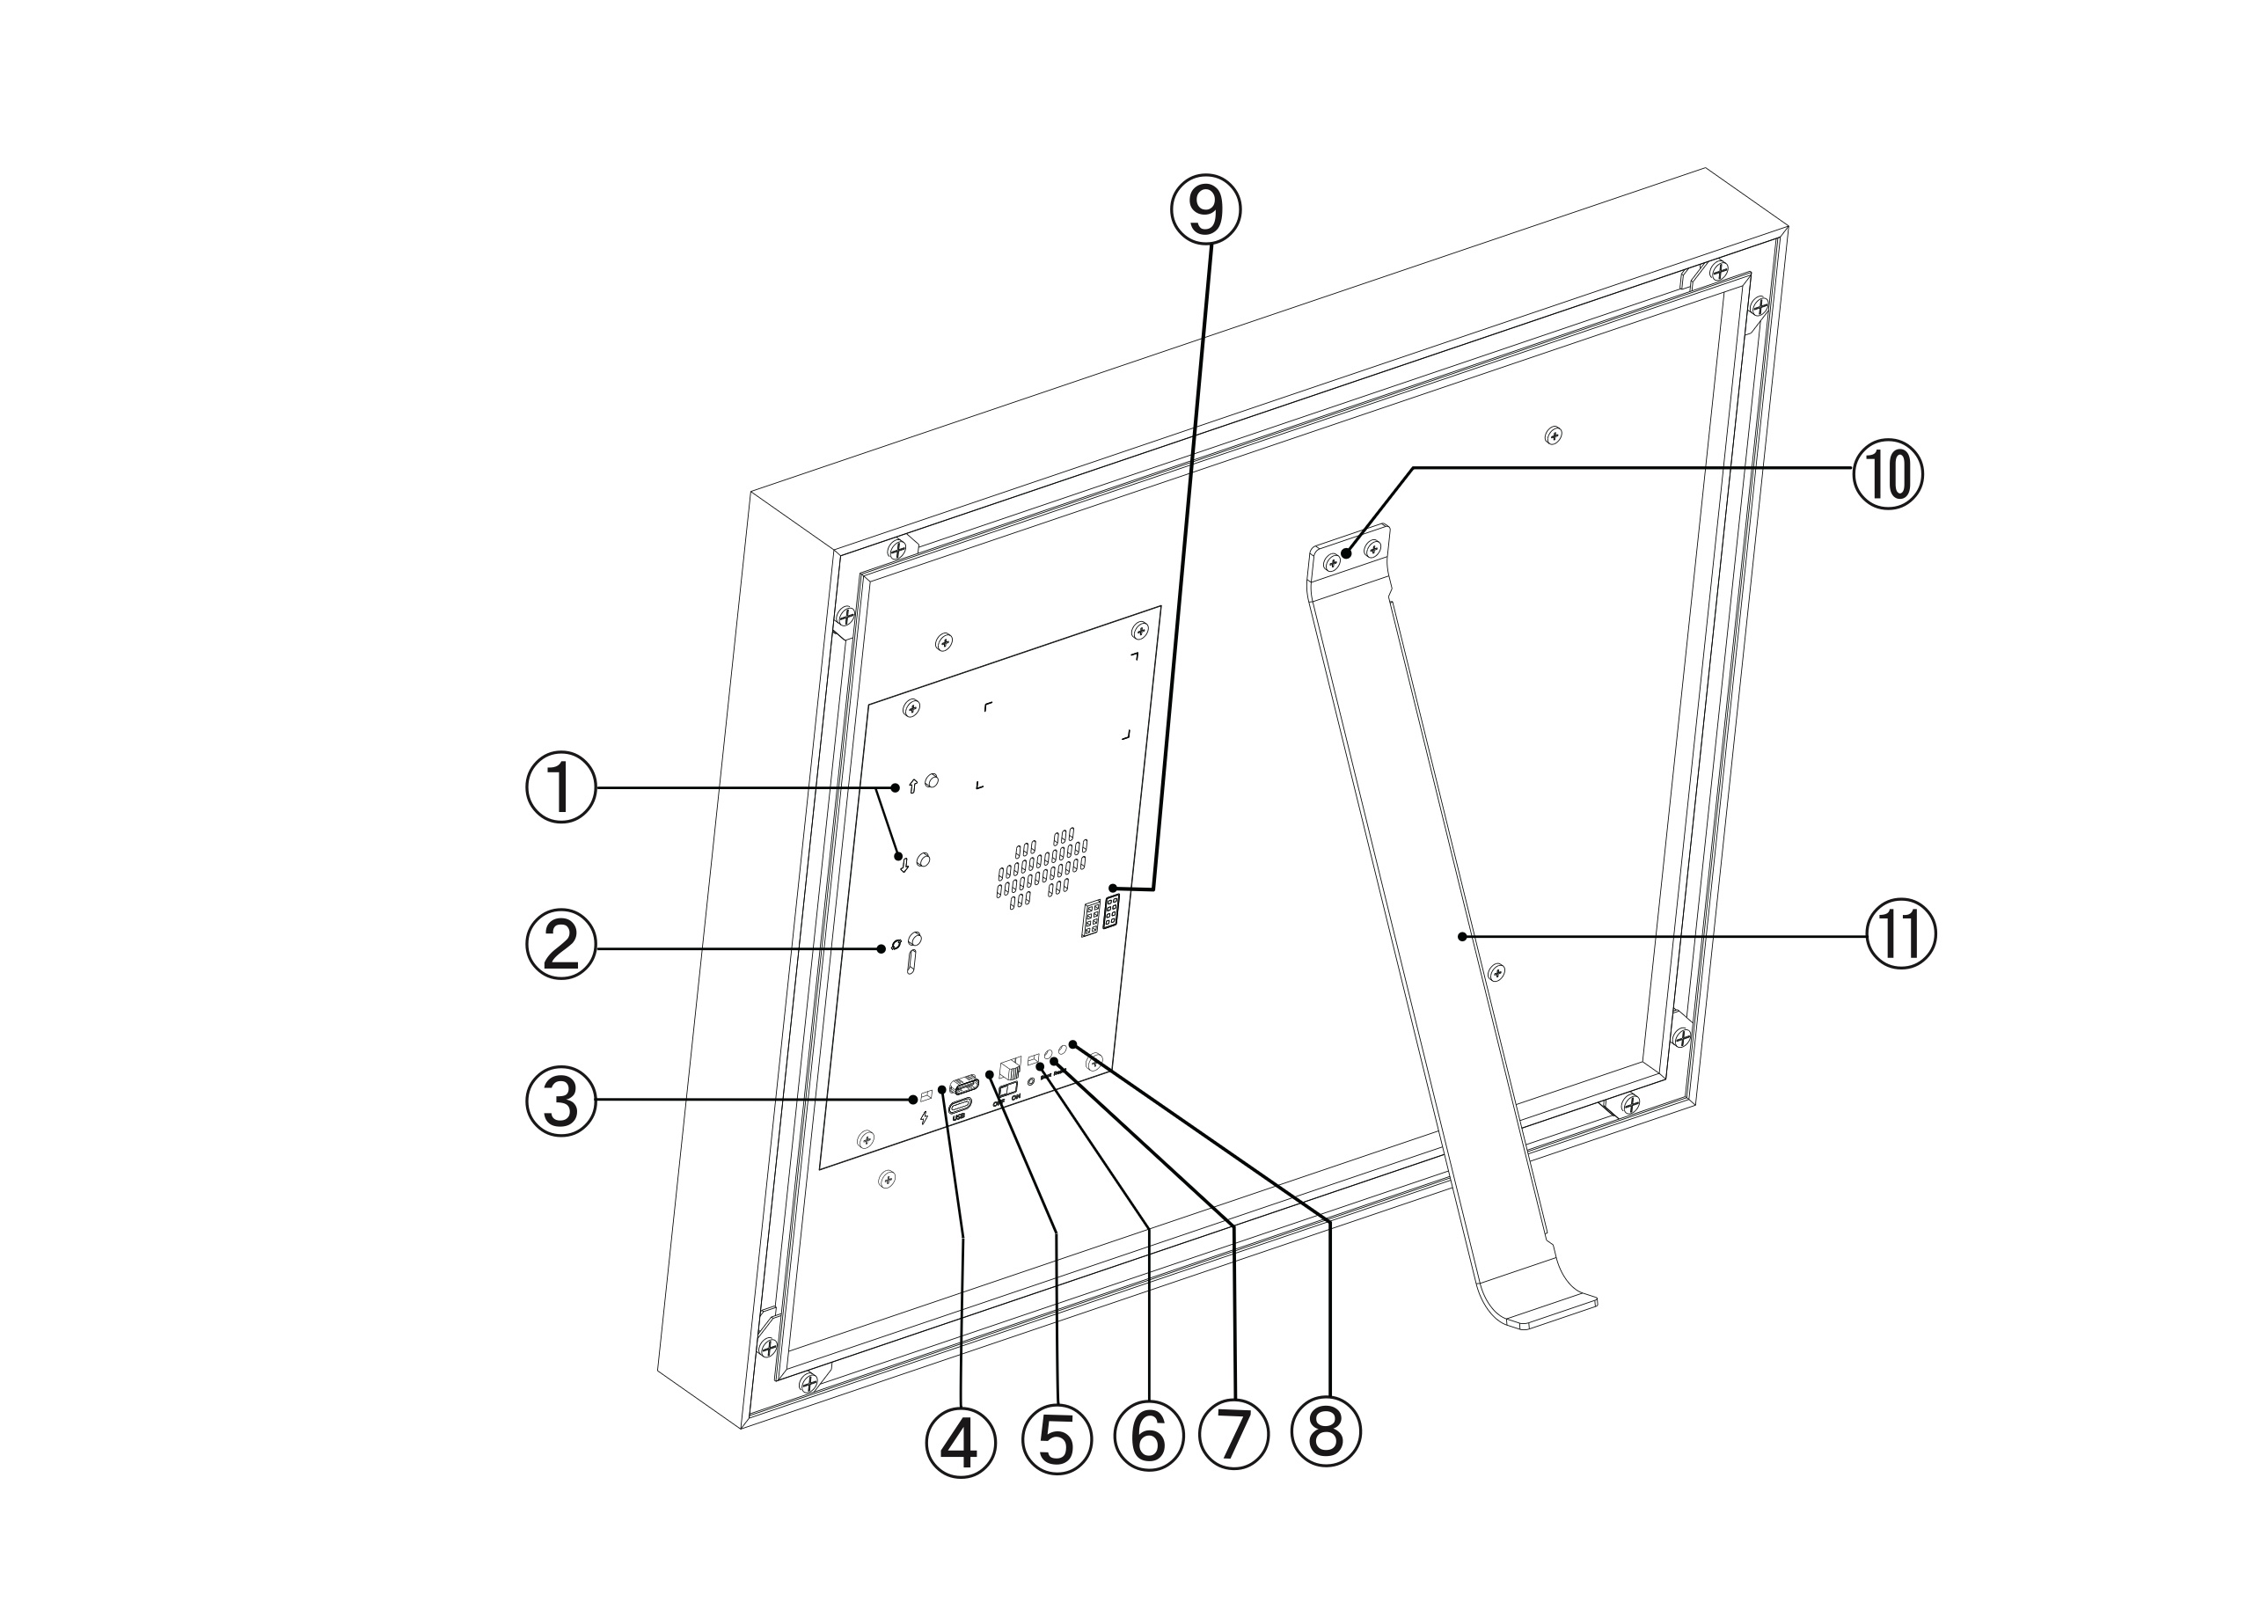
- Page Up and Down Button: Used for navigating and turning pages.
- Screen Refresh Button: Used to manually refresh the E-ink display.
- Red Power LED: Indicates the power status of the device.
- USB-C Data and Charge Port: For charging the device and data transmission.
- Power Switch: To turn the device power on or off.
- Green Status LED: Indicates the current operational or system status.
- Boot: Used for system booting or entering boot mode.
- Reset: For resetting the hardware components.
- Expansion Port: For connecting external expansion modules or peripherals.
- Stand Mounting Screws: Used for securing the device onto its stand.
- Metal Stand: Provides physical support and stability for the device.
Getting Started with SenseCraft HMI
The reTerminal E1004 comes pre-loaded with firmware that supports SenseCraft HMI, a no-code platform that allows you to design and deploy personalized dashboards effortlessly.
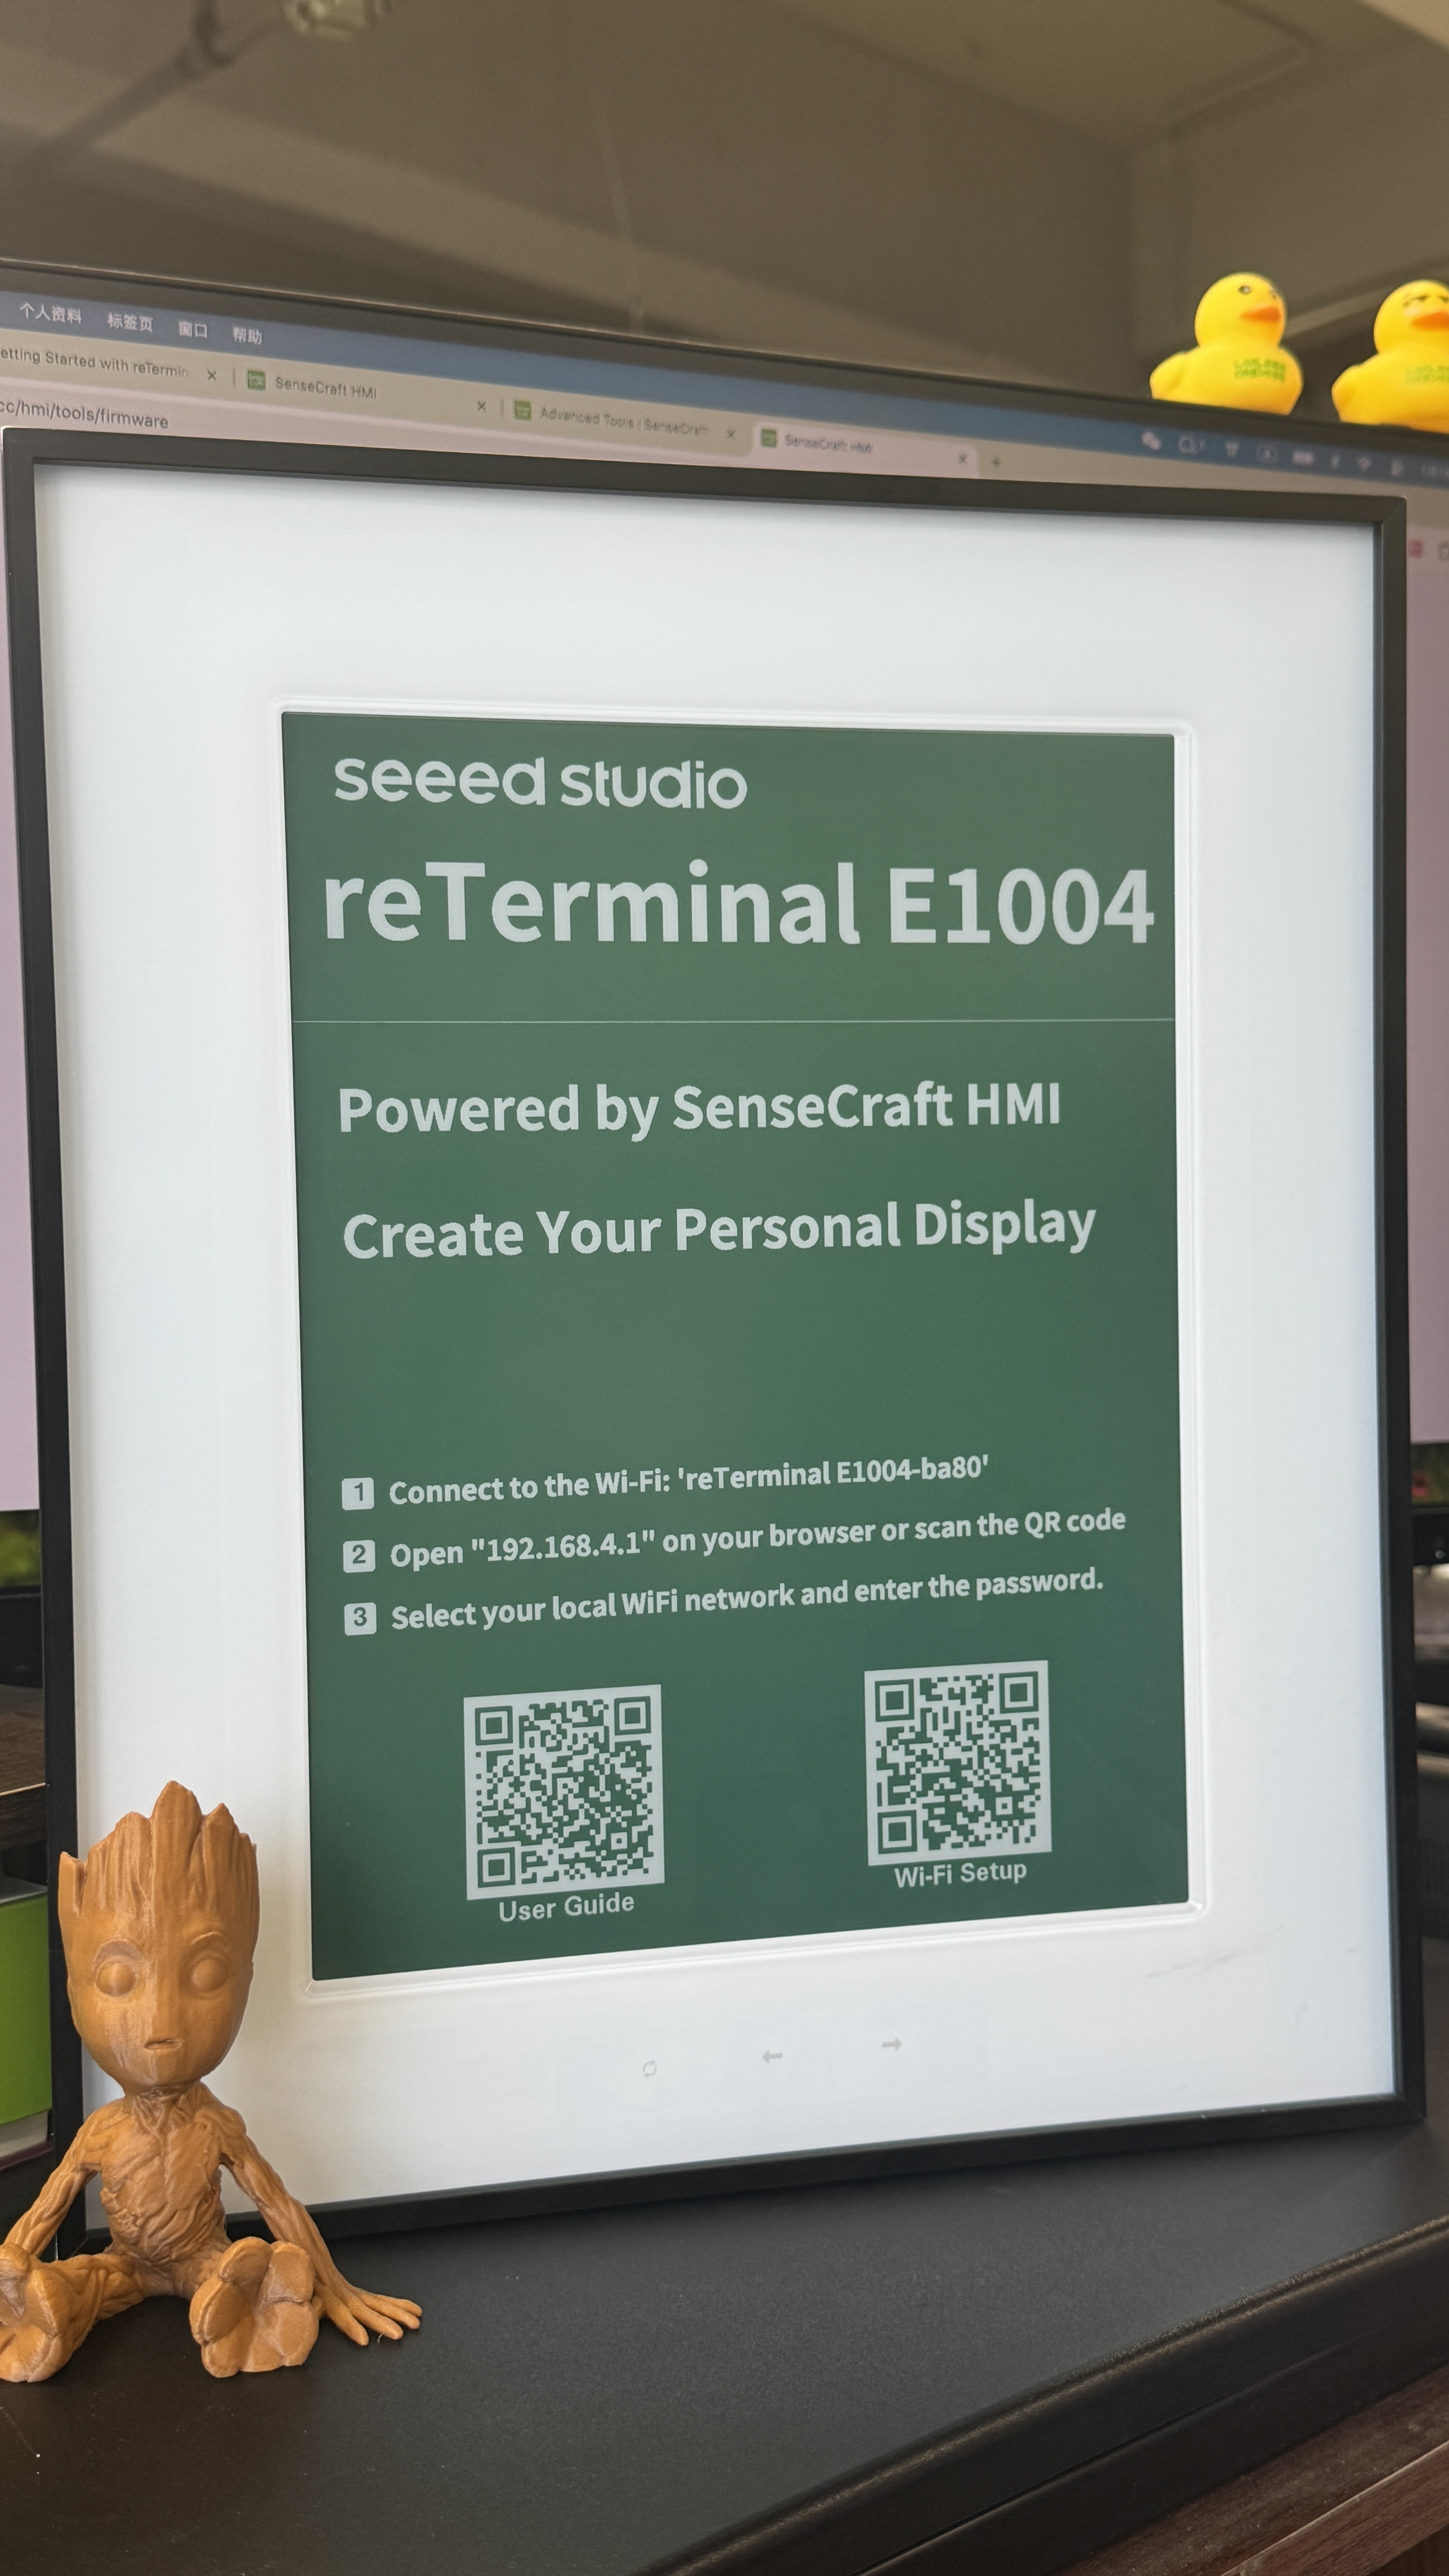
Step 1. Power On and Network Configuration
- Turn on the Power Button to turn on the reTerminal E1004.
- Use your smartphone to connect to the device's hotspot (AP mode) to configure the Wi-Fi credentials.
- The screen will display a "Network Configuration" QR code or use browser open 192.168.4.1 page.
- Once connected to the internet, the device will display a Device Code or Binding QR Code.
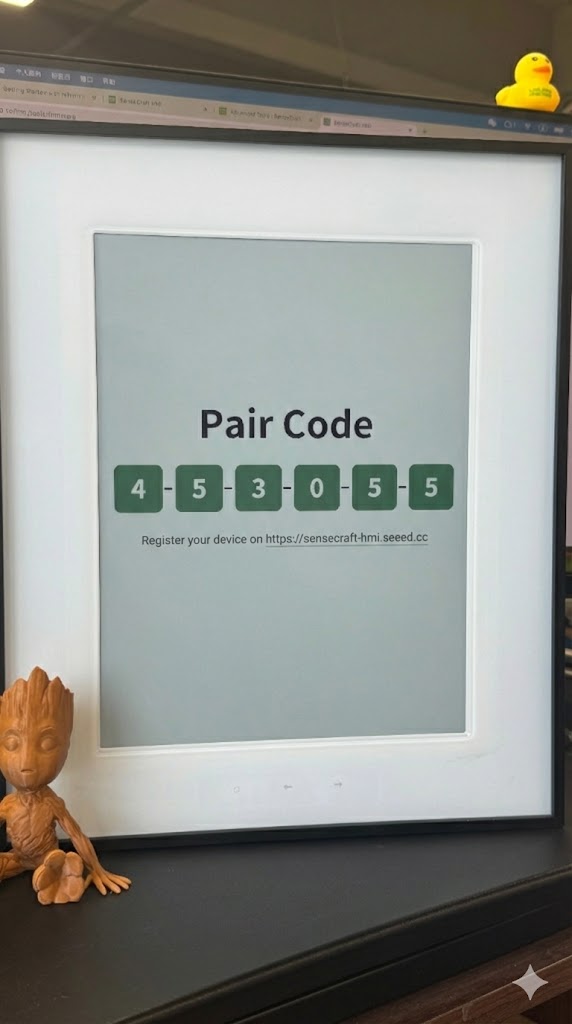
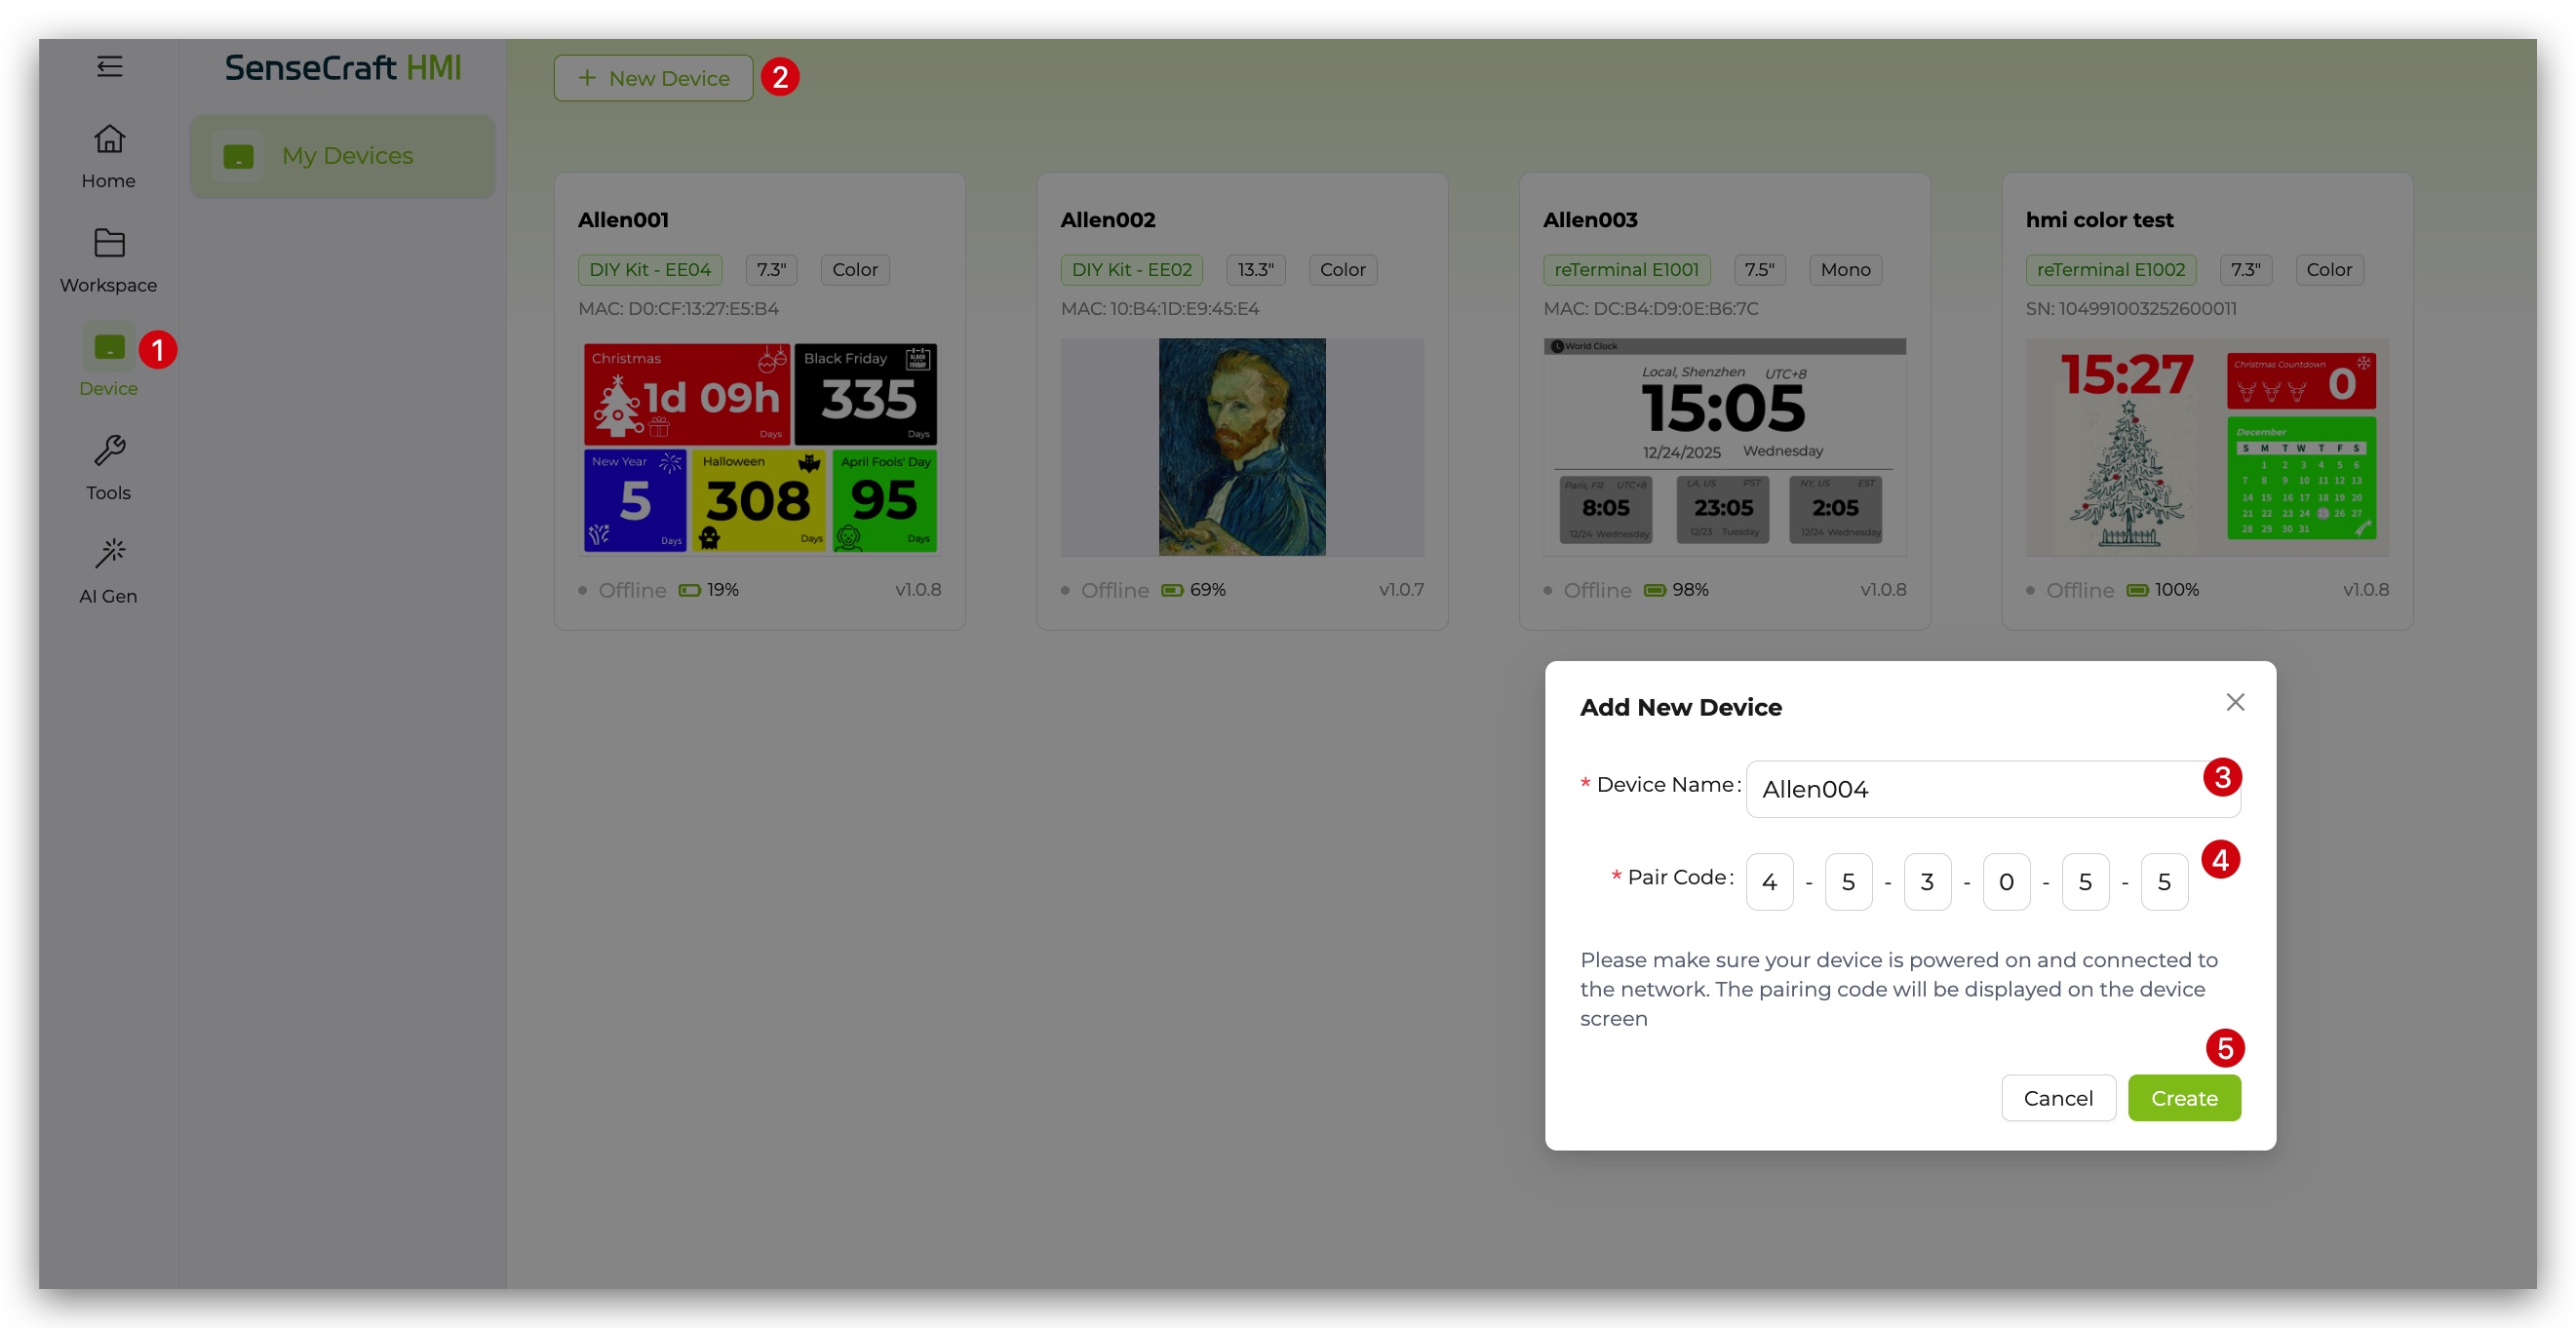
Step 2. Bind the Device
- Visit the SenseCraft HMI Platform on your computer browser.
- Log in to your account (or create one if you haven't).
- Navigate to the Device Management section and click Add Device.
- Enter the Device Code displayed on your reTerminal E1004 screen to complete the binding process.
Step 3. Create Content on the Platform
- Go to the Home Page select a template you want or Wrokspace to create your work from sratch.
- Click this link to learn how to use HMI Platform if you have question.

Step 4. Deploy Content to Device
- Once your design is ready, click the Preview button to check how it looks.
- Click the Save or deploy button.
- Select your bound reTerminal E1004 from the list.
- The platform will send the data to your device via Wi-Fi. The ePaper screen will refresh to display your new dashboard.
Due to the nature of E Ink technology, the screen refresh may take a few seconds to fully update the image and clear any ghosting.
Troubleshooting
Q1: Device Won't Power On
- Ensure the power switch is in the ON position
- Connect the USB-C cable to charge the device
- Check if the red LED is always on (indicating charging)
- If using battery power, ensure the battery is properly connected and charged
Q2: Can't Connect to Wi-Fi
- Verify you're entering the correct Wi-Fi password
- Ensure your Wi-Fi network is operational
- Check if your Wi-Fi router supports 2.4GHz networks (5GHz is not supported)
- Try positioning the device closer to your Wi-Fi router
Q3: Display Not Updating
- Press the refresh button to manually trigger an update
- Verify the device is connected to Wi-Fi (no disconnection icon in the corner)
- Check your SenseCraft account to ensure the dashboard is properly deployed
- If the problem persists, try restarting the device
- If the device still does not respond after restarting, re-flash the corresponding firmware on the SenseCraft HMI platform and check whether the device can refresh normally
Q4: Network Connection Lost
- The device will automatically attempt to reconnect to known networks
- When reconnected, the Wi-Fi disconnection icon will disappear
- If unable to reconnect, follow the Network Reset procedure above
Q5: Cannot Find Serial Port (COM) on macOS
If your Mac doesn't recognize the reTerminal via USB, follow this compact guide to install the CH340/CH340K driver:
Step 1. Download and Install the Driver
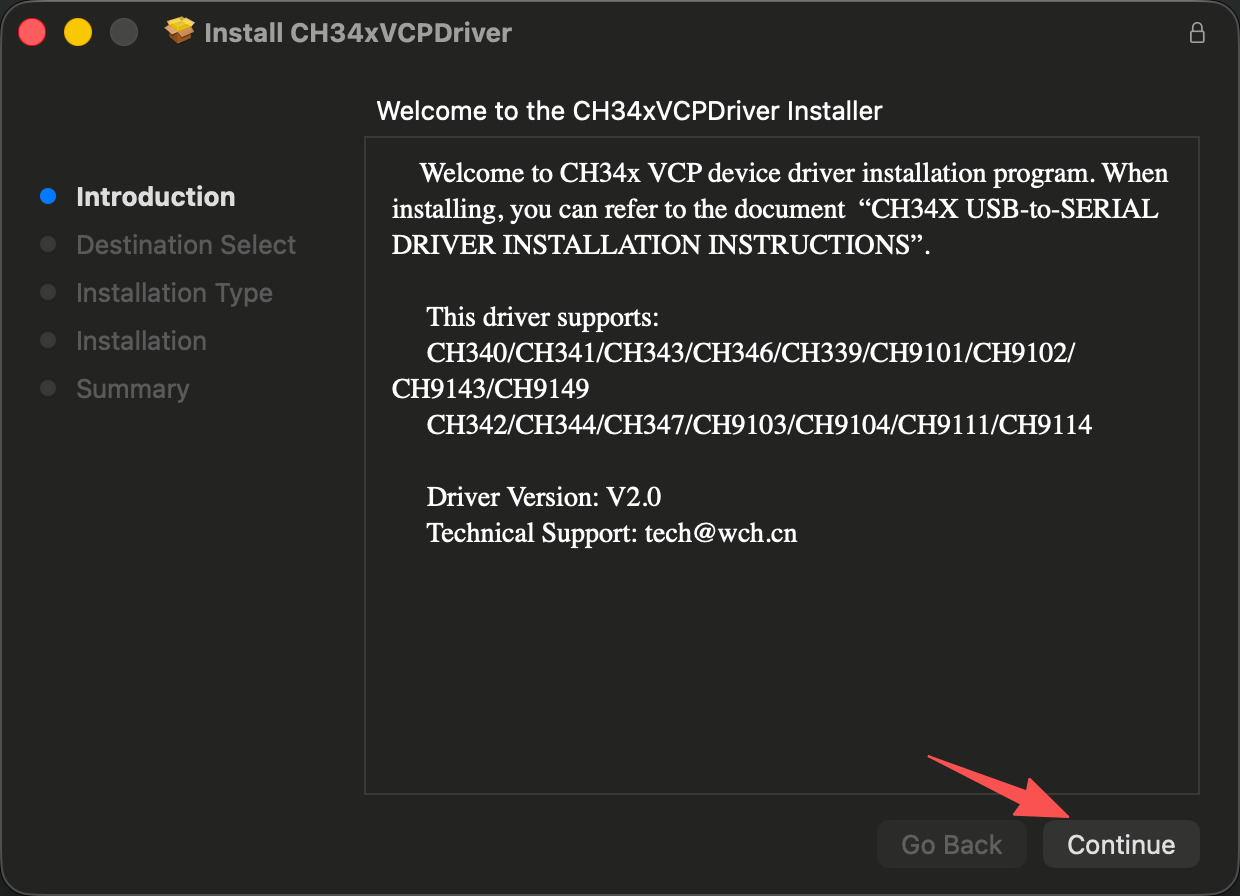
Download the driver from the official WCH page and run CH34xVCPDriver.pkg.
If macOS blocks the installation, go to System Settings → Privacy & Security, scroll to find the blocked WCH software, and click Allow.
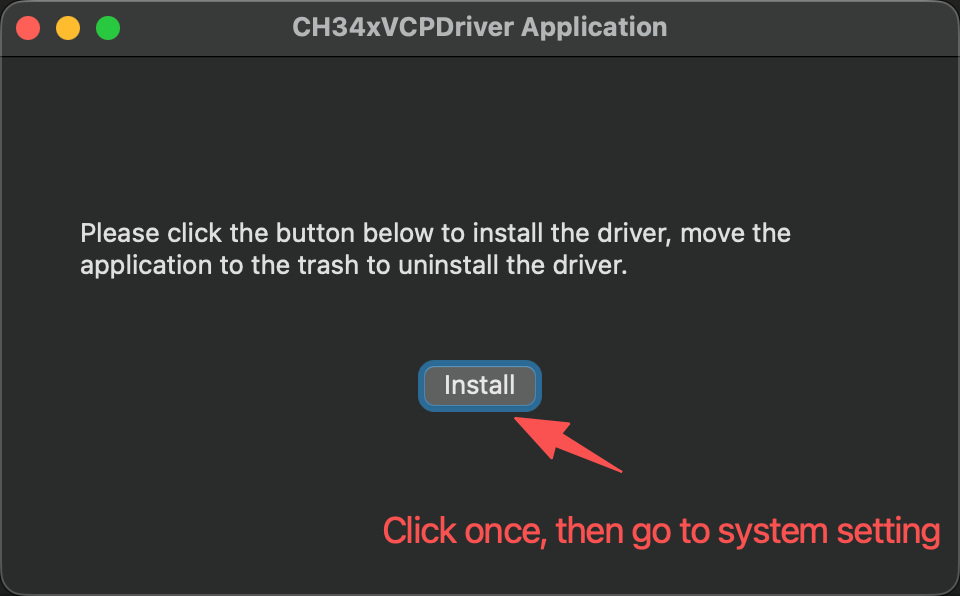
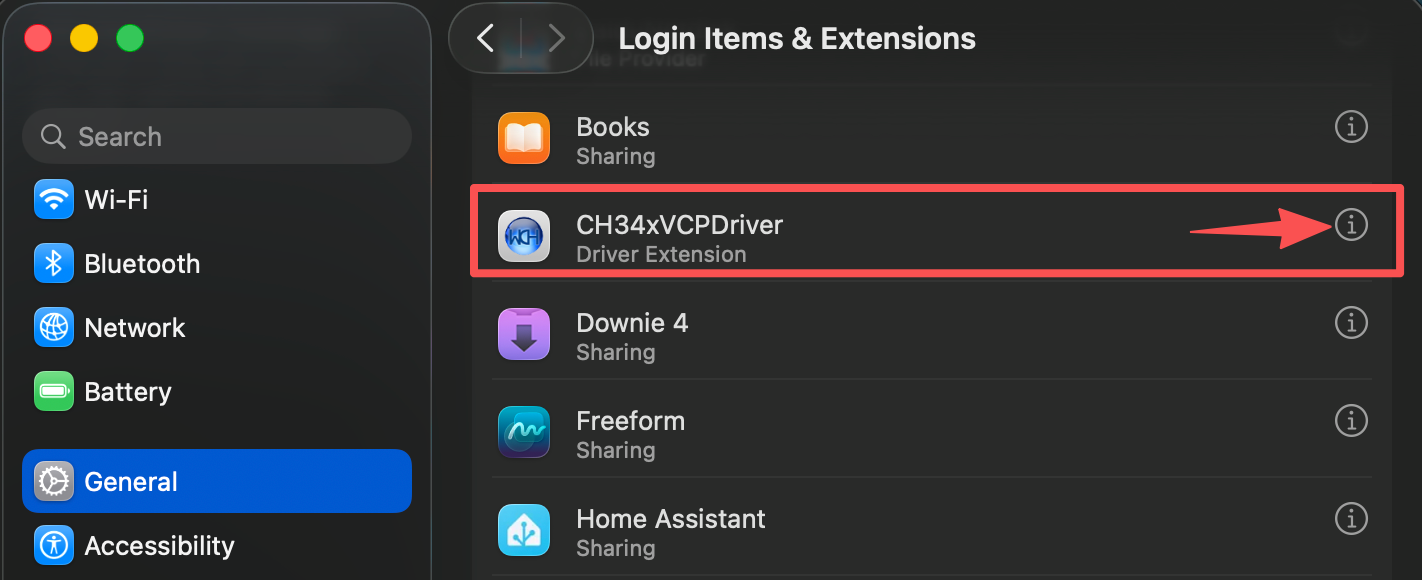
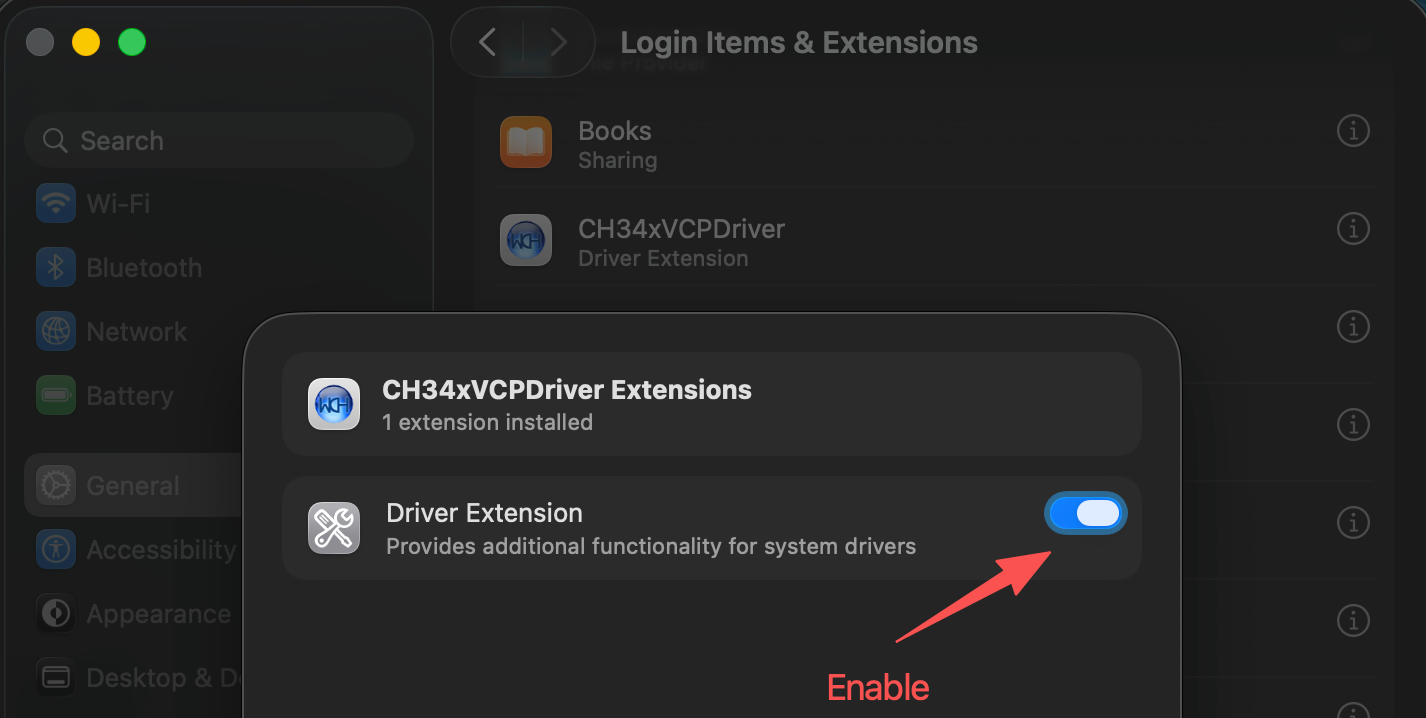
Step 2. Enable Driver Extension (Critical) Open the CH34xVCPDriver app from Launchpad, click Install, then go to System Settings → General → Login Items & Extensions → Driver Extensions. Toggle CH34xVCPDriver Extensions to ON (blue).
Step 3. Connect and Verify Ensure the device power switch is ON and use a data USB-C cable (not charge-only). Open Terminal and run:
ls /dev/tty.wch*
# Expected output: /dev/tty.wchusbserialxxx
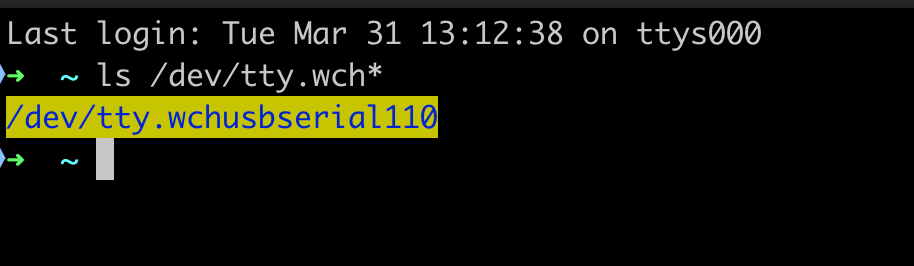
If you see the device path in the output, the driver is correctly installed and your reTerminal is ready for use!
Resources
Tech Support & Product Discussion
Thank you for choosing our products! We are here to provide you with different support to ensure that your experience with our products is as smooth as possible. We offer several communication channels to cater to different preferences and needs.