Getting Started with Seeed Studio IoT Button
Introduction
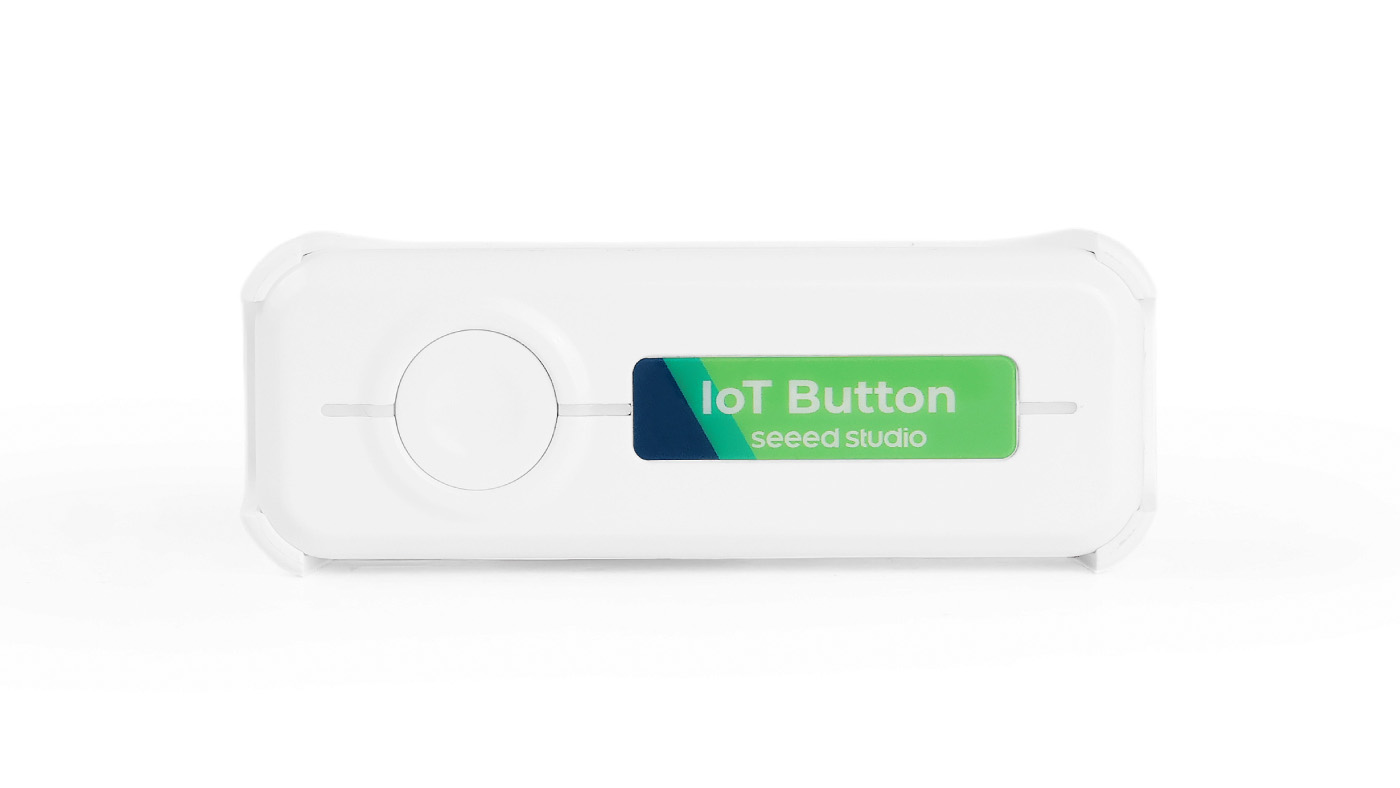
The IoT Button is a versatile smart switch offering dual Home Assistant integrations through ESPHome (via Wi-Fi) and Zigbee. Powered by the ESP32-C6, it features customizable RGB LED indicators, programmable event triggers for multiple press patterns, USB-C charging, and flexible mounting options - everything you need for intuitive smart home control.
This guide will walk you through setting up your IoT Button, whether you have the V1 hardware (which shipped with ESPHome firmware) or the V2 hardware (which ships with Zigbee firmware).
Features
- Home Assistant Ready: Seamless integration via ESPHome or the Zigbee Home Automation (ZHA) integration.
- One Switch, Customizable Actions: Supports single-press, double-press, and long-press actions to trigger different automations.
- Reliable Power Supply: Powered by a standard 18650 rechargeable battery with a convenient USB-C charging port.
- Easy Mounting Solution: Compact design that can be placed anywhere or mounted for easy access.
- Open for Customization: Both hardware versions support flashing either ESPHome or Zigbee firmware, allowing you to choose the best protocol for your needs.
Hardware Overview
Before everything starts, it is quite essential to have some basic parameters of the product. The following table provides information about the characteristics of both V1 and V2 of the IoT Button.
| Parameter | Description |
|---|---|
| MCU | Espressif ESP32-C6 |
| Flash | 4MB |
| LED | User RGB LED: WS2812B (GPIO19, requires GPIO18 to be enabled) Charge LED: Green User LED (Blue): GPIO2 (V1) / GPIO3 (V2) Low Battery LED (Red): GPIO14 (V2 only) |
| Wireless | 2.4GHz Wi-Fi Zigbee 3.0 |
| Battery | 3.6V Li-ion 18650 Rechargeable battery |
| Battery Monitoring | ADC for voltage reading (V2 only, GPIO1) |
| Charging Interface | USB Type-C |
| Battery Protection | Reverse polarity protection |
| Firmware Update | Support OTA (Over-the-Air) |
| Dimensions | 92x32x25 mm |


Getting Started
Step 1: Initial Setup
When you first receive your IoT Button, it's essential to perform an initial activation step before use. This applies to both V1 and V2 hardware.
- Use a standard 5V USB Type-C data cable to connect the IoT Button to a power source (like a USB charger or computer).
- This initial power connection is crucial as it activates the built-in battery's protection circuit.
- Without this activation step, the device will not function properly on battery power.
Make sure to use a compliant 5V USB Type-C cable for the activation process. Using non-standard cables may result in improper activation.
Step 2: Choose Your Connection Method
The IoT Button offers two primary ways to connect to Home Assistant. Your choice will depend on the hardware version you have or the protocol you prefer.
- IoT Button V1 comes pre-loaded with ESPHome firmware. Please follow Method 1.
- IoT Button V2 comes pre-loaded with Zigbee firmware. Please follow Method 2.
If you are an advanced user, you can flash either firmware onto either hardware version. See the "Advanced Usage" section for more details.
Method 1: ESPHome (Wi-Fi) Integration
This method is the default for V1 hardware and is for users who want to connect their IoT Button to Home Assistant via Wi-Fi.
1. Set Up Home Assistant
For optimal performance, it's recommended to install Home Assistant OS on a device like a Raspberry Pi or Home Assistant Green.
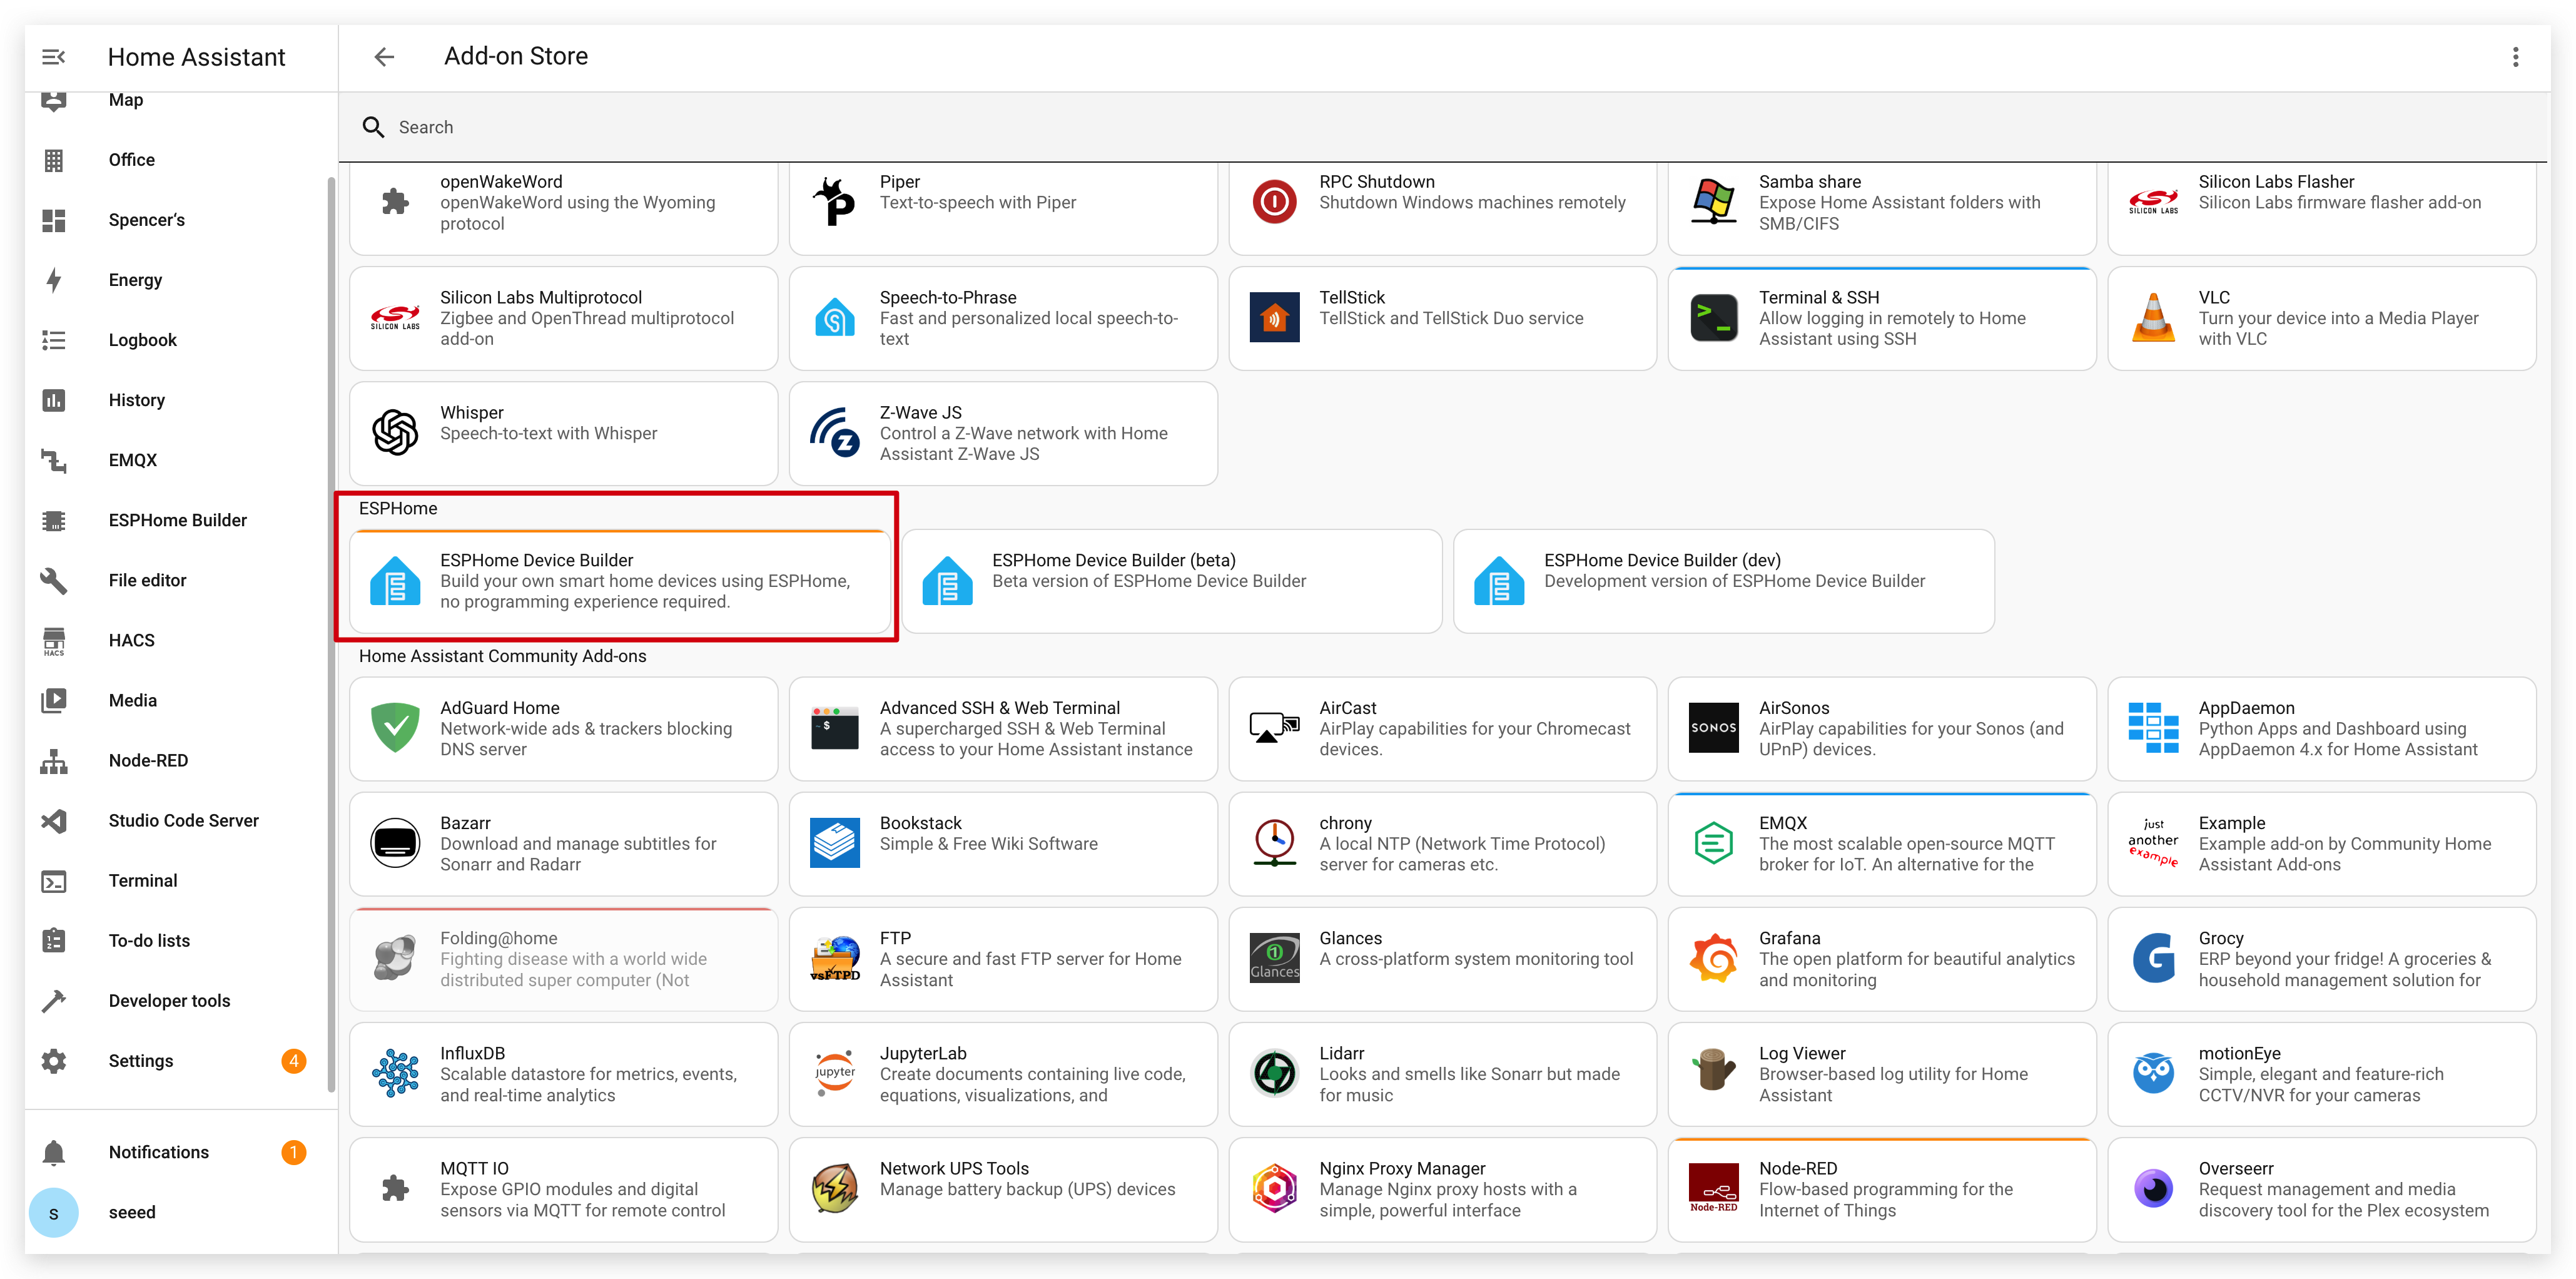
Once Home Assistant is running, ensure the ESPHome add-on is installed and started from the Add-on store.
2. Flash/Update ESPHome Firmware (If Necessary)
Your device comes pre-flashed. You only need to perform this step if you want to update to the latest firmware version or if the existing firmware is corrupted.
- Web Tool
- ESPHome Web
The easiest method is to use our XIAO ESPHome Projects Firmware Flasher.
- Connect your IoT Button to your computer via a USB cable.
- On the flasher page, find "Seeed Studio IoT Button" and click INSTALL.
- Select the correct COM port from the popup dialog.
- The browser will automatically download and flash the latest ESPHome firmware to your device.
Alternatively, you can use the official ESPHome Web tool.
- Download the latest
*.factory.binfirmware file from the GitHub Releases page. - Connect the IoT Button to your PC.
- Visit the ESPHome Web page, click CONNECT, and choose the correct COM port.
- Click INSTALL and select the
.binfile you downloaded.
3. Connect to Wi-Fi and Home Assistant
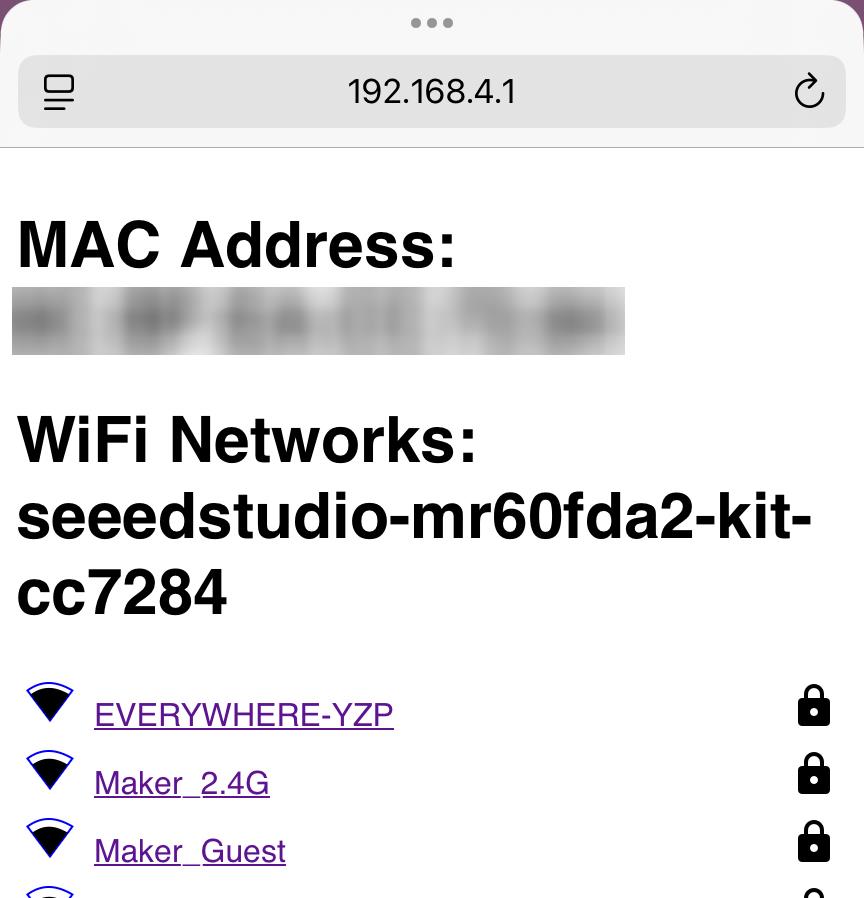
- After flashing, the IoT Button will create a Wi-Fi access point named
seeedstudio-iot-button. - Connect to this Wi-Fi network from your phone or computer.
- A captive portal should open automatically. If not, navigate to
192.168.4.1in your browser. - Select your home Wi-Fi network (SSID) and enter the password. The button will then connect to your network.
4. Add the Device in Home Assistant
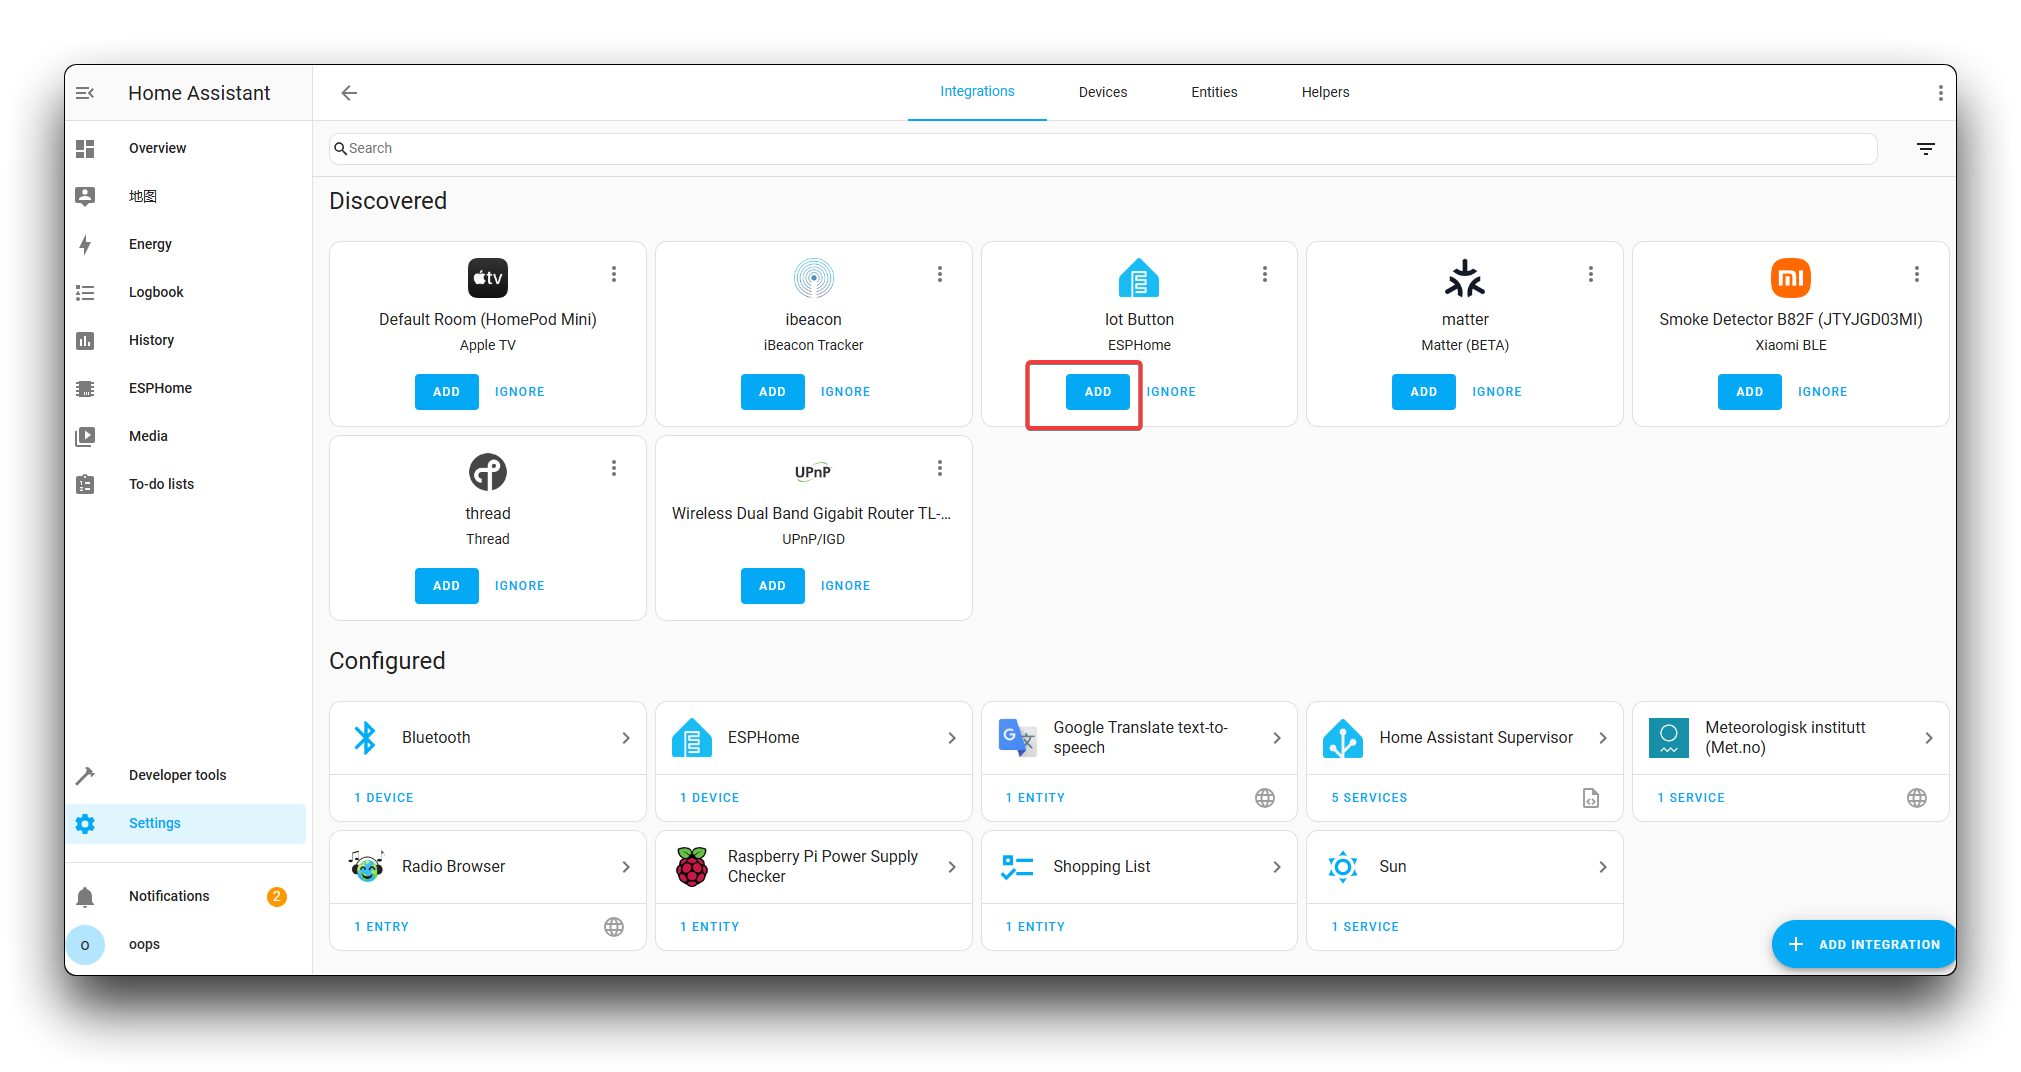
Once the IoT Button is on the same network as your Home Assistant server, it should be automatically discovered.
- Navigate to Settings > Devices & Services.
- Under the "Discovered" section, you should see
Seeed Studio IoT Button. - Click CONFIGURE, then SUBMIT, and assign the device to an area (e.g., Living Room).
5. Create Automations with ESPHome
The ESPHome firmware exposes different press patterns as separate switches.
- Go to Settings > Automations & Scenes and click CREATE AUTOMATION.
- For the Trigger, select
Deviceand choose your IoT Button. - Select a trigger type from the list, such as:
Single-press actionDouble-press actionLong-press action
- For the Action, choose the device or service you want to control (e.g.,
light.toggle). - Save the automation.
Method 2: Zigbee Integration
This method is the default for V2 hardware and is for users who want to connect their IoT Button to a Zigbee mesh network.
1. Set Up Zigbee in Home Assistant
Before pairing, you need a Zigbee coordinator connected to your Home Assistant instance.
- Install a Zigbee Coordinator: Connect a coordinator like the Home Assistant SkyConnect to your server.
- Set Up Zigbee Home Automation (ZHA):
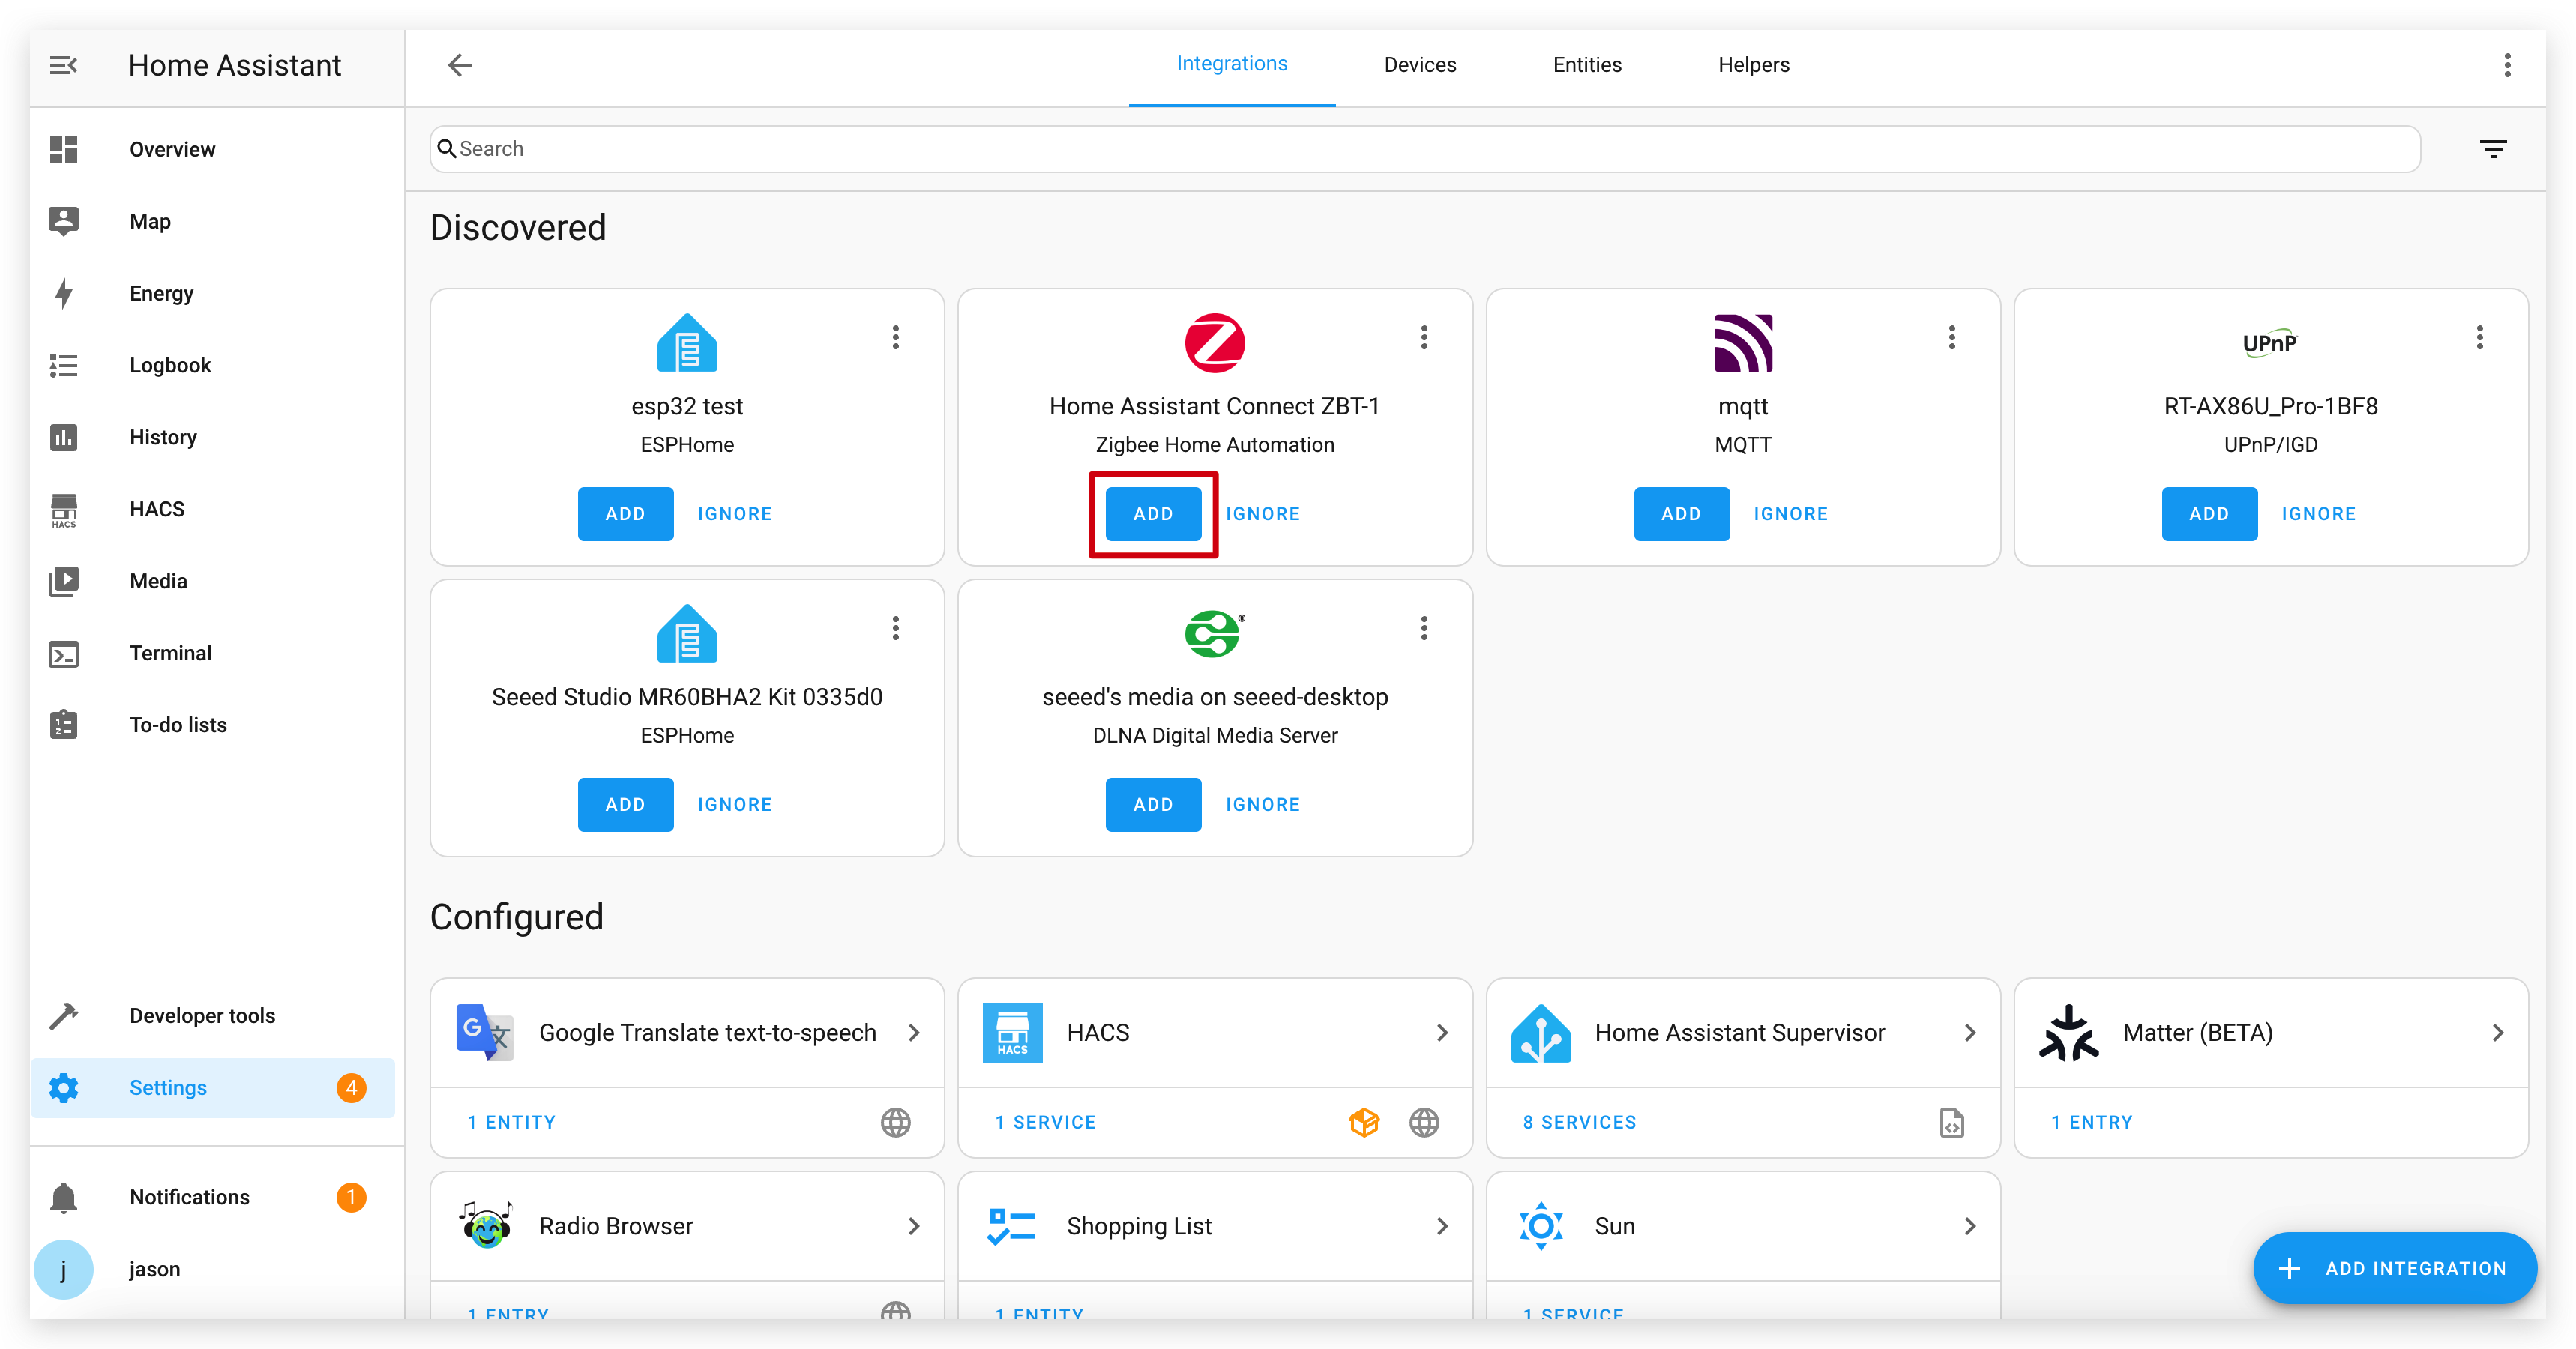
- Go to Settings > Devices & Services.
- Click Add Integration and search for Zigbee Home Automation.
- Follow the prompts to set up ZHA with your coordinator.
2. Pair the IoT Button with Home Assistant
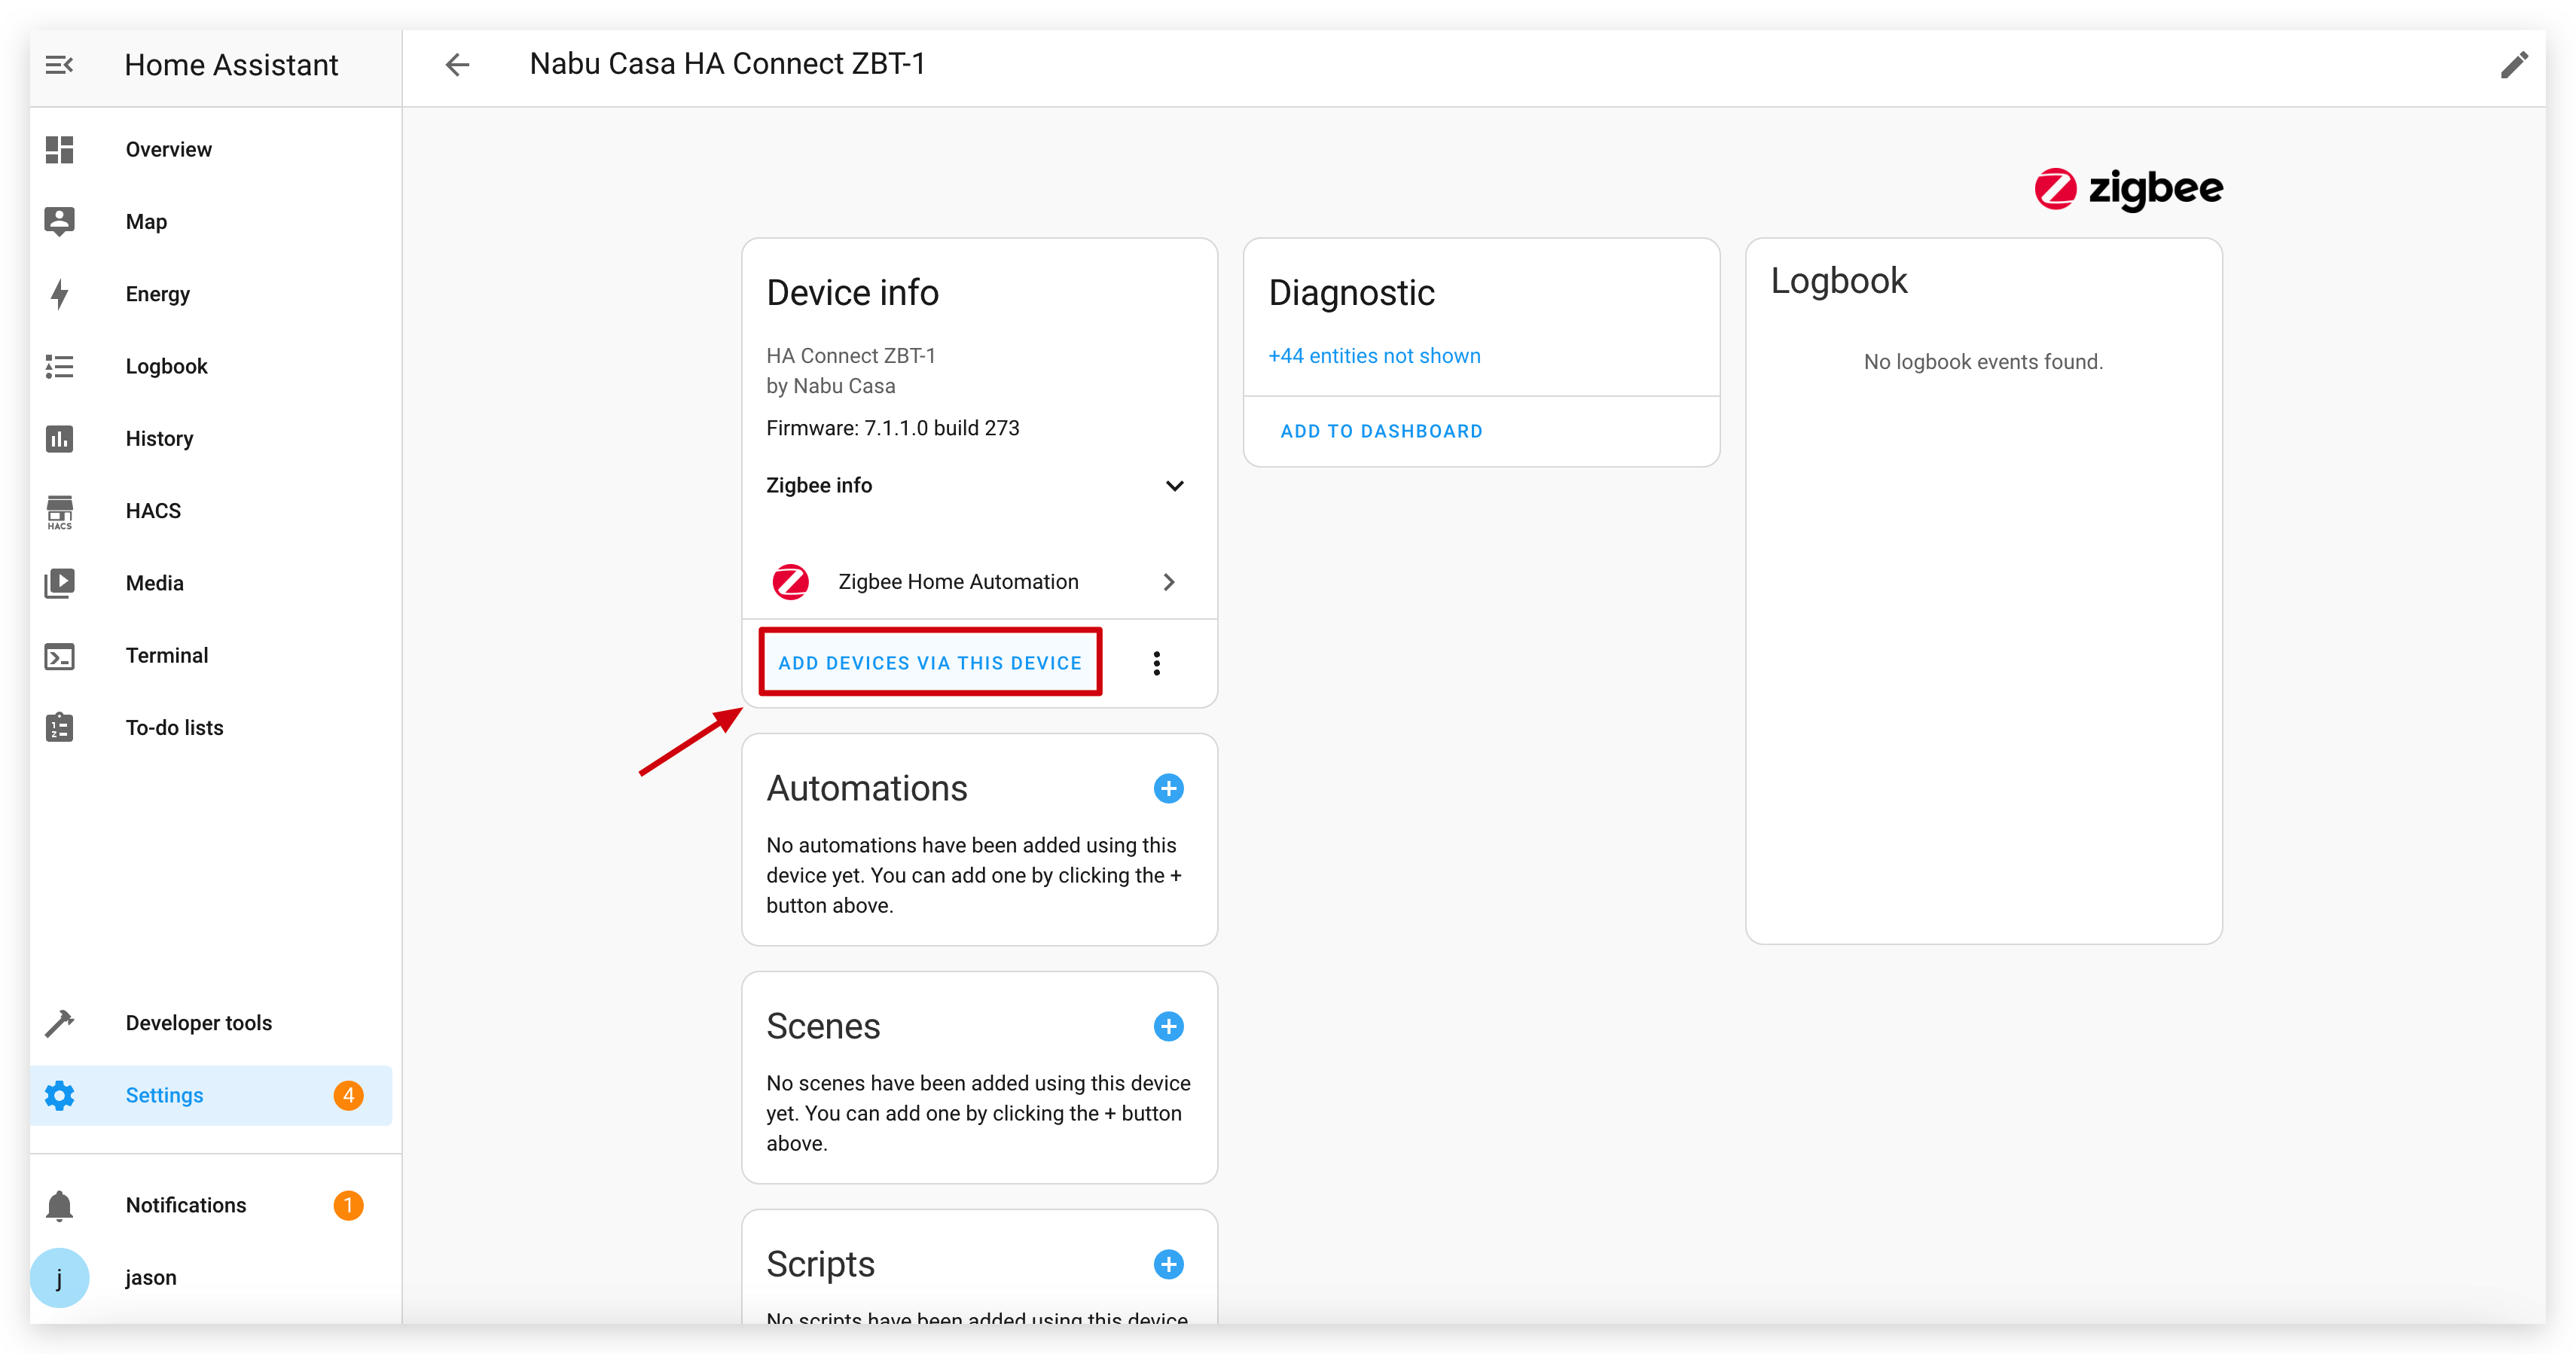
- In Home Assistant, navigate to the Zigbee Home Automation integration page.
- Click Add Device to put your coordinator in pairing mode.
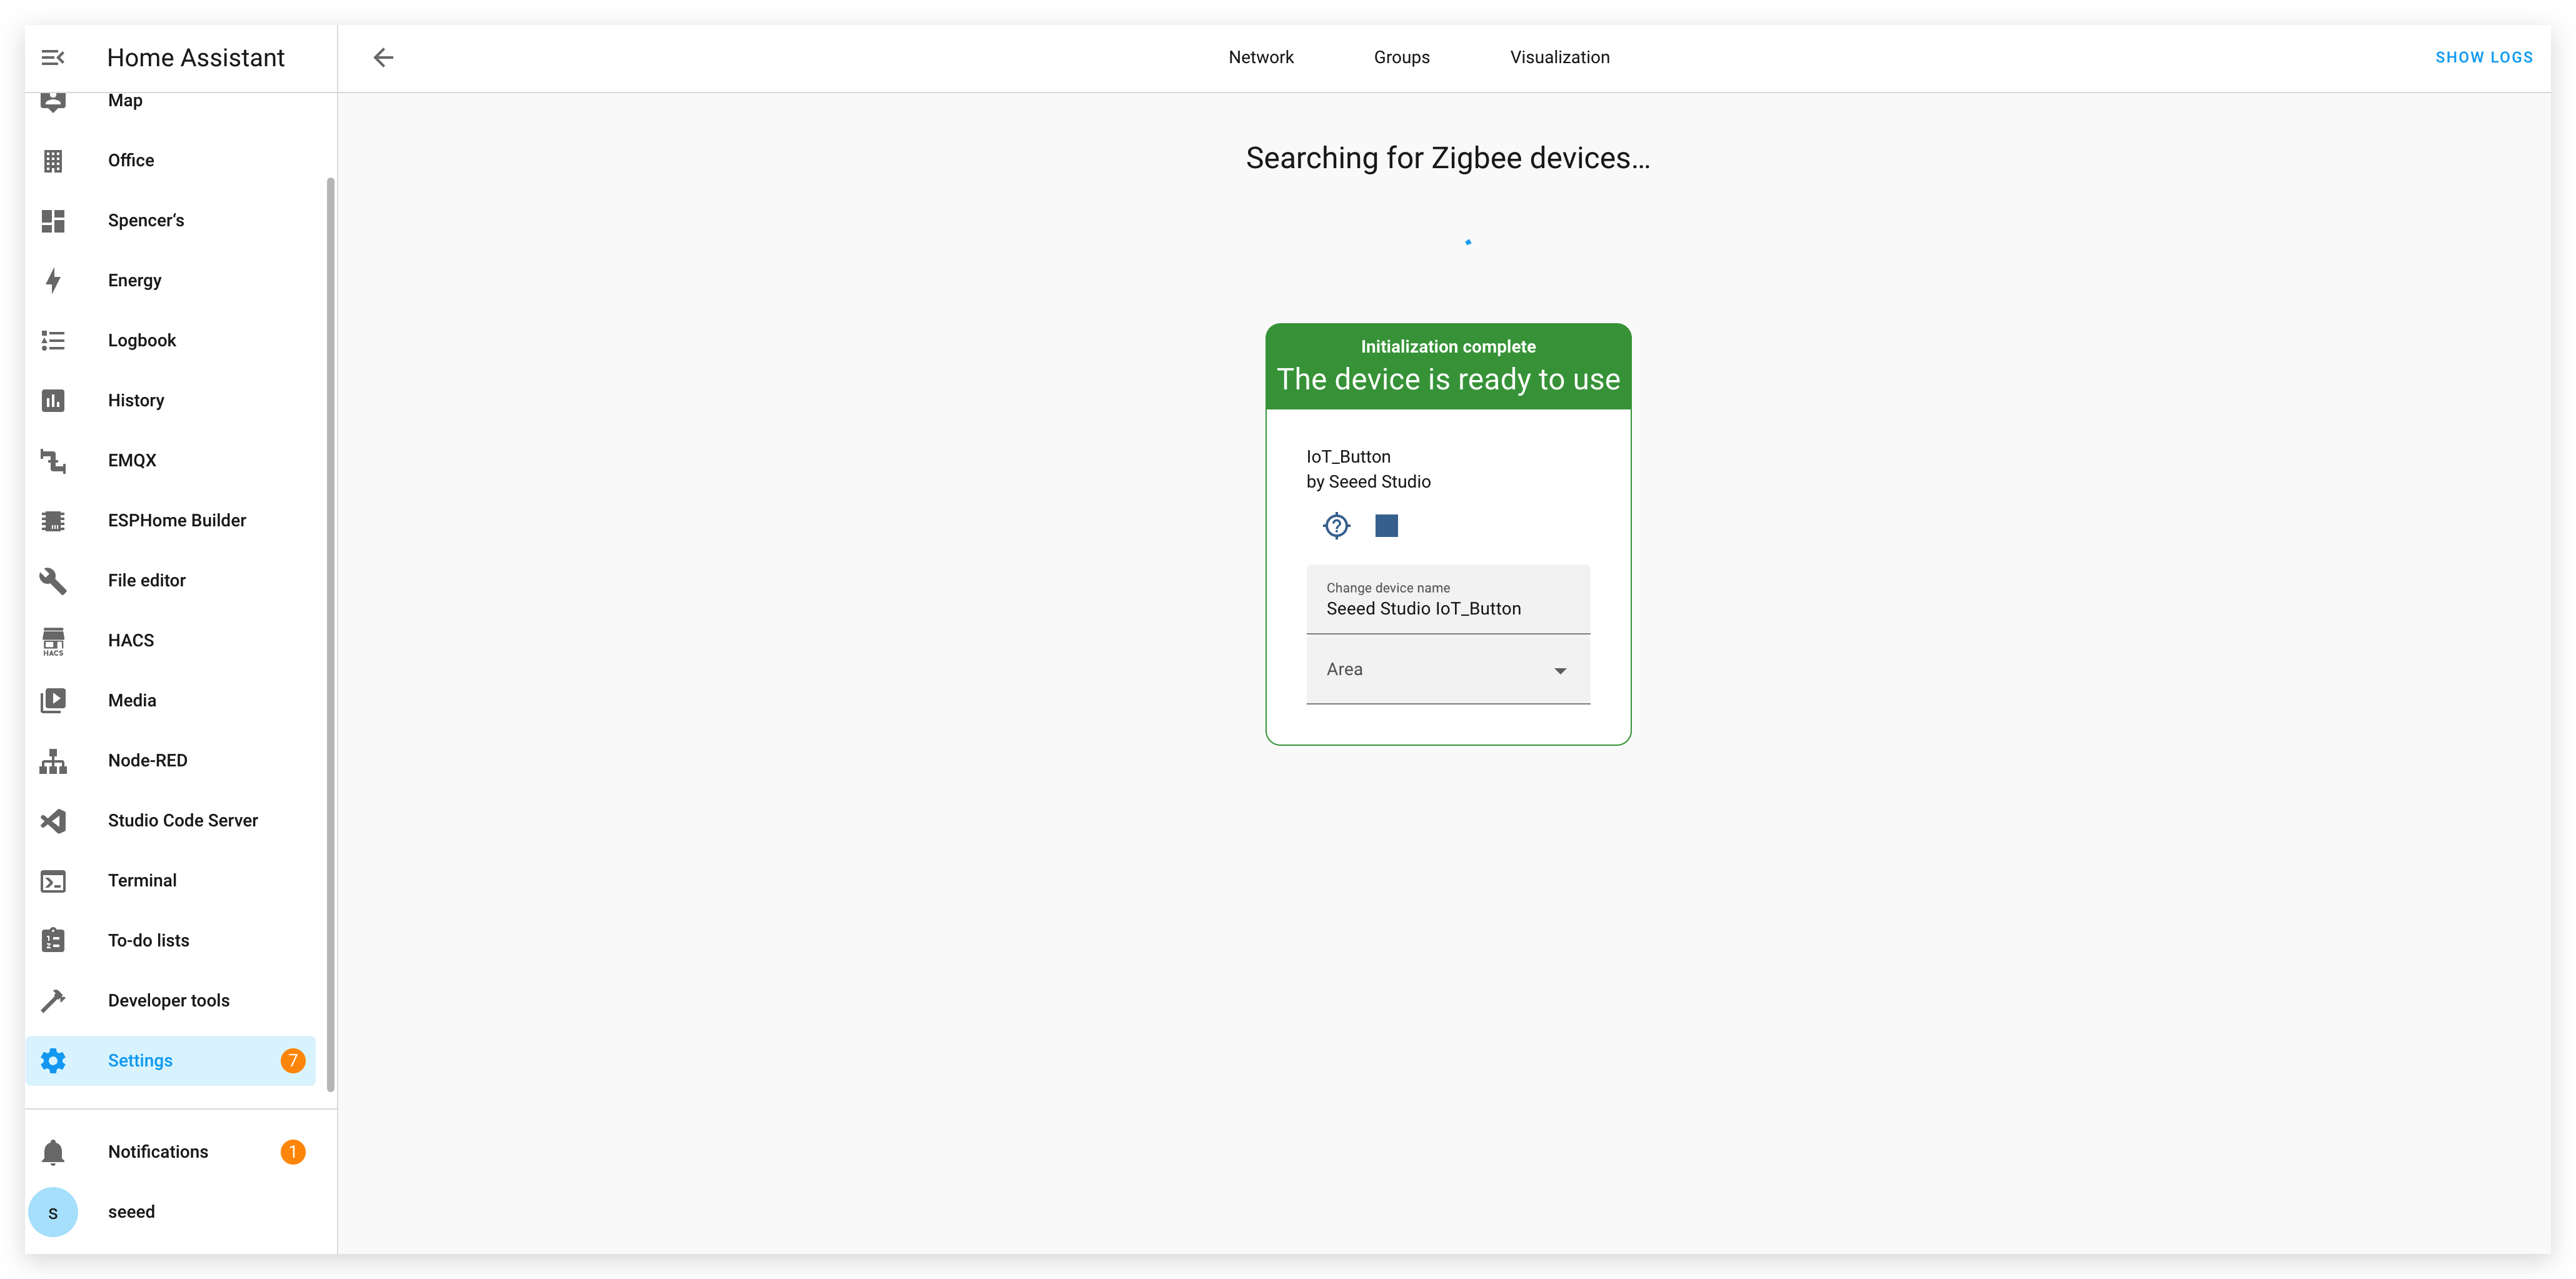
- Press the button on your IoT Button once to wake it and initiate pairing.
- If it doesn't pair, the device may have gone to sleep. Press it again.
- To force pairing, press and hold the button for more than 5 seconds. This triggers a factory reset and puts the device directly into pairing mode. The RGB LED will flash to confirm.
- Home Assistant should discover the device as Seeed Studio IoT_Button.
- The device will appear with multiple entities: a binary sensor for real-time state and several switches for different click actions.
3. Create Automations with Zigbee
Once paired, you can create automations based on the button's actions.
- Go to Settings > Automations & Scenes and click CREATE AUTOMATION.
- For the Trigger, select
Deviceand find your IoT Button. - ZHA exposes the clicks as device actions. Select the desired trigger from the list, for example:
"remote_button_short_press""remote_button_double_press""remote_button_long_press"
- Configure the Action you want to perform.
- Save the automation.
Example automation in Home Assistant YAML to toggle a light with a double click:
alias: IoT Button Double Click - Toggle Living Room Light
description: ""
trigger:
  - platform: device
    domain: zha
    device_id: YOUR_DEVICE_ID_HERE # Replace with your button's device ID
    type: "remote_button_double_press" # The exact type may vary, select it from the UI
action:
  - service: light.toggle
    target:
      entity_id: light.living_room
mode: single
Advanced Usage: Switching Firmware
One of the key features of the IoT Button is its flexibility. You can switch between ESPHome and Zigbee firmware on either V1 or V2 hardware.
-
(Not recommended) To switch to ESPHome: If your button is running Zigbee firmware and you want to use Wi-Fi, simply follow the flashing instructions in Method 1, Step 2 to install the ESPHome firmware.
-
To switch to Zigbee: If your button is running ESPHome and you want to join a Zigbee network, you will need to compile and flash the Zigbee firmware using Arduino IDE. After flashing, follow the pairing steps in Method 2.
Resources
- [GITHUB] Seeed Studio IoT Button V2 Github Repository
- [PCB Design Files] Seeed Studio IoT Button V2 KiCad Project
- [Schematic] Seeed Studio IoT Button V2 Schematic
Tech Support & Product Discussion
Thank you for choosing our products! We are here to provide you with different support to ensure that your experience with our products is as smooth as possible. We offer several communication channels to cater to different preferences and needs.