Getting Started with Wi-Fi HaLow Mini PCIe Module
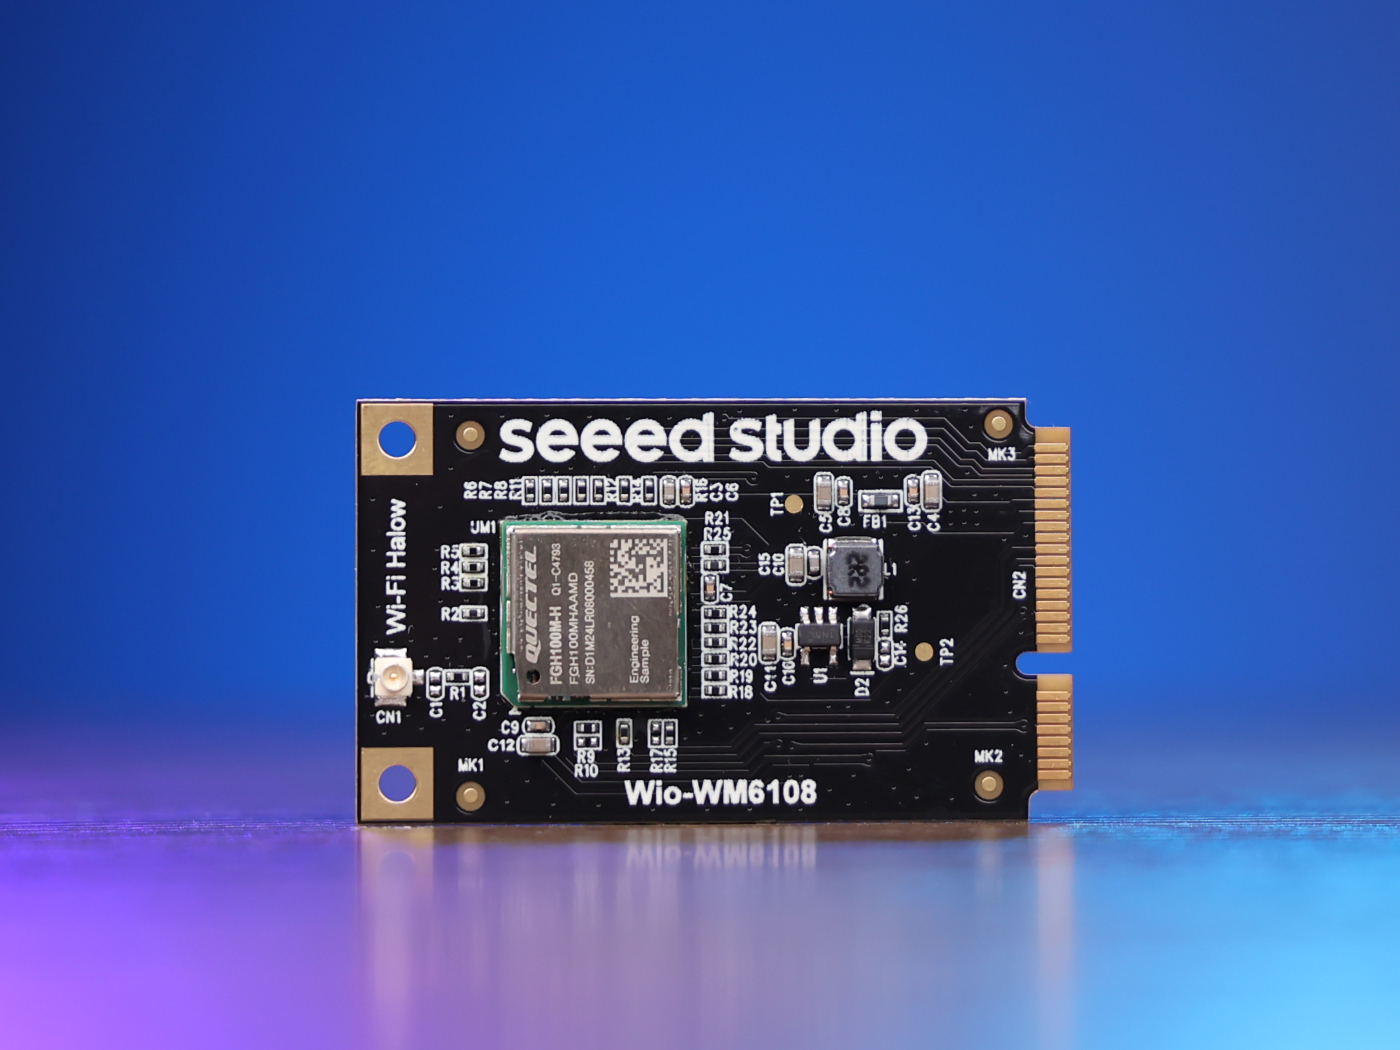
This guide will walk you through setting up and using the Wi-Fi HaLow Mini PCIe Module to build a Wi-Fi HaLow gateway. The Mini PCIe form factor makes it easy to integrate Wi-Fi HaLow connectivity into existing systems and create IoT gateways that can connect numerous low-power devices over long distances.
Overview
The Wi-Fi HaLow Mini PCIe Module is designed to enable long-range wireless connectivity for IoT applications. It provides:
- Standard Mini PCIe interface for easy integration
- Support for IEEE 802.11ah Wi-Fi HaLow protocol
- Range up to 1km line-of-sight
- Low power consumption
- Ability to connect thousands of IoT devices
What is Wi-Fi HaLow?
Wi-Fi HaLow (IEEE 802.11ah) is a wireless networking technology specifically designed for Internet of Things (IoT) applications. Operating in the sub-1 GHz frequency band, it offers several key advantages:
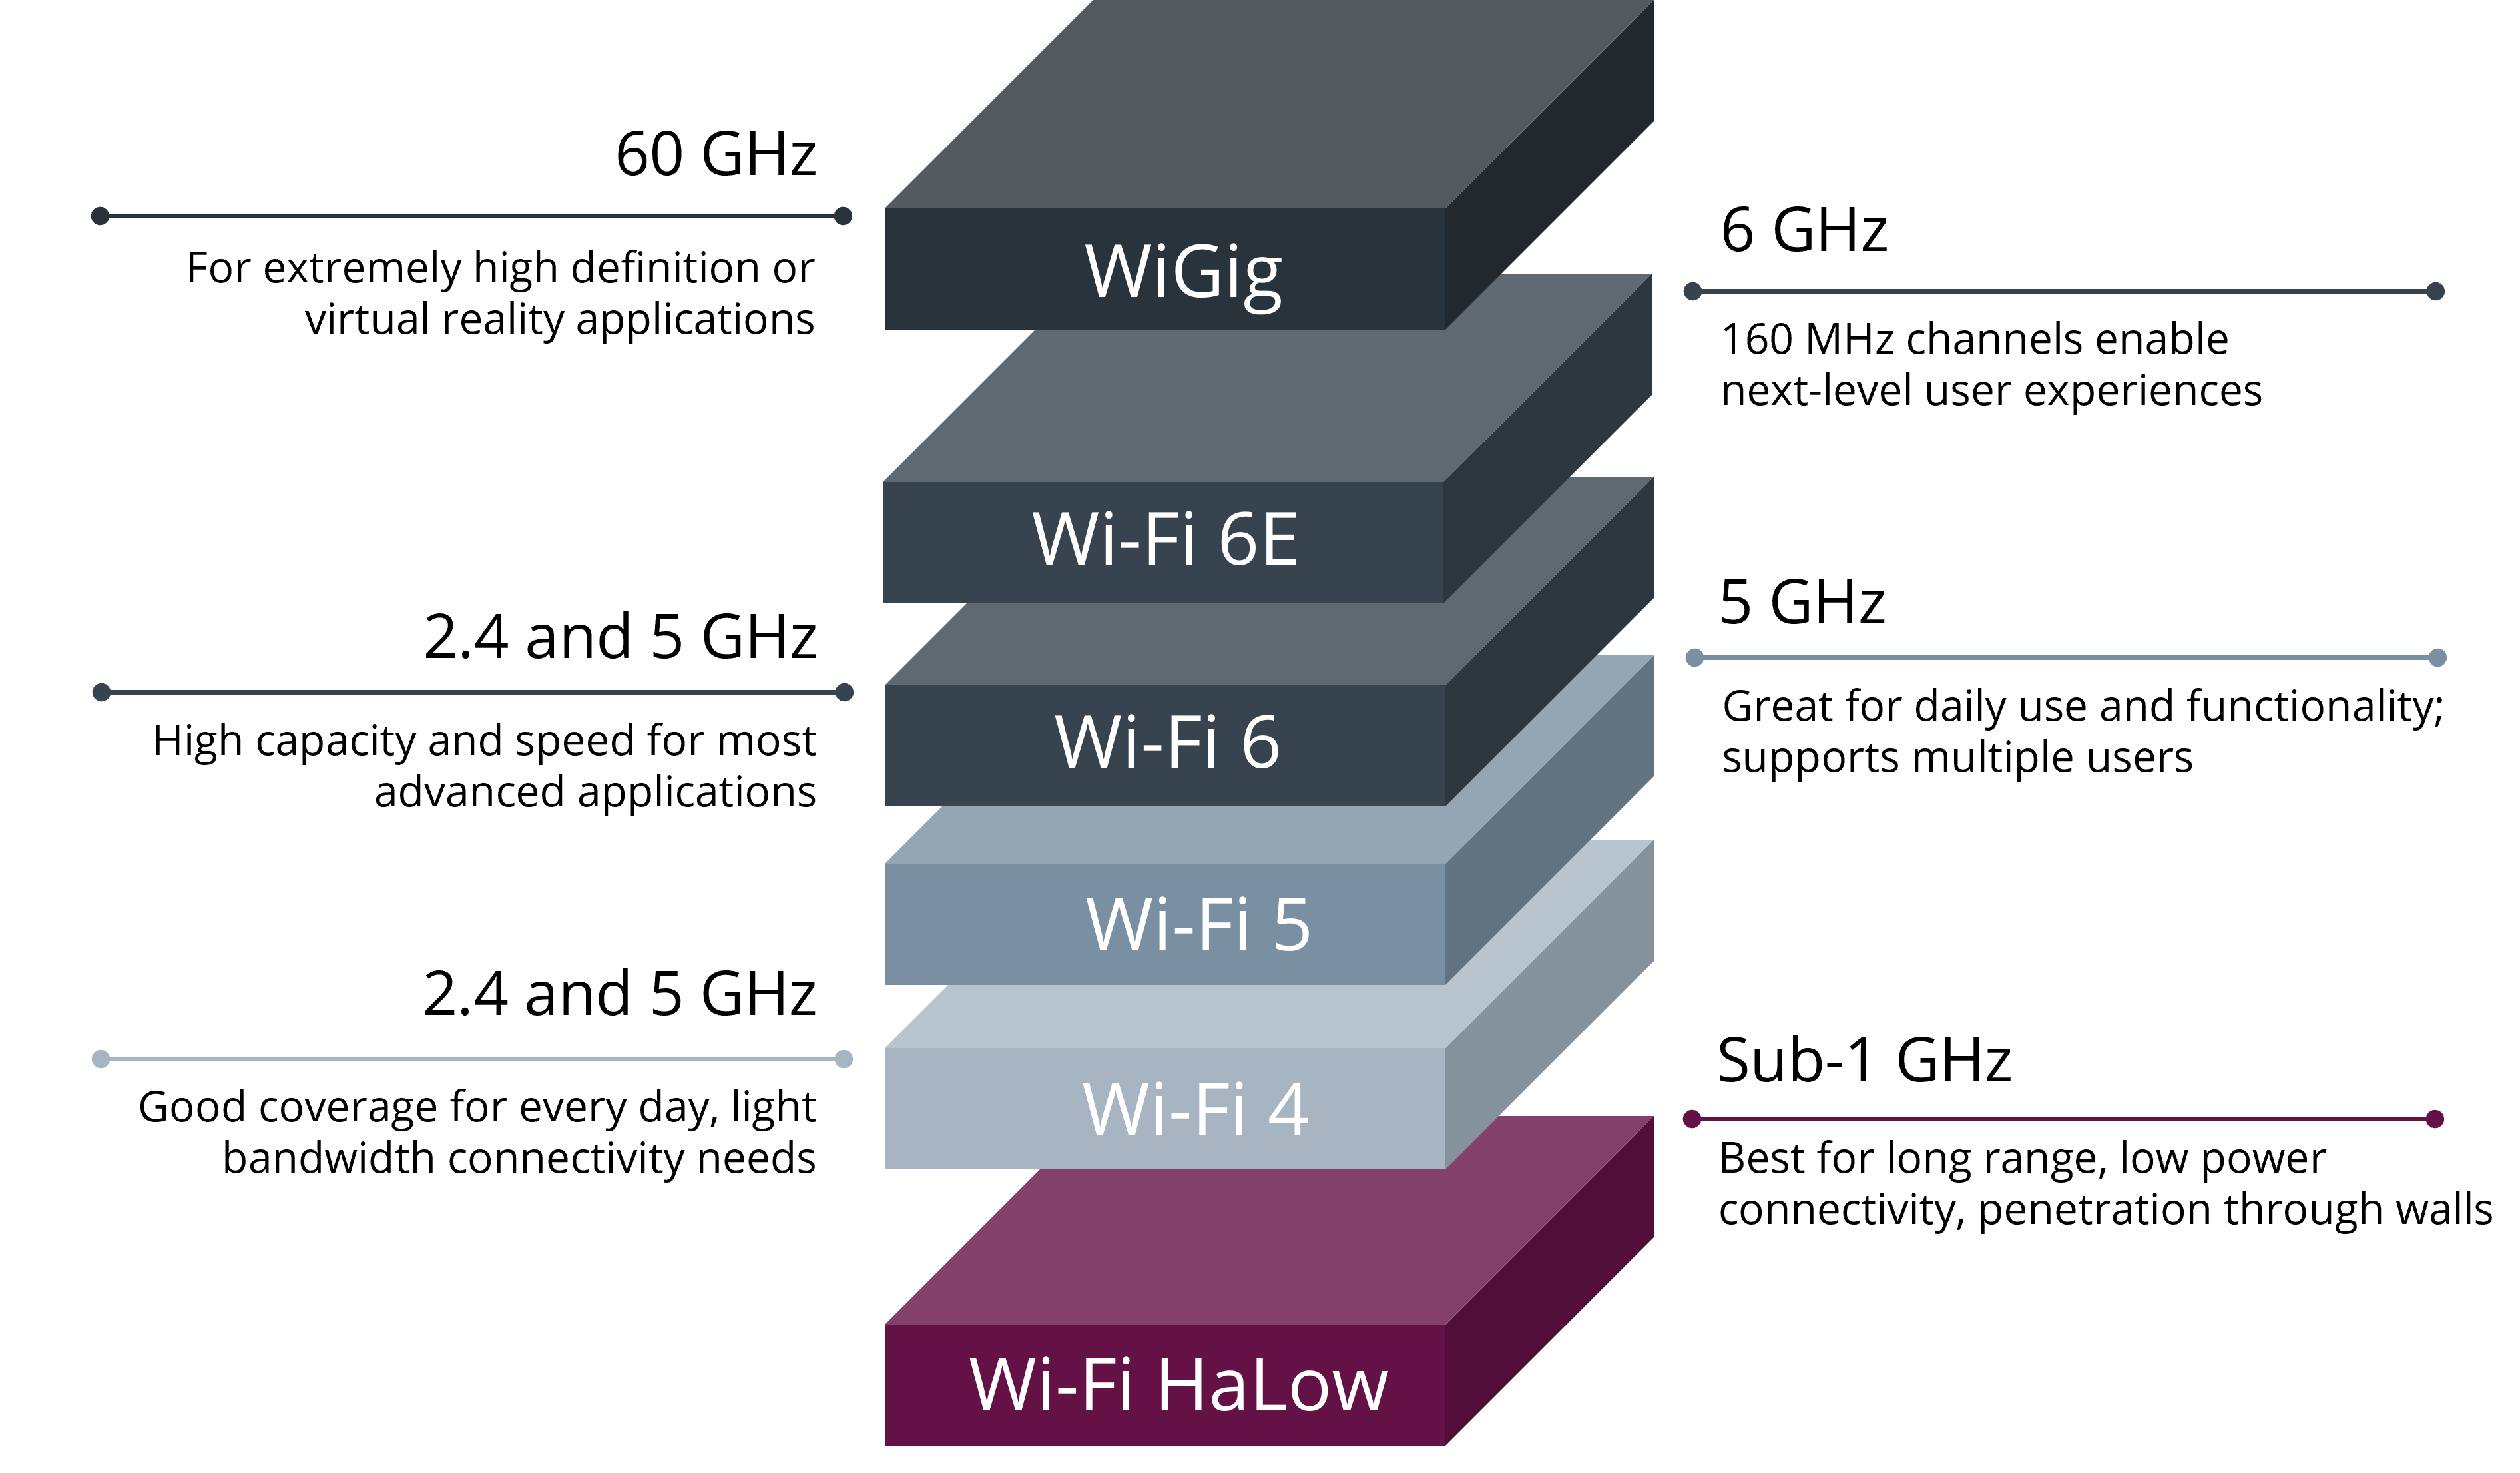
Key Benefits
- Extended Range: Can reach up to 1 kilometer in line-of-sight conditions, far exceeding traditional Wi-Fi
- Better Penetration: Lower frequency signals can penetrate walls and obstacles more effectively
- Energy Efficiency: Optimized for battery-powered IoT devices
- High Scalability: Supports thousands of connected devices per access point
- Native IP Support: Seamless integration with existing IP networks
Applications
Wi-Fi HaLow is ideal for:
- Smart Agriculture
- Industrial IoT
- Smart Cities
- Building Automation
- Environmental Monitoring
- Asset Tracking
Why It Matters
Wi-Fi HaLow addresses critical challenges in IoT deployments:
- Coverage Gap: Bridges the gap between short-range Wi-Fi and cellular networks
- Battery Life: Enables years of operation on battery power
- Deployment Cost: Reduces infrastructure costs compared to cellular solutions
- Standardization: Based on familiar Wi-Fi standards for easier adoption
- Security: Incorporates enterprise-grade WPA3 security
By combining long range, low power, and high device density capabilities, Wi-Fi HaLow is positioned to become a key technology for large-scale IoT deployments across various industries.
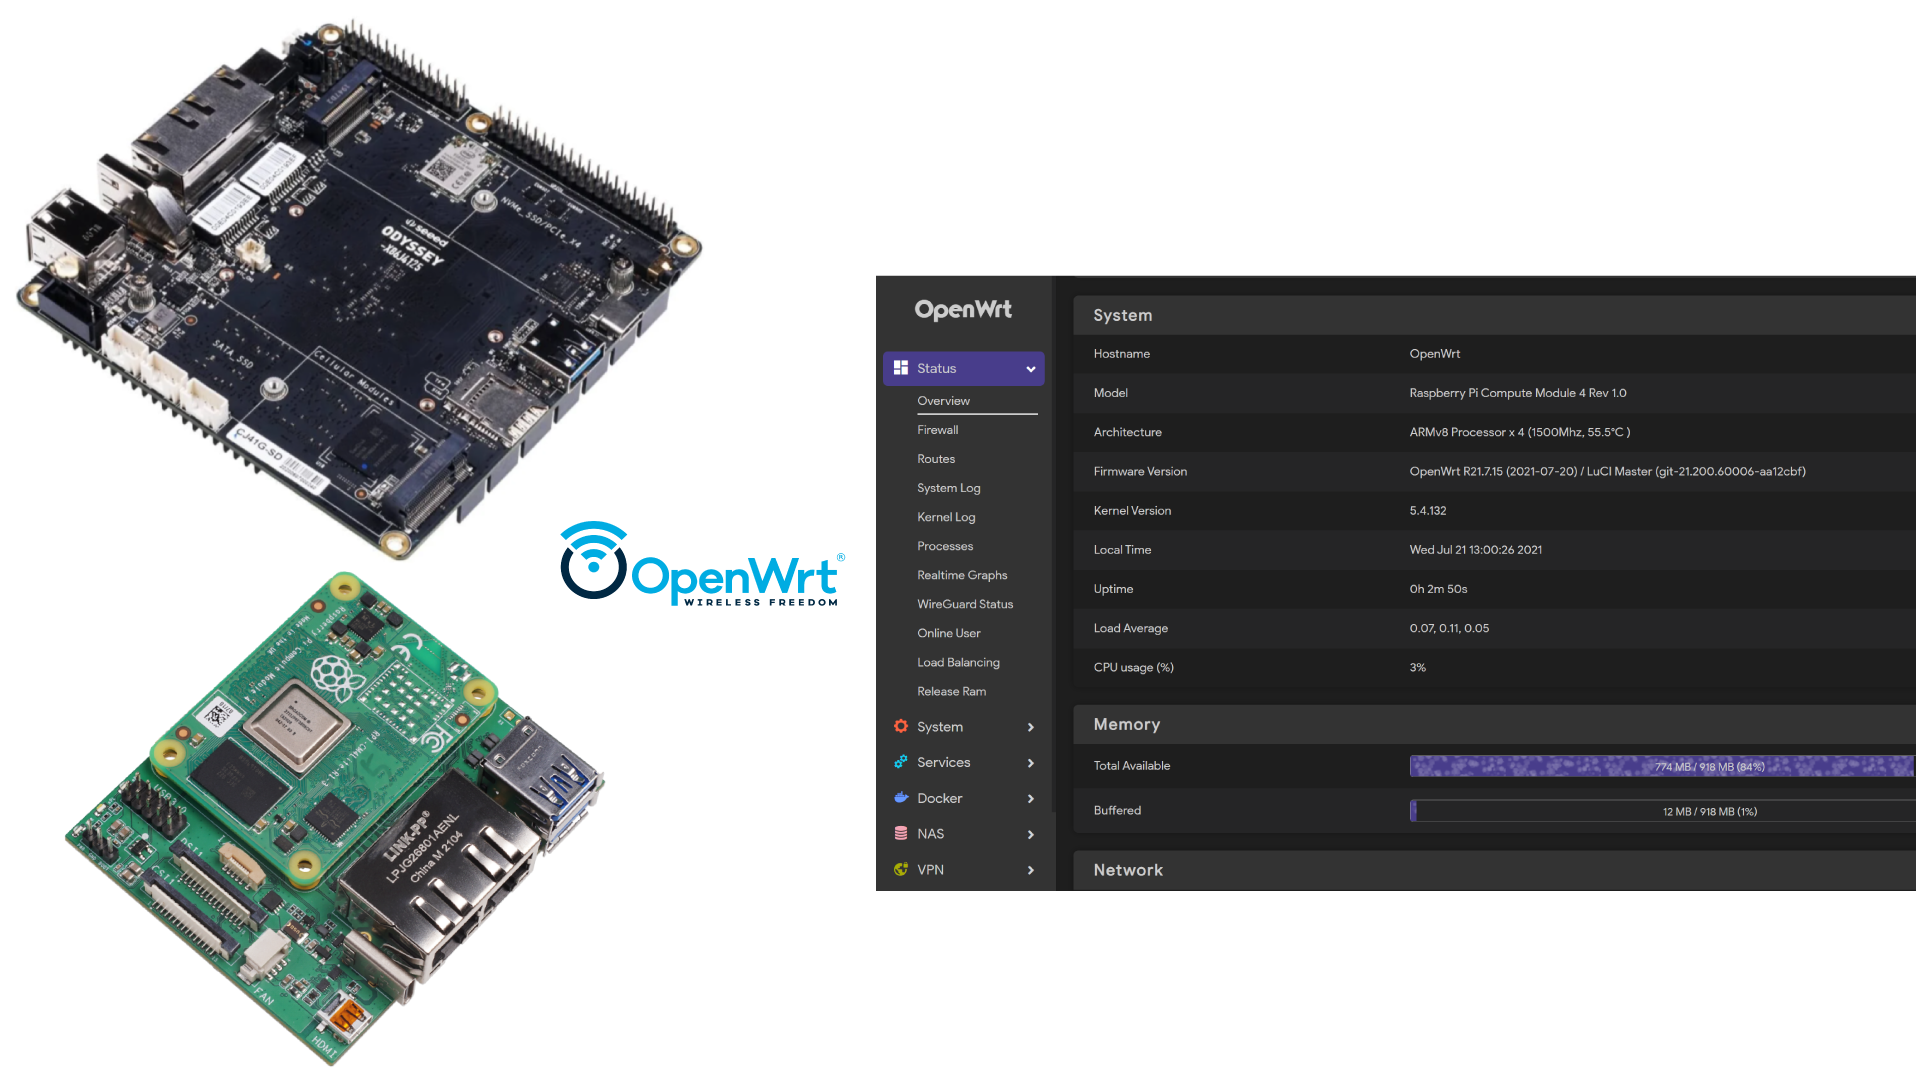
OpenWrt Overview
The Wi-Fi HaLow Mini PCIe Module runs on OpenWrt, a highly extensible Linux operating system primarily designed for embedded devices like routers. Here's what makes OpenWrt an excellent platform for Wi-Fi HaLow gateways:
What is OpenWrt?
OpenWrt is a Linux-based operating system that provides:
- A fully writable filesystem with package management
- High modularity allowing you to customize functionality
- Support for a wide range of embedded devices
- Active development community and regular updates
- Extensive networking capabilities
Benefits for Wi-Fi HaLow Deployments
OpenWrt provides an ideal platform for Wi-Fi HaLow gateways because:
- Stability: Rock-solid Linux foundation for 24/7 operation
- Flexibility: Easy customization for specific IoT requirements
- Performance: Optimized networking stack for efficient data handling
- Security: Enterprise-grade security features built-in
- Community: Large ecosystem of developers and users
The combination of OpenWrt and Wi-Fi HaLow creates a powerful foundation for building robust IoT networks that can scale from small deployments to large industrial installations.
Materials Required
Here are the materials needed to run this tutorial.
| Raspberry Pi 4 Model B | WiFi HaLow Mini PCIe Module |
|---|---|
 | |
Additionally, you will need the following items:
- Mini PCIe to PCIe adapter - For connecting the Wi-Fi HaLow Mini PCIe Module to Raspberry Pi.
- Heatsink for Raspberry Pi - Recommended for thermal management during continuous operation.
- MicroSD card (8GB or larger) - For storing the OpenWrt firmware.
- MicroSD card reader - For reading the MicroSD card.
- Ethernet cable - Used to connect to the host computer and configure the Raspberry Pi's WiFi-Halow.
- Power supply for Raspberry Pi
- Computer - for flashing the firmware and configuring the Raspberry Pi's WiFi-Halow.
- Antenna - For extending the range of the Wi-Fi HaLow Mini PCIe Module. Here are the verified, recommended antenna models.
| Long Range Indoor Antenna Kit | 2.6dBi Long Range Antenna |
|---|---|
 |  |
To connect the antenna to the WiFi-Halow module, you may also need to purchase the SMA to I-PEX Antenna Cable.
| SMA to I-PEX Antenna Cable |
|---|
 |
If you are using it for the first time, you can refer to the following video for antenna installation.
Installing WiFi Halow for OpenWrt to Raspberry Pi
This section will guide you through setting up a Raspberry Pi 4 as a Wi-Fi HaLow gateway using a pre-built OpenWrt firmware image.
Download Firmware
Download the pre-built OpenWrt Image with Wi-Fi HaLow support from:
Flash Firmware to MicroSD Card
- Download and install balenaEtcher.
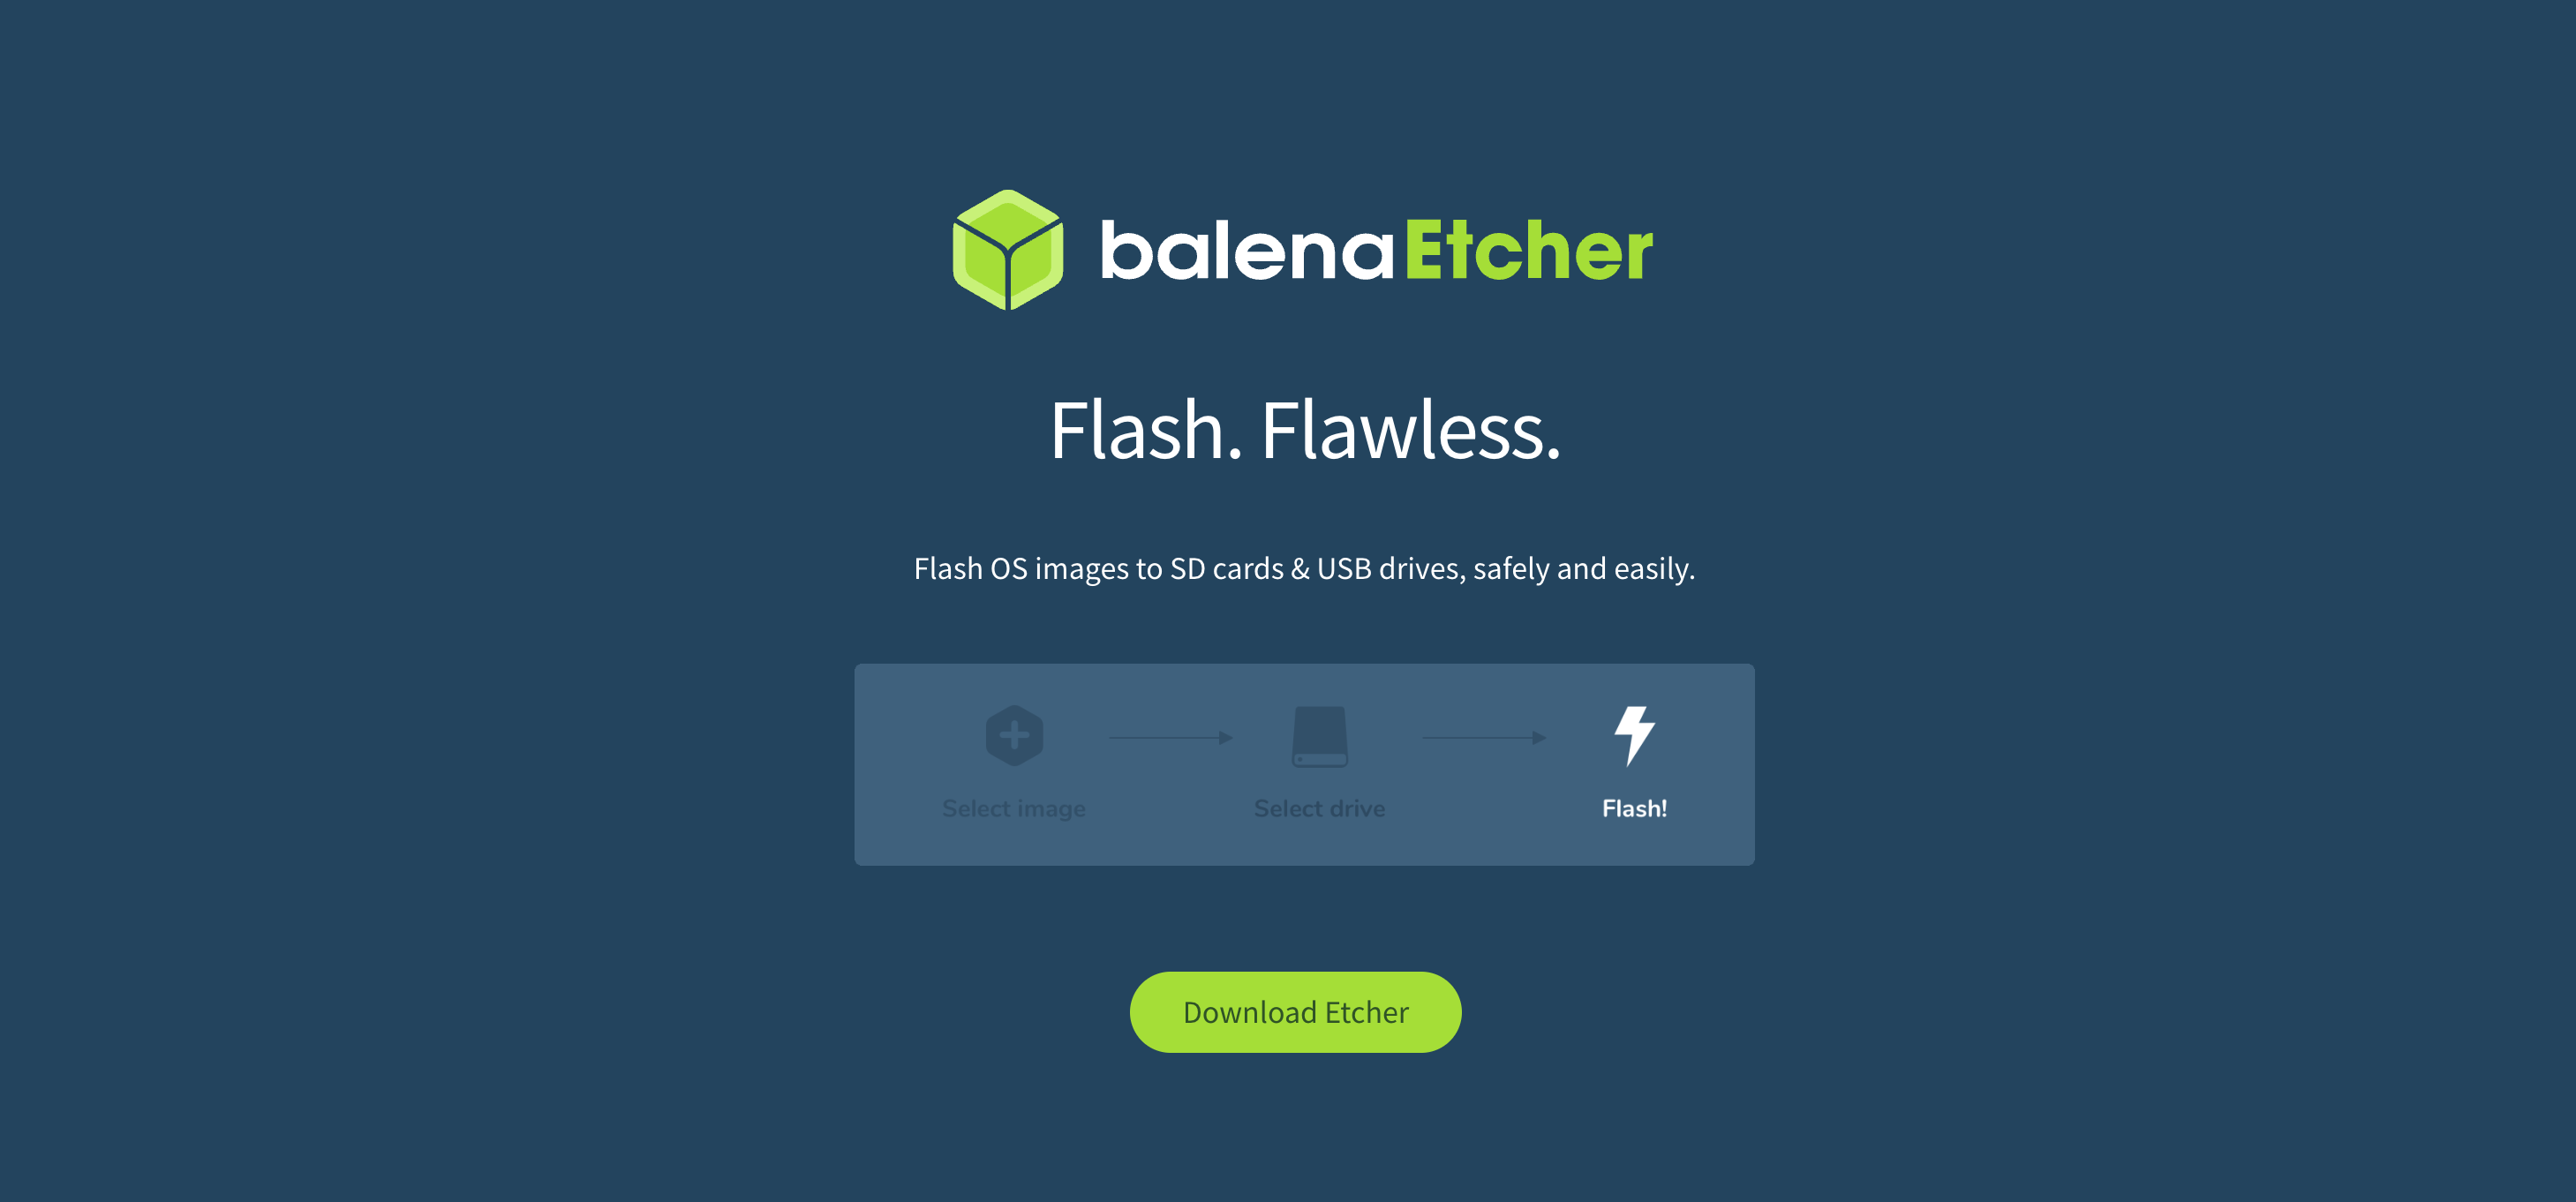
- Insert your MicroSD card into your computer.
- Launch balenaEtcher.
- Click "Flash from file" and select the downloaded OpenWrt firmware.
- Select your MicroSD card as the target.
- Click "Flash!" and wait for the process to complete.
Setup and First Boot
- Insert the flashed MicroSD card into your Raspberry Pi 4
- Connect an Ethernet cable between your computer and the Raspberry Pi
- Power on the Raspberry Pi
- Wait approximately 2-3 minutes for the system to boot
Accessing the Gateway Interface
- Configure your computer's Ethernet interface to use DHCP, or set a static IP in the 10.42.0.x range
- Open a web browser
- Navigate to: http://10.42.0.1/
- You should see the Morse Micro login page
The default login credentials are:
- Username: root
- No need to enter a password

If you cannot access the interface:
- Verify your Ethernet connection
- Check that your computer is receiving an IP address
- Try pinging 10.42.0.1 to verify connectivity
Configure the Raspberry Pi as an Access Point
Log in to the Morse Micro interface. On the welcome page, please follow the example in the image below to configure your country.
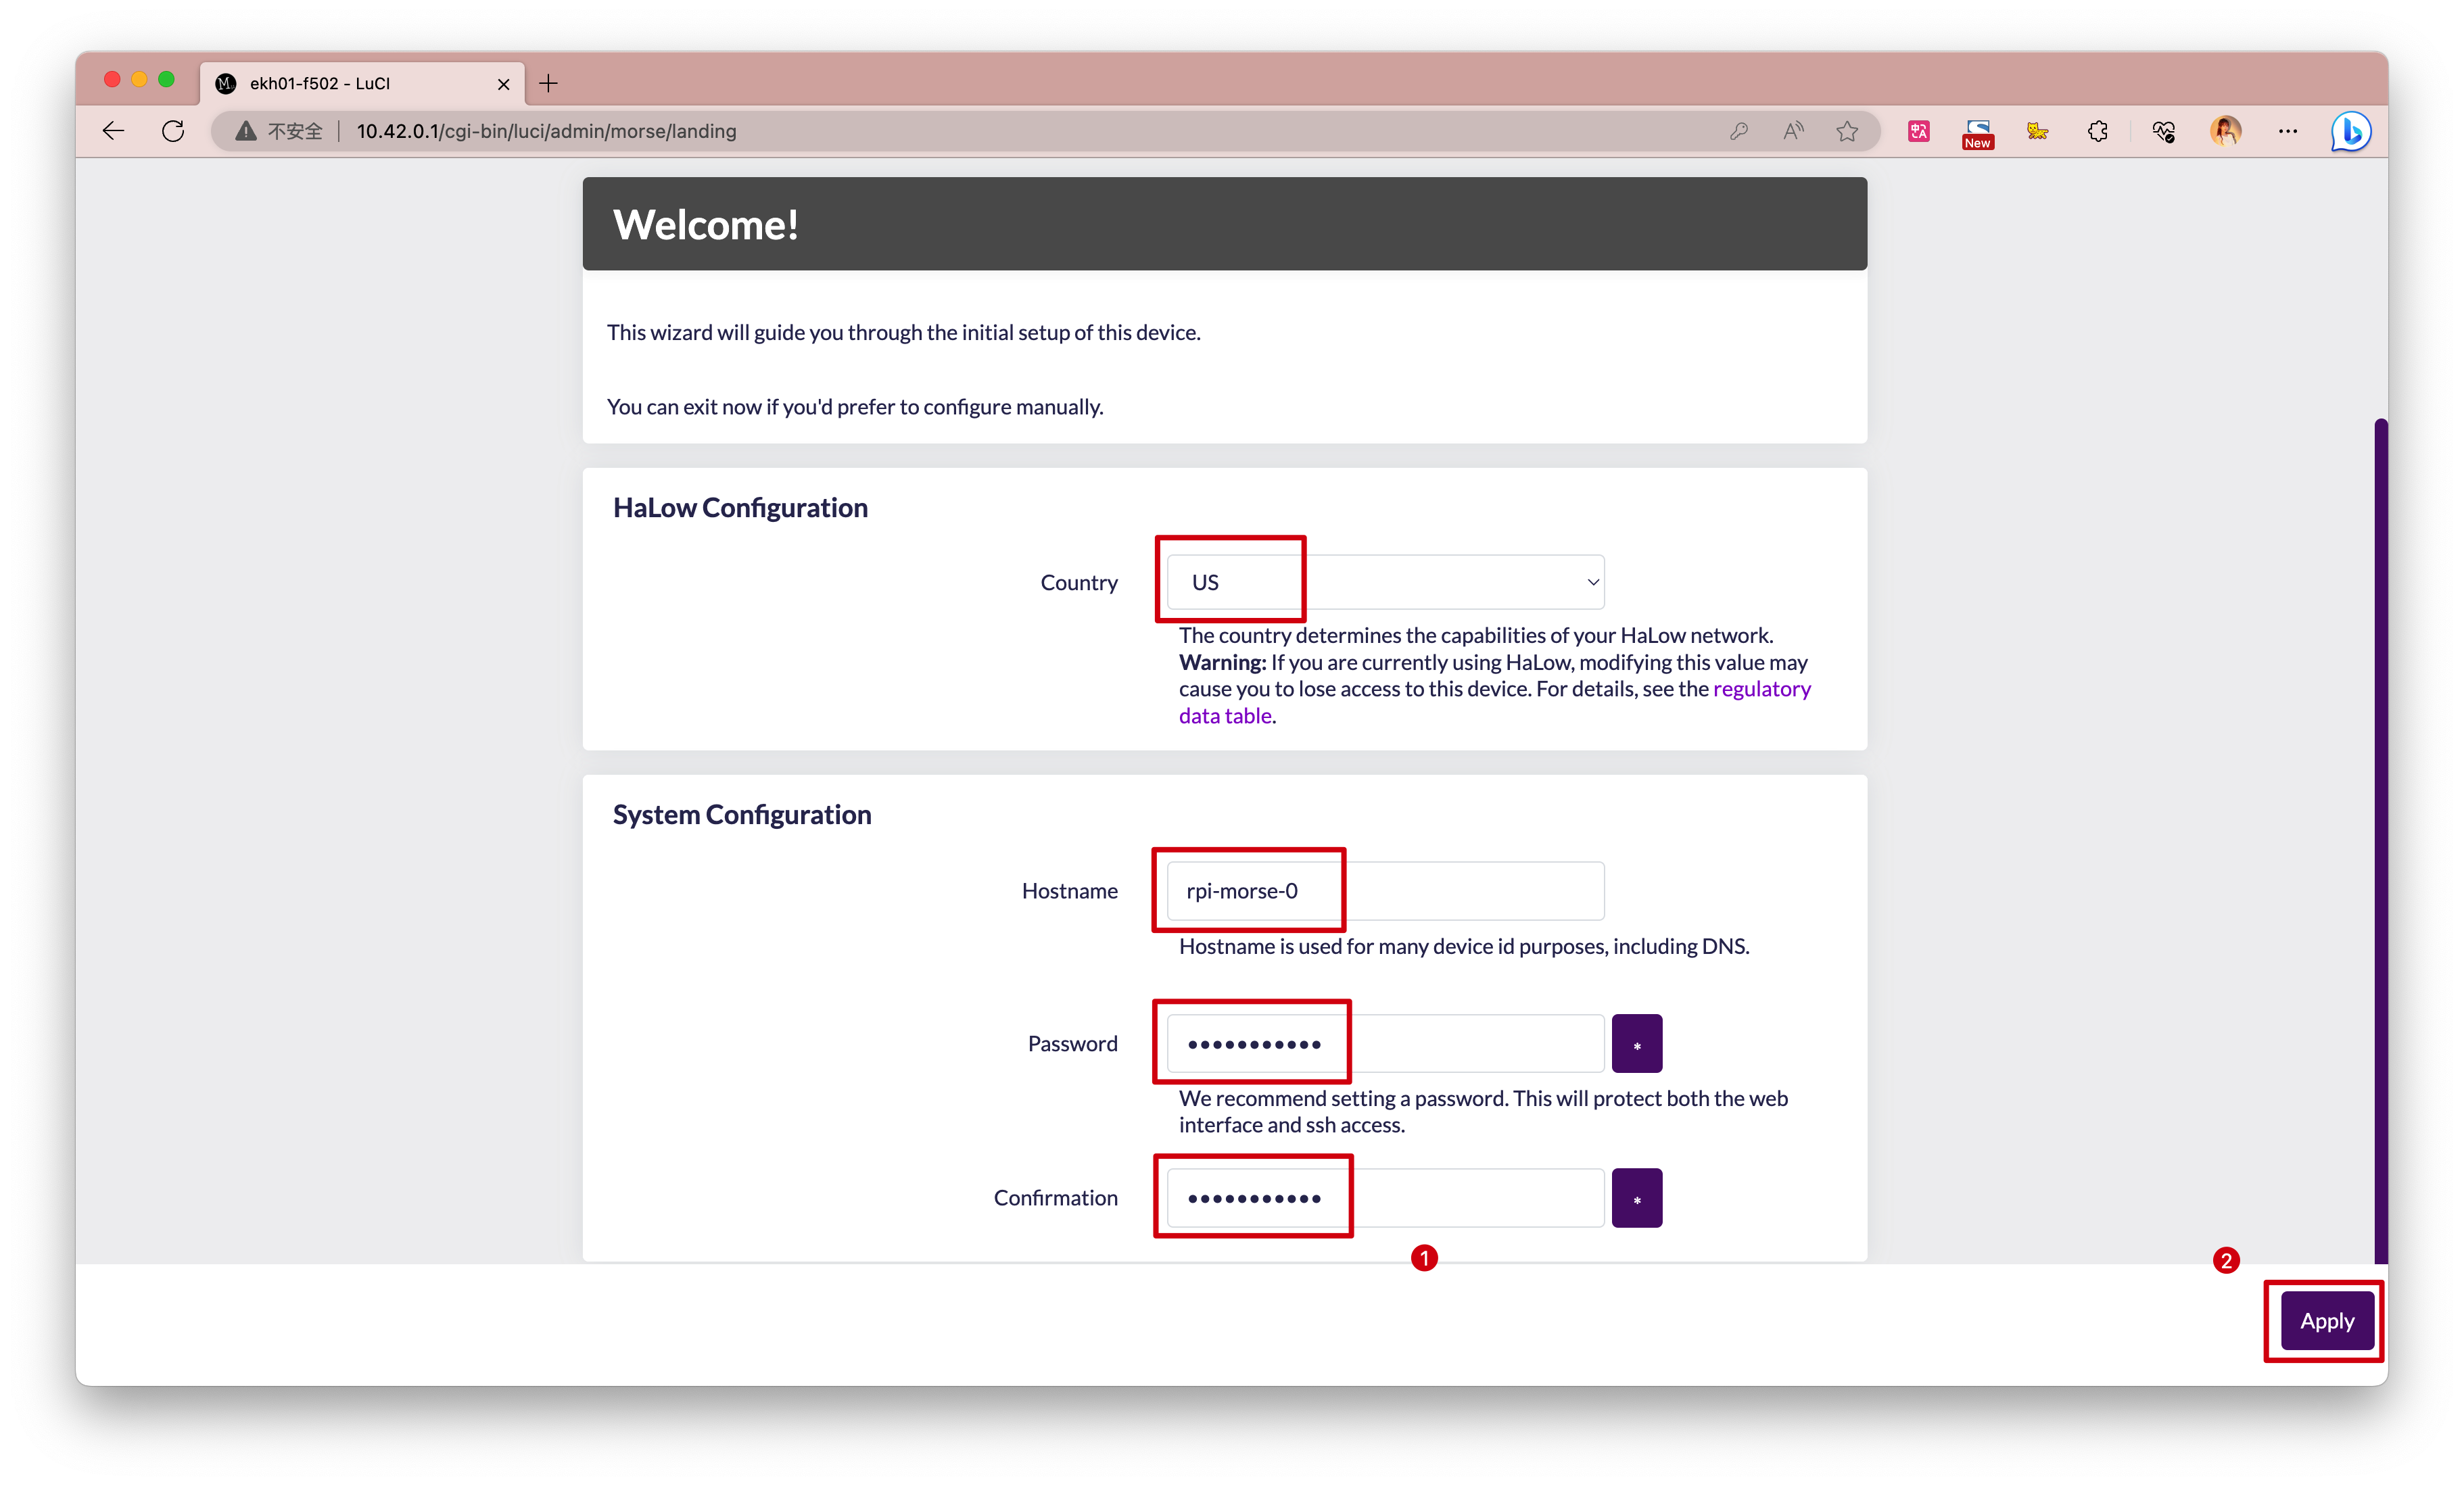
Currently, this device only supports the US and does not support other countries or regions.
After configuring your country, you can set the Hostname and Password according to your actual situation. Please keep this information safe, as you will need to use this password to access the device (ssh) later. Then click the Next button in the bottom right corner.
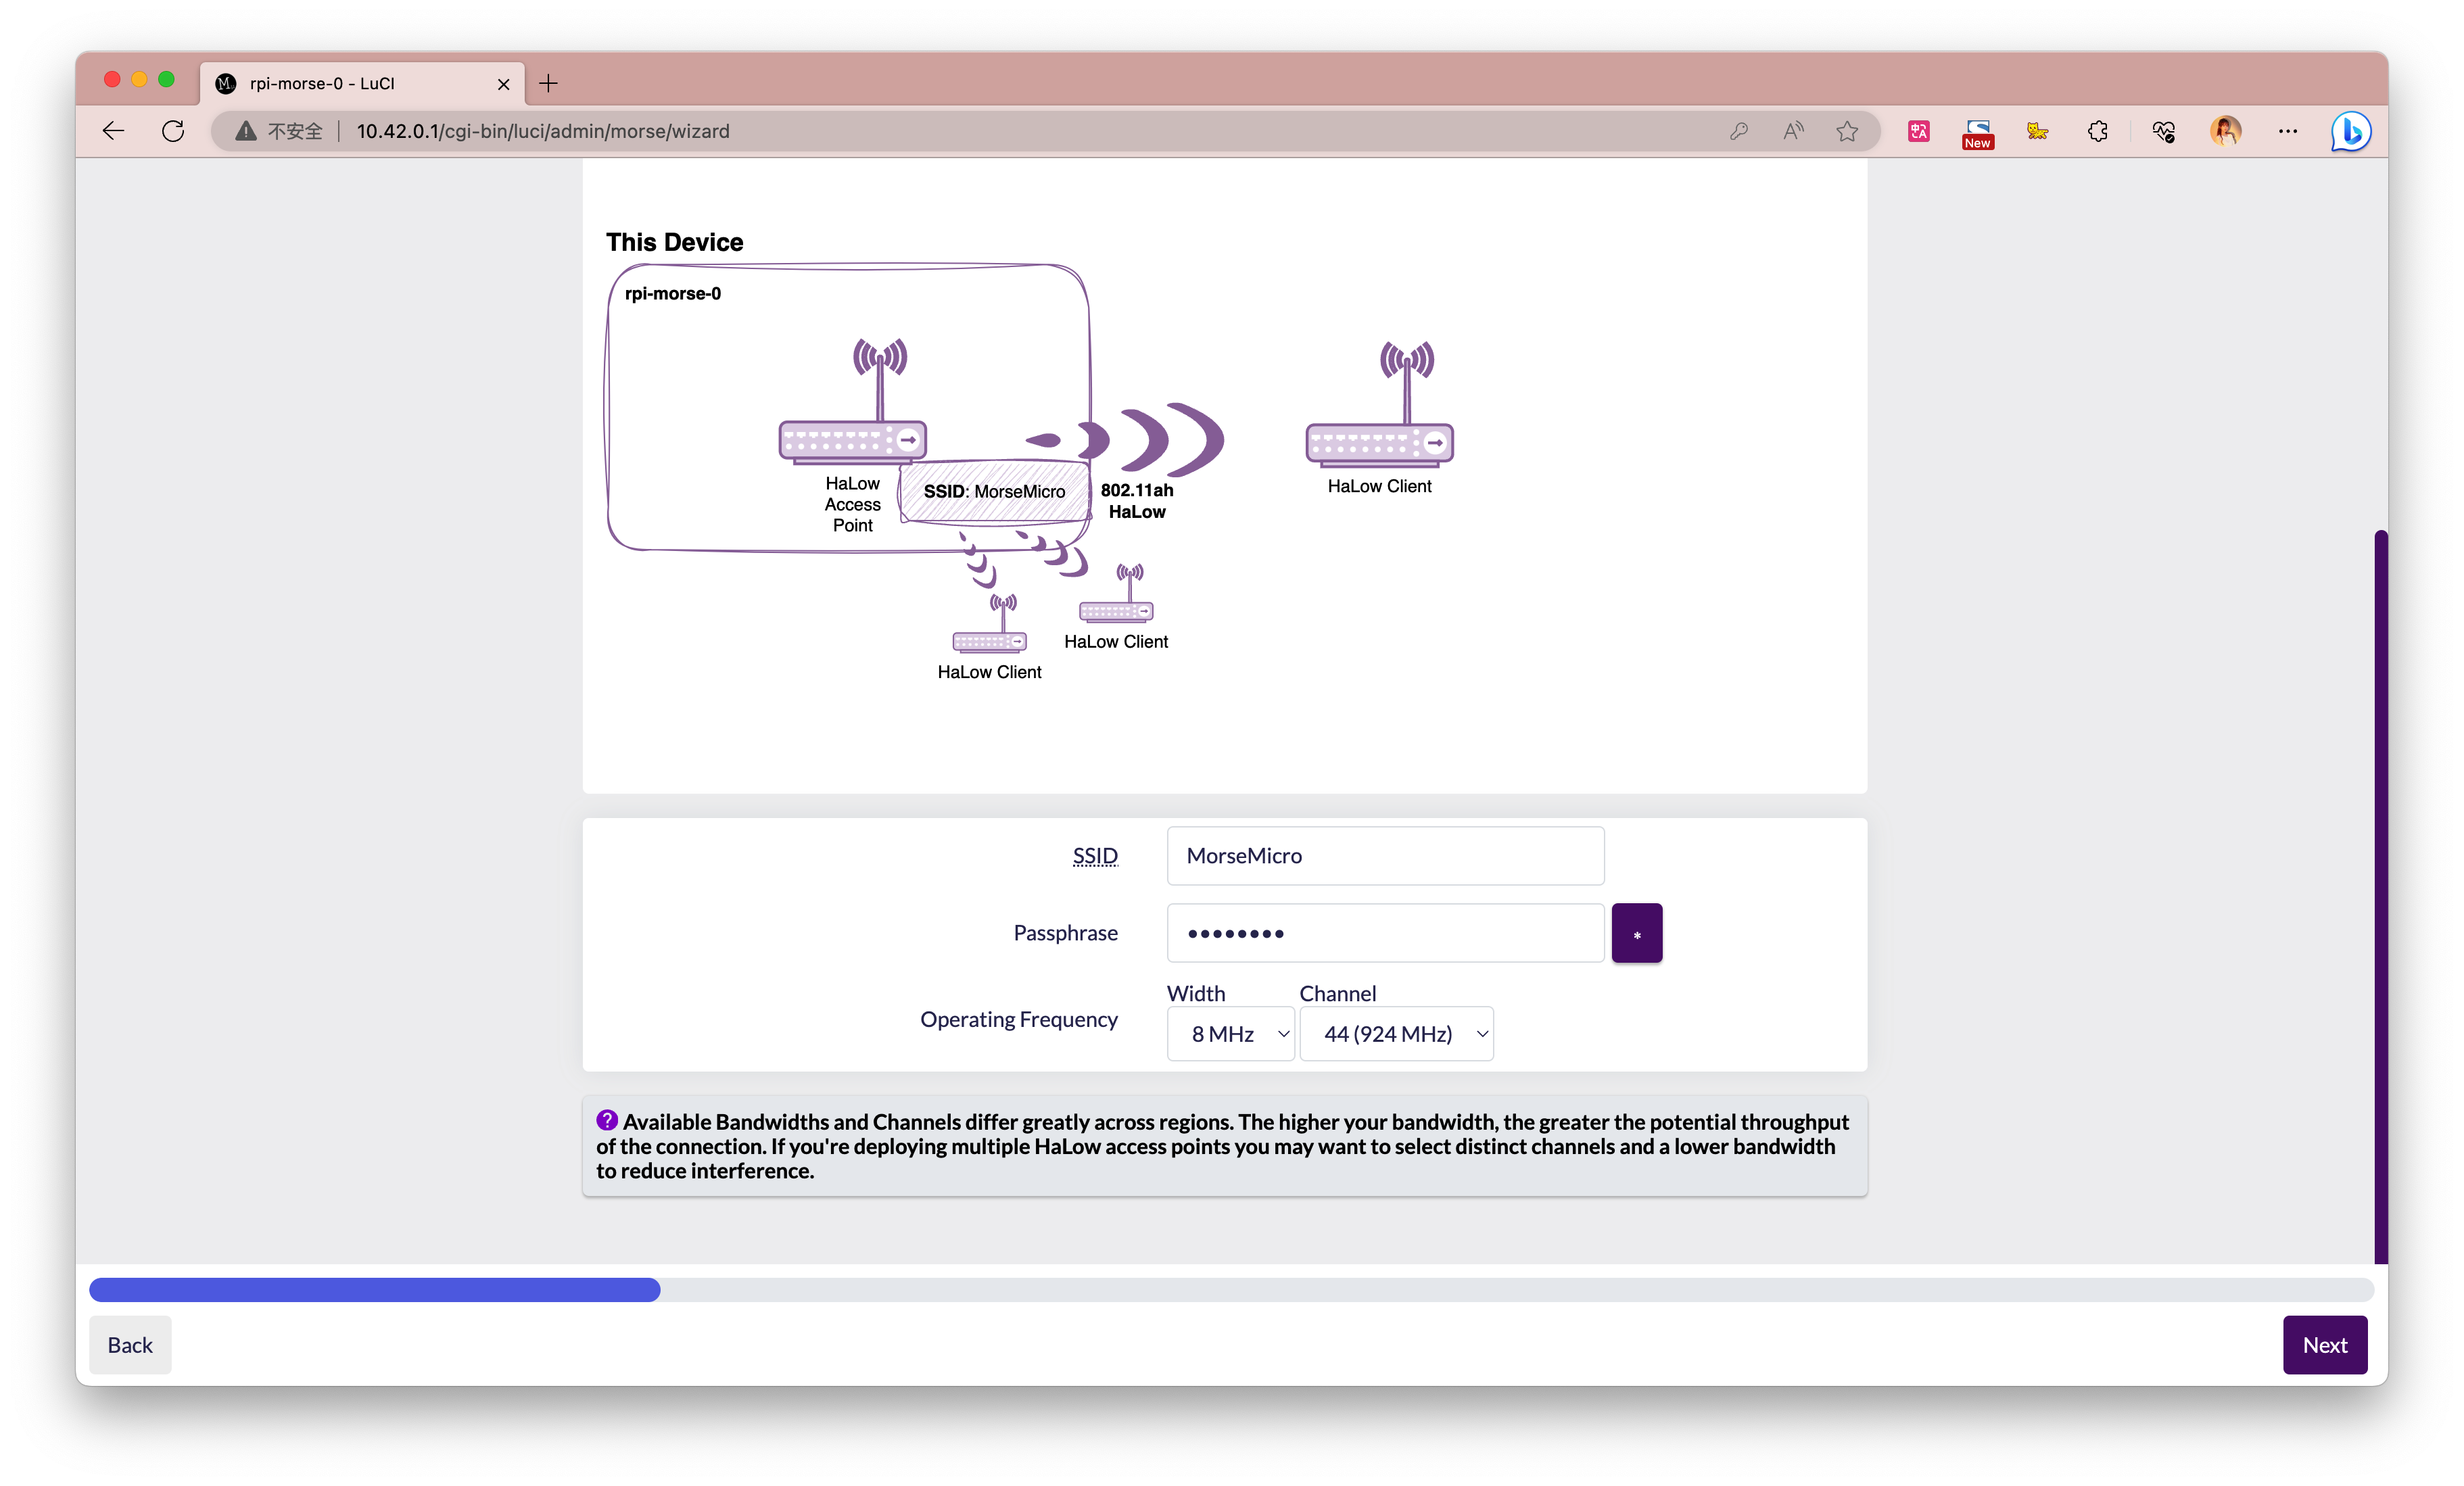
Please select the Access Point option in the new page.

Then click the Next button, and on the new page, set the Wi-Fi HaLow network credentials. Please remember them, as your client devices will need these to connect.
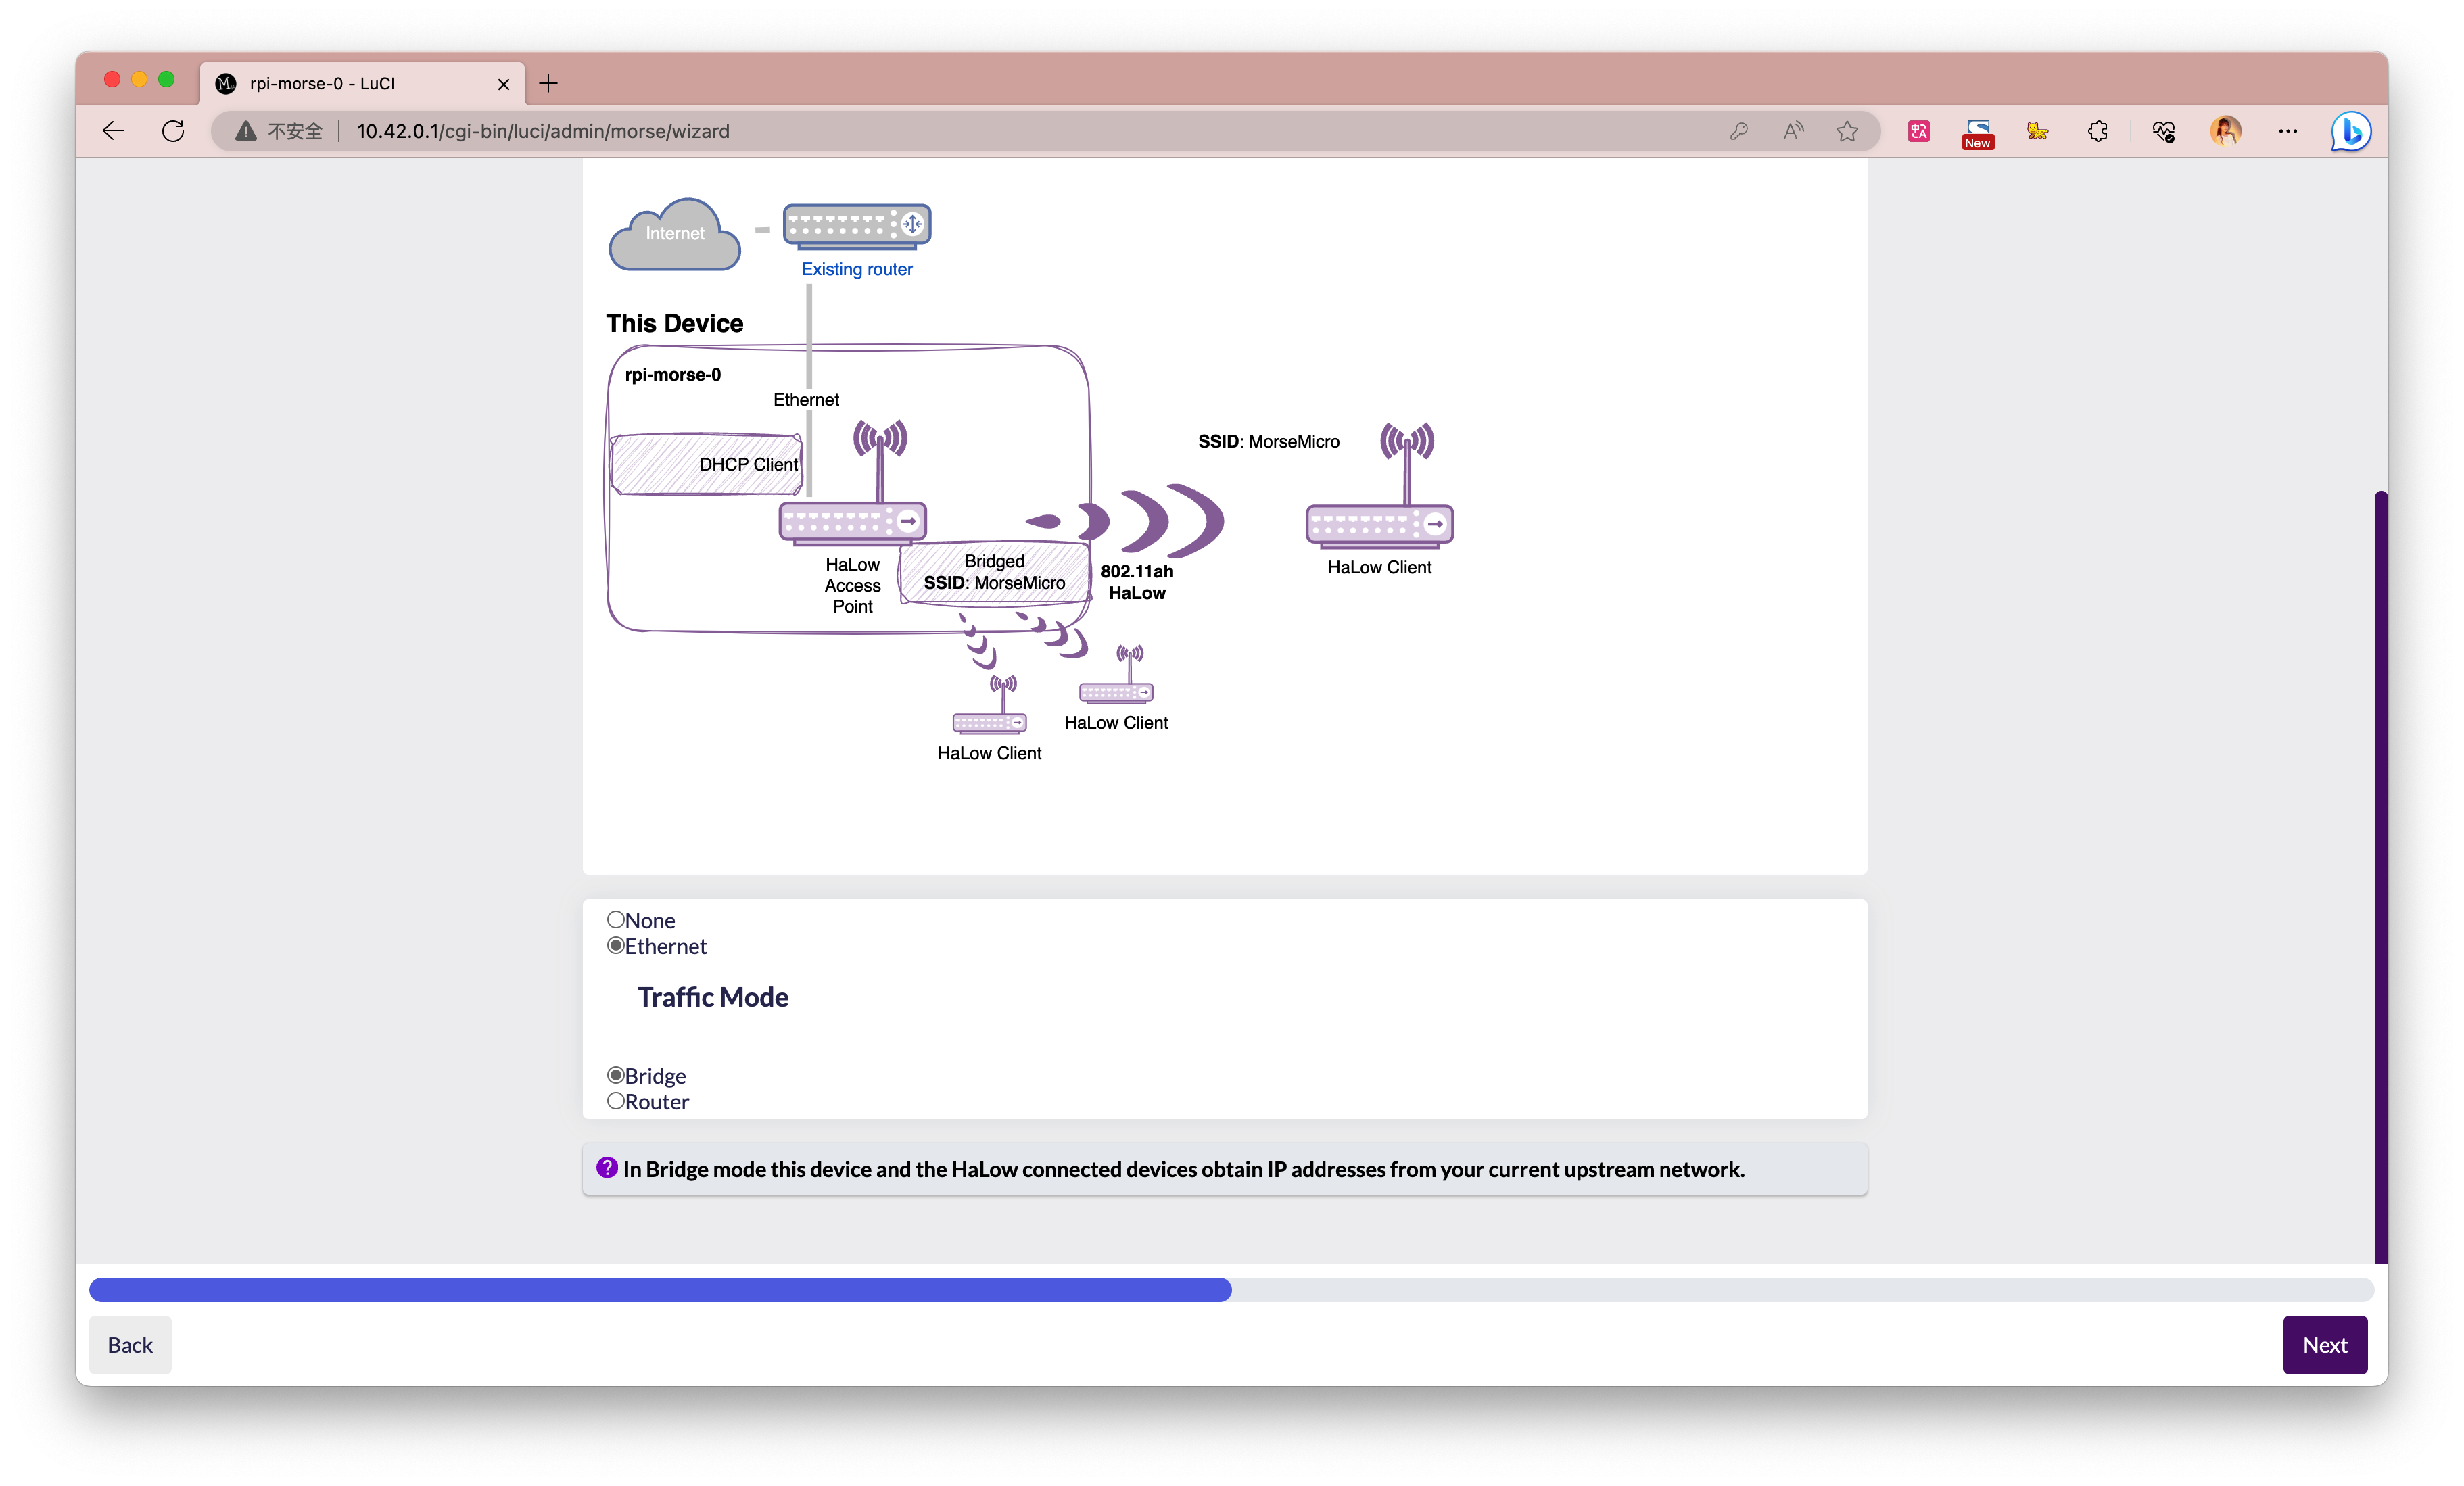
Click the Next button, then select Ethernet on the new page and choose Bridge. Configuring the network in this way allows for seamless communication between devices on the Ethernet and Wi-Fi networks, enabling a unified network experience for connected devices.
Then wait for the network configuration to take effect.
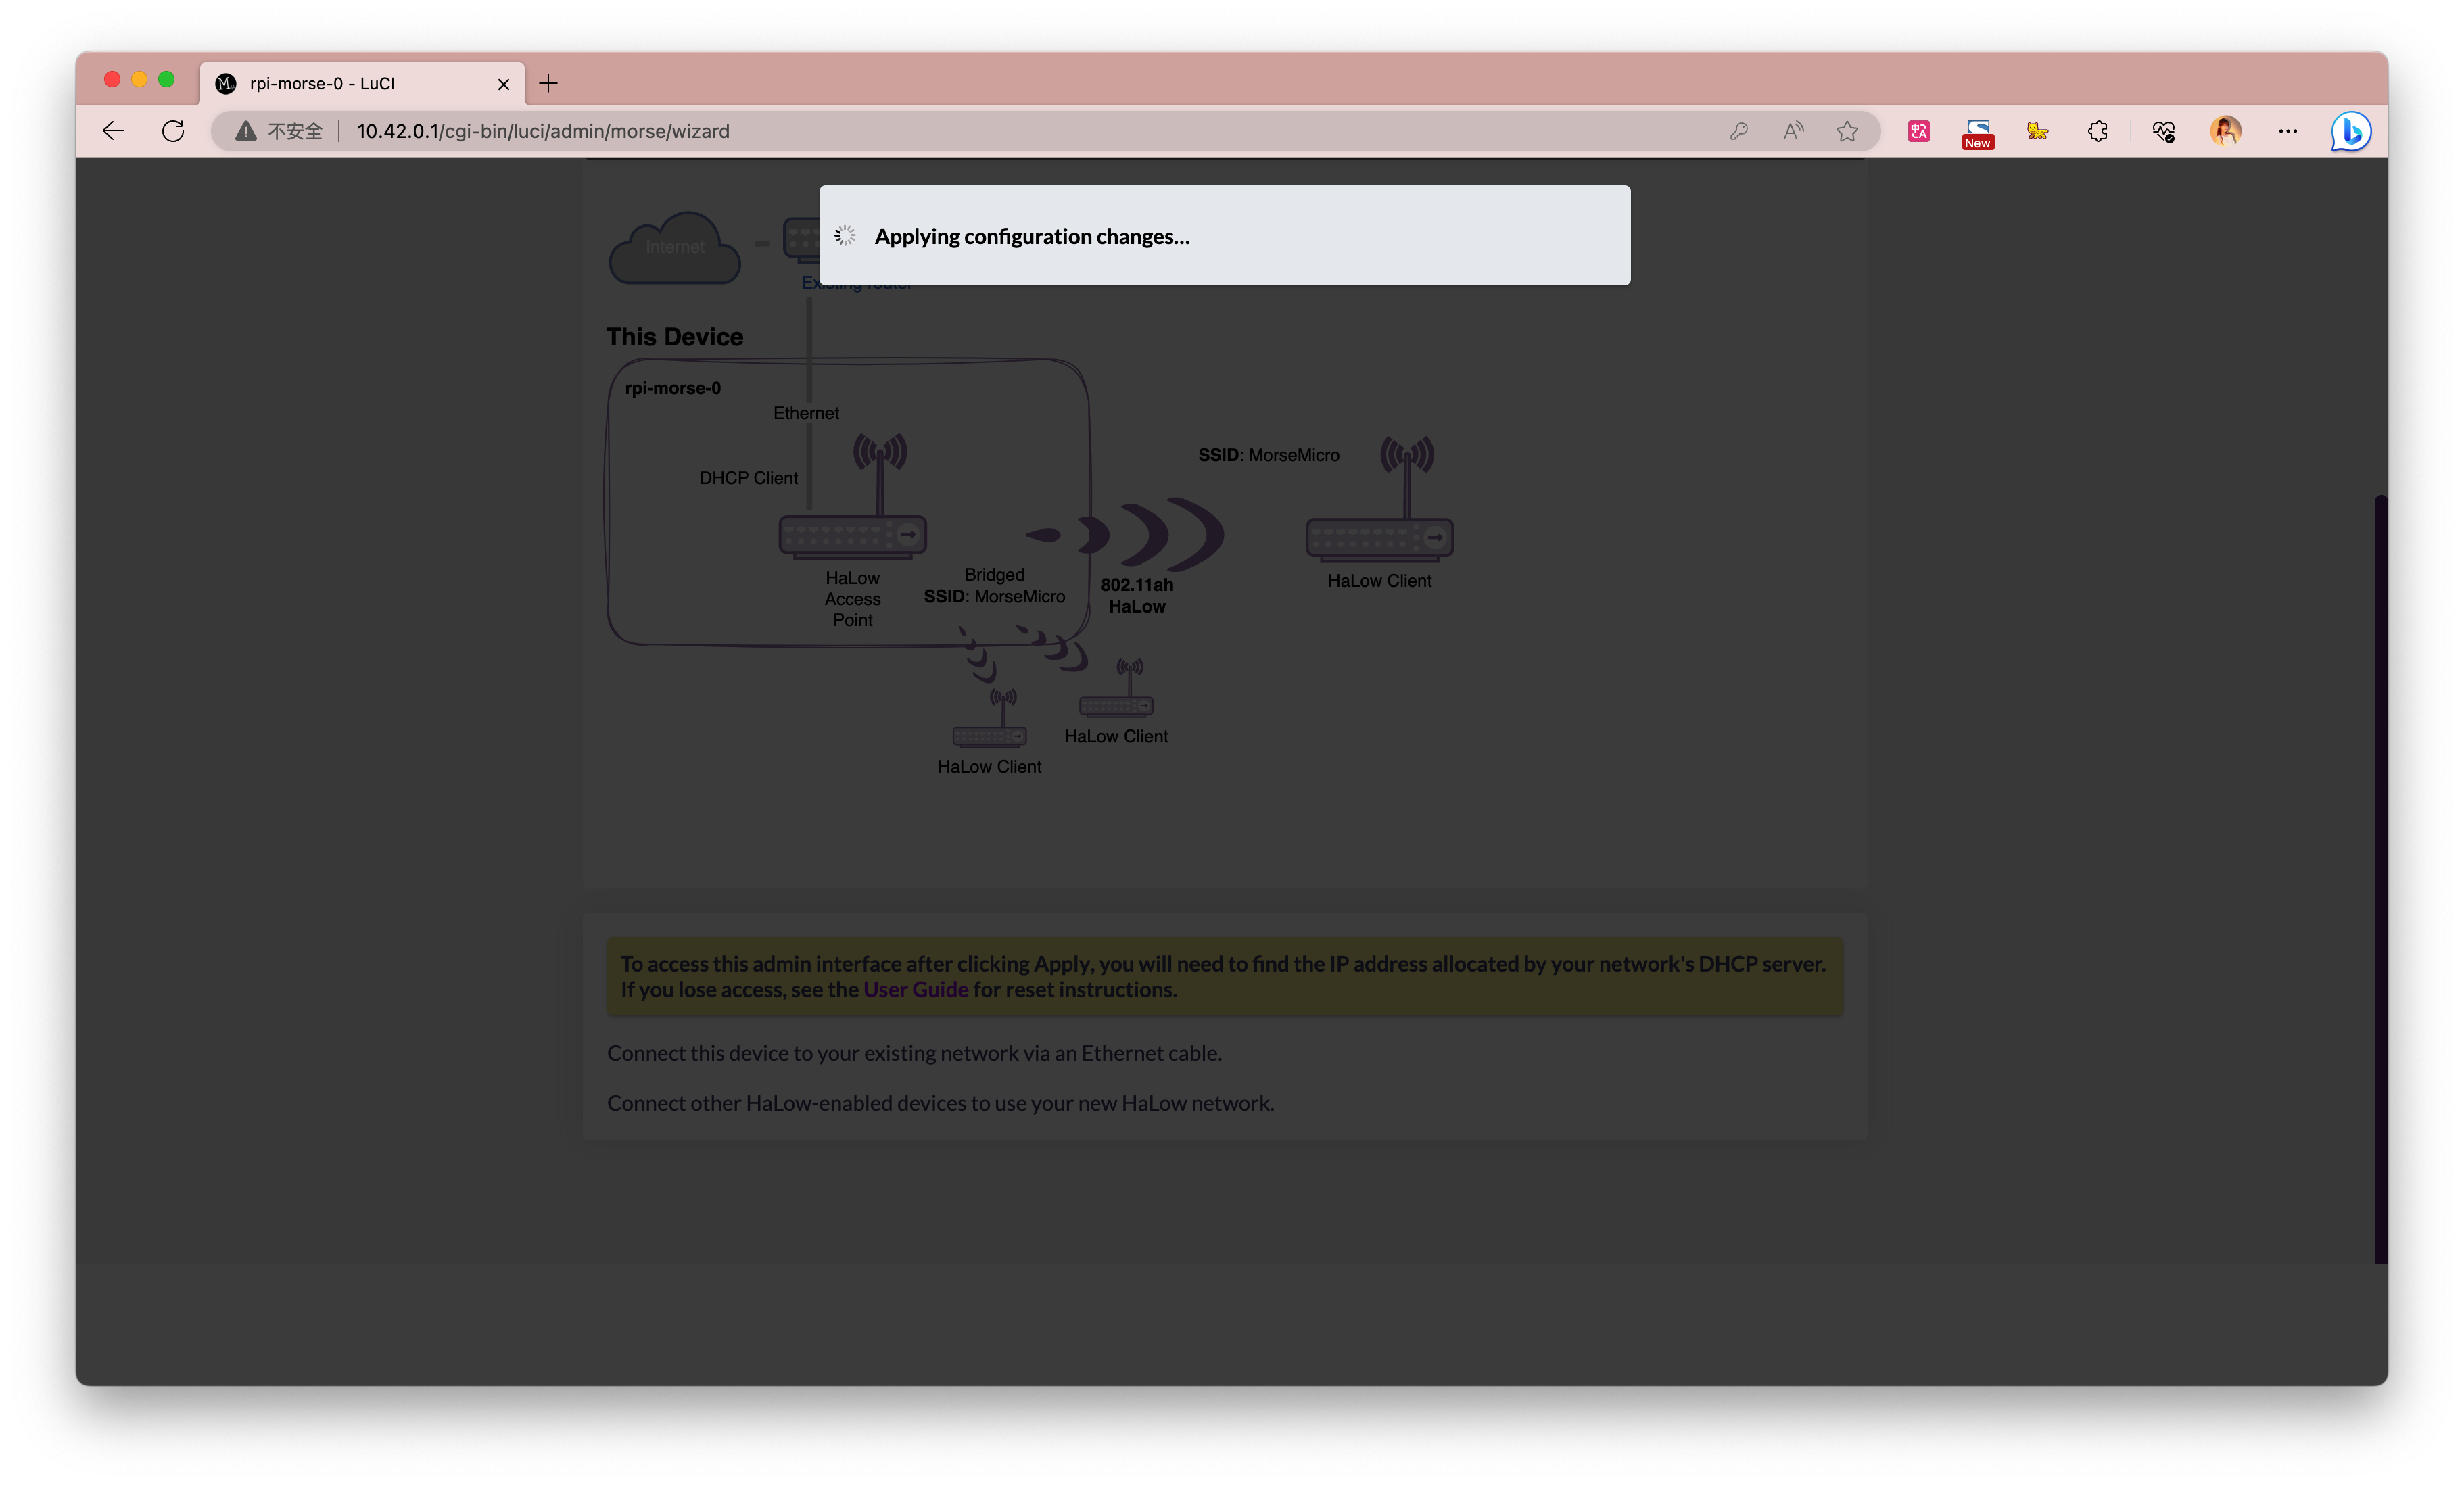
When the following interface appears, you can disconnect the Raspberry Pi from the computer and connect the Ethernet cable between your router and the Raspberry Pi. Then, check the Raspberry Pi's IP address through the router's admin page.
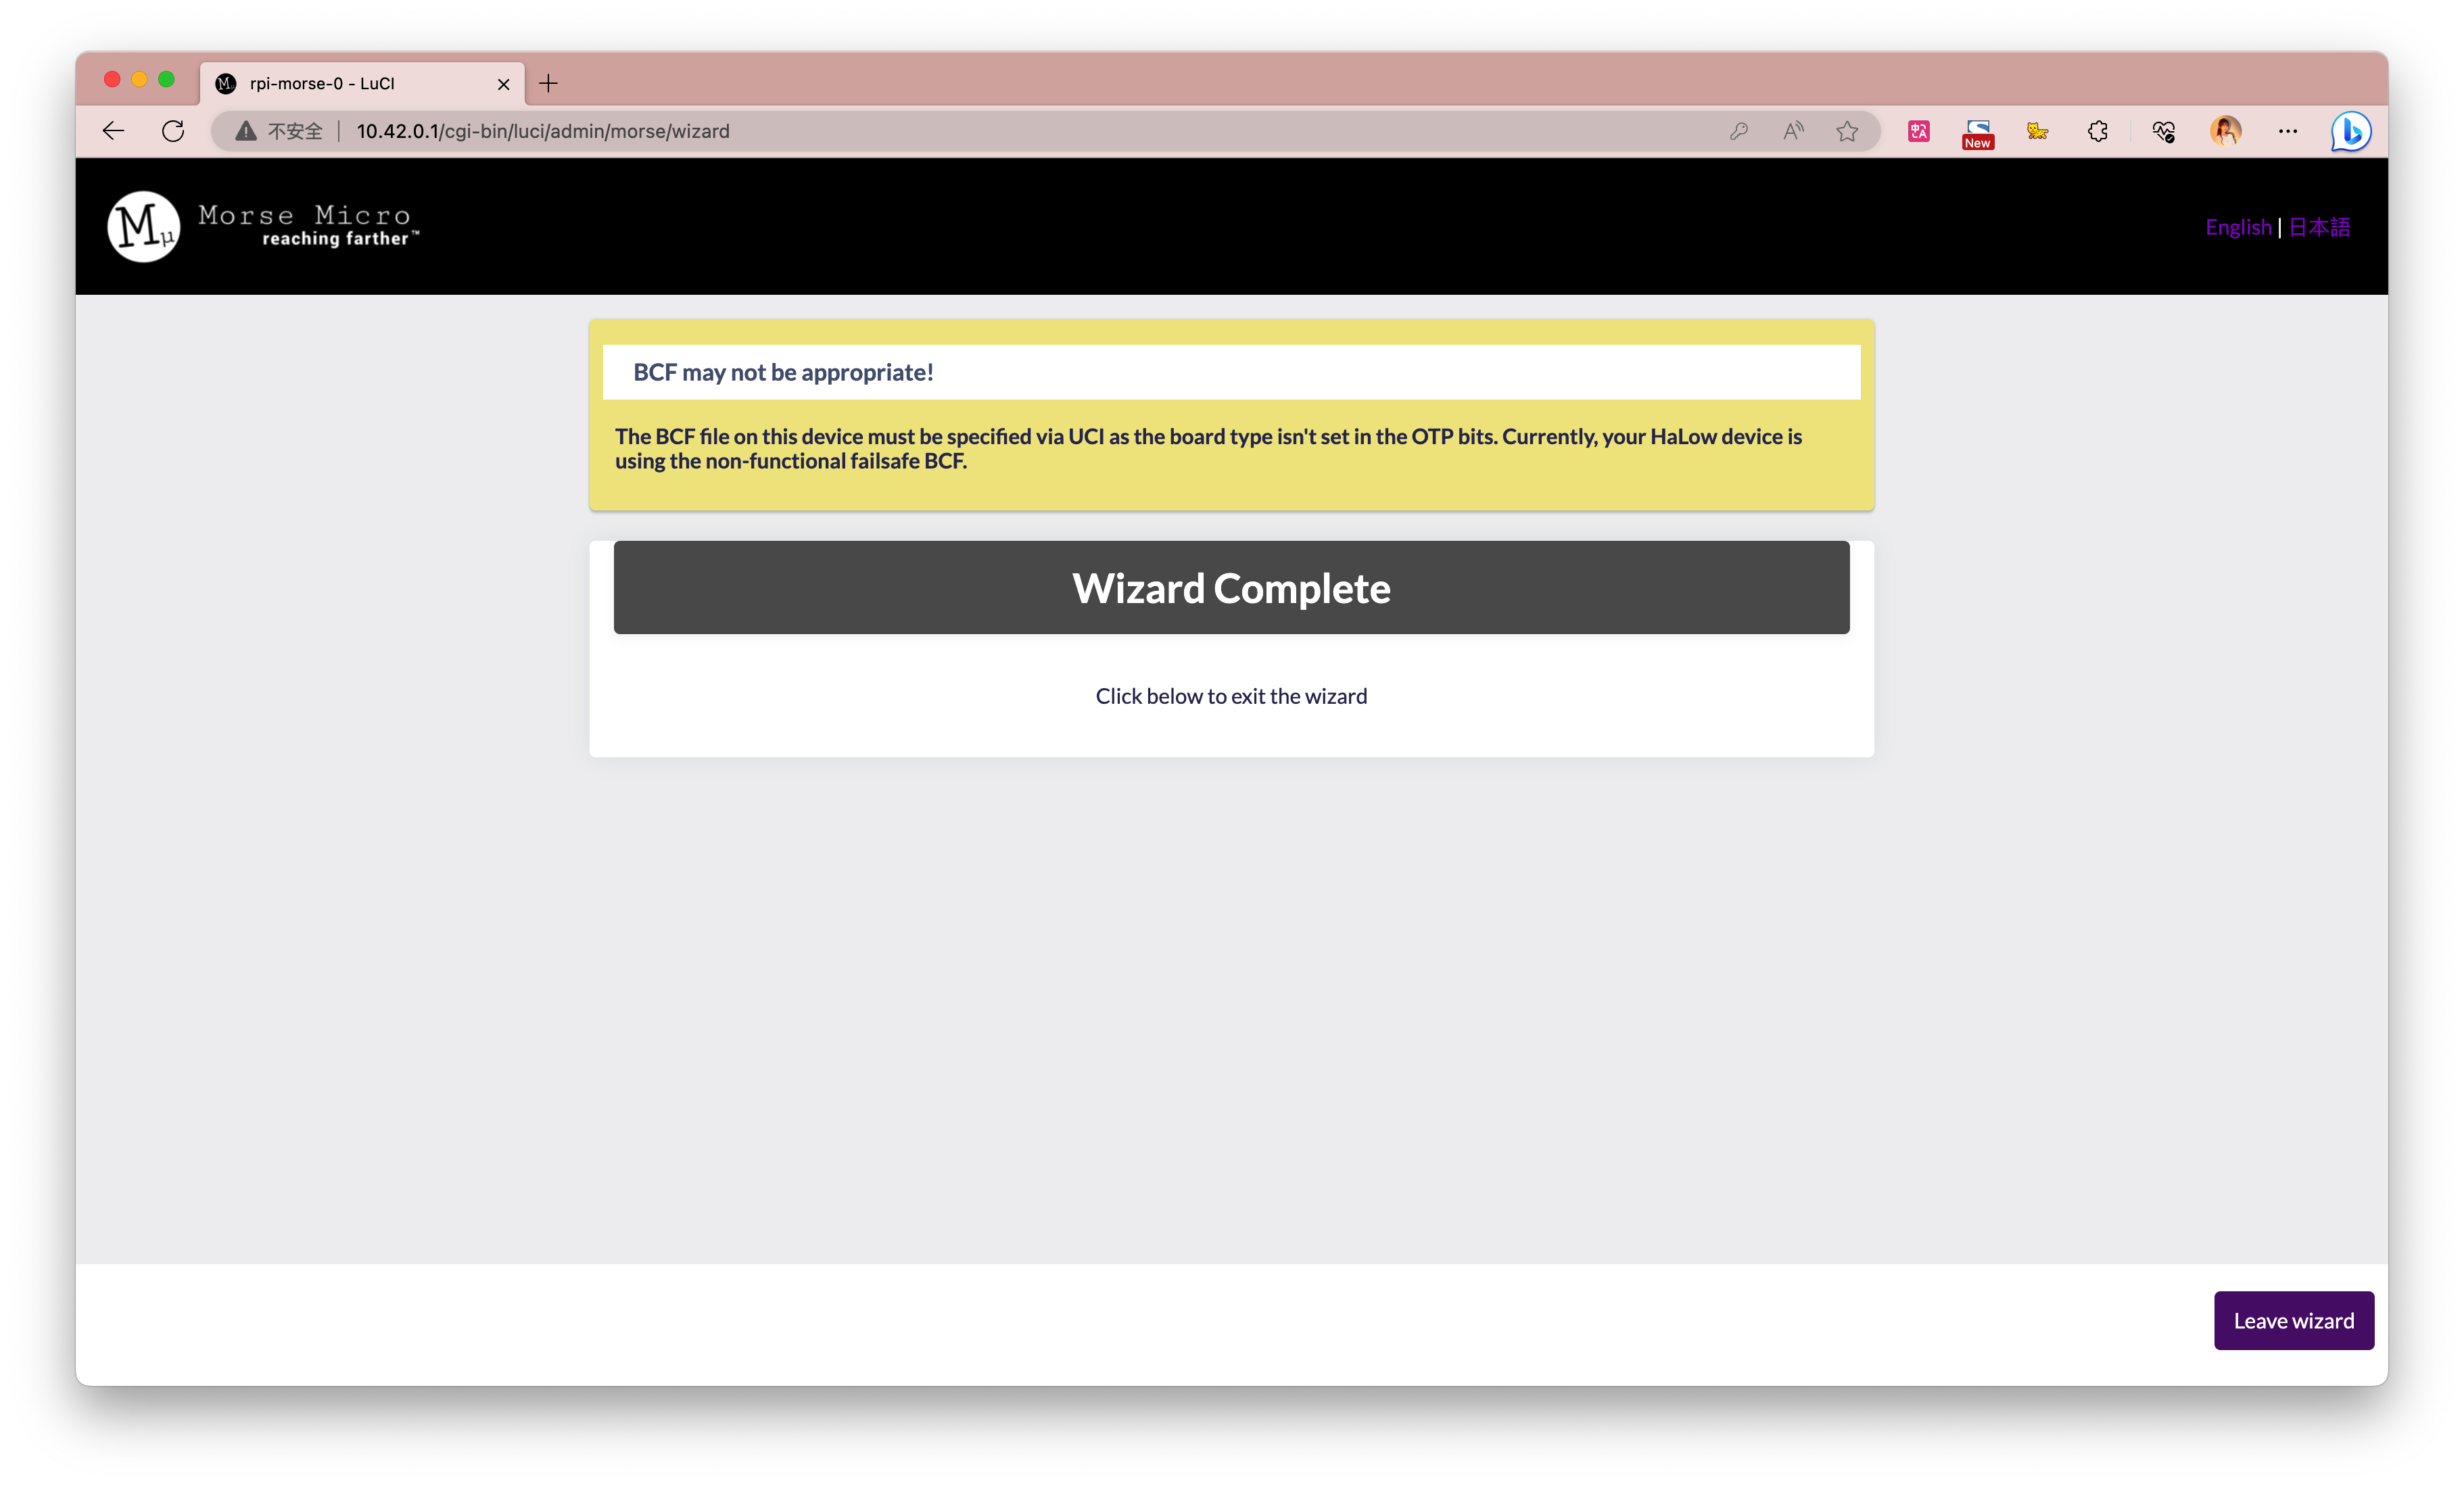
For my device, the IP address is: 192.168.1.168. Entering this address in the browser will allow you to access the Wi-Fi HaLow gateway's backend page.

Resources
- [PDF] UG MM6108 Eval Kit User Guide 2.6 - v18
- [PDF] Quectel_FGH100M-H_Short-Range_Module_Specification_V1.0.0
- [PDF] WiFi-Halow Mini PCIe Module SCH PDF
- [KiCAD] WiFi-Halow Mini PCIe Module KiCAD PCB File
Tech Support & Product Discussion
Thank you for choosing our products! We are here to provide you with different support to ensure that your experience with our products is as smooth as possible. We offer several communication channels to cater to different preferences and needs.