Deploy Grove Vision AI V2 To Notifies You Via Telegram
This project combines the XIAO ESP32S3 and Grove Vision AI V2 to create a compact person detection device. The V2 module, equipped with a person detection model, identifies human presence and sends the results to the ESP32S3. The microcontroller then processes the information and forwards the detection alerts to a designated Telegram account, providing real-time notifications whenever a person is detected in the monitored area.
Material Required
| XIAO ESP32S3 | Grove Vision AI V2 Kit |
|---|---|
 |  |
Part 1. Telegram API
If we want to send something to Telegram, we need to get Telegram's Token and ChatId to access Telegram's API. So let's get them in the following steps.
Step 1. Use BotFather create a new bot
Open your Telegram and get into BotFather page, send /start and BotFather will give you some feedback.

Click the /newbot link. BotFather will create a new bot for you and you should give your bot a name according the rule.

Step 2. Get your Token And ChatId
According to previous step, BotFather will give you some feedback when you created your bot. You will find Token in the feedback and the format would be like: 123456789:AoUJnnpoFlkkdfJbCXlo.... And then use your Token to access this link to get your ChatId.
#access this link using your Token
https://api.telegram.org/bot{Token}/getUpdates

#example
https://api.telegram.org/bot123456789:AoUJnnpoFlkkdfJbCXlo.../getUpdates
You will find your ChatId following the image below. The ChatId would be like: 12234556. Save your Token and ChatId, we will use them later.
If you see nothing in this page, please send something to your bot and refresh this page again.

Part 2. People Detection Model
Step 3. Choose model
First, we need to open the main SenseCraft AI Model Assistant page.
Choose the model you want to deploy and click into it.

You can see the description of this model here and if it suit to you, click the Deploy Model button at the right side.

Step 4. Connect the module and upload a suitable model
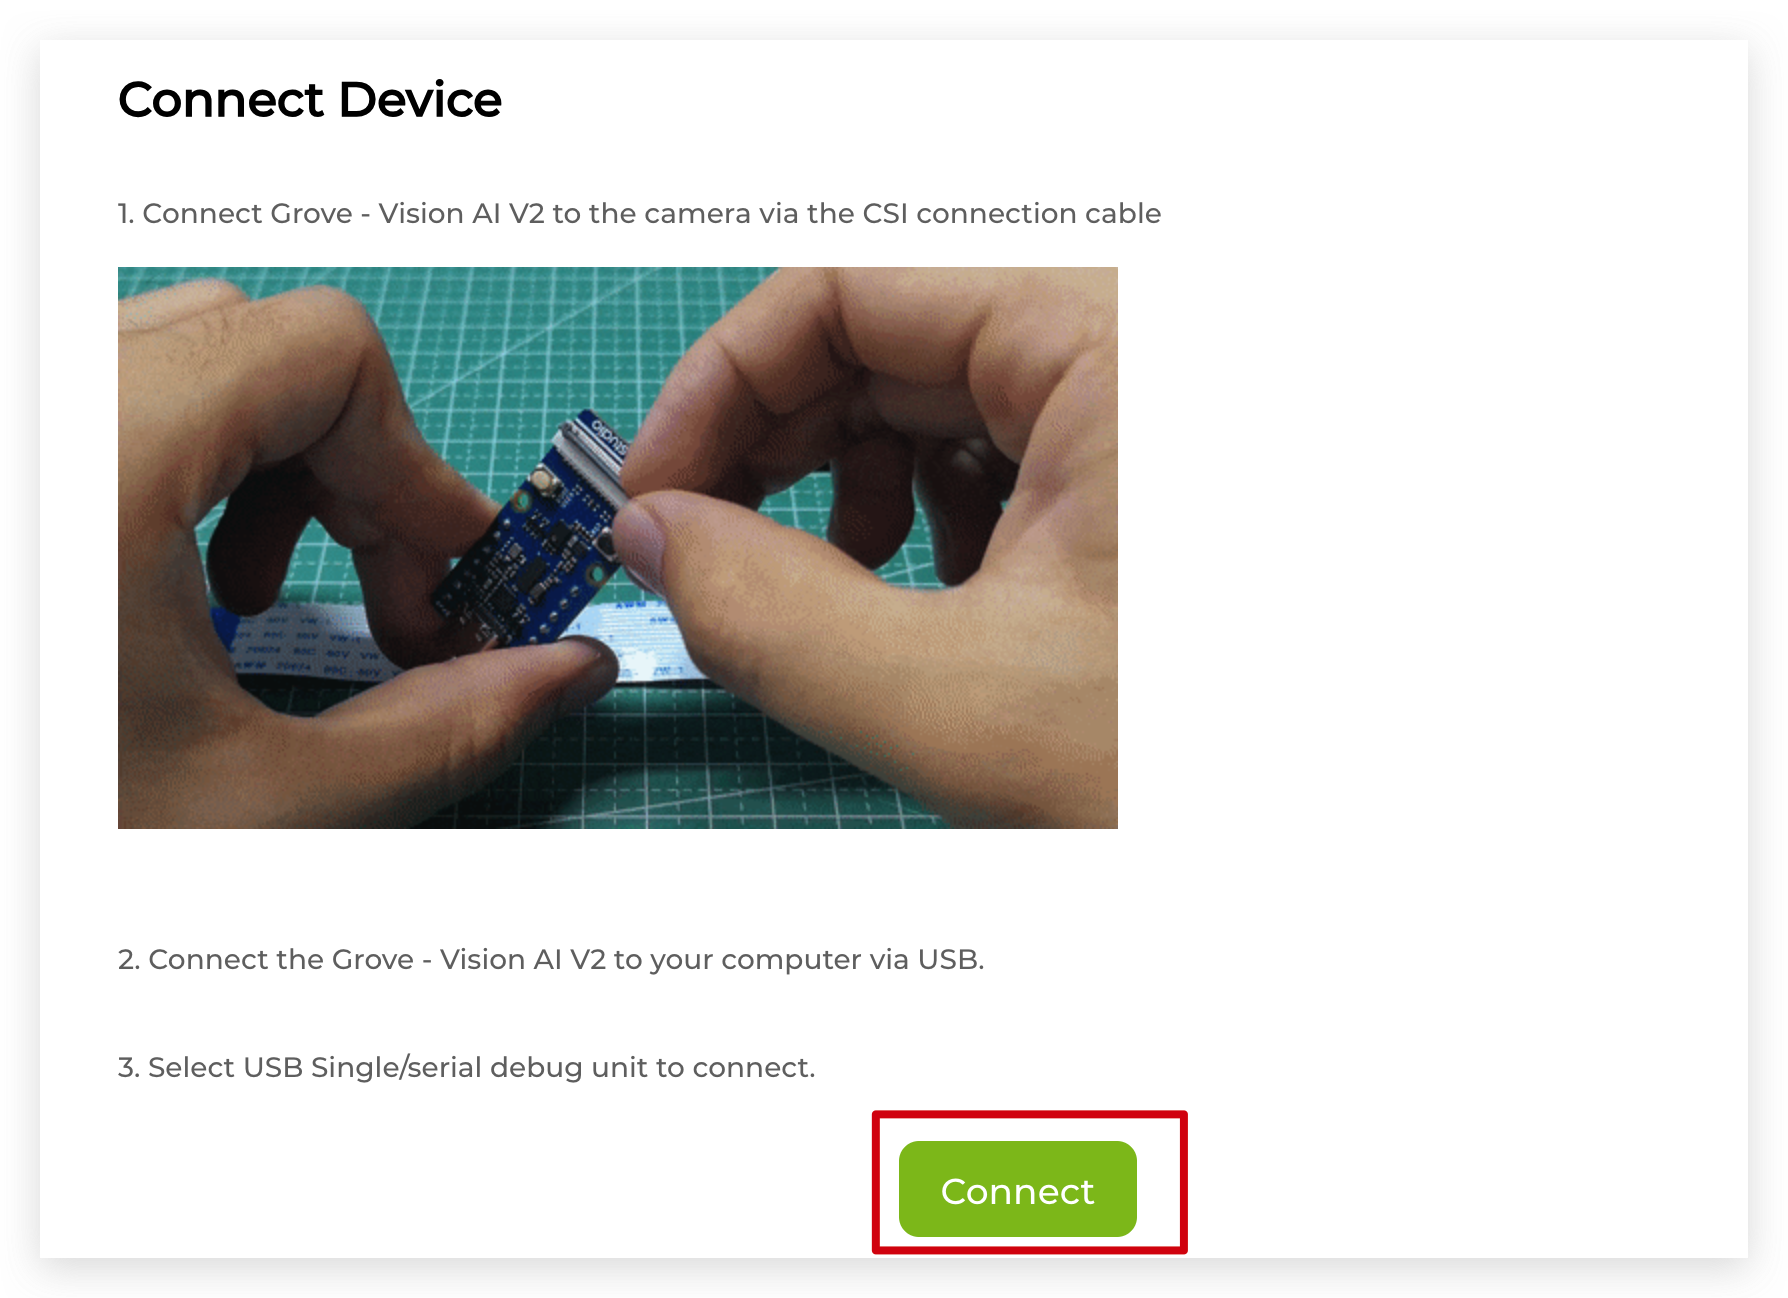
Please use a Type-C type cable to connect Grove Vision AI V2 to your computer and then click Connect button.
Click Confirm button. In the upper left corner of the this page, you can select USB Single Serial. Then click the Connect button.
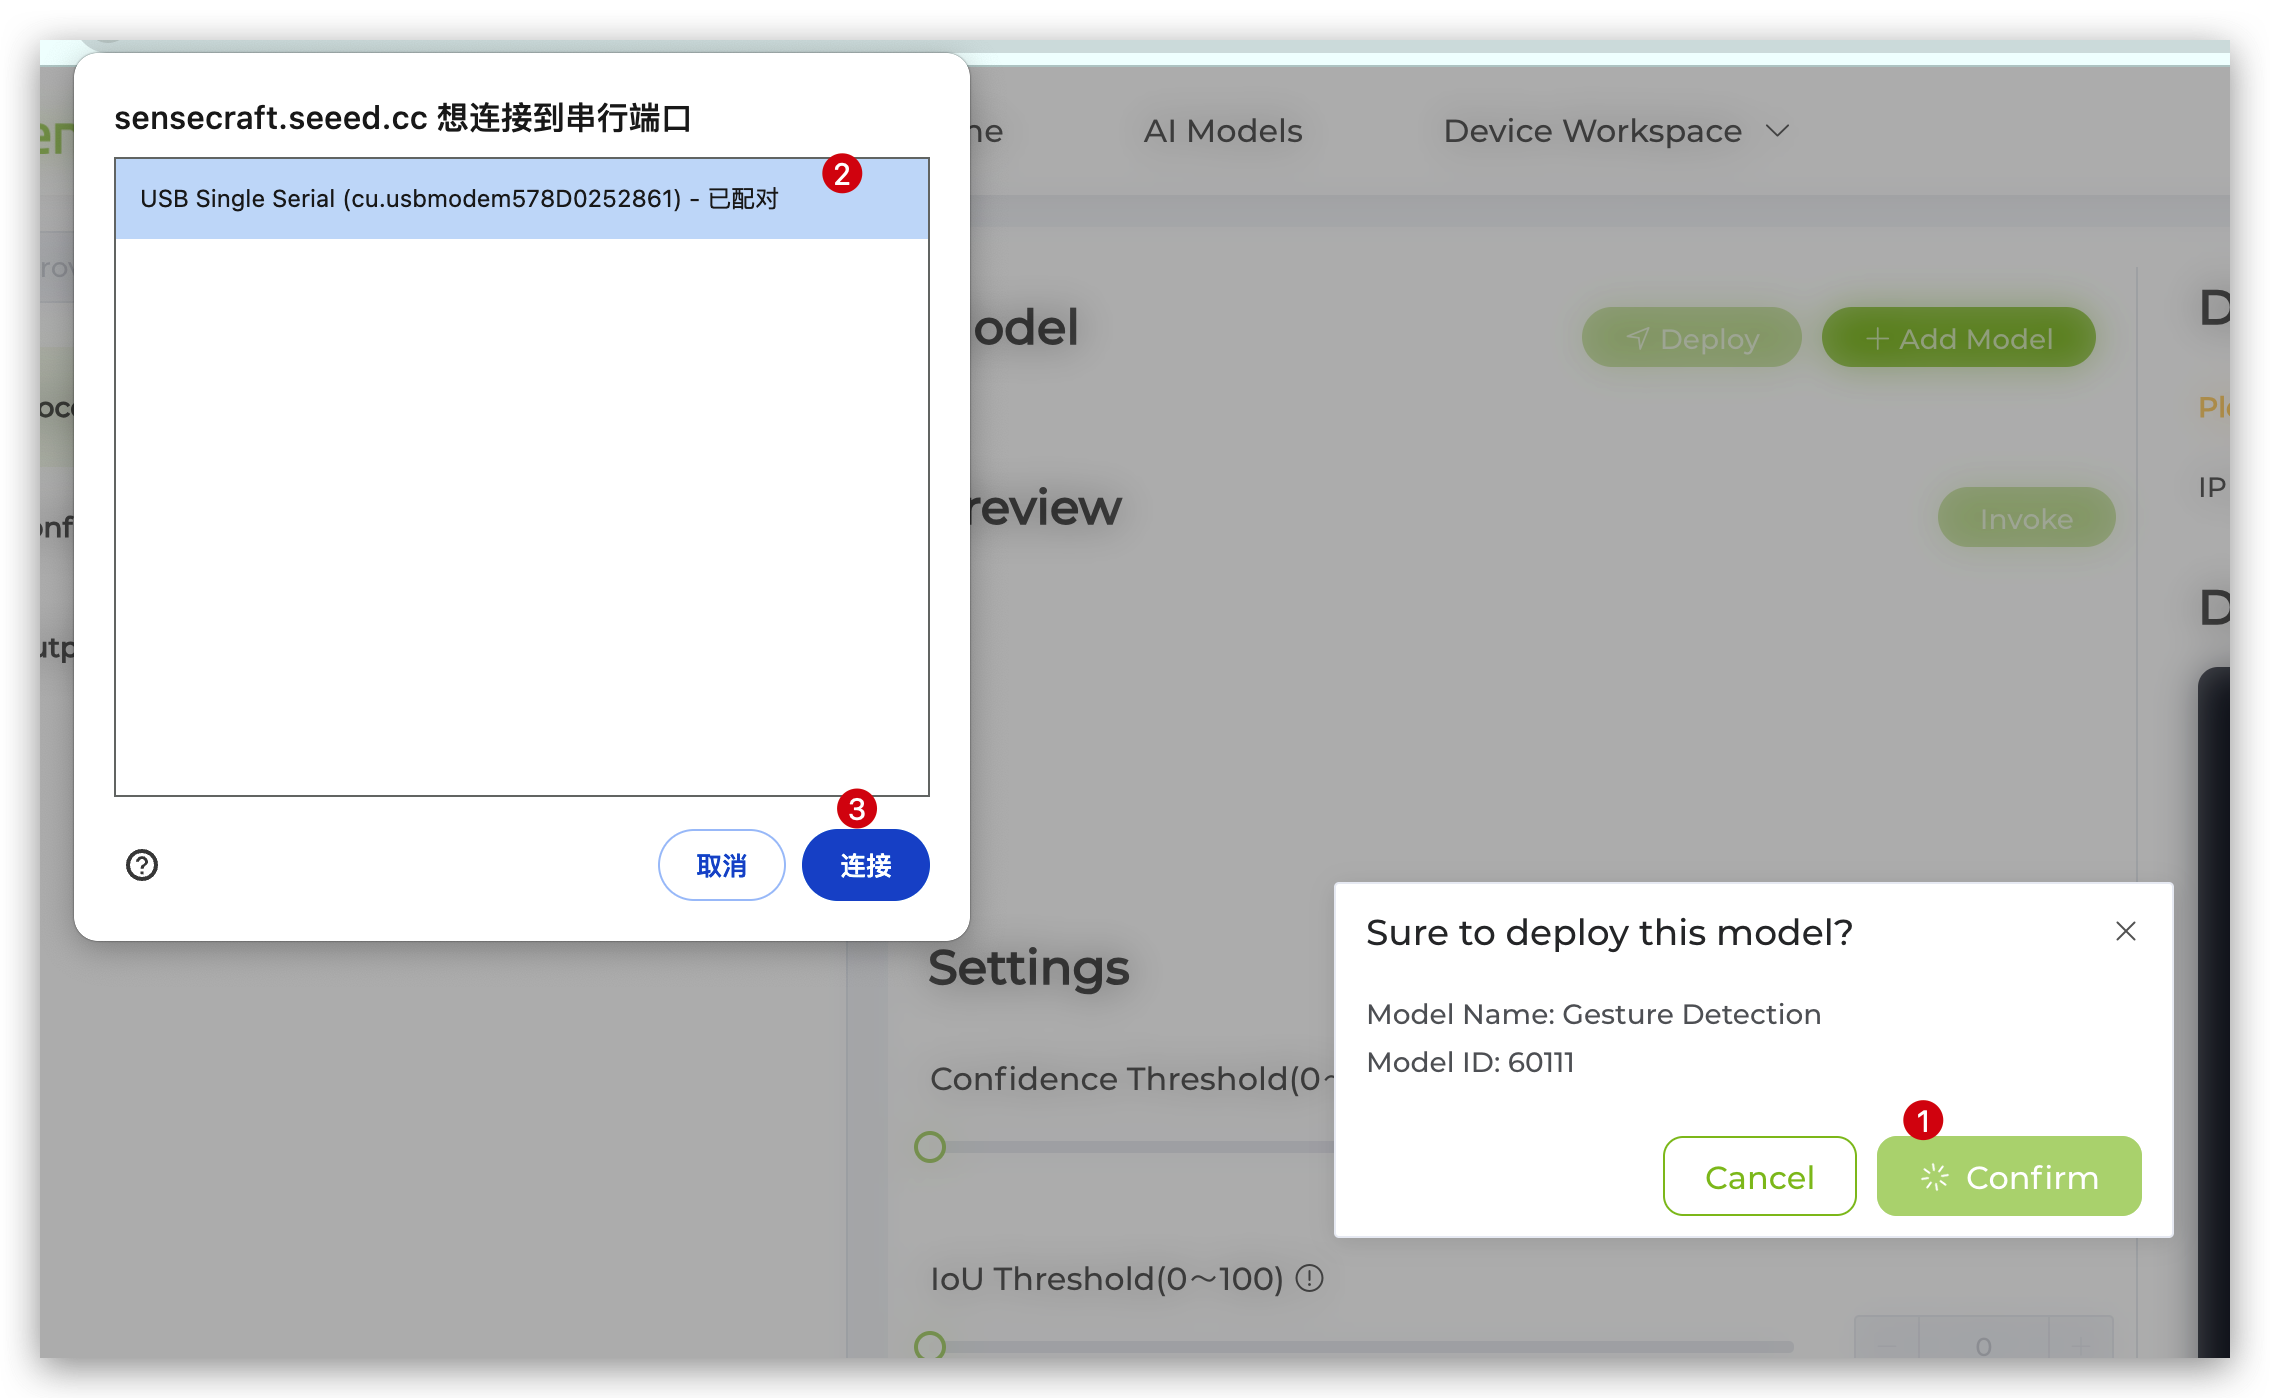
Please remain on this page for 1-2 minutes until the model is successfully uploaded. Kindly note that switching to another page tab during this process may result in an unsuccessful upload (our team is actively working on resolving this issue, and it will be fixed soon).
Step 5. Observations
Once the model is uploaded successfully, you will be able to see the live feed from the Grove Vision AI V2 camera in the Preview on the left.

Congratulations! So far so good, next we are going to write some code to send something to Telegram via XIAO ESP32 series.
Part 3. Send Notification to Telegram
Step 6. Installation
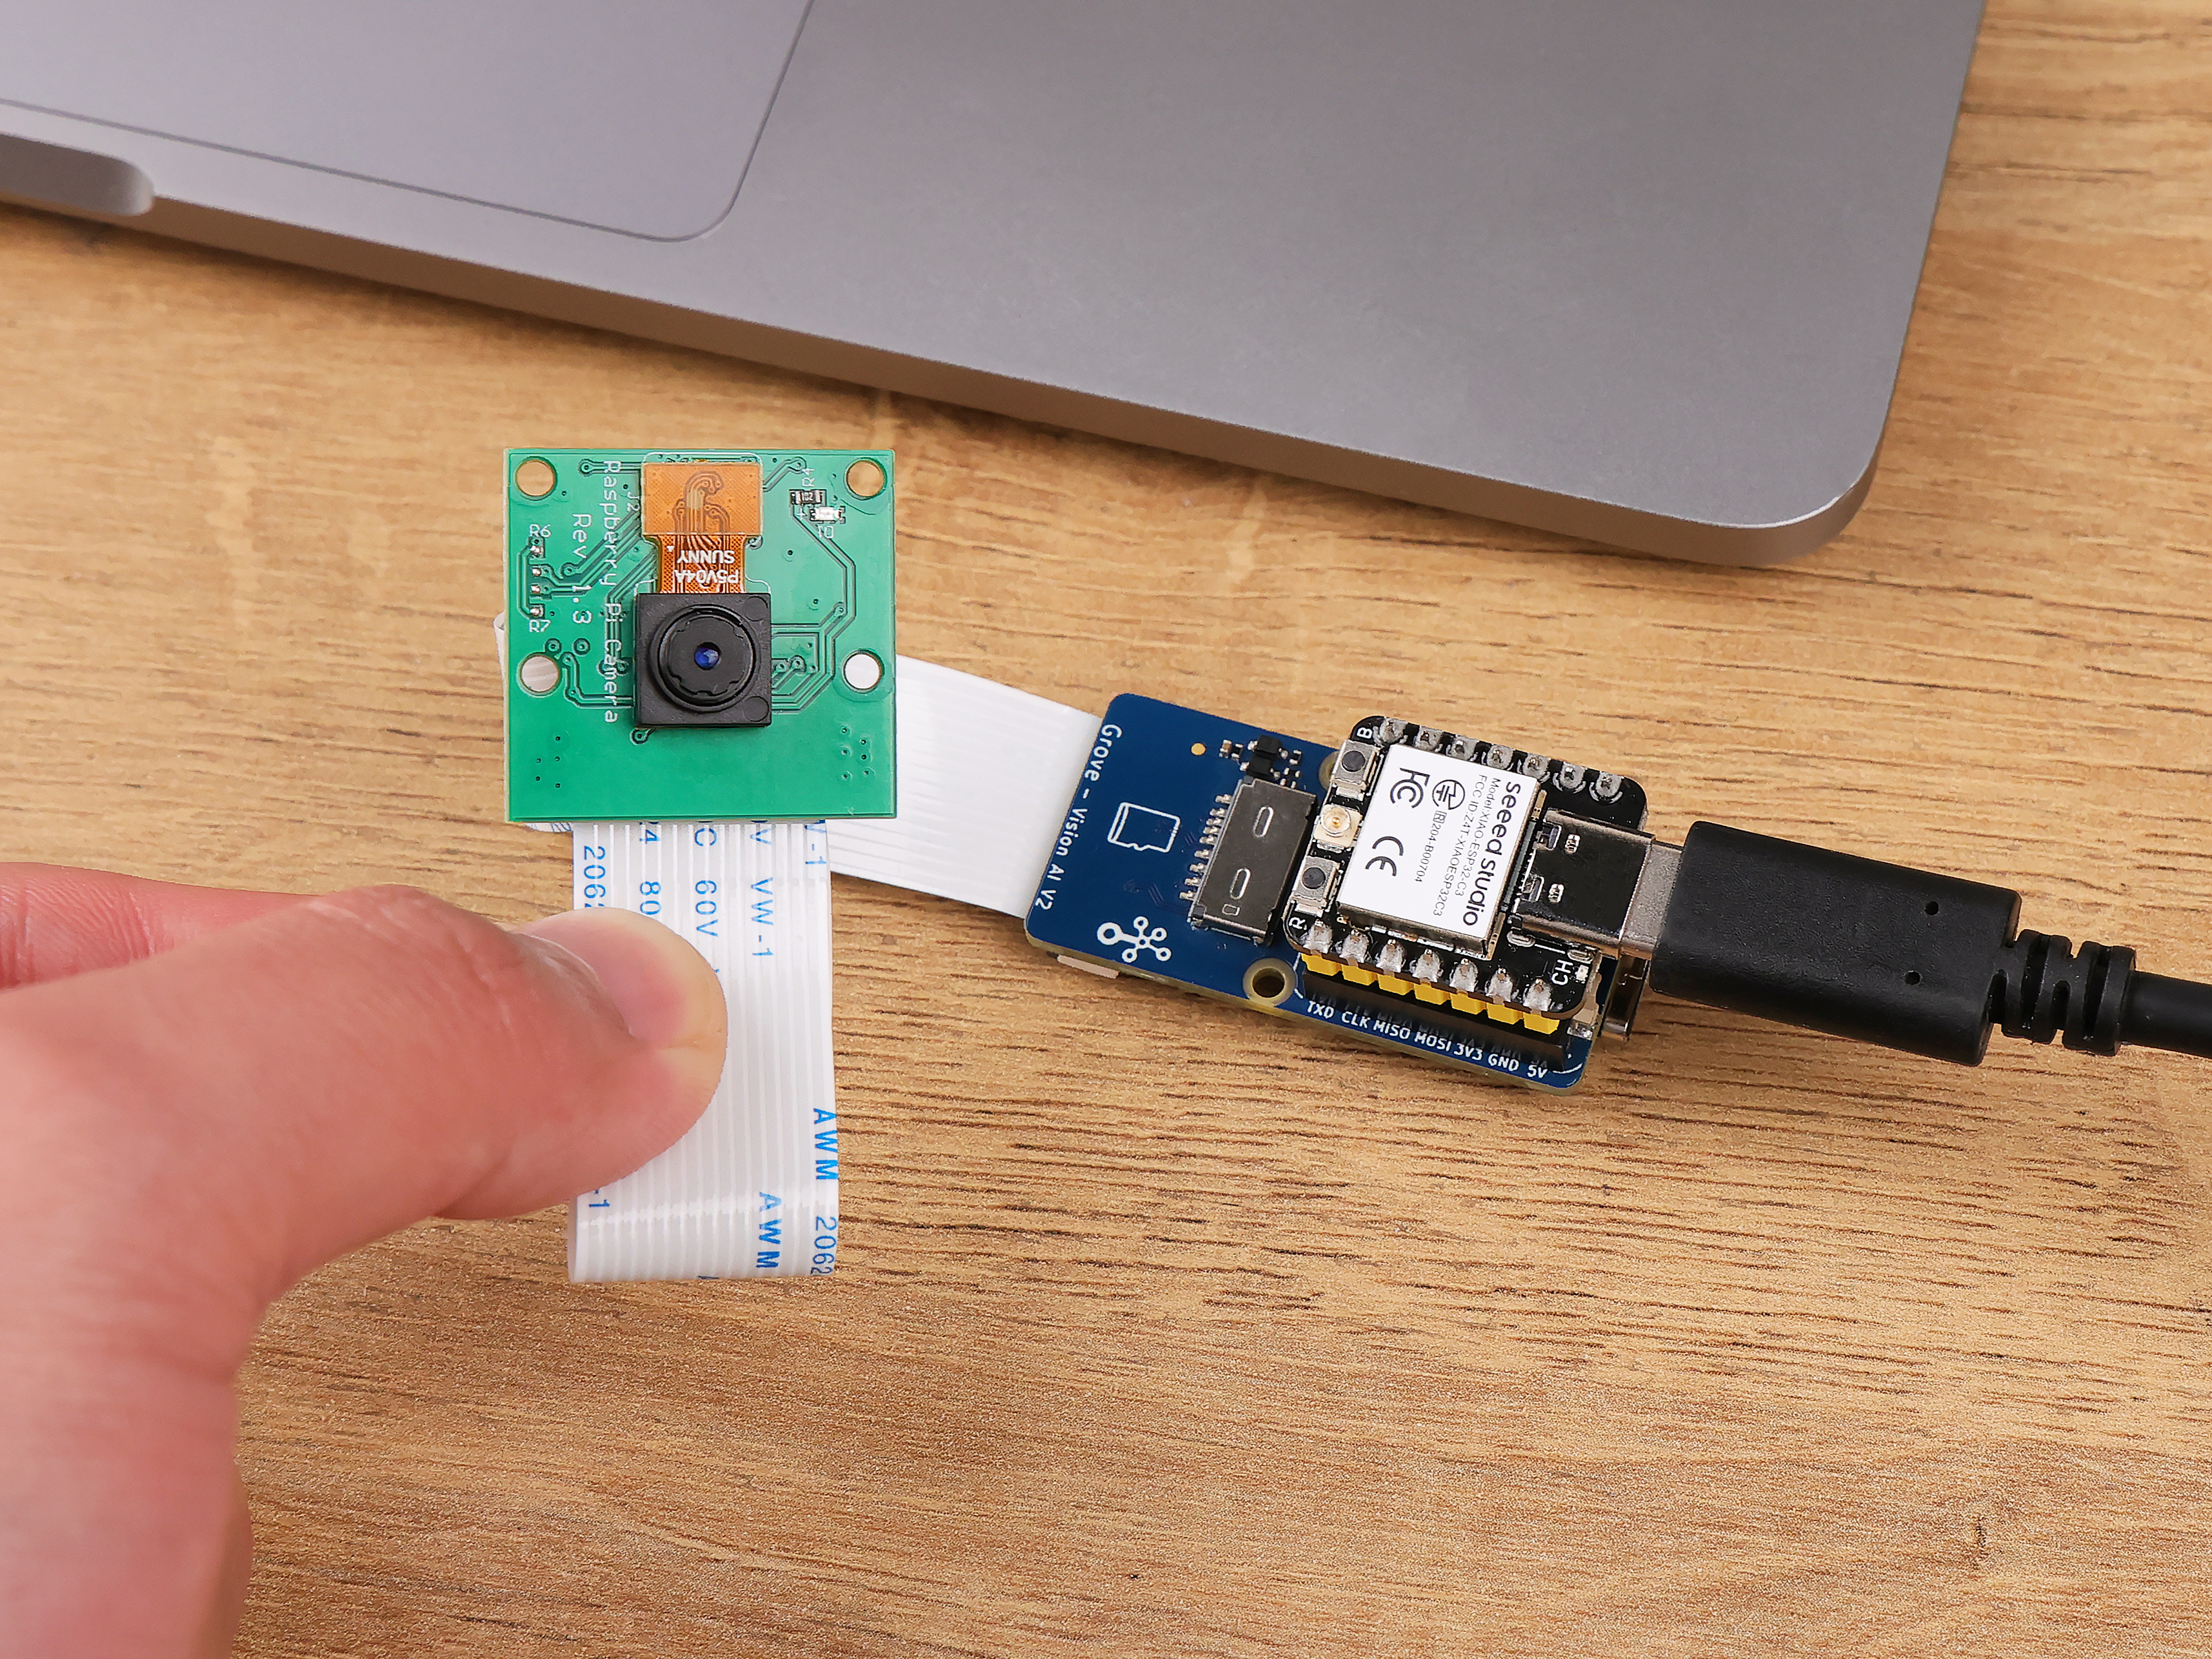
First, connect XIAO ESP32S3 to Grove Vision AI V2 via pin, and then connect antenna to XIAO ESP32S3. Finally, connect the XIAO ESP32S3 to your computer via Type-C cable.

Step 7. Coding
First we need to download SSCMA Library in this page.

And then we need to add this zip package to Arduino IDE.

Now, create a new sketch in Arduino IDE and past the following code to the sketch and upload.
Please change to your 2.4G Wi-Fi ssid, password and your Telegram Token, ChatId saved before.
#include <WiFi.h>
#include <HTTPClient.h>
#include <ArduinoJson.h>
#include <Seeed_Arduino_SSCMA.h>

//change to your ssid and password
const char* ssid = "xxx";
const char* password = "xxx";

//change to your token and chatid
const String botToken = "xxx";
const String chatId = "xxx";

SSCMA AI;

void setup()
{
    AI.begin();
    Serial.begin(9600);
    WiFi.begin(ssid, password);
    while (WiFi.status() != WL_CONNECTED) {
      delay(1000);
      Serial.println("Connecting to WiFi...");
    }
}

void loop()
{
    if (!AI.invoke()){
      for (int i = 0; i < AI.boxes().size(); i++){
          //Get the model inference
          if(AI.boxes()[i].score>70){
            Serial.println("People detected");
            //Call the function to send the monitering result to Telegram
            if(WiFi.status() == WL_CONNECTED) {
              sendMessage("People Detected");
              delay(1000);
            }
          }
      }
    }
}

//The function that access Telegram and send some message
void sendMessage(String text) {
  String url = "https://api.telegram.org/bot" + botToken + "/sendMessage";
  String payload = "{\"chat_id\":\"" + chatId + "\",\"text\":\"" + text + "\"}";

  HTTPClient http;
  http.begin(url);
  http.addHeader("Content-Type", "application/json");

  int statusCode = http.POST(payload);
  if (statusCode == 200) {
    Serial.println("Message sent successfully!");
  } else {
    Serial.println("Failed to send message.");
  }
  http.end();
}
After uploading code, open serial monitor and use Grove Vision AI V2 to detect people. You will see the following results when Vision AI V2 has detected people.

Now, open your bot chatting page in Telegram and you will see some messages sent from XIAO ESP32S3. Also you can use power bank to supply eletricity like the vedio.

Tech Support & Product Discussion
Thank you for choosing our products! We are here to provide you with different support to ensure that your experience with our products is as smooth as possible. We offer several communication channels to cater to different preferences and needs.