MR60FDA2 Fall detection Sensor with Home Assistant
The RADAR firmware updates and the ESPHome YAML updates are 2 different pieces of software. The ESPHome YAML can be updated OTA, while the RADAR board can ONLY be updated via USB inside the case, with specialized software that SEEED provides. You can customize the ESPHome software, you can NOT customize the RADAR firmware. Seeed Studio only allows RADAR customization if your doing a business application.
Introduction
The MR60FDA2 is a 60GHz mmWave Fall Detection Sensor module designed for integration with the XIAO ESP32C6 microcontroller. This advanced sensor utilizes millimeter-wave technology to provide non-invasive monitoring of vital signs and presence detection.
This guide aims to provide a clear and comprehensive walkthrough for integrating the MR60FDA2 mmWave Sensor with Home Assistant using the XIAO ESP32C6 microcontroller. This Home Assistant integration empowers users to enhance their smart home systems with advanced sensing capabilities, enabling automated responses and real-time monitoring for various applications(e.g., fall detection for elderly care, security applications).
Product Overview
| MR60FDA2 mmWave Sensor |
|---|
 |
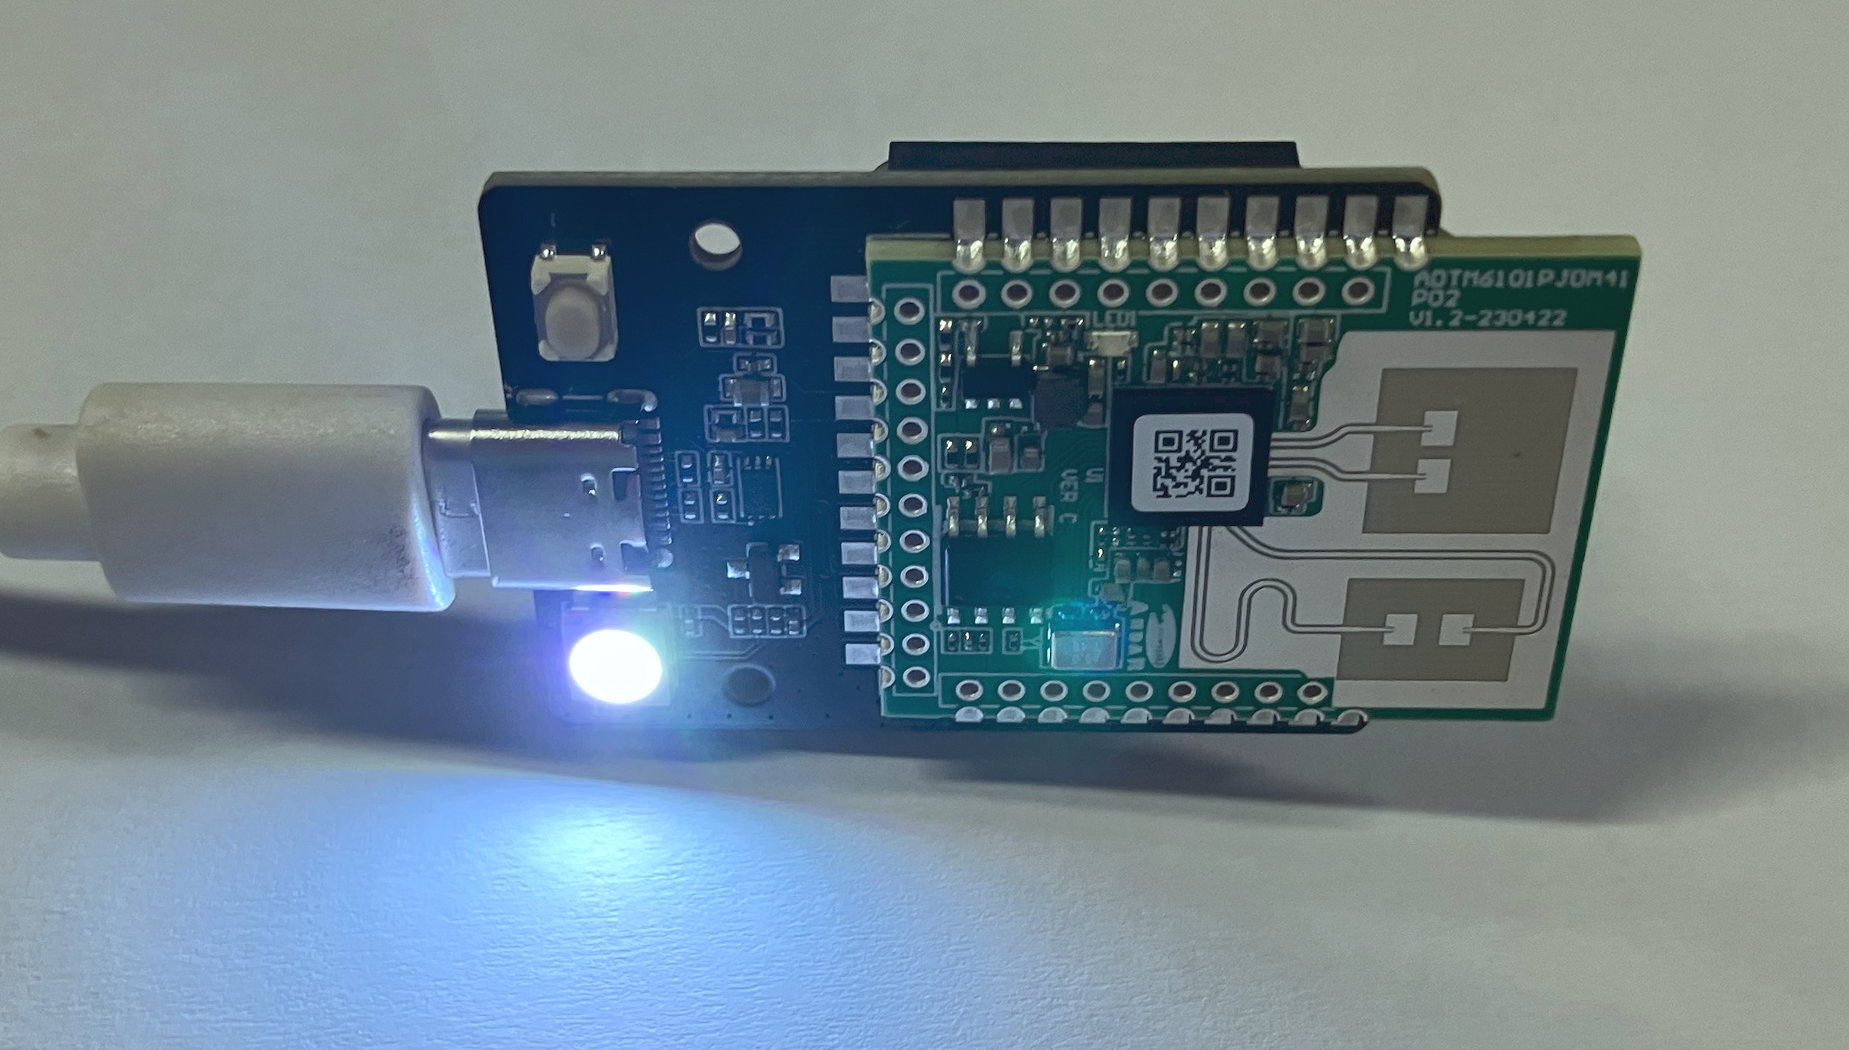
MR60FDA2 mmWave Sensor with XIAO ESP32C6
To effectively integrate the MR60FDA2 mmWave Sensor with Home Assistant using the XIAO ESP32C6, follow these essential steps:
- Set Up Home Assistant: Begin by installing and configuring Home Assistant to manage your smart home devices, ensuring a seamless connection with the sensor.
- Connect the MR60FDA2 Sensor: Learn how to discover and add the MR60FDA2 Sensor to your Home Assistant setup, enabling real-time monitoring of vital signs.
- Monitor Sensor Data: Once integrated, you can effectively monitor sensor data to check whether or not a fall has occurred.
- Implement Automation: Explore the powerful automation features of Home Assistant to create responsive actions based on the sensor data, enhancing your smart home environment.
- Modify Firmware with ESPHome: Utilize ESPHome to customize the sensor's functionality, tailoring it to meet your specific needs for greater flexibility and control.
These steps will guide you in utilizing your MR60FDA2 mmWave Sensor and XIAO ESP32C6 integration.
Getting Started
Please note that when we refer to firmware updates or modifications, we are specifically addressing the firmware on the XIAO ESP32C6.
To successfully integrate the MR60FDA2 mmWave Sensor with Home Assistant, you will need the following components:
- Home Assistant: A smart home platform that will manage the sensor data.
- ESPHome Add-on: Firmware that enables easy configuration and management of ESP32 devices.
Step 1: Setting Up Home Assistant
- Installation: For optimal performance, it's recommended to install Home Assistant OS on a Virtual Machine or Raspberry Pi. Follow the official installation guide on the Home Assistant website.
- Enabling ESPHome Add-on:
- Access the Home Assistant dashboard.
- Navigate to the "Add-ons" section and search for the ESPHome add-on.
- Click "Install" and then "Start" to enable it.
- Once installed, configure the add-on to ensure proper communication with the XIAO ESP32C6.

By gathering the necessary components and setting up Home Assistant with the ESPHome add-on, you'll be ready to proceed with the integration of the MR60FDA2 mmWave Sensor.
We have also written how to install Home Assistant for some of Seeed Studio products, please refer to them.
Step 2: Preparing the Kit
By default, your device (XIAO ESP32C6) comes pre-flashed with firmware for breathing and heart rate detection. However, there are two scenarios where you may need to update the firmware:
- Re-flashing the Firmware: If the existing firmware is corrupted or you need to start fresh.
- Upgrading the Firmware: If there is a newer version of the firmware with improved functionality.
There are two simple methods for flashing the firmware:
- Web Tool
- ESPHome Web
You can use this Web Tool for an easy and direct method to flash your firmware. Simply follow the on-screen instructions.
- Click the
CONNECTbutton to initiate the connection. The tool will automatically update the firmware.
If something goes wrong, follow the on-screen troubleshooting steps or switch to the ESPHome Web method to complete the process.
For this method, you'll need to download the bin firmware file from here(you'll need to unzip the downloaded file).
- Connect the sensor kit to your PC.
- Visit the ESPHome Web page.
- Select the firmware file with the
*.factory.binsuffix.
Watch the following video for a detailed walkthrough of flashing the firmware via ESPHome Web:
With either method, you'll have your firmware updated and ready for integration with Home Assistant.
Connect to the kit's hotspot
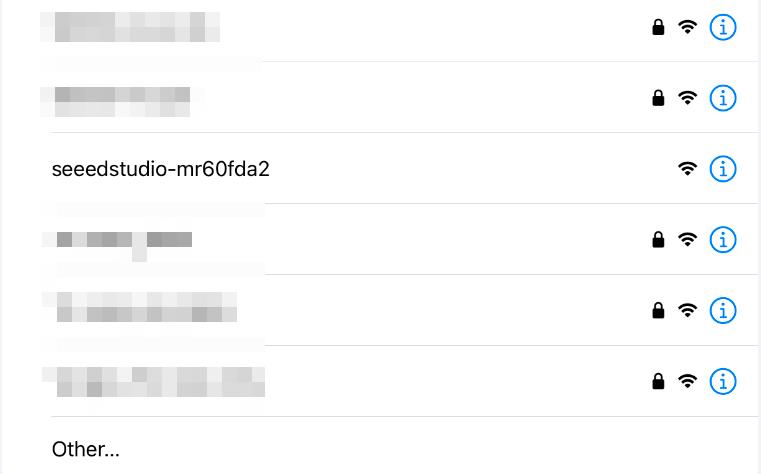
With the firmware, you could power on the sensor kit, and a Wi-Fi access point will appear: seeedstudio-mr60fda2.
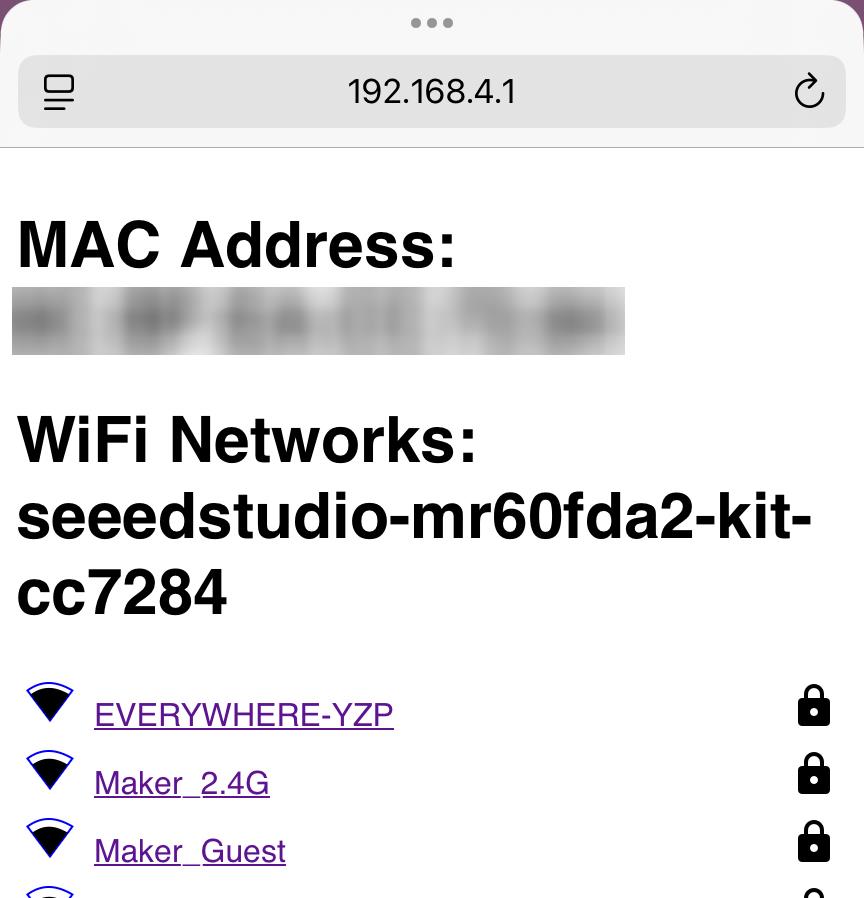
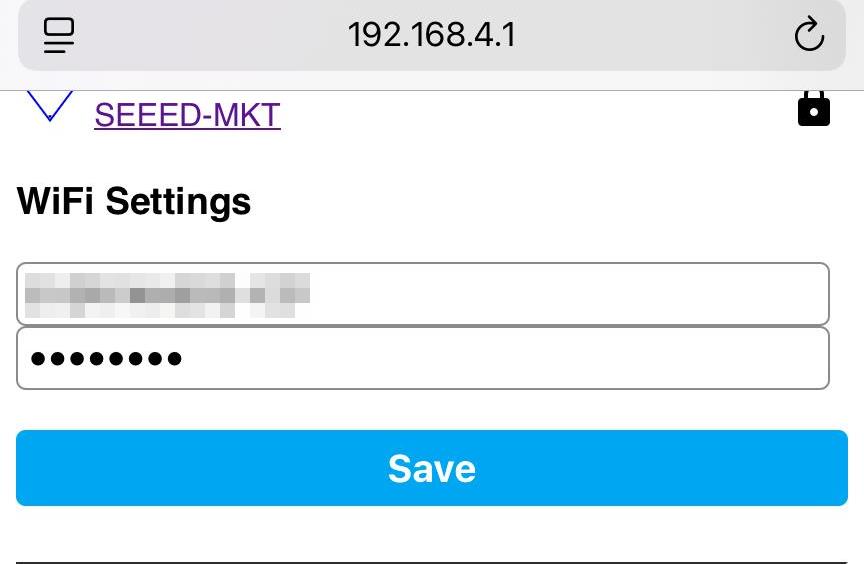
Navigate to 192.168.4.1 to configure your Home Assistant server's local network settings.
Step 3: Discovering and Adding the Device in Home Assistant
In this section, we'll go through the process using the Home Assistant app, where the logic is the same as on the web.
- Open the App: Once you launch the app, select your Home Assistant server. The app will automatically find your server.
- Create an Account: If you haven't created an account, you'll need to do so. After that, log in with your credentials.
- Navigate to the Integration Page: Once logged in, go to the "Integrations" page in Home Assistant. If you have installed the ESPHome add-on and both the XIAO ESP32C6 and your Home Assistant server are on the same network, you should see the device
Seeed Studio MR60FDA2 Kit {device-mac-address}appear under discovered devices. - Add the Device: Click to add the device to your Home Assistant setup.
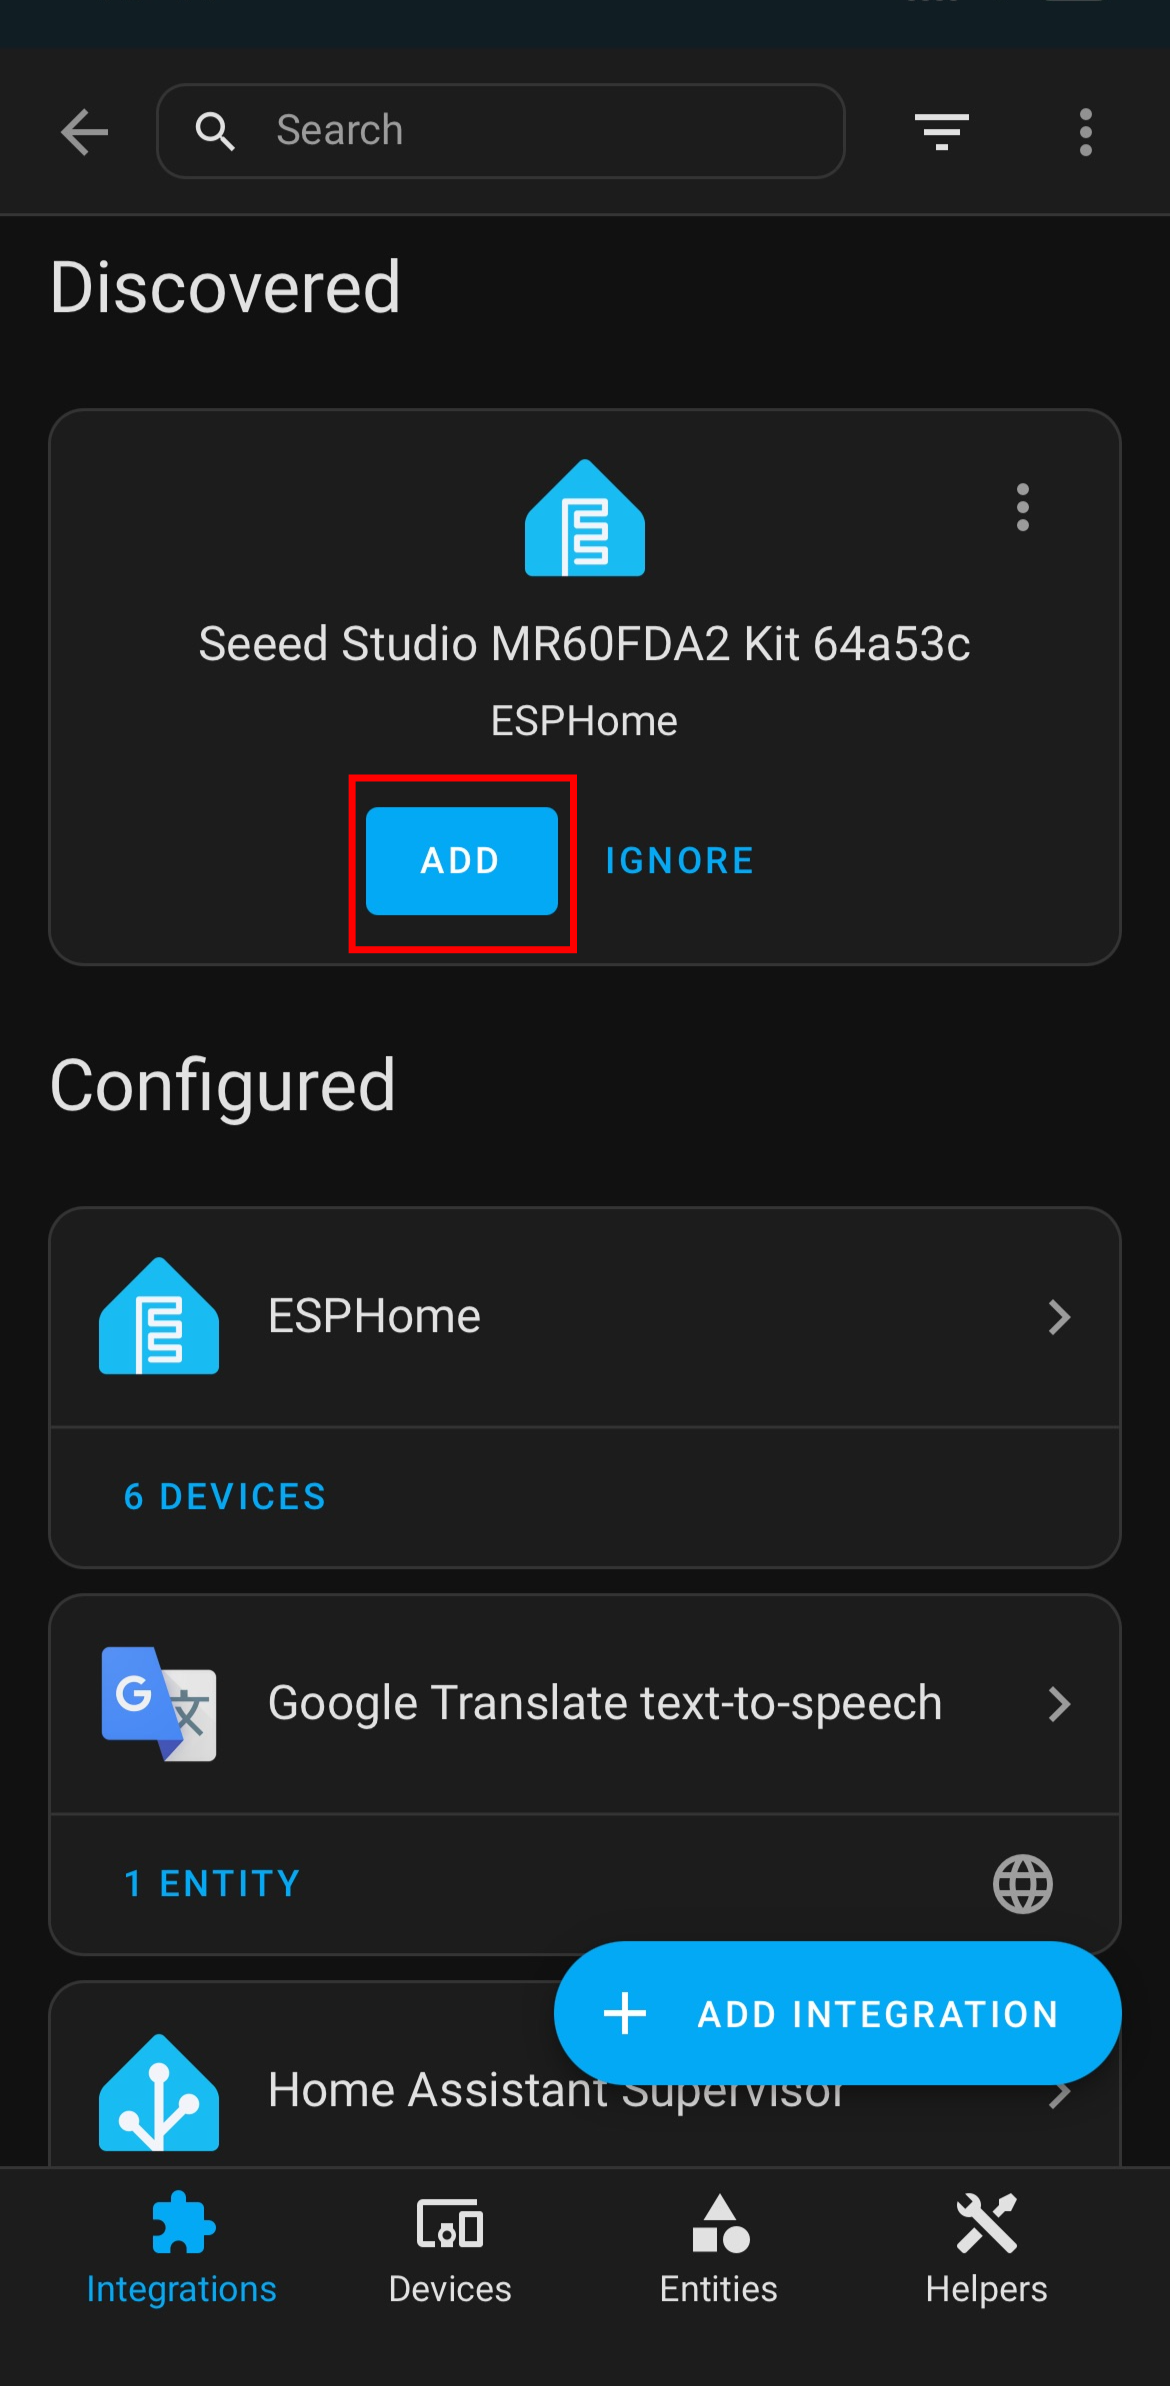
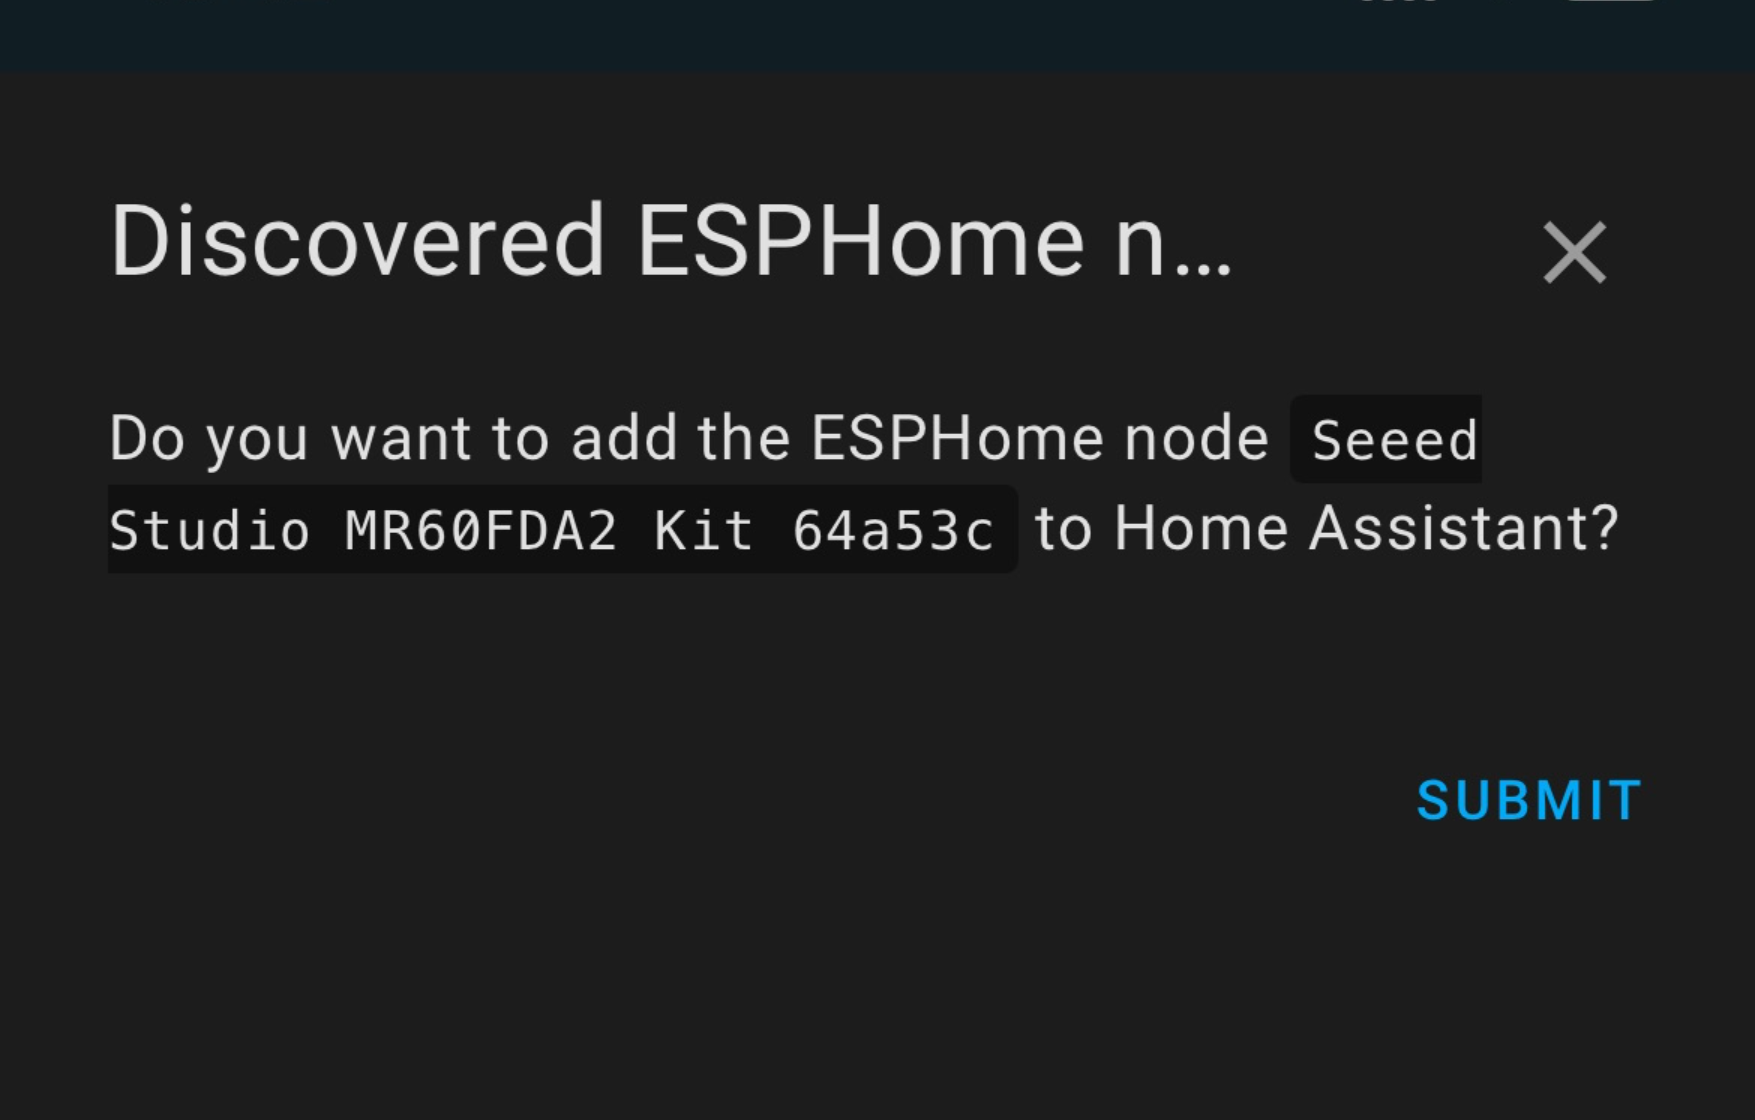
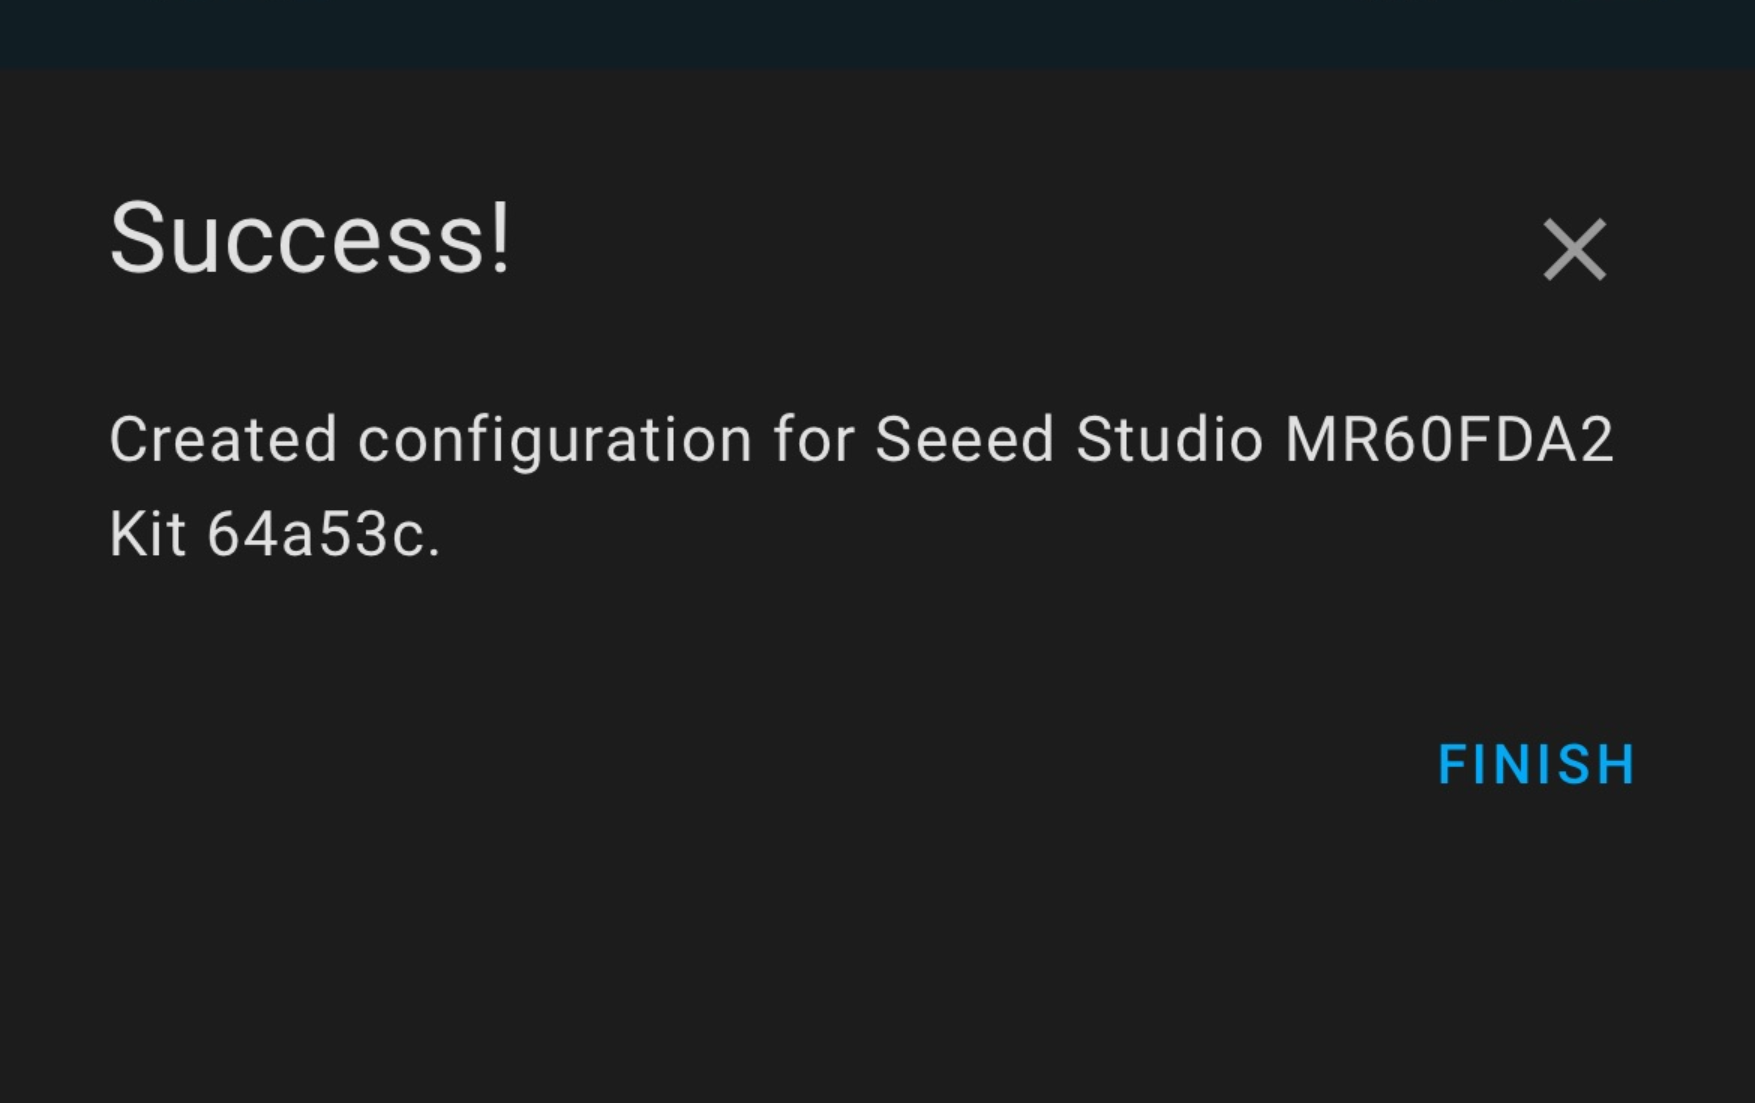
Click the CONFIGURE button, confirm by pressing the SUBMIT button, and assign the device to your preferred area (e.g., Bathroom). After this, the device will be managed through your ESPHome integration, enabling full control and monitoring in Home Assistant.
If the prompt does not require you to assign an area during the setup process, you can manually assign it later by navigating to the "Integrations" section in Home Assistant, selecting your device, and configuring the area from there.
Monitoring and Control
Upon completing the steps, you will have successfully integrated and added the MR60FDA2 Sensor to Home Assistant, enabling monitoring.
Sensor data Monitoring
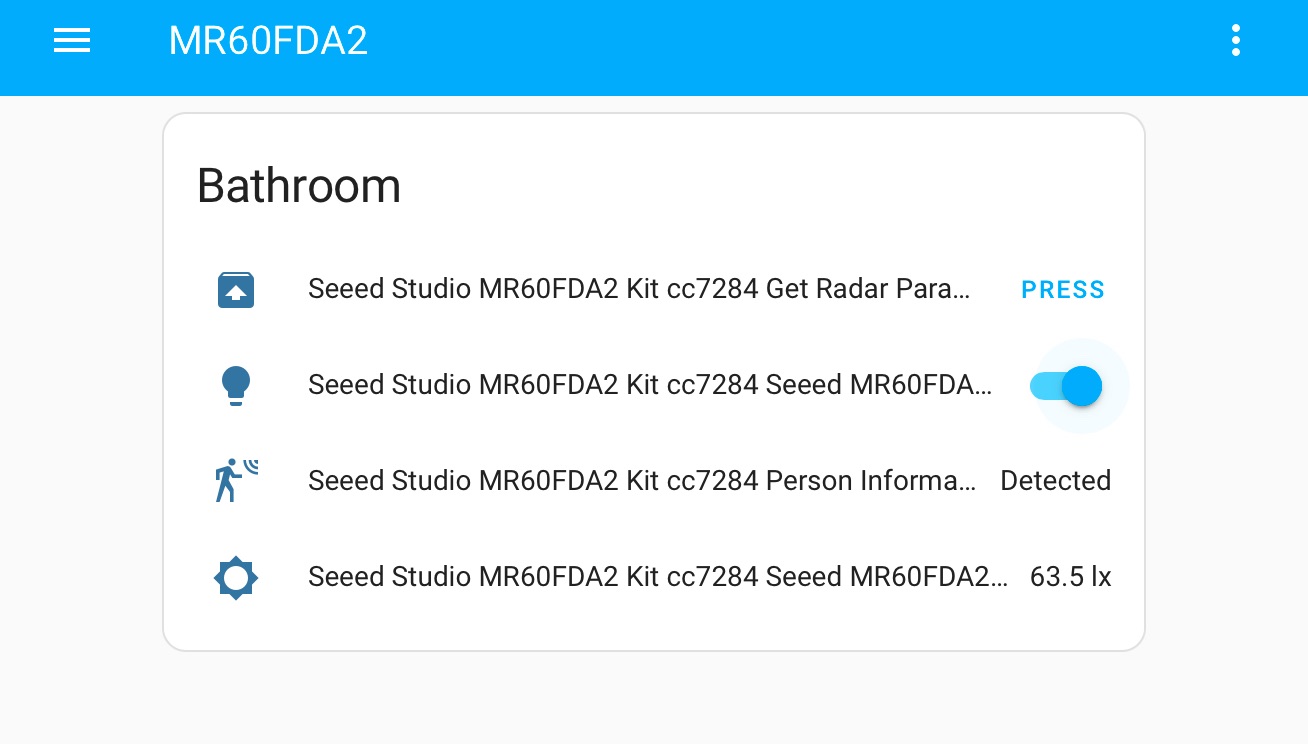
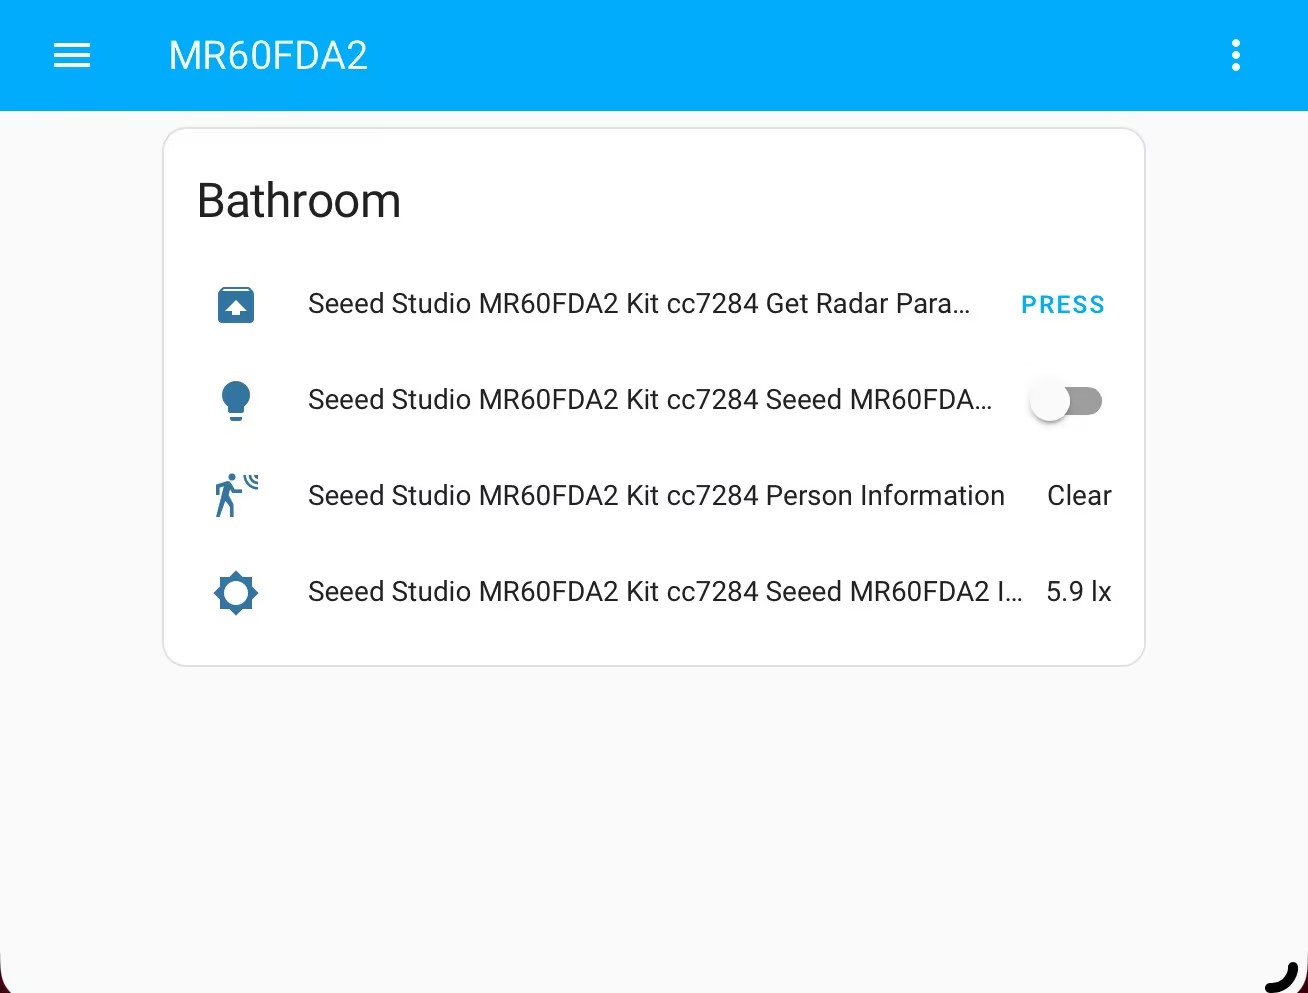
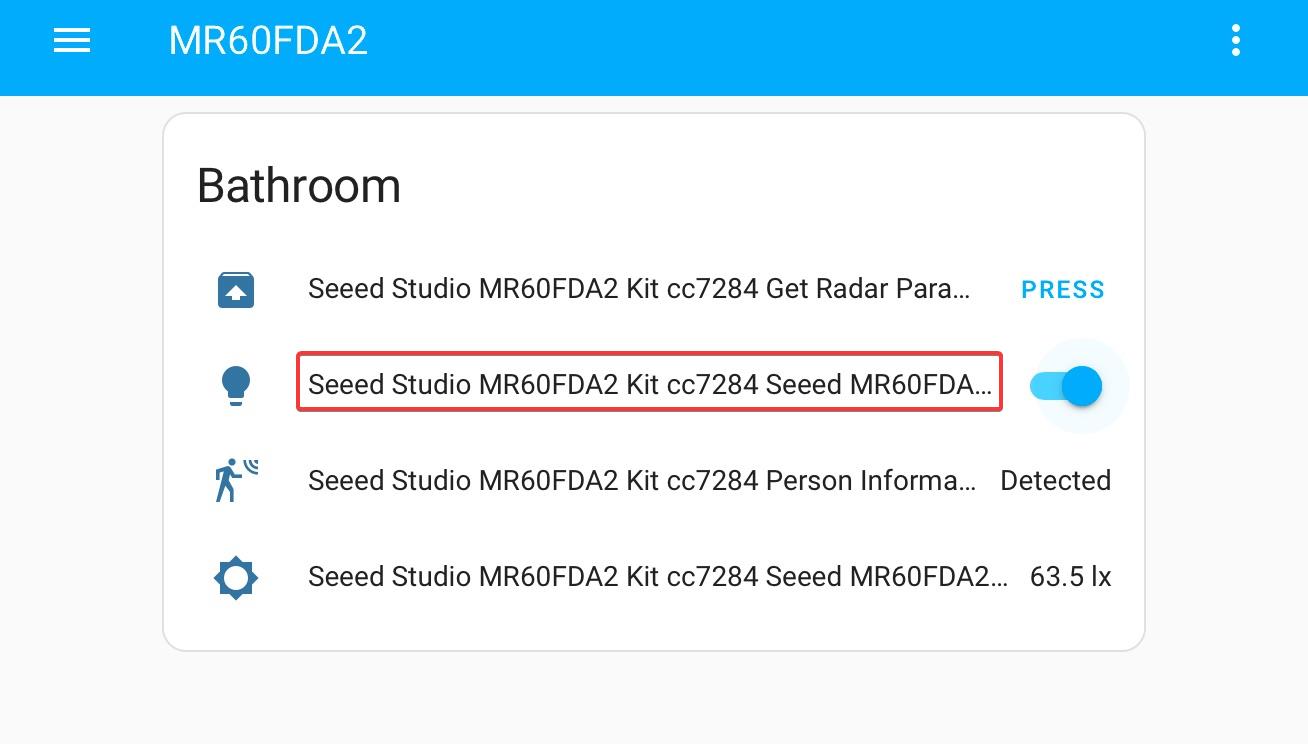
In this setction, the sensor is added to the "Bathroom", navigate to the "Overview" tab. You will see the mmWave card displayed in the Bathroom section.
RGB light Controlling
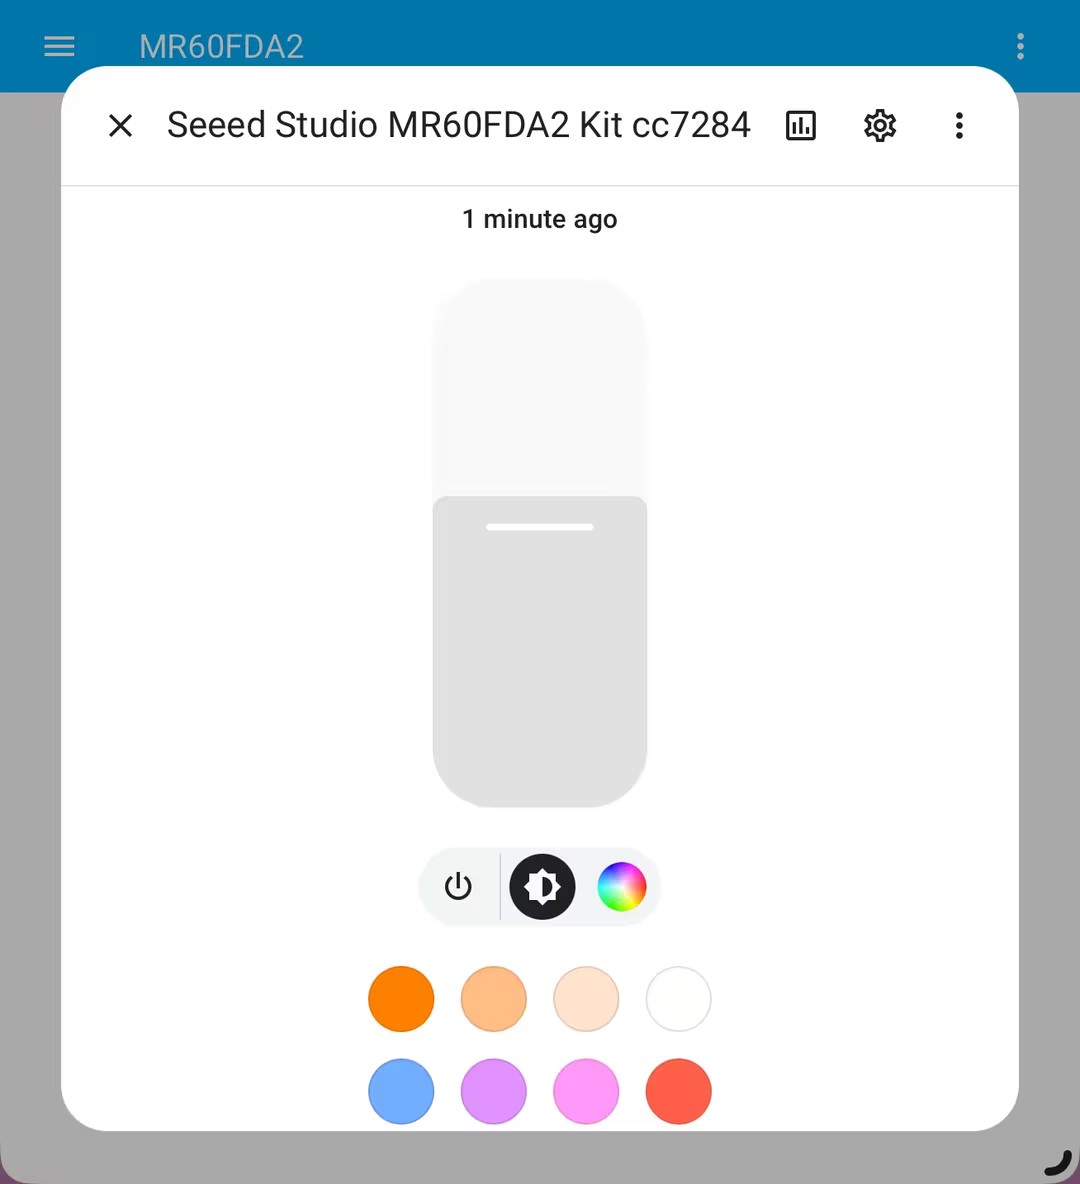
In this section, we will explore how to control an RGB light.

Click on the corresponding box to directly control the RGB light:
Next Steps
Now that you have successfully integrated the MR60FDA2 mmWave Sensor with the XIAO ESP32C6 and Home Assistant, you can explore further enhancements to make the most out of your setup. Here are two essential avenues to consider:
Implementing Automation in Home Assistant
Home Assistant's powerful automation features allow you to create a more responsive smart home environment based on the data collected from your MR60FDA2 Sensor. This means you can set up actions that occur automatically based on specific triggers related to motion or heartbeat detection.
Here's how to implement automations step-by-step:
- Navigate to the Automations Section: In your Home Assistant dashboard, find and click on the "Automations" tab. This area is dedicated to creating and managing automated actions within your home.
- Create a New Automation: Click on the "Add Automation" button. Home Assistant offers a user-friendly wizard that guides you through the process of setting up an automation.
- Define the Trigger: Choose a trigger based on the MR60FDA2 Sensor's data. For example, you can set the automation to trigger when someone falled. This means your automation can respond immediately to the sensor's readings.
- Set Conditions (Optional): Conditions allow you to refine when the automation should execute. For instance, you might want the lights to turn on only when it's dark outside or if a specific user is home.
- Determine the Action: Specify what action should occur when the trigger conditions are met. Actions can include turning on lights, sending notifications, or even adjusting thermostat settings. For example, you could create an action that turns on an RGB light when motion is detected, enhancing both security and comfort.
- Save and Test: After configuring your automation, save it and test its functionality. Walk past the sensor to see if the lights turn on as expected. If any issues arise, you can return to the automation settings to troubleshoot and adjust.
By leveraging Home Assistant's automation capabilities, you can create a truly smart environment that responds to your movements and health metrics, ensuring that your living space adapts to your lifestyle seamlessly.
Modifying the Firmware with ESPHome
One of the significant advantages of using the XIAO ESP32C6 is its compatibility with ESPHome, a powerful tool for managing and customizing your microcontroller firmware. With ESPHome, you can directly modify the firmware to tailor the functionality of the MR60FDA2 mmWave Sensor to your specific needs.
To get started with ESPHome, follow these steps:
-
Access the ESPHome Dashboard: In Home Assistant, navigate to the ESPHome add-on. You should see your XIAO ESP32C6 listed among the devices.
-
Create a New Configuration: Click on the device to open its configuration. Here, you can adjust settings such as the sensor's sensitivity, reporting intervals, and output formats. ESPHome uses a YAML configuration format, which is user-friendly and allows you to define various parameters. You can use the following template YAML file as a starting point for your configuration, which is designed specifically for the MR60FDA2 Sensor:
# template from https://github.com/limengdu/MR60FDA2_ESPHome_external_components/blob/main/example/mr60fda2.yaml

substitutions:
  name: "seeedstudio-mr60fda2-kit"
  friendly_name: "Seeed Studio MR60FDA2 Kit"

esphome:
  name: "${name}"
  friendly_name: "${friendly_name}"
  name_add_mac_suffix: true
  project:
    name: "seeedstudio.mr60fda2_kit"
    version: "1.0"
  platformio_options:
    board_upload.maximum_size: 4194304
  min_version: "2024.3.2" # Fix logger compile error on ESP32-C6 esphome#6323

esp32:
  board: esp32-c6-devkitc-1
  variant: esp32c6
  flash_size: 4MB # upload.flash_size
  framework:
    type: esp-idf
    platform_version: 6.5.0 # Need at least 6.4 for ESP32-C6

    # Tasmota's release of 5.1.3 works, first-party release does not LOL
    version: 5.1.3
    source: https://github.com/tasmota/esp-idf/releases/download/v5.1.3.240325/esp-idf-v5.1.3.zip

    # Fix flash size by ensuring IDF flash size is also set (was defaulting to 2MB?!?)
    # See https://github.com/esphome/issues/issues/5404
    sdkconfig_options:
      CONFIG_ESPTOOLPY_FLASHSIZE_4MB: y

external_components:
  - source:
      type: git
      url: https://github.com/ssieb/esphome
      ref: adc
    components: [ adc ]
    refresh: 1min
  - source:
      type: git
      url: https://github.com/limengdu/MR60FDA2_ESPHome_external_components
      ref: main
    components: [ seeed_mr60fda2 ]
    refresh: 0s

# Enable logging
logger:
  hardware_uart: USB_SERIAL_JTAG
  level: DEBUG

# Enable Home Assistant API
api:

ota:
  - platform: esphome

wifi:
  # Enable fallback hotspot (captive portal) in case wifi connection fails
  ap:
    ssid: "seeedstudio-mr60fda2"

captive_portal:

# For XIAO ESP32C6 Onboard LED
# light:
#   - platform: status_led
#     name: "Switch state"
#     pin: GPIO15

light:
  - platform: esp32_rmt_led_strip
    id: led_ring
    name: "Seeed MR60FDA2 RGB Light"
    pin: GPIO1
    num_leds: 1
    rmt_channel: 0
    rgb_order: GRB
    chipset: ws2812

i2c:
  sda: GPIO22
  scl: GPIO23
  scan: true
  id: bus_a

sensor:
  - platform: bh1750
    name: "Seeed MR60FDA2 Illuminance"
    address: 0x23
    update_interval: 1s

uart:
  id: seeed_mr60fda2_uart
  baud_rate: 115200
  rx_pin: 17
  tx_pin: 16
  parity: NONE
  stop_bits: 1

seeed_mr60fda2:
  id: my_seeed_mr60fda2
  uart_id: seeed_mr60fda2_uart

binary_sensor:
  - platform: seeed_mr60fda2
    people_exist:
      name: "Person Information"
    fall_detected:
      name: "Falling Information"

button:
  - platform: seeed_mr60fda2
    get_radar_parameters:
      name: "Get Radar Parameters"
    factory_reset:
      name: "Reset"

select:
  - platform: seeed_mr60fda2
    install_height:
      name: "Set Install Height"
    height_threshold:
      name: "Set Height Threshold"
    sensitivity:
name: "Set Sensitivity" -
Customize Functionality: You can enhance the sensor's capabilities by exploring various features available in ESPHome, allowing for flexible adjustments to suit your specific needs.
-
Upload the Updated Firmware: After making your modifications, save the configuration. The ESPHome dashboard allows you to upload the firmware directly over the air. Simply click the
Uploadbutton, and follow the prompts to complete the process. This streamlined method makes it easy to keep your firmware up to date. -
Test and Iterate: Once the upload is complete, test your changes in real-time. Monitor the sensor's performance to ensure it operates as expected. If you encounter any issues, revisit the ESPHome dashboard to refine your settings. This iterative approach enables you to continually improve your firmware, ensuring it meets your requirements effectively.
By utilizing ESPHome, you empower yourself to make ongoing improvements to your sensor setup, adapting it to suit your evolving needs. This capability not only enhances your project's functionality but also provides a platform for learning and experimentation with IoT development.
Through these steps, you can maximize the functionality of your MR60FDA2 mmWave Sensor and XIAO ESP32C6 setup, transforming it into a highly customized and responsive smart home system tailored to your preferences and needs.
Resources
Tech Support & Product Discussion
Thank you for choosing our products! We are here to provide you with different support to ensure that your experience with our products is as smooth as possible. We offer several communication channels to cater to different preferences and needs.