Getting Started with HaLowLink 2
From unboxing to a working long-range HaLow link in four stages: connect the hardware, log in to the web UI, choose a network mode, and pair two units. Specifications and features: Introduction.
Web UI screenshots in this guide were captured on HaLowLink software 2.11.8; menu names and card layouts can differ in other firmware versions.
Preparation
What you need
- One HaLowLink 2 (Router / Access Point), or two units for a long-range link with an Extender (two-device setup)
- Retail package items: power adapter, USB-C to USB-C cable, Ethernet cable, antenna, stand
- A computer or smartphone for setup; optionally, an existing router as Internet uplink
The bottom label carries the web UI username and password and the default 2.4 GHz Wi-Fi SSID/password (plus a QR code). You need these to log in.
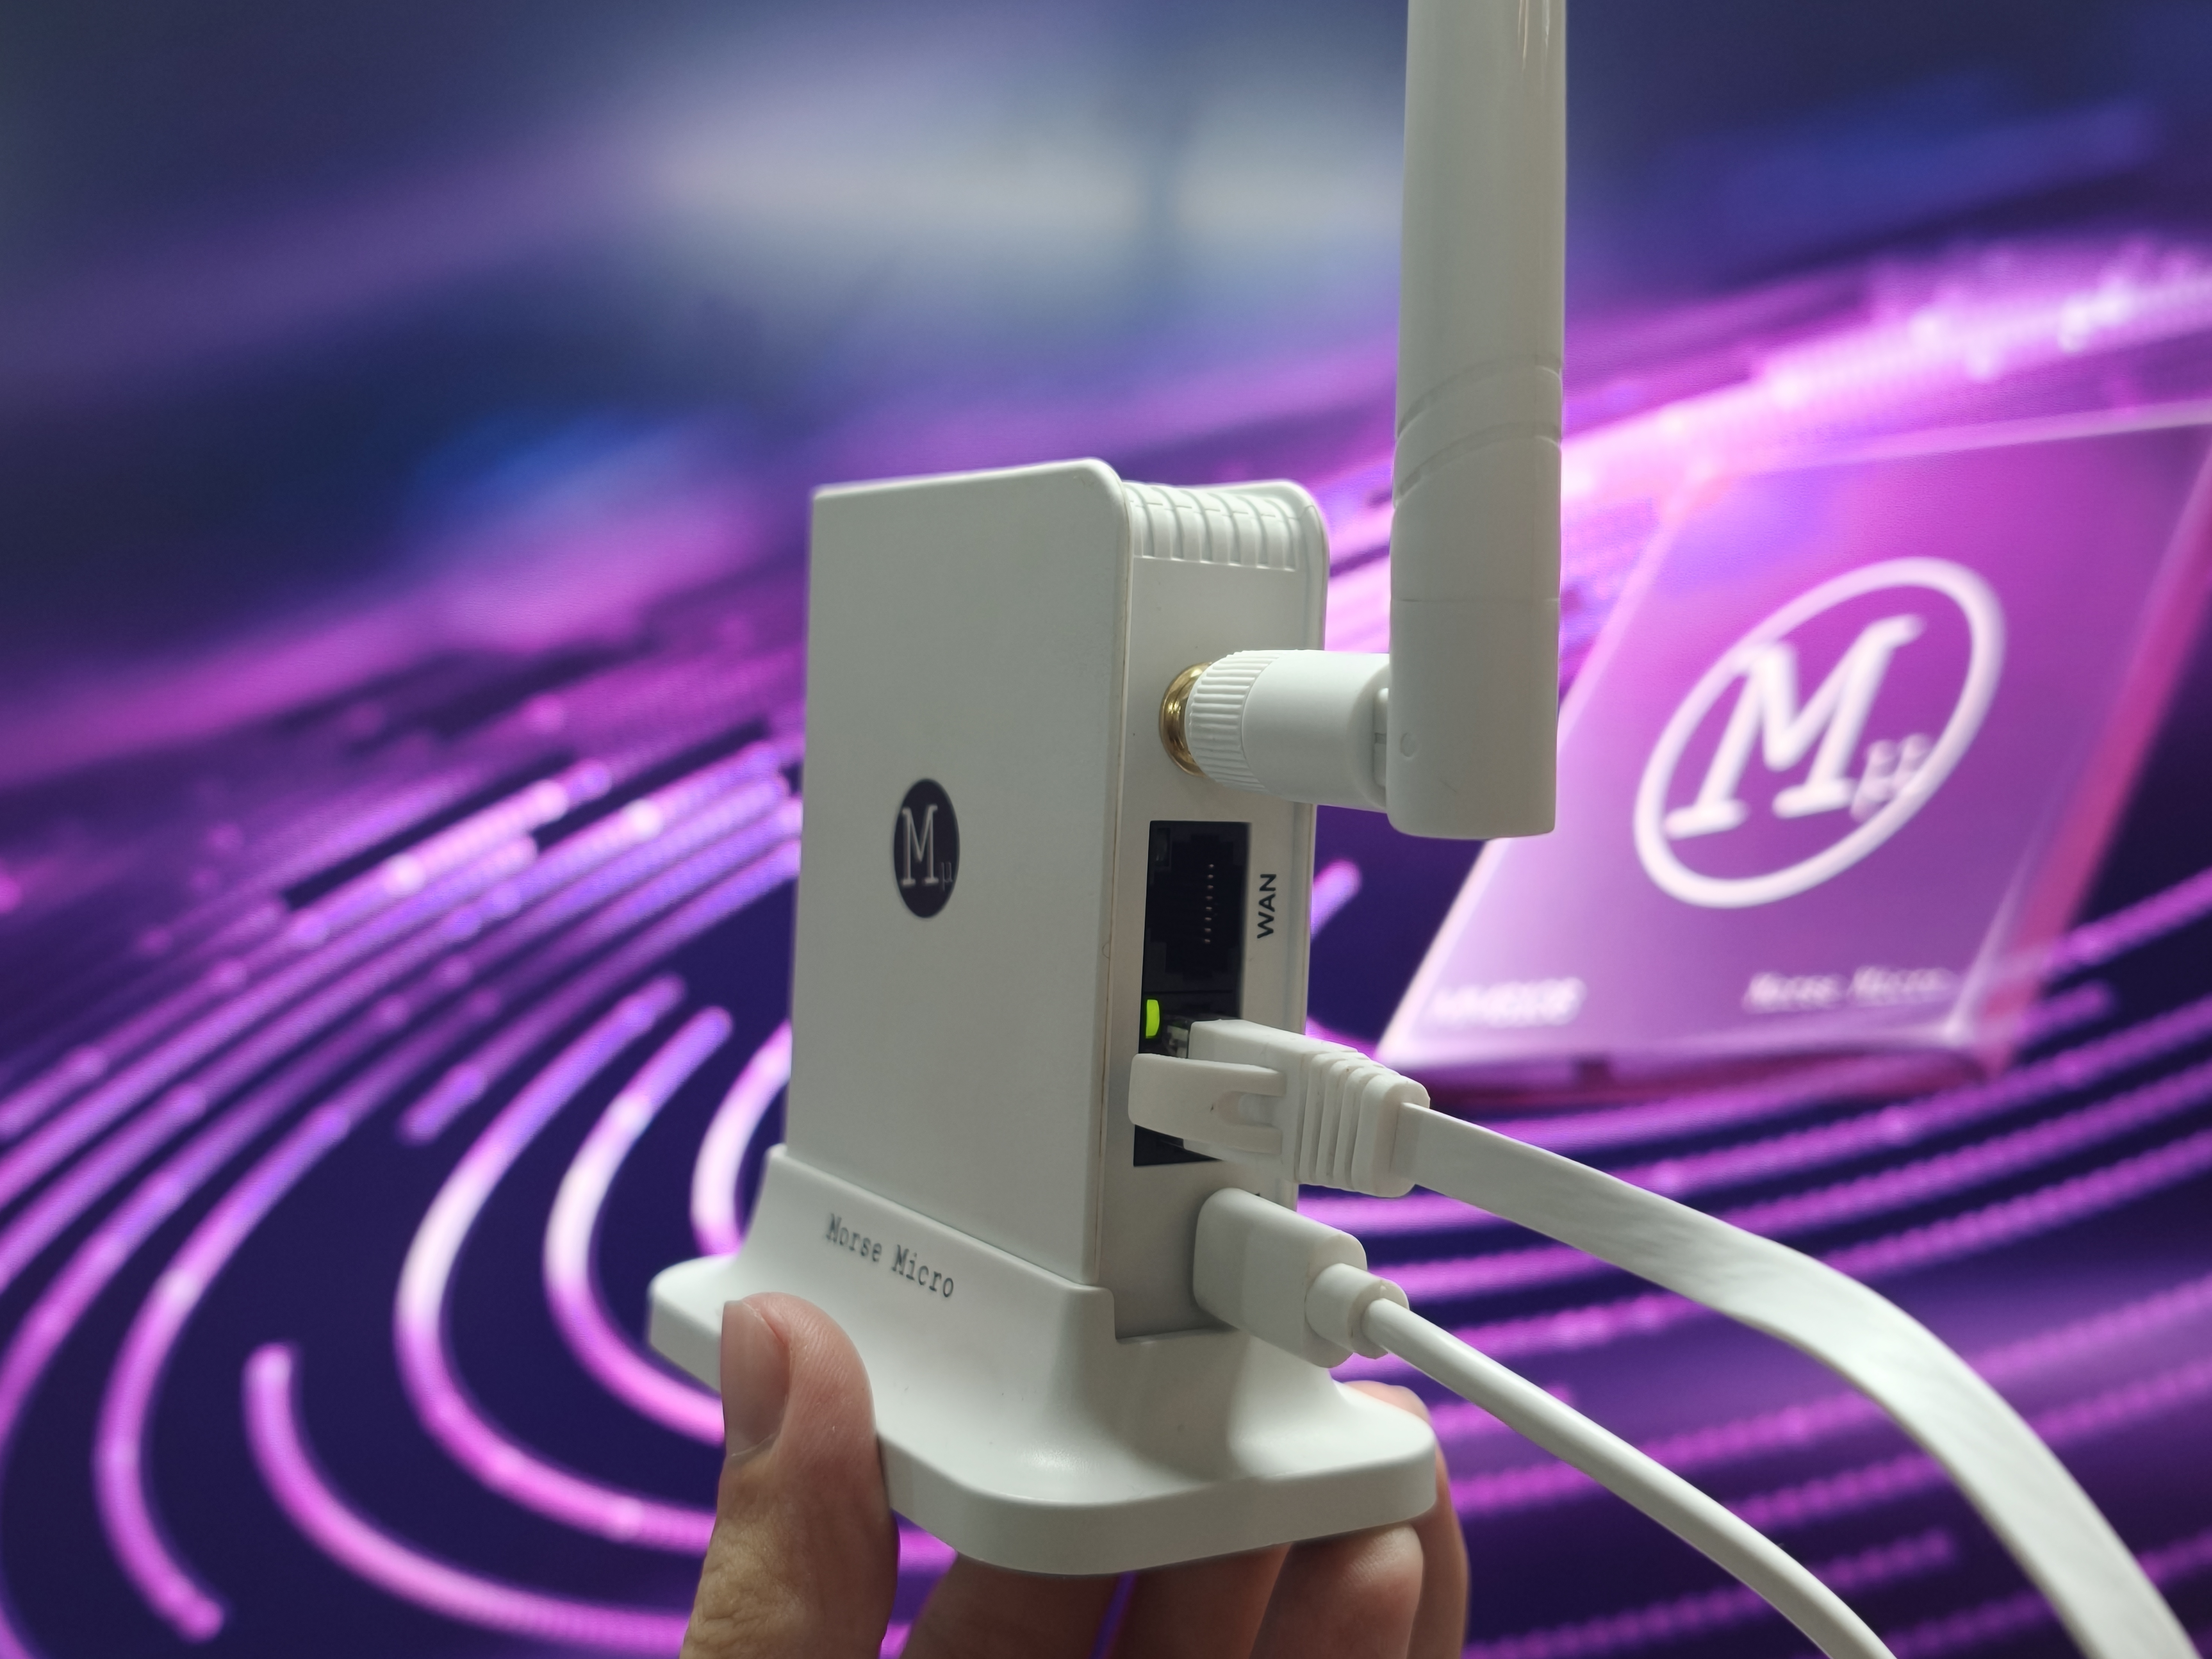
Device side: antenna on the SMA connector, Ethernet cable in the LAN port, USB-C power cable. The WAN port is empty in this photo; the computer end is not shown.
Connect the hardware
- Screw the antenna onto the SMA connector before powering on.
- Power the device through USB-C with the provided power adapter. Do not use a USB-A to USB-C adapter.
- Connect your computer — pick one method:
- Ethernet cable to the LAN port — recommended for first setup
- 2.4 GHz Wi-Fi — SSID and password on the label (join after boot)
- USB-C to USB-C cable — the device appears as a network adapter on your computer
- Internet needed downstream? Connect your router to the WAN port.
Expected result: Status LED solid green — the device runs its factory-default Router configuration with a Wi-Fi HaLow Access Point.
Access the Web UI
-
Open a browser and go to:
https://192.168.12.1The management interface is HTTPS-only; typing
http://redirects automatically. -
First visit shows a certificate warning — the device uses a self-signed certificate. Accept it; the connection is still encrypted.
-
Log in with the username and password printed on the device label.
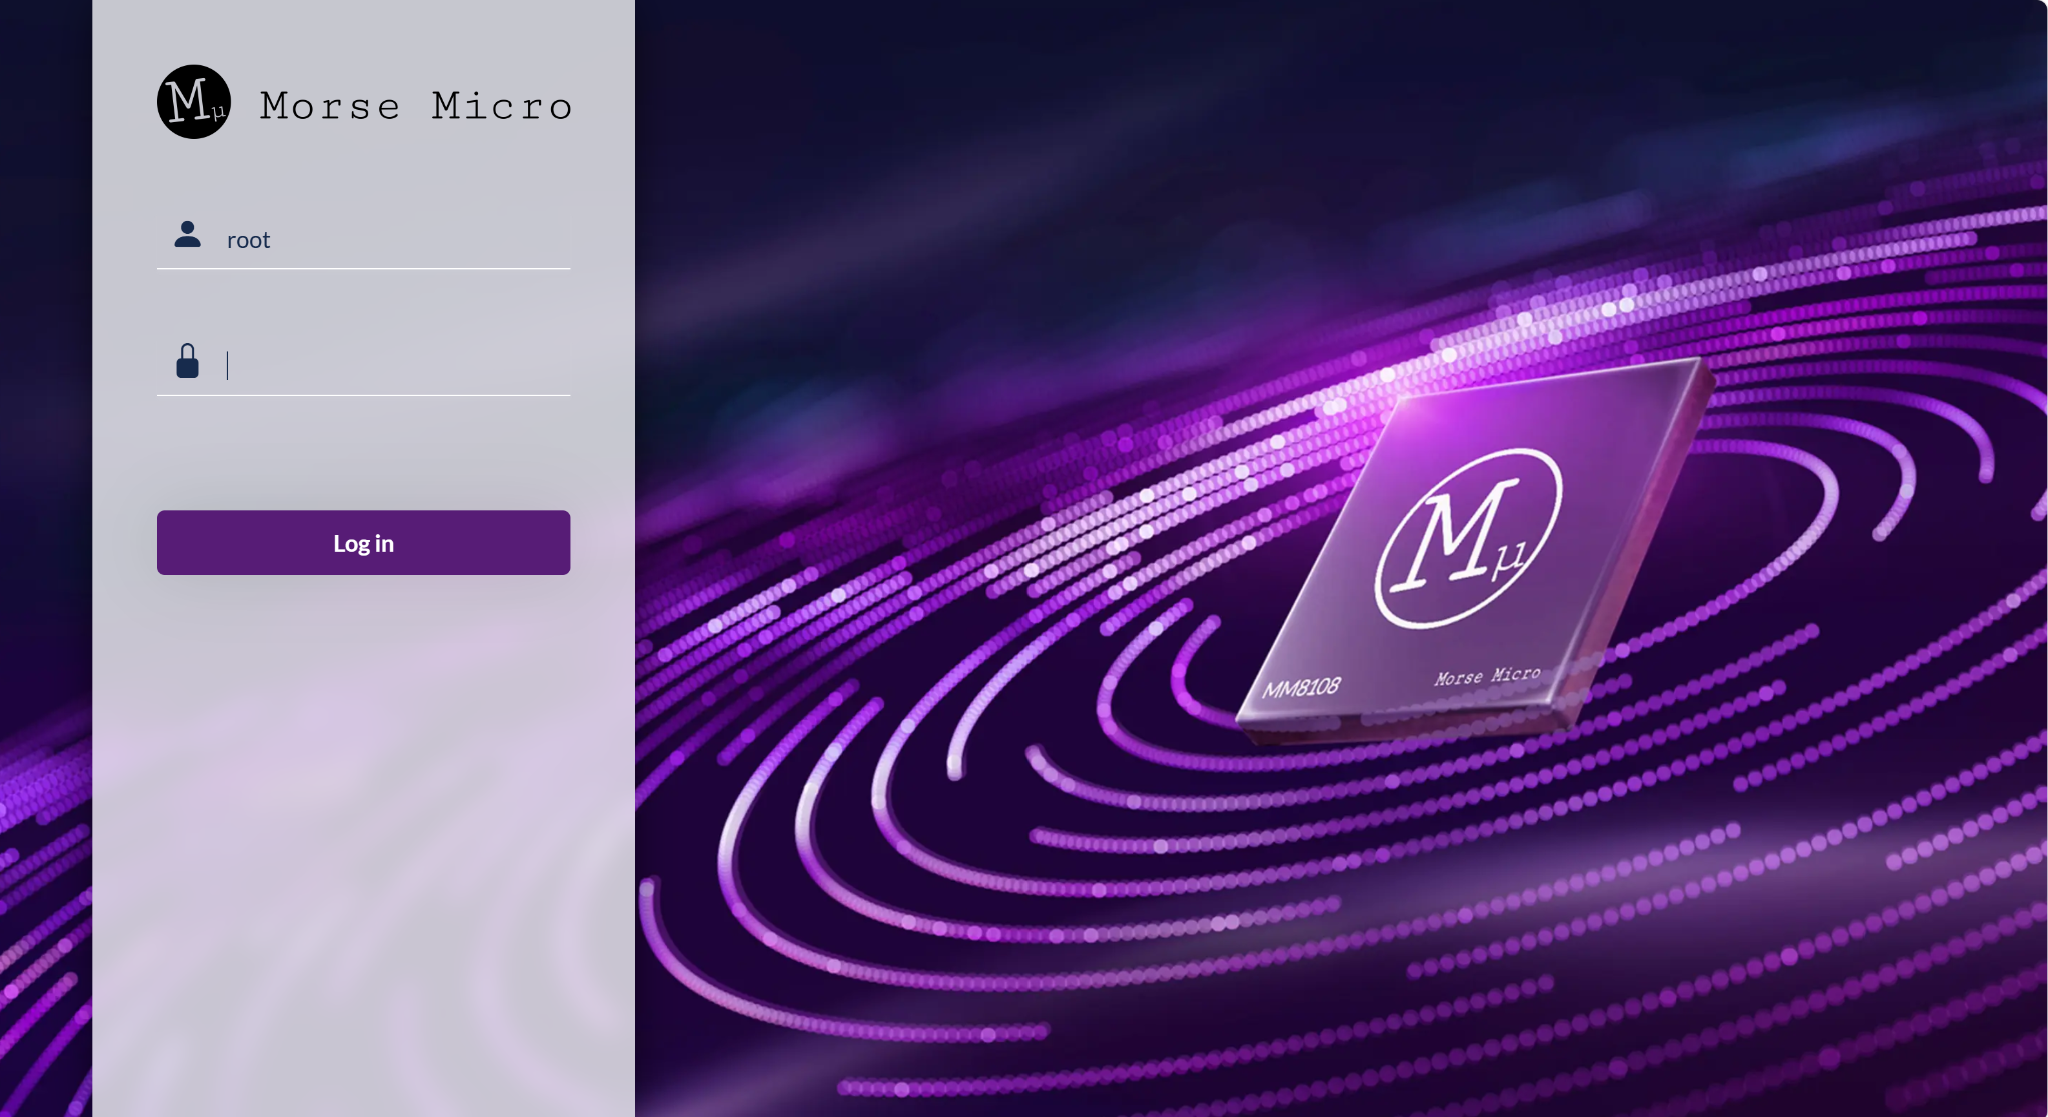
Login page: enter the username and password from the device label, then choose Log in.
- The Home page opens with these cards: Access Point (HaLow), Access Point (2.4 GHz), Local Network, Uplink (Ethernet), Mode, Network Interfaces, System. The firmware version sits at the bottom left; the System card adds model, OpenWrt version, and any upgrade notice (Firmware).
Expected result: the Home page loads; the firmware version is visible at the bottom left.
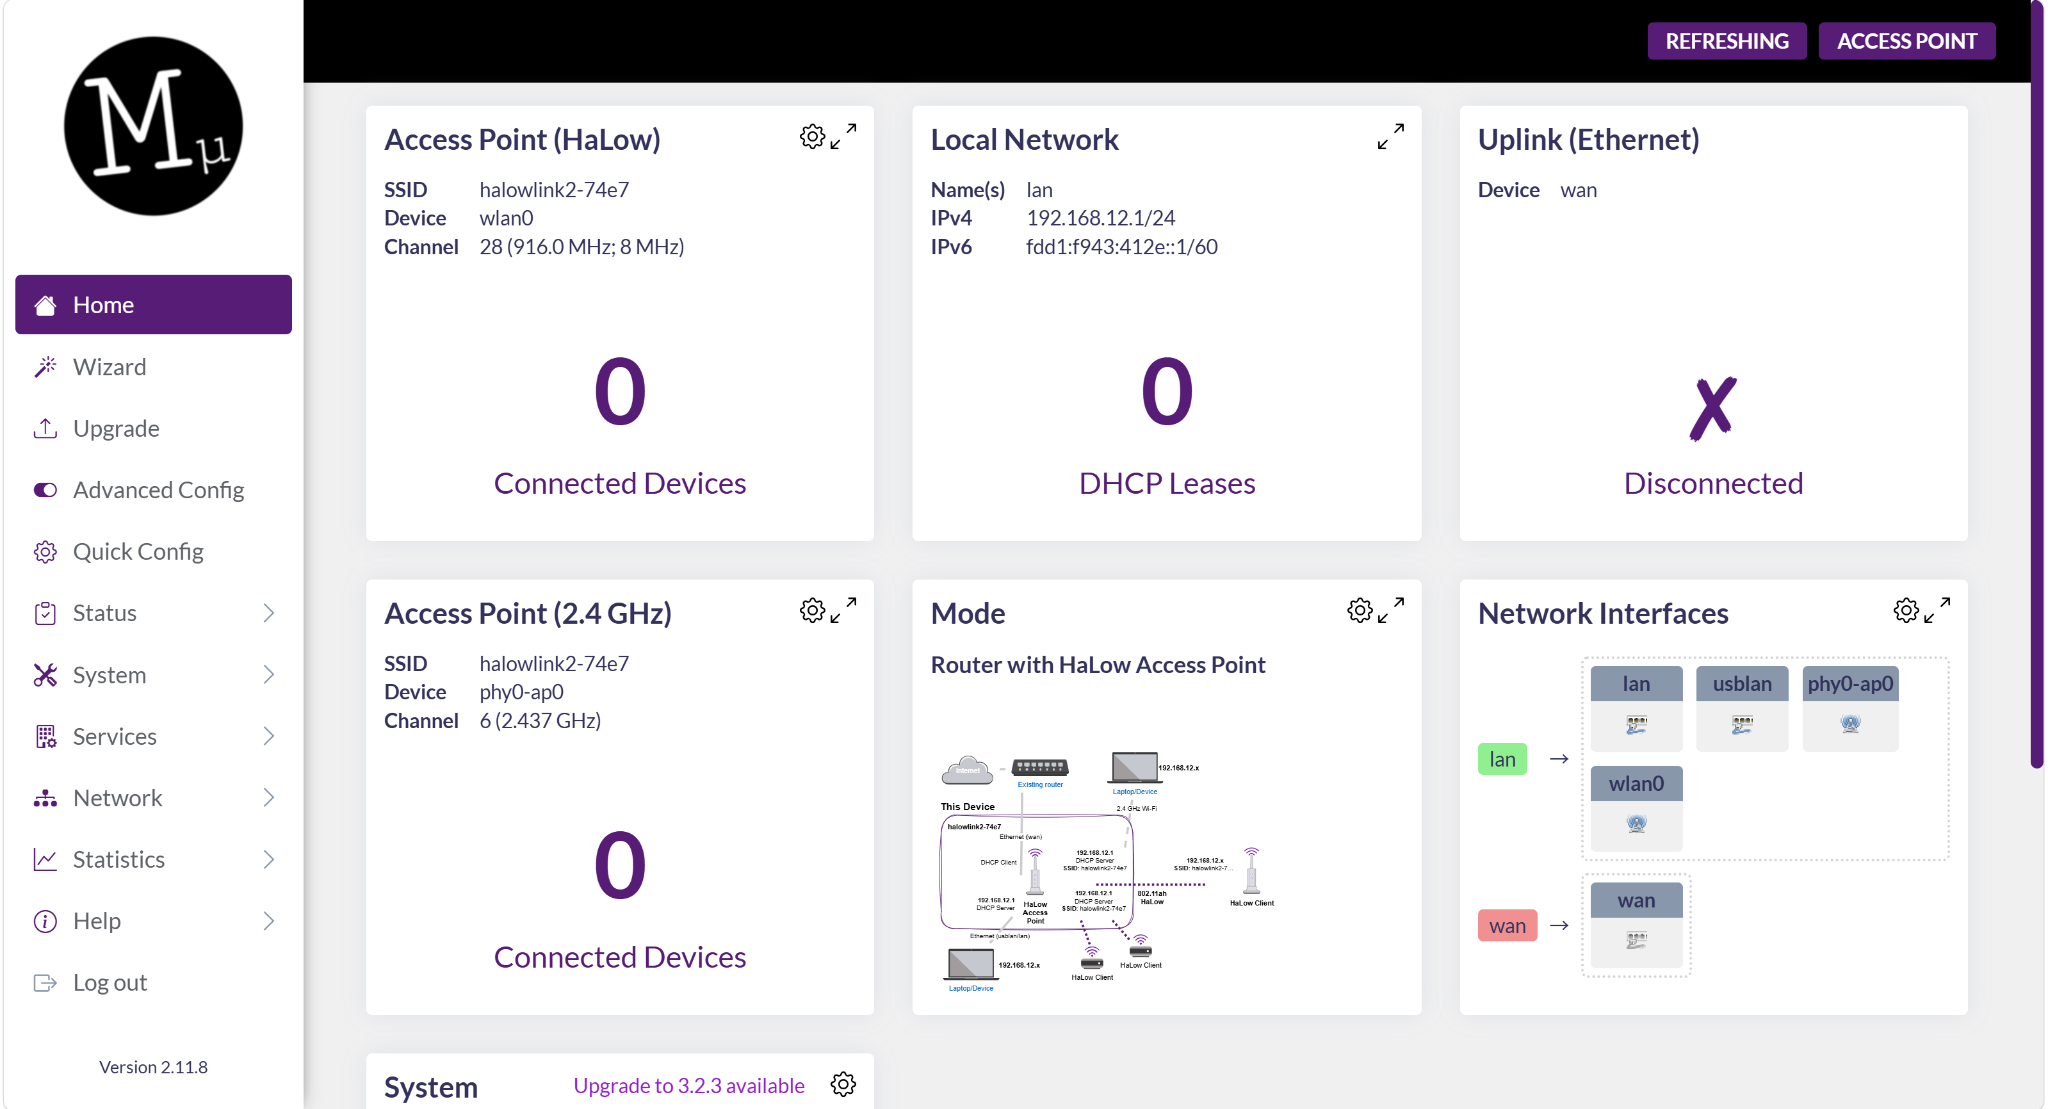
Home page (2.11.8), factory default: the Mode card reads "Router with HaLow Access Point", 0 clients connected, Uplink (Ethernet) Disconnected (no WAN cable). It shows the layout — not a working HaLow link.
Network Configuration
The HaLowLink 2 runs in one of three configurations:
- Router / Access Point — both host a HaLow AP; they differ in where clients get IP addresses. Set in the Wizard.
- Extender — joins that AP over a HaLow client link. Set with the physical Mode button.
A green Status LED alone does not tell Router from Access Point.
| Mode | Status LED | Clients get IP addresses from | Management address | When to use it |
|---|---|---|---|---|
| Router (factory default) | Solid green | The device itself — 192.168.12.x, with its own DHCP server, NAT, and firewall | https://192.168.12.1 | A standalone HaLow network or an isolated test setup |
| Access Point (recommended) | Solid green | Your existing router's DHCP server — no NAT | The upstream-assigned IP, plus https://192.168.12.1 on the LAN port | Adding HaLow devices to an existing LAN so everything can talk to everything |
| Extender | Solid aqua | The network behind the Access Point, over the HaLow link | None — manage it through the Access Point | The remote unit of a two-device deployment |
When the device hosts the HaLow AP (Router or Access Point configuration):
- The
192.168.12.1management address stays available on the LAN port (and USB-C), even after the device gets a different upstream IP. Exceptions: a paired Extender, or the fully bridged configuration. - The Wizard starts from the default configuration — running it overwrites changes made outside the Wizard.
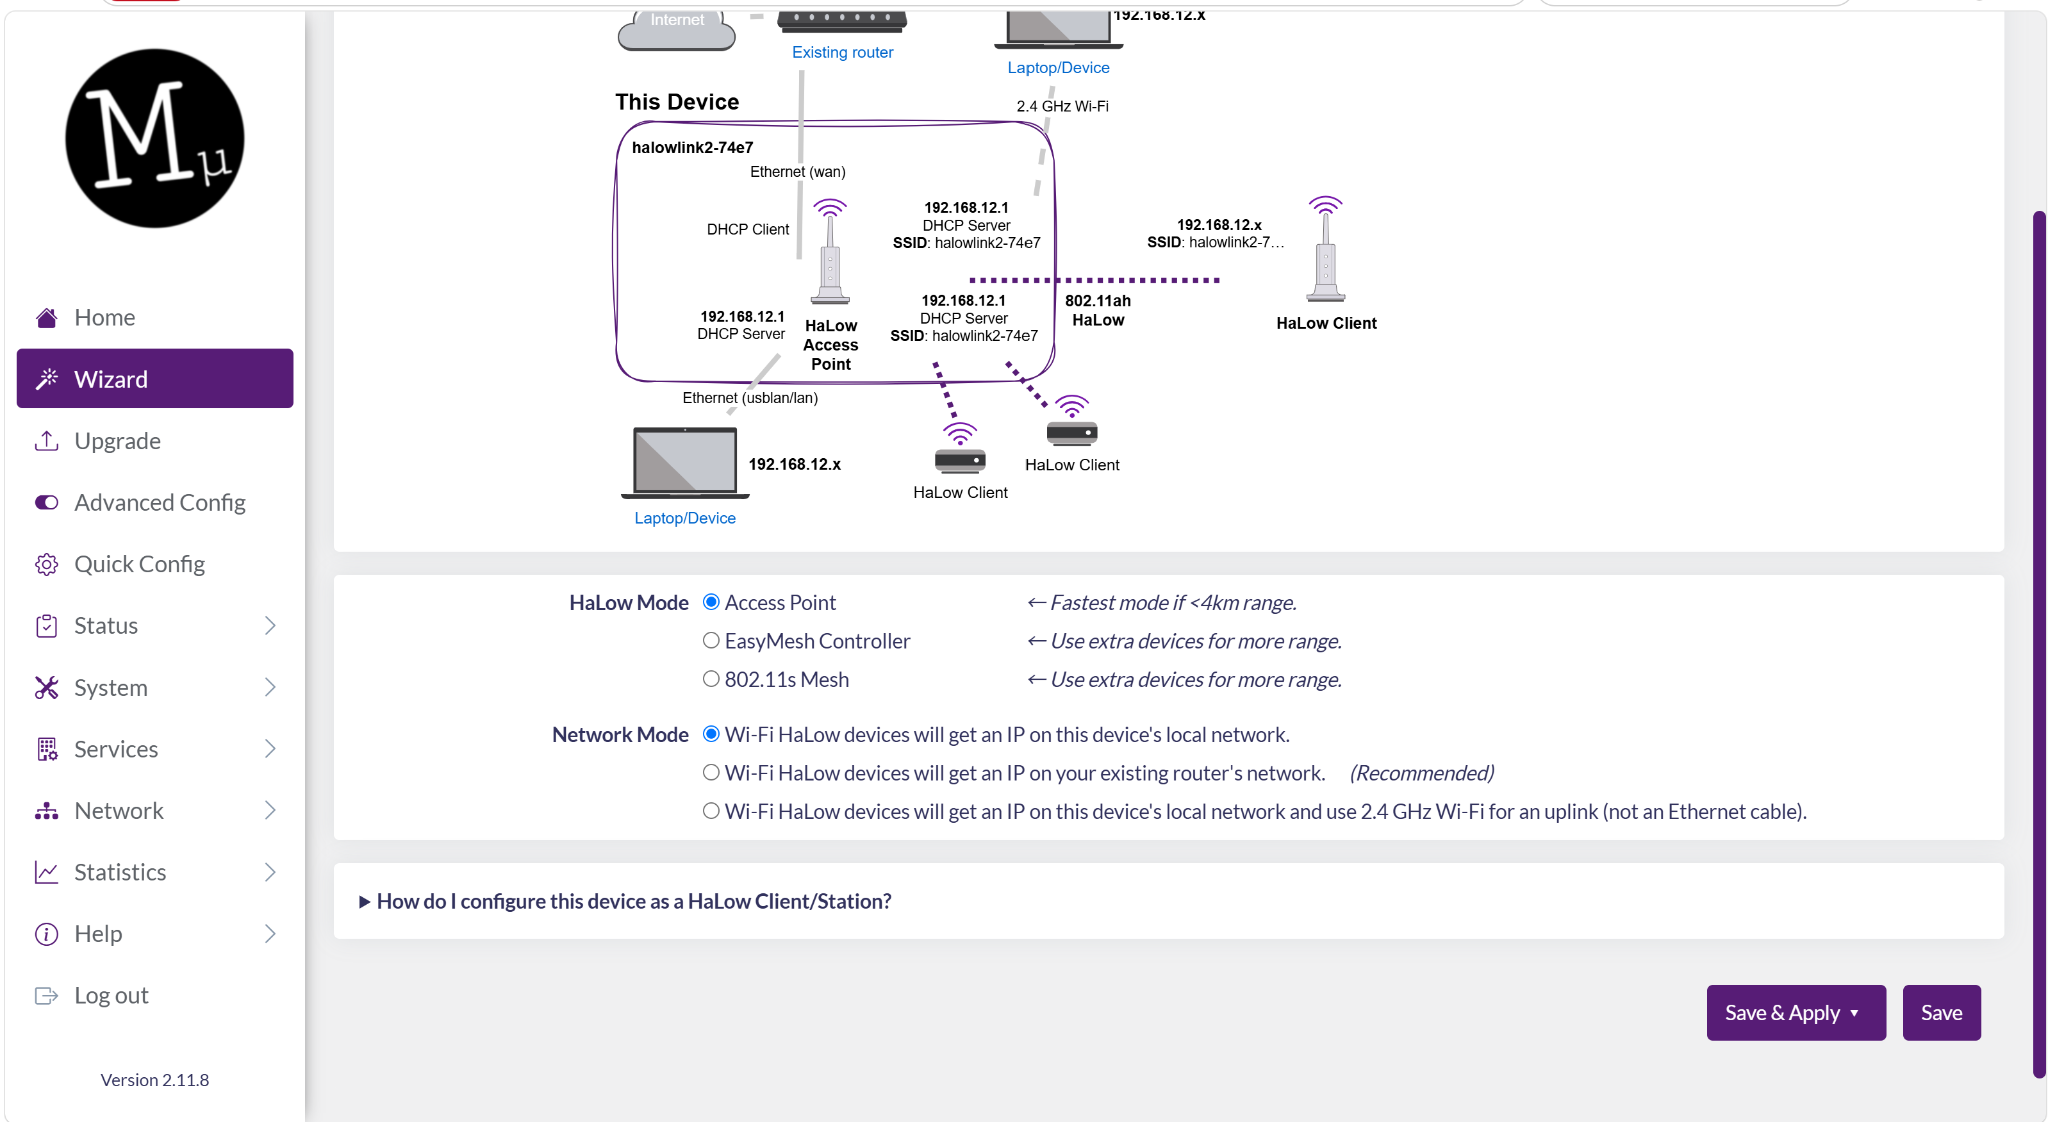
Wizard (2.11.8). HaLow Mode: Access Point, EasyMesh Controller, or 802.11s Mesh. Network Mode: where HaLow devices get IPs — the screenshot shows the default selection (this device's local network); the recommended existing-router option is the second radio button. Changes apply on Save & Apply.
Transient Status LED states: flashing green or aqua = booting; flashing yellow = factory reset in progress; solid yellow = bootloader (Recovery); flashing blue = firmware update — do not disconnect power.
Router Mode (Default)
Out of the box the device routes traffic: own 192.168.12.x subnet, DHCP server and firewall, WAN port as uplink. Nothing to configure. The web UI answers only on the device's own networks (LAN, USB-C, 2.4 GHz Wi-Fi, HaLow) — never from the WAN side.
Access Point Mode (Recommended)
Use this mode to make HaLow devices first-class members of your existing network:
- Cable the WAN port to your router. On the Home page, check that Uplink (Ethernet) shows an assigned IP.
- Open the Wizard. Select "Wi-Fi HaLow devices will get an IP on your existing router's network" (marked (Recommended)).
Expected result: HaLow clients get IPs from your router and reach every device on your LAN. The web UI stays reachable at the upstream address and at https://192.168.12.1 on the LAN port.
Extender Mode
Extender mode is for the remote unit of a two-device deployment. Switch it on with the physical Mode button — no web UI needed:
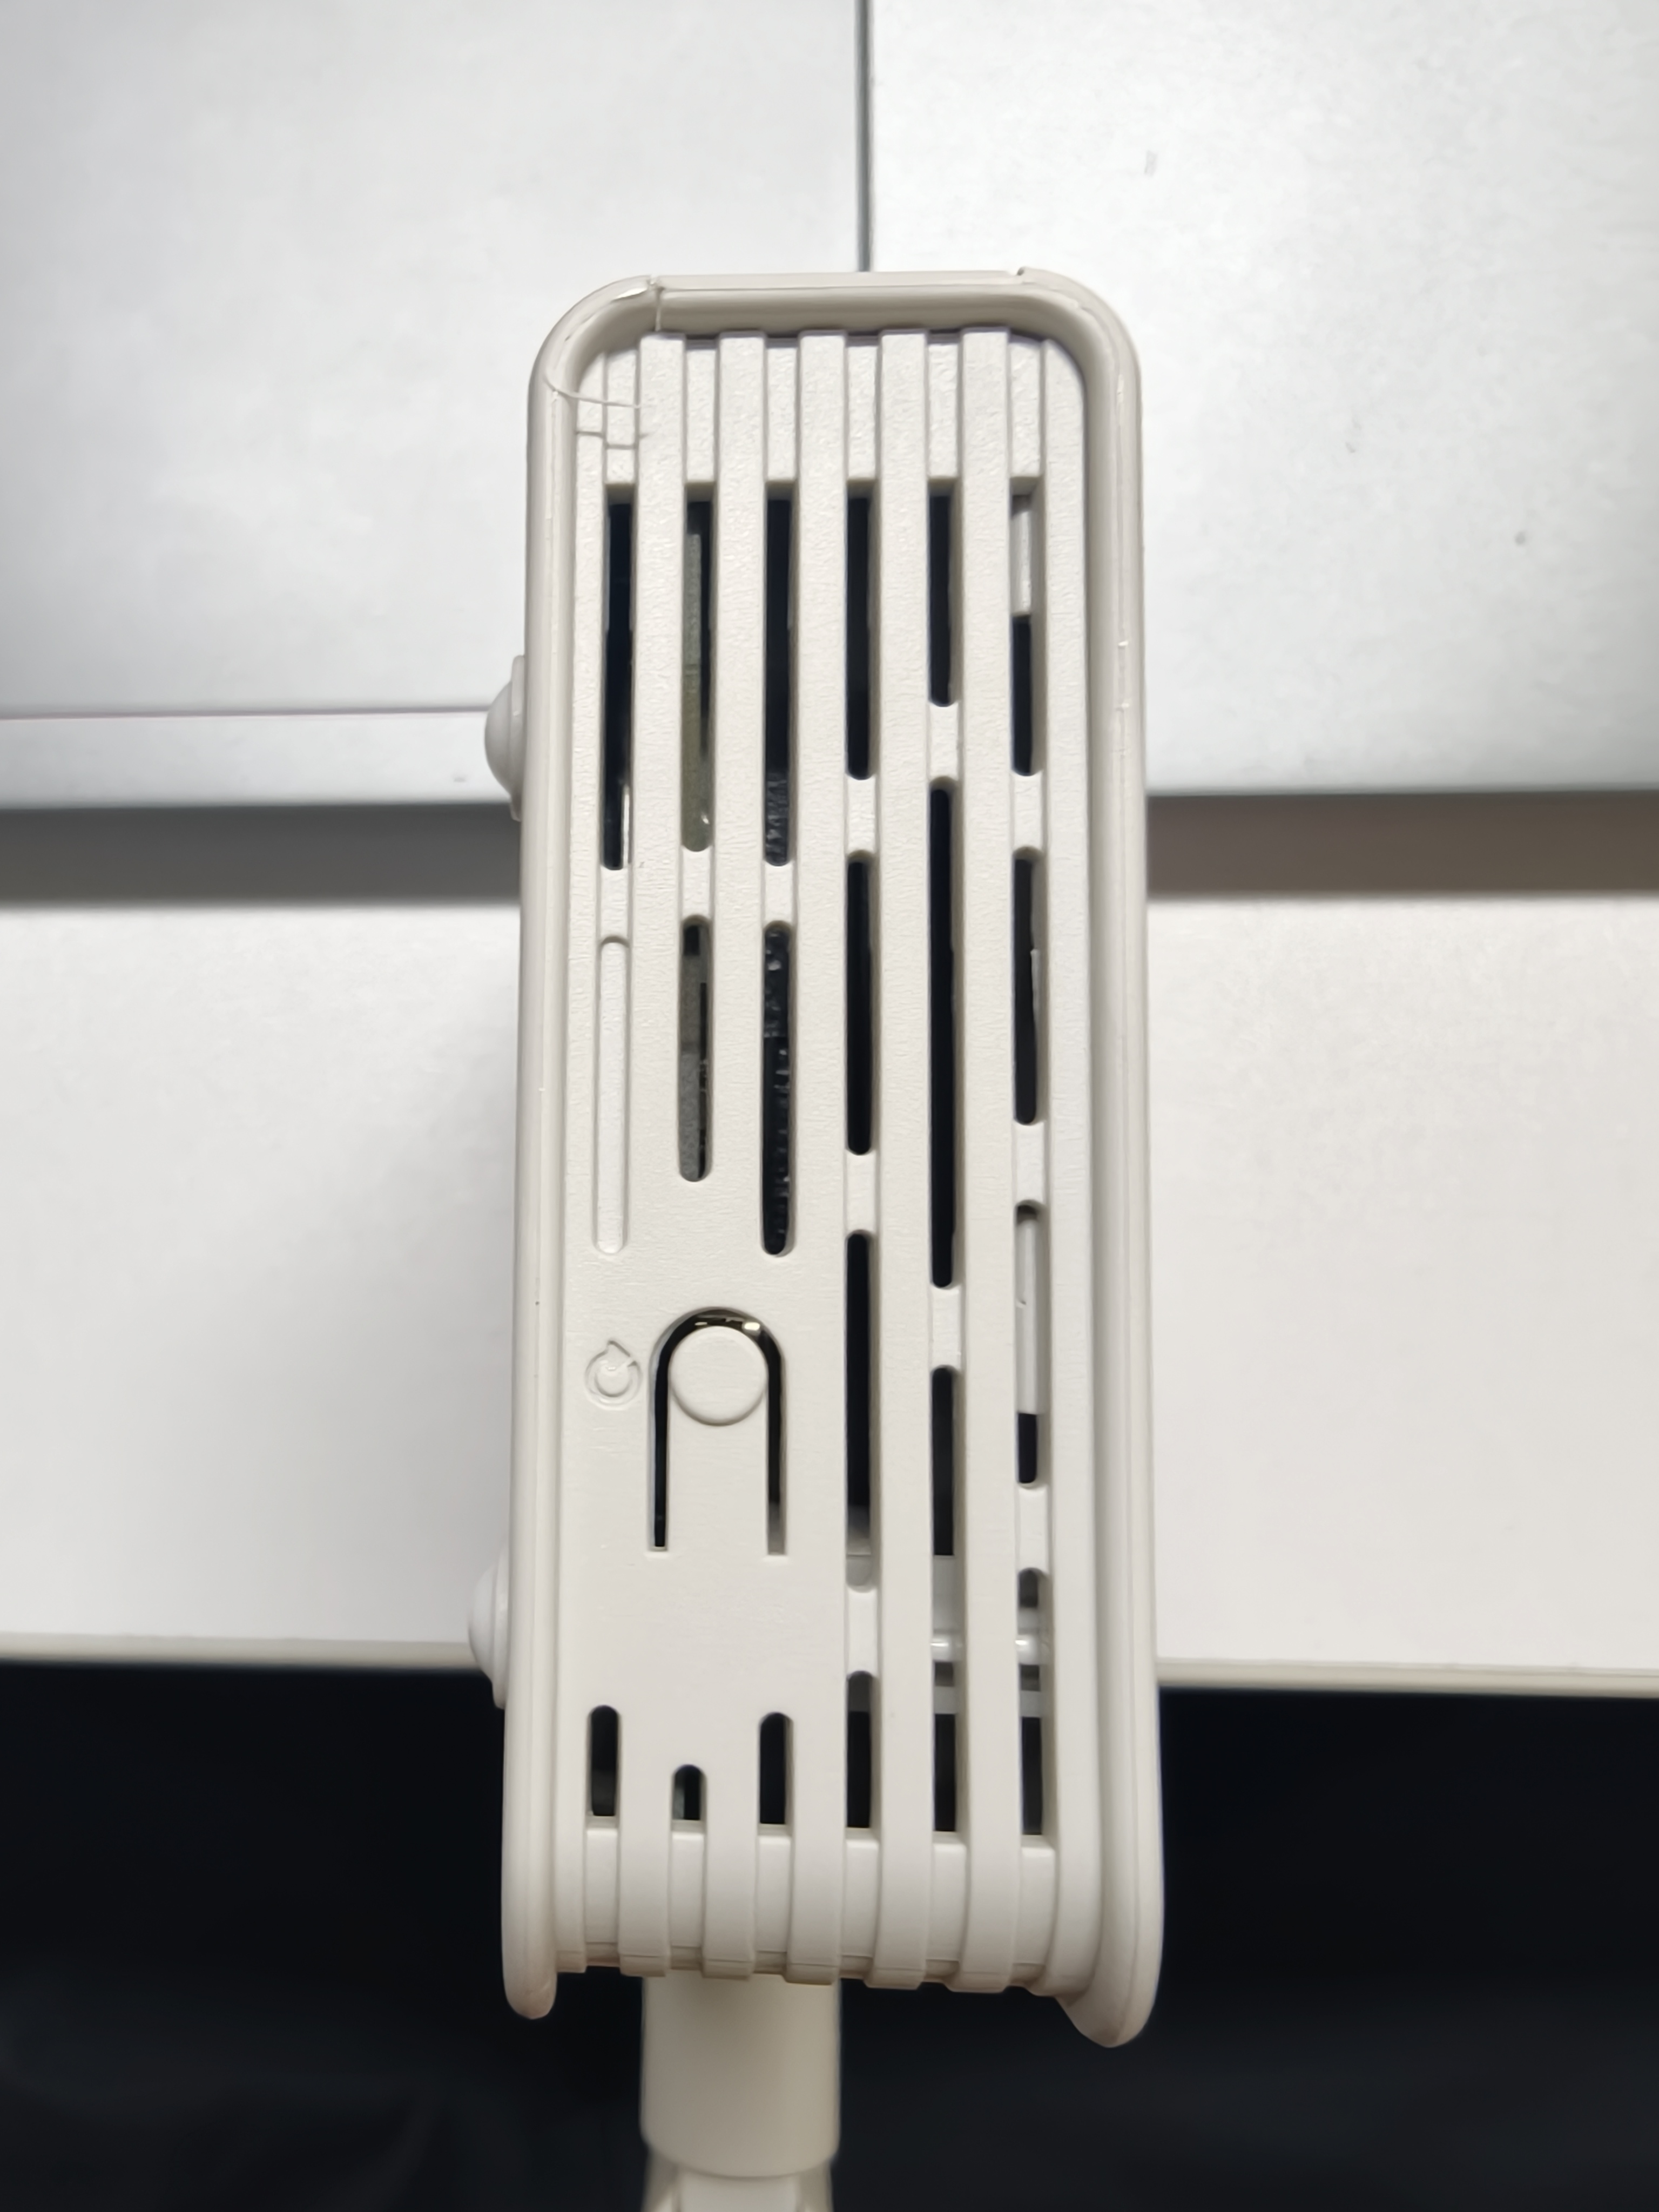
The Mode button on the side of the enclosure, between the ventilation slots. It is not a power switch.
- Power on. Wait until the Status LED is solid (green or aqua).
- Hold the Mode button. The Status LED flashes slowly green, then quickly aqua. Release at quickly-aqua. (Releasing during slow-green performs a factory reset instead.)
- Wait until the Status LED is solid aqua.
Expected result: solid aqua = Extender mode. The unit now needs pairing (next section). Once paired it has no web UI of its own — manage it through the Access Point. Its LAN, WAN, USB-C, and 2.4 GHz Wi-Fi all serve the extended network.
Connect Two HaLowLink 2 Devices
Unit #1 = HaLow Access Point next to your router. Unit #2 = Extender at the remote site. Anything plugged into the Extender — Ethernet, USB-C, or 2.4 GHz Wi-Fi — joins your network over the sub-1 GHz HaLow link. Every Application scenario builds on this procedure.
Network Topology
[ Router / LAN ] --Ethernet(WAN)-- [ HaLowLink 2 #1: HaLow AP (green LED) ]
                                        )))  Wi-Fi HaLow link ( sub-1 GHz )  (((
[ Remote devices ] --Ethernet/USB-C/2.4 GHz Wi-Fi-- [ HaLowLink 2 #2: Extender (aqua LED) ]
Pair the Devices
Prepare the two units:
- Unit previously configured? Factory reset it first so both start from the default state.
- Unit #1 = Access Point near your router: WAN port cabled to the router, Wizard run with the recommended option (steps). Status LED solid green.
- Unit #2 = Extender at the remote site (steps). Status LED solid aqua.
- Same firmware on both? Check the version at the bottom left of each Home page before unit #2 enters Extender mode and loses its web UI.
Then pair them — push-configuration, no credentials to type:
- On the Access Point: press and immediately release the Mode button. The Wi-Fi HaLow LED starts flashing slowly.
- On the Extender: press and immediately release the Mode button. Its Wi-Fi HaLow LED starts flashing slowly.
- Wait for the credential exchange to finish (usually a few seconds).
Expected result: the Extender's Wi-Fi HaLow LED turns solid purple — credentials received, link connected.
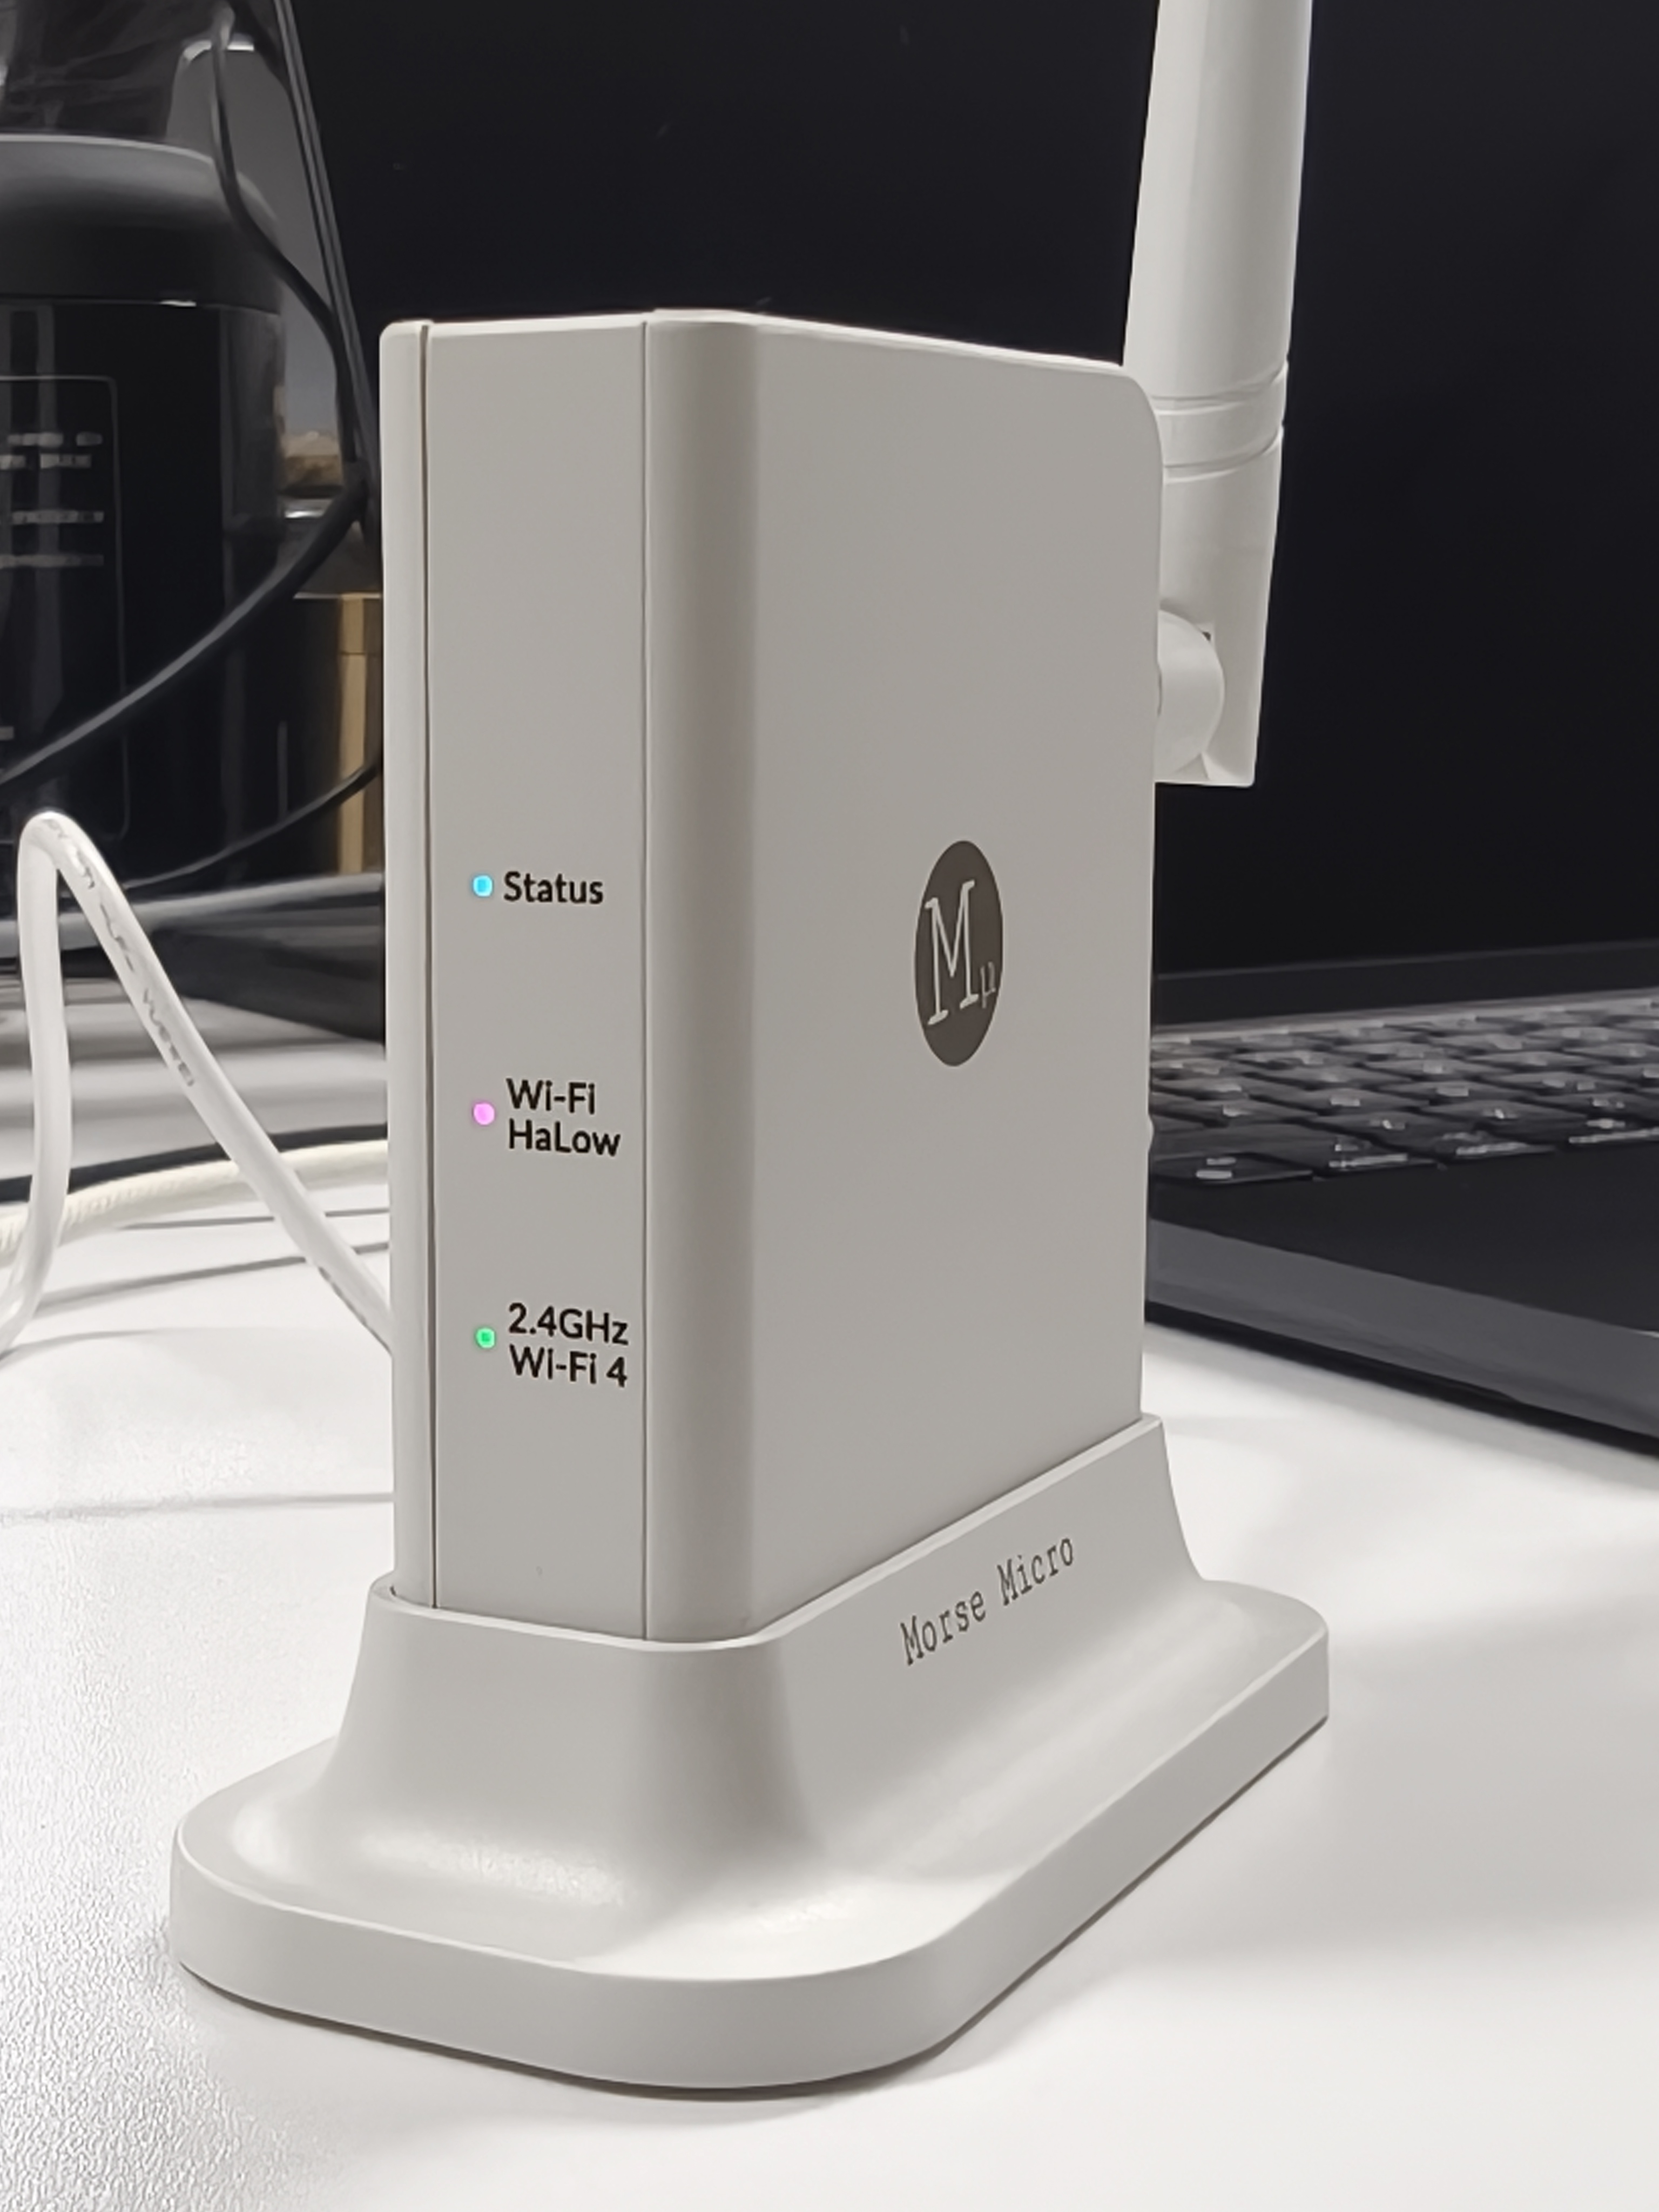
The three labelled front LEDs. Here: Status aqua + Wi-Fi HaLow purple = a paired Extender. A static photo shows colors only, not flashing timing.
Pairing failed? Both HaLow LEDs flash quickly for 120 seconds — a security retry delay. Wait until the flashing stops on both units, then repeat from step 1.
If the Access Point runs as an EasyMesh Controller, paired Extenders become EasyMesh Agents automatically (mesh: not supported in the EU or UK; rarely needed). Manual credentials instead: factory-reset the Extender and use its configuration portal at https://192.168.12.1. Details: the official HaLowLink User Guide.
Verify the Connection
- Access Point Home page → Connected Devices: the Extender and the devices behind it appear here — click the card for signal strength.
- On the Extender: the Wi-Fi HaLow LED is solid purple (flickering purple = traffic activity).
- Attach a test device to the Extender — Ethernet, USB-C, or its 2.4 GHz Wi-Fi. The Wi-Fi credentials are on the Extender's own label, not the Access Point's.
- Check its IP address: DHCP-assigned — in the recommended setup, from your main router (see its lease table).
- Ping your router or another LAN host from the test device, or use Network → Diagnostics in the Access Point's web UI.
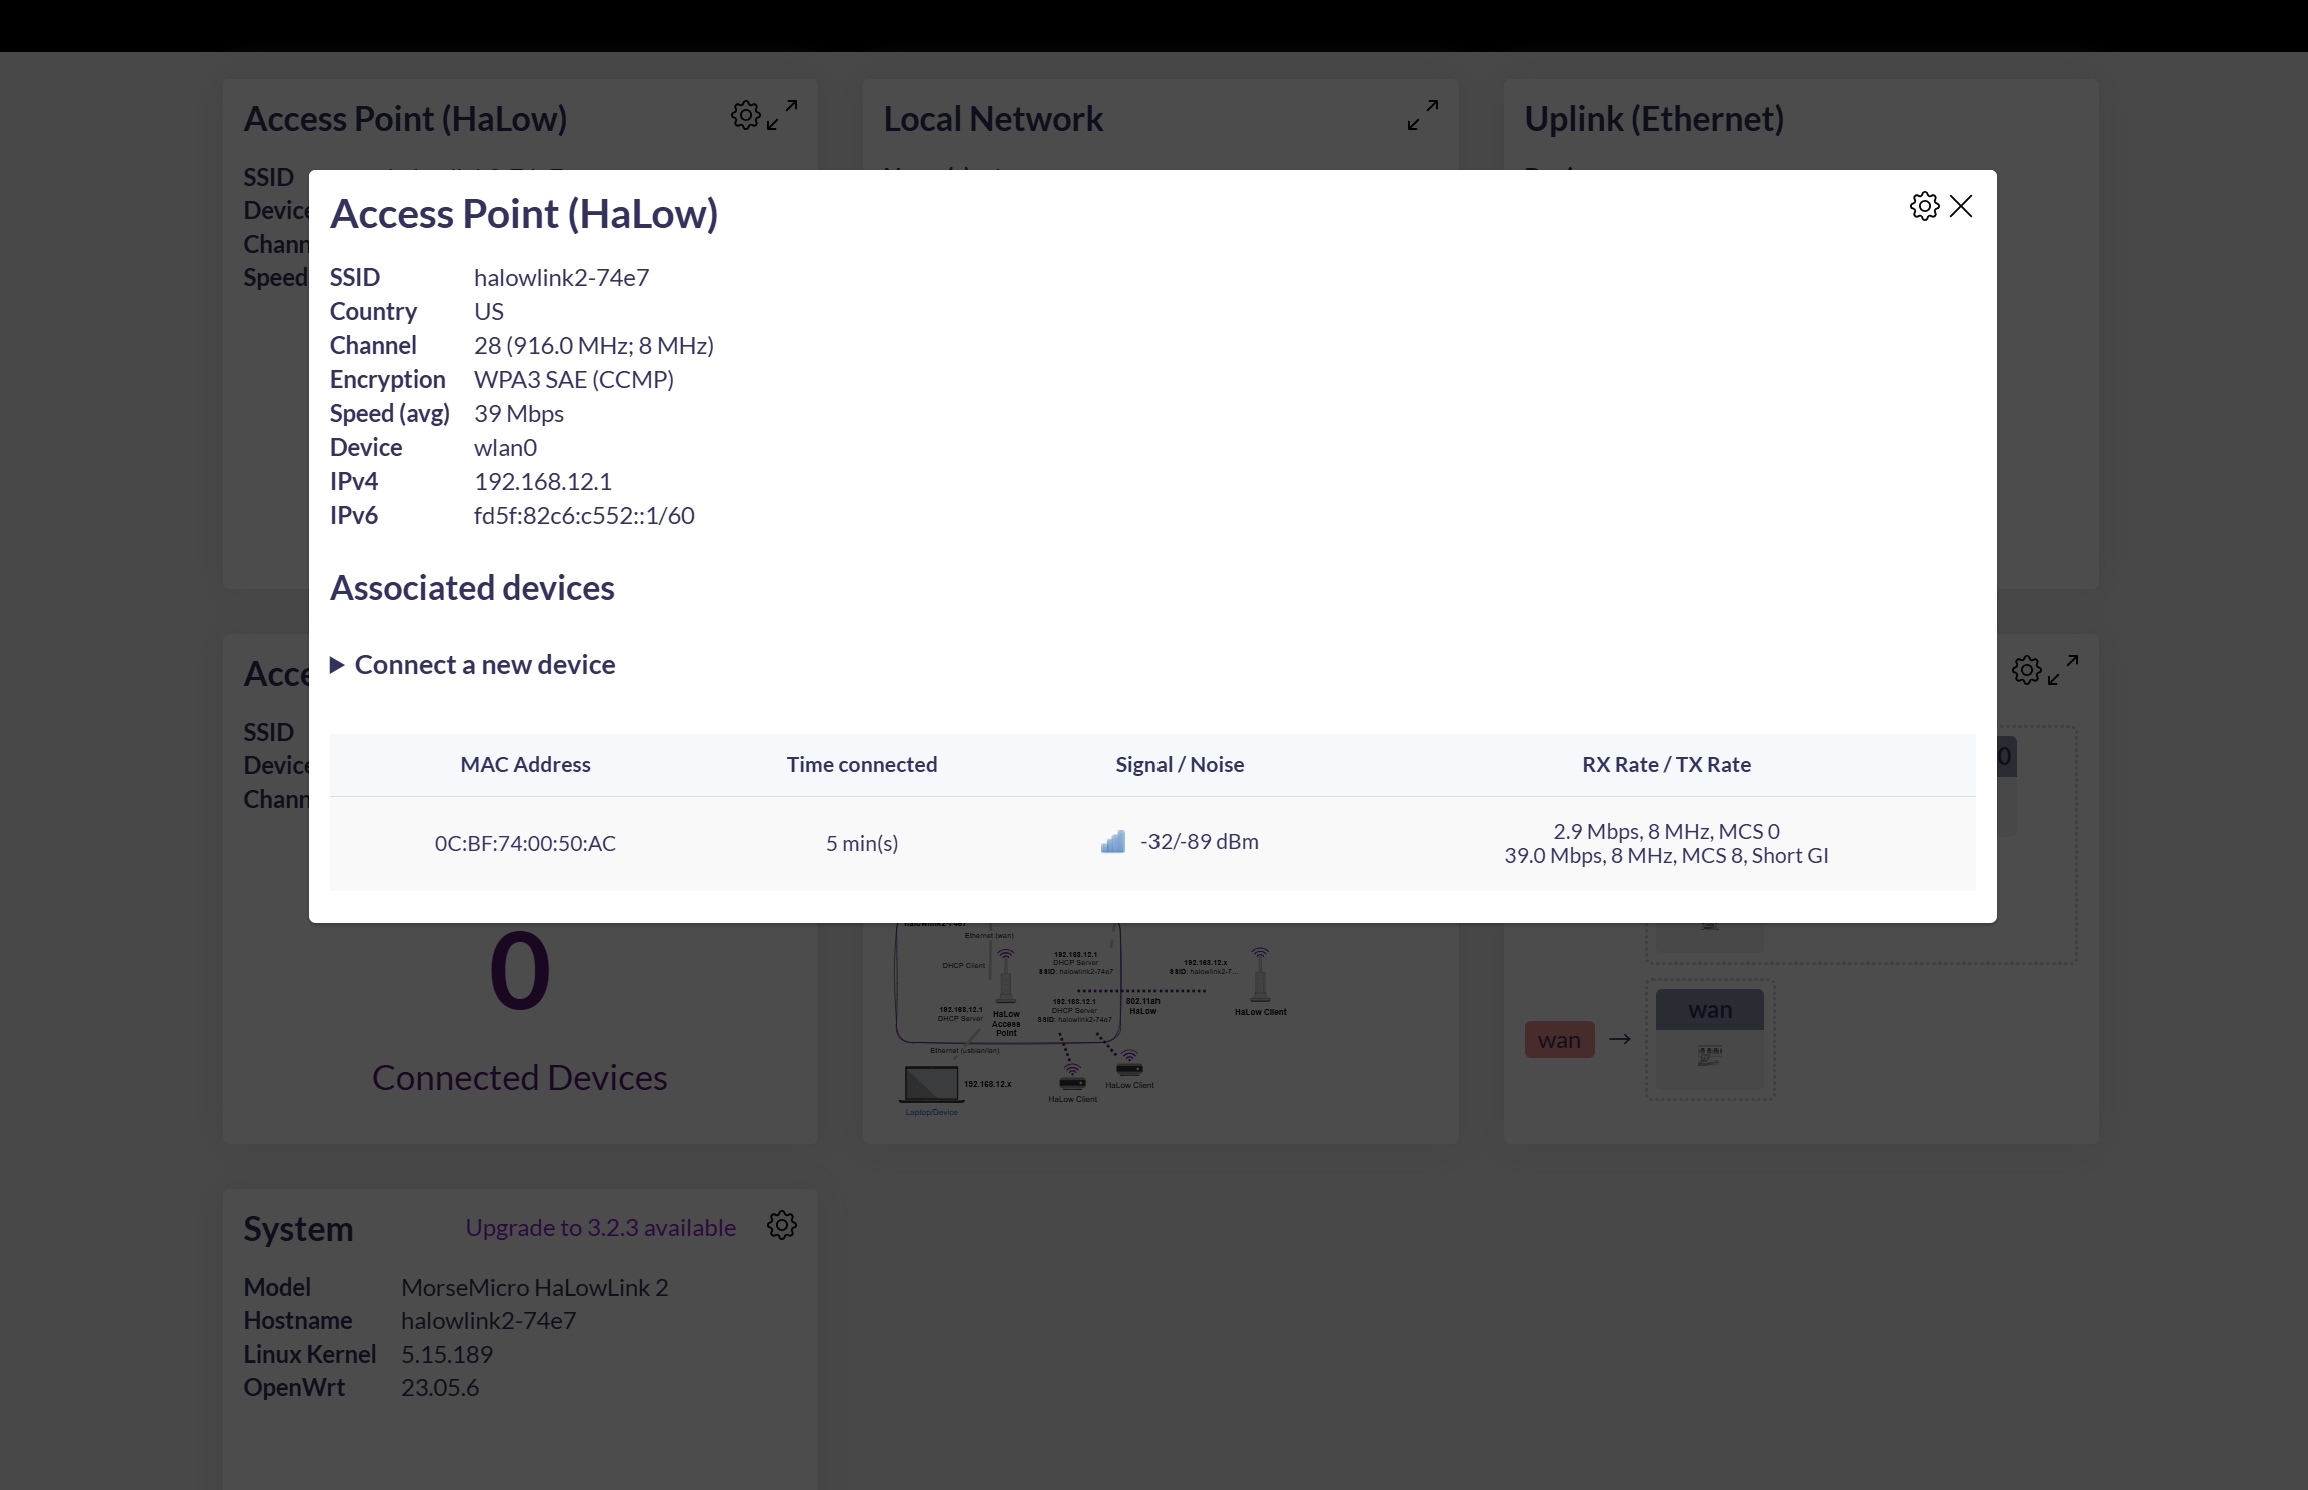
Access Point (HaLow) card expanded on the AP's Home page: one associated HaLow client — the paired Extender — at −32 dBm signal. The RX/TX figures are radio link rates reported by the UI, not measured application throughput.
Expected result: the test device holds a main-LAN IP address and reaches your network through the HaLow link.
Advanced Settings
Beyond the Wizard: Quick Config (common settings, shown live in a diagram) and Advanced Config (granular access: interfaces, wireless, firewall, system, packages, terminal). With Advanced Config enabled, the Unsaved Changes indicator previews the exact uci commands each change produces before you apply it.
A wrong network setting can lock you out of the web UI. Rescue path: on a computer on the LAN or WAN port, set a static IP 10.22.121.110 (netmask 255.255.255.254, or 255.255.255.0 if your OS cannot set /31). The device always answers at https://10.22.121.111. Last resort: factory reset.
Wireless Settings
- Quick Config → Wireless sets SSID, password, channel, and bandwidth.
- Bandwidth is 1 / 2 / 4 / 8 MHz: wider = higher throughput, narrower = better range and robustness.
- The regulatory region is locked. Channel, bandwidth, and TX power follow the regional variant (EU/UK: 14 dBm; Japan: 16 dBm; capability: up to 26 dBm). No mesh in the EU or UK. Use the device only in the region it was sold for.
- Crowded airspace? Status → Channel Analysis (Advanced Config) finds a quieter channel; Status → Realtime Graphs shows live link quality.
Static IP and DHCP
- Quick Config → Network Interfaces sets each logical interface to a static IP (optionally with a DHCP server) or a DHCP client; ports in the same network bridge automatically. Changes apply on Save & Apply.
- Fully bridged Access Point (advanced): remove the separate
192.168.12.1management subnet by moving the LAN, 2.4 GHz, and USB interfaces from thelannetwork ontowlan. Do it from the upstream-assigned address (not192.168.12.1), or use Apply Unchecked — otherwise it auto-reverts. Details: the official HaLowLink User Guide. - CLI:
uci set … && uci commit, thenreload_config(no restart needed); follow the log withlogread -l 100 -f.
SSH and Diagnostics
- SSH is disabled by default. Enable it under Advanced Config → Administration → SSH Access; log in with the label credentials. Services → Terminal is a browser-based console (plain HTTP only — follow the browser's warning link).
- Network → Diagnostics runs ping, traceroute, arp-scan, and iperf3 — and shows the exact command used.
- Services → Range Test (Advanced Config) automates iperf3 between two HaLowLink devices: same firmware on both, select the remote unit from the dropdown, enter its label password, Start Test. Export results as CSV/JSON. CLI extras:
morse_cli(low-level HaLow chip access) andwavemon(signal monitor).
Range Test results are volatile — a reboot deletes them, so export first. A result of ~40 Mbps UDP and 900+ Mbps TCP means the test ran over Ethernet, not the HaLow link: reposition the devices and retest.
Firmware Update and Factory Reset
Check and update firmware. The installed version is at the bottom left of the Home page. When online, the System card shows an upgrade notice (e.g. Upgrade to 3.2.3 available) — a notice only, until you install it. Install from the Upgrade page in the sidebar: automatic upgrade (downloads from the official update servers; Internet required) or manual file upload. During an update the Status LED flashes blue — do not disconnect power.
Factory reset. Returns the device to the default Router configuration with a Wi-Fi HaLow Access Point (solid green):
- Power on. Wait until the Status LED is solid (green or aqua).
- Hold the Mode button until the Status LED flashes slowly green, then release. (Holding to quickly-aqua enters Extender mode instead.)
- The LED flashes yellow briefly, then turns solid green = done. Log in again at
https://192.168.12.1with the label credentials.
Recovery. Power lost during an update can corrupt the firmware: the Status LED then stays solid yellow and the device does not boot normally. Recovery runs through the bootloader — follow the "Recovering From Failed Updates" section of the official HaLowLink User Guide carefully, and contact Seeed support before attempting it.
FAQ
What is Wi-Fi HaLow?
Wi-Fi HaLow (IEEE 802.11ah) is Wi-Fi in the sub-1 GHz band, built for long range and low power. On the HaLowLink 2: up to 1 km line of sight, better obstacle penetration than 2.4 GHz Wi-Fi, at lower per-link data rates.
Do I need two HaLowLink 2 devices?
One unit is enough to add a Wi-Fi HaLow Access Point for HaLow-capable clients (e.g. Wio-WM6108 / Wio-WM6180-based nodes). Two units bridge non-HaLow devices — phones, laptops, Ethernet equipment — across a long-range link: one Access Point, one Extender.
What is the default management address and login?
https://192.168.12.1 (HTTPS only; the certificate warning on first visit is expected), with the username and password printed on the device label. In Extender mode the device is not reachable at this address.
What is the difference between Access Point mode and Extender mode?
Access Point (solid green): hosts the HaLow network, connects to your router, full web UI. Extender (solid aqua): a HaLow client that extends the AP's network via Ethernet, USB-C, and its own 2.4 GHz Wi-Fi; no web UI of its own once paired. Switch to Extender mode with the Mode button; a factory reset returns the unit to Access Point mode.
Can a regular smartphone connect to Wi-Fi HaLow directly?
No — consumer phones have no sub-1 GHz 802.11ah radio. Use a second HaLowLink 2 as an Extender: it rebroadcasts the link as an ordinary 2.4 GHz Wi-Fi hotspot (credentials on its own label) and on its Ethernet/USB-C ports.
Is 43.3 Mbps the actual throughput?
No — it is the maximum PHY (physical-layer) rate of the MM8108 radio at 8 MHz bandwidth. Real throughput is lower and depends on bandwidth, distance, signal quality, and interference. Measure your own link with the Diagnostics / Range Test tools.
Can I change the operating region?
No. The device is certified for the region it was sold in (USA, Canada, Australia, UK, Europe, Japan); bands, channels, and TX power limits follow it. Changing or bypassing the region is not supported and would violate radio regulations.
Troubleshooting
| Symptom | Check | Fix |
|---|---|---|
Cannot access the web UI at https://192.168.12.1 | Status LED color? Computer on LAN or USB-C (not WAN)? Computer holds a 192.168.12.x address (DHCP client)? | Solid aqua = Extender mode — expected; manage the network from the AP, or factory reset to leave Extender mode. Solid green but unreachable: factory reset. Locked out after a settings change: use the diagnostic IP 10.22.121.111. |
| Devices cannot pair (HaLow LEDs flash quickly) | Both buttons pressed and immediately released (not held)? AP solid green, Extender solid aqua? Devices in range? | Quick flashing = the 120-second retry delay — wait until it stops on both units, then pair again. AP mode changed after pairing: power-cycle the Extender (Network Mode change) or redo pairing (HaLow Mode change). |
| No IP address on a connected client | Which mode is the device in? Who runs DHCP? (See the comparison table.) | Router mode: the device serves 192.168.12.x. Access Point mode: your main router serves IPs — check its lease table; clients do not appear in the device's Local Network card. Extender clients: served via the AP's network — power-cycle the Extender if the AP was reconfigured. |
| Connected but no Internet | AP Home page: does Uplink (Ethernet) show an IP? WAN port cabled to the router? | Fix the WAN uplink first. If Internet only degrades while a computer is cabled to an Extender/AP: your OS prefers the wired link — adjust its route priority/metric so your usual connection keeps the default route. |
| Low throughput on the HaLow link | Signal strength (Connected Devices card), Realtime Graphs, Channel Analysis; distance and obstacles; bandwidth setting | Reposition or reorient the devices; pick a less crowded channel; review the bandwidth setting. Every extra mesh hop halves throughput. In Range Test, ~40 Mbps UDP + 900+ Mbps TCP = traffic went over Ethernet, not HaLow. A constantly quick-flashing HaLow LED = network loop — remove any second cable between the two sides. |
For anything not covered here: update the firmware first, then try a factory reset. To report an issue, open Help → Support → Create Archive in the web UI and keep the archive for support. Further detail: the official HaLowLink User Guide.
Tech Support & Product Discussion
Thank you for choosing our products! We are here to provide you with different support to ensure that your experience with our products is as smooth as possible. We offer several communication channels to cater to different preferences and needs.