IMX219 Camera Setup Guide
The IMX219 is a widely used 8-megapixel CMOS image sensor that utilizes a 15-pin CSI ribbon cable.
Hardware Installation
The CSI camera does not support hot-swapping. All wiring operations must be performed with the development board completely powered off.
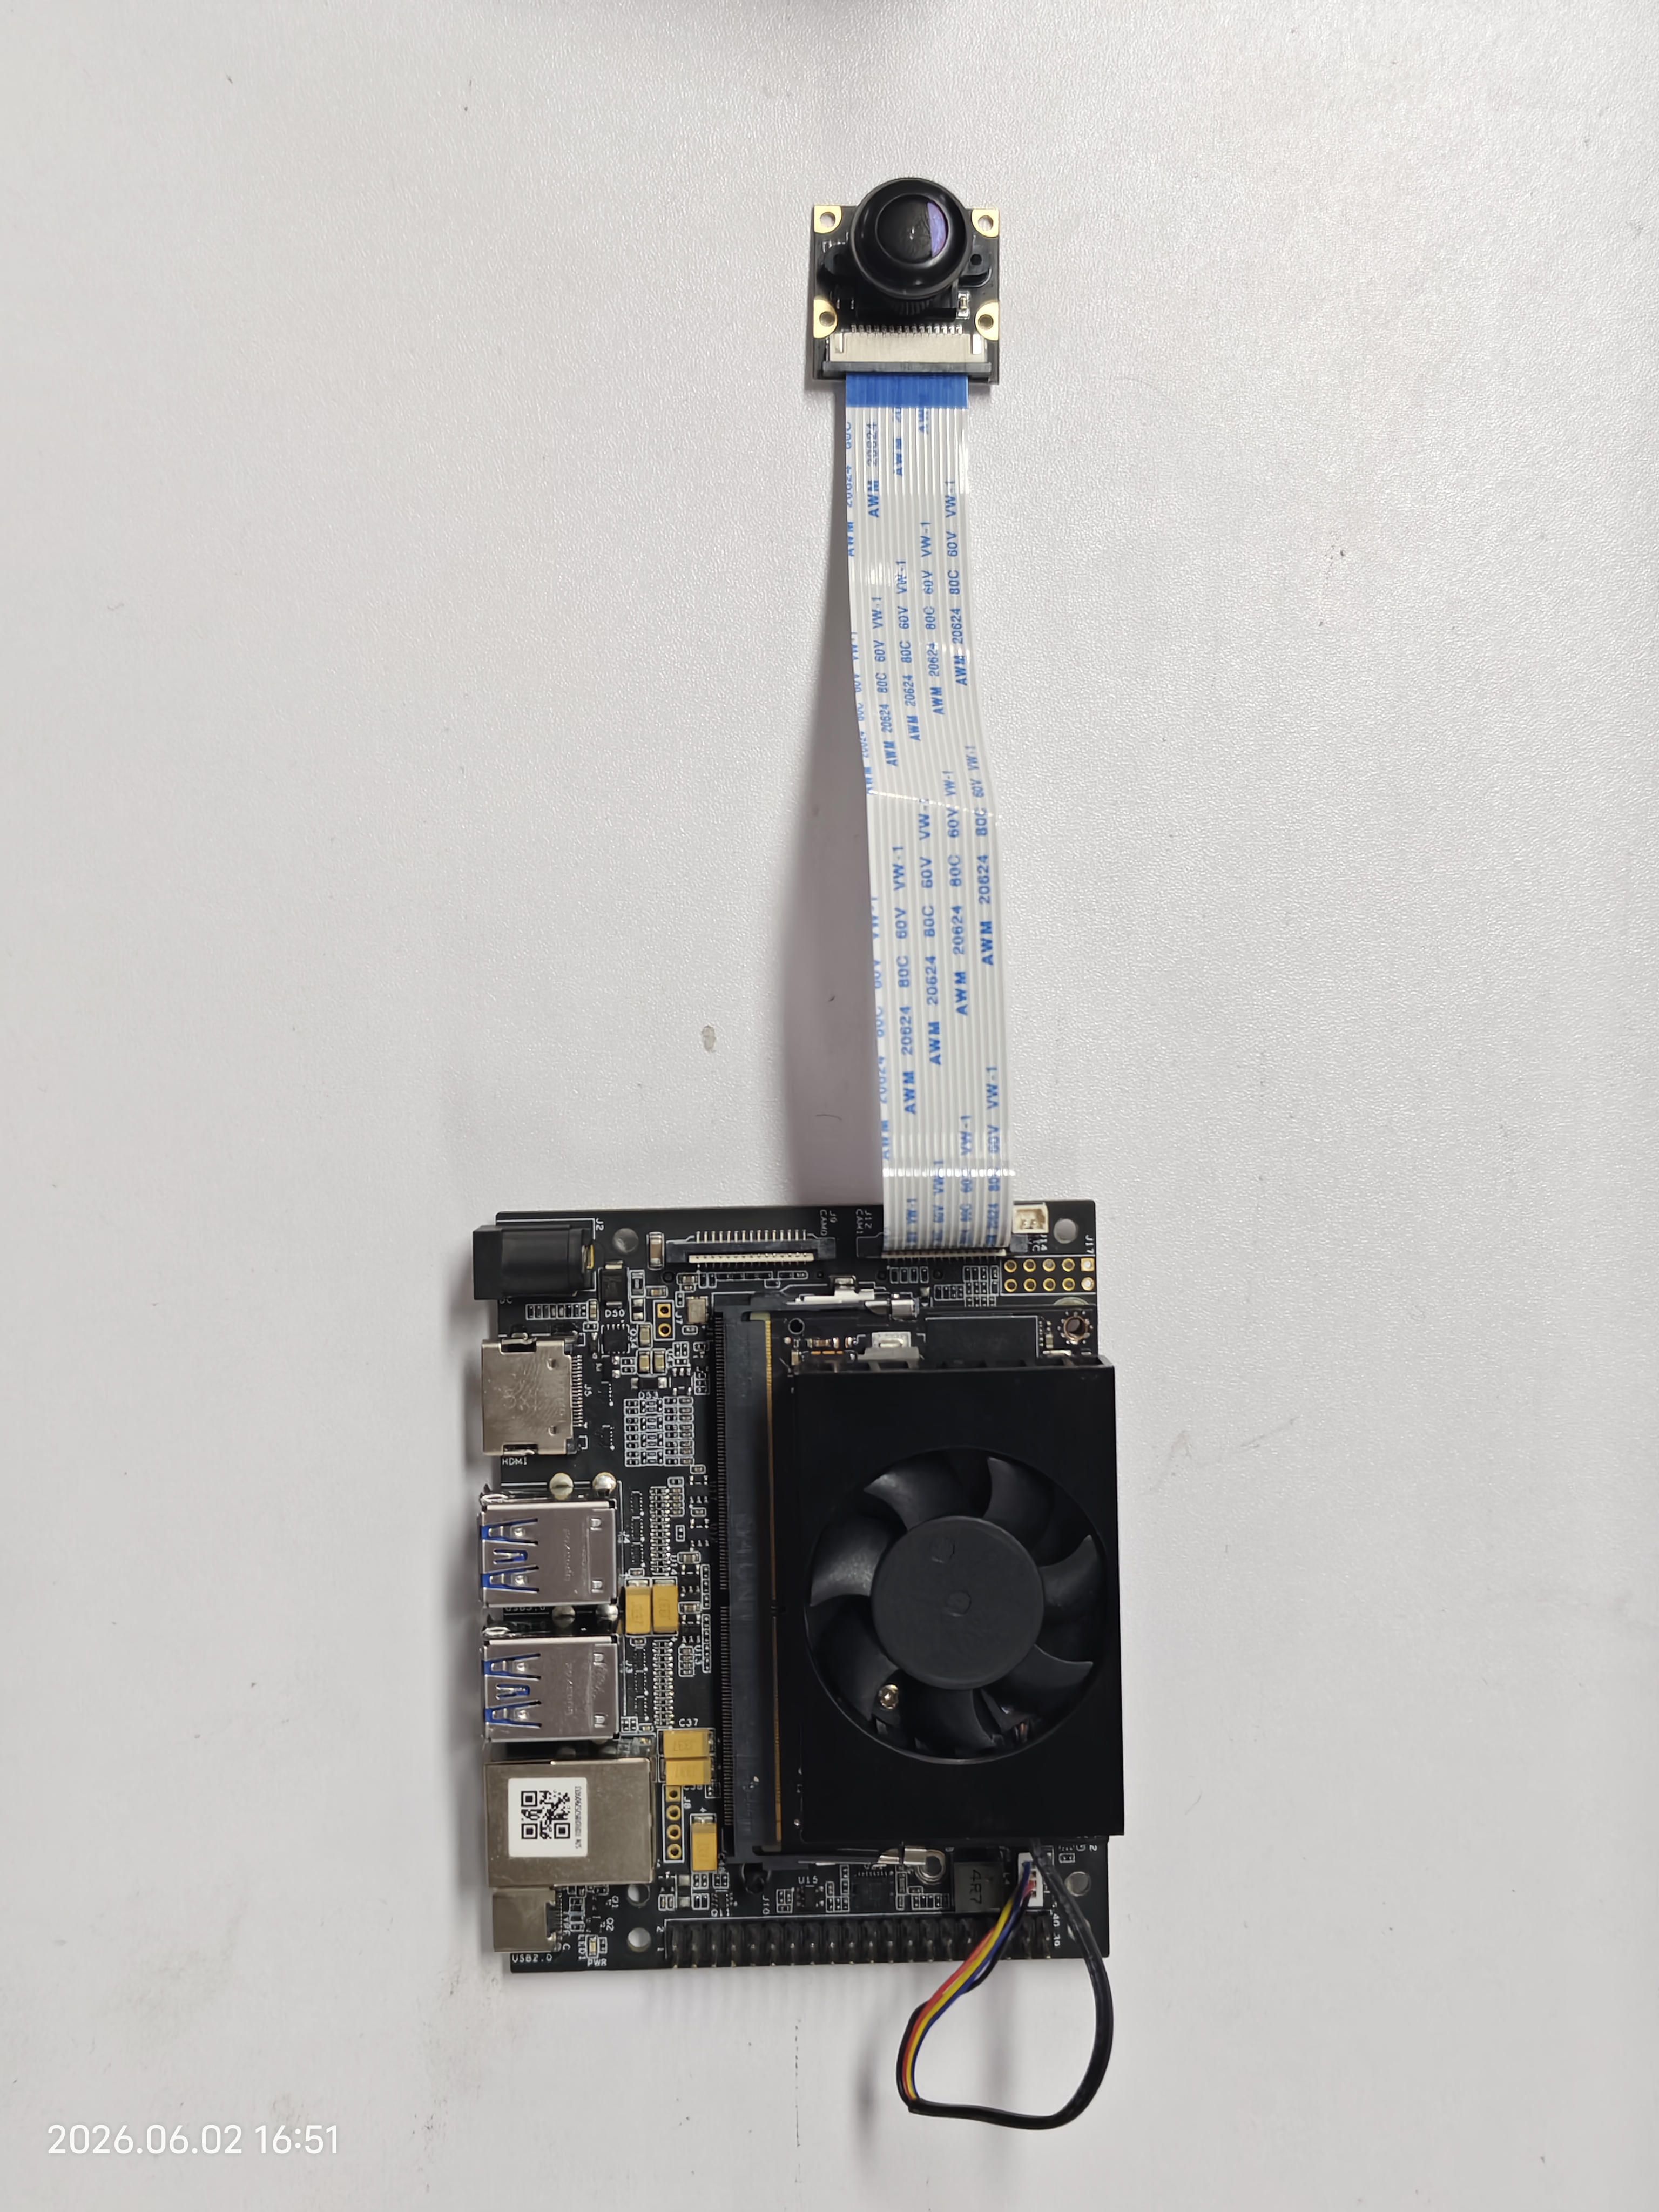
Lift the latch on the CSI connector of the Jetson board. Insert the CSI ribbon cable, ensuring the cable's metal contacts align with those on the Jetson carrier board. Press the latch down firmly to lock the cable in place.
Software Driver Configuration
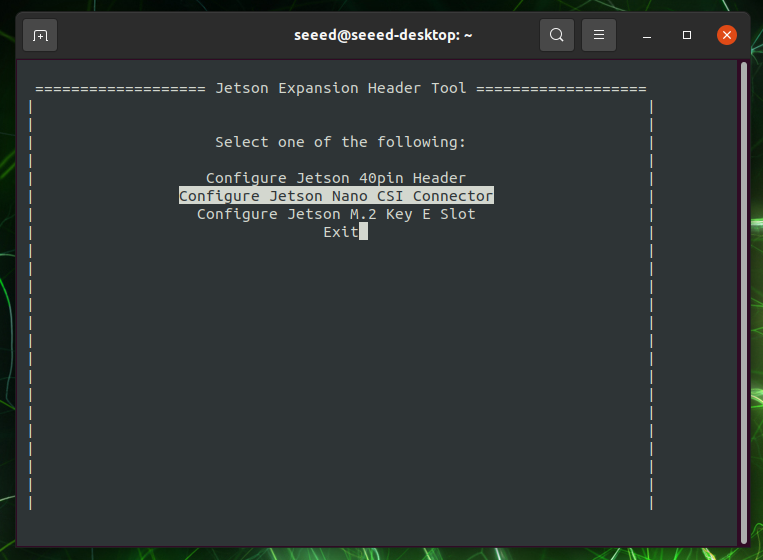
Launch the NVIDIA configuration tool:
sudo /opt/nvidia/jetson-io/jetson-io.py
Navigate to Configure Jetson Nano CSI Connector.
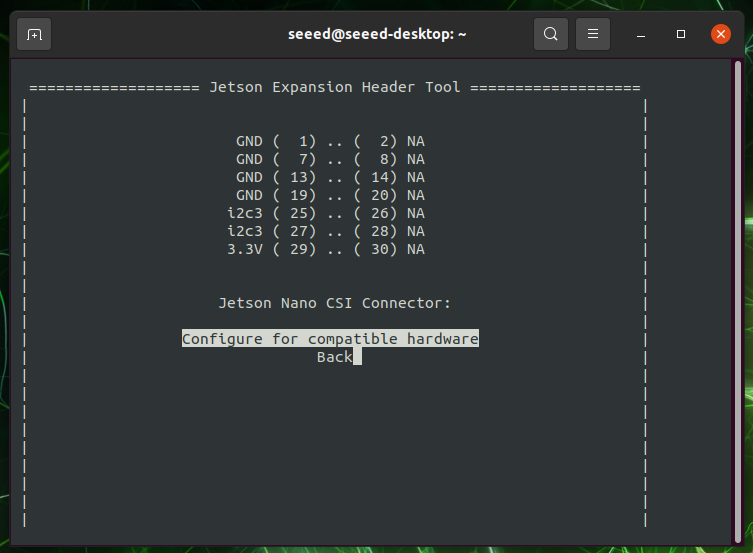
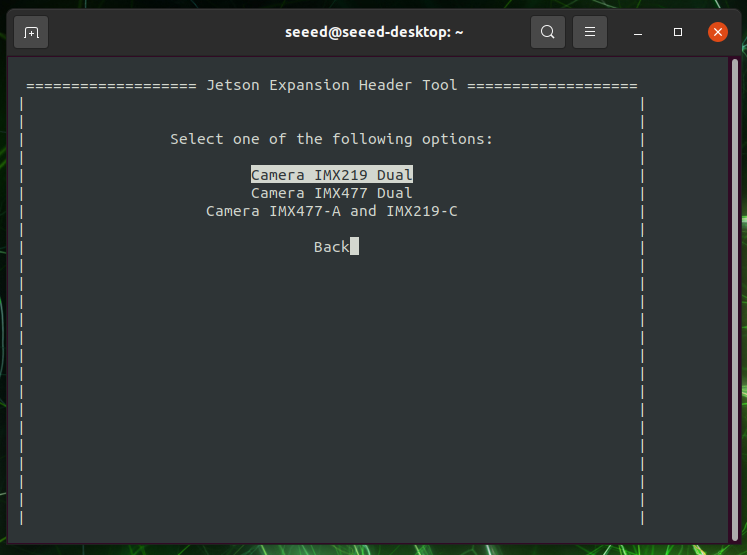
Select Configure for compatible hardware. Choose Camera IMX219 Dual from the list.
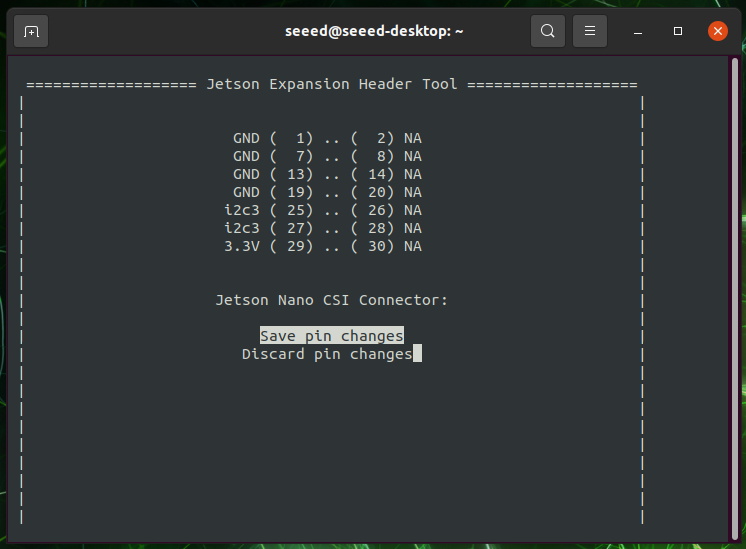
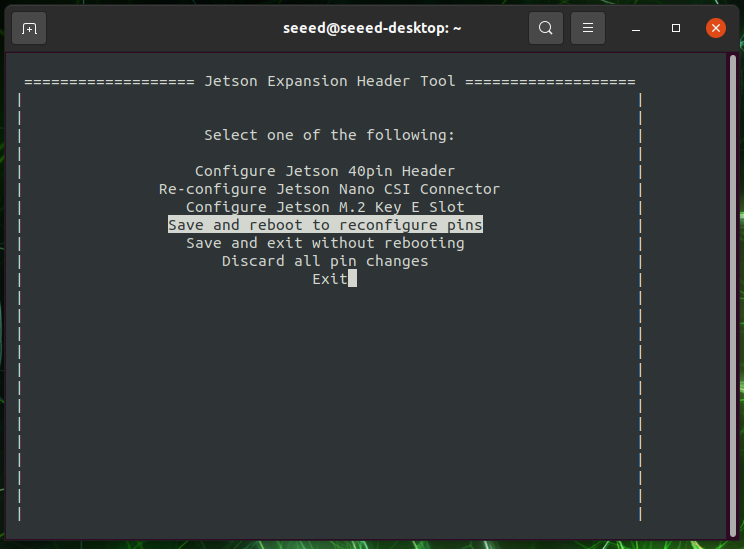
Select Save pin changes. Select Save and reboot to reconfigure pins to apply the device tree changes.
💡 Tip: If connecting a single camera, you must select the "Camera IMX219 Dual" mode for it to function correctly. Conversely, if connecting a dual-camera setup, you should select the "Single" mode.
Device Node Verification After the system reboots, open a terminal and run the following command to check if the hardware is recognized:
ls /dev/video*
If the output includes a device node like /dev/video0, the hardware connection is successful. You can then test the camera using the simplest method:
nvgstcapture
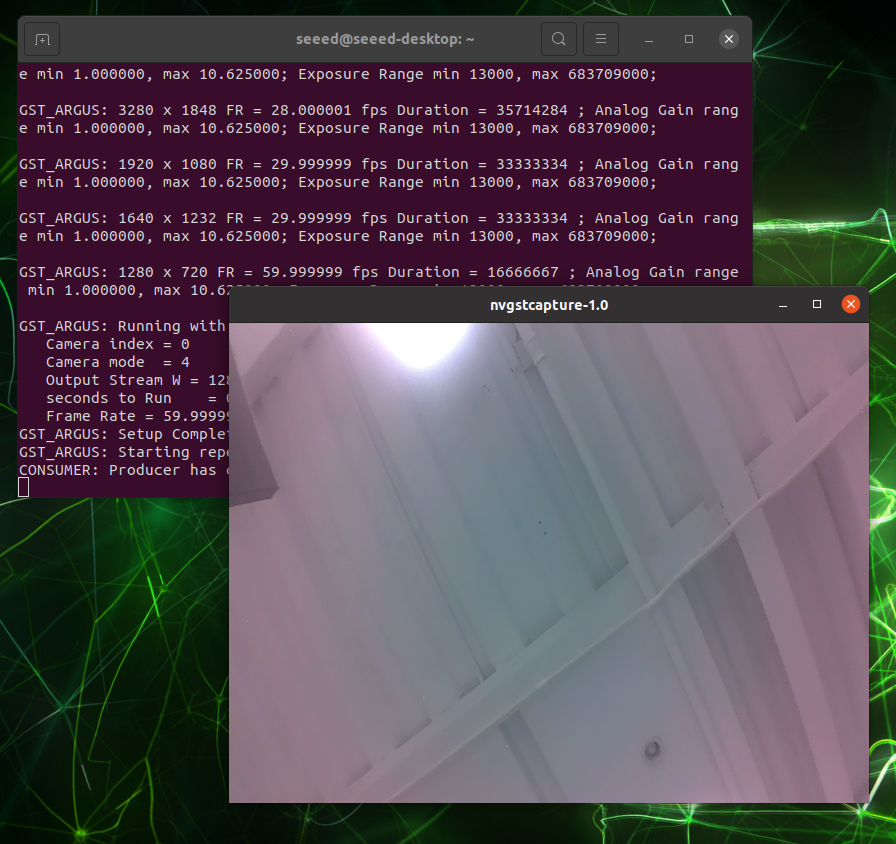
You may notice a red tint at the edges of the camera feed. This is caused by a missing ISP (Image Signal Processing) configuration file.
ISP File Configuration
You can fix the color distortion by downloading and installing NVIDIA's official ISP configuration file.
Download and extract the file:
wget https://files.seeedstudio.com//Driver/Camera_overrides.tar.gz
tar zxvf Camera_overrides.tar.gz
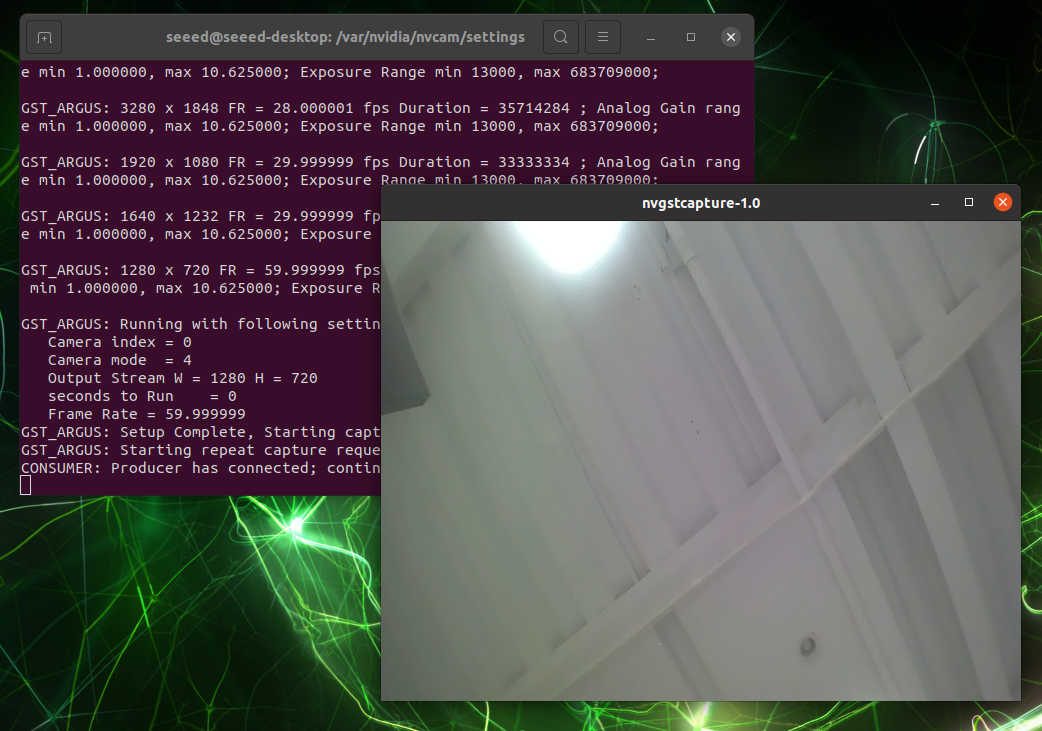
Move the file to the system's Nvidia camera settings directory and modify the permissions:
sudo mv camera_overrides.isp /var/nvidia/nvcam/settings/
sudo chmod 664 /var/nvidia/nvcam/settings/camera_overrides.isp
sudo chown root:root /var/nvidia/nvcam/settings/camera_overrides.isp
After replacing the ISP file, restart the camera preview application. The red tint at the edges should be corrected.
⚠️ Note:Applying this ISP override file may cause a blue tint around the image if you switch back to a standard Raspberry Pi V2 camera. It is recommended to back up or restore the original ISP settings when switching between different camera modules.
Tech Support & Product Discussion
Thank you for choosing our products! We are here to provide you with different support to ensure that your experience with our products is as smooth as possible. We offer several communication channels to cater to different preferences and needs.