Connect IoT Button V2 to Home Assistant via Seeed HA Discovery
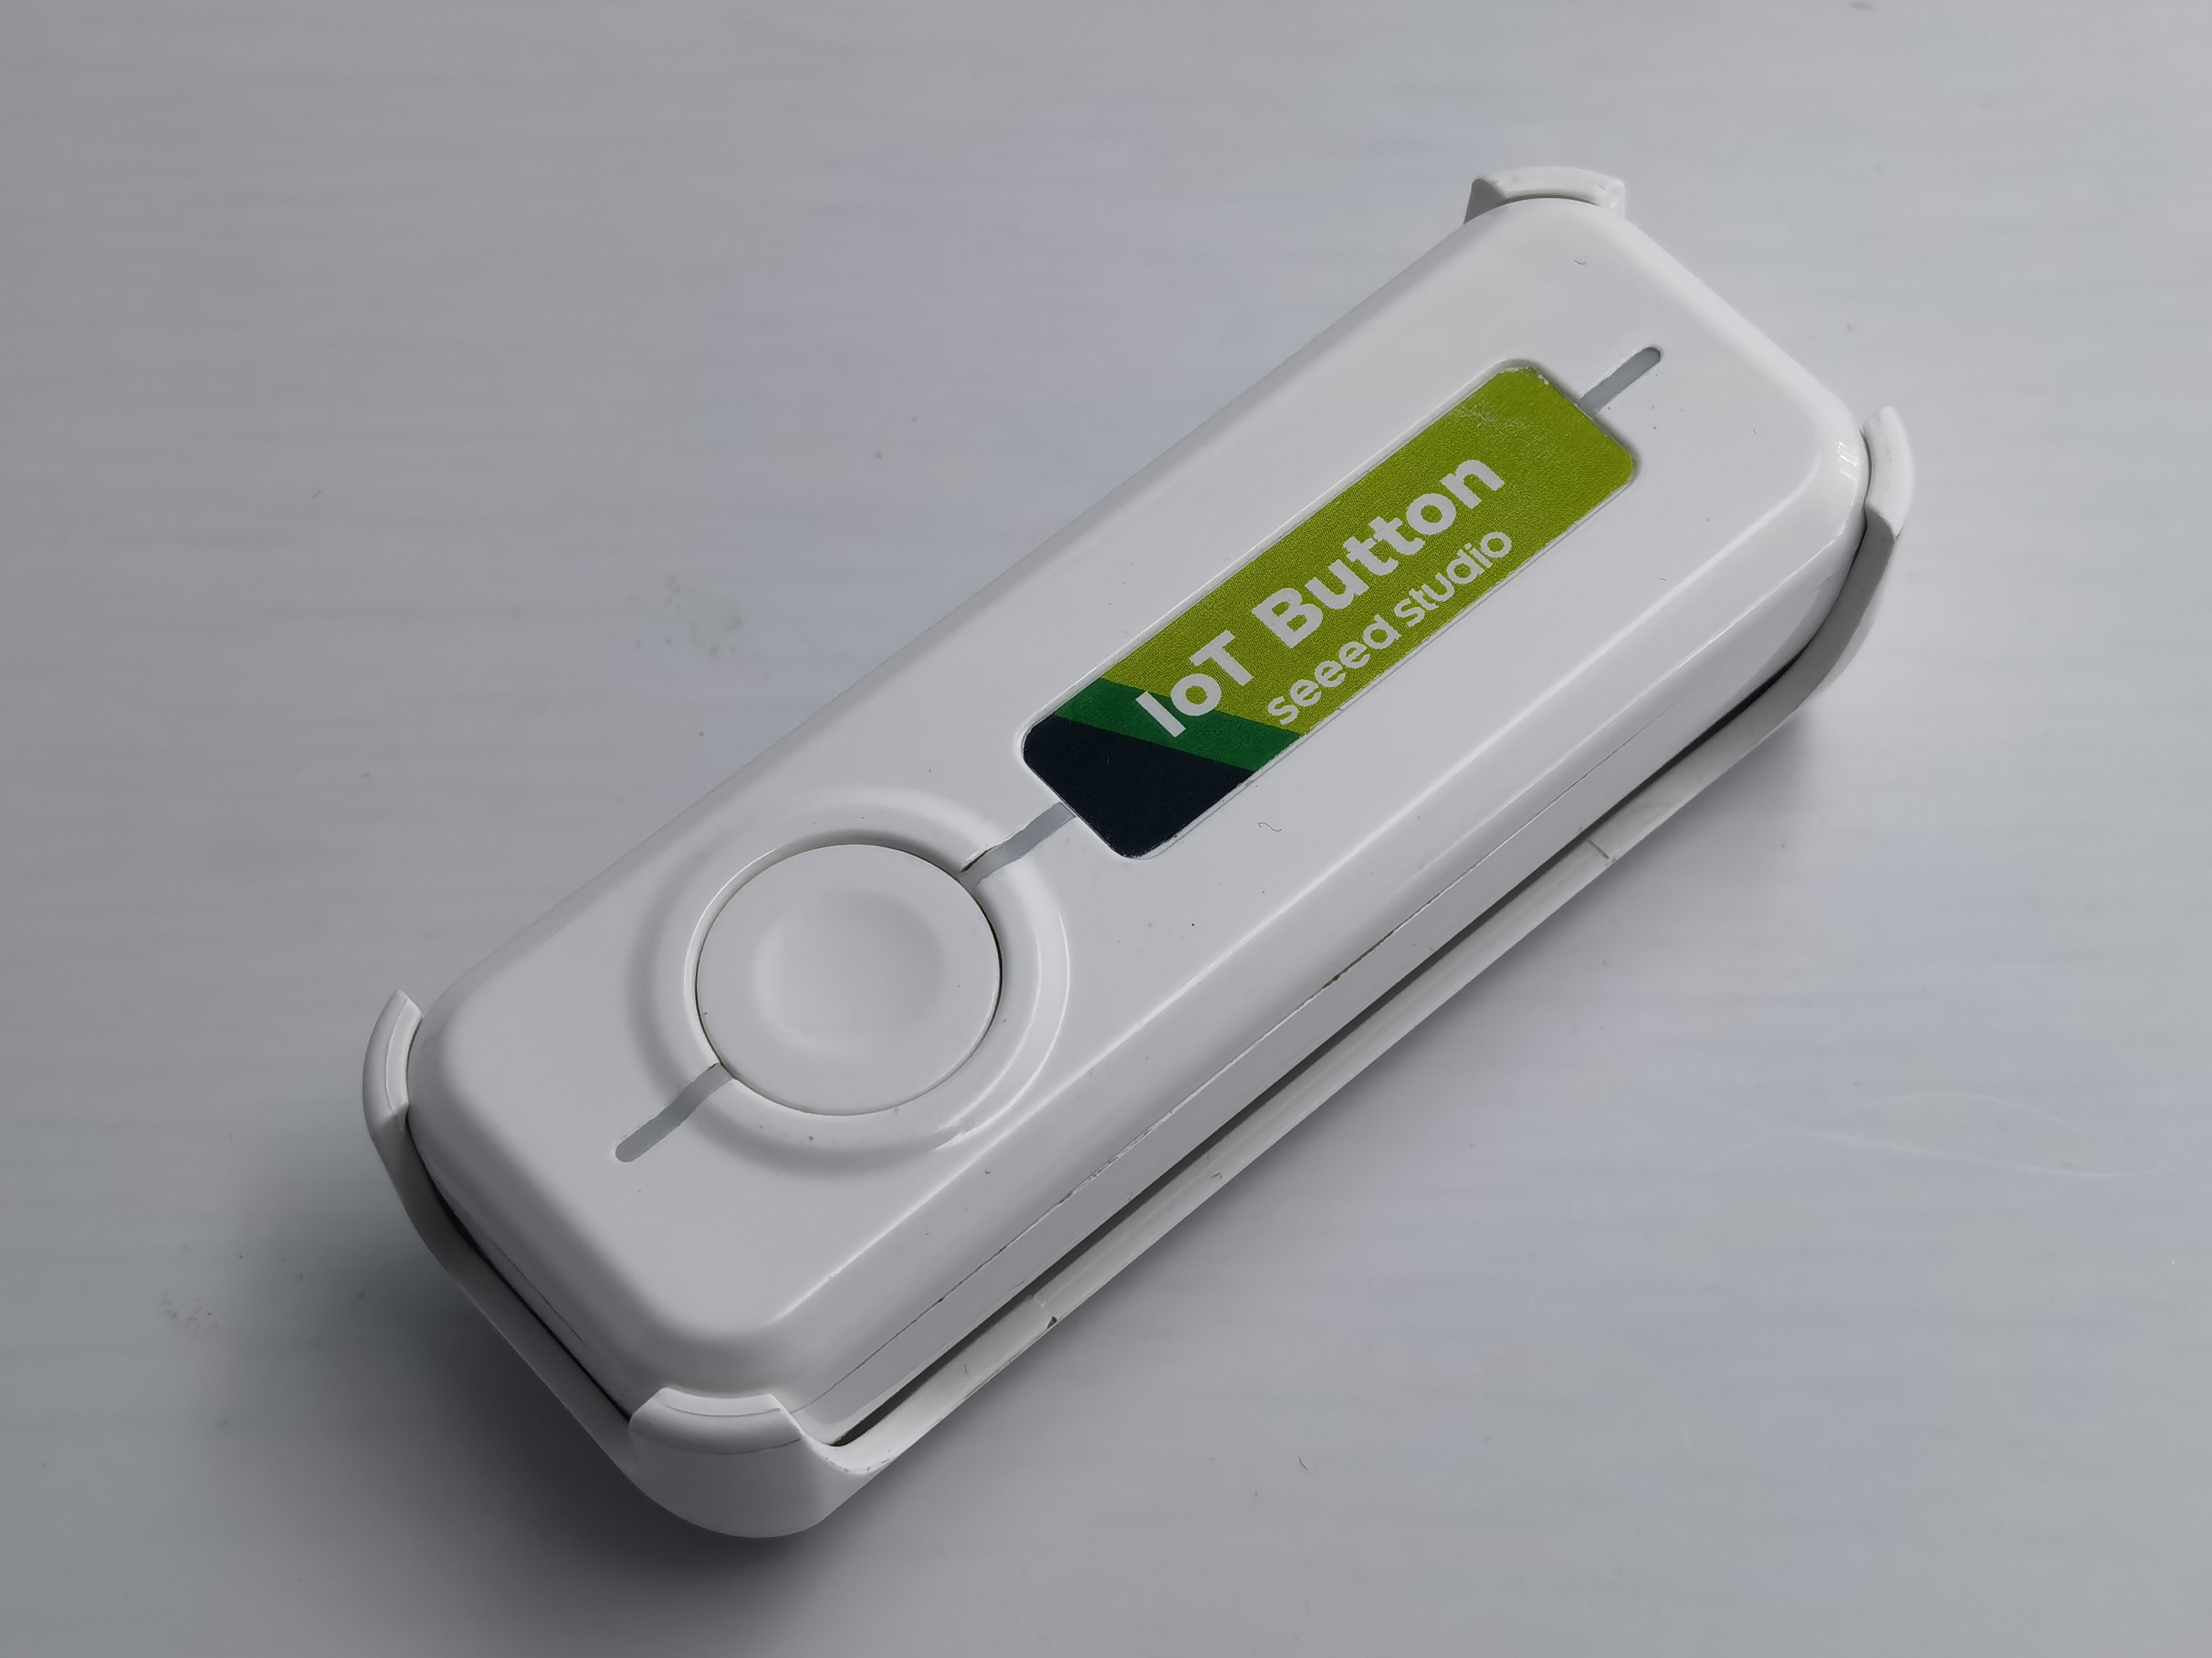
The Seeed Studio IoT Button V2 is a versatile smart switch powered by ESP32-C6, offering customizable RGB LED indicators, programmable event triggers, and USB-C charging capabilities. In this project, we'll guide you through connecting your IoT Button V2 to Home Assistant using the Seeed HA Discovery integration - a solution that makes it easy to connect ESP32 devices to Home Assistant with automatic discovery and real-time communication via WebSocket.
Compared with using ESPHome, this solution is designed specifically for deep-sleep friendly button use cases. ESPHome currently only supports light sleep for the IoT Button V2, which leads to higher power consumption over time and requires you to wake the device with a dedicated press before the actual button press can trigger entities reliably. With this firmware and the Seeed HA Discovery integration, the button can properly enter deep sleep and wake directly on button interaction, avoiding these limitations and providing a more responsive and power-efficient experience.
Getting Started
This project will walk you through three main phases: flashing the firmware to your IoT Button V2 using a web-based flasher, installing the Seeed HA Discovery integration via HACS (Home Assistant Community Store), and discovering your button in Home Assistant for smart home automation.
Materials Required
| Seeed Studio IoT Button V2 | Home Assistant Green |
|---|---|
 |  |
Home Assistant Green is the easiest and most privacy-focused way to automate your home. It offers an effortless setup and allows you to control all the smart devices with just one system, where all the data is stored locally by default. This board benefits from the thriving Home Assistant ecosystem and it will be improved every month by open source.
We recommend using Home Assistant Green as the Home Assistant host for this tutorial, or you can use any Home Assistant host with a Supervisor.
We have also written how to install Home Assistant for some of Seeed Studio products, please refer to them.
- Getting Started with Home Assistant on ODYSSEY-X86
- Getting Started with Home Assistant on reTerminal
- Getting Started with Home Assistant on LinkStar H68K/reRouter CM4
If you are not using a Seeed Studio product, you can also check and learn how to install Home Assistant for other products on the official Home Assistant website.
Preliminary Preparation
Before starting this project, ensure you have the following:
- A running Home Assistant instance (Home Assistant OS, Container, or Core)
- HACS (Home Assistant Community Store) installed on your Home Assistant
- A computer with Google Chrome or Microsoft Edge browser (required for web-based firmware flashing)
- Your WiFi network name (SSID) and password
- Your IoT Button V2 and a USB-C cable for connection
If you haven't installed HACS yet, please follow the official HACS installation guide to set it up first. HACS is required to install the Seeed HA Discovery integration.
Flash Firmware to IoT Button V2
Seeed HA Discovery is a complete solution for easily connecting ESP32/nRF52840 devices to Home Assistant, and the first step is to flash the appropriate firmware to your IoT Button V2.
The web-based firmware flasher is only compatible with IoT Button V2. Currently not supported for use with IoT Button V1.
Step 1. Access the Web Flasher
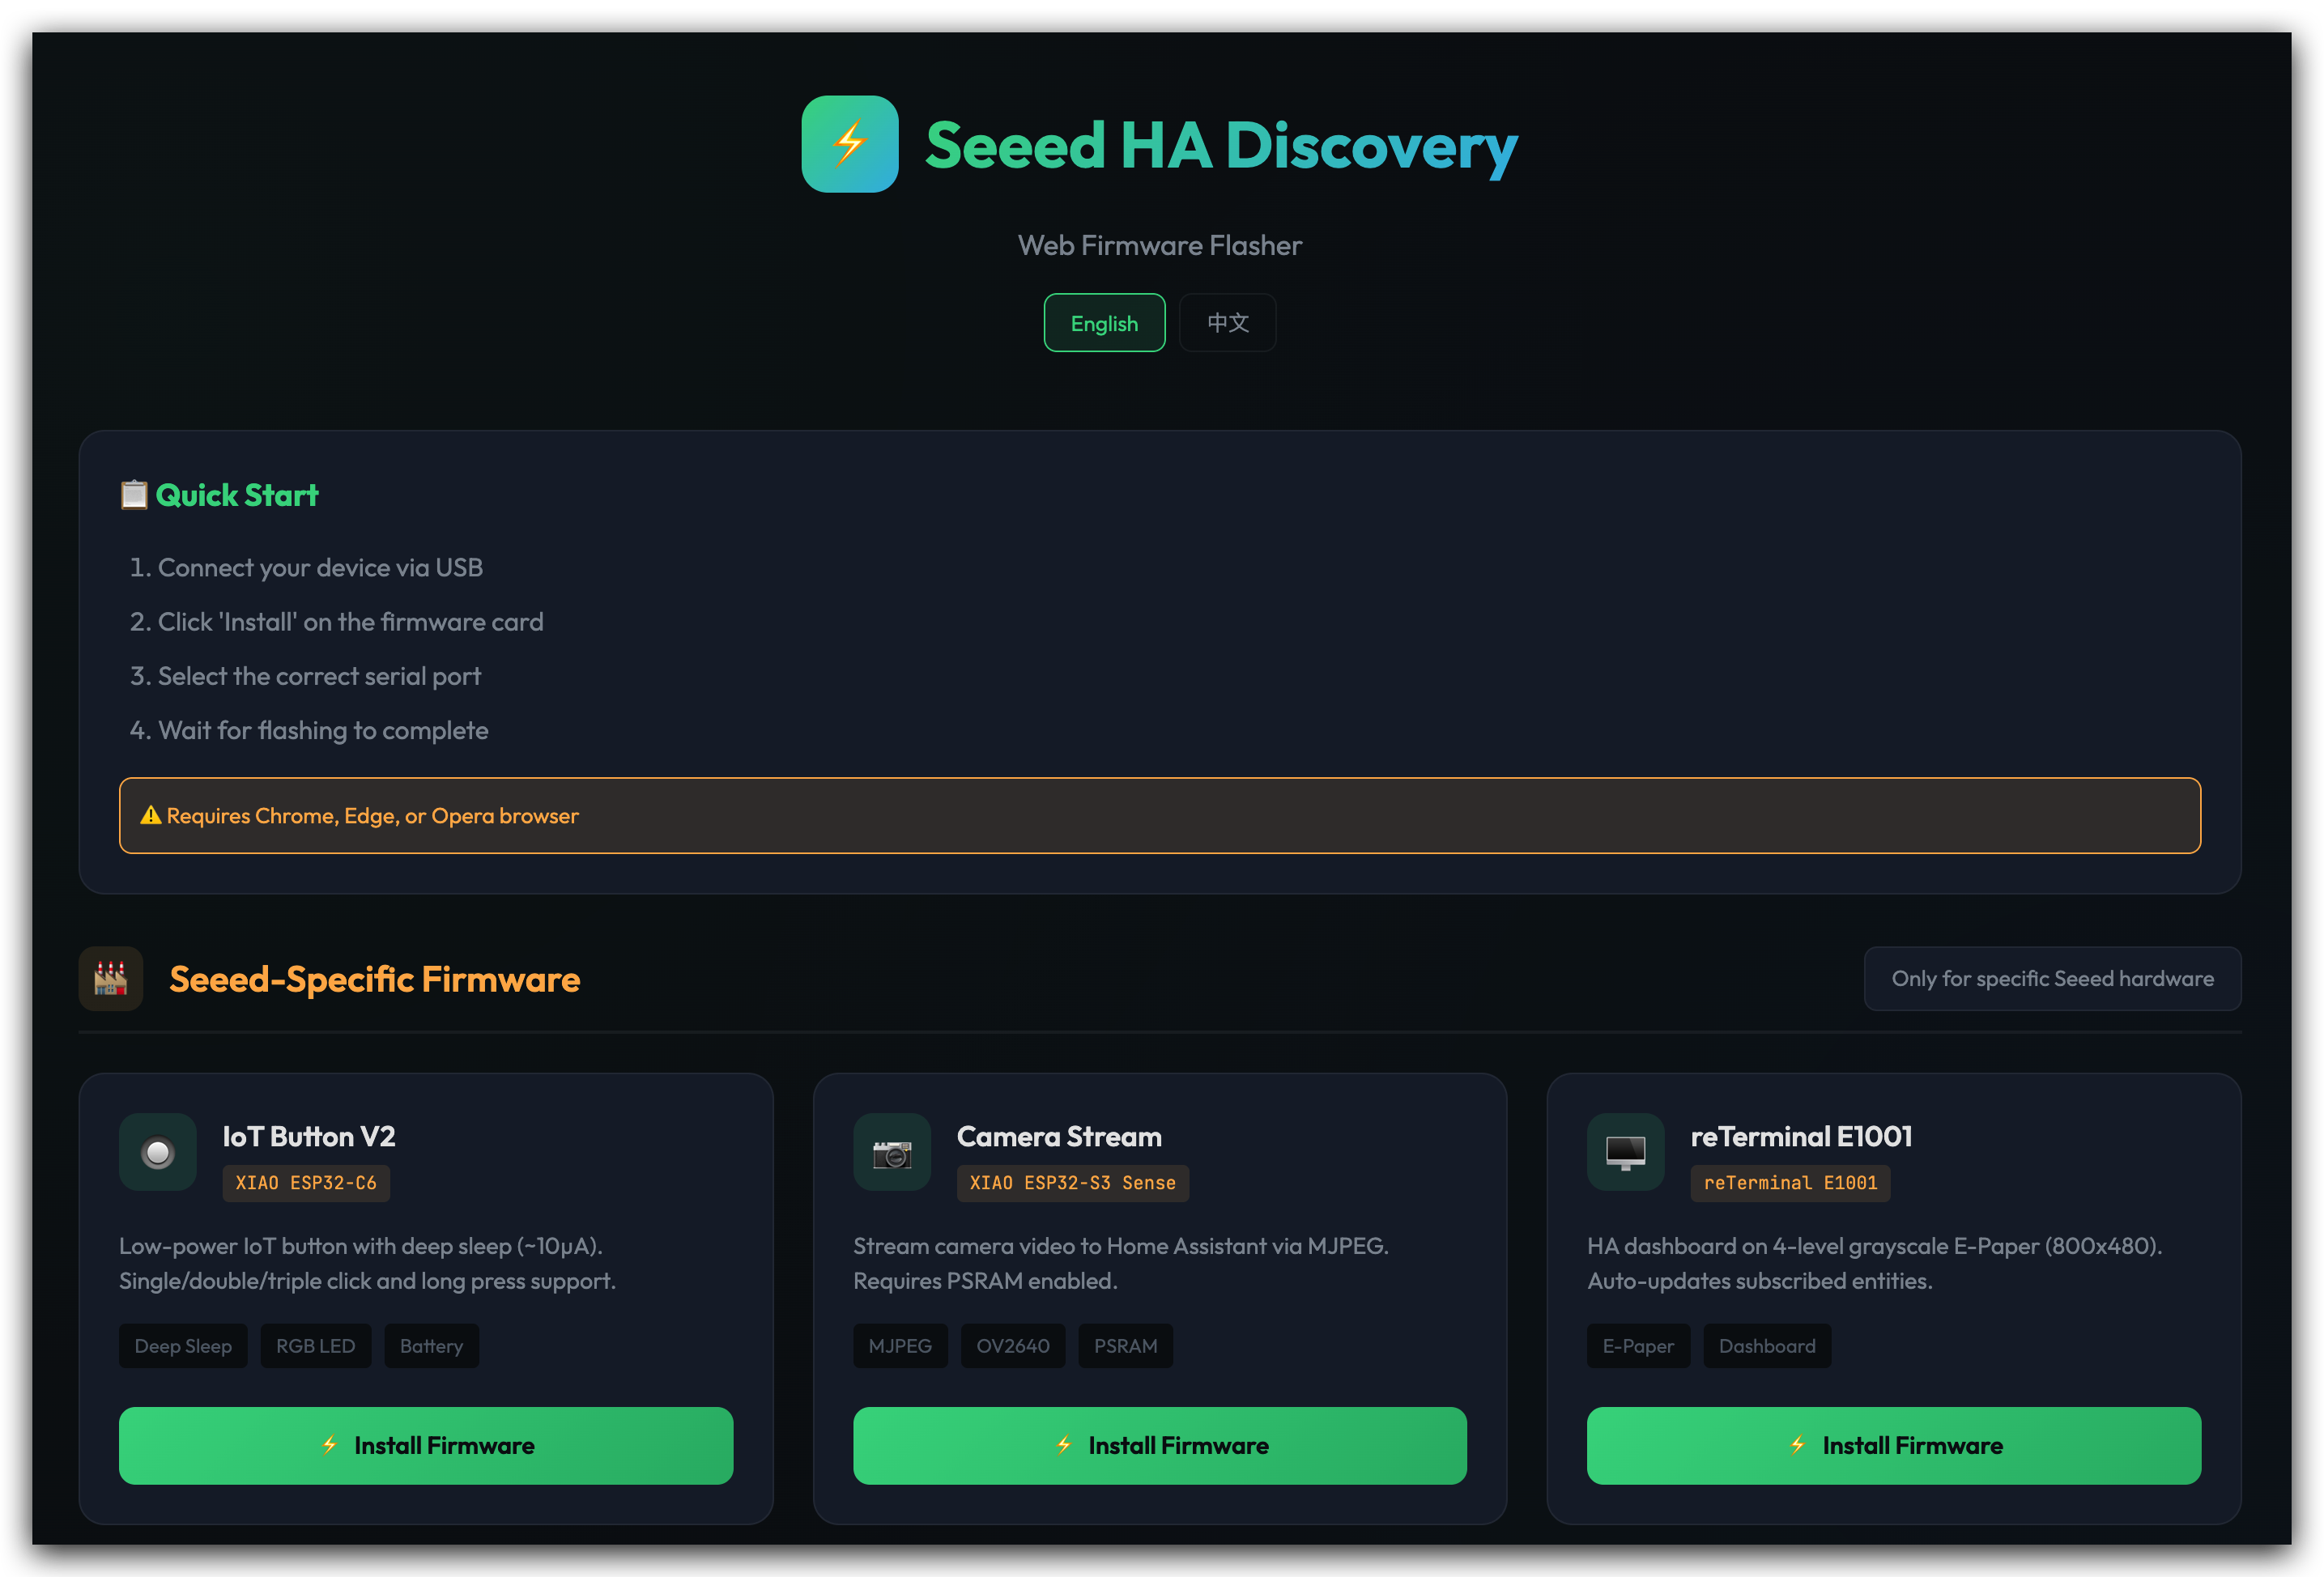
Open Google Chrome or Microsoft Edge browser and navigate to the Seeed HA Discovery Web Flasher:
Web Serial is available in Google Chrome and Microsoft Edge browsers (but not on your iOS device). Make sure you're using a supported browser on a desktop or laptop computer.
Step 2. Connect Your IoT Button V2
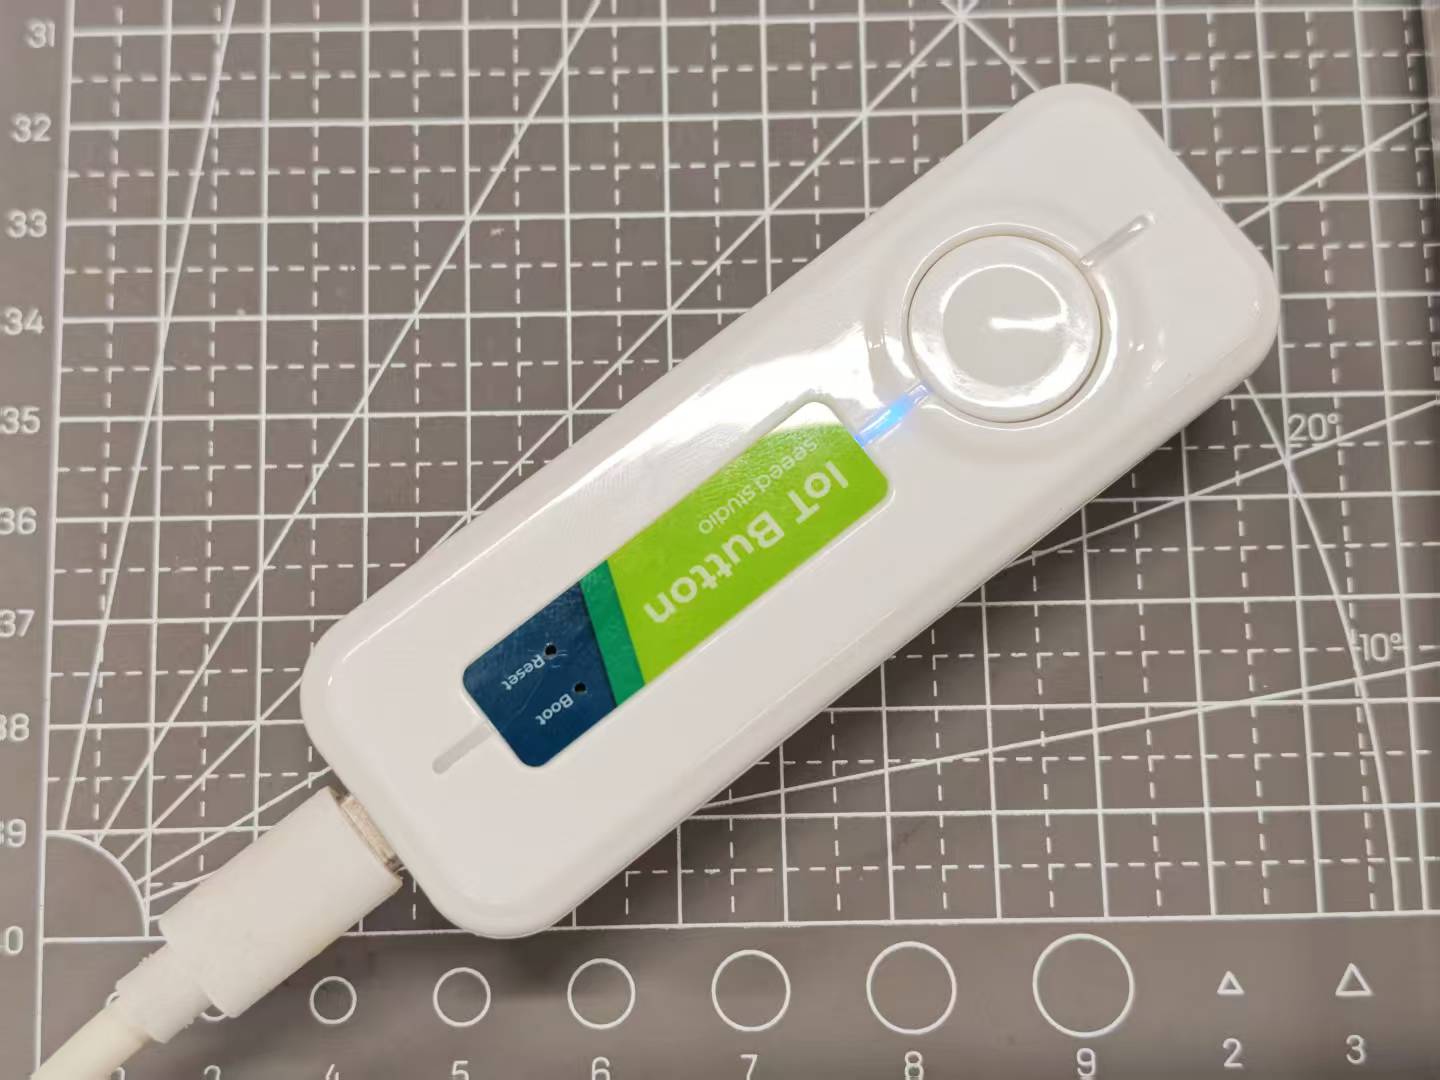
If you are using Zigbee/ESPHome firmware, please note whether the device automatically enters sleep mode. If the device enters sleep mode, you may be unable to locate its serial port. Ensure the device's blue LED is lit and remains awake before flashing the firmware.
Step 2.1. Connect your IoT Button V2 to your computer using a USB-C cable.
Step 2.2. On the web flasher page, locate the IoT Button V2 firmware option and click the "Connect" button.
Step 2.3. A browser popup will appear showing available serial ports. Select the port corresponding to your IoT Button V2 (usually labeled as USB JTAG or serial) and click "Connect".

Step 3. Flash the Firmware
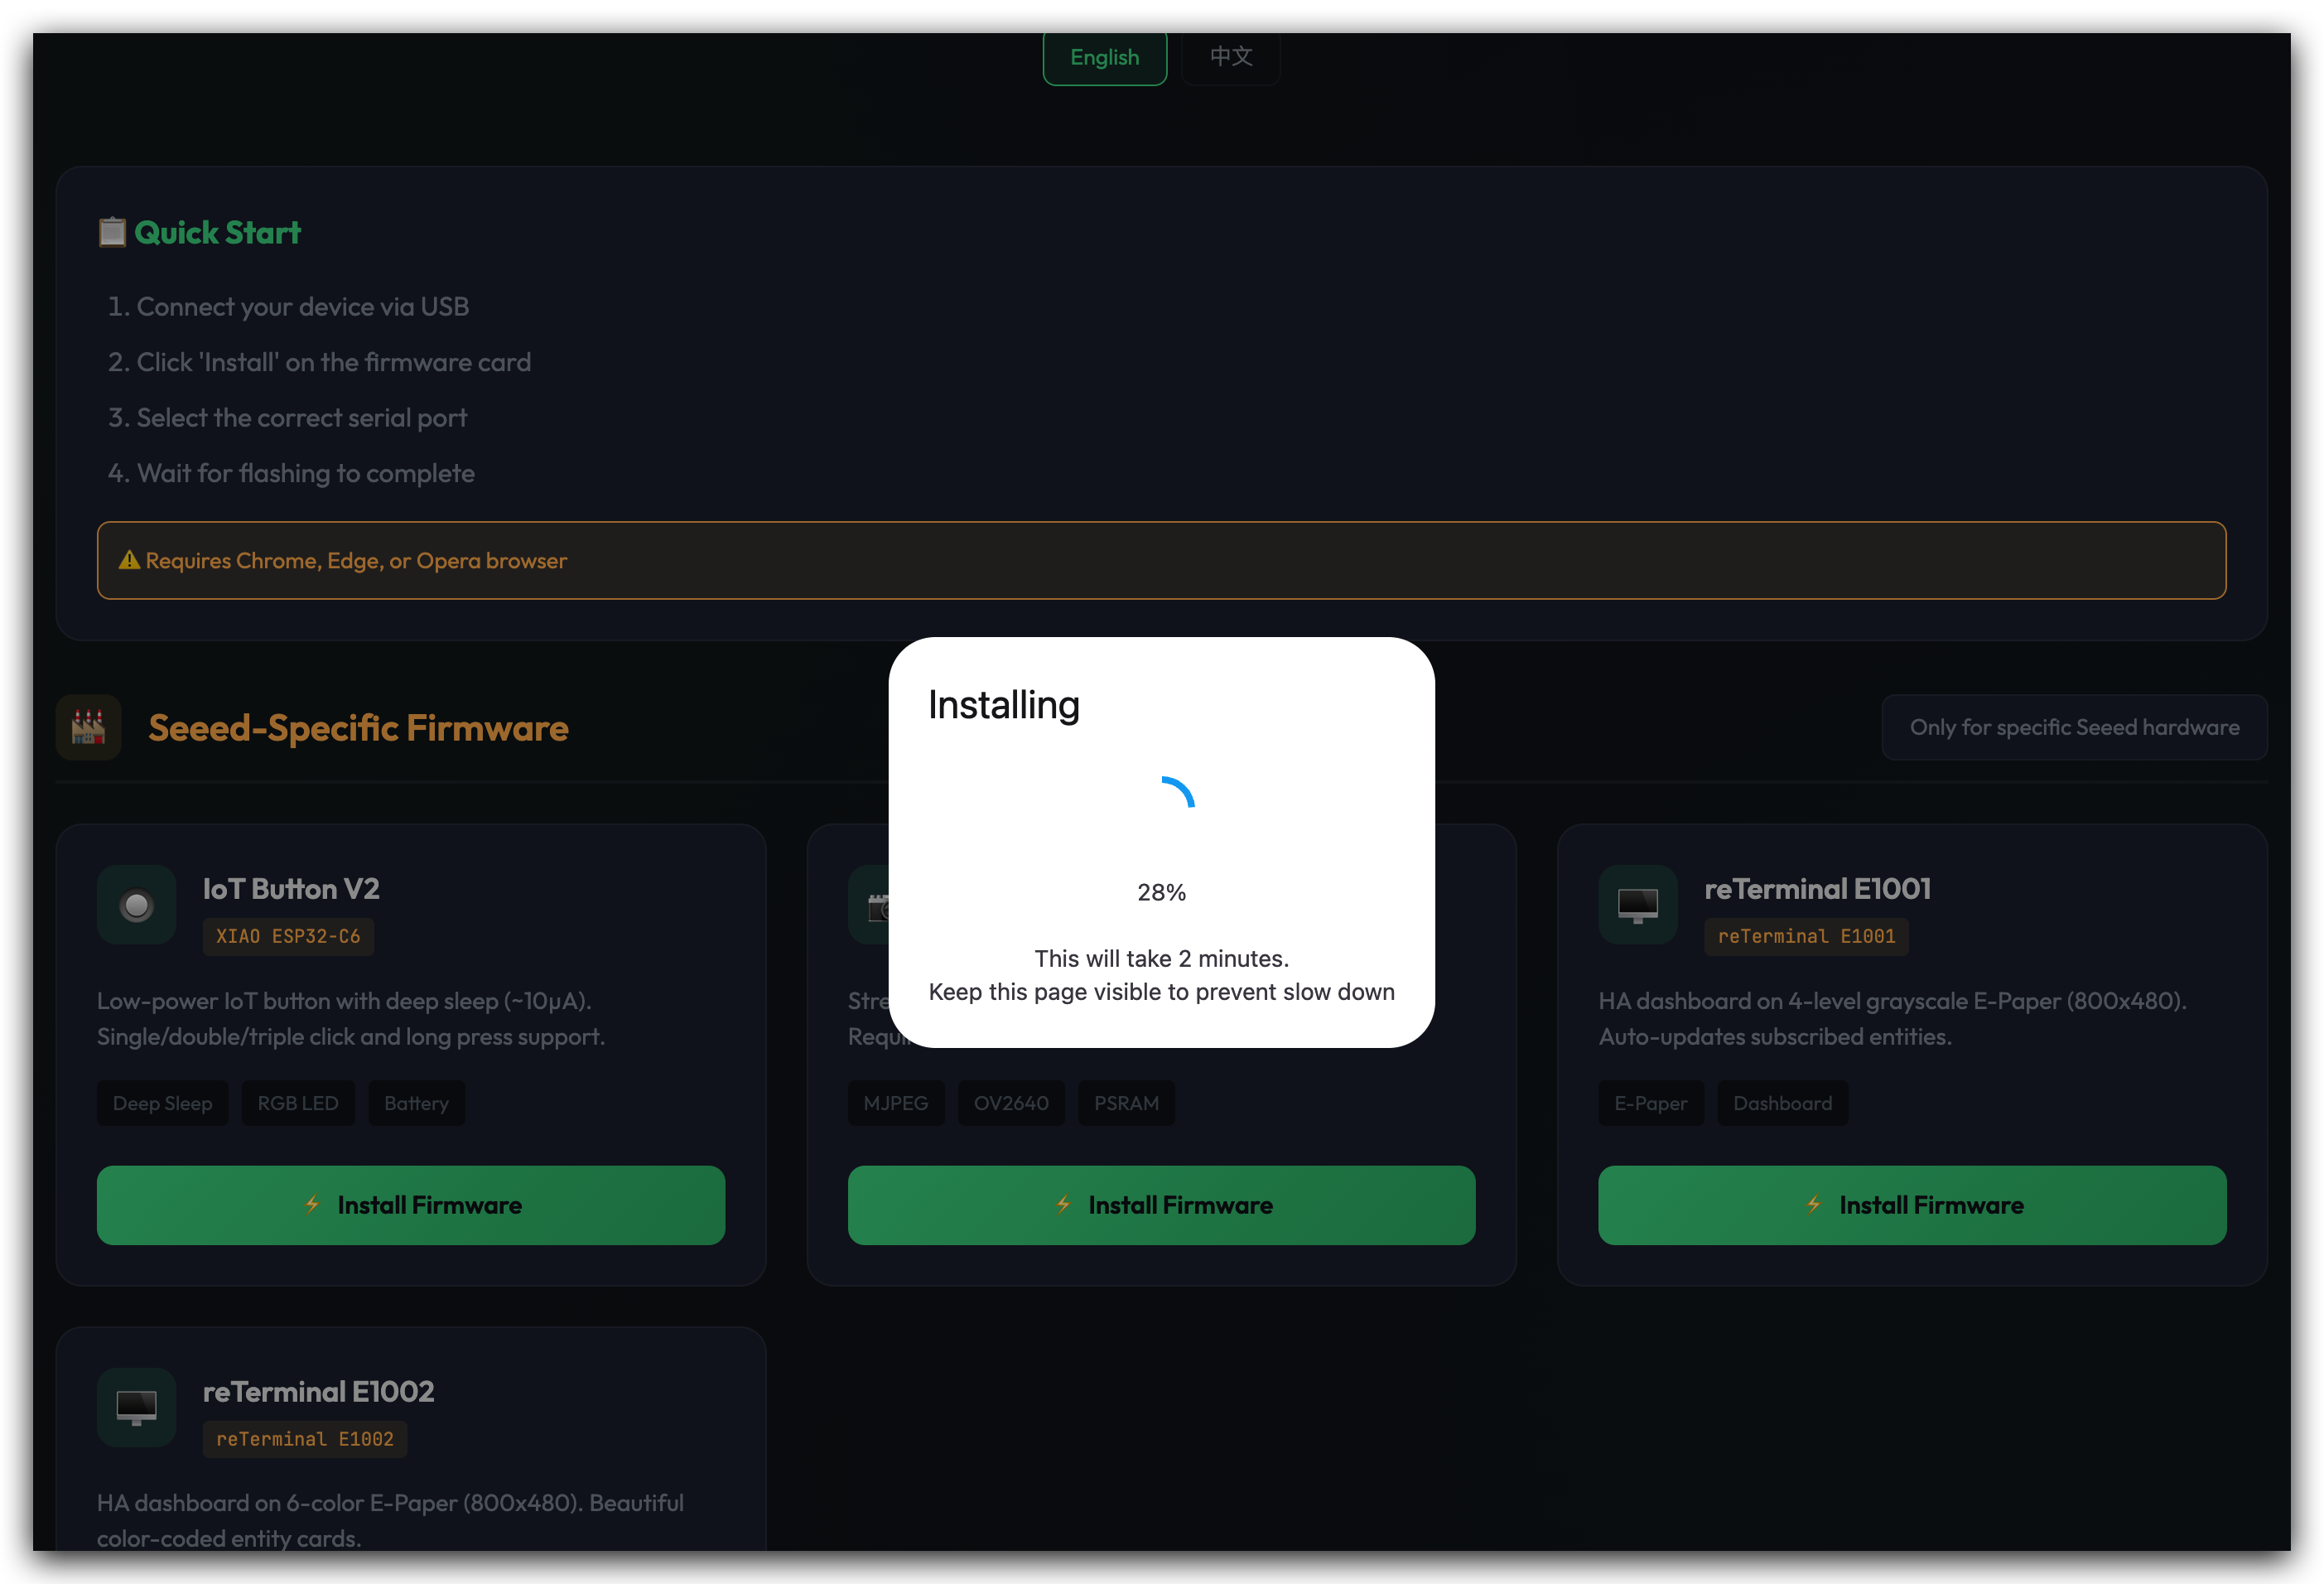
Step 3.1. Once connected, click the "Install IoT Button V2" button to begin the firmware upload process.
Step 3.2. Then you need to choose whether to erase the device. If you only want to update the device firmware without losing network credentials, you can leave this option unchecked and click Next. If you're switching from another firmware, I strongly recommend checking this button during your first firmware flash.

The flasher will erase the existing firmware and upload the new Seeed HA Discovery firmware. This process typically takes 1-2 minutes. Do not disconnect your device during this process.
Step 3.3. When you see the "Installation complete!" message, your firmware has been successfully flashed.
Understanding the Firmware Features
The IoT Button V2 firmware with deep sleep functionality offers several key features:
Power Management:
- The deep_sleep component can be used to automatically enter a deep sleep mode on the ESP32 after a certain amount of time. This is especially useful with nodes that operate on batteries and therefore need to conserve as much energy as possible[1].
- The button enters light sleep mode after 3 minutes of inactivity to conserve battery power
- Wake up from sleep is triggered by pressing the button
Button Events:
- Single Press: Triggers single-click event in Home Assistant
- Double Press: Triggers double-click event in Home Assistant
- Long Press: Triggers long-press event (typically 1+ seconds)
- Triple Press: Enters developer mode, where the device stays awake for 3 minutes, allowing you to flash firmware without losing the serial port connection
- Long Press (6+ seconds): After the LED flashes, release the button to initiate network reconfiguration mode, allowing you to configure a new Wi-Fi network
LED Feedback:
- RGB LED provides visual feedback for button presses and connection status
- Customizable LED colors for different states
Battery Monitoring:
- ADC-based voltage reading for battery level estimation
- Real-time battery status reporting to Home Assistant
IoT Button V2: Lifecycle & Events
Install Seeed HA Discovery Integration
Now that your IoT Button V2 has the appropriate firmware, the next step is to install the Seeed HA Discovery integration in Home Assistant via HACS.
Step 4. Install HACS (If Not Already Installed)
If you haven't installed HACS yet:
Step 4.1. Install the Home Assistant Community Store (HACS) to enable the installation of Seeed HA Discovery plugins within Home Assistant.
Step 4.2. Follow the official HACS installation guide at https://www.hacs.xyz/docs/use/download/download/#to-download-hacs

Step 4.3. You may need to restart Home Assistant for HACS to fully integrate into your system.
Step 5. Add Seeed HA Discovery Repository
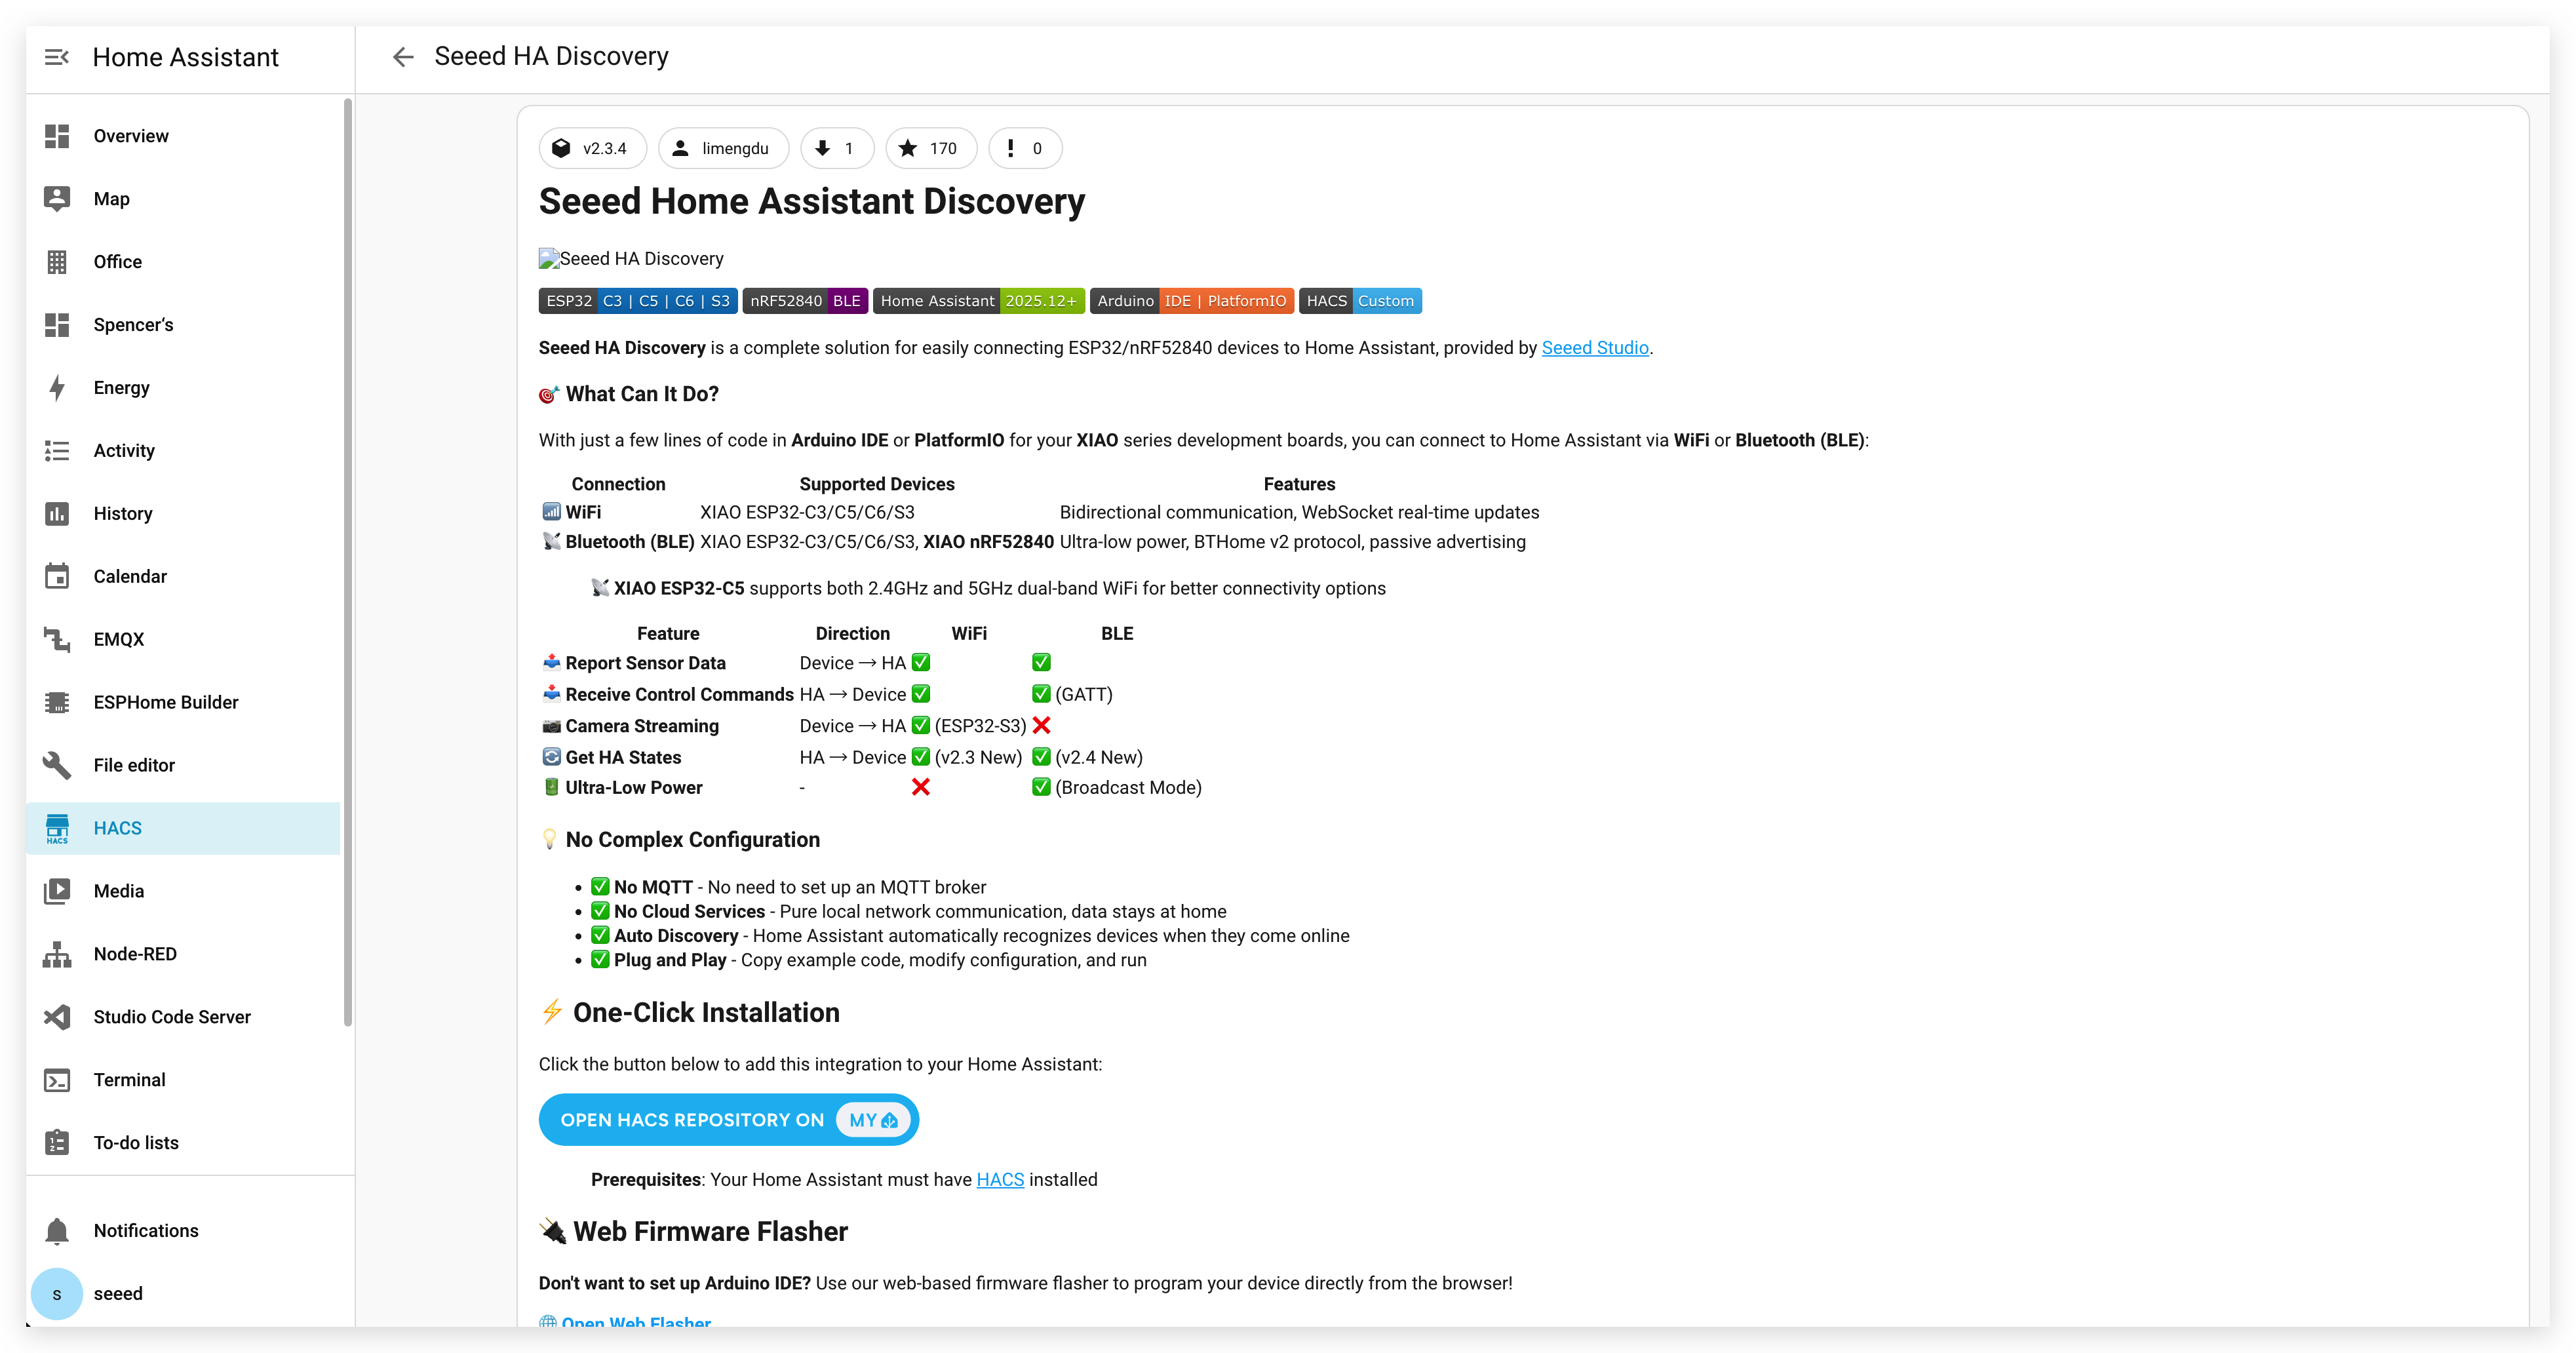
Step 5.1. Navigate to the Seeed HA Discovery GitHub repository:
Step 5.2. In the README section, locate the ⚡ One-Click Installation area and click the OPEN HACS REPOSITORY ON MY HA button.
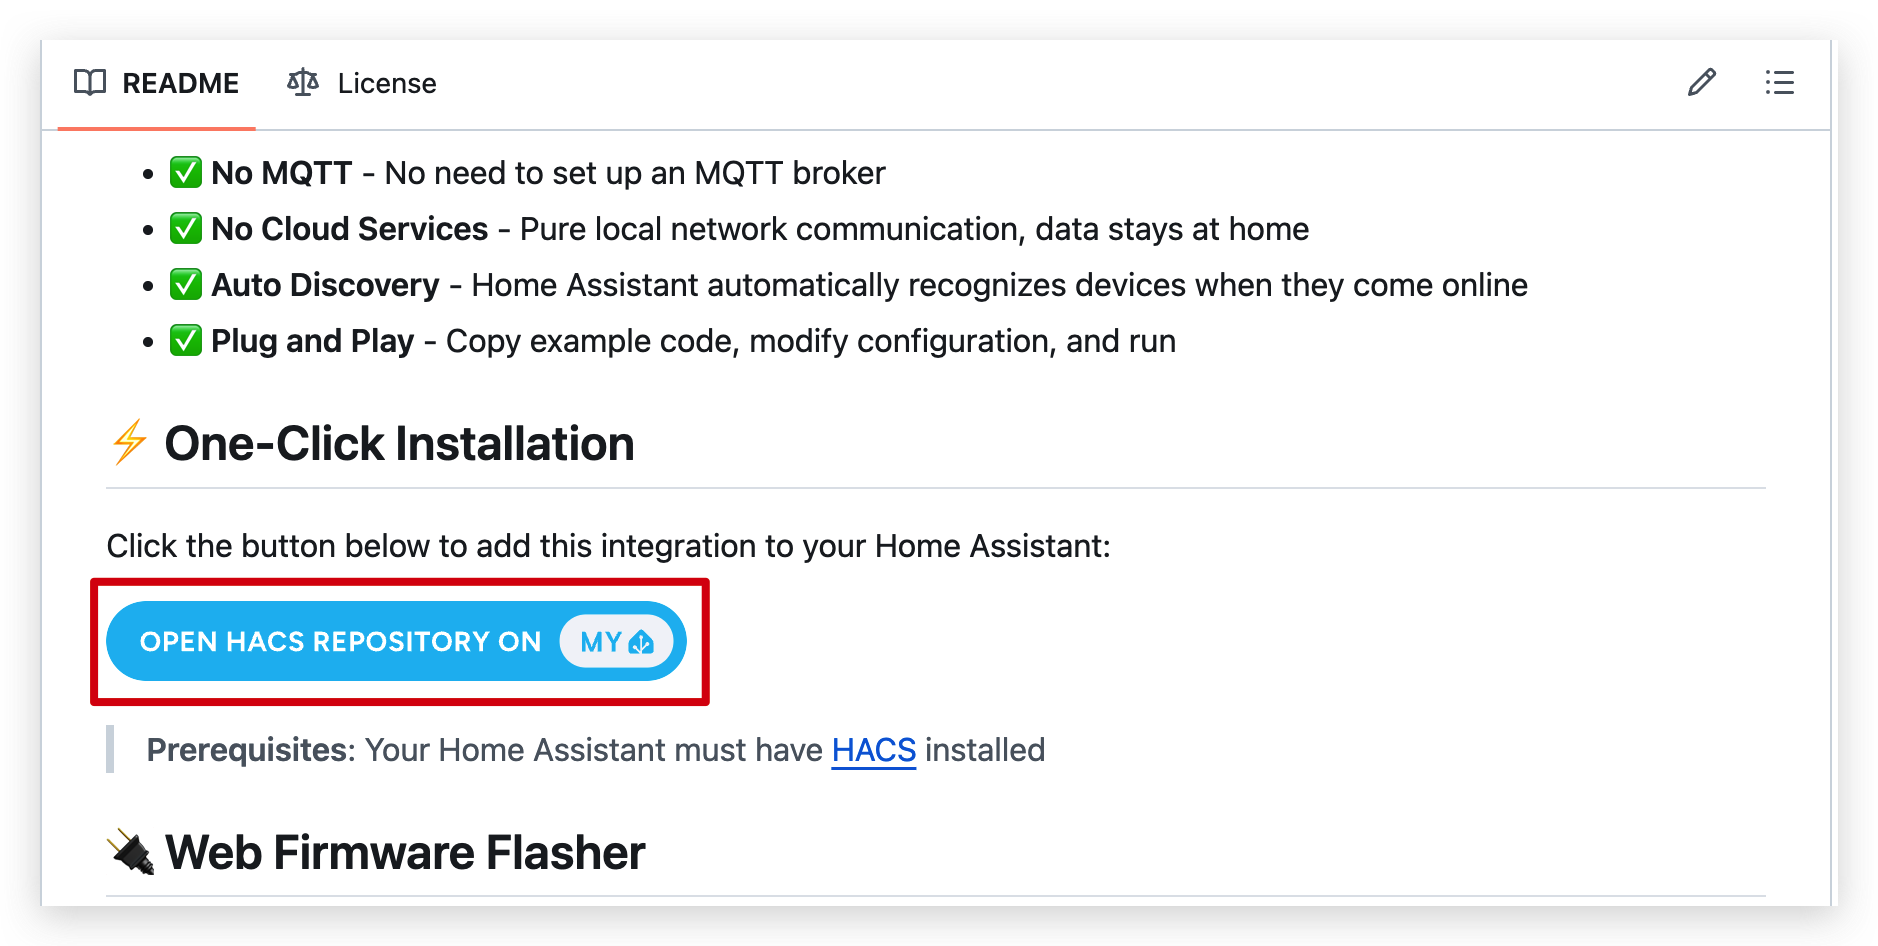
This button will automatically redirect you to your Home Assistant instance and open the HACS repository addition page.
Step 5.3. A redirect page will appear showing your Home Assistant URL. Verify that the detected Home Assistant address is correct (it should match your Home Assistant's IP address or domain name).

-
If the address is correct, click Open link to proceed
-
If the address is incorrect, manually enter your correct Home Assistant URL in the format:
http://YOUR_HA_IP:8123orhttps://YOUR_HA_DOMAIN
Step 5.4. Home Assistant will open and display the HACS repository addition dialog with the Seeed HA Discovery repository URL already filled in.
Step 5.5. Click bottom-right corner Download to add the repository to HACS. Ensure you are using the latest version of the plugin. After the installation script has finished, you need to restart Home Assistant to apply the changes. You can restart Home Assistant through the UI by going to Settings > System > Restart
If the one-click button doesn't work, you can manually add the repository by:
-
Opening HACS in your Home Assistant sidebar
-
Clicking the menu button (three dots) in the bottom right corner
-
Selecting "Custom repositories"
-
Entering
https://github.com/limengdu/Seeed-Homeassistant-Discoveryand selecting category "Integration"
Configure WiFi and Discover IoT Button
With the integration installed, you can now configure your IoT Button V2 to connect to your WiFi network and discover it in Home Assistant.
Step 6. Configure WiFi on IoT Button V2
Step 6.1. After flashing the firmware, your IoT Button V2 will create a WiFi access point (AP) for initial configuration. The AP name will typically be Seeed_IoT_Button_V2_AP.
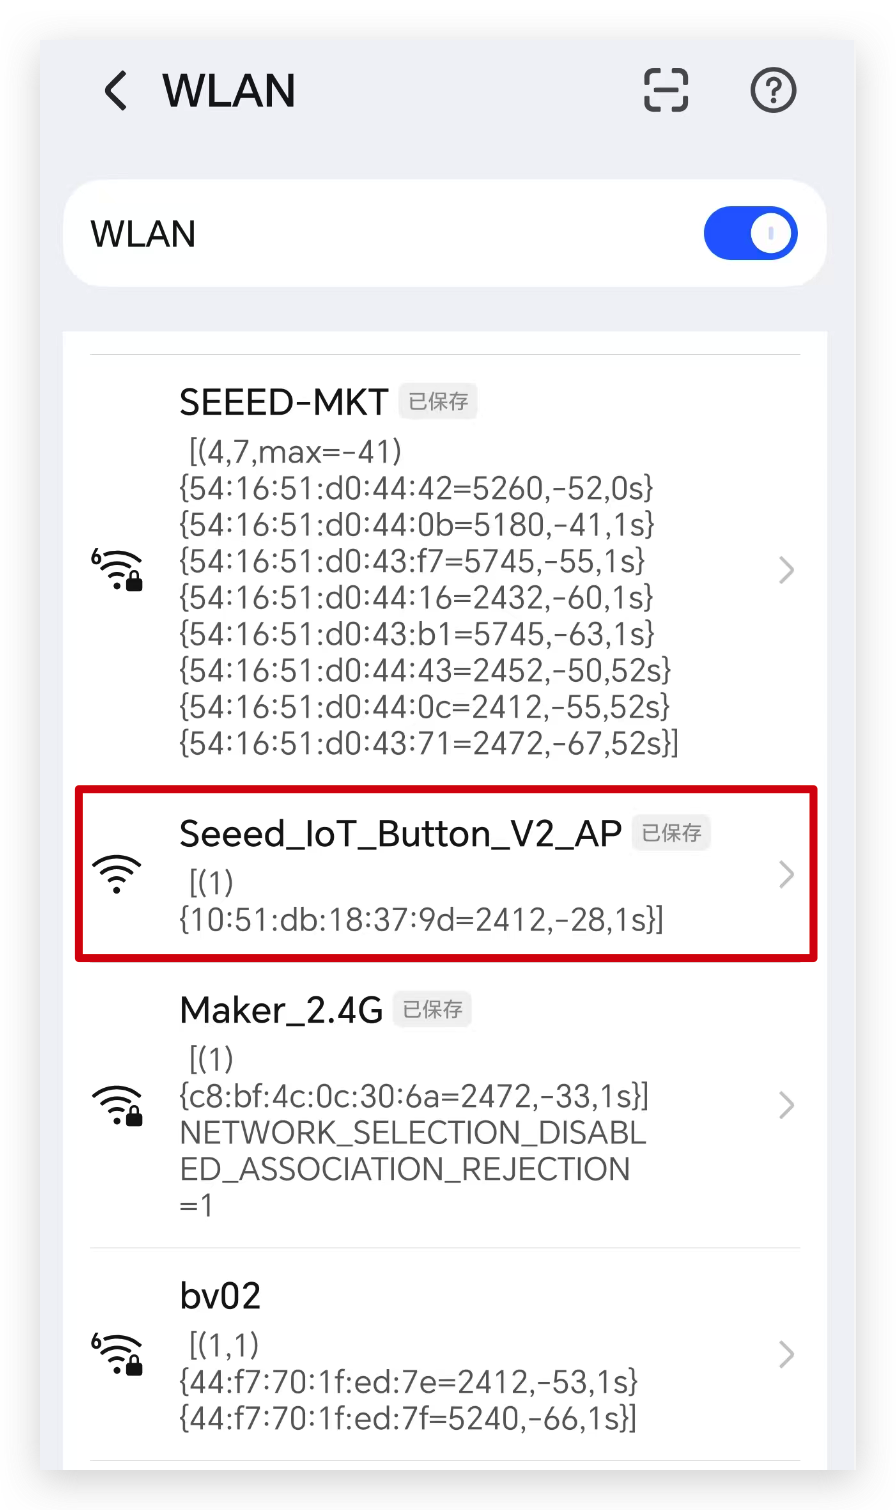
Step 6.2. Using your smartphone or computer, connect to this WiFi access point.
Step 6.3. A captive portal should automatically open. If not, open a web browser and navigate to http://192.168.4.1.
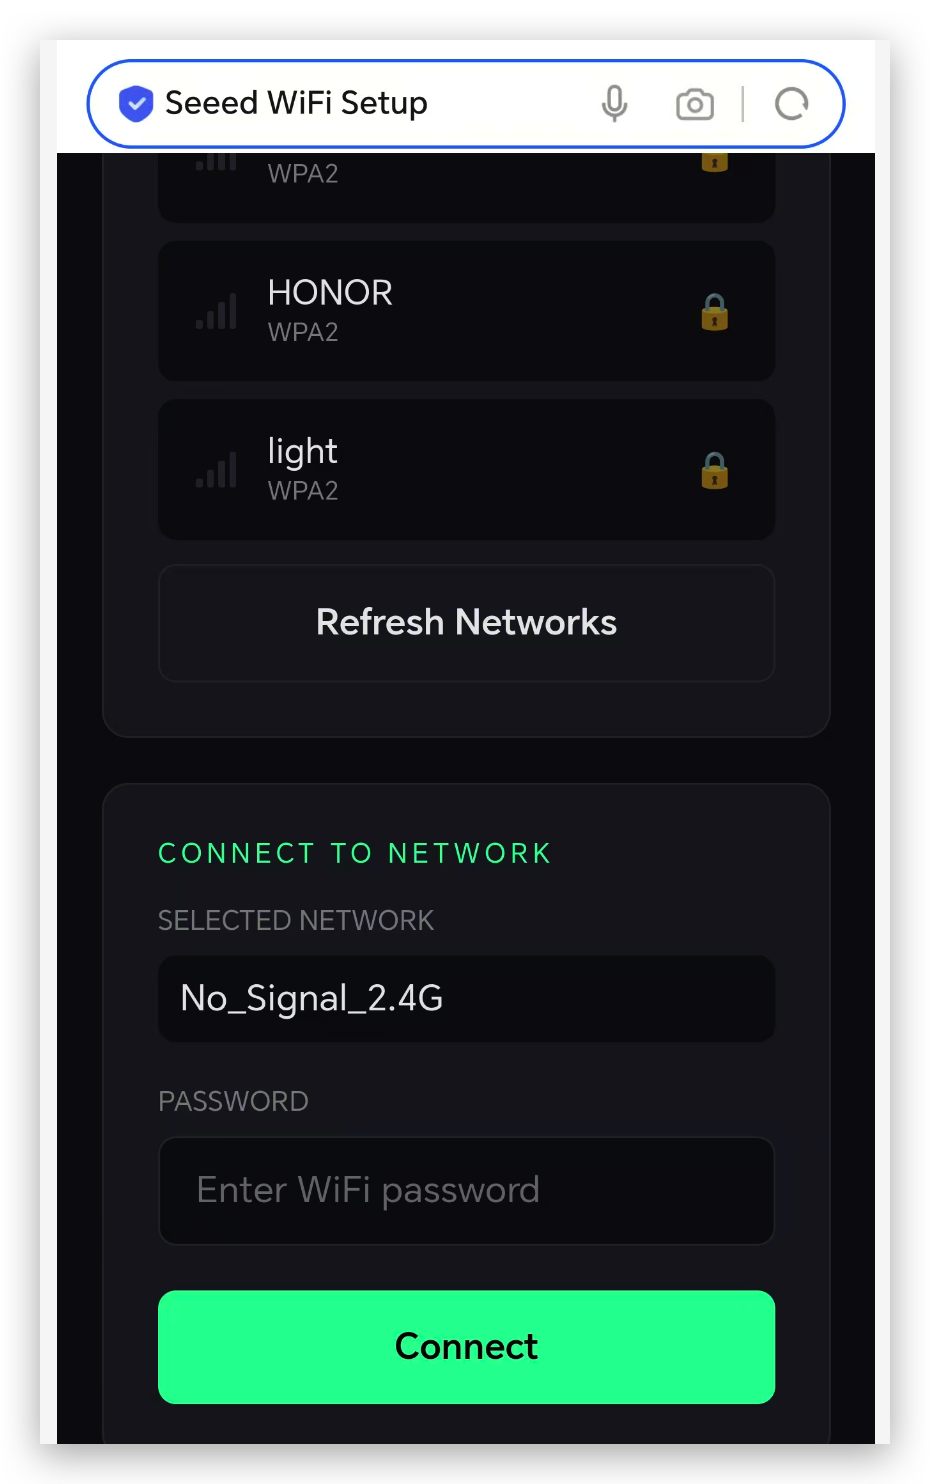
Step 6.4. In the configuration portal, enter your home WiFi network credentials:
Please note that the IoT Button does not currently support networks operating on 5G frequency bands.
- SELECTED NETWORK: Your WiFi network name
- PASSWORD: Your WiFi password
Step 6.5. Click "Connect" to save the configuration.
Step 6.6. The IoT Button V2 will restart and connect to your WiFi network. The RGB LED will display blue.
Step 7. Add IoT Button in Home Assistant
Step 7.1. After the reboot, click on Settings in the sidebar to open the settings menu. Within the settings menu, navigate to Devices & Services.
Step 7.2. If your IoT Button V2 is successfully connected to your WiFi network, the device will be automatically discovered by Home Assistant after connecting to WiFi. If the device is not automatically detected, you can also manually add it by clicking “Add Integration” in the bottom-right corner, searching for “Seeed HA Discovery,” and entering the device's IP address.
The device's IP address can be obtained from the serial port log or the router's backend.

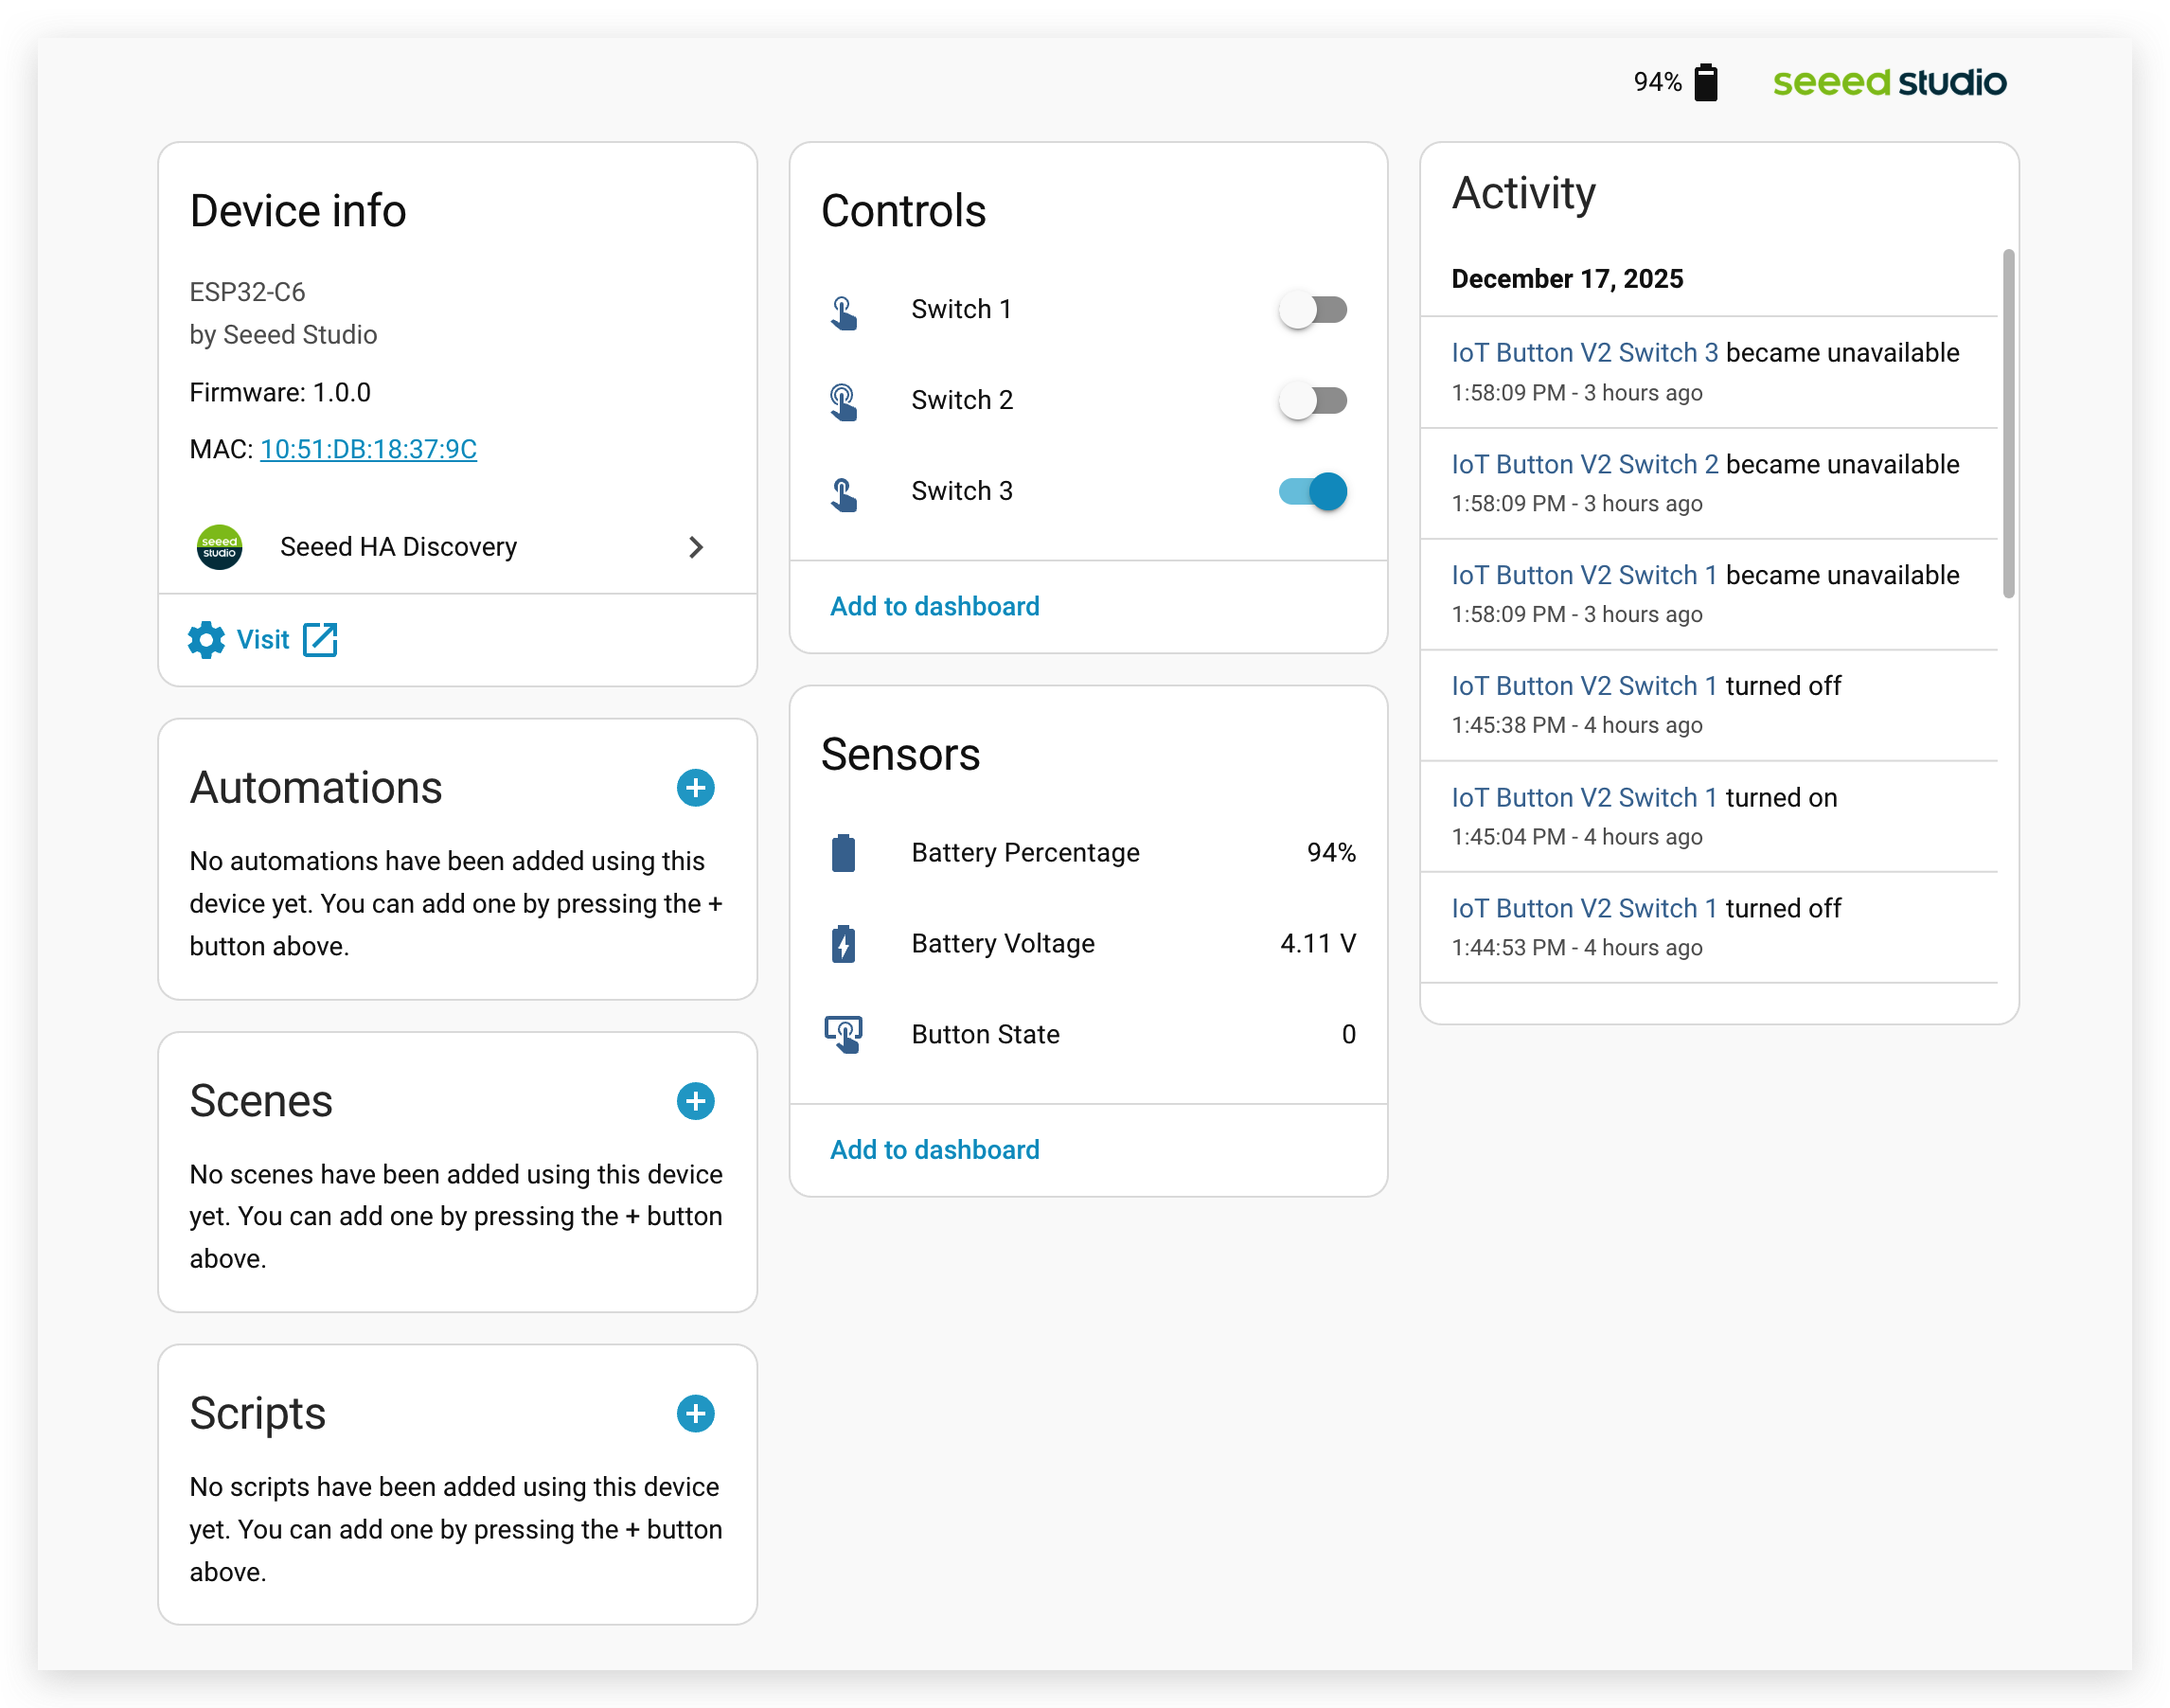
Step 7.3. Follow the on-screen prompts to complete the integration setup. You may need to assign the button to an area in your home.

Step 7.4. Once configured, your IoT Button V2 will appear in your Home Assistant dashboard with available entities for button events, battery status, and LED control.
Step 8. Create Automations
Now that your IoT Button is connected, you can create automations in Home Assistant:
Step 8.1. Navigate to Settings > Automations & Scenes.
Step 8.2. Click "Create Automation" and select "Start with an empty automation".
Step 8.3. For the Trigger, select your IoT Button device and choose the event type (single press, double press, or long press).

Step 8.4. For the Action, choose what you want to happen (e.g., turn on lights, trigger scenes, send notifications).
Step 8.5. Save your automation and test it by pressing your IoT Button!
Tech Support & Product Discussion
Thank you for choosing our products! We are here to provide you with different support to ensure that your experience with our products is as smooth as possible. We offer several communication channels to cater to different preferences and needs.