Xiao ESP32C3 ESPHome スマートサーモスタット

このwikiでは、Xiao ESP32C3 ESPHome スマートサーモスタットの作り方を段階的に説明します。それでは始めましょう!
ハードウェアの準備
このチュートリアルをすべて実行したい場合は、以下を準備する必要があります。
| Seeed Studio XIAO ESP32C3 | Seeed Studio 拡張ボード | Home Assistant デバイス 例:Seeed Studio Home assistant Yellow |
|---|---|---|
 |  |  |
Grove センサー
| Grove - Temperature & Humidity Sensor Pro (DHT22/AM2302) | Grove - 2-Channel SPDT Relay | Grove - Relay High current 5V/10A | Grove - OLED Display 0.96" (SSD1315) | モーメンタリーボタン(どのような種類でも可) |
|---|---|---|---|---|
|
|
|
|
|


ソフトウェアの準備
Home Assistant のインストール
Home Assistant が既に稼働していることを確認してください。製品にHome Assistantをフラッシュする方法を紹介する複数のwikiがあります。私はRaspberry Pi CM4で動作するHome assistant Yellowを使用しているため、公式のものを直接使用してHome assistant YellowにOSをフラッシュできます。
Home Assistant に ESPHome をインストール
ESPHome は Home Assistant アドオンとして利用でき、アドオンストアから簡単にインストールできます。

- ステップ 1. INSTALL をクリック

- ステップ 2. すべてのオプションを有効にして START をクリック

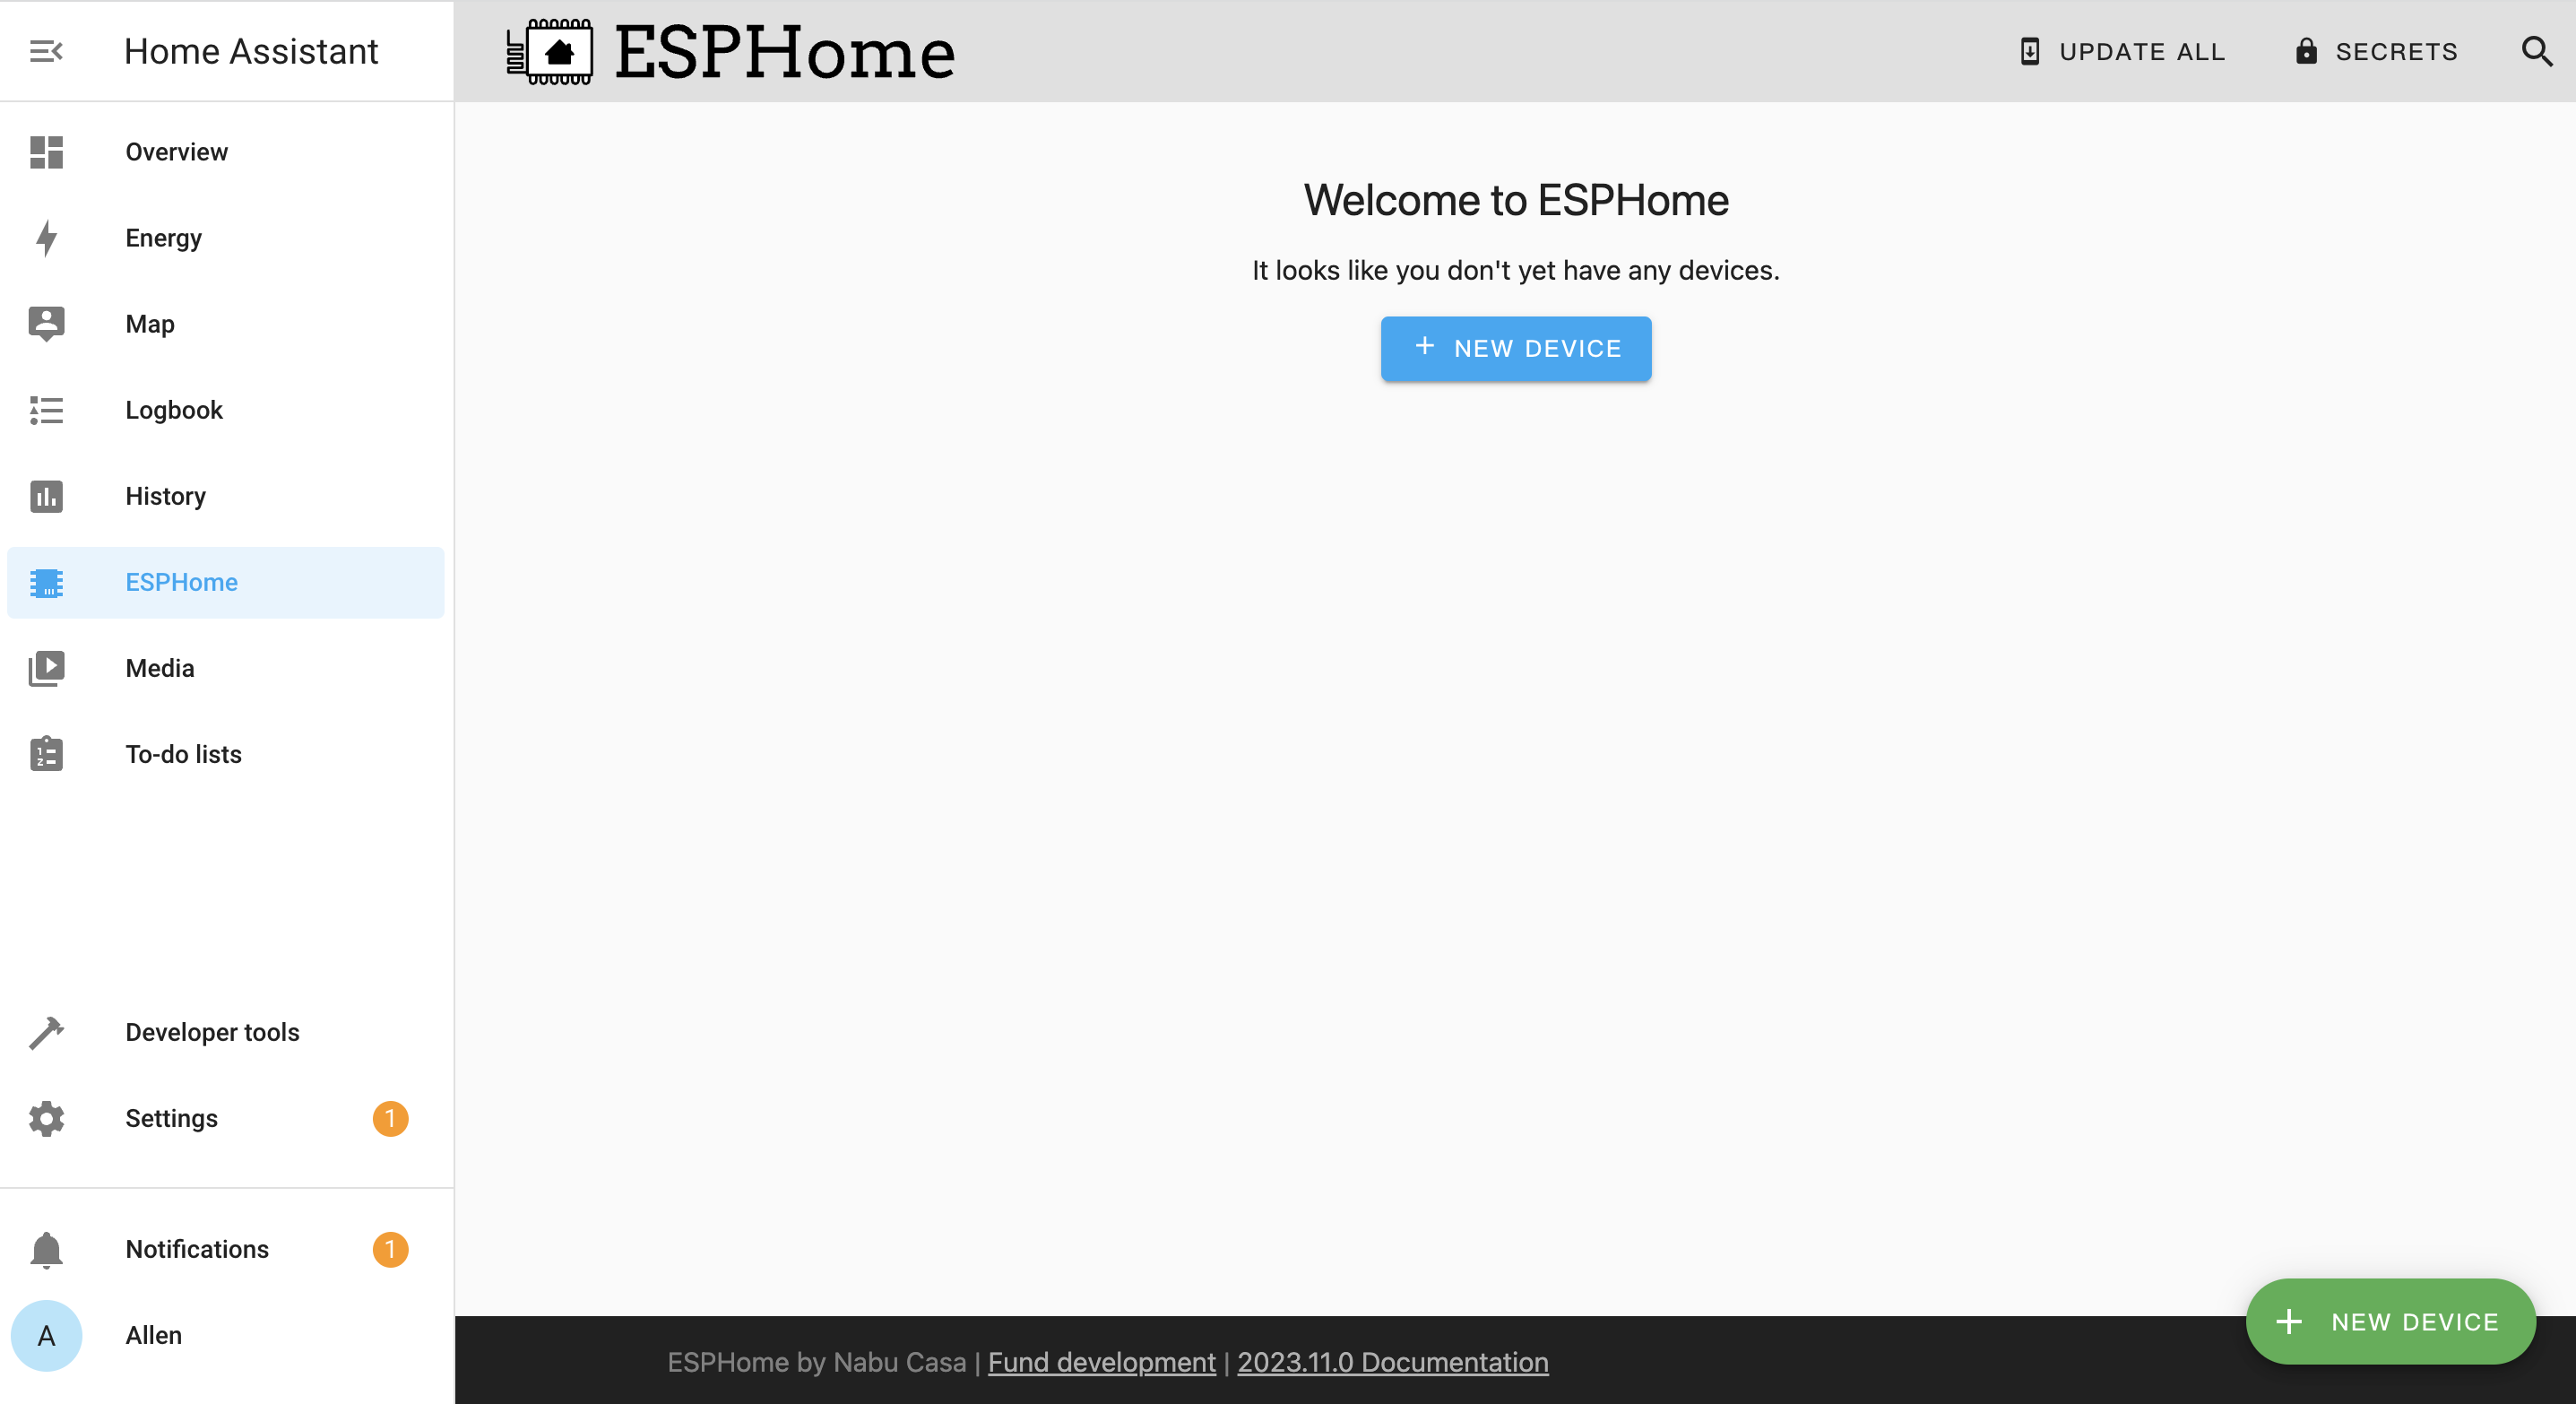
ESPHome が正常に読み込まれると、以下のウィンドウが表示されます
はじめに
すべてのソフトウェアとハードウェアが準備できたら、開始できます。
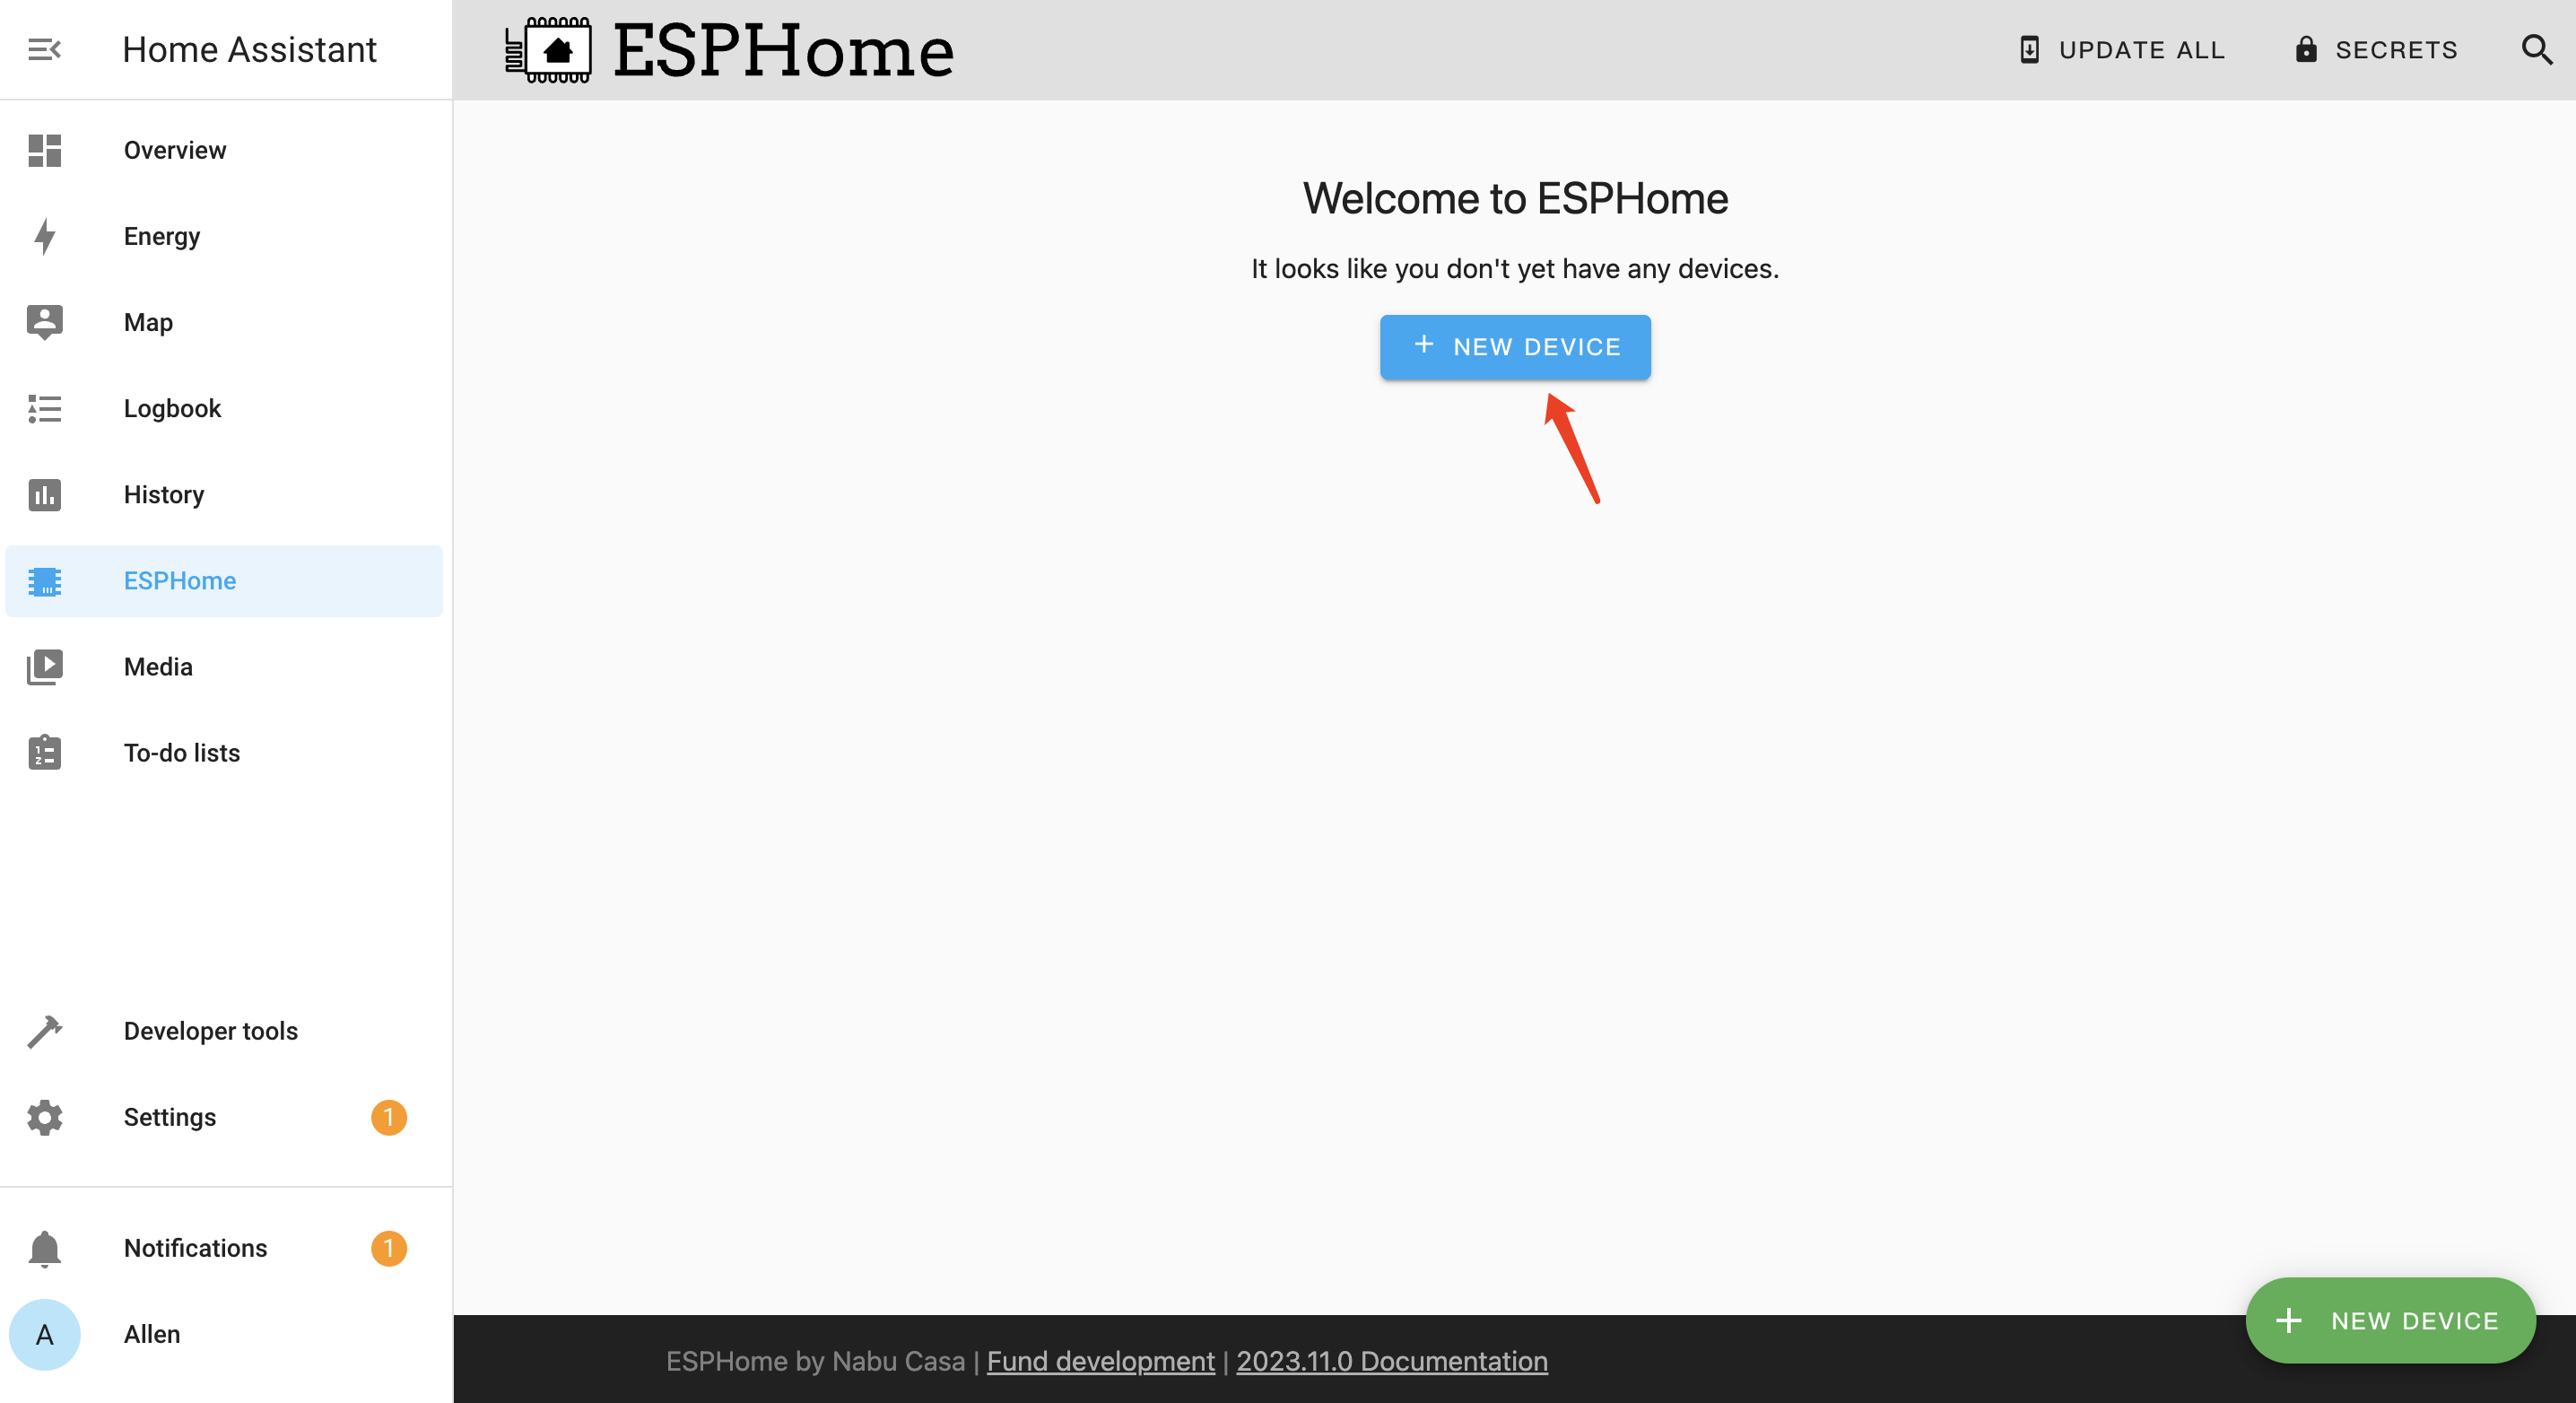
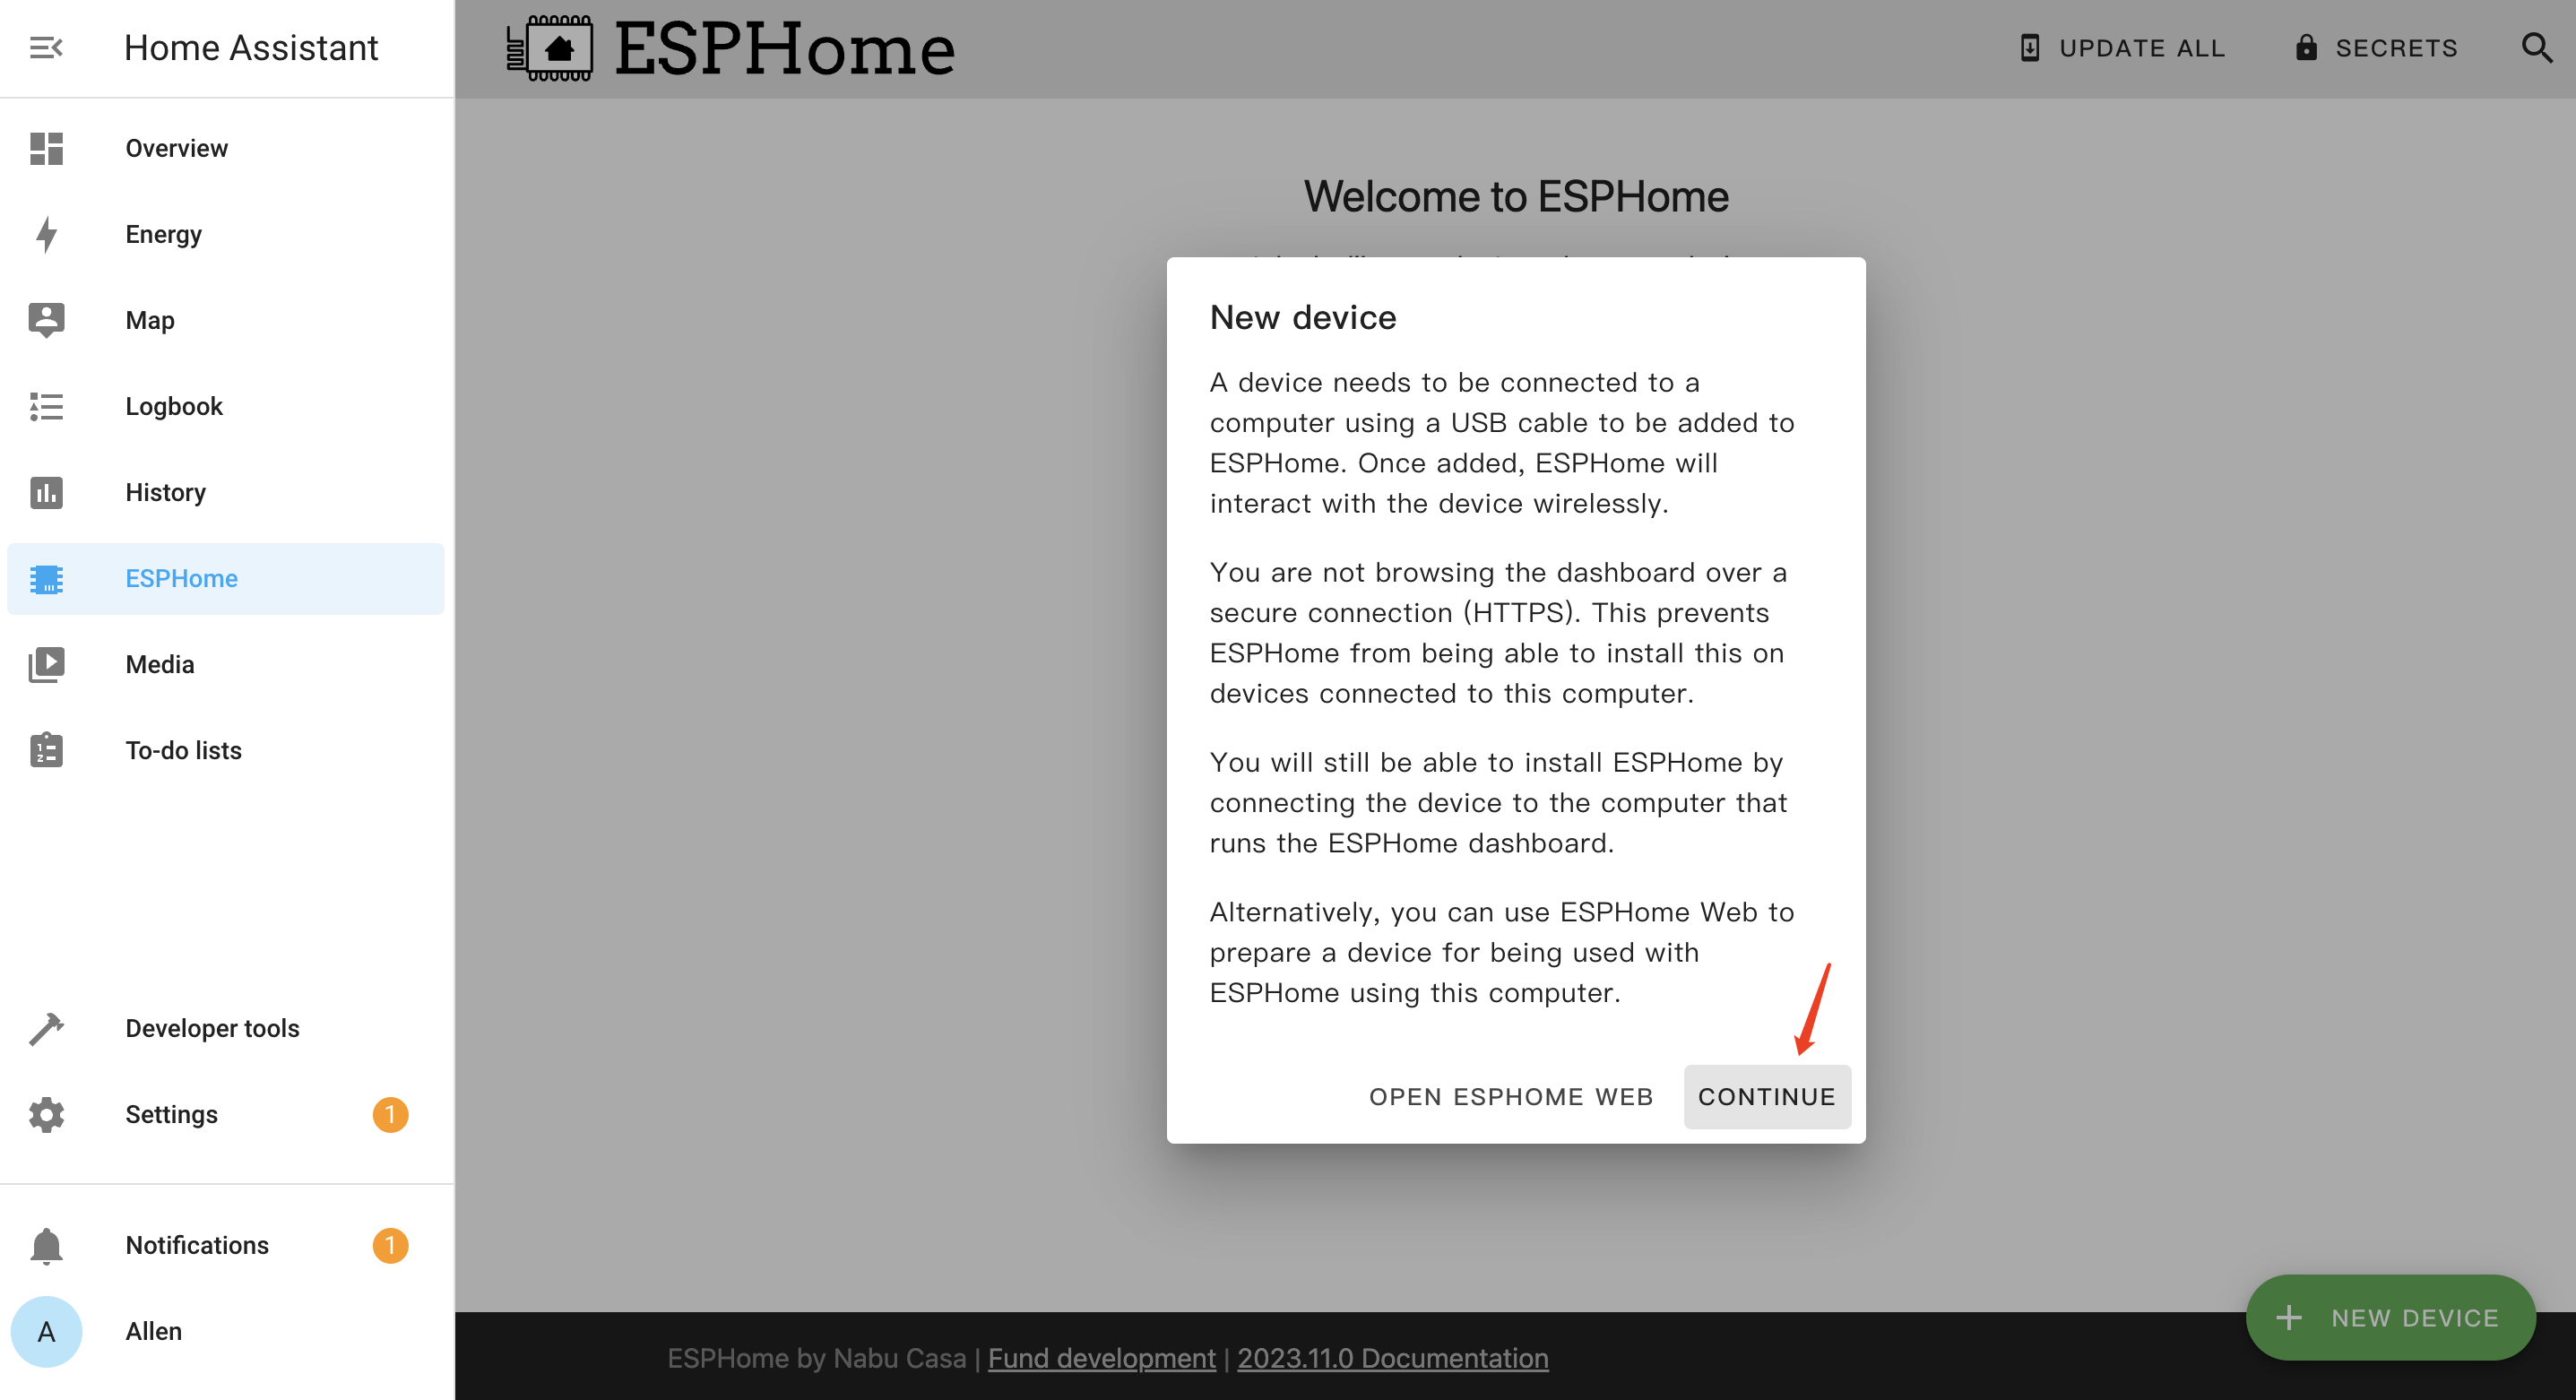
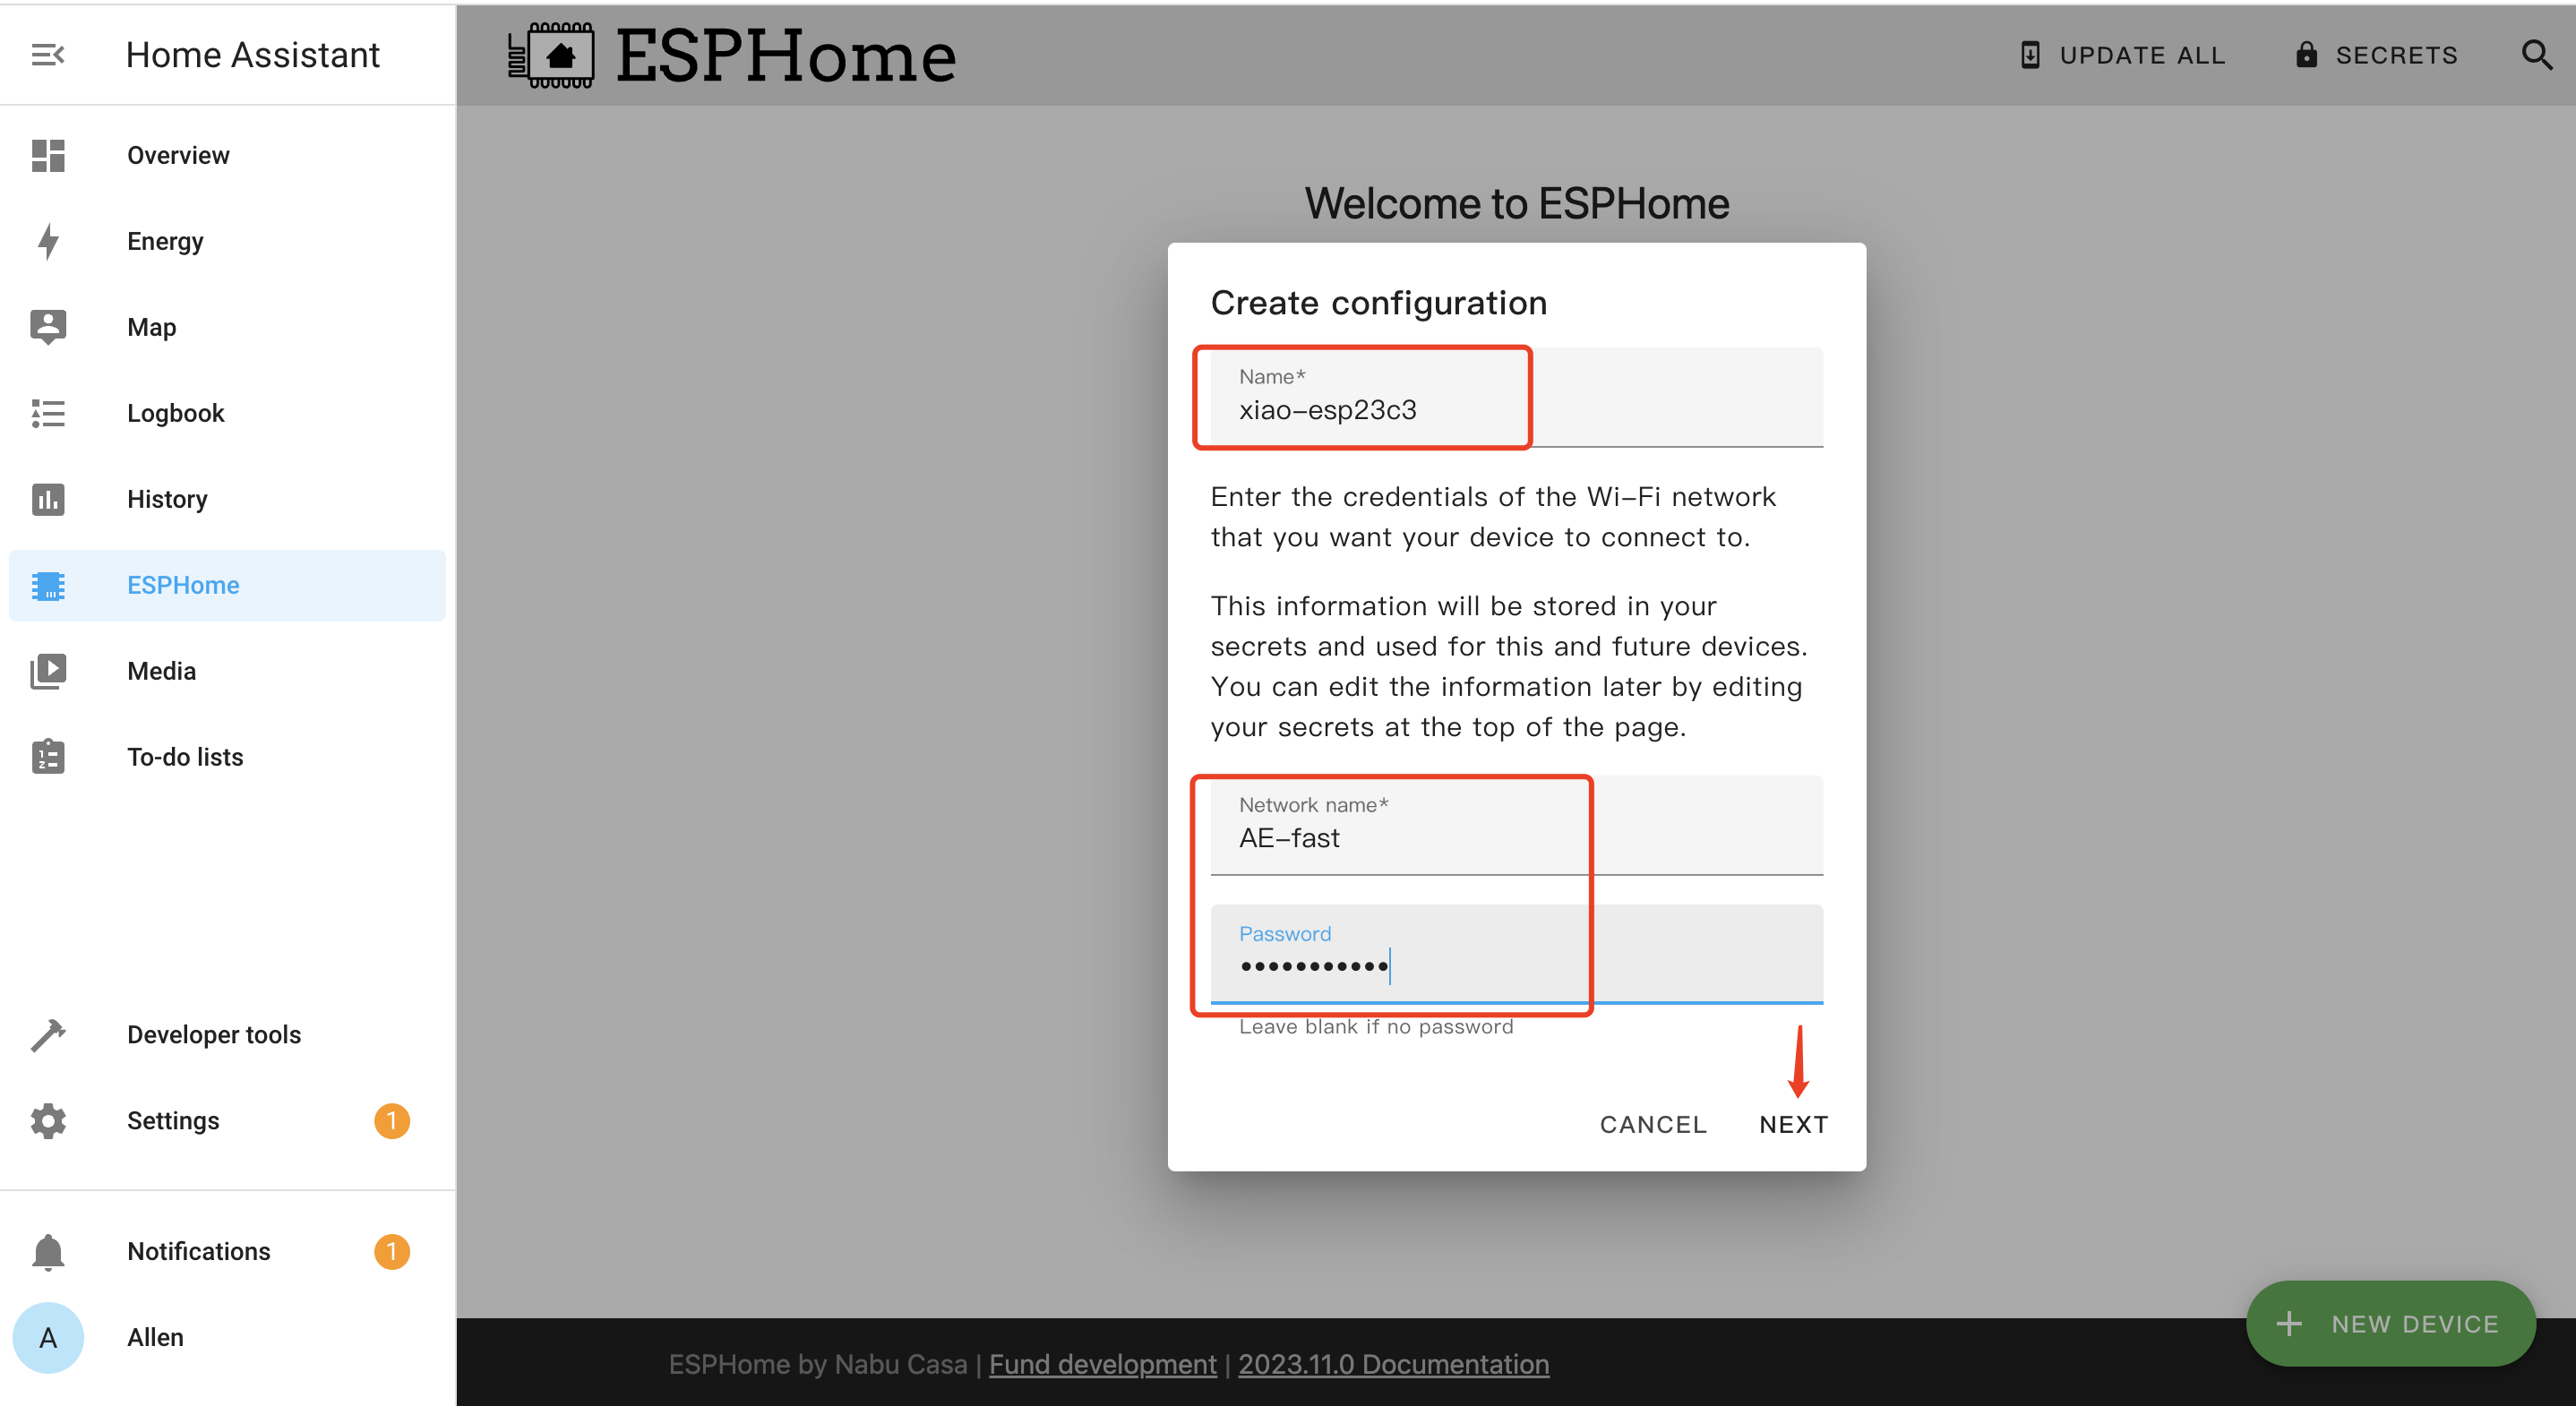
1. Seeed Studio XIAO ESP32C3 を ESPHome に追加する
- ステップ 1. + NEW DEVICE をクリックします
- ステップ 2. CONTINUE をクリックします
- ステップ 3. デバイスの 名前 を入力し、ネットワーク名 と パスワード などのWiFi認証情報を入力します。次に NEXT をクリックします
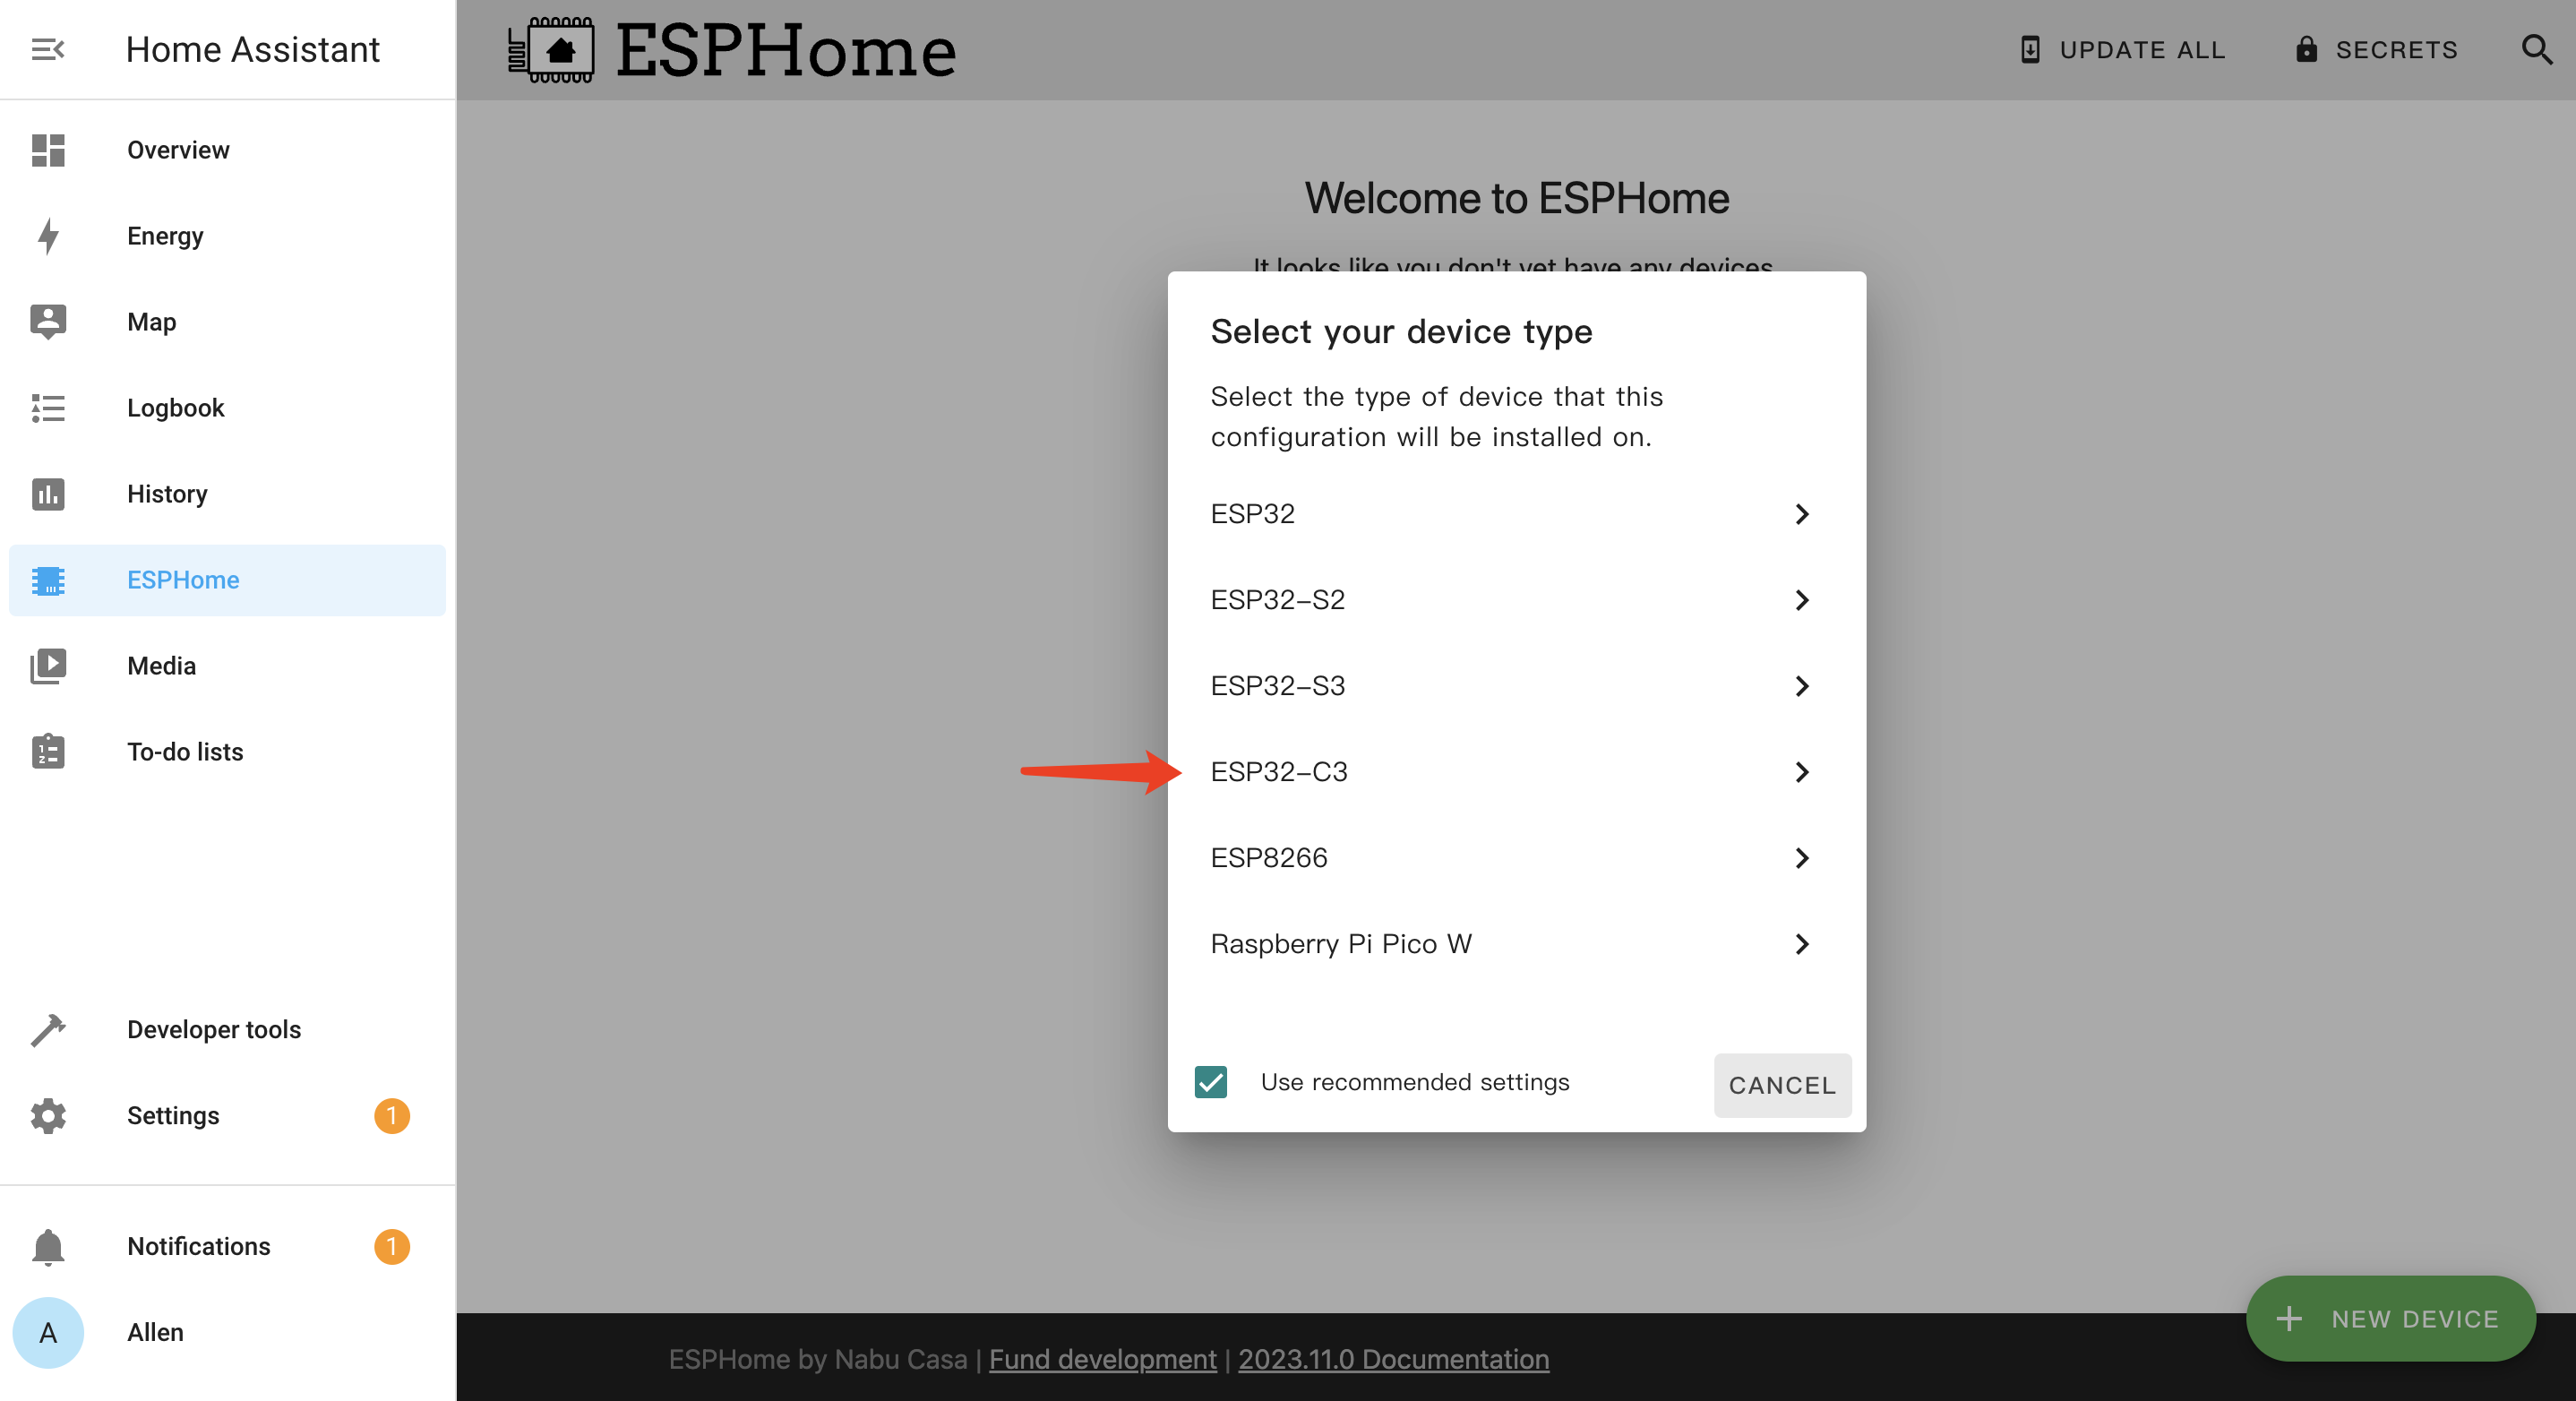
- ステップ 4. ESP32-C3 を選択してクリックします
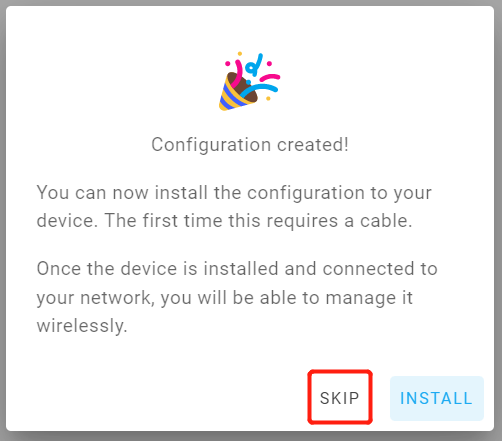
- ステップ 5. このボードを手動で設定するため、SKIP をクリックします
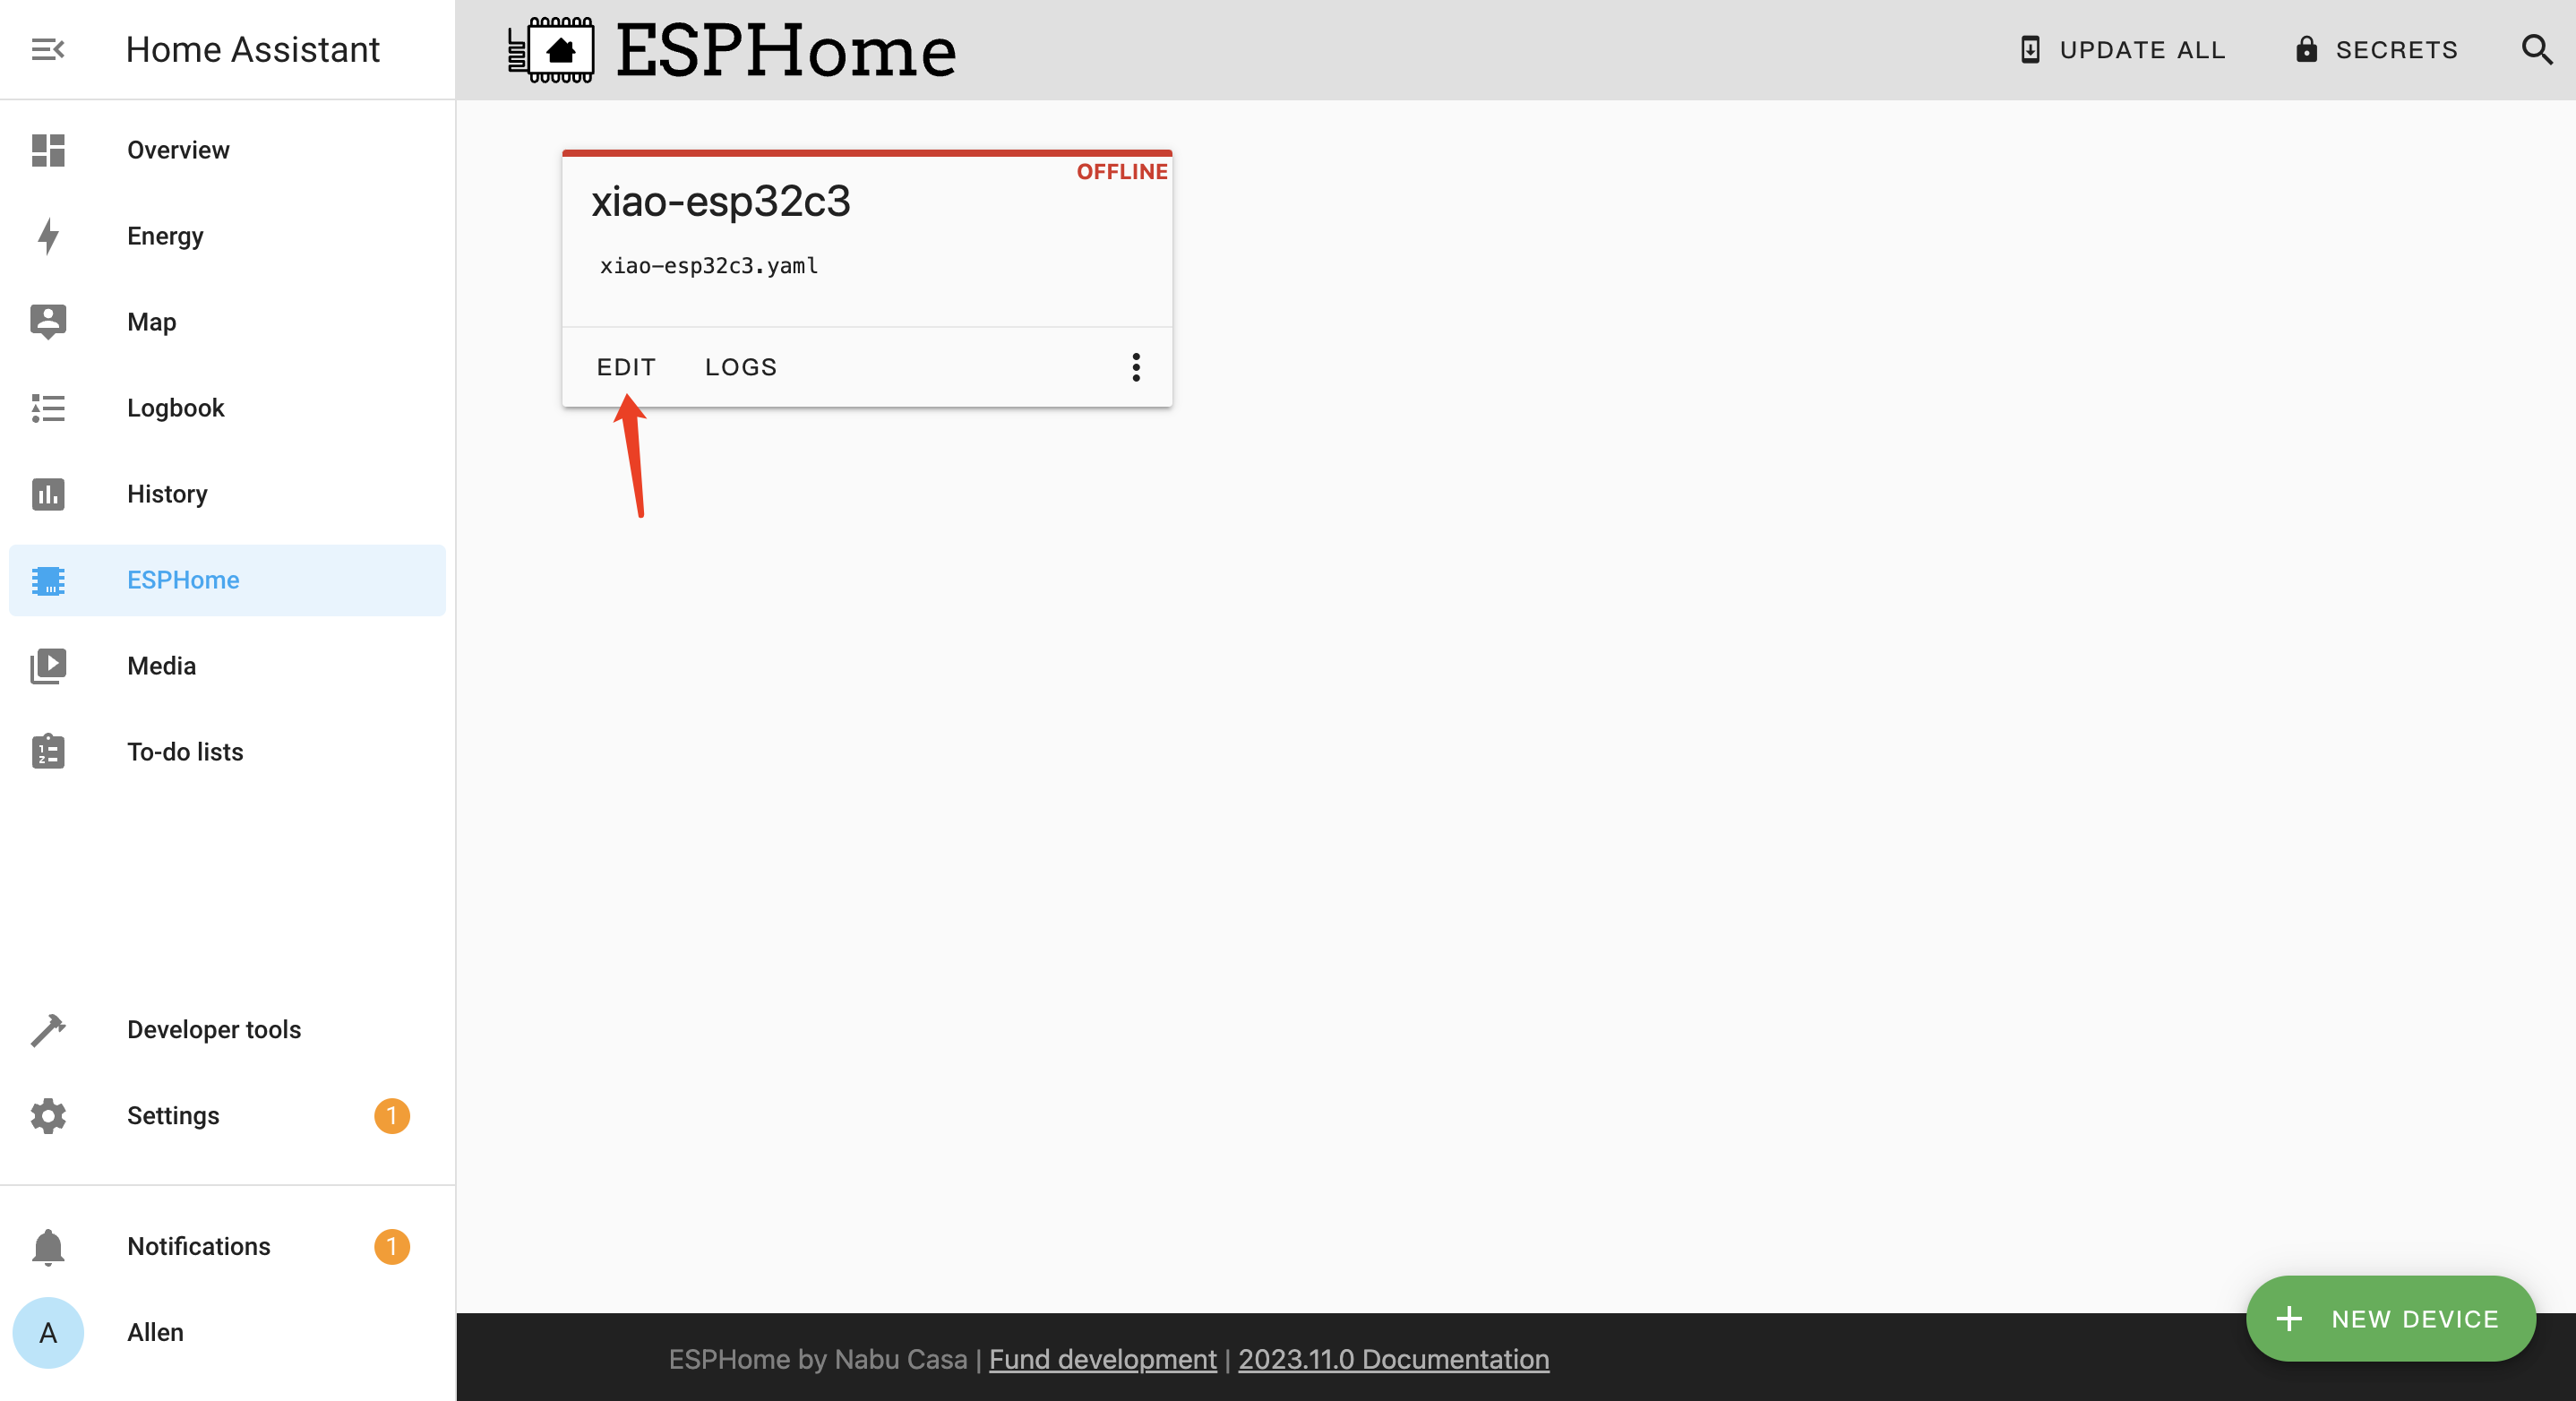
2. YAML設定の作成とアップロード
- ステップ 1. 新しく作成されたボードの下にある EDIT をクリックします
-
ステップ 7. YAML設定の作成とアップロード
以下のコードの説明:
-
名前: "thermostat"
-
ボード設定:
フラッシュモードはDIOに設定。
ボードはArduinoフレームワークで「seeed_xiao_esp32c3」として指定。 -
起動時のアクション:
ログメッセージを表示:「Booting thermostat.」
3つのリレーをオフにする:heat、cooling、fan。
500ミリ秒遅延。
「boot_beep」という名前のスクリプトを実行。 -
スクリプト設定:
起動ビープスクリプト:
ブザーをオンにし、ビープ音を出すために周波数を設定し、300ミリ秒後にオフにする。 -
APIとOTA設定:
API:
暗号化キーが指定されている。
OTA:
無線アップデート用にパスワードが「13371337」に設定されている。 -
ブザー出力:
ピン5でLEDCプラットフォームを使用して設定。 -
WiFi設定:
Wi-Fi接続用のSSIDとパスワードを指定。
フォールバックホットスポット(キャプティブポータル)がSSID「Xiao-Esp32C3」とパスワード「13371337」で設定されている。 -
I2C設定:
SDAピン6とSCLピン7でI2C通信を設定。 -
フォント設定:
異なるサイズのディスプレイ用に2つのフォントを定義。 -
ディスプレイ設定:
ラムダ関数を使用してSSD1315 I2Cディスプレイを利用し、情報をフォーマットして表示。
華氏温度、湿度、Wi-Fi信号強度、IPアドレスを表示。 -
センサー設定:
10秒の更新間隔でDHT22センサーを使用して温度と湿度の読み取りを行う。
20秒の更新間隔でWi-Fi信号センサーを含む。 -
テキストセンサー設定:
サーモスタットのIPアドレスと ESPHome バージョンを表示。 -
スイッチ設定:
relay_heat、relay_cooling、relay_fan用に3つの GPIO スイッチを設定。 -
バイナリセンサー設定:
循環ファンボタン押下用のバイナリセンサーを設定。
押されると、気候システムのファンモードを制御。 -
気候設定:
指定された温度センサーを使用してサーモスタット制御を実装。
暖房、冷房、ファンモード、アイドル用のアクションを定義。
温度制限、ステップサイズ、デフォルトプリセットを設定。
これを ESPHome デバイス設定yamlファイルに貼り付けてください。完全な.yamlファイルはこちらからダウンロードできます
-
esphome:
  name: ecostat
  platformio_options:
    board_build.flash_mode: dio
  on_boot:
    priority: 750
    then:
      - logger.log: "Booting EcoStat"
      - delay: 500ms
      - lambda: |-
          id(relay_heat).turn_off();
          id(relay_cooling).turn_off();
          id(relay_fan).turn_off();
          id(ecostat_control_heat).mode = CLIMATE_MODE_OFF;
          id(ecostat_control_cooling).mode = CLIMATE_MODE_OFF;
      - script.execute: boot_beep

esp32:
  board: seeed_xiao_esp32c3
  variant: esp32c3
  framework:
    type: arduino
    platform_version: 5.4.0

#logger:
 # level: VERY_VERBOSE

api:
  encryption:
    key: "YOURKEYHERE"

ota:
  password: "13371337"

script:
- id: boot_beep
  then:
    # First ^E
    - output.turn_on: buzzer
    - output.ledc.set_frequency:
        id: buzzer
        frequency: 659.25Hz  # E
    - output.set_level:
        id: buzzer
        level: "50%"
    - delay: 150ms
    - output.turn_off: buzzer
    - output.turn_on: buzzer
    - output.ledc.set_frequency:
        id: buzzer
        frequency: 1000Hz
    - output.set_level:
        id: buzzer
        level: "50%"
    - delay: 150ms
    - output.turn_off: buzzer
output:
  - platform: ledc
    pin: 5
    id: buzzer

wifi:
  ssid: YOURWIFINAME
  password: YOURWIFIPASS

  # Enable fallback hotspot (captive portal) in case wifi connection fails
  ap:
    ssid: "Xiao-Esp32C3 Fallback Hotspot"
    password: "13371337"

i2c:
  sda: 6
  scl: 7
  scan: False

font:
  # gfonts://family[@weight]
  - file: "gfonts://Roboto"
    id: roboto
    size: 20

  - file: "gfonts://Poppins@700"
    id: inter
    size: 10

display:
  - platform: SSD1315_i2c
    id: oled
    model: "SSD1315 128x64"
    address: 0x3C
    lambda: |-
      float temp_celsius = id(temp).state;
      float temp_fahrenheit = (temp_celsius * 9.0 / 5.0) + 32.0;
      char temp_str[6]; // Buffer for temperature string
      dtostrf(temp_celsius, 4, 1, temp_str); // Convert Celsius to string with 1 decimal place

      it.print(28, 0, id(inter), id(ip_address).state.c_str());
      it.printf(0, 18, id(roboto), "T: %.1f  ", temp_fahrenheit);
      it.printf(70, 18, id(roboto), "H: %d", int(id(humidity).state));
      it.printf(31, 45, id(inter), "RSSI: %d", int(id(rssi).state));

climate:
  - platform: thermostat
    name: "EcoStat Heating"
    id: ecostat_control_heat
    sensor: temp
    heat_deadband: 2 °F
    heat_overrun: 0
    min_heating_run_time: 60s
    min_heating_off_time: 120s
    min_idle_time: 3min
    visual:
      min_temperature: 60 °F
      max_temperature: 80 °F
      temperature_step:
        current_temperature: 0.1
        target_temperature: 1.0
        target_temperature_low: 65 °F
    heat_action:
      - switch.turn_on: relay_heat
    idle_action:
      - switch.turn_off: relay_heat
    default_preset: Normal
    preset:
      - name: Normal
        default_target_temperature_low: 65 °F


  - platform: thermostat
    name: "EcoStat Cooling"
    id: ecostat_control_cooling
    sensor: temp
    cool_deadband: 2 °F
    cool_overrun: 0
    min_cooling_off_time: 20s
    min_cooling_run_time: 60s
    min_idle_time: 3min
    visual:
      min_temperature: 60 °F
      max_temperature: 80 °F
      temperature_step:
        current_temperature: 0.1
        target_temperature: 1.0
        target_temperature_low: 70 °F
    cool_action:
      - switch.turn_on: relay_cooling
    idle_action:
      - switch.turn_off: relay_cooling
    min_fan_mode_switching_time: 20s
    fan_mode_on_action:
      - switch.turn_on: relay_fan
    fan_mode_off_action:
      - switch.turn_off: relay_fan
    default_preset: Normal
    preset:
      - name: Normal
        default_target_temperature_high: 70 °F

sensor:
  - platform: dht
    pin: 20
    model: DHT22
    update_interval: 10s
    temperature:
      name: "EcoStat Temperature"
      id: temp
    humidity:
      name: "EcoStat Humidity"
      id: humidity
  - platform: wifi_signal
    name: "Wi-Fi Signal Strength"
    id: rssi
    update_interval: 20s

text_sensor:
  - platform: wifi_info
    ip_address:
      name: "EcoStat IP Address"
      id: ip_address
  - platform: version
    name: "EcoStat ESPHome Version"

switch:
  - platform: gpio
    id: relay_heat
    pin:
      number: 10
      mode: OUTPUT
  - platform: gpio
    id: relay_cooling
    pin:
      number: 9
      mode: OUTPUT
  - platform: gpio
    id: relay_fan
    pin:
      number: 21
      mode: OUTPUT

binary_sensor:
  - platform: gpio
    id: tempup
    pin:
      number: 8
      mode: INPUT_PULLUP
    filters:
      - delayed_on: 50ms
      - delayed_off: 50ms
    on_press:
      then:
        - lambda: |-
            if (id(ecostat_control_heat).mode == esphome::climate::CLIMATE_MODE_HEAT) {
              auto current_target_temp = id(ecostat_control_heat).target_temperature_low;
              id(ecostat_control_heat).target_temperature_low = current_target_temp + 0.56;
              auto current_target_temp_high = id(ecostat_control_heat).target_temperature_high;
              id(ecostat_control_heat).target_temperature_high = current_target_temp_high + 0.56;
            } else if (id(ecostat_control_cooling).mode == esphome::climate::CLIMATE_MODE_COOL) {
              auto current_target_temp = id(ecostat_control_cooling).target_temperature_low;
              id(ecostat_control_cooling).target_temperature_low = current_target_temp + 0.56;
              auto current_target_temp_high = id(ecostat_control_cooling).target_temperature_high;
              id(ecostat_control_cooling).target_temperature_high = current_target_temp_high + 0.56;
            }

  - platform: gpio
    id: tempdown
    pin:
      number: 2
      mode: INPUT_PULLUP
    filters:
      - delayed_on: 50ms
      - delayed_off: 50ms
    on_press:
      then:
        - lambda: |-
            if (id(ecostat_control_heat).mode == esphome::climate::CLIMATE_MODE_HEAT) {
              auto current_target_temp = id(ecostat_control_heat).target_temperature_low;
              id(ecostat_control_heat).target_temperature_low = current_target_temp - 0.56;
              auto current_target_temp_high = id(ecostat_control_heat).target_temperature_high;
              id(ecostat_control_heat).target_temperature_high = current_target_temp_high - 0.56;
            } else if (id(ecostat_control_cooling).mode == esphome::climate::CLIMATE_MODE_COOL) {
              auto current_target_temp = id(ecostat_control_cooling).target_temperature_low;
              id(ecostat_control_cooling).target_temperature_low = current_target_temp - 0.56;
              auto current_target_temp_high = id(ecostat_control_cooling).target_temperature_high;
              id(ecostat_control_cooling).target_temperature_high = current_target_temp_high - 0.56;
            }

  - platform: gpio
    id: modeswitch
    pin:
      number: 3
      mode: INPUT_PULLUP
    filters:
      - delayed_on: 50ms
      - delayed_off: 50ms
    on_press:
      then:
        - lambda: |-
            auto current_mode = id(ecostat_control_heat).mode;
            if (current_mode == esphome::climate::CLIMATE_MODE_OFF) {
              id(ecostat_control_heat).mode = esphome::climate::CLIMATE_MODE_HEAT;
            } else if (current_mode == esphome::climate::CLIMATE_MODE_HEAT) {
              id(ecostat_control_heat).mode = esphome::climate::CLIMATE_MODE_COOL;
            } else if (current_mode == esphome::climate::CLIMATE_MODE_COOL) {
              id(ecostat_control_heat).mode = esphome::climate::CLIMATE_MODE_OFF;
            }

  - platform: gpio
    id: momentaryswitch0
    pin:
      number: 4
      mode: INPUT_PULLUP
    filters:
      - delayed_on: 50ms
      - delayed_off: 50ms
    on_press:
      then:
        - if:
            condition:
              switch.is_off: relay_fan
            then:
              - climate.control:
                  id: ecostat_control_cooling
                  fan_mode: "on"
            else:
              - climate.control:
                  id: ecostat_control_cooling
                  fan_mode: "off"
3. 選択したケースの組み立て(オプション)
このプロジェクトで使用したケース用のSTLファイルがあります。
お好みに応じて自由に使用または変更してください。個人的に3Dプリンターをお持ちでない場合は、 お好みの材料でこれらのファイルを印刷してくれるオンラインサービスがたくさんあります。

4. コンポーネントの取り付け
ステップ1 リストされたすべてのコンポーネントをケースに取り付ける
M2x4およびM2x6ネジを使用して、前述のすべてのコンポーネントをケース内の対応する場所に取り付けます。
(DHT22センサーは単純に圧入で所定の位置に収まります)。

ステップ2. すべてのセンサーと周辺機器を前述のYAML内の対応するピンに接続する
接続プロセス中に使用した方法は次のとおりです:
- DHT22/SSD1315 - JSTコネクタを使用: 適切な取り付けのために、DHT22とSSD1315のコネクタをはんだ除去し、PCBの反対側に反転させます。
-
2種類のリレー - JST/DuPontコネクタを使用: リレーについては、片側にJSTを使用し、もう片側には拡張ボードのGPIOブレークアウトヘッダー用にDuPontコネクタを使用しました。
-
バッテリー接続: また、メイン電源の停電時のバックアップバッテリーとして使用するため、拡張ボードのバッテリー接続に3.7Vリチウムセルを接続しています。

ステップ3. お好みのスタイルのモーメンタリーボタンをケースの内側前面に接続する
これは、ボタンを少量のホットグルーで取り付けることで実現しました。次に、モーメンタリーボタンの対角線上の対向するピンにワイヤーをはんだ付けし、ワイヤーの反対側にDuPontコネクタを配置して、拡張ボードの正しいブレークアウトGPIOヘッダーに接続しました。

ステップ4. スクリーンをフロントカバーの背面に組み立てる
スクリーンをフロントカバーの背面に組み立てます(少量のホットグルーで所定の位置に固定します)。次に、下図のように3本のM4x6ネジでフロントカバーをケースに固定します。
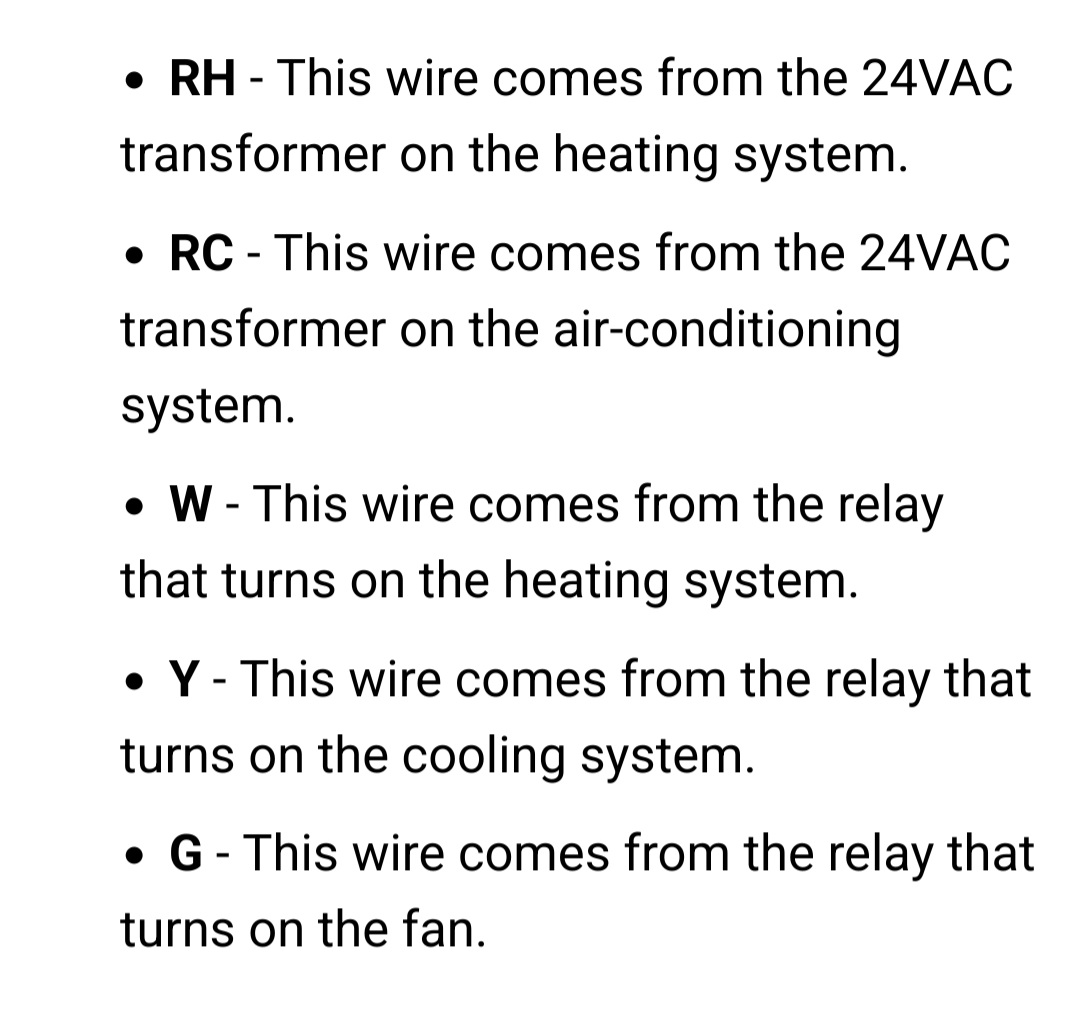
5. EcoStatの対応するリレーにワイヤーを接続する
スマートサーモスタットの完成です!既存の家庭用サーモスタットを取り外し、下の写真を使用して正しいワイヤーをEcoStatの対応するリレーに接続するだけです!
✨ コントリビュータープロジェクト
- このプロジェクトは、Seeed Studio コントリビュータープロジェクトによってサポートされています。
- Chrisの努力に感謝し、あなたの作業は展示されます。
技術サポート & 製品ディスカッション
私たちの製品をお選びいただき、ありがとうございます!私たちは、お客様の製品体験が可能な限りスムーズになるよう、さまざまなサポートを提供しています。異なる好みやニーズに対応するため、複数のコミュニケーションチャンネルを提供しています。