Raspberry Pi 5/CM5でのFrigate NVR
はじめに
Frigate NVRは、AIモデルを使用したリアルタイム物体検出用に設計されたオープンソースのネットワークビデオレコーダーです。Raspberry Pi 5/CM5と組み合わせることで、エッジでの効率的なビデオ監視が可能になります。このガイドでは、最適なセットアップのためのインストールと設定プロセスを説明します。
公式Frigate
ハードウェアの準備
推奨コンポーネント
| reComputer AI R2130 | reComputer AI Industrial R2145 | reComputer Industrial R20xx | reComputer Industrial R21xx |
|---|---|---|---|
 |  |  |  |
また、ビデオストリーミング用に少なくとも1台のカメラが必要です。推奨カメラについては推奨ハードウェアを参照してください。
Hailo PCIeドライバーのインストール
ステップ1:PCIe Gen 3を有効にする
ターミナルを開いて、以下のコマンドを実行します。
sudo apt update
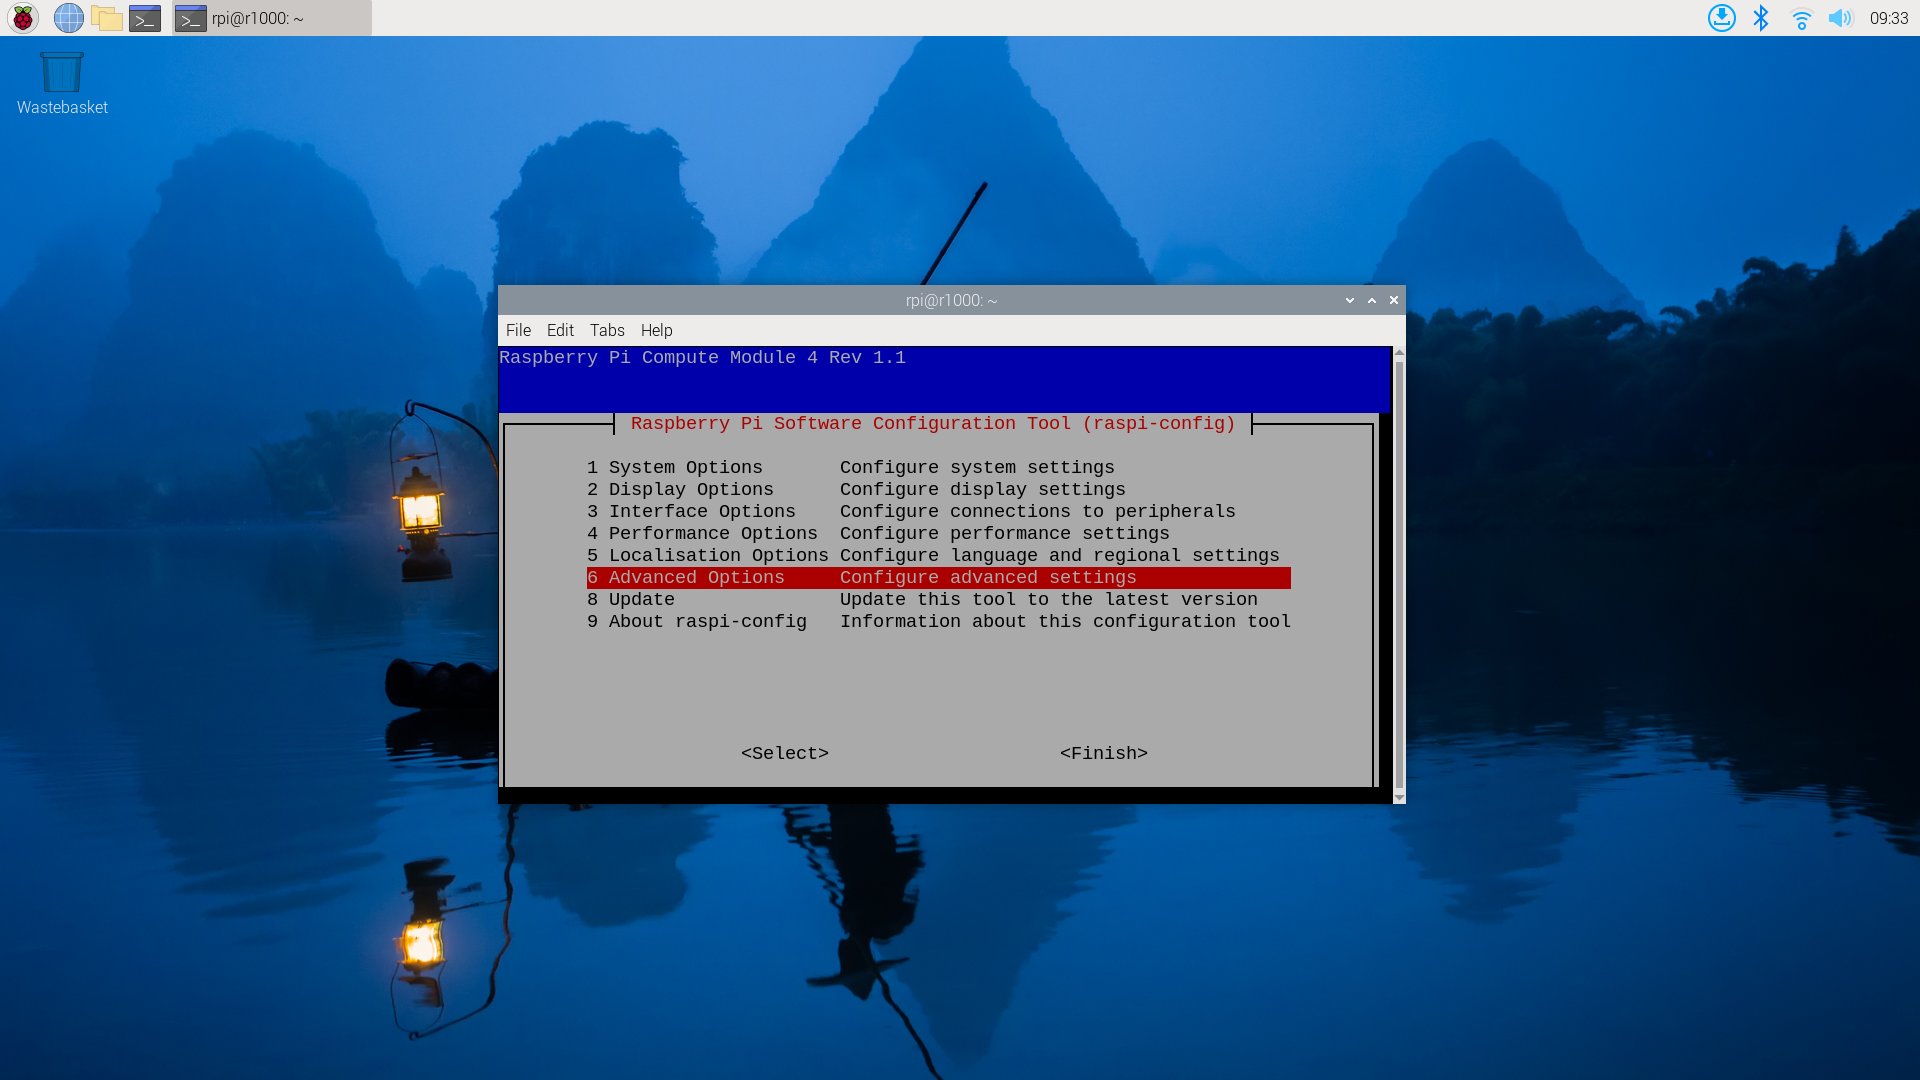
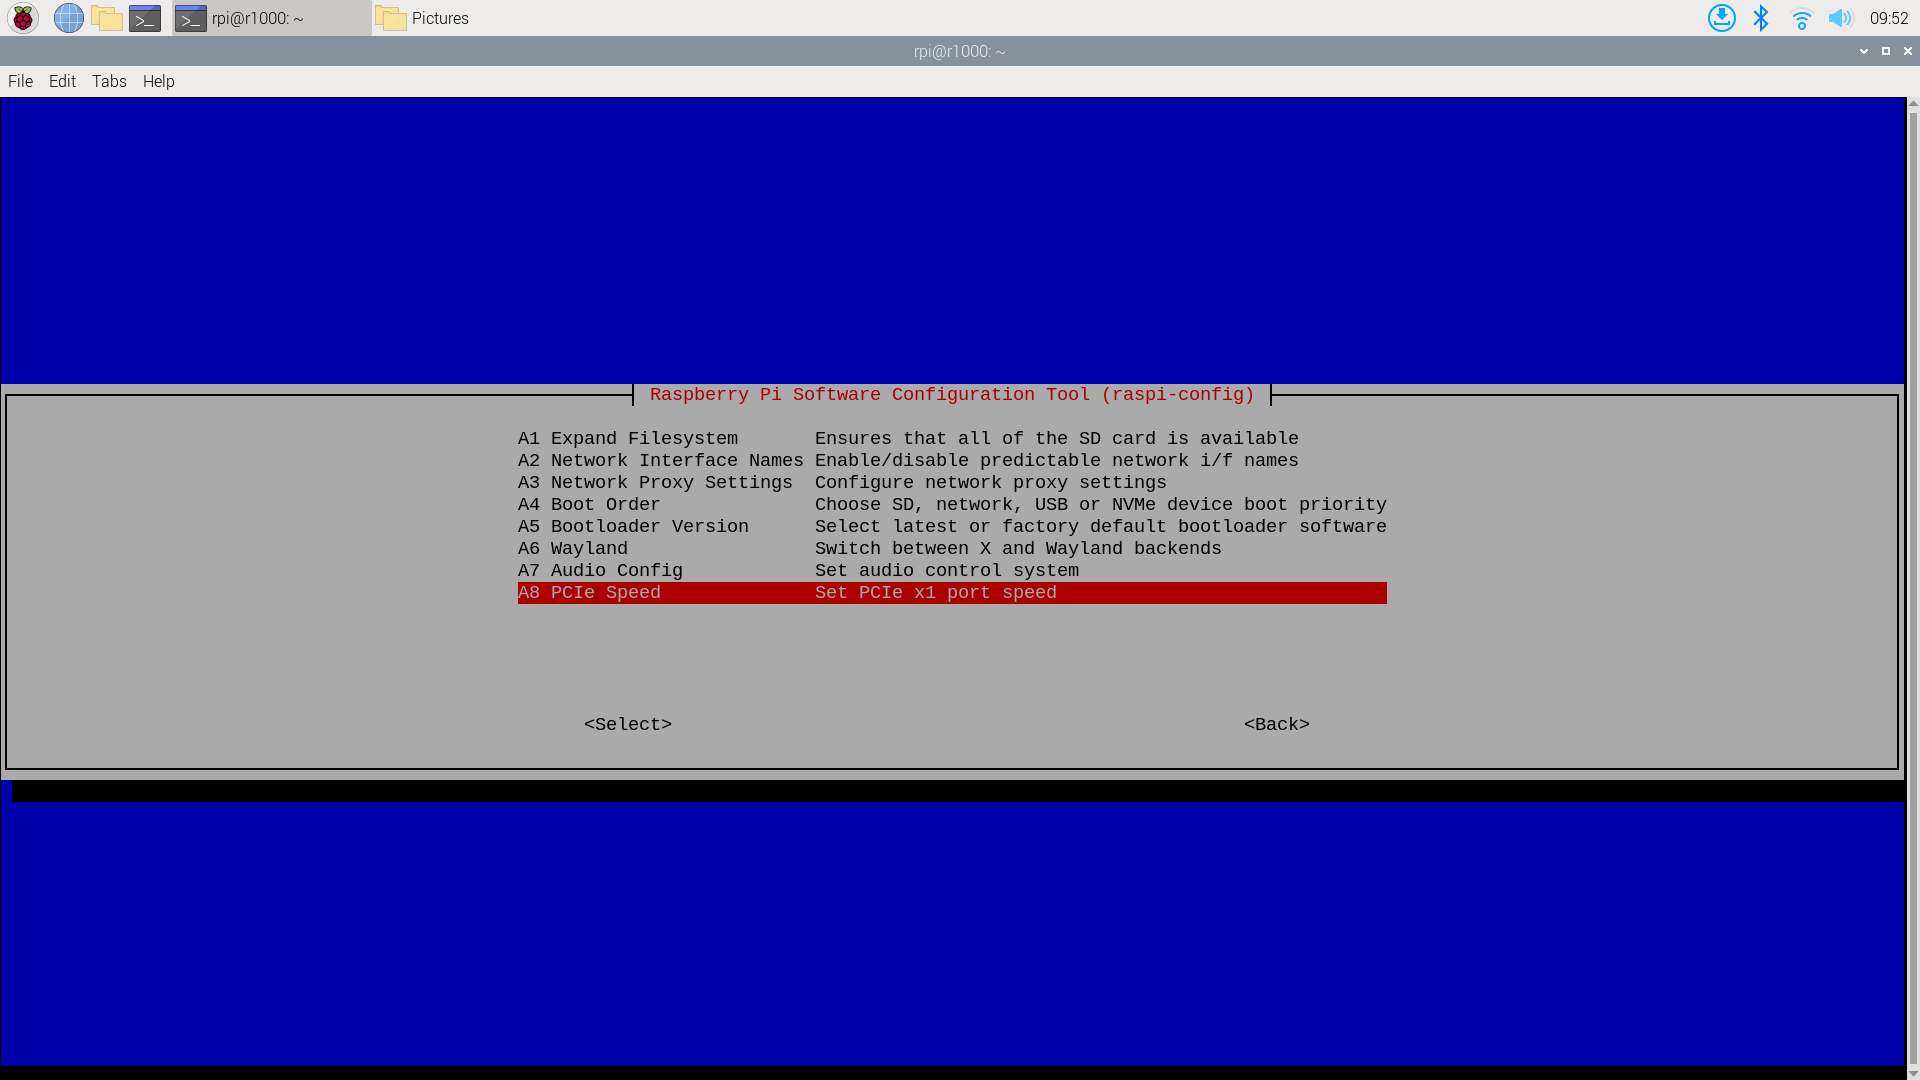
sudo raspi-config
ダイアログで、6 Advanced Optionsを選択し、次にA8 PCIe Speedを選択します。
"Yes"を選択してPCIe Gen 3モードを有効にします。
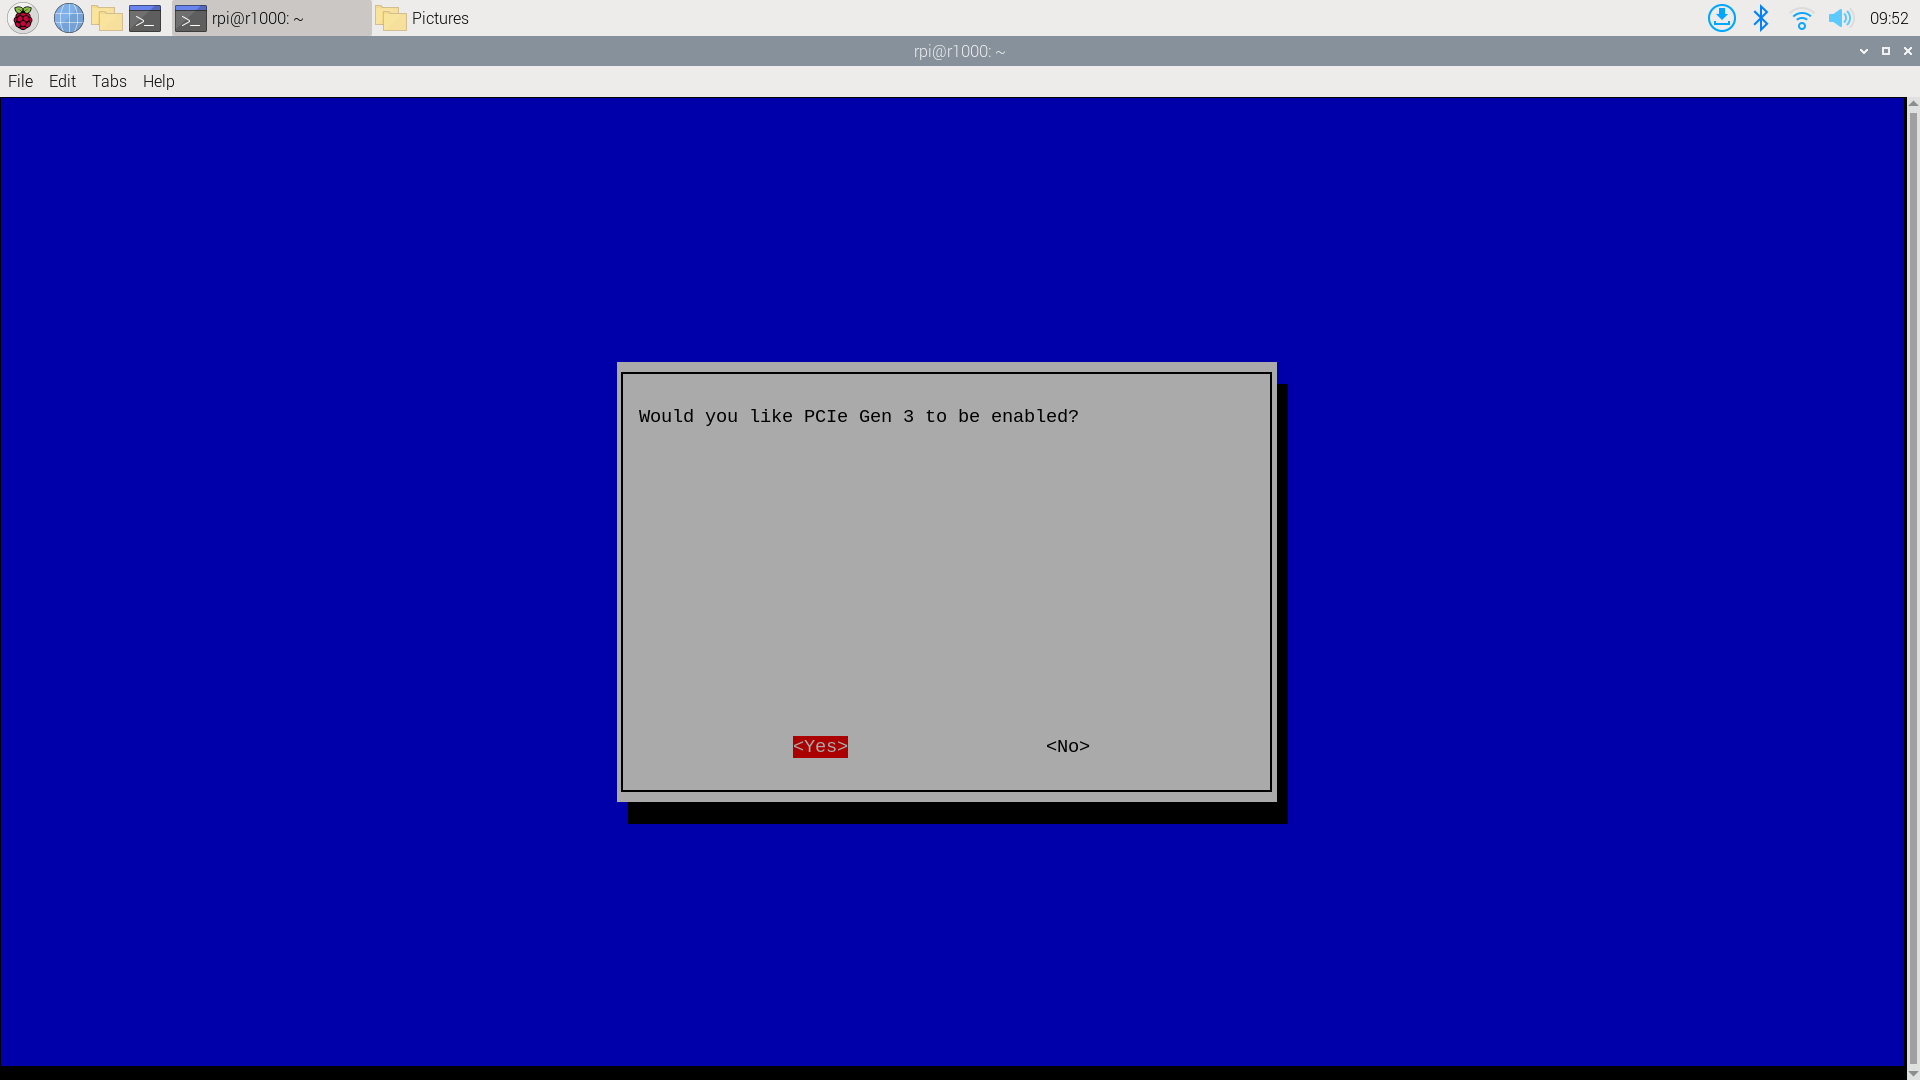
その後、"Finish"をクリックして終了します。
/boot/firmware/config.txtを編集し、ファイルの最後に以下の行を追加します。
dtoverlay=pciex1-compat-pi5,no-mip
ステップ2:Hailo PCIeドライバーのインストール
dkmsパッケージをインストールします。このパッケージはHailo PCIeドライバーのインストールに必要です。
sudo apt update
sudo apt install dkms
GitHubからHailo PCIeドライバーを取得します。
git clone https://github.com/hailo-ai/hailort-drivers
cd hailort-drivers/linux/pcie
git checkout 24e7ff2fb58fab7029024c1a1d3f2d1914f56d7b
次に、Hailo PCIeドライバーをインストールします。
sudo make install_dkms
インストール後、Hailo用のファームウェアをダウンロードし、/lib/firmware/hailoディレクトリにコピーします。
cd ../..
./download_firmware.sh
sudo mkdir -p /lib/firmware/hailo
sudo cp hailo8_fw*.bin /lib/firmware/hailo/hailo8_fw.bin
PCIe max_desc_page_sizeの問題を回避するため、以下の内容で/etc/modprobe.d/hailo_pci.confにルールを作成する必要があります。
options hailo_pci force_desc_page_size=4096
システムを再起動して設定を有効にします。
sudo reboot
システムが再起動された後、Hailo PCIeドライバーが正常にインストールされます。/dev/hailo0デバイスが作成されます。以下のコマンドを実行してデバイスを確認します。
$ ls /dev/hailo*
/dev/hailo0
Frigate NVRのインストール
この部分では、カメラがセットアップされ、RTSPプロトコルで1920x1080解像度でストリーミングする準備ができていることを前提としています。
- RTSP URLの例:
rtsp://admin:[email protected]:554/cam/realmonitor?channel=1&subtype=0
ステップ1:環境の準備
-
システムを更新します:
sudo apt update -
Dockerをインストールします:
curl -fsSL get.docker.com | bash
sudo usermod -aG docker $USER -
システムを再起動します:
sudo reboot
ステップ2:Frigateのデプロイ
-
Frigateイメージをプルします:
Package frigateにアクセスし、
-h8lサフィックス付きのイメージを選択します。この例では、ghcr.io/blakeblackshear/frigate:0.15.0-rc2-h8lを選択します。docker pull ghcr.io/blakeblackshear/frigate:0.15.0-rc2-h8l -
Docker Composeファイルを作成します:
以下は
frigate.ymlファイルの例です。hailo0デバイスは前のステップで作成したもので、設定ファイルは./configディレクトリに、データファイルは./dataディレクトリにあります:services:
frigate-hailo:
container_name: frigate-hailo
privileged: true
restart: unless-stopped
image: ghcr.io/blakeblackshear/frigate:0.15.0-rc2-h8l
shm_size: 1024mb
devices:
- /dev/hailo0:/dev/hailo0
volumes:
- /etc/localtime:/etc/localtime:ro
- ./config/:/config
- ./data/db/:/data/db
- ./data/storage:/media/frigate
- type: tmpfs
target: /tmp/cache
tmpfs:
size: 1g
ports:
- 5000:5000 -
Frigate設定を編集します:
以下はFrigateアプリケーション用の
config/config.ymlファイルの例です:database:
path: /data/db/frigate.db
go2rtc:
streams:
home:
- rtsp://admin:[email protected]:554/cam/realmonitor?channel=1&subtype=0
cameras:
home:
ffmpeg:
inputs:
- path: rtsp://admin:[email protected]:554/cam/realmonitor?channel=1&subtype=0
roles:
- record
- detect
mqtt:
enabled: False
objects:
track:
- person
- cat
detectors:
hailo8l:
type: hailo8l
device: PCIe
model:
width: 300
height: 300
model_type: ssd
path: /config/model_cache/h8l_cache/ssd_mobilenet_v1.hef
version: 0.15-1 -
Dockerインスタンスを開始します:
docker compose -f frigate.yml up -dFrigateが起動して実行されると、
http://<your-raspberry-pi-ip>:5000でFrigate Web UIにアクセスしてカメラストリームを確認できます。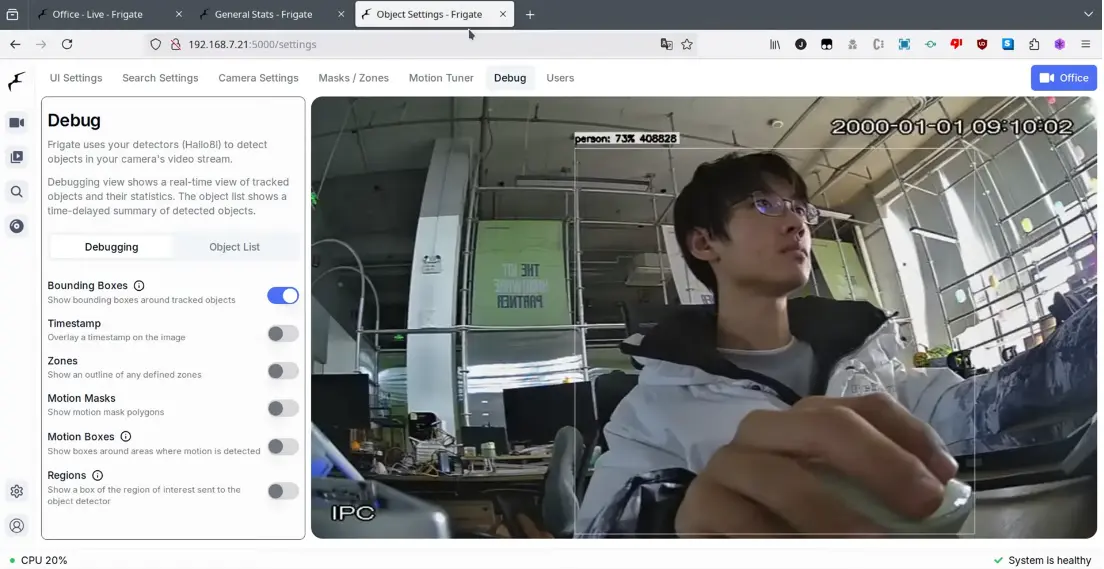
Seeed Frigate
PCIe設定の変更
config.txtを開きます
sudo nano /boot/firmware/config.txt
config.txtに以下のテキストを追加します
dtparam=pciex1_gen=3
dtoverlay=pciex1-compat-pi5,no-mip
次にCtrl+xを使用してファイルを保存し、AIボックスを再起動します
dockerとhailo-allのインストール
sudo apt update
sudo apt install hailo-all
curl -fsSL https://get.docker.com -o get-docker.sh
sudo sh get-docker.sh
sudo usermod -aG docker $USER
sudo apt install docker-compose-plugin
ymlファイルの作成
docker composeでfrigateを実行するためのfrigate.ymlを作成します
cd ~
sudo nano frigate.yml
以下はfrigate.ymlの例です
version: "3.9"
services:
    frigate-hailo:
        container_name: frigate-hailo
        privileged: true
        restart: unless-stopped
        image: mjqx2023/frigate_seeed:latest
        shm_size: 1024mb
        environment:
            - HAILO_MONITOR=1
        devices:
            - /dev/hailo0:/dev/hailo0
        volumes:
            - /etc/localtime:/etc/localtime:ro
            - ./config/:/config
            - ./data/db/:/data/db
            - ./data/storage:/media/frigate
            - type: tmpfs
              target: /tmp/cache
              tmpfs:
                  size: 1000000000
        ports:
            - 5000:5000
            - 1984:1984
            - 5002:5002
            - 5003:5003
yoloモデルをダウンロードし、config.ymlを作成します。
mkdir config && cd config && mkdir model_cache
cd model_cache && wget https://hailo-model-zoo.s3.eu-west-2.amazonaws.com/ModelZoo/Compiled/v2.14.0/hailo8/yolov8n.hef

cd .. && nano config.yml
以下はconfig.ymlの例です
database:
  path: /data/db/frigate.db

go2rtc:
  streams:
    home:
      - rtsp://admin:[email protected]:554/cam/realmonitor?channel=1&subtype=1
    home1:
      - rtsp://admin:[email protected]:554/cam/realmonitor?channel=1&subtype=1
    yard:
      - rtsp://admin:[email protected]:554/cam/realmonitor?channel=1&subtype=1
    yard1:
      - rtsp://admin:[email protected]:554/cam/realmonitor?channel=1&subtype=1

cameras:
  home:
    ffmpeg:
      inputs:
        - path: rtsp://127.0.0.1:8554/home
          roles:
            - detect

    motion:
      threshold: 45
      contour_area: 60
      improve_contrast: true

  yard:
    ffmpeg:
      inputs:
        - path: rtsp://127.0.0.1:8554/yard
          roles:
            - detect

    motion:
      threshold: 45
      contour_area: 60
      improve_contrast: true

  home1:
    ffmpeg:
      inputs:
        - path: rtsp://127.0.0.1:8554/home1
          roles:
            - detect


    motion:
      threshold: 45
      contour_area: 60
      improve_contrast: true

  yard1:
    ffmpeg:
      inputs:
        - path: rtsp://127.0.0.1:8554/yard1
          roles:
            - detect

    motion:
      threshold: 45
      contour_area: 60
      improve_contrast: true
mqtt:
  enabled: false

objects:
  track:
    - person
    - cat

detectors:
  hailo8l:
    type: hailo8l
    device: PCIe

model:
  width: 640
  height: 640
  path: /config/model_cache/yolov8n.hef

version: 0.16-0

camera_groups:
  test:
    order: 1
    icon: LuAlignEndHorizontal
    cameras:
      - home
      - home1
      - yard
      - yard1
Dockerイメージをプルしてfrigateを実行
frigate_seeedイメージをプル
cd ~
docker pull mjqx2023/frigate_seeed
docker compose -f frigate.yml start
次に、AI boxのWebブラウザでlocalhost:5000を開きます:

技術サポート & 製品ディスカッション
弊社製品をお選びいただき、ありがとうございます!お客様の製品体験が可能な限りスムーズになるよう、さまざまなサポートを提供いたします。異なる好みやニーズに対応するため、複数のコミュニケーションチャネルをご用意しています。