Isaac Sim 4.2 で SO100Arm Kit をインポートして制御する方法(4.2のみ)
はじめに
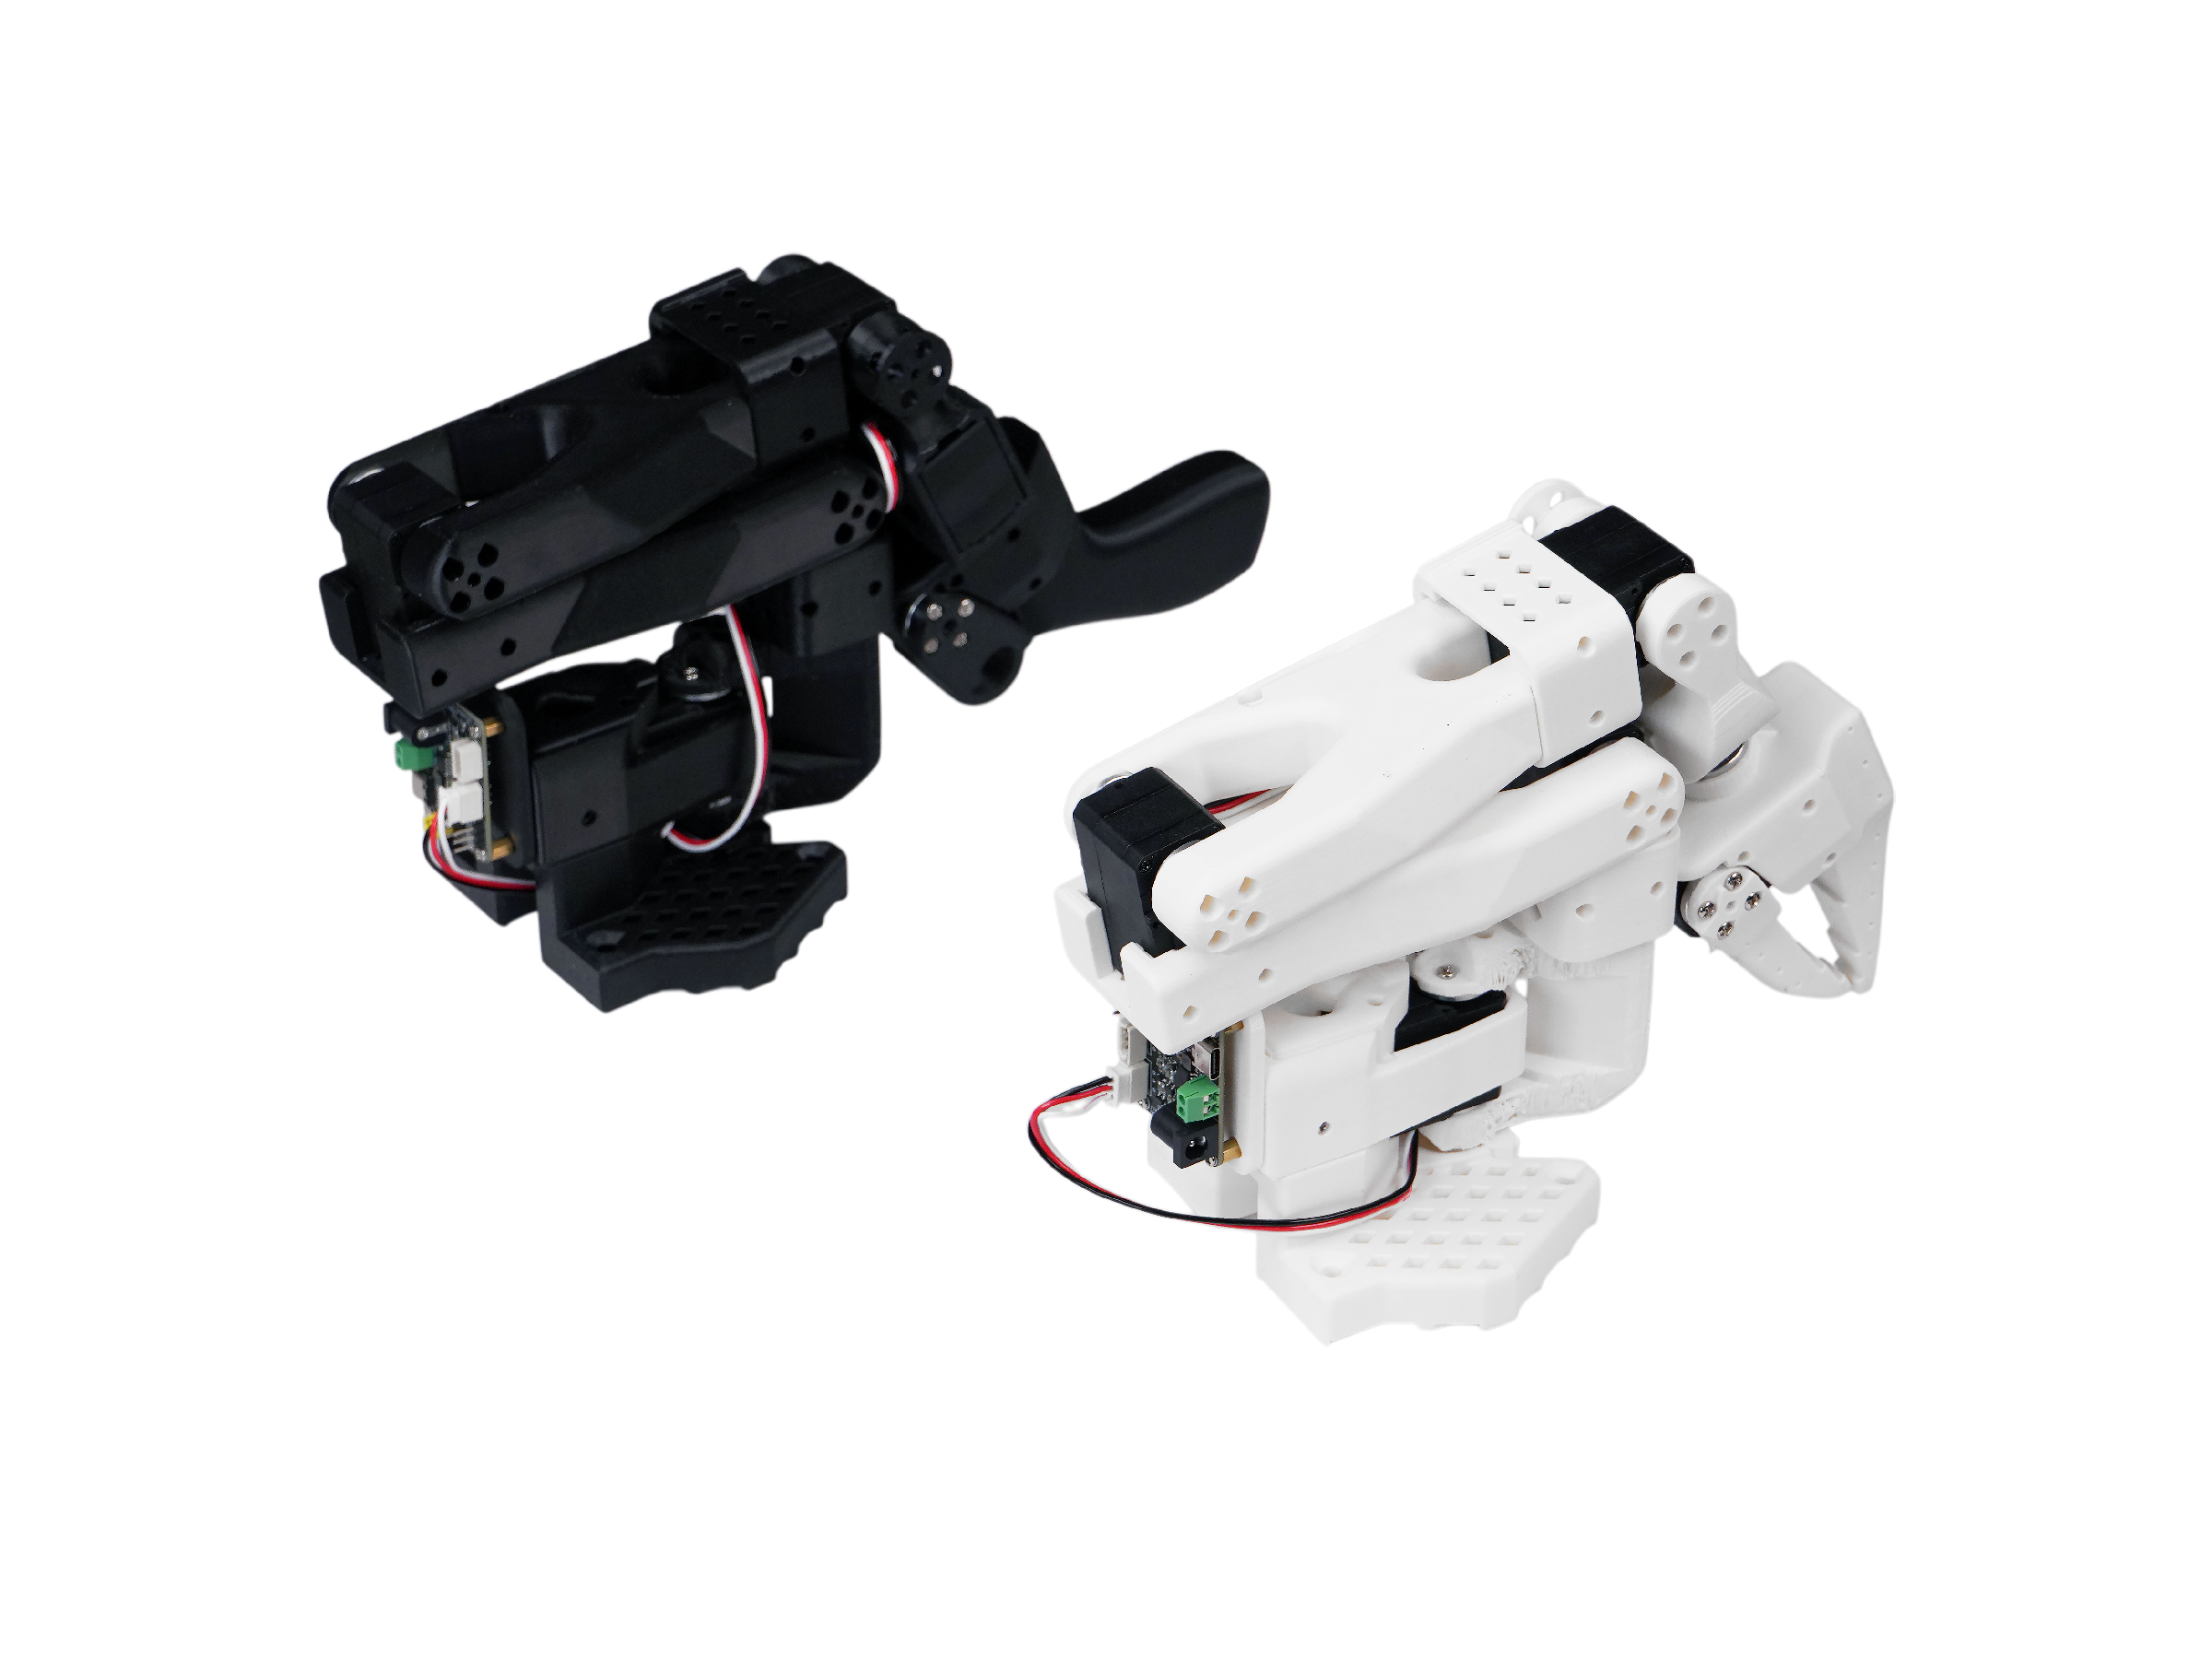
SO-100ARM は、TheRobotStudio によって開始された完全オープンソースのロボットアームプロジェクトです。フォロワーアームとリーダーロボットアームが含まれており、詳細な3Dプリントファイルと操作ガイドも提供されています。LeRobot は、PyTorch で実世界のロボティクス用のモデル、データセット、ツールを提供することに取り組んでいます。その目的は、ロボティクスの参入障壁を下げ、誰もがデータセットと事前訓練済みモデルの共有に貢献し、恩恵を受けられるようにすることです。
このwikiでは、SO100 Arm Kitロボットアームを NVIDIA の Isaac Sim シミュレーションプラットフォームにインポートし、ROS2 と Python スクリプトを使用して制御する方法について説明します。
プロジェクト紹介
SO-ARM100 と reComputer Jetson AI インテリジェントロボットキットは、高精度ロボットアーム制御と強力な AI コンピューティングプラットフォームをシームレスに組み合わせ、包括的なロボット開発ソリューションを提供します。このキットは Jetson Orin または AGX Orin プラットフォームをベースとし、SO-ARM100 ロボットアームと LeRobot AI フレームワークを組み合わせて、教育、研究、産業オートメーションなどの複数のシナリオに適用可能なインテリジェントロボットシステムをユーザーに提供します。 このwikiでは、SO ARM100 の組み立てとデバッグのチュートリアルを提供し、Lerobot フレームワーク内でのデータ収集とトレーニングを実現します。
仕様
| 仕様 | Arm Kit | Arm Kit Pro |
|---|---|---|
| タイプ | Arm Kit | Arm Kit Pro |
| 自由度 | 6 | 6 |
| 最大トルク | 19.5kg.cm 7.4V | 30kg.cm 12V |
| サーボ | STS3215 Bus Servo | STS3215 Bus Servo |
| 電源 | 5.5mm*2.1mm DC 5V4A | 5.5mm*2.1mm DC 12V1A |
| 角度センサー | 12ビット磁気エンコーダー | 12ビット磁気エンコーダー |
| 推奨動作温度範囲 | 0℃~40℃ | 0℃~40℃ |
| 通信方式 | UART | UART |
| 制御方式 | PC | PC |
部品表(BOM)
| 部品 | 数量 | 含まれる |
|---|---|---|
| STS3215 Servo1 | 12 | ✅ |
| モーター制御ボード | 2 | ✅ |
| USB-C ケーブル 2本 | 1 | ✅ |
| 電源2 | 2 | ✅ |
| テーブルクランプ | 1 | ❌ |
| アームの3Dプリント部品 | 1 | ❌ |
3Dプリント部品とテーブルクランプは製品に含まれていません。ただし、SO-100ARM は詳細な3Dプリント STL ファイルとプリントパラメーターを提供しています。さらに、テーブルクランプの3Dプリント部品も提供しています。
前提条件
Lerobot 環境のインストール
ステップ 1. Lerobot プロジェクトをクローンする
  cd ~/
  git clone https://github.com/ZhuYaoHui1998/lerobot.git
  cd lerobot
チュートリアルに従って Lerobot 環境をインストールしていることを確認してください
URDF を Isaac Sim にインポートする
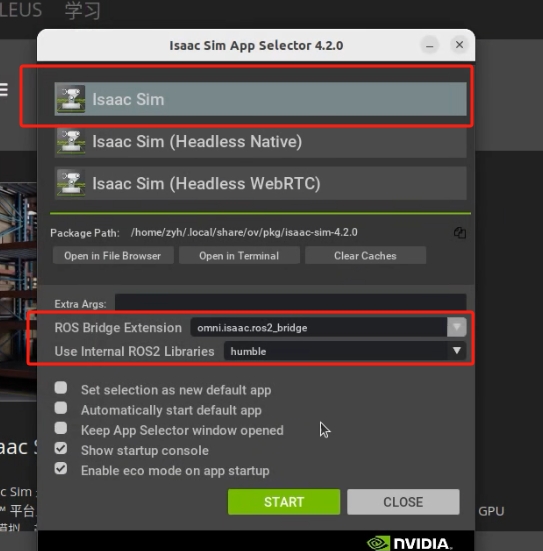
ステップ 1. Isaac Sim を開く
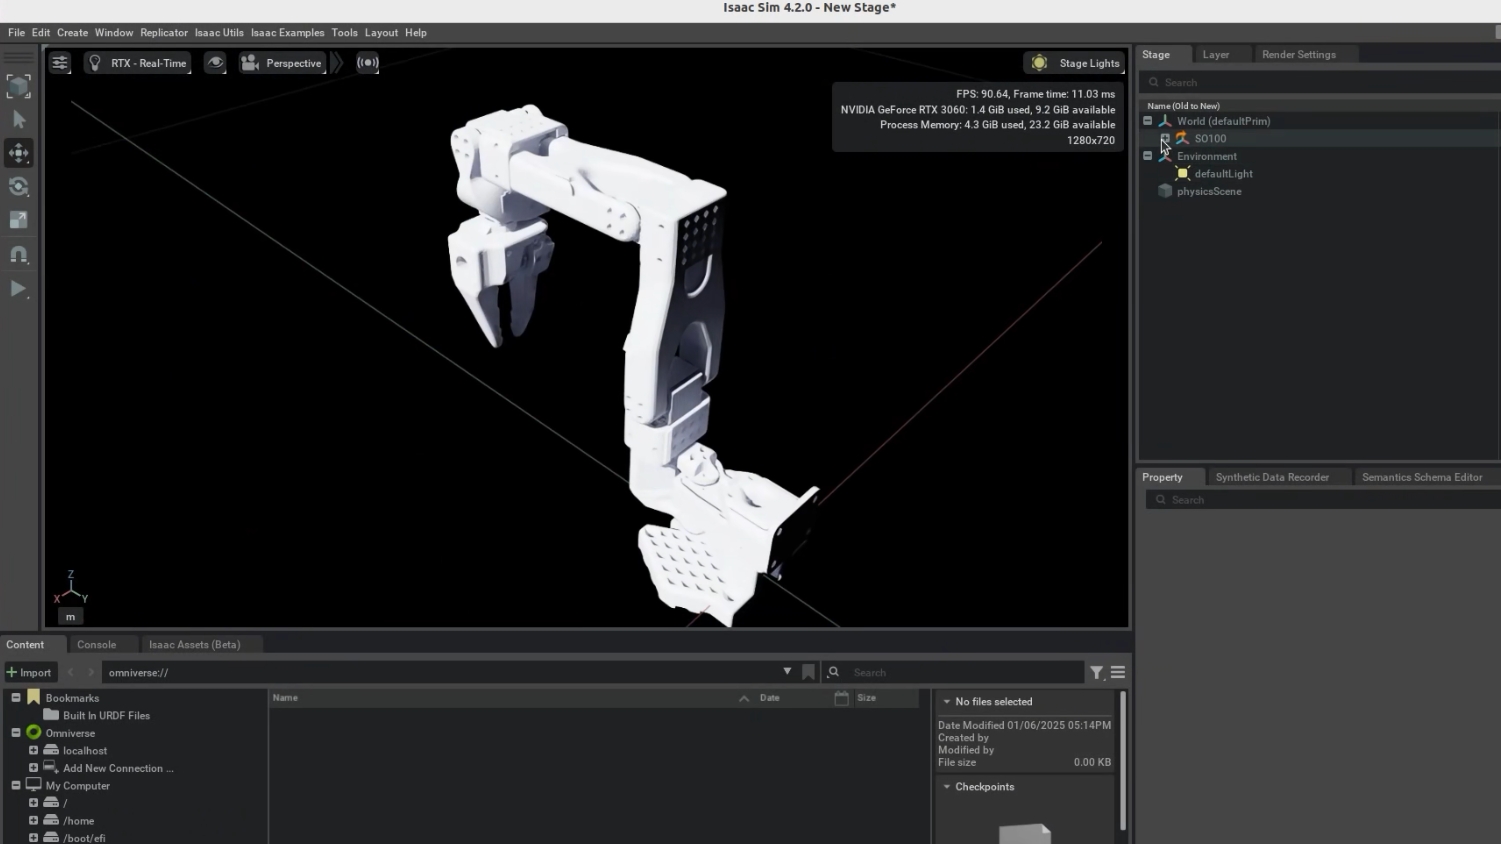
NVIDIA の公式チュートリアルに従って Isaac Sim がインストールされ、ROS2 がインストールされ、基本環境設定が完了していることを確認してください。下図に示すパラメーターで Isaac Sim インターフェースを開きます。
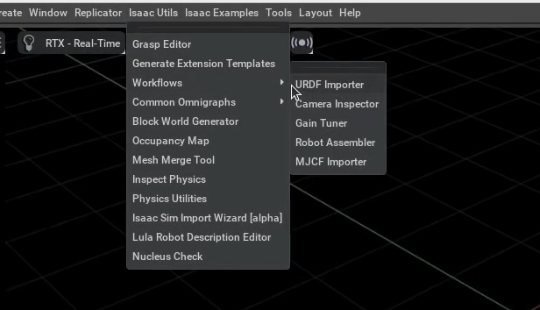
ステップ 2. URDF Importer を使用する
Isaac Sim ツールバーで Isaac Utils → Workflows → URDF Importer を開く
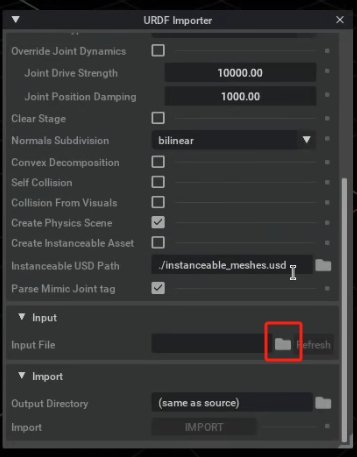
ステップ 3. URDF をインポートする
デフォルトパラメーターを保持し、Input でファイルを参照し、クローンした Lerobot リポジトリの /lerobot/SO-ARM100/URDF/SO_5DOF_ARM100_8j_URDF.SLDASM/urdf/SO_5DOF_ARM100_8j_URDF.SLDASM.urdf から URDF をインポートします

これで SO100 ロボットアームが Isaac Sim にインポートされたことが確認できます。
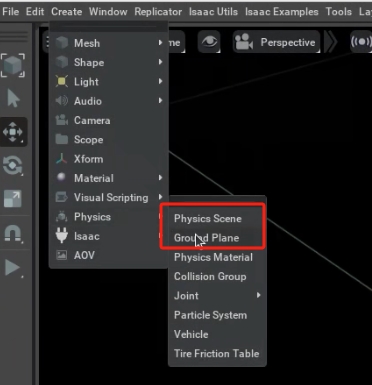
ステップ 4. 物理要素を追加する
Isaac Sim ツールバーで、Create → Physics に移動し、Physics Scene と Ground Plane の両方を追加して物理環境と地面を設定します。
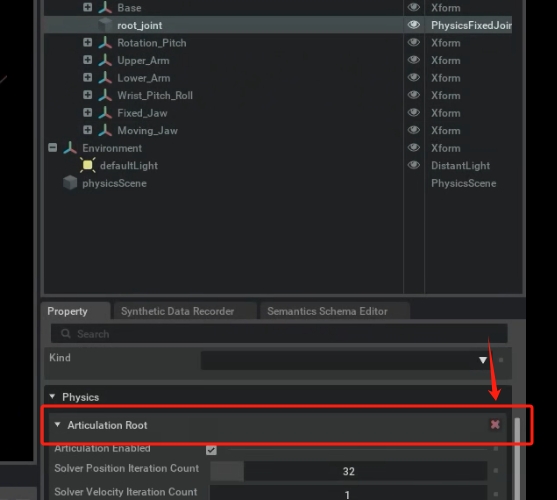
ステップ 5. root_joint の Articulation Root を削除する
右側の Stage パネルで root_joint を見つけます。それをクリックし、下の Properties で Physics の下にある Articulation Root を見つけ、右側の × をクリックしてこのルートを削除します。
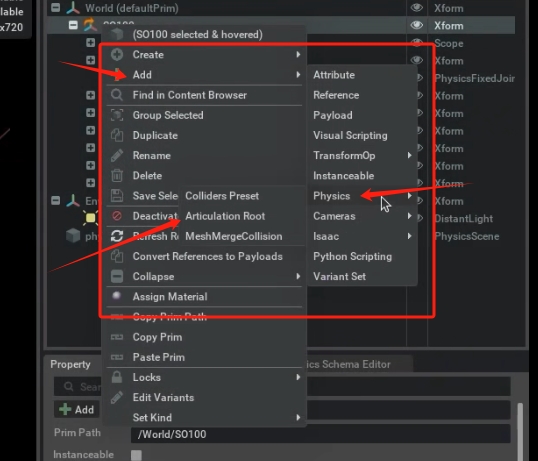
ステップ 6. root_joint の Articulation Root を追加する
Stage パネルで SO100 をクリックし、右クリックして Add → Physics → Articulation Root を選択します。
Action Graph を追加する
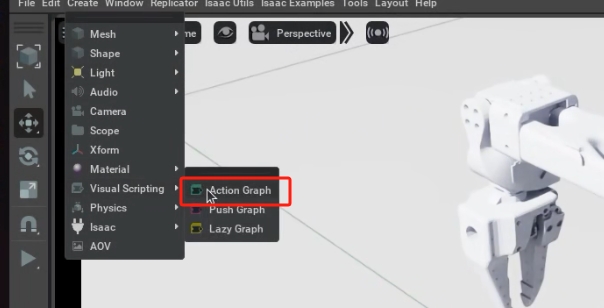
ステップ 1. ツールバーで Create → Visual Scripting に移動し、Action Graph を追加します。
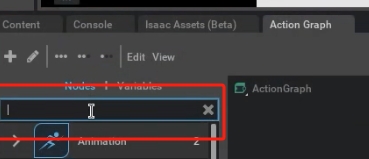
ステップ 2. Action Components を追加する。
検索ボックスで、順番に追加します:On Playback Tick、Isaac Read Simulation Time、ROS2 Publish Joint State、Articulation Controller、ROS2 Subscribe Joint State。
この部分をより明確に理解するために、ビデオコンテンツに従ってアクション接続と基本パラメーター設定を実行してください。
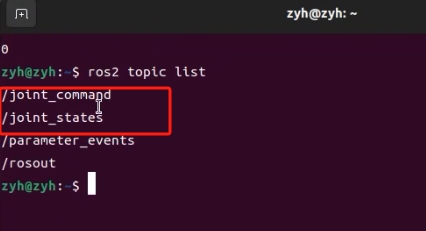
ステップ 3. 再生
右側の Play ボタンをクリックしてアクションを正常に開始します。この時点で、ros2 topic list コマンドを使用してトピック情報を表示します。
ROS2 Python によるロボットアーム動作制御
これで、ROS2 環境で以下の Python スクリプトを実行してロボットアームを制御できます。スクリプトファイルは lerobot/lerobot/scripts/ の下に control_motor.py と lerobot_publisher.py として配置されています。
control_motor.py では、特定のサーボの角度を個別に送信でき、角度値は -π と π の間の範囲です。
control_motor.py
import threading

import rclpy
from sensor_msgs.msg import JointState

rclpy.init()
node = rclpy.create_node('position_velocity_publisher')
pub = node.create_publisher(JointState, 'joint_command', 10)

thread = threading.Thread(target=rclpy.spin, args=(node, ), daemon=True)
thread.start()

joint_state_position = JointState()

joint_state_position.name = ["Rotation", "Pitch","Elbow","Wrist_Pitch","Wrist_Roll","Jaw"]

joint_state_position.position = [0.2,0.2,float('nan'),0.2,0.2,0.2]
#joint_state_position.position = [0.0,0.0,0.0,0.0,0.0,0.0]

rate = node.create_rate(10)
try:
    while rclpy.ok():
        pub.publish(joint_state_position)

        rate.sleep()
except KeyboardInterrupt:
    pass
rclpy.shutdown()
thread.join()
lerobot_publisher.py は、サーボに継続的にアクションコマンドを送信することを実装します。
lerobot_publisher.py
import rclpy
from rclpy.node import Node
from sensor_msgs.msg import JointState
import numpy as np
import time


class TestROS2Bridge(Node):
    def __init__(self):

        super().__init__("test_ros2bridge")

        # Create the publisher. This publisher will publish a JointState message to the /joint_command topic.
        self.publisher_ = self.create_publisher(JointState, "joint_command", 10)

        # Create a JointState message
        self.joint_state = JointState()

        self.joint_state.name = [
            "Rotation",
            "Pitch",
            "Elbow",
            "Wrist_Pitch",
            "Wrist_Roll",
            "Jaw"
        ]


        num_joints = len(self.joint_state.name)

        # make sure kit's editor is playing for receiving messages
        self.joint_state.position = np.array([0.0] * num_joints, dtype=np.float64).tolist()
        self.default_joints = [0, 0, 0, 0, 0, 0]

        # limiting the movements to a smaller range (this is not the range of the robot, just the range of the movement
        self.max_joints = np.array(self.default_joints) + 0.3
        self.min_joints = np.array(self.default_joints) - 0.3

        # position control the robot to wiggle around each joint
        self.time_start = time.time()

        timer_period = 0.05  # seconds
        self.timer = self.create_timer(timer_period, self.timer_callback)

    def timer_callback(self):
        self.joint_state.header.stamp = self.get_clock().now().to_msg()

        joint_position = (
            np.sin(time.time() - self.time_start) * (self.max_joints - self.min_joints) * 0.5 + self.default_joints
        )
        self.joint_state.position = joint_position.tolist()

        # Publish the message to the topic
        self.publisher_.publish(self.joint_state)


def main(args=None):
    rclpy.init(args=args)

    ros2_publisher = TestROS2Bridge()

    rclpy.spin(ros2_publisher)

    # Destroy the node explicitly
    ros2_publisher.destroy_node()
    rclpy.shutdown()


if __name__ == "__main__":
    main()
引用
TheRobotStudio Project: SO-ARM100
Huggingface Project: Lerobot
Dnsty: Jetson Containers
技術サポート & 製品ディスカッション
弊社製品をお選びいただき、ありがとうございます!私たちは、お客様の製品体験が可能な限りスムーズになるよう、さまざまなサポートを提供いたします。異なる好みやニーズに対応するため、複数のコミュニケーションチャンネルを用意しています。