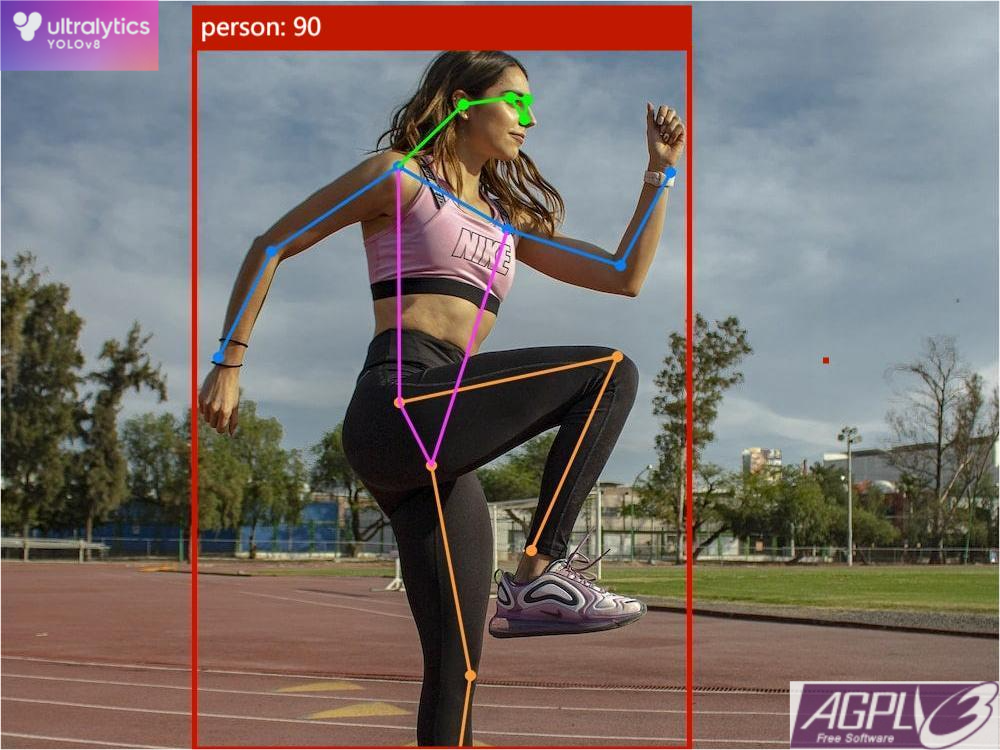
YOLOv8ポーズ推定モデルのデプロイ

このWikiでは、公式のYOLOv8姿勢推定モデルをトレーニングし、トレーニング済みモデルをGrove Vision AI(V2)またはXIAO ESP32S3デバイスにデプロイする方法を紹介します。
データセットの準備
ポーズ推定データセットについては、YOLOv8公式ドキュメントを確認することをお勧めします。
YOLOv8コマンドラインツールのインストール
- デフォルトでは、
python環境とpipパッケージ管理ツールがすでにインストールされており、python>=3.8が必要です。
# 公式リポジトリをクローン
git clone https://github.com/ultralytics/ultralytics

# クローンしたフォルダに移動
cd ultralytics

# 開発者モードでインストールし、後続の変更を同期できるようにする
pip install -e .
Gitを使用してインストールすることを推奨する理由は、後でコードを変更する必要があるためであり、開発者モードでインストールする必要があるからです。
yoloコマンドラインツールが正常にインストールされたかどうかをテストするために、バージョン確認コマンドを使用できます。
# バージョン確認
yolo -v
トレーニング
-
まず、ダウンロードしたデータセットフォルダに移動します。
-
次のコマンドを実行してモデルのトレーニングを開始します。
yolo train detect model=yolov8n-pose.pt data=./data_pose.yaml imgsz=192
モデルをtflite形式にエクスポート
-
トレーニング後、モデルは
runs/train/exp*/weights/フォルダに保存されます。モデルの評価指標が要件を満たしていることを確認してください。 -
その後、モデルの後処理を減らすために公式コードを変更する必要があります。まず、
~/ultralytics/ultralytics/nn/modules/head.pyファイル内のDetectクラスとPoseクラスのforward関数を変更します。変更後は以下のようになります。
# Detectクラスのforward関数
    def forward(self, x):
        """予測されたバウンディングボックスとクラス確率を結合して返します。"""
        shape = x[0].shape  # BCHW

        if self.export:
            return [
                torch.permute(j, (0, 2, 3, 1)).reshape(j.shape[0], -1, x.shape[1])
                for j in [self.cv2[i](x[i]) for i in range(self.nl)]
                + [self.cv3[i](x[i]) for i in range(self.nl)]
            ]
        else:
            for i in range(self.nl):
                x[i] = torch.cat((self.cv2[i](x[i]), self.cv3[i](x[i])), 1)
        if self.training:
            return x
        elif self.dynamic or self.shape != shape:
            self.anchors, self.strides = (
                x.transpose(0, 1) for x in make_anchors(x, self.stride, 0.5)
            )
            self.shape = shape

        x_cat = torch.cat([xi.view(shape[0], self.no, -1) for xi in x], 2)
        if self.export and self.format in (
            "saved_model",
            "pb",
            "tflite",
            "edgetpu",
            "tfjs",
        ):  # TF FlexSplitV opsを回避
            box = x_cat[:, : self.reg_max * 4]
            cls = x_cat[:, self.reg_max * 4 :]
        else:
            box, cls = x_cat.split((self.reg_max * 4, self.nc), 1)
        dbox = (
            dist2bbox(self.dfl(box), self.anchors.unsqueeze(0), xywh=True, dim=1)
            * self.strides
        )

        if self.export and self.format in ("tflite", "edgetpu"):
            # TFLite整数モデルの量子化誤差を軽減するために画像サイズでxywhを正規化
            img_h = shape[2] * self.stride[0]
            img_w = shape[3] * self.stride[0]
            img_size = torch.tensor(
                [img_w, img_h, img_w, img_h], device=dbox.device
            ).reshape(1, 4, 1)
            dbox /= img_size

        y = torch.cat((dbox, cls.sigmoid()), 1)
        return y if self.export else (y, x)

# Poseクラスのforward関数
    def forward(self, x):
        """YOLOモデルを通じてフォワードパスを実行し、予測を返します。"""
        bs = x[0].shape[0]  # バッチサイズ
        kpt = torch.cat([self.cv4[i](x[i]).view(bs, self.nk, -1) for i in range(self.nl)], -1)  # (bs, 17*3, h*w)
        x = self.detect(self, x)
        if self.training:
            return x, kpt
        if self.export:
            return x, torch.permute(kpt, (0, 2, 1))
        pred_kpt = self.kpts_decode(bs, kpt)
        return torch.cat([x, pred_kpt], 1) if self.export else (torch.cat([x[0], pred_kpt], 1), (x[1], kpt))
- コマンドラインでの異常エラーを回避するために、
~/ultralytics/ultralytics/engine/exporter.pyファイル内のExporterクラスのexport_saved_modelメソッドコードも以下のように変更できます。
    @try_export
    def export_saved_model(self, prefix=colorstr('TensorFlow SavedModel:')):
        """YOLOv8 TensorFlow SavedModelのエクスポート。"""
        cuda = torch.cuda.is_available()
        try:
            import tensorflow as tf  # noqa
        except ImportError:
            check_requirements(f"tensorflow{'-macos' if MACOS else '-aarch64' if ARM64 else '' if cuda else '-cpu'}")
            import tensorflow as tf  # noqa
        check_requirements(
            ('onnx', 'onnx2tf>=1.15.4,<=1.17.5', 'sng4onnx>=1.0.1', 'onnxsim>=0.4.33', 'onnx_graphsurgeon>=0.3.26',
             'tflite_support', 'onnxruntime-gpu' if cuda else 'onnxruntime'),
            cmds='--extra-index-url https://pypi.ngc.nvidia.com')  # onnx_graphsurgeonはNVIDIAのみ

        LOGGER.info(f'\n{prefix} tensorflow {tf.__version__}でエクスポートを開始...')
        check_version(tf.__version__,
                      '<=2.13.1',
                      name='tensorflow',
                      verbose=True,
                      msg='https://github.com/ultralytics/ultralytics/issues/5161')
        f = Path(str(self.file).replace(self.file.suffix, '_saved_model'))
        if f.is_dir():
            import shutil
            shutil.rmtree(f)  # 出力フォルダを削除

        # キャリブレーションファイルを事前ダウンロードして問題を修正
        onnx2tf_file = Path('calibration_image_sample_data_20x128x128x3_float32.npy')
        if not onnx2tf_file.exists():
            attempt_download_asset(f'{onnx2tf_file}.zip', unzip=True, delete=True)

        # ONNXへのエクスポート
        self.args.simplify = True
        f_onnx, _ = self.export_onnx()

        # TFへのエクスポート
        tmp_file = f / 'tmp_tflite_int8_calibration_images.npy'  # int8キャリブレーション画像ファイル
        if self.args.int8:
            verbosity = '--verbosity info'
            if self.args.data:
                # 整数量子化用のキャリブレーションデータを生成
                LOGGER.info(f"{prefix} 'data={self.args.data'からINT8キャリブレーション画像を収集")
                data = check_det_dataset(self.args.data)
                dataset = YOLODataset(data['val'], data=data, imgsz=self.imgsz[0], augment=False)
                images = []
                for i, batch in enumerate(dataset):
                    if i >= 100:  # キャリブレーション画像の最大数
                        break
                    im = batch['img'].permute(1, 2, 0)[None]  # リストをnparrayに変換、CHWをBHWCに変換
                    images.append(im)
                f.mkdir()
                images = torch.cat(images, 0).float()
                np.save(str(tmp_file), images.numpy())  # BHWC
                int8 = f'-oiqt -qt per-tensor -cind images "{tmp_file}" "[[[[0, 0, 0]]]]" "[[[[255, 255, 255]]]]"'
            else:
                int8 = '-oiqt -qt per-tensor'
        else:
            verbosity = '--non_verbose'
            int8 = ''

        cmd = f'onnx2tf -i "{f_onnx}" -o "{f}" -nuo {verbosity} {int8}'.strip()
        LOGGER.info(f"{prefix} 実行中 '{cmd}'")
        subprocess.run(cmd, shell=True)
        yaml_save(f / 'metadata.yaml', self.metadata)  # metadata.yamlを追加

        # TFLiteモデルの削除/名前変更
        if self.args.int8:
            tmp_file.unlink(missing_ok=True)
            for file in f.rglob('*_dynamic_range_quant.tflite'):
                file.rename(file.with_name(file.stem.replace('_dynamic_range_quant', '_int8') + file.suffix))
            for file in f.rglob('*_integer_quant_with_int16_act.tflite'):
                file.unlink()  # 余分なfp16アクティベーションTFLiteファイルを削除

        return str(f), tf.saved_model.load(f, tags=None, options=None)  # saved_modelをKerasモデルとしてロード
- 以下のコマンドを使用して tflite モデルをエクスポートします。
yolo export model=${your model path} format=tflite imgsz=192 int8
- その後、現在のフォルダ内に
yolov8n-pose_saved_modelフォルダが生成され、その中にyolov8n-pose_full_integer_quant.tfliteモデルファイルが含まれています。このモデルファイルはGrove Vision AI(V2)またはXIAO ESP32S3デバイスにデプロイすることができます。
モデルグラフの最適化
- Grove Vision AI (V2) は vela で最適化されたモデルをサポートしており、モデル推論を加速することができます。まず、以下のコマンドを実行して vela コマンドラインツールをインストールします(
XIAO ESP32S3デバイスはまだサポートされていません)。
pip3 install ethos-u-vela
- 次に、こちらから
vela関連の設定ファイルをダウンロードするか、以下の内容をコピーしてファイルに保存します。このファイル名はvela_config.iniとすることができます。
; file: my_vela_cfg.ini ; -----------------------------------------------------------------------------
; Vela configuration file ; -----------------------------------------------------------------------------
; System Configuration

; My_Sys_Cfg
[System_Config.My_Sys_Cfg]
core_clock=400e6
axi0_port=Sram
axi1_port=OffChipFlash
Sram_clock_scale=1.0
Sram_burst_length=32
Sram_read_latency=16
Sram_write_latency=16
Dram_clock_scale=0.75
Dram_burst_length=128
Dram_read_latency=500
Dram_write_latency=250
OnChipFlash_clock_scale=0.25
OffChipFlash_clock_scale=0.015625
OffChipFlash_burst_length=32
OffChipFlash_read_latency=64
OffChipFlash_write_latency=64
; -----------------------------------------------------------------------------
; Memory Mode
; My_Mem_Mode_Parent
[Memory_Mode.My_Mem_Mode_Parent]
const_mem_area=Axi1
arena_mem_area=Axi0
cache_mem_area=Axi0
- 最後に、以下のコマンドを使用してグラフを最適化します。
vela --accelerator-config ethos-u55-64 \
    --config vela_config.ini \
    --system-config My_Sys_Cfg \
    --memory-mode My_Mem_Mode_Parent \
    --output-dir ${Save path of the optimized model} \
    ${The path of the tflite model that needs to be optimized}
デプロイ
-
デプロイする必要があるモデルファイルは、上記でエクスポートした
tfliteファイルです。以下のチュートリアルに従って、モデルファイルをターゲットデバイスに書き込むことができます。 -
トレーニング済みの tflite モデルをデバイスに書き込むには、弊社のウェブツールを使用することを強くお勧めします。詳細な操作手順は デプロイメントチュートリアル に記載されています。
注意: ESP32S3 デバイスは vela グラフ最適化後のモデルデプロイをサポートしていないため、XIAO ESP32S3 デバイスにモデルをデプロイする場合は、tflite モデルグラフの最適化を行う必要はありません。