XIAO 用 mmWave から Home Assistant へ Bluetooth 経由で接続

はじめに
24GHz mmWave Sensor for XIAO - Human Static Presence は、Seeed Studio XIAO シリーズ用の拡張ボードです。これは FMCW 原理に基づいたアンテナ一体型の高感度 mmwave センサーです。センサー信号処理と正確な人体感知アルゴリズムを組み合わせることで、動いている状態と静止している状態の人体を識別できます。
この章では、主に 24GHz mmWave Sensor for XIAO が Bluetooth 経由で HA に接続する方法を紹介します。24GHz mmWave Sensor for XIAO の詳細な機能については、こちらを参照してください。
この Wiki のすべての内容は 24GHz mmWave for XIAO にのみ適用され、他のミリ波センサーには使用できない場合があります。
入門ガイド
ハードウェアの準備
この記事では、美観と配線の簡単さのために、mmWave for XIAO を XIAO ESP32C3 と組み合わせて使用し、Home Assistant に接続します。このチュートリアルに正確に従いたい場合は、以下のモジュールを準備する必要があります。
| Seeed Studio XIAO ESP32C3 | 24GHz mmWave for XIAO |
|---|---|
 | 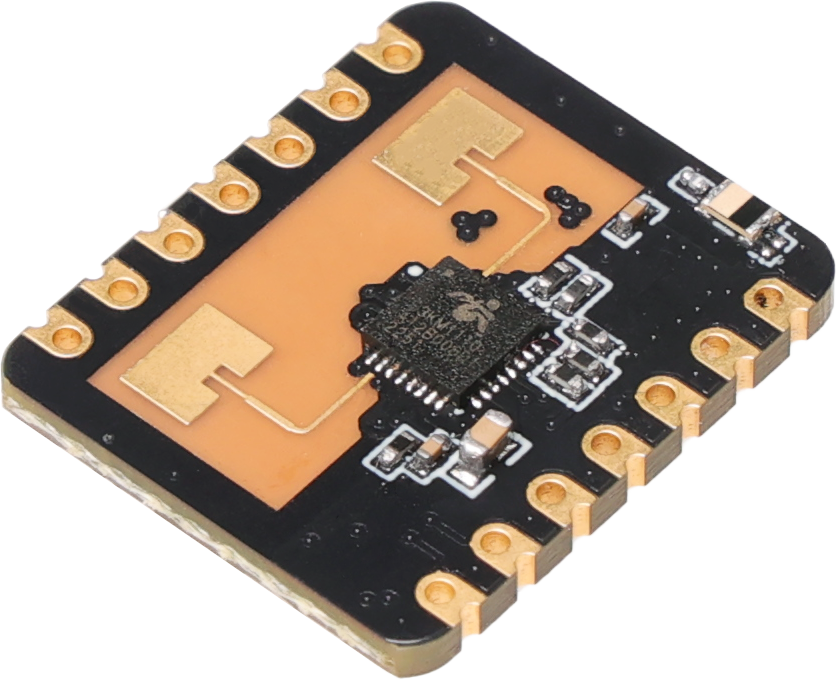 |
このセンサーは XIAO 互換性のために設計されているため、一般的に、このセンサーを使用したい場合は、XIAO を準備し、センサー用のメスヘッダーピンを取り付ける必要があります。XIAO に接続する際は、センサーの取り付け方向に特に注意してください。逆向きに差し込まないでください。そうしないと、センサーや XIAO を焼損する可能性があります。
正しい方向は、センサーのアンテナが外側を向くようにすることです。

接続方向が正しいことを確認した後、USB-C タイプケーブルをコンピューターまたは 3.3V 電源に接続すると、センサーが動作を開始します。
現在 XIAO が手元にない場合は、TTL を 3.3V ピンと GND ピンに接続して mmwave for XIAO に個別に電源を供給することもできます。これもこのチュートリアルの内容を使用して実行できます。このチュートリアルでは、RX と TX ピンを使用する必要はありません。

ソフトウェアの準備
まだ HomeAssistant をインストールしていない場合は、こちらをクリックして公式の HomeAssistant チュートリアルを参照してください。
手順
ステップ 1. デバイスの発見
Home Assistant で、左下の setting をクリックし、中央の Devices&Services を選択します。

Discovered ゾーンにセンサーアイコンが表示されるので、configure をクリックします。

ポップアップウィンドウが表示されるので、submit をクリックします。

設定成功のポップアップが表示されるので、finish をクリックします。

ステップ 2. デバイスの設定
設定済みゾーンで、ld2410_ble をクリックします。

センサー設定ページに入ったら、1 device をクリックします。

センサーの戻り値をダッシュボードに追加します。

ポップアップウィンドウで ADD TO DASHBOARD を選択します。

最後に、左上の overview をクリックすると、mmwave-for-xiao センサーデータがダッシュボードに正常に表示されます。これで mmwave for xiao センサーが Home Assistant に正常に接続されました。
次に、自動化で創造性を発揮してください!
ESPHome を使用した Wifi 経由での XIAO 用 mmWave から Home Assistant への接続
以下の yaml ファイルは、ESPHome ファームウェアを使用して、レーダーモジュール付きの Seeed XIAO ESP32-C3 を Home Assistant に接続します:
# Configuration for ESPHome
substitutions:
  name: "xiao-24ghz-mmwave"
  friendly_name: "XIAO 24GHz mmwave"

esphome:
  name: "${name}"
  friendly_name: "${friendly_name}"
  name_add_mac_suffix: True

esp32:
  board: esp32-c3-devkitm-1
  framework:
    type: arduino

# Enable logging
logger:

# Enable Home Assistant API
api:

ota:
  - platform: esphome

wifi:
  ssid: !secret wifi_ssid
  password: !secret wifi_password

  # Enable fallback hotspot (captive portal) in case wifi connection fails
  ap:
    ssid: "${friendly_name}"

captive_portal:

uart:
  id: mmWave_uart
  tx_pin: GPIO5  # D3
  rx_pin: GPIO4  # D2
  baud_rate: 9600
  parity: NONE
  stop_bits: 1

ld2410:
  id: ld2410_radar
  uart_id: mmWave_uart

number:
  - platform: ld2410
    timeout:
      name: Radar Timeout
    max_move_distance_gate:
      name: Radar Max Move Distance
    max_still_distance_gate:
      name: Radar Max Still Distance
    g0:
      move_threshold:
        name: g0 move threshold
      still_threshold:
        name: g0 still threshold
    g1:
      move_threshold:
        name: g1 move threshold
      still_threshold:
        name: g1 still threshold
    g2:
      move_threshold:
        name: g2 move threshold
      still_threshold:
        name: g2 still threshold
    g3:
      move_threshold:
        name: g3 move threshold
      still_threshold:
        name: g3 still threshold
    g4:
      move_threshold:
        name: g4 move threshold
      still_threshold:
        name: g4 still threshold
    g5:
      move_threshold:
        name: g5 move threshold
      still_threshold:
        name: g5 still threshold
    g6:
      move_threshold:
        name: g6 move threshold
      still_threshold:
        name: g6 still threshold
    g7:
      move_threshold:
        name: g7 move threshold
      still_threshold:
        name: g7 still threshold
    g8:
      move_threshold:
        name: g8 move threshold
      still_threshold:
        name: g8 still threshold

binary_sensor:
  - platform: ld2410
    has_target:
      name: Radar Target
      id: radar_has_target
    has_moving_target:
      name: Radar Moving Target
    has_still_target:
      name: Radar Still Target

sensor:
  - platform: ld2410
    moving_distance:
      name: Radar Moving Distance
      id: moving_distance
    still_distance:
      name: Radar Still Distance
      id: still_distance
    moving_energy:
      name: Radar Move Energy
    still_energy:
      name: Radar Still Energy
    detection_distance:
      name: Radar Detection Distance
      id: radar_detection_distance
    g0:
      move_energy:
        name: g0 move energy
      still_energy:
        name: g0 still energy
    g1:
      move_energy:
        name: g1 move energy
      still_energy:
        name: g1 still energy
    g2:
      move_energy:
        name: g2 move energy
      still_energy:
        name: g2 still energy
    g3:
      move_energy:
        name: g3 move energy
      still_energy:
        name: g3 still energy
    g4:
      move_energy:
        name: g4 move energy
      still_energy:
        name: g4 still energy
    g5:
      move_energy:
        name: g5 move energy
      still_energy:
        name: g5 still energy
    g6:
      move_energy:
        name: g6 move energy
      still_energy:
        name: g6 still energy
    g7:
      move_energy:
        name: g7 move energy
      still_energy:
        name: g7 still energy
    g8:
      move_energy:
        name: g8 move energy
      still_energy:
        name: g8 still energy
技術サポートと製品ディスカッション
弊社製品をお選びいただき、ありがとうございます!弊社製品での体験が可能な限りスムーズになるよう、さまざまなサポートを提供しています。さまざまな好みやニーズに対応するため、複数のコミュニケーションチャネルを提供しています。