reComputer上のMoonfire NVR
はじめに
Moonfire-NVRは、軽量でミニマリスティックな使いやすいNVRシステムの提供を目標として設計されており、他のより肥大化した商用NVRソリューションの複雑さを持ちません。機能性とシンプルさを重視し、ユーザーがIPカメラから直接ファイルシステムやクラウドストレージに録画できるようにします。
前提条件
ハードウェア要件


Moonfireのダウンロード
システムの更新
以下のコマンドを使用して実行してください。
sudo apt update
sudo apt upgrade -y
dockerとdocker composeのダウンロード
以下のコマンドを使用してdockerをインストールしてください。
wget https://get.docker.com -O get-docker.sh
chmod +x
sudo sh get-docker.sh
sudo systemctl start docker
sudo systemctl enable docker
docker --version
結果は以下のように表示されます:

以下のコマンドを使用してdocker composeをインストールしてください。
sudo curl -L "https://github.com/docker/compose/releases/download/$(curl -s https://api.github.com/repos/docker/compose/releases/latest | jq -r .tag_name)/docker-compose-$(uname -s)-$(uname -m)" -o /usr/local/bin/docker-compose
sudo chmod +x /usr/local/bin/docker-compose
docker-compose --version
結果は以下のように表示されます:

docker-compose.yamlの作成
以下のコマンドを使用してIDとUIDを確認してください。
id
結果は以下のように表示されます。

以下のコマンドを使用してdocker-compose.yamlを作成してください。
cd ~ && nano docker-compose.yaml
注意:自分の
IDとUIDに基づいてYAMLファイルを書き換えてください。
次に、以下の内容をYAMLファイルに入力してください。
services:
  moonfire-nvr:
    # The `vX.Y.Z` images will work on any architecture (x86-64, arm, or
    # aarch64); just pick the correct version.
    image: ghcr.io/scottlamb/moonfire-nvr:v0.7.23
    command: run

    volumes:
      # Pass through `/var/lib/moonfire-nvr` from the host.
      - "/var/lib/moonfire-nvr:/var/lib/moonfire-nvr"

      # Pass through `/etc/moonfire-nvr.toml` from the host.
      # Be sure to create `/etc/moonfire-nvr.toml` first (see below).
      # Docker will "helpfully" create a directory by this name otherwise.
      - "/etc/moonfire-nvr.toml:/etc/moonfire-nvr.toml:ro"

      # Pass through `/var/tmp` from the host.
      # SQLite expects to be able to create temporary files in this dir, which
      # is not created in Moonfire's minimal Docker image.
      # See: <https://www.sqlite.org/tempfiles.html>
      - "/var/tmp:/var/tmp"

      # Add additional mount lines here for each sample file directory
      # outside of /var/lib/moonfire-nvr, e.g.:
      # - "/media/nvr:/media/nvr"

      # The Docker image doesn't include the time zone database; you must mount
      # it from the host for Moonfire to support local time.
      - "/usr/share/zoneinfo:/usr/share/zoneinfo:ro"

    # Edit this to match your `moonfire-nvr` user.
    # Note that Docker will not honor names from the host here, even if
    # `/etc/passwd` is passed through.
    # - Be sure to run the `useradd` command below first.
    # - Then run `echo $(id -u moonfire-nvr):$(id -g moonfire-nvr)` to see
    #   what should be filled in here.
    user: "1000:1000"

    # Uncomment this if Moonfire fails with `clock_gettime failed` (likely on
    # older 32-bit hosts). <https://github.com/moby/moby/issues/40734>
    # security_opt:
    # - seccomp:unconfined

    environment:
      # Edit zone below to taste.
      TZ: "America/Los_Angeles"
      RUST_BACKTRACE: 1

    # docker's default log driver won't rotate logs properly, and will throw
    # away logs when you destroy and recreate the container. Using journald
    # solves these problems.
    # <https://docs.docker.com/config/containers/logging/configure/>
    logging:
      driver: journald
      options:
        tag: moonfire-nvr

    restart: unless-stopped

    ports:
    - "8080:8080/tcp"
以下のコマンドを使用して権限を変更してください。
sudo chmod -R 777 /var/lib/moonfire-nvr
/etc/moonfire-nvr.tomlの作成
以下のコマンドを使用して/etc/moonfire-nvr.tomlを作成してください。
sudo nano /etc/moonfire-nvr.toml
次に、以下の内容をtomlファイルに入力してください。
ain@AI-Box:~ $ sudo cat /etc/moonfire-nvr.toml
[[binds]]
ipv4 = "0.0.0.0:8080"
allowUnauthenticatedPermissions = { viewVideo = true }

[[binds]]
unix = "/var/lib/moonfire-nvr/sock"
ownUidIsPrivileged = true
Moonfireの設定
docker composeの実行
以下のコマンドを使用してデータベースを初期化してください。
sudo docker compose run --rm moonfire-nvr init
結果は以下のように表示されます。

フォルダの作成
ビデオ録画を保存するフォルダを作成してください:
sudo mkdir -p /var/lib/moonfire-nvr/recordings
sudo chown 1000:1000 /var/lib/moonfire-nvr/recordings
インタラクティブ設定の実行
sudo docker compose run --rm moonfire-nvr config 2>debug-log
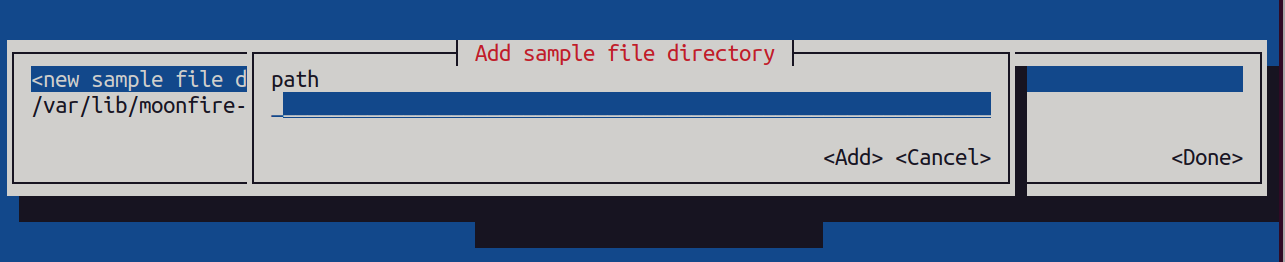
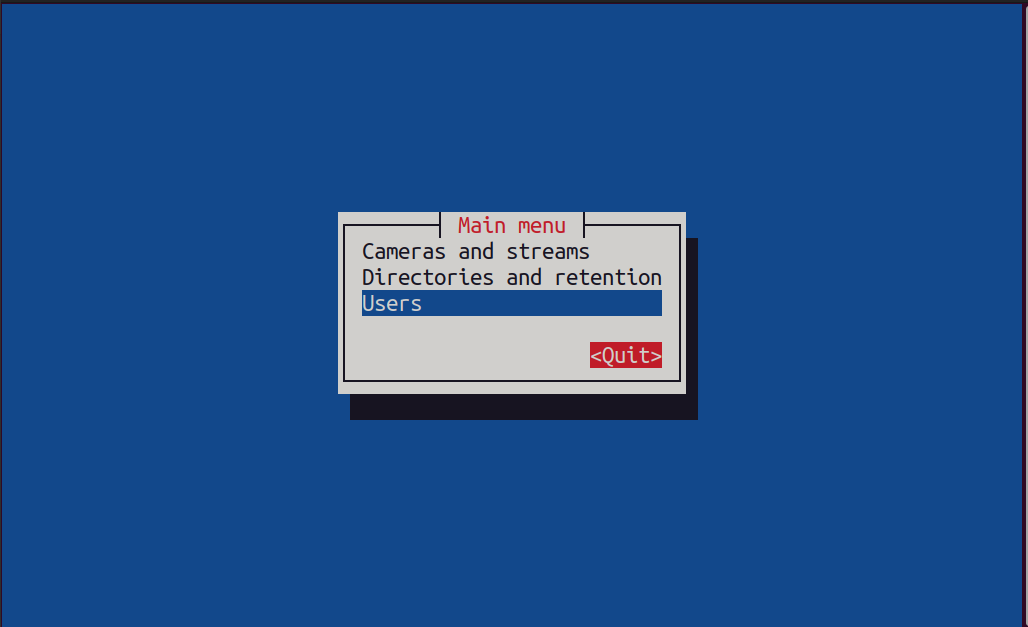
以下の手順に従ってフォルダを追加してください。
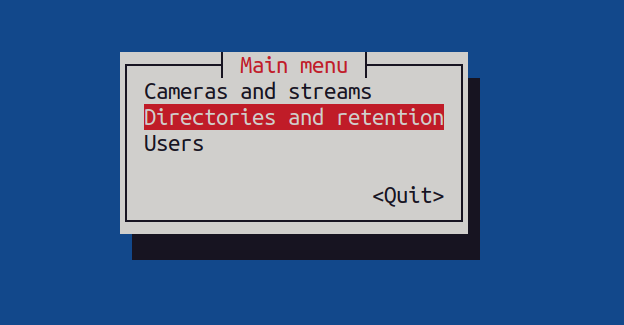
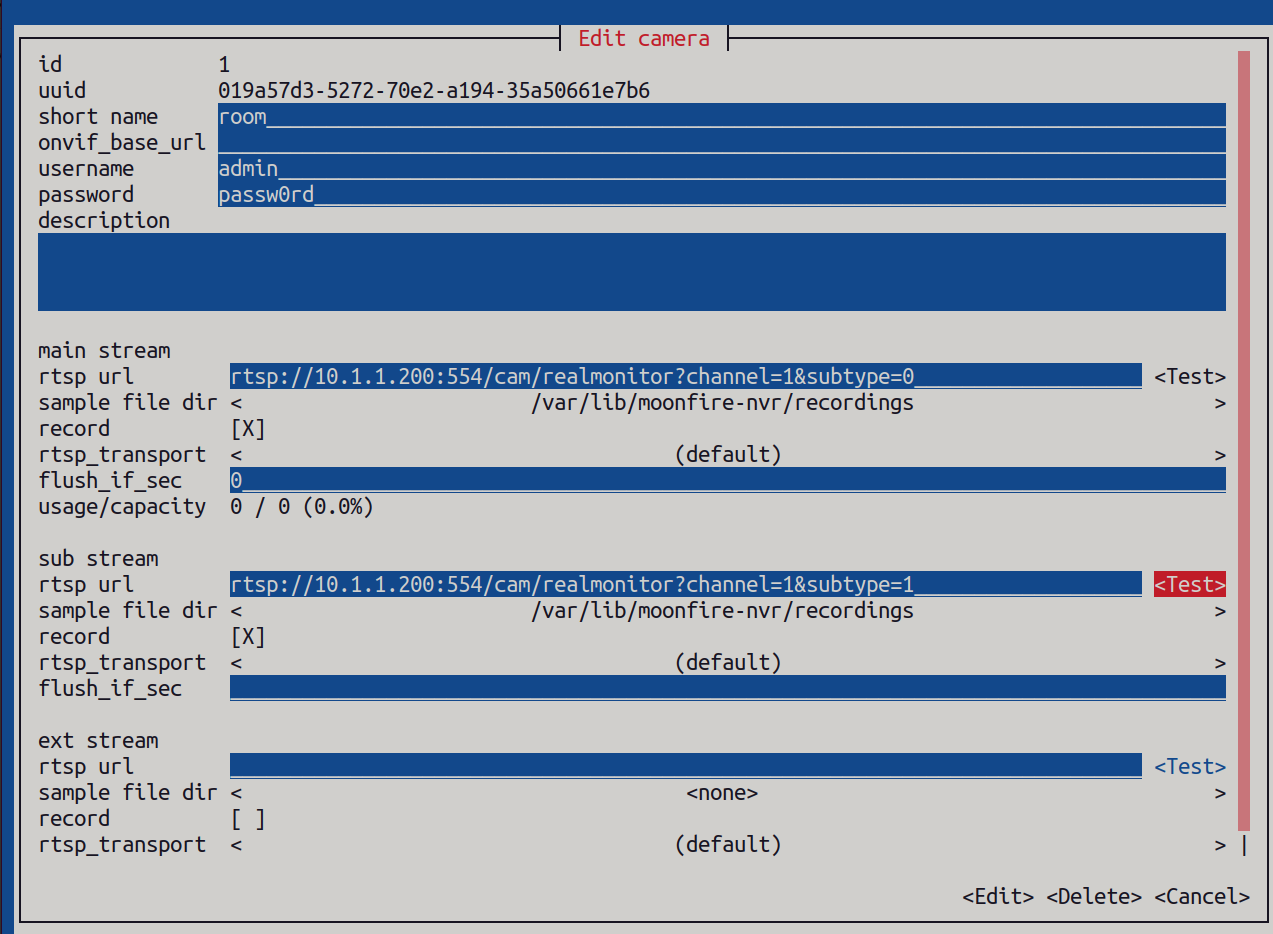
以下の手順に従ってカメラを追加してください。


Moonfire NVR の実行
以下のコマンドを使用してMoonfire NVRを実行してください。
sudo docker compose up --detach moonfire-nvr
次に、デバイスでlocalhost:8080ポートを開いてアクセスします。結果は以下のように表示されます:
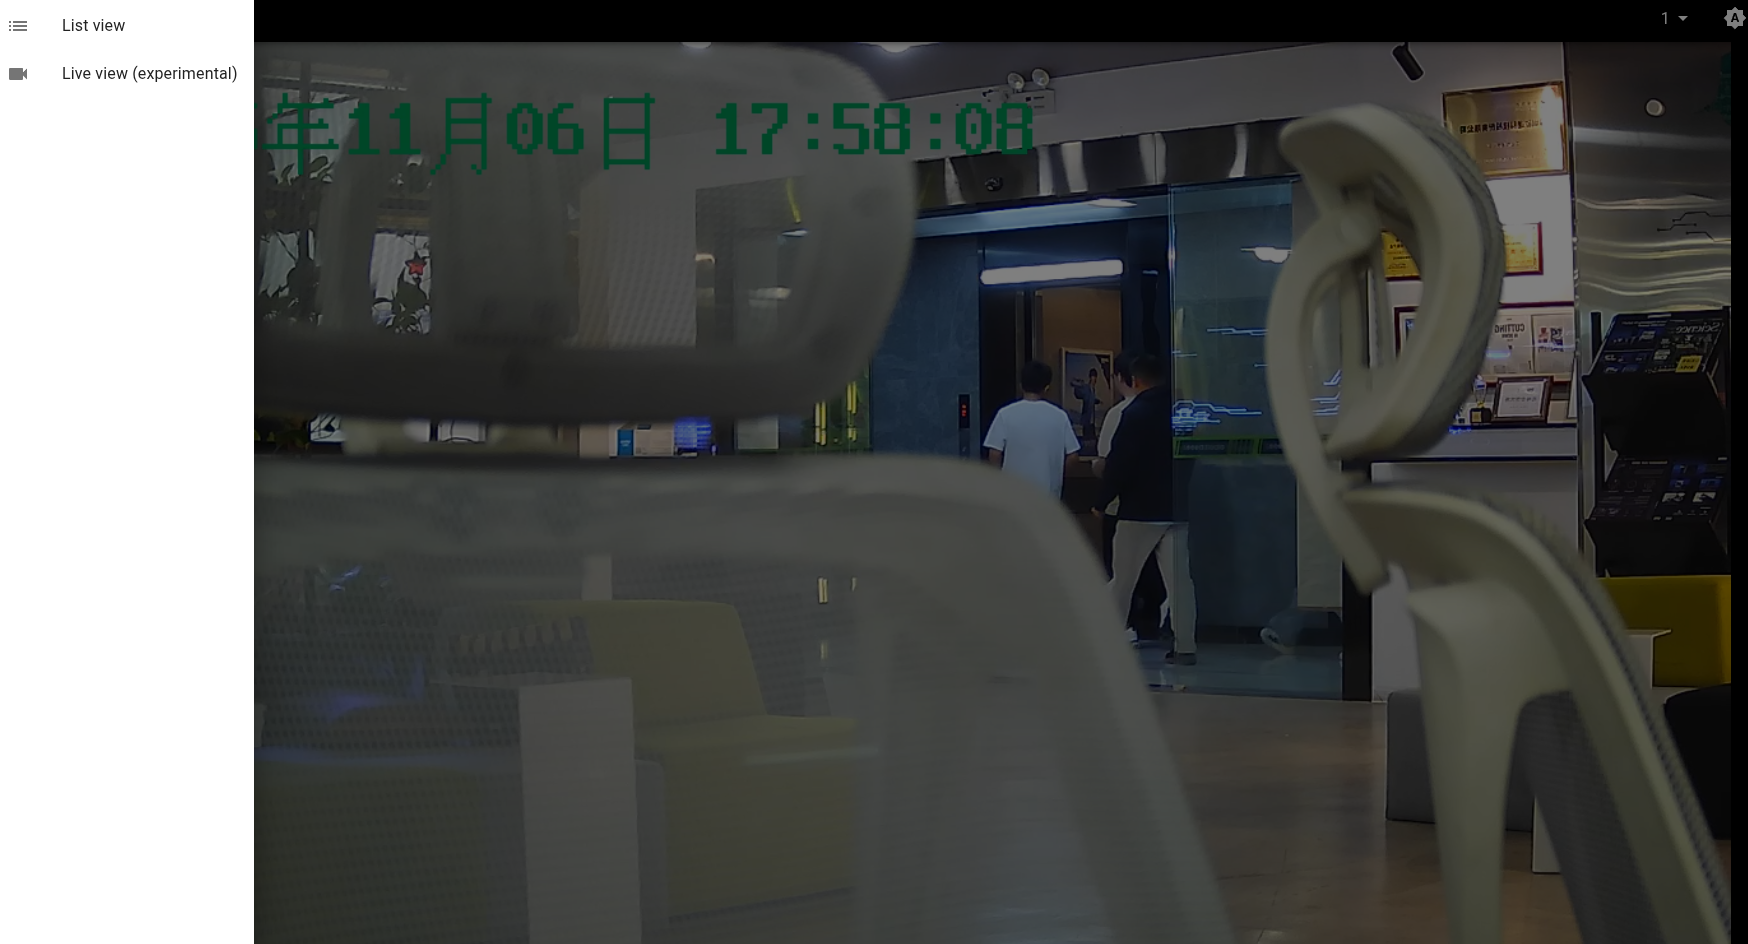
注意:左上角のオプションをクリックすることを忘れないでください。
結果
すべてを設定したら、現在のカメラからのライブフィードを表示できます。
技術サポートと製品ディスカッション
弊社製品をお選びいただき、ありがとうございます!弊社製品でのご体験が可能な限りスムーズになるよう、さまざまなサポートを提供いたします。異なる好みやニーズに対応するため、複数のコミュニケーションチャンネルを提供しています。