Seeed Studio Round Display for XIAO クリスマスボール
このチュートリアルでは、雪が降り、背景画像が変化するクリスマスボールの作り方を紹介します。
プログラムは以下の機能を実行します:
- C配列として保存された背景画像を表示します。
- 風の効果を伴って画像上に雪の粒子が降るシミュレーションを行います。
- タッチ入力を検出し、背景画像のセットを循環表示します。
- スムーズなアニメーションのためにダブルバッファリングを使用します。
環境準備
ハードウェア
このプロジェクトには以下が必要です:
メモリの関係でXIAO ESP32S3を使用しています。PNGDECの実行には約40kバイトのメモリが必要です。
ソフトウェア準備
Round Displayを使用するには、Getting Started with Round Display for XIAOにアクセスして必要なライブラリをインストールしてください。
すべてが正常に動作するかいくつかの例を試してみてください。
ライブラリ
このプロジェクトでは、Seeed Studio Round Display For XIAOにバンドルされているライブラリを使用します。
チュートリアルGetting Started with Round Display for XIAOで指定されているように、すべてのライブラリをインストールしてください。 その後、以下が必要です:
- PNGdecライブラリ
- LVGLライブラリの更新(またはSeeed Studio githubのものをインストールしない)
画像
画像はFlash配列に保存されたPNG画像です。PNGdecライブラリを使用して表示されます。
すべての画像はPNGである必要があります
以下は私が使用した画像です - すべてAI生成です


背景画像は、TFT_eSPIが表示でき、Round Display for XIAOによく適合するように準備する必要があります。
画像の準備
画像のリサイズ
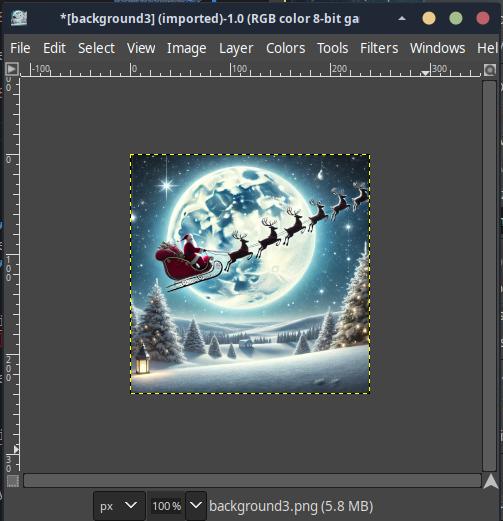
Round Display for XIAOの解像度は240x240です。画像をリサイズする必要があります。GIMPを使用した方法を紹介します。
- 画像を開く
- Image > Scale Imageに移動

- 幅と高さを240に設定します。Keep Ratioが選択されている(チェーン)ため、widthを変更するとheightも変更されるはずです。
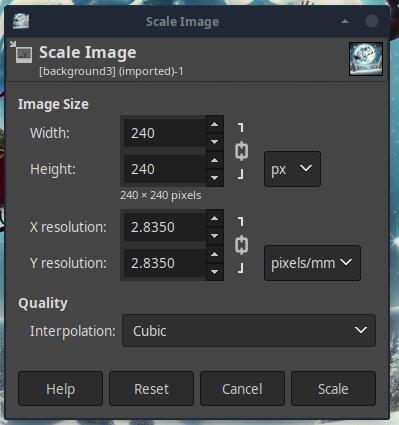
- Scaleボタンを押します。
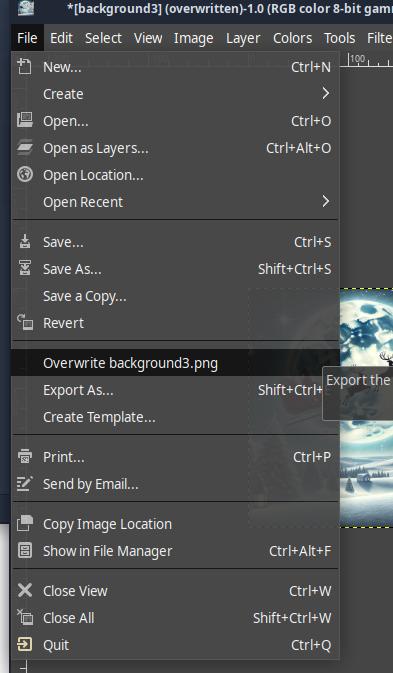
- 画像を保存します(古いものを上書きします)
Flash配列の作成
注意: この手順はTFT_eSPI Flash_PNGの例に含まれています。
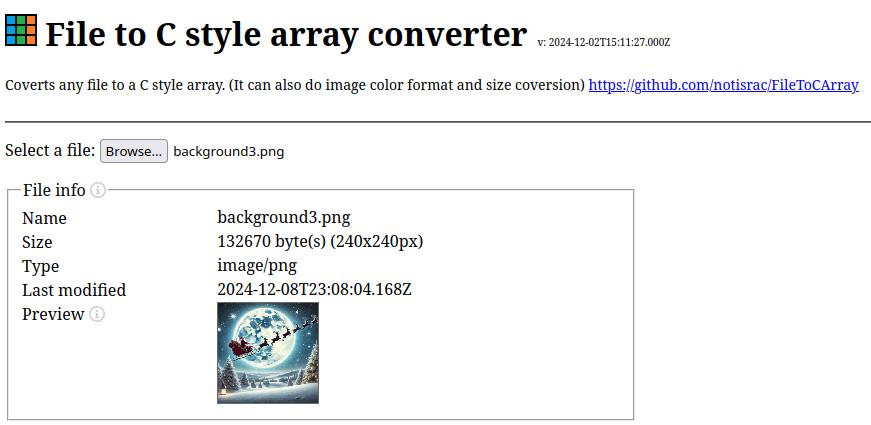
Flash配列を作成するには、File to C style array converterにアクセスしてください。
手順は以下の通りです:
- Browseを使用して画像をアップロードします。画像をアップロードした後
- いくつかのオプションを設定する必要があります
- Treat as binary

他のすべてのオプションがグレーアウトします。
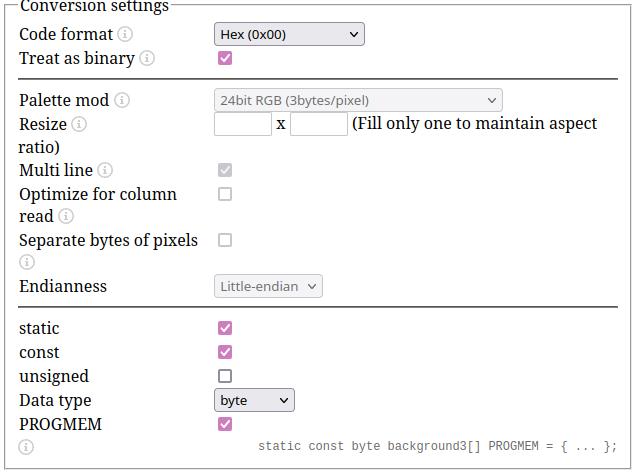
- Data typeをcharに変更しましょう
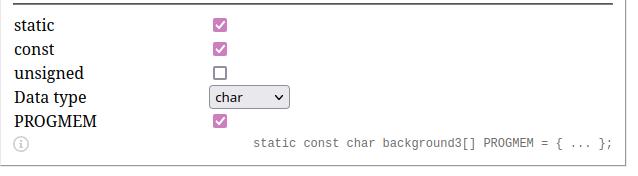
- convertを押します。これで画像が配列に変換されます。
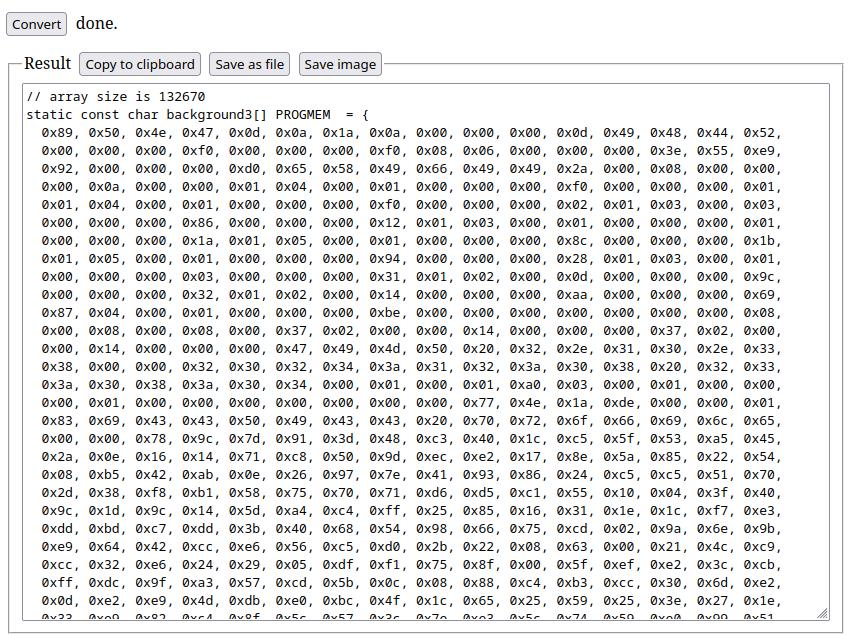
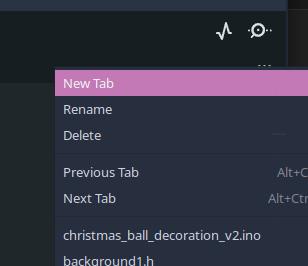
- Save as fileボタンを押して画像を保存し、Arduinoスケッチに追加するか、Copy to clipboardボタンを押すことができます。 Copy to clipboardを選択した場合、Arduinoエディタの右側にある3つの点を押してNew Tabを選択する必要があります。
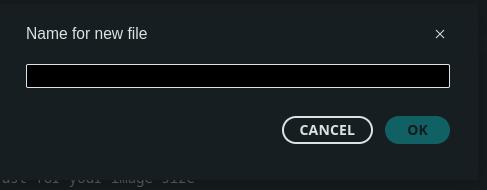
名前を付けます(通常は画像名に.h拡張子を付けたもの)
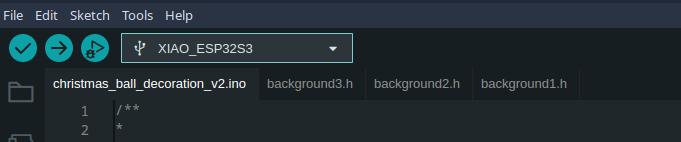
すべての画像が*.h*ファイルとして表示されます。
コード
以下はクリスマスボールのコードです。 コードの主要な機能について少し説明します。コードにはいくつかのコメントも含まれています。
ヘッダーとライブラリ
まず、いくつかのライブラリをインクルードします。
#include <PNGdec.h>
#include <TFT_eSPI.h>
#include <Wire.h>

#include "background1.h"
#include "background2.h"
#include "background3.h"

#define USE_TFT_ESPI_LIBRARY
#include "lv_xiao_round_screen.h"
Seeed Studioライブラリがインストールされている必要があることを覚えておいてください。
背景画像
背景画像を管理するための関数は以下の通りです
struct Background {
  const uint8_t *data;
  size_t size;
};

const Background backgrounds[] = {
    {(const uint8_t *)background1, sizeof(background1)},
    {(const uint8_t *)background2, sizeof(background2)},
    {(const uint8_t *)background3, sizeof(background3)},
};
-
構造体: 各背景画像は Background 構造体として保存され、以下を含みます:
- data: PNG データへのポインタ。
- size: PNG ファイルのサイズ。
-
配列: backgrounds 配列はすべての背景画像を保存します。currentBackground 変数は現在表示されている背景を追跡します。
雪の粒子シミュレーション
- 粒子の初期化
void initParticles() {
  for (int i = 0; i < numParticles; i++) {
    particles[i].x = random(0, sprite.width());
    particles[i].y = random(0, sprite.height());
    particles[i].speed = random(3, 8);
  }
}
- ランダムな位置と速度で numParticles を初期化します。
- パーティクルの更新
void updateParticles() {
  for (int i = 0; i < numParticles; i++) {
    particles[i].speed += random(-1, 2); // Speed variation
    particles[i].speed = constrain(particles[i].speed, 3, 8);
    particles[i].y += particles[i].speed; // Move down
    particles[i].x += random(-1, 2);      // Wind effect
    // Wrap-around logic
    if (particles[i].y > sprite.height()) {
      particles[i].y = 0;
      particles[i].x = random(0, sprite.width());
      particles[i].speed = random(3, 8);
    }
    if (particles[i].x < 0) particles[i].x = sprite.width();
    if (particles[i].x > sprite.width()) particles[i].x = 0;
  }
}
- パーティクルの位置を以下で更新:
- 落下効果:各パーティクルが下に移動。
- 風効果:わずかな水平方向のドリフトを追加。
- ラップアラウンド:パーティクルが底部を出ると上部にリセット。
- パーティクルのレンダリング:
void renderParticlesToSprite() {
  for (int i = 0; i < numParticles; i++) {
    sprite.fillCircle(particles[i].x, particles[i].y, 2, TFT_WHITE);
  }
}
- 各パーティクルを小さな白い円として描画します
PNG デコード
int16_t rc = png.openFLASH((uint8_t *)backgrounds[currentBackground].data,
                           backgrounds[currentBackground].size,
                           pngDrawToSprite);
if (rc != PNG_SUCCESS) {
  Serial.println("Failed to open PNG file!");
  return;
}
png.decode(NULL, 0);
- png.openFLASH() 関数を使用して現在の背景 PNG を読み込み、デコードする
タッチ操作
if (chsc6x_is_pressed()) {
  currentBackground = (currentBackground + 1) % numBackgrounds; // Cycle backgrounds
  delay(300); // Debounce
}
- chsc6x_is_pressed() を使用してタッチイベントを検出し、currentBackground をインクリメントして背景画像を変更します
セットアップとループ
- セットアップ:
void setup() {
  Serial.begin(115200);
  tft.begin();
  tft.fillScreen(TFT_BLACK);
  sprite.createSprite(240, 240); // Match display size
  pinMode(TOUCH_INT, INPUT_PULLUP);
  Wire.begin();
  initParticles();
}
-
ディスプレイ、タッチ入力、雪の粒子を初期化する
-
Main loop:
void loop() {
  sprite.fillScreen(TFT_BLACK);
  // Render background and snow
  int16_t rc = png.openFLASH((uint8_t *)backgrounds[currentBackground].data,
                             backgrounds[currentBackground].size,
                             pngDrawToSprite);
  if (rc == PNG_SUCCESS) {
    png.decode(NULL, 0);
    updateParticles();
    renderParticlesToSprite();
    sprite.pushSprite(0, 0);
  }
  // Handle touch input
  if (chsc6x_is_pressed()) {
    currentBackground = (currentBackground + 1) % numBackgrounds;
    delay(300);
  }
  delay(10); // ~100 FPS
}
- スプライトをクリアし、現在のフレーム(背景 + パーティクル)をレンダリングし、ユーザー入力をチェックします。
ダブルバッファリング
雪片のちらつきを減らし、アニメーションの滑らかさを向上させるために、ダブルバッファリングを使用します。
これにより、画面に表示する前にオフスクリーンバッファに描画することができます。
ここでのダブルバッファリング
このプロジェクトでは、TFT_eSPI ライブラリの TFT_eSprite クラスがダブルバッファリングを実装しています。
- スプライト作成
- スプライト(オフスクリーンバッファ)は setup() 関数で作成されます:
sprite.createSprite(240, 240); // Match display size
- バッファの描画
- すべての描画操作(背景レンダリングと雪の粒子アニメーション)はスプライト上で実行されます:
sprite.fillScreen(TFT_BLACK); // Clear the sprite
renderParticlesToSprite();   // Draw snow particles
- ディスプレイの更新
- フレームがスプライト内で完全に描画された後、一度の操作でディスプレイにプッシュされます:
sprite.pushSprite(0, 0);
- これにより、バッファの内容が瞬時に画面に転送されます。
- 再利用
- スプライトは loop() の開始時にクリアすることで、すべてのフレームで再利用されます:
sprite.fillScreen(TFT_BLACK);
ダブルバッファリング使用の利点
- スムーズな雪のアニメーション:落下する雪の粒子がちらつきなしにシームレスに更新されます。
- 動的な背景切り替え:タッチによってトリガーされる背景変更が、目に見える遅延やアーティファクトなしに発生します。
- 効率的なレンダリング:メモリ(RAM)での描画は、ディスプレイを直接行ごとに更新するよりも高速です。
プロジェクトの完全なコードは以下の通りです:
/**
*
* To create the images as C arrays, visit:
* https://notisrac.github.io/FileToCArray/
*
*/
#include <PNGdec.h>
#include <TFT_eSPI.h>

#include "background1.h"
#include "background2.h"
#include "background3.h"

#define USE_TFT_ESPI_LIBRARY
#include "lv_xiao_round_screen.h"

// PNG decoder and TFT display instances
PNG png;
//TFT_eSPI tft = TFT_eSPI();
TFT_eSprite sprite = TFT_eSprite(&tft); // Off-screen buffer

#define MAX_IMAGE_WIDTH 240

// Backgrounds for the snow globe
struct Background {
  const uint8_t *data;
  size_t size;
};

// Define the backgrounds with explicit casting
const Background backgrounds[] = {
    {(const uint8_t *)background1, sizeof(background1)},
    {(const uint8_t *)background2, sizeof(background2)},
    {(const uint8_t *)background3, sizeof(background3)},
};
const size_t numBackgrounds = sizeof(backgrounds) / sizeof(backgrounds[0]);

int currentBackground = 0; // Index of the current background

// Snow particle properties
const int numParticles = 100; // Number of snow particles
struct Particle {
  int16_t x, y;   // Position
  int16_t speed;  // Vertical speed
};
Particle particles[numParticles];

// Function to draw PNG to the sprite (callback for PNG decoder)
void pngDrawToSprite(PNGDRAW *pDraw) {
  uint16_t lineBuffer[MAX_IMAGE_WIDTH];
  png.getLineAsRGB565(pDraw, lineBuffer, PNG_RGB565_BIG_ENDIAN, 0xffffffff);
  sprite.pushImage(0, pDraw->y, pDraw->iWidth, 1, lineBuffer);
}

// Initialize snow particles
void initParticles() {
  for (int i = 0; i < numParticles; i++) {
    particles[i].x = random(0, sprite.width());
    particles[i].y = random(0, sprite.height());
    particles[i].speed = random(3, 8); // Random speed for each snowflake
  }
}

// Update snow particle positions
void updateParticles() {
  for (int i = 0; i < numParticles; i++) {
    particles[i].speed += random(-1, 2); // Random variation in speed
    particles[i].speed = constrain(particles[i].speed, 3, 8);
    particles[i].y += particles[i].speed;
    particles[i].x += random(-1, 2); // Wind effect

    // Wrap around screen
    if (particles[i].y > sprite.height()) {
      particles[i].y = 0;
      particles[i].x = random(0, sprite.width());
      particles[i].speed = random(3, 8);
    }
    if (particles[i].x < 0) particles[i].x = sprite.width();
    if (particles[i].x > sprite.width()) particles[i].x = 0;
  }
}

// Render snow particles to the sprite
void renderParticlesToSprite() {
  for (int i = 0; i < numParticles; i++) {
    sprite.fillCircle(particles[i].x, particles[i].y, 2, TFT_WHITE);
  }
}

void setup() {
  Serial.begin(115200);
  Serial.println("\n\nUsing the PNGdec library with touch interaction");

  // Initialize TFT
  tft.begin();
  tft.fillScreen(TFT_BLACK);
  sprite.createSprite(240, 240); // Match display size

  // Initialize touch interrupt pin
  pinMode(TOUCH_INT, INPUT_PULLUP);
  Wire.begin();

  // Initialize particles
  initParticles();

  Serial.println("Setup complete.");
}

void loop() {
  // Clear the sprite for the new frame
  sprite.fillScreen(TFT_BLACK);

  // Render the current background to the sprite
  int16_t rc = png.openFLASH((uint8_t *)backgrounds[currentBackground].data,
                           backgrounds[currentBackground].size,
                           pngDrawToSprite);


  if (rc != PNG_SUCCESS) {
    Serial.println("Failed to open PNG file!");
    return;
  }
  png.decode(NULL, 0); // Decode and render background

  // Update and render snow particles
  updateParticles();
  renderParticlesToSprite();

  // Push the sprite to the display
  sprite.pushSprite(0, 0);

  // Check for touch input using chsc6x_is_pressed
  if (chsc6x_is_pressed()) {
    currentBackground = (currentBackground + 1) % numBackgrounds; // Cycle through backgrounds
    delay(300); // Debounce delay
  }

  delay(10); // ~100 FPS
}
今、あなた自身の写真を使って魔法のクリスマスボールを作ることができます。
✨ Contributor Project
- このプロジェクトは、Seeed Studio Contributor Project によってサポートされています。
- Bruno Santos に感謝し、あなたの作品は展示されます。
技術サポート・製品ディスカッション
私たちの製品をお選びいただき、ありがとうございます!私たちは、お客様の製品体験が可能な限りスムーズになるよう、さまざまなサポートを提供しています。異なる好みやニーズに対応するため、複数のコミュニケーションチャンネルを提供しています。