reComputer Jetsonで音声インタラクション機能付きVLMを実行する方法
はじめに
このガイドでは、reComputer Nvidia Jetsonデバイス上でマルチモーダルビジュアル言語モデル(VLM)を音声インタラクション機能付きで実行する方法について詳細に説明します。このモデルは、公式Nvidia Jetsonプラットフォームの強力な計算能力と、Alibabaのオープンソース音声認識モデルSenseVoice、およびcoqui-aiのテキスト音声合成(TTS)モデルを組み合わせて、複雑なマルチモーダルタスクを実行します。このガイドに従うことで、このシステムを正常にインストールして動作させることができ、視覚認識と音声インタラクション機能の両方を有効にして、プロジェクトにより賢いソリューションを提供できます。
VLM(ビジュアル言語モデル)の紹介
ビジュアル言語モデル(VLM)は、Nvidia Jetsonプラットフォーム向けに最適化されたマルチモーダルモデルです。視覚と言語処理を組み合わせて、物体認識や記述的言語の生成などの複雑なタスクを処理します。VLMは自動運転、インテリジェント監視、スマートホームなどの分野で応用され、インテリジェントで直感的なソリューションを提供します。
SenseVoiceの紹介
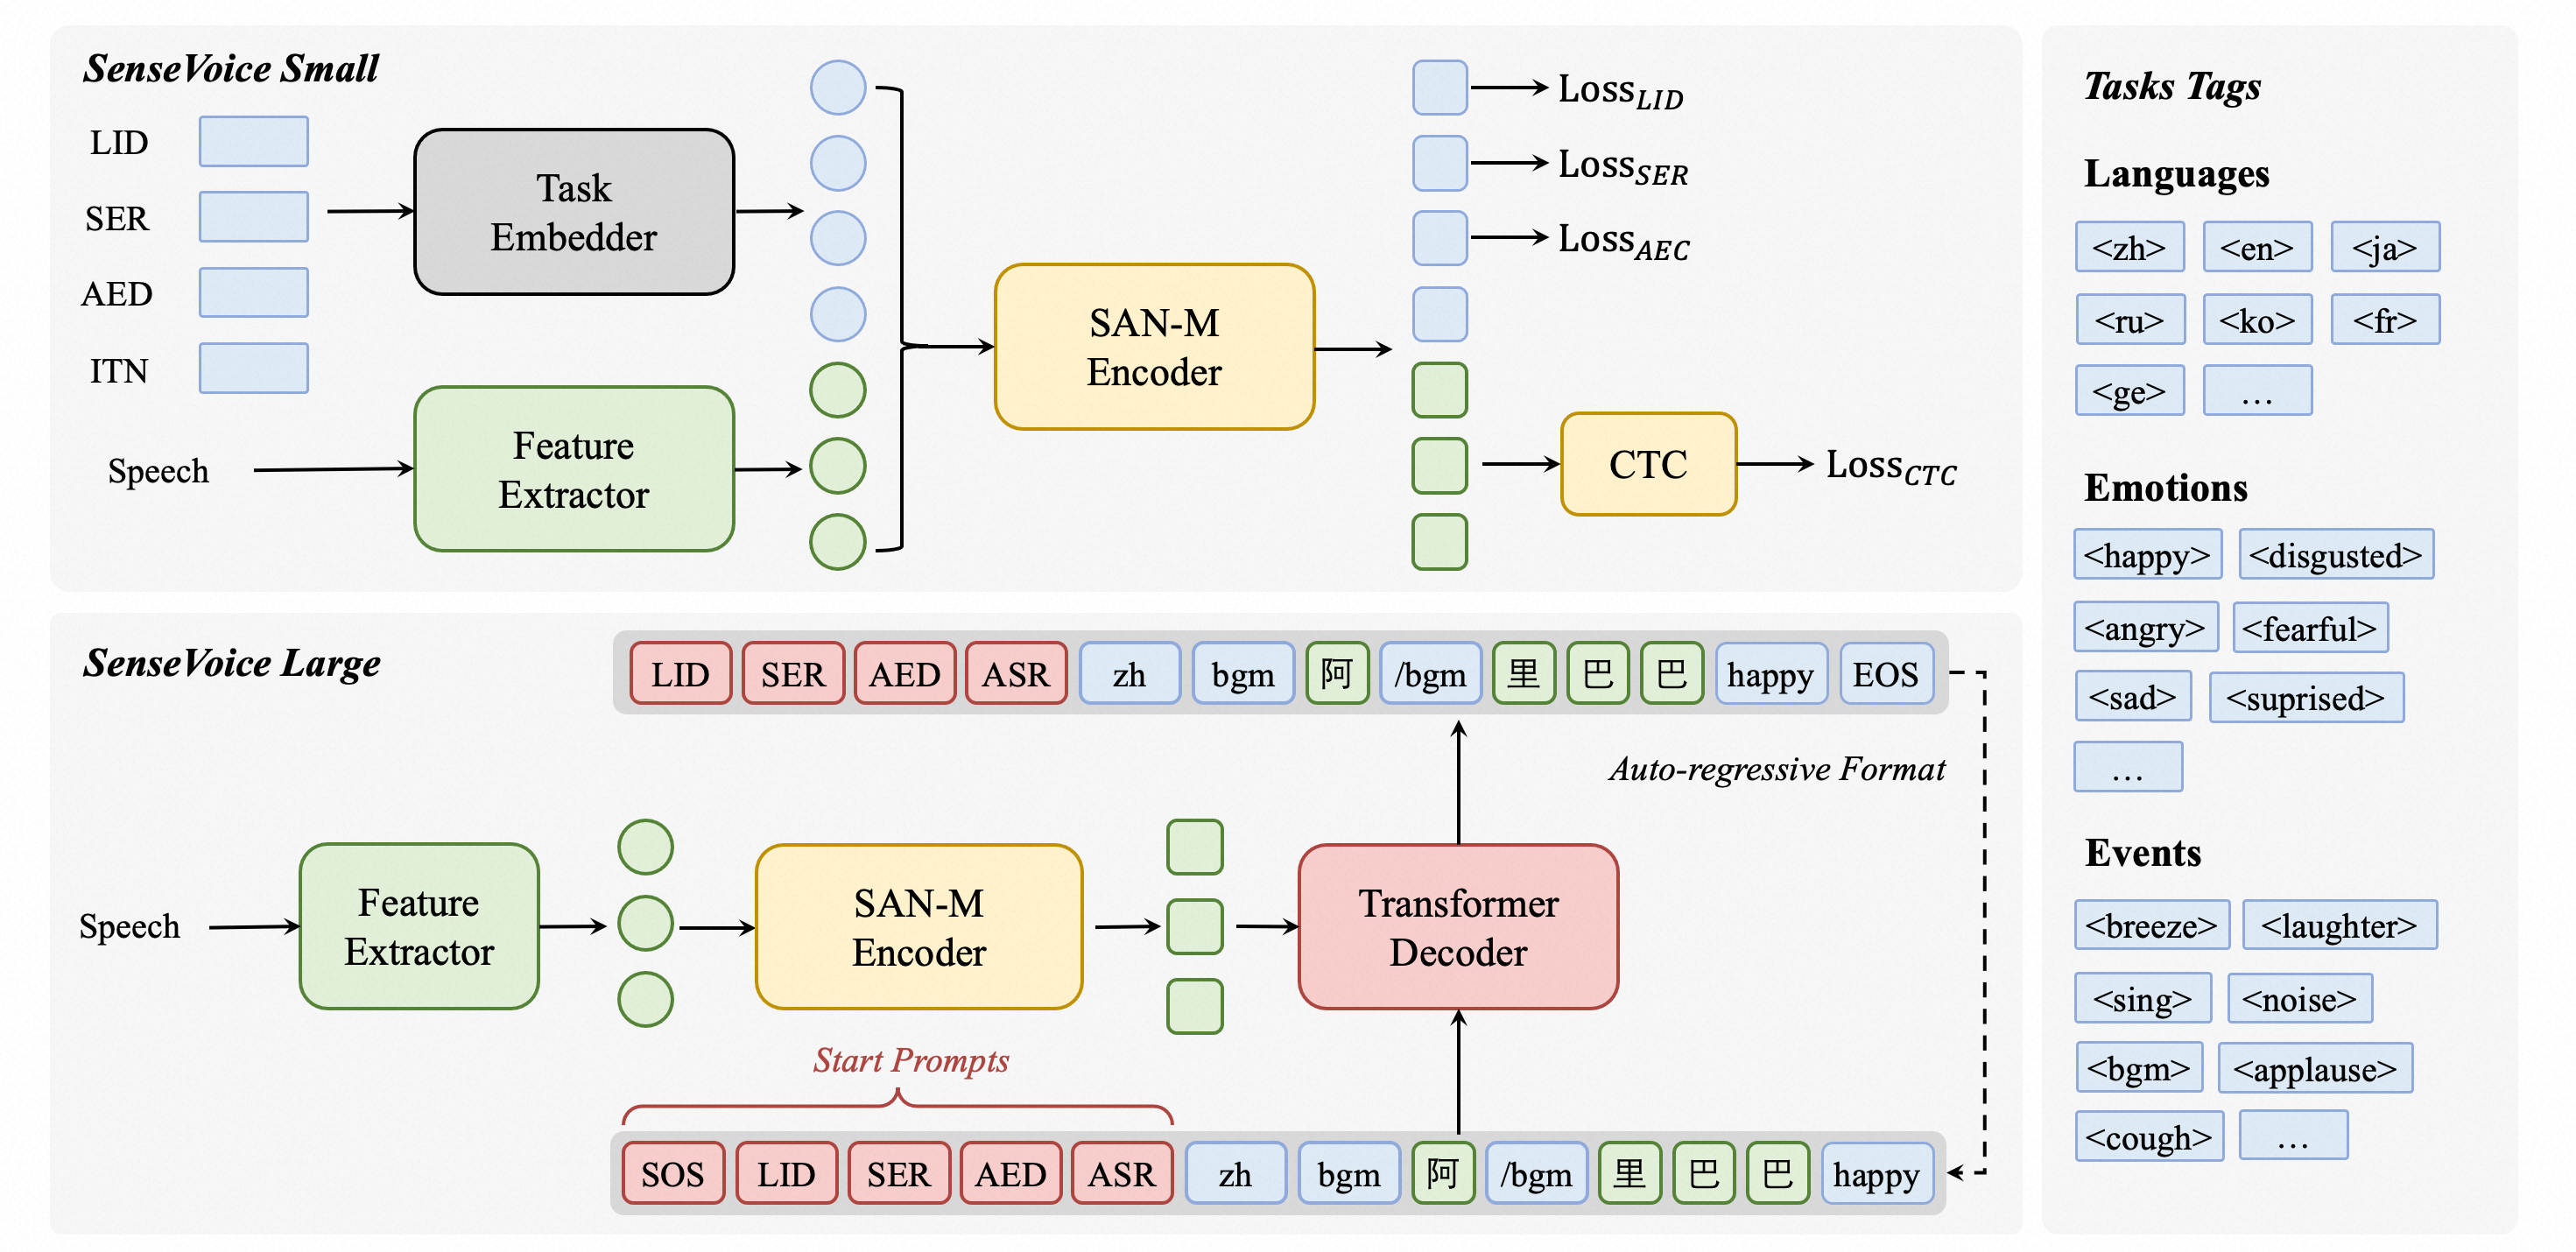
SenseVoiceは、高精度多言語音声認識、音声感情認識、音声イベント検出に焦点を当てたオープンソースモデルです。40万時間以上のデータで訓練され、50以上の言語をサポートし、Whisperモデルを上回る性能を発揮します。SenseVoice-Smallモデルは超低遅延を実現し、10秒の音声をわずか70msで処理します。また、便利なファインチューニングを提供し、Python、C++、HTML、Java、C#を含む複数言語での展開をサポートします。
TTS(テキスト音声合成)の紹介
TTSモデルは、テキスト音声合成タスク用の高性能深層学習モデルです。Tacotron2などの様々なモデルと、MelGANやWaveRNNなどのボコーダーを含みます。TTSモデルはマルチスピーカーTTS、効率的な訓練をサポートし、データセットキュレーションとモデルテスト用のツールを提供します。そのモジュラーコードベースにより、新機能の実装が容易になります。

前提条件
- 16GB以上のメモリを持つreComputer Jetson AGX Orin 64GまたはreComputer Jetson J4012 16Gデバイス。
- USBドライバー不要のスピーカーマイク
- RTSPストリームアドレスを出力できるIPカメラ。また、NVIDIA Nvstreamerツールの使用方法に関する説明も含めており、ローカルビデオをRTSPストリームに変換する方法を説明しています。
このwikiの実現可能性は、reComputer Orin NX 16GBおよびAGX Orin 64GB Developer Kitで既にテスト済みです。

インストール
システム環境の初期化
-
JP6で初期システムをインストールした後、
CUDAおよびその他のライブラリのインストールを確認する必要があります。sudo apt-get install nvidia-jetpackを実行して確認およびインストールできます。 -
python3-pip、jtop、およびdocker-ceをインストールします。 -
以下のコマンドを実行して必要な依存関係をインストールします:
sudo apt-get install libportaudio2 libportaudiocpp0 portaudio19-dev
sudo pip3 install pyaudio playsound subprocess wave keyboard
sudo pip3 --upgrade setuptools
sudo pip3 install sudachipy==0.5.2 -
オーディオの入力と出力、およびUSBスピーカーマイクが正常に機能し、ネットワーク接続が安定していることを確認してください。
VLMのインストール
このプロジェクトのコア機能は視覚言語モデル(VLM)です。reComputer Nvidia JetsonでVLMを使用する方法のガイドを提供しています。インストールと使用方法については、このリンクを参照してください。以下の手順に進む前に、VLMでテキスト記述を使用して推論を実行する方法を完全に理解していることを確認してください。
Pytorch Torchaudioのインストール
初心者向けのNvidia Jetson AIコースを提供しており、PyTorch、Torchaudio、およびTorchvisionのインストール方法の手順が含まれています。システム環境に応じてこれらのパッケージをダウンロードしてインストールしてください。
Speech_vlm(SenseVoiceベース)のインストール
-
Speech_vlmパッケージをクローンします:
cd ~/
git clone https://github.com/ZhuYaoHui1998/speech_vlm.git -
Speech_vlm環境をインストールします:
cd ~/speech_vlm
sudo pip3 install -r requement.txt
TTS(Coqui-aiベース)のインストール
cd ~/speech_vlm/TTS
sudo pip3 install .[all]
使用方法
speech_vlm リポジトリの構造は以下の通りです:
speech_vlm/
├── /TTS   # Coqui-ai TTS program
├── config # VLM config
├── README.md    #Project Introduction
├── requirements.txt   #SenseVoice required environment libraries
├── compose.yaml   #VLM Docker Compose startup file
├── delete_id.sh     #Delete camera ID script
├── example_1.wav     #Audio feedback sound tone template (replaceable)
├── model.py     #SenseVoice main program
├── set_alerts.sh     #Set up camera alerts
├── set_describe.sh     #Text input to have the VLM describe the current scene
├── set_streamer_id.sh  #Add RTSP camera to VLM
├── view_rtsp.py  # View RTSP stream by opencv
└── vlm_voice.py  # multimodal main program
-
VLMを開始する
cd ~/speech_vlm
sudo docker compose up -d
-
VLMにRTSPストリームを追加する
speech_vlmリポジトリ下のset_streamer_id.shの内容を確認します:
#!/bin/bash
curl --location 'http://0.0.0.0:5010/api/v1/live-stream' \
--header 'Content-Type: application/json' \
--data '{"liveStreamUrl": "RTSP stream address"}'
0.0.0.0 を Jetson デバイスの IP アドレスに置き換え、RTSP stream address をカメラの RTSP ストリームアドレスに置き換えてください。
例:
#!/bin/bash
curl --location 'http://192.168.49.227:5010/api/v1/live-stream' \
--header 'Content-Type: application/json' \
--data '{"liveStreamUrl": "rtsp://admin:[email protected]:554//Streaming/Channels/1"}'
RTSPカメラをお持ちでない場合は、NVStreamerを使用してローカル動画をRTSPとしてストリーミングする方法とそれらをVLMに追加する方法の手順を提供しています。
set_streamer_id.shを実行します
cd ~/speech_vlm
sudo chmod +x ./set_streamer_id.sh
./set_streamer_id.sh
カメラIDを取得します。このIDは非常に重要で記録する必要があります。以下のようになります:

- vlm_voice.pyを実行する
以下のPythonコードの2行で0.0.0.0を置き換える必要があります:
API_URL = 'http://0.0.0.0:5010/api/v1/chat/completions'  # API endpoint
REQUEST_ID = ""  # Request ID
Jetson の IP アドレスに置き換え、ステップ 2 で返されたカメラ ID を REQUEST_ID の場所に入力してください。
vlm_voice.py
import pyaudio
import wave
import keyboard
import subprocess
import json
from funasr import AutoModel
from funasr.utils.postprocess_utils import rich_transcription_postprocess
import time
import torch
from TTS.api import TTS
import os
# Get device
device = "cuda" if torch.cuda.is_available() else "cpu"
# Init TTS
api = TTS("tts_models/en/ljspeech/glow-tts").to(device)
# Configuration parameters
FORMAT = pyaudio.paInt16 # 16-bit resolution
CHANNELS = 1 # Mono channel
CHUNK = 1024 # Number of samples per chunk
OUTPUT_FILENAME = "output.wav" # Output file name
API_URL = 'http://192.168.49.227:5010/api/v1/chat/completions' # API endpoint
REQUEST_ID = "1388b691-3b9f-4bda-9d70-0ff0696f80f4" # Request ID
# Initialize PyAudio
audio = pyaudio.PyAudio()
# Prepare the list to store recording data
frames = []
# Initialize Micphone Rate
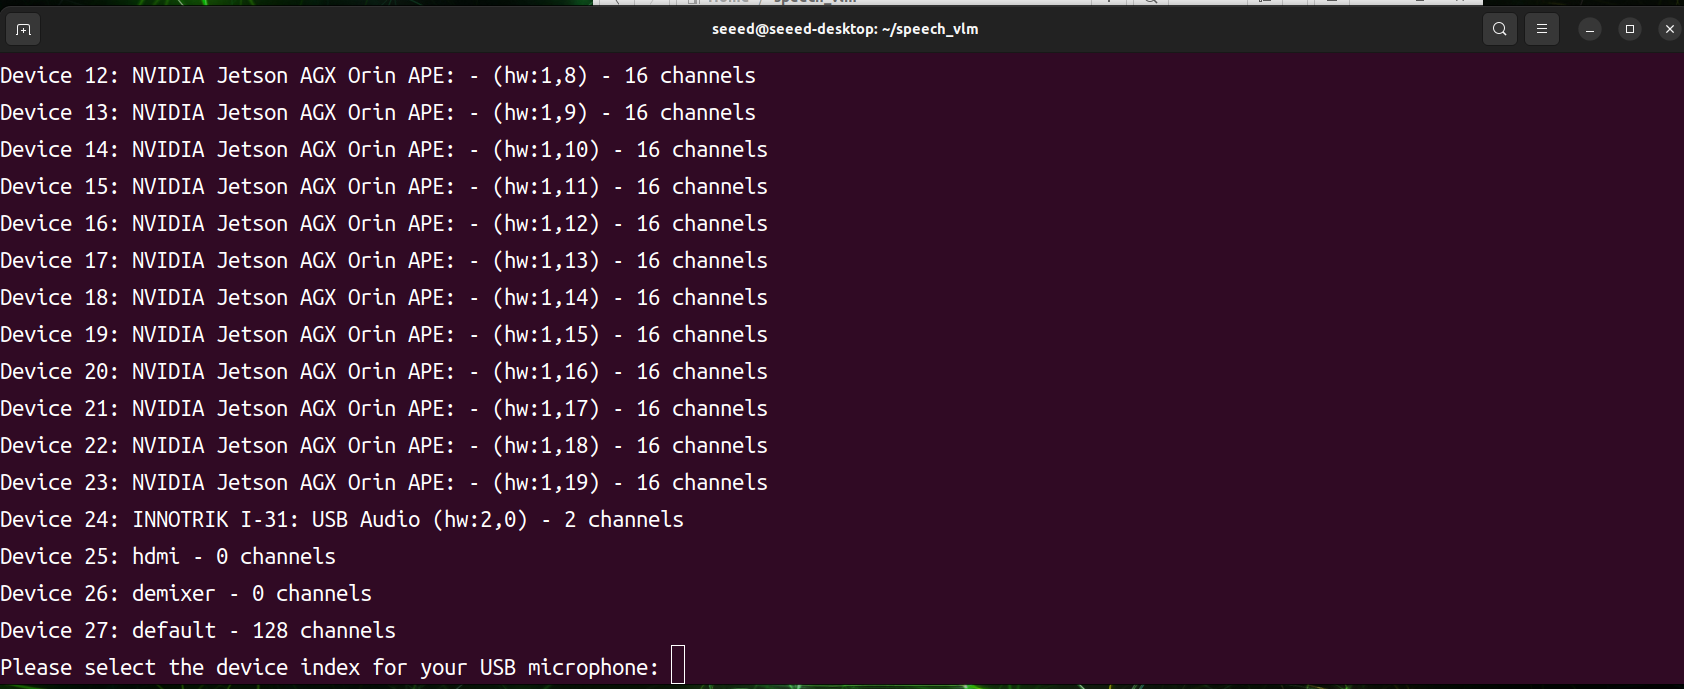
print("Available audio input devices:")
for i in range(audio.get_device_count()):
info = audio.get_device_info_by_index(i)
print(f"Device {i}: {info['name']} - {info['maxInputChannels']} channels")
device_index = int(input("Please select the device index for your USB microphone: "))
device_info = audio.get_device_info_by_index(device_index)
supported_sample_rates = [8000, 16000, 32000, 44100, 48000]
supported_rate=0
for rate in supported_sample_rates:
try:
if audio.is_format_supported(rate,
input_device=device_index,
input_channels=1,
input_format=pyaudio.paInt16):
supported_rate=rate
print(f"{rate} Hz is supported.")
except ValueError:
print(f"{rate} Hz is not supported.")
# Initialize the model
model = "./SenseVoiceSmall"
model = AutoModel(
model=model,
vad_model="./speech_fsmn_vad_zh-cn-16k-common-pytorch",
vad_kwargs={"max_single_segment_time": 30000},
trust_remote_code=True,
disable_log=True
)
def extract_content(json_response):
try:
# 解析JSON字符串
data = json.loads(json_response)
# 提取content部分
content = data["choices"][0]["message"]["content"]
print(f"{content}")
return content
except KeyError as e:
print(f"Key error: {e}")
except json.JSONDecodeError as e:
print(f"JSON decode error: {e}")
except Exception as e:
print(f"An unexpected error occurred: {e}")
def start_recording():
global frames
frames = []
try:
stream = audio.open(format=FORMAT, channels=CHANNELS,
rate=supported_rate, input=True,
frames_per_buffer=CHUNK, input_device_index=device_index)
print("Recording started... Press '2' to stop recording.")
while True:
if keyboard.is_pressed('2'):
print("Recording stopped.")
break
data = stream.read(CHUNK)
frames.append(data)
stream.stop_stream()
stream.close()
except Exception as e:
print(f"An error occurred during recording: {e}")
def save_recording():
try:
waveFile = wave.open(OUTPUT_FILENAME, 'wb')
waveFile.setnchannels(CHANNELS)
waveFile.setsampwidth(audio.get_sample_size(FORMAT))
waveFile.setframerate(supported_rate)
waveFile.writeframes(b''.join(frames))
waveFile.close()
print(f"Recording saved as {OUTPUT_FILENAME}")
except Exception as e:
print(f"An error occurred while saving the recording: {e}")
def send_alert(text):
# Construct the JSON payload
payload = {
"messages": [
{
"role": "system",
"content": "You are a helpful AI assistant."
},
{
"role": "user",
"content": [
{
"type": "stream",
"stream": {
"stream_id": REQUEST_ID
}
},
{
"type": "text",
"text": text
}
]
}
],
"min_tokens": 1,
"max_tokens": 128
}
# Convert the payload to a JSON string
json_payload = json.dumps(payload)
# Execute the curl command using subprocess
curl_command = [
'curl', '--location', API_URL,
'--header', 'Content-Type: application/json',
'--data', json_payload
]
try:
result = subprocess.run(curl_command, check=True, capture_output=True, text=True)
##Get words
content_result=extract_content(result.stdout)
# TTS
api.tts_to_file(
str(content_result),
speaker_wav="./example_1.wav",
file_path="speech.wav"
)
# Convert audio rate
subprocess.run(['ffmpeg', '-i', 'speech.wav', '-ar',str(supported_rate), 'speech1.wav','-y'])
# Play audio
wf = wave.open('./speech1.wav', 'rb')
stream = audio.open(format=pyaudio.paInt16,
channels=1,
rate=supported_rate,
output=True,
output_device_index=device_index)
data = wf.readframes(1024)
while data:
stream.write(data)
data = wf.readframes(1024)
# Play audio
os.remove('speech.wav')
os.remove('speech1.wav')
stream.stop_stream()
stream.close()
wf.close() # Close the wave file as well
#print(f"Alert sent successfully: {result.stdout}")
except subprocess.CalledProcessError as e:
print(f"An error occurred while sending the alert: {e.stderr}")
finally:
# Even if an error occurs, try to close the stream
if stream.is_active():
stream.stop_stream()
os.remove('speech.wav')
os.remove('speech1.wav')
stream.close()
print("Welcome to the Recording and Speech-to-Text System!")
print("Press '1' to start recording, '2' to stop recording.")
while True:
if keyboard.is_pressed('1'):
print("Preparing to start recording...")
start_recording()
save_recording()
print("Processing the recording file, please wait...")
try:
res = model.generate(
input=f"./{OUTPUT_FILENAME}",
cache={},
language="auto", # "zh", "en", "yue", "ja", "ko", "nospeech"
use_itn=True,
batch_size_s=60,
merge_vad=True,
merge_length_s=15,
)
text = rich_transcription_postprocess(res[0]["text"])
print(f"Speech-to-Text Result:\n{text}")
# Send the transcription result as an alert
send_alert(text)
except Exception as e:
print(f"An error occurred while processing the recording: {e}")
time.sleep(0.1) # Reduce CPU usage
Python を実行:
cd ~/speech_vlm
sudo python3 vlm_voice.py
プログラムが開始されると、すべてのオーディオ入力および出力デバイスをスキャンします。希望するオーディオデバイスのインデックスIDを手動で選択する必要があります。プログラムが動作を開始する準備ができたら、1を押して録音し、2を押して送信します。
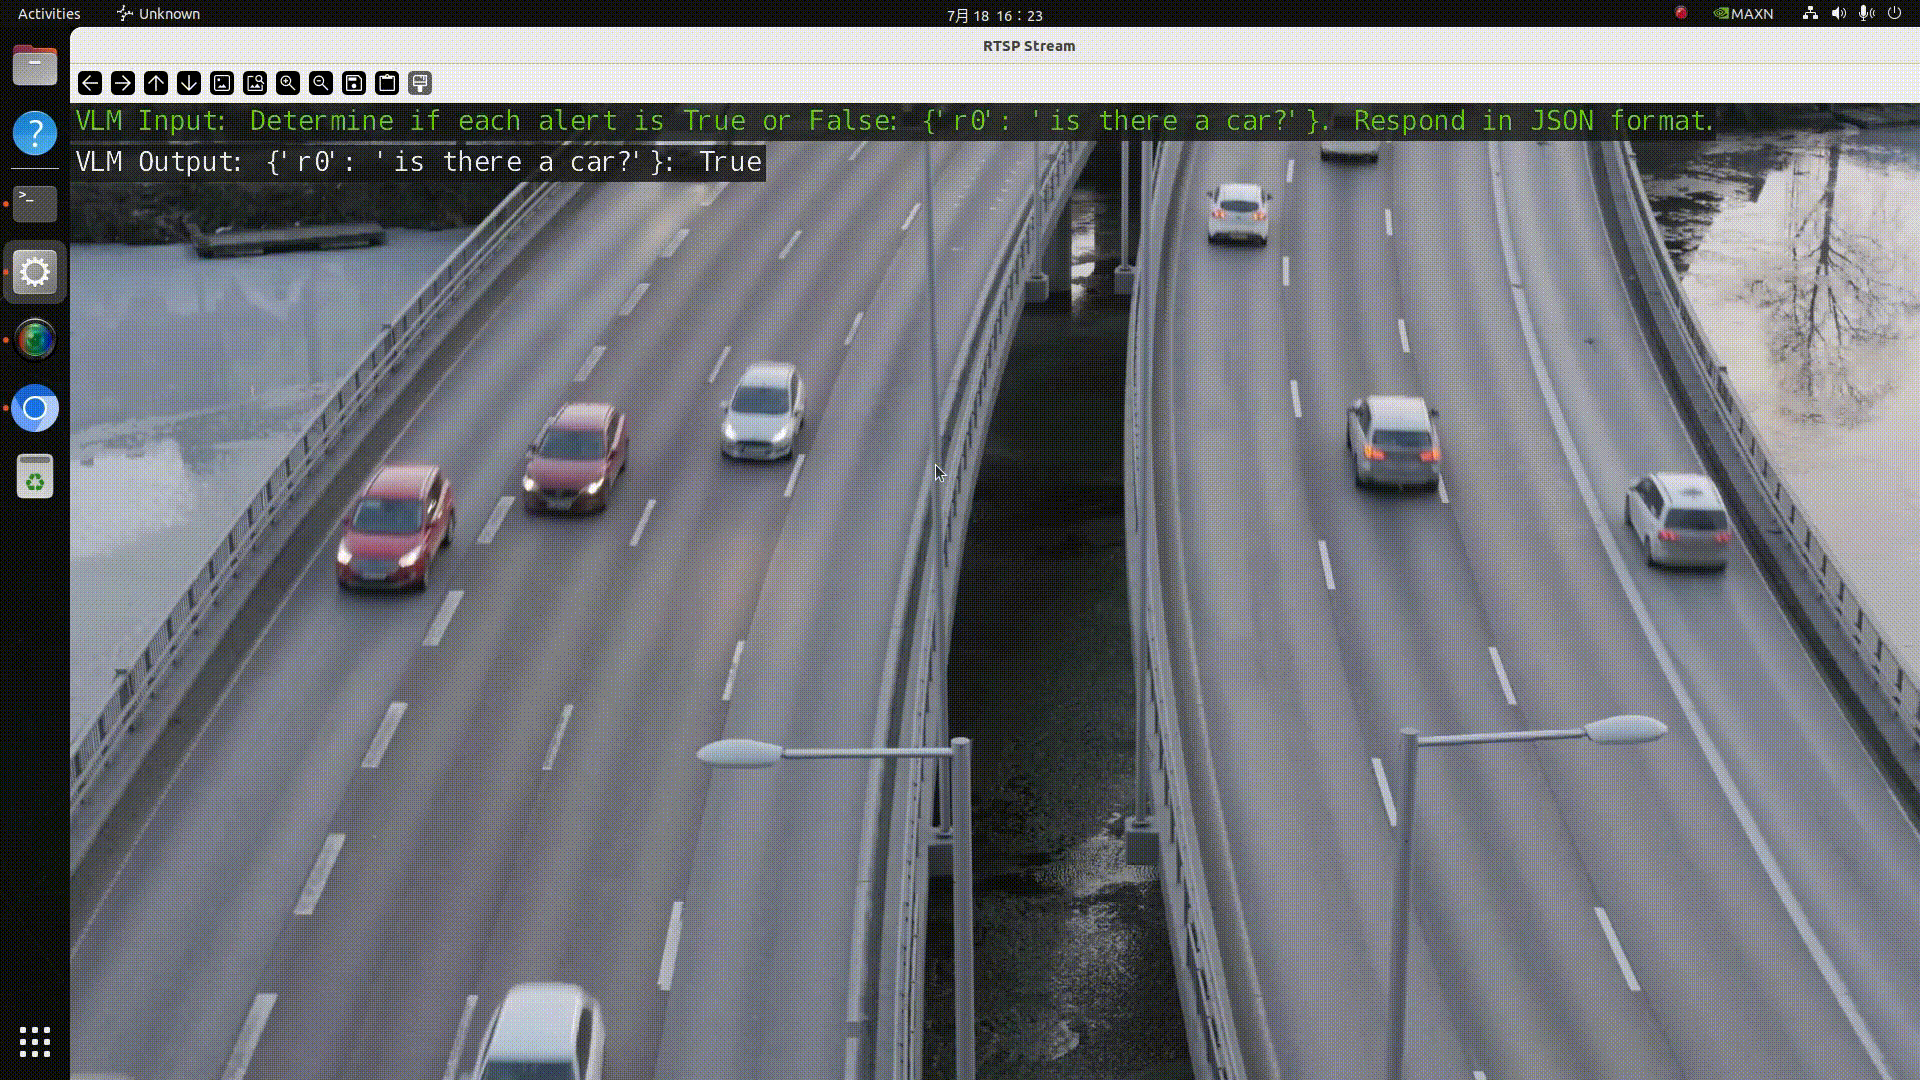
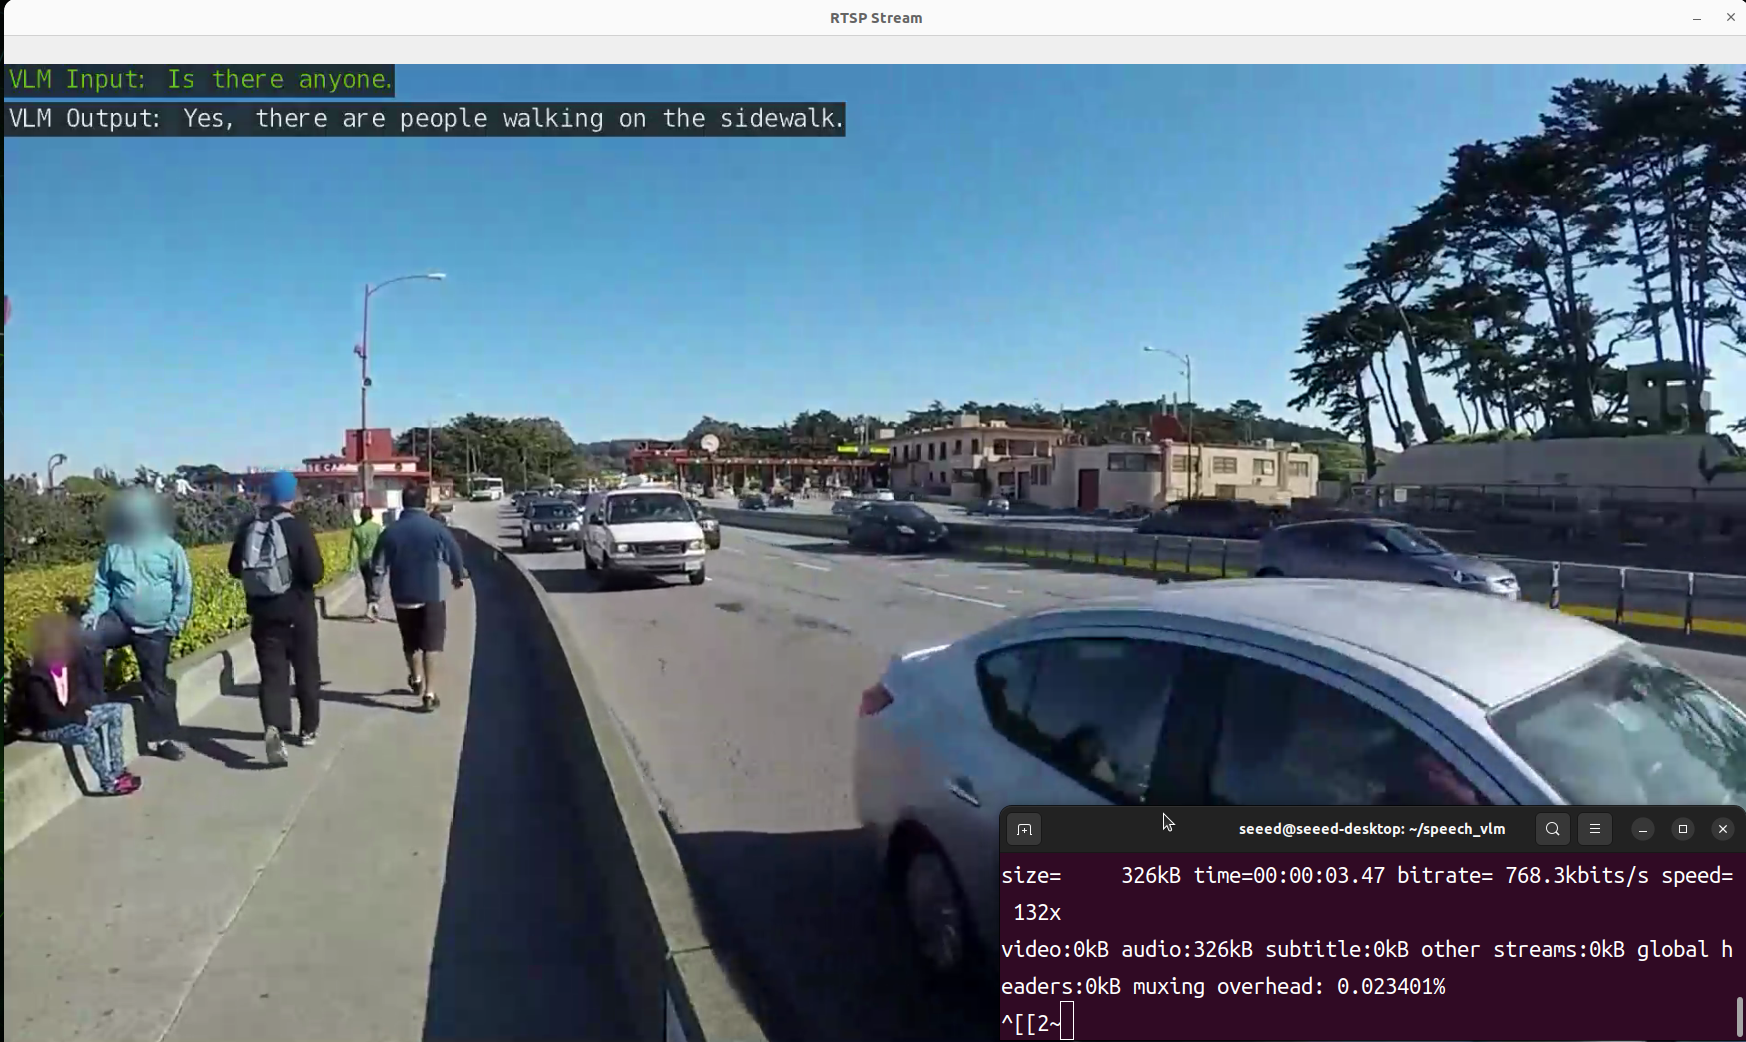
- 結果を表示
出力結果を表示するためのview_rtsp.pyスクリプトを用意しました。rtsp_url = "rtsp://0.0.0.0:5011/out"のIP部分をJetsonデバイスのIPアドレスに置き換える必要があります。
viwe_rtsp.py
import cv2

rtsp_url = "rtsp://192.168.49.227:5011/out"

cap = cv2.VideoCapture(rtsp_url)

if not cap.isOpened():
    print("Cannot open RTSP stream")
    exit()

while True:
    ret, frame = cap.read()
    if not ret:
        print("Failed to retrieve frame")
        break

    height, width = frame.shape[:2]

    frame_resized = cv2.resize(frame, (int(width // 1.1), int(height // 1.1)))

    cv2.imshow('RTSP Stream', frame_resized)

    if cv2.waitKey(1) & 0xFF == ord('q'):
        break

cap.release()
cv2.destroyAllWindows()
sudo pip3 install opencv-python
cd ~/speech_vlm
sudo python3 view_rtsp.py
デモンストレーション
技術サポート & 製品ディスカッション
私たちの製品をお選びいただき、ありがとうございます!私たちは、お客様の製品体験が可能な限りスムーズになるよう、さまざまなサポートを提供しています。異なる好みやニーズに対応するため、複数のコミュニケーションチャンネルを用意しています。