ESPHome クックブック: XIAO 7.5" ePaper Panel
このページは XIAO 7.5" パネル専用の ESPHome クックブックです。共通の手順 ― 書き込み方法の選択、汎用的な YAML スケルトン、Home Assistant への接続 ― は Work with ESPHome にまとめられています。Seeed の ePaper で ESPHome を使うのが初めての場合は、まずそちらに目を通してください。このページでは XIAO ESP32-C3 ベースのパネルに特有の内容に焦点を当てます。

Home Assistant の概要
Home Assistant は、オープンソースの強力なホームオートメーションプラットフォームであり、スマートホームデバイスを 1 つの統合されたインターフェースから制御・監視できます。スマートホームの中枢ハブとして機能し、ルーチンの自動化、センサーの監視、よりインテリジェントな生活空間の構築を可能にします。

なぜ Home Assistant なのか?
-
ローカル制御: 多くのクラウドベースのソリューションとは異なり、Home Assistant はネットワーク上でローカルに動作するため、データはプライベートに保たれ、インターネット接続がなくても自動化が機能します。
-
幅広いデバイス対応: Home Assistant は何千もの異なるスマートホームデバイスやサービスと連携できるため、非常に汎用性が高く、将来性があります。
-
強力な自動化機能: 時刻、デバイスの状態、センサーの値など、さまざまなトリガーに反応する高度な自動化ルールを作成できます。
-
カスタマイズ可能なダッシュボード: 自分にとって最も重要な情報を表示するユーザーインターフェースを自由にデザインできます。
なぜ Home Assistant と E-Paper ディスプレイを組み合わせるのか?
XIAO 7.5" ePaper Panel は、次のような理由から Home Assistant の優れた相棒となります。
-
省エネルギー: e-paper ディスプレイはコンテンツを更新するときにのみ電力を消費するため、天気予報、カレンダーイベント、システムステータスなどの常時表示したい情報に最適です。
-
高い視認性: LCD 画面とは異なり、e-paper ディスプレイは直射日光下を含むあらゆる照明条件で読みやすく、壁掛けのホームコントロールパネルに理想的です。
-
長いバッテリー寿命: ディープスリープモードと組み合わせることで、1 回のバッテリー充電で数か月間動作しつつ、一目で分かる有用な情報を提供できます。
-
柔軟な統合: ESPHome を介してディスプレイは Home Assistant とシームレスに統合され、スマートホームシステムのあらゆるデータを、常に表示されるエレガントな形式で表示できます。
これらの利点により、XIAO 7.5" ePaper Panel は、Home Assistant 環境向けに省エネルギーで常時オンの情報ディスプレイを構築するための理想的な選択肢となります。
ESPHome との連携
ESPHome は、ESP8266/ESP32 デバイス向けに特別に設計されたオープンソースのファームウェア作成ツールです。シンプルな YAML 設定ファイルを使ってカスタムファームウェアを作成し、それをデバイスに書き込むことができます。XIAO 7.5" ePaper Panel にとって、ESPHome はデバイスと Home Assistant 間の通信を可能にする重要なミドルウェアとして機能します。
このシステムは、YAML 設定を ESP デバイス上で動作するフル機能のファームウェアに変換することで動作します。このファームウェアは、ネットワークへの接続、Home Assistant との通信、ePaper ディスプレイの制御といった複雑な処理をすべて担当します。Home Assistant と組み合わせることで、ESPHome は高度なホームオートメーション用ディスプレイやコントロールを構築するための堅牢なプラットフォームを提供します。
それでは、この多用途なディスプレイのセットアップ方法と活用方法を見ていきましょう。
はじめに
この記事のチュートリアル内容に入る前に、以下のハードウェアを用意しておく必要があります。
必要なもの


Home Assistant Green は、最も簡単かつプライバシー重視で自宅を自動化する方法です。セットアップは簡単で、すべてのスマートデバイスを 1 つのシステムで制御でき、データはデフォルトでローカルに保存されます。このボードは活発な Home Assistant エコシステムの恩恵を受けており、オープンソースによって毎月改善されていきます。
このチュートリアルでは、Home Assistant のホストとして Home Assistant Green を使用することを推奨しますが、Supervisor を備えた任意の Home Assistant ホストを使用することもできます。
Seeed Studio のいくつかの製品向けに、Home Assistant のインストール方法も記載していますので、そちらも参照してください。
- ODYSSEY-X86 での Home Assistant 入門
- reTerminal での Home Assistant 入門
- LinkStar H68K/reRouter CM4 での Home Assistant 入門
Seeed Studio 製品を使用していない場合は、公式の Home Assistant ウェブサイトで、他の製品向けの Home Assistant のインストール方法を確認して学ぶこともできます。
ステップ 1. ESPHome をインストールする
すでに ESPHome をインストールしている場合は、このステップをスキップできます。
Settings -> Add-ons -> ADD-ON STORE に移動します。


ESPHome を検索してクリックします。INSTALL と START をクリックします。
アドオンストアで ESPHome が見つからない場合は、アドオンをサポートする Home Assistant インストール(Home Assistant OS や supervised インストールなど)を使用していることを確認してください。Home Assistant Container などの他のインストールタイプでは、ESPHome Device Builder を Docker を使って独立して実行する必要がある場合があります。詳しくは 公式 ESPHome ドキュメント を参照してください。

その後、ESPHome Builder がサイドバーに表示されます。

ステップ 2. 新しいデバイスを追加する
ESPHome に移動し、NEW DEVICE をクリックします。

デバイスに好きな名前を付け、NEXT をクリックします。


新しいデバイスを作成したら、EDIT をクリックします。

ステップ 3. ファームウェアをインストールする
これはとても基本的な例で、ディスプレイに "Hello World!" を表示します。
主な目的は、デバイスにファームウェアをインストールするさまざまな方法を紹介することです。
ESPHome をインストールして新しいデバイスを追加したら、以下のコードをコピーして、下図のように captive_portal の後に貼り付けることができます。
ここをクリックしてコード全体をプレビュー
# define font to display words
font:
  - file: "gfonts://Inter@700"
    id: font1
    size: 24

# define SPI interface
spi:
  clk_pin: GPIO8
  mosi_pin: GPIO10

display:
  - platform: waveshare_epaper
    cs_pin: GPIO3
    dc_pin: GPIO5
    busy_pin:
      number: GPIO4
      inverted: true
    reset_pin: GPIO2
    model: 7.50inv2
    update_interval: 30s
    lambda: |-
      it.print(0, 0, id(font1), "Hello World!");

INSTALL をクリックしてコードをデバイスにインストールすると、次の画像のように表示されます。
- ブラウザ経由でインストール
- ホスト経由でインストール
- Wi-Fi 経由でインストール
Home Assistant ホスト(Raspberry PI/Green/Yellow など)が手元から離れている場合は、この方法をおすすめします。手元のコンピュータを使ってインストールできます。
まず、Manual download をクリックして、コンパイル済みファームウェアをダウンロードする必要があります。

次に、この Web サイトを開き、ここから ePaper パネルにファームウェアをアップロードします。

ESPHome に戻り、ファームウェアをダウンロードします。

Factory format を選択します。

USB ケーブルを使用して ePaper パネルをコンピュータに接続し、CONNECT をクリックします。

usbmodemxxx(Windows では COMxxx)を選択して connect をクリックします。問題が発生しましたか?ここをクリックしてください。

INSTALL をクリックし、先ほどダウンロードしたファームウェアを選択します。

しばらく待つと、ディスプレイに「Hello world!」と表示されます~


Home Assistant ホスト(Raspberry PI/Green/Yellow など)が近くにある場合は、この方法の方が簡単なのでおすすめです。
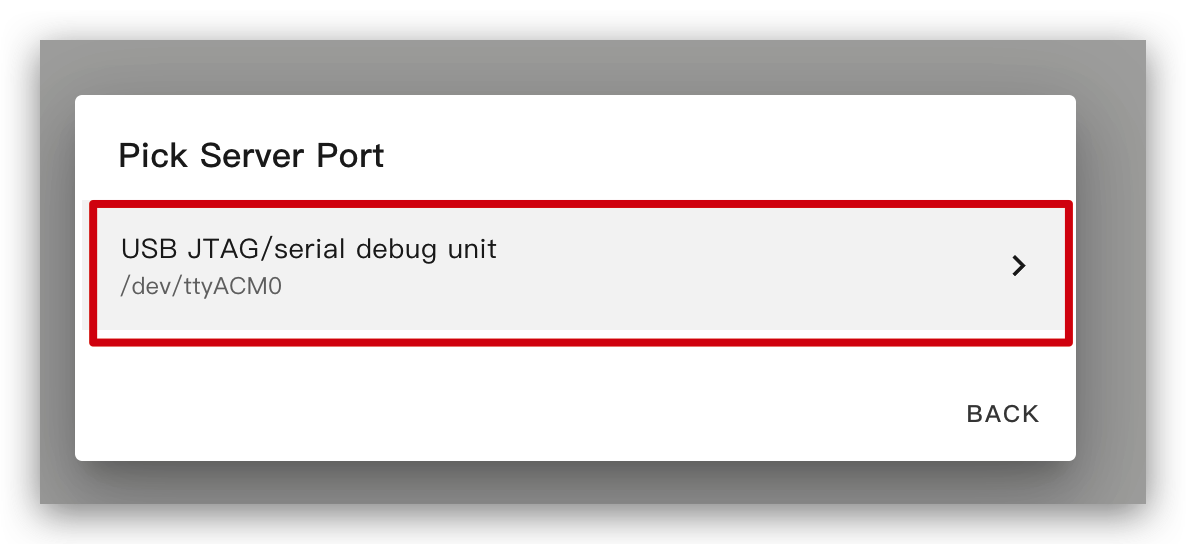
コードをデバイスにインストールする前に、USB ケーブルを使用して このデバイスを Home Assistant を実行している Raspberry Pi や HA Green(Yellow)などに接続する 必要があります。
画像の手順に従ってオプションをクリックし、コードをデバイスにインストールします。デバイスがディープスリープモードのときにポートが見つかりませんか?

しばらく待つと、次の画像のようなフィードバックが表示されます。これはコードが正常に動作していることを意味します。

これは最も簡単な方法ですが、初回にプログラムをインストールするときは、まず左側の方法を使って ePaper パネルにプログラムをアップロードしておく必要があります。その後は Wi-Fi 経由でアップロードできます。また、この方法が機能するためには、YAML 設定に有効な暗号化キーを含む適切に設定された ota と api セクションが含まれていることを確認してください。
この方法では、ePaper パネルを何かに接続する必要はなく、オンラインになっていることだけを確認してください。
オプションをクリックすると、ファームウェアが自動的に ePaper パネルにインストールされます。

しばらく待つと、次の画像のようなフィードバックが表示されます。失敗した場合は、電波が弱い可能性があります。デバイスをルーターの近くに移動してください。問題が発生しましたか?ここをクリックしてください。

基本的な使い方
1. 形状を表示する
このサンプルでは、ディスプレイに図形を表示します。
ESPHome をインストールして新しいデバイスを追加したら、以下のコードをコピーして、次の画像のように captive_portal の部分に貼り付けることができます。
コードをコピーするにはここをクリックしてください。
spi:
  clk_pin: GPIO8
  mosi_pin: GPIO10

display:
  - platform: waveshare_epaper
    model: 7.50inv2
    cs_pin: GPIO3
    dc_pin: GPIO5
    reset_pin: GPIO2
    busy_pin:
      number: GPIO4
      inverted: true
    update_interval: 5min
    lambda: |-
      it.rectangle(10, 10, 100, 50);
      it.rectangle(150, 10, 50, 50);
      it.circle(250, 35, 25);

      it.filled_rectangle(10, 80, 100, 50);
      it.filled_rectangle(150, 80, 50, 50);
      it.filled_circle(250, 105, 25);

次の画像のようなフィードバックが表示されたら、コードが正常に動作していることを意味します。
こちらをクリック して、さらに多くの使い方を確認することもできます。

2. HA の情報を表示する
このサンプルでは、HA 内の情報をディスプレイに表示します。
まず最初に、このデバイスを HA に追加する必要があります。そうしないと、HA から情報を取得できません。
もし HA にデバイスが表示されない場合は、先ほどのデモを先に実行してください。上記のデモを実行した後、HA にデバイスが表示されるようになります。

その後、SUBMIT と FINISH をクリックします。


ESPHome をインストールして新しいデバイスを追加したら、以下のコードをコピーして、下図のように captive_portal の後に貼り付けることができます。
完全なコードをプレビューするにはここをクリック
# Define font to show info
font:
  - file: "gfonts://Inter@700"
    id: myFont
    size: 24

# Get info from HA, as string format
text_sensor:
  - platform: homeassistant
    entity_id: weather.forecast_home
    id: myWeather
    internal: true
  - platform: homeassistant
    entity_id: weather.forecast_home
    id: myTemperature
    attribute: "temperature"
    internal: true

# Get info from HA, as float format
sensor:
  - platform: homeassistant
    entity_id: weather.forecast_home
    id: myPressure
    attribute: "pressure"
    internal: true

# Display info via SPI
spi:
  clk_pin: GPIO8
  mosi_pin: GPIO10

display:
  - platform: waveshare_epaper
    cs_pin: GPIO3
    dc_pin: GPIO5
    busy_pin:
      number: GPIO4
      inverted: true
    reset_pin: GPIO2
    model: 7.50inv2
    update_interval: 30s
    lambda: |-
      //print info in log
      ESP_LOGD("epaper", "weather: %s", id(myWeather).state.c_str());
      ESP_LOGD("epaper", "temperature: %s", id(myTemperature).state.c_str());
      ESP_LOGD("epaper", "pressure: %.1f", id(myPressure).state);
      //display info in epaper screen
      it.printf(100, 100, id(myFont), "%s", id(myWeather).state.c_str());
      it.printf(100, 150, id(myFont), "%s", id(myTemperature).state.c_str());
      it.printf(100, 200, id(myFont), "%.1f", id(myPressure).state);
これらのコードをデバイスにインストールします。

このコードの機能は、HA から 天気、気温、気圧 を取得し、それらをディスプレイに表示することです。

次の画像のようなフィードバックが表示されたら、コードが正常に動作していることを意味します。


3. アイコンを表示する
このサンプルでは、ディスプレイにアイコンを表示します。
まず、File Editor アドオンをインストールする必要があります。Studio Code Server を検索してクリックします。INSTALL と START をクリックします。


そして次に、fonts という名前の新しいフォルダを作成し、このファイルをダウンロードして fonts フォルダに入れます。

ESPHome をインストールして新しいデバイスを追加したら、以下のコードをコピーして、下図のように captive_portal の後に貼り付けます。
ここをクリックしてコード全体をプレビュー
font:
  - file: 'fonts/materialdesignicons-webfont.ttf'  #here is the directory to save ttf file
    id: font_mdi_large
    size: 200        # big size icon
    glyphs: &mdi-weather-glyphs
      - "\U000F0595" # weather cloudy
      - "\U000F0592" # weather hail
  - file: 'fonts/materialdesignicons-webfont.ttf'
    id: font_mdi_medium   # small size icon
    size: 40
    glyphs: *mdi-weather-glyphs

spi:
  clk_pin: GPIO8
  mosi_pin: GPIO10

display:
  - platform: waveshare_epaper
    cs_pin: GPIO3
    dc_pin: GPIO5
    busy_pin:
      number: GPIO4
      inverted: true
    reset_pin: GPIO2
    model: 7.50inv2
    update_interval: 30s
    lambda: |-
      it.printf(100, 200, id(font_mdi_medium), TextAlign::CENTER, "\U000F0595");
      it.printf(400, 200, id(font_mdi_large), TextAlign::CENTER, "\U000F0592");

次の画像のようなフィードバックが表示されたら、コードが正常に実行されていることを意味します。

他のアイコンを使用したい場合は、下のボタンをクリックしてさらに探索できます。
使用したいアイコンを選択します。

コードをコピーして、次の画像のように captive_portal の部分に貼り付けます。


4. 画像を表示する
このサンプルでは、任意の画像をディスプレイに表示します。
前のサンプルと同様に、Studio Code Server をインストールし、画像を保存するために image という名前の新しいフォルダを作成する必要があります。
そして image フォルダに画像を入れます。下のボタンをクリックして画像をダウンロードし、試してみることができます。

ESPHome をインストールして新しいデバイスを追加したら、以下のコードをコピーして、下図のように captive_portal の後に貼り付けます。
ここをクリックしてコード全体をプレビュー
image:
  - file: /config/esphome/image/wifi.jpg    # the path where you save the image, png or jpg format
    id: myImage
    type: BINARY
    resize: 800x480    # how big you want to show, the biggest size should be as same as ePaper Penal pixel(800x480)
    invert_alpha: true   # invert color

spi:
  clk_pin: GPIO8
  mosi_pin: GPIO10

display:
  - platform: waveshare_epaper
    cs_pin: GPIO3
    dc_pin: GPIO5
    busy_pin:
      number: GPIO4
      inverted: true
    reset_pin: GPIO2
    model: 7.50inv2
    update_interval: 30s
    lambda: |-
      it.image(0, 0, id(myImage));

次の画像のようなフィードバックが表示されたら、コードが正常に実行されていることを意味します。

デモ 1. Home Assistant ダッシュボードをスクリーンショットとして取得する
このサンプルでは、ディスプレイに HA のスクリーンショットを表示します。
まず、スクリーンショット用のアドオン Puppet をインストールする必要があります。インストールするにはここをクリックします。

バージョンは 1.11.4 以上 である必要があることに注意してください。インストール後、Configuration page に移動します。このアドオン用の access_token を作成する必要があります。

次のステップでトークンを作成し、ここに貼り付けます。

Security page の一番下に移動してトークンを作成し、それをコピーして Puppet アドオンに貼り付けます。

忘れずに Puppet アドオンを再起動してください。

アドオンを起動すると、ポート 10000 で新しいサーバーが立ち上がります。リクエストした任意のパスは、そのページのスクリーンショットを返します。必要なビューポートサイズを指定する必要があります。
例えば、デフォルトダッシュボードの 1000px x 1000px のスクリーンショットを取得するには、次を取得します:
# http://192.168.1.191:10000/lovelace/0?viewport=1000x1000(My address)

http://homeassistant.local:10000/lovelace/0?viewport=1000x1000
E Ink® ディスプレイ用にカラーパレットを減らすには、eink パラメータを追加できます。この値は使用する色数(黒を含む)を表します。例えば、2 色の E Ink® ディスプレイの場合:
http://homeassistant.local:10000/lovelace/0?viewport=1000x1000&eink=2
eink=2 を使用している場合は、invert パラメータを追加することで色を反転させることもできます:
http://homeassistant.local:10000/lovelace/0?viewport=1000x1000&eink=2&invert
そのほか、HA の To-do lists ページなど、別のページのスクリーンショットを撮ることもできます:
http://192.168.1.191:10000/todo?viewport=800x480&eink=2&invert
このリンクをブラウザに入力すると、スクリーンショットの効果を確認できます。

ESPHome をインストールして新しいデバイスを追加したら、以下のコードをコピーして、下図のように captive_portal の後に貼り付けます。
ここをクリックしてコード全体をプレビュー
http_request:
  verify_ssl: false
  timeout: 10s
  watchdog_timeout: 15s

online_image:
  - id: dashboard_image
    format: PNG
    type: BINARY
    buffer_size: 30000
    url: http://192.168.1.191:10000/todo?viewport=800x480&eink=2&invert #change this link to your screenshot link
    update_interval: 30s
    on_download_finished:
      - delay: 0ms
      - component.update: main_display

spi:
  clk_pin: GPIO8
  mosi_pin: GPIO10

display:
  - platform: waveshare_epaper
    id: main_display
    cs_pin: GPIO3
    dc_pin: GPIO5
    busy_pin:
      number: GPIO4
      inverted: true
    reset_pin: GPIO2
    model: 7.50inv2
    update_interval: never
    lambda: |-
      it.image(0, 0, id(dashboard_image));

次の画像のようなフィードバックが表示されたら、コードは正常に実行されています。

デモ2. ディープスリープモード
ディープスリープモード中は、デバイスに直接コードをアップロードすることはできません。ダウンロードモードに入る必要があります。Q3 にジャンプするにはここをクリックしてください。
この例では、ディープスリープモードを使用して電力を節約する方法を示します。情報は6時間ごとに更新されます。2000mAh のバッテリーで約3か月動作します。
ESPHome をインストールして新しいデバイスを追加したら、以下のコードをコピーして、下図のように captive_portal の後に貼り付けます。
ここをクリックしてフルコードをプレビュー
globals:
  - id: sleep_counter
    type: int
    restore_value: yes  # key parameter, to use RTC storage
    initial_value: '0'

# Here is deep sleep part
deep_sleep:
  id: deep_sleep_1
  run_duration: 30s  # Device wake up and run 30s (enough to display)
  sleep_duration: 3min  # deep sleep for 3min

interval:
  - interval: 29s  # run this command before the end of run_duration
    then:
      - logger.log: "Entering deep sleep now..."

font:
  - file: "gfonts://Inter@700"
    id: font1
    size: 24

spi:
  clk_pin: GPIO8
  mosi_pin: GPIO10

display:
  - platform: waveshare_epaper
    cs_pin: GPIO3
    dc_pin: GPIO5
    busy_pin:
      number: GPIO4
      inverted: true
    reset_pin: GPIO2
    model: 7.50inv2
    update_interval: 3min
    lambda: |-
      id(sleep_counter) += 1;
      ESP_LOGD("main", "Wakeup count: %d", id(sleep_counter));
      it.printf(100, 100, id(font1), "Wakeup count: %d", id(sleep_counter));

カウンターが表示されます。ウェイクアップするたびに1ずつ増加します。

デモ3. 総合的なサンプル
よりよく理解するために、まず上記の基本的な使い方を実行することを強くお勧めします。
この例では、HA から天気情報とカレンダー情報を取得し、それらをディスプレイに表示する方法を示します。さらに、ディープスリープモード を使用して電力を節約します。情報は6時間ごとに更新されます。2000mAh のバッテリーで約3か月動作します。
まず、HA に weather コンポーネントがあるかどうかを確認する必要があります。通常、HA をインストールすると1つ用意されています。

また、Developer Tools -> STATES に移動して、HA に天気情報があるかどうかを確認することもできます。ここに、後で取得する情報が表示されます。

次に、HA に calendar コンポーネントをインストールする必要があります。
Settings -> Devices & Services -> Integrations -> Add Integration に移動します。


Local Calendar を選択し、SUBMIT ボタンをクリックします。


その後、設定済みの部分とサイドバーに Local Calendar が表示されます。

サイドバーの Calendar をクリックし、calendar、epaper_event、new_calendar という名前の新しいカレンダーを3つ作成します。他の名前を使用することもできますが、後でコード内で同じ名前を使用してください。


コードをコピーする前に、wifi.jpg、icon ttf file and font ttf file を image フォルダと fonts フォルダに入れてください。
ここをクリックしてフルコードをプレビュー
esphome:
  name: dashboard
  friendly_name: dashboard

esp32:
  board: esp32-c3-devkitm-1
  framework:
    type: arduino

# Enable logging
logger:

# Enable Home Assistant API
api:
  encryption:
    key: "jBgx0v+Y9eKiQmYTk0SCnHgtDowNDZqgFU26Z2VTYzM="

ota:
  - platform: esphome
    password: "9f78b53ef216c5d689f7408bb1ebe728"

# -------------------------------------- Keep your code above, change your code below --------------------------------------

globals:
  - id: wifi_status
    type: int
    restore_value: no
    initial_value: "0"
  - id: first_update_done
    type: bool
    restore_value: no
    initial_value: "false"

wifi:
  ssid: !secret wifi_ssid
  password: !secret wifi_password
  on_connect:
    then:
      - lambda: |-
          id(wifi_status) = 1;
  on_disconnect:
    then:
      - lambda: |-
          id(wifi_status) = 0;


captive_portal:

# Here is deep sleep part
deep_sleep:
  id: deep_sleep_1
  run_duration: 1min  # Device wake up and run 60s (enough to pull data and update)
  sleep_duration: 60min  # deep sleep for 1h

script:
  - id: update_display
    then:
      - component.update: my_display

interval:
  # Condition: wifi connected && data retrieved && first time
  - interval: 10s  # Check every second
    then:
      - if:
          condition:
            and:
              - wifi.connected:
              - lambda: "return !id(ha_calendar_event_1).state.empty();"
              - lambda: "return !id(first_update_done);"
          then:
            - lambda: |-
                ESP_LOGD("Display", "Updating Display...");
            - script.execute: update_display  # Refresh immediately
            - lambda: "id(first_update_done) = true;"
  - interval: 59s  # run this command before 1s of run_duration end
    then:
      - logger.log: "Entering deep sleep now..."


image:
  - file: image/wifi.jpg
    type: BINARY
    id: esphome_logo
    resize: 400x240
    invert_alpha: true

# Connect to Home Assistant to get time
time:
  - platform: homeassistant
    id: homeassistant_time

text_sensor:
  - platform: homeassistant
    id: ha_calendar_event_1
    entity_id: calendar.calendar
    attribute: "message"
  - platform: homeassistant
    id: ha_calendar_start_time_1
    entity_id: calendar.calendar
    attribute: "start_time"
  - platform: homeassistant
    id: ha_calendar_end_time_1
    entity_id: calendar.calendar
    attribute: "end_time"

  - platform: homeassistant
    id: ha_calendar_event_2
    entity_id: calendar.epaper_event
    attribute: "message"
  - platform: homeassistant
    id: ha_calendar_start_time_2
    entity_id: calendar.epaper_event
    attribute: "start_time"
  - platform: homeassistant
    id: ha_calendar_end_time_2
    entity_id: calendar.epaper_event
    attribute: "end_time"

  - platform: homeassistant
    id: ha_calendar_event_3
    entity_id: calendar.new_calendar
    attribute: "message"
  - platform: homeassistant
    id: ha_calendar_start_time_3
    entity_id: calendar.new_calendar
    attribute: "start_time"
  - platform: homeassistant
    id: ha_calendar_end_time_3
    entity_id: calendar.new_calendar
    attribute: "end_time"

  - platform: homeassistant
    entity_id: weather.forecast_home
    id: myWeather
  - platform: homeassistant
    entity_id: weather.forecast_home
    id: temp
    attribute: "temperature"
  - platform: homeassistant
    entity_id: weather.forecast_home
    id: humi
    attribute: "humidity"
  - platform: homeassistant
    entity_id: weather.forecast_home
    id: press
    attribute: "pressure"
  - platform: homeassistant
    entity_id: weather.forecast_home
    id: wind
    attribute: "wind_speed"

font:
  - file: "fonts/Montserrat-Black.ttf"
    id: web_font
    size: 20
  - file: "fonts/Montserrat-Black.ttf"
    id: data_font
    size: 30
  - file: "fonts/Montserrat-Black.ttf"
    id: sensor_font
    size: 22

  - file: "gfonts://Inter@700" #
    id: font1
    size: 24

  - file: 'fonts/materialdesignicons-webfont.ttf' # Directory to save ttf file
    id: font_mdi_large
    size: 200
    glyphs: &mdi-weather-glyphs # https://pictogrammers.com/library/mdi/
      - "\U000F050F" # Thermometer
      - "\U000F058E" # Humidity
      - "\U000F059D" # Wind speed
      - "\U000F0D60" # Atmospheric pressure
      - "\U000F0590" # Cloudy weather
      - "\U000F0596" # Rainy weather
      - "\U000F0598" # Snowy weather
      - "\U000F0599" # Sunny weather
  - file: 'fonts/materialdesignicons-webfont.ttf'
    id: font_weather # Copy the above icon and change the size to 40
    size: 200
    glyphs: *mdi-weather-glyphs
  - file: 'fonts/materialdesignicons-webfont.ttf'
    id: img_font_sensor # Copy the above icon and change the size to 40
    size: 70
    glyphs: *mdi-weather-glyphs

spi:
  clk_pin: GPIO8
  mosi_pin: GPIO10

display:
  - platform: waveshare_epaper
    id: my_display
    cs_pin: GPIO3
    dc_pin: GPIO5
    busy_pin:
      number: GPIO4
      inverted: true
    reset_pin: GPIO2
    model: 7.50inv2
    update_interval: 50s
    lambda: |-
      if(id(wifi_status) == 0){
        it.image(180, 0, id(esphome_logo));
        it.print(230, 300, id(data_font), "WI-FI CONNECTING");
      }else{
        // Draw weather images here
        std::string weather_string = id(myWeather).state.c_str();
        if(weather_string == "rainy" || weather_string == "lightning" || weather_string == "pouring"){
          // Draw rainy weather image
          it.printf(120, 85, id(font_weather), TextAlign::CENTER, "\U000F0596");
        }else if(weather_string == "snowy"){
          // Draw snowy weather image
          it.printf(120, 85, id(font_weather), TextAlign::CENTER, "\U000F0598");
        }else if(weather_string == "sunny" || weather_string == "windy"){
          // Draw sunny weather image
          it.printf(120, 85, id(font_weather), TextAlign::CENTER, "\U000F0599");
        }else{
          // Draw cloudy weather image
          it.printf(120, 85, id(font_weather), TextAlign::CENTER, "\U000F0590");
        }

        auto time_now = id(homeassistant_time).now();
        // Month conversion
        const char* months[] = {
          "January", "February", "March", "April", "May", "June",
          "July", "August", "September", "October", "November", "December"
        };
        const char* month_str = months[time_now.month - 1];  // Month index starts from 0
        // Get the day
        int day = time_now.day_of_month;
        // Draw the date
        it.printf(250, 110, id(data_font), "%s %d", month_str, day);
        // Get the day of the week
        const char* days[] = {"Saturday", "Sunday", "Monday", "Tuesday", "Wednesday", "Thursday", "Friday"};
        const char* day_of_week = days[time_now.day_of_week];
        it.printf(250, 70, id(data_font), "%s", day_of_week);

        int x = 20, y = 180, w = 180, h = 120, r = 10, thickness = 4;
        // Draw four borders
        it.filled_rectangle(x + r, y, w - 2 * r, thickness); // Top border
        it.filled_rectangle(x + r, y + h - thickness, w - 2 * r, thickness); // Bottom border
        it.filled_rectangle(x, y + r, thickness, h - 2 * r); // Left border
        it.filled_rectangle(x + w - thickness, y + r, thickness, h - 2 * r); // Right border
        // Draw four rounded corners
        it.filled_circle(x + r, y + r, r); // Top-left corner
        it.filled_circle(x + w - r, y + r, r); // Top-right corner
        it.filled_circle(x + r, y + h - r, r); // Bottom-left corner
        it.filled_circle(x + w - r, y + h - r, r); // Bottom-right corner
        // Fill the inside with black to form a border
        it.filled_rectangle(x + thickness, y + thickness, w - 2 * thickness, h - 2 * thickness, COLOR_OFF);
        // Temperature
        it.printf(x+10, y+10, id(sensor_font), "Temperature");
        it.printf(x+45, y+75, id(img_font_sensor), TextAlign::CENTER, "\U000F050F");
        // Get temperature data
        it.printf(x+75,y+65, id(data_font), "%s°F", id(temp).state.c_str());

        x = 220;
        y = 180;
        // Draw four borders
        it.filled_rectangle(x + r, y, w - 2 * r, thickness); // Top border
        it.filled_rectangle(x + r, y + h - thickness, w - 2 * r, thickness); // Bottom border
        it.filled_rectangle(x, y + r, thickness, h - 2 * r); // Left border
        it.filled_rectangle(x + w - thickness, y + r, thickness, h - 2 * r); // Right border
        // Draw four rounded corners
        it.filled_circle(x + r, y + r, r); // Top-left corner
        it.filled_circle(x + w - r, y + r, r); // Top-right corner
        it.filled_circle(x + r, y + h - r, r); // Bottom-left corner
        it.filled_circle(x + w - r, y + h - r, r); // Bottom-right corner
        // Fill the inside with black to form a border
        it.filled_rectangle(x + thickness, y + thickness, w - 2 * thickness, h - 2 * thickness, COLOR_OFF);
        // Humidity
        it.printf(x+10, y+10, id(sensor_font), "Humidity");
        it.printf(x+45, y+75, id(img_font_sensor), TextAlign::CENTER, "\U000F058E");
        // Get humidity data
        it.printf(x+75,y+65, id(data_font), "%s%%", id(humi).state.c_str());

        x = 20;
        y = 320;
        // Draw four borders
        it.filled_rectangle(x + r, y, w - 2 * r, thickness); // Top border
        it.filled_rectangle(x + r, y + h - thickness, w - 2 * r, thickness); // Bottom border
        it.filled_rectangle(x, y + r, thickness, h - 2 * r); // Left border
        it.filled_rectangle(x + w - thickness, y + r, thickness, h - 2 * r); // Right border
        // Draw four rounded corners
        it.filled_circle(x + r, y + r, r); // Top-left corner
        it.filled_circle(x + w - r, y + r, r); // Top-right corner
        it.filled_circle(x + r, y + h - r, r); // Bottom-left corner
        it.filled_circle(x + w - r, y + h - r, r); // Bottom-right corner
        // Fill the inside with black to form a border
        it.filled_rectangle(x + thickness, y + thickness, w - 2 * thickness, h - 2 * thickness, COLOR_OFF);
        // Air Pressure
        it.printf(x+10, y+10, id(sensor_font), "Air Pressure");
        it.printf(x+45, y+75, id(img_font_sensor), TextAlign::CENTER, "\U000F0D60");
        // Get atmospheric pressure data
        it.printf(x+85,y+50, id(data_font), "%s", id(press).state.c_str());
        it.printf(x+85,y+78, id(sensor_font), "inHg");

        x = 220;
        y = 320;
        // Draw four borders
        it.filled_rectangle(x + r, y, w - 2 * r, thickness); // Top border
        it.filled_rectangle(x + r, y + h - thickness, w - 2 * r, thickness); // Bottom border
        it.filled_rectangle(x, y + r, thickness, h - 2 * r); // Left border
        it.filled_rectangle(x + w - thickness, y + r, thickness, h - 2 * r); // Right border
        // Draw four rounded corners
        it.filled_circle(x + r, y + r, r); // Top-left corner
        it.filled_circle(x + w - r, y + r, r); // Top-right corner
        it.filled_circle(x + r, y + h - r, r); // Bottom-left corner
        it.filled_circle(x + w - r, y + h - r, r); // Bottom-right corner
        // Fill the inside with black to form a border
        it.filled_rectangle(x + thickness, y + thickness, w - 2 * thickness, h - 2 * thickness, COLOR_OFF);
        // Wind Speed
        it.printf(x+10, y+10, id(sensor_font), "Wind Speed");
        it.printf(x+45, y+75, id(img_font_sensor), TextAlign::CENTER, "\U000F059D");
        // Get wind speed data
        it.printf(x+85,y+50, id(data_font), "%s", id(wind).state.c_str());
        it.printf(x+85,y+78, id(sensor_font), "mph");

        // Draw a vertical line
        it.filled_rectangle(430, 30, 5, 430);
        // Right section
        it.printf(540, 40, id(data_font), "Calendar");

        // Define event structure
        struct Event {
            std::string message;
            std::string start_time;
            std::string end_time;
            time_t start_timestamp;
        };

        // Parse time string to time_t (UNIX timestamp)
        auto parse_time = [](const std::string &time_str) -> time_t {
            struct tm timeinfo = {};
            if (strptime(time_str.c_str(), "%Y-%m-%d %H:%M:%S", &timeinfo) == nullptr) {
                return 0;  // Invalid time
            }
            return mktime(&timeinfo);
        };

        // Create event list
        std::vector<Event> events = {
            {id(ha_calendar_event_1).state, id(ha_calendar_start_time_1).state, id(ha_calendar_end_time_1).state, parse_time(id(ha_calendar_start_time_1).state)},
            {id(ha_calendar_event_2).state, id(ha_calendar_start_time_2).state, id(ha_calendar_end_time_2).state, parse_time(id(ha_calendar_start_time_2).state)},
            {id(ha_calendar_event_3).state, id(ha_calendar_start_time_3).state, id(ha_calendar_end_time_3).state, parse_time(id(ha_calendar_start_time_3).state)}
        };
        ESP_LOGD("myCalendar", "Start Time: %s -> %ld", id(ha_calendar_start_time_1).state.c_str(), parse_time(id(ha_calendar_start_time_1).state));
        ESP_LOGD("myCalendar", "Start Time: %s -> %ld", id(ha_calendar_start_time_2).state.c_str(), parse_time(id(ha_calendar_start_time_2).state));
        ESP_LOGD("myCalendar", "Start Time: %s -> %ld", id(ha_calendar_start_time_3).state.c_str(), parse_time(id(ha_calendar_start_time_3).state));

        // Filter invalid events (start_timestamp == 0)
        events.erase(std::remove_if(events.begin(), events.end(), [](const Event &e) { return e.start_timestamp == 0; }), events.end());

        // Sort by `start_timestamp` (earliest to latest)
        std::sort(events.begin(), events.end(), [](const Event &a, const Event &b) {
            return a.start_timestamp < b.start_timestamp;
        });

        // Define a function to format time
        auto format_time = [](std::string time_str) -> std::string {
            struct tm timeinfo;
            if (strptime(time_str.c_str(), "%Y-%m-%d %H:%M:%S", &timeinfo) == nullptr) {
                return "Invalid";
            }
            char buffer[10];
            strftime(buffer, sizeof(buffer), "%I:%M%p", &timeinfo); // Convert to 12-hour format
            return std::string(buffer);
        };
        // Parse date
        auto format_date = [](const std::string &time_str) -> std::string {
            struct tm timeinfo = {};
            if (strptime(time_str.c_str(), "%Y-%m-%d %H:%M:%S", &timeinfo) == nullptr) {
                return "Invalid";
            }
            char buffer[6];  // Need to store "MM-DD\0"
            strftime(buffer, sizeof(buffer), "%m-%d", &timeinfo);
            return std::string(buffer);
        };

        // Draw events
        int even_x_start_offset = 460;
        int even_y_start_offset = 80;
        for (const auto &event : events) {
          if(even_y_start_offset >= 420){
            break;
          }

          // Format time
          std::string formatted_date = format_date(event.start_time);
          std::string formatted_start_time = format_time(event.start_time);
          std::string formatted_end_time = format_time(event.end_time);

          // Combine time range string
          std::string time_range = formatted_start_time + " - " + formatted_end_time;
          time_range = formatted_date + "  " + time_range;
          if(formatted_start_time == "Invalid" || formatted_end_time == "Invalid"){
            time_range.clear();
          }
          // Display time range, e.g., "10:00AM - 11:00AM"
          it.printf(even_x_start_offset, even_y_start_offset, id(sensor_font), "%s", time_range.c_str());
          even_y_start_offset += 30;
          // Display event name
          it.printf(even_x_start_offset, even_y_start_offset, id(sensor_font), "%s", event.message.c_str());
          even_y_start_offset += 40;
        }
      }
次の画像のようなフィードバックが表示されたら、コードは正常に実行されています。

FAQ
Q1: なぜデータがありませんか?


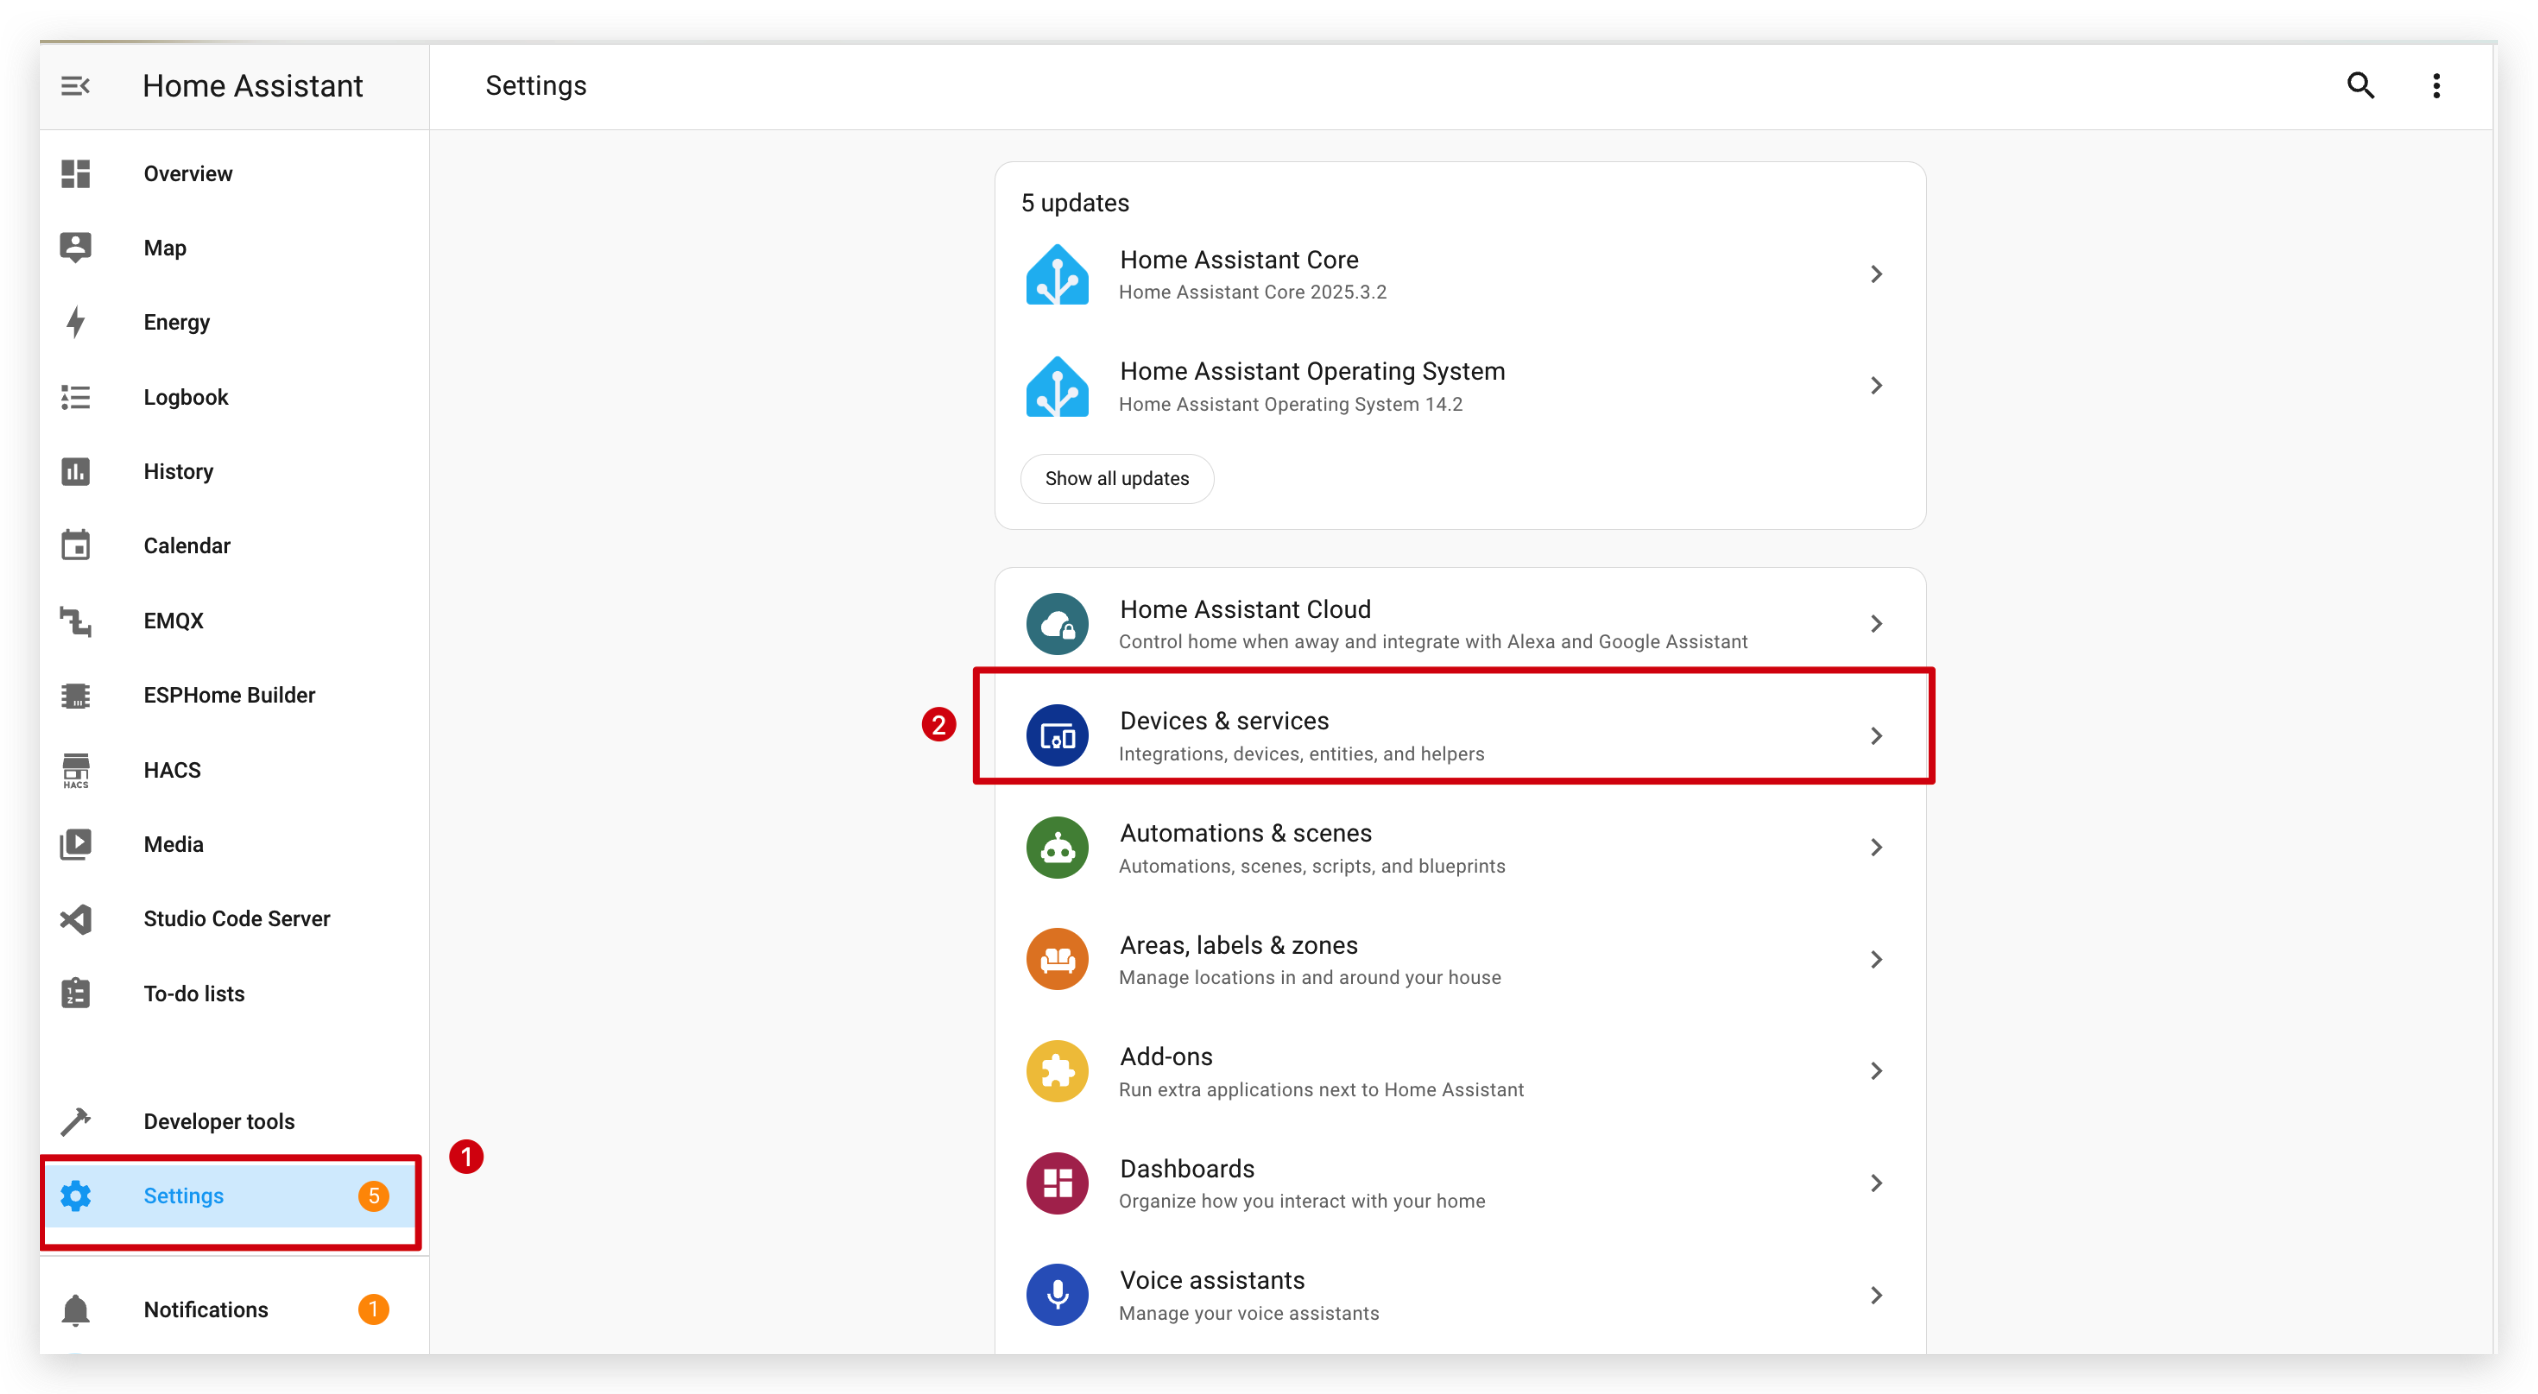
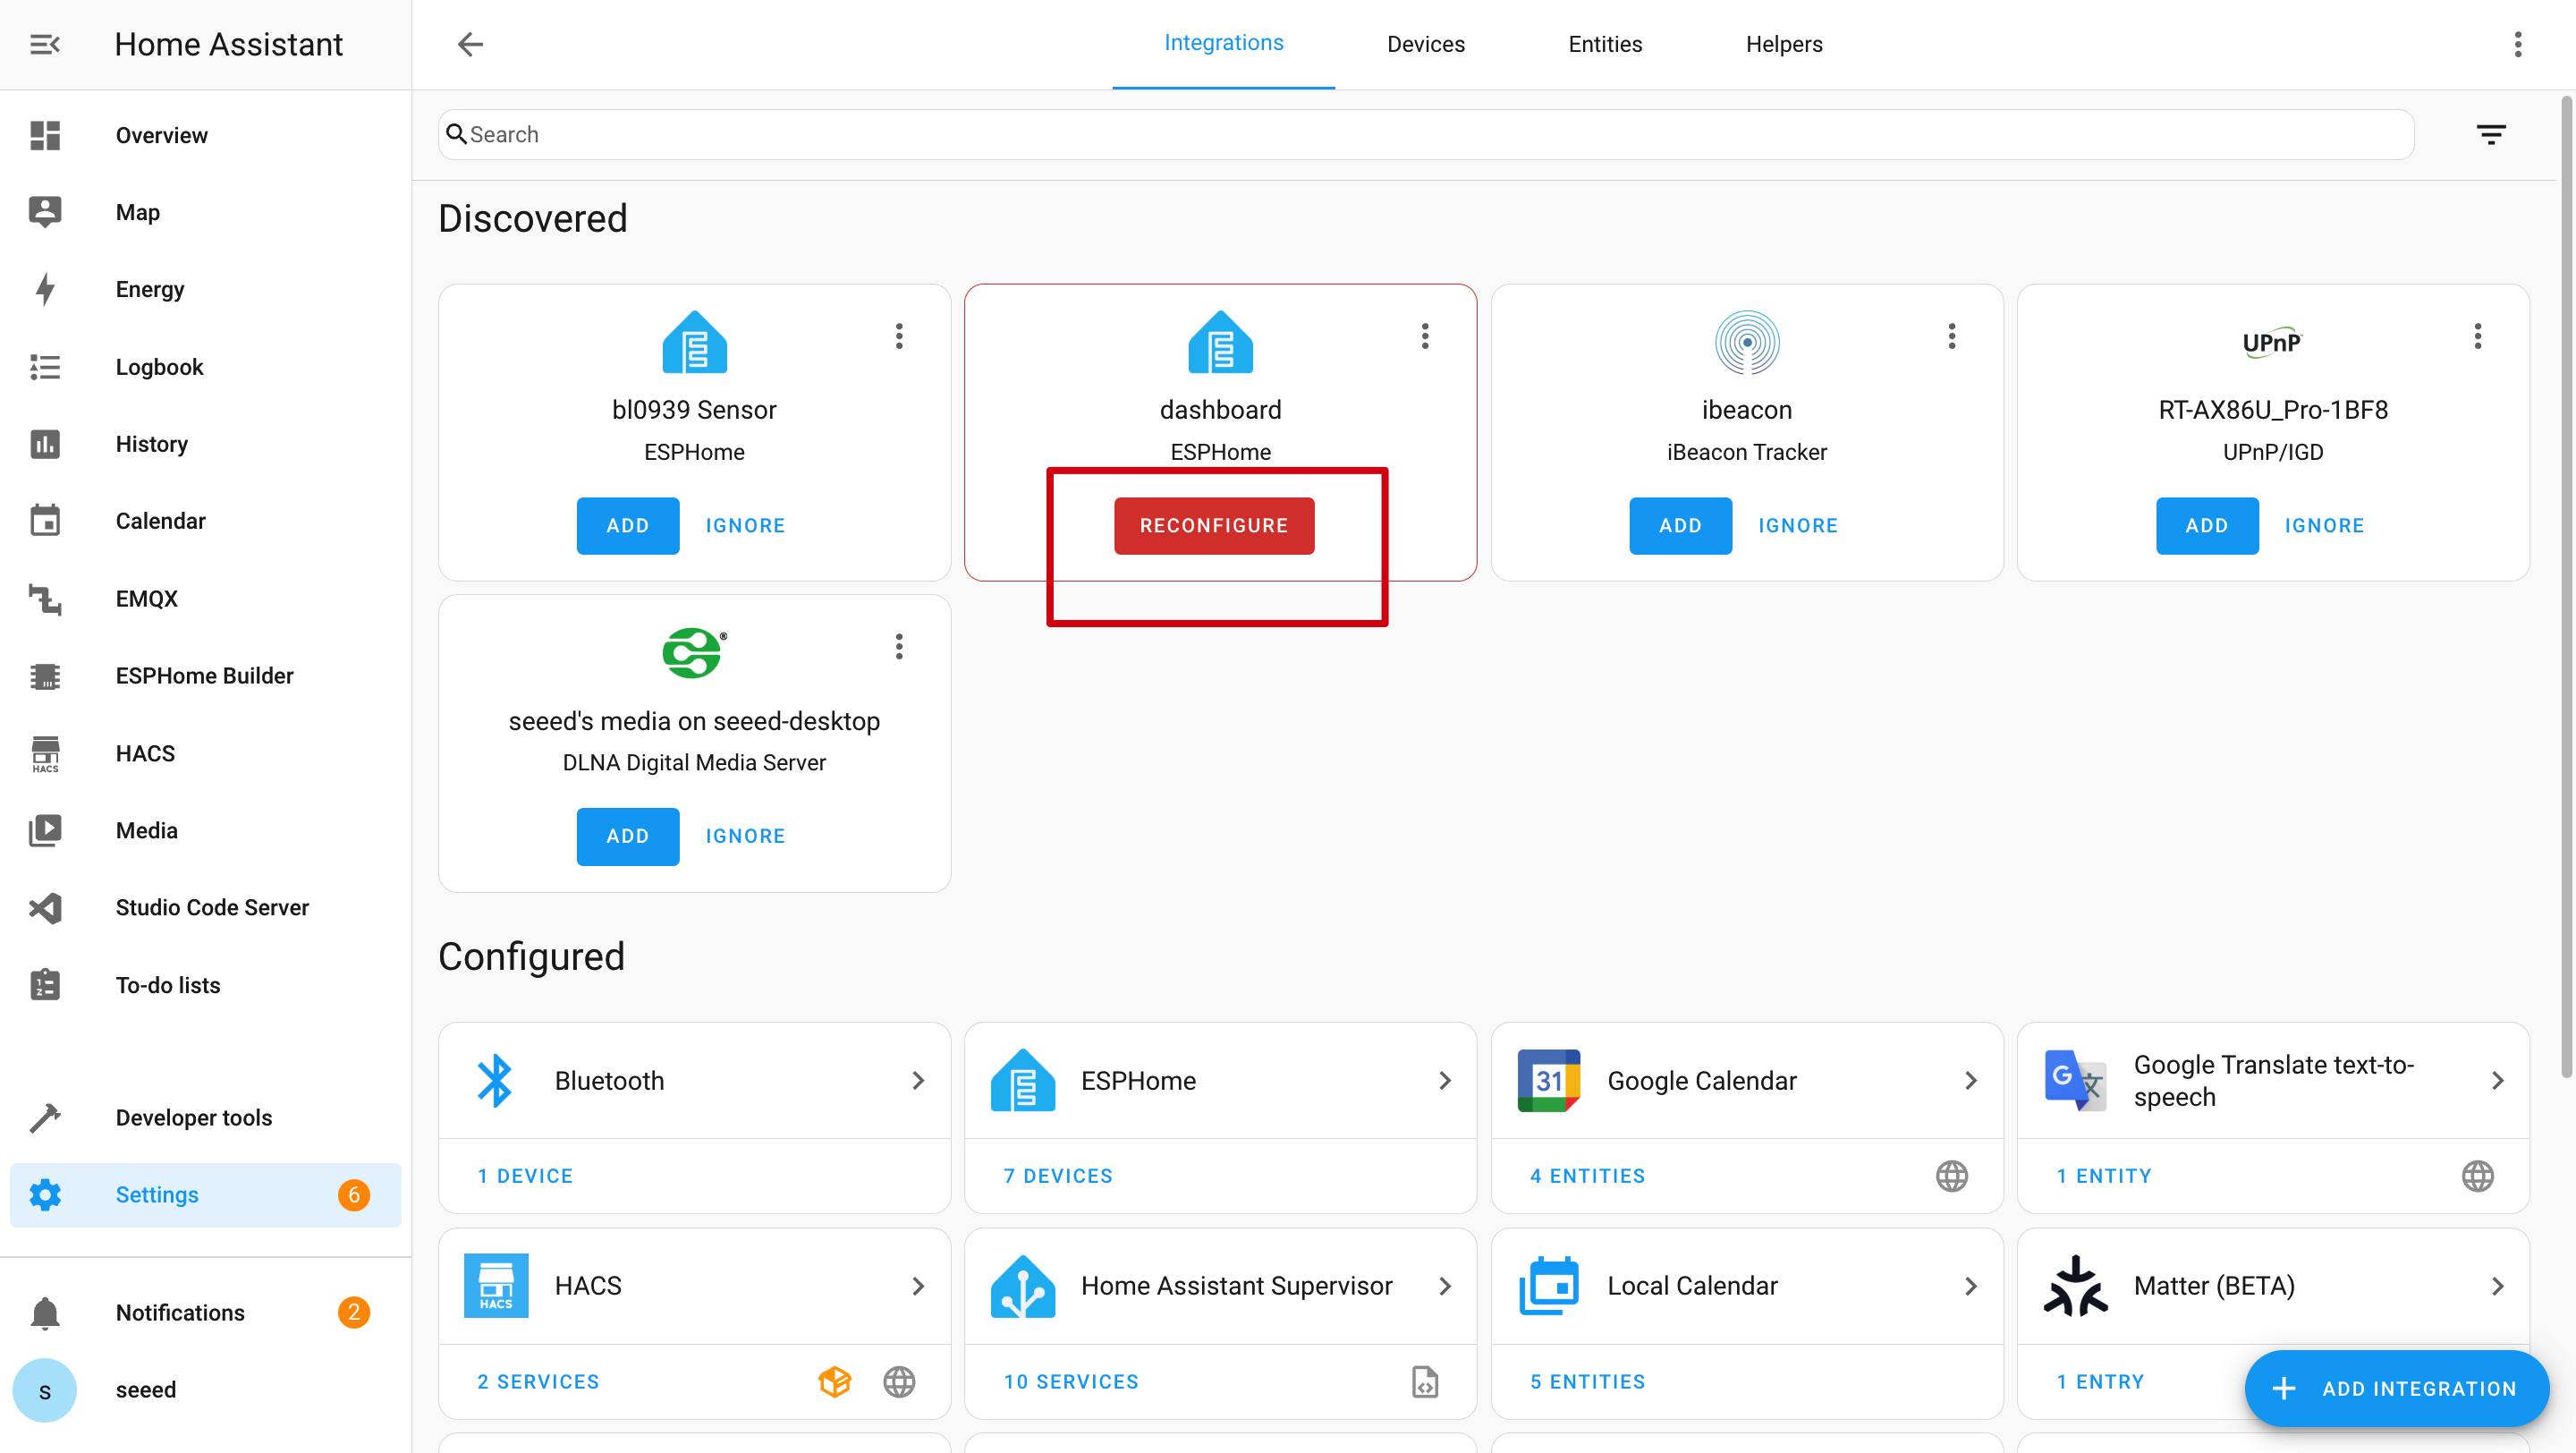
この場合、Settings -> Devices & Services -> Integrations に移動してデバイスをRECONGFIGUREする必要があります。ePaper Penal が見つかりませんか?HA を再起動してみてください。
Q2: なぜ Home Assistant でこれらのデータを取得できないのですか?
この場合、Settings -> Devices & Services -> Integrations に移動して、デバイスを HA にADDする必要があります。
Q3: デバイスがディープスリープモードのときに、新しいプログラムをどのようにアップロードできますか?


デバイスがディープスリープモードのときは、新しいプログラムを直接アップロードすることはできません。
-
まず、デバイスの電源が入っていることを確認し、その後ボード背面の Boot ボタンを押します。
-
Reset ボタンを 1 回クリックし、Boot ボタンを離します。
-
その後、バッテリースイッチをオフにし、電源ケーブルを抜きます。
-
最後に、ケーブルを再接続して新しいプログラムをアップロードします。
Q4: バッテリーはどのくらい持ちますか?
充電するときは、バッテリーボタンをオンにすることを忘れないでください。そうしないと、バッテリーは充電されません。
テストの結果、6 時間ごとに画面をリフレッシュした場合、ディープスリープモードでバッテリーは約 3 か月持ちます。
Q5: ePaper Penel がコンピュータに接続できませんか?

何度か抜き差ししてみるか、プロンプトに従ってドライバをインストールしてください。
Q6: Wi-Fi 経由でのプログラムのアップロードに失敗しますか?

この場合、epaper penal がオフラインであるか、ディープスリープモードになっています。オンラインにするか、ウェイクアップしてください。
リソース
- [STP]: 3D モデル筐体
- [PDF]: ePaper ドライバボード SCH PDF
技術サポート & 製品ディスカッション
弊社製品をお選びいただきありがとうございます。弊社は、製品をできるだけスムーズにご利用いただけるよう、さまざまなサポートを提供しています。お好みやニーズに合わせて選べる、複数のコミュニケーションチャネルをご用意しています。