Seeed Studio XIAO RA4M1で動作するホロー時計
インスピレーションの誕生
ホロー時計は少し前にYouTubeで大きな人気を博しました。オリジナルデザインはsh1uraによるもので、クールなデモ動画とThingsverseで利用可能な3Dデザインがあります。この素晴らしいインスピレーションを与えてくれたsh1uraに大きな感謝を送ります。 巨人の肩の上に立って、私たちは親指サイズのXIAO RA4M1とカスタムの小型モータードライバーボードを使用したバージョンをリミックスしました!
ハードウェア概要
MCU
| Seeed Studio XIAO RA4M1 |
|---|
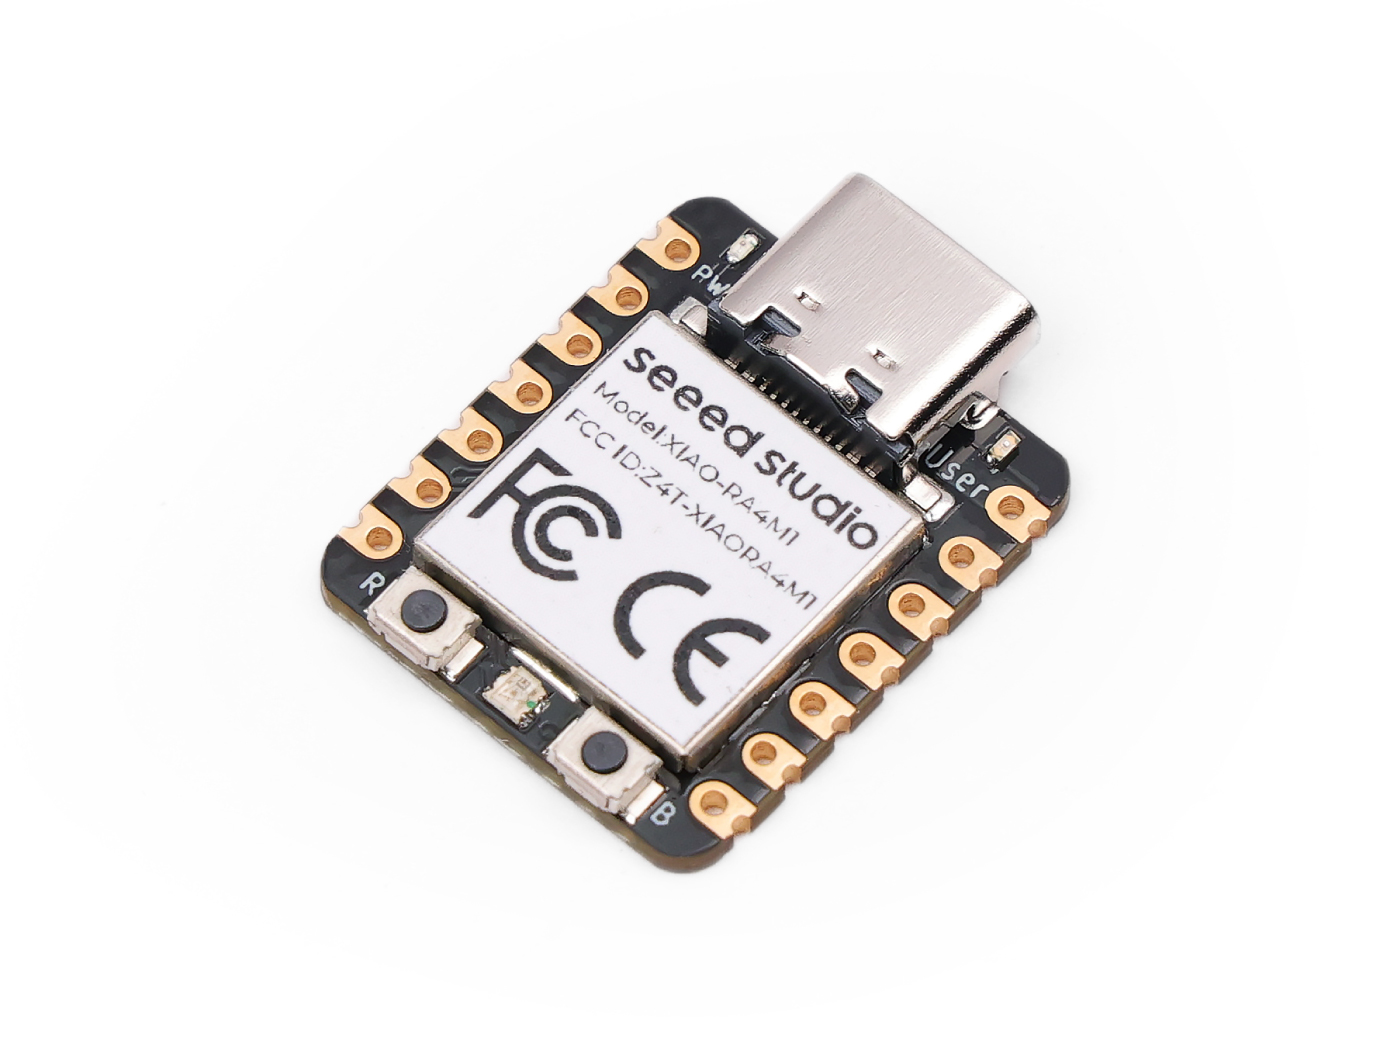 |
回路基板
XIAOと同じ体積で、マザーソケットを溶接してXIAOとモーターを挿入するだけで動作します。
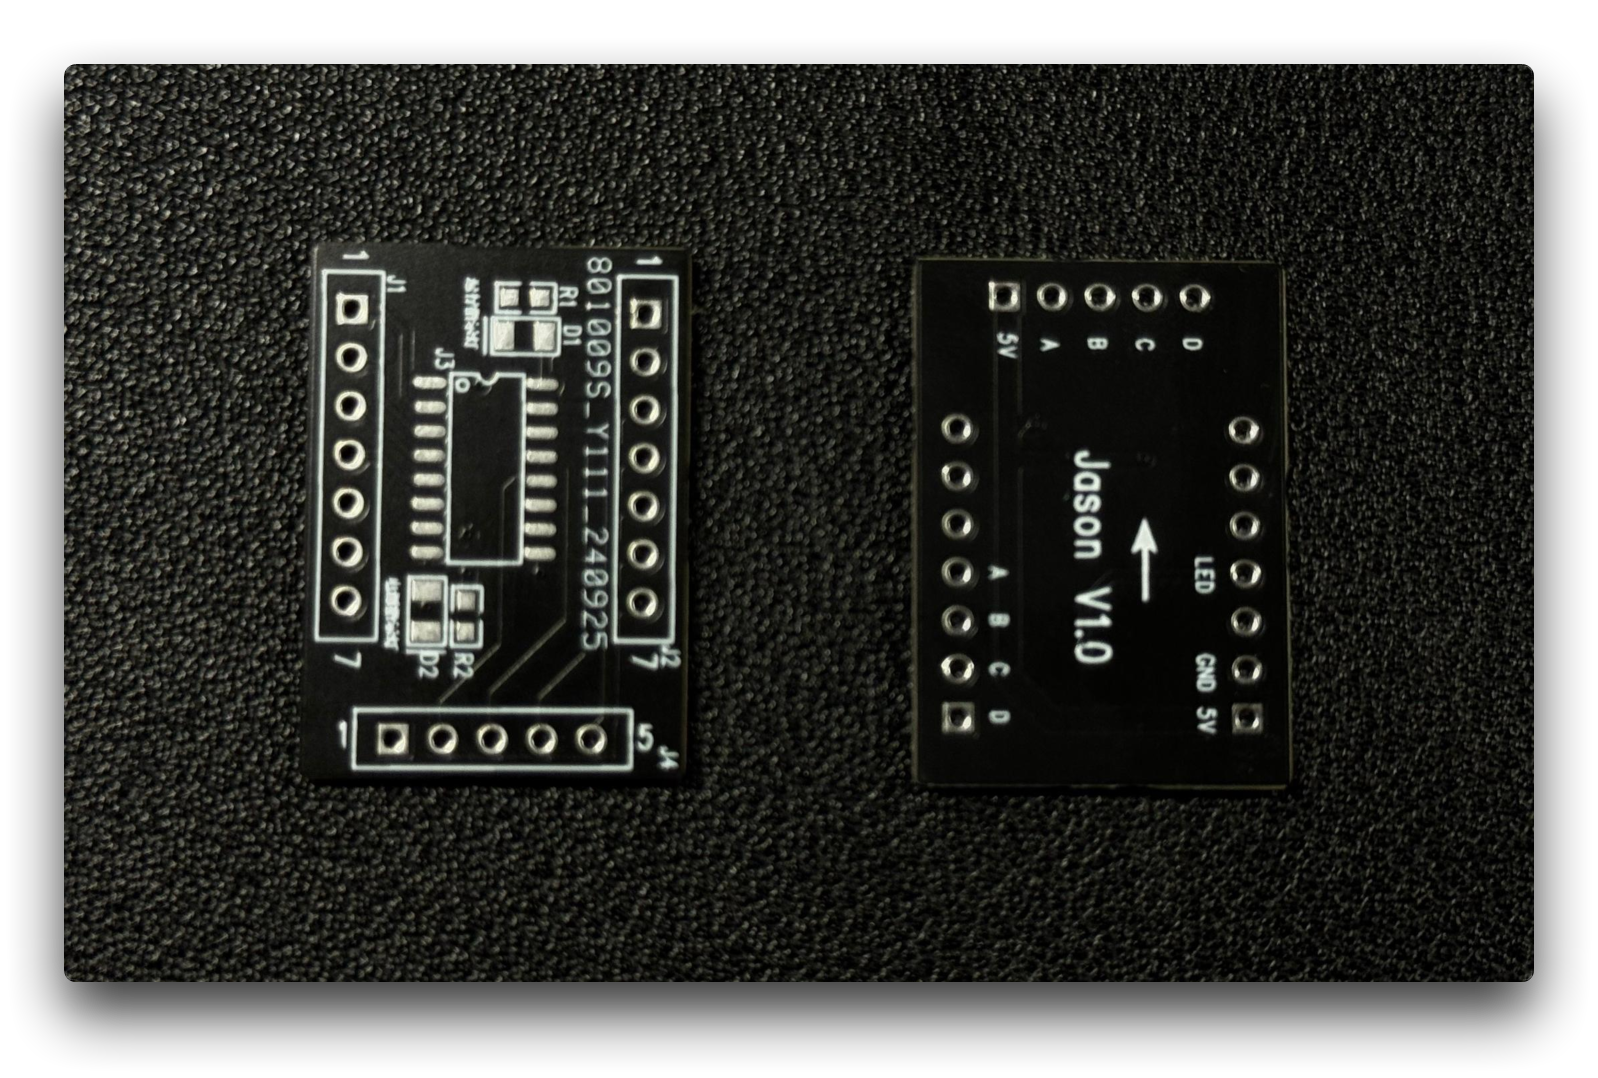
具体的な情報は最後のリソースにあります。
モーターとコンポーネントの両方を自分で購入する必要があります。
ソフトウェア概要
// This code controls a stepper motor for a clock project,
// allowing the minute hand to rotate accurately based on time.

// Please tune the following value if the clock gains or loses time.
// Theoretically, the standard value is 60000 milliseconds per minute.
#define MILLIS_PER_MIN 60000 // milliseconds per a minute

// Motor and clock parameters
// Total steps for a full turn of the minute rotor
// Calculated as 4096 steps per revolution * 90 degrees / 12 hours
#define STEPS_PER_ROTATION 30720 // steps for a full turn of minute rotor

// Wait time for a single step of the stepper motor
int delaytime = 2;

// Ports used to control the stepper motor
// If your motor rotates in the opposite direction,
// change the order of the port numbers as needed.
int port[4] = {0, 1, 2, 3};

// Sequence of stepper motor control
// This array defines the control sequence for the motor phases.
int seq[8][4] = {
  {  LOW, HIGH, HIGH,  LOW},
  {  LOW,  LOW, HIGH,  LOW},
  {  LOW,  LOW, HIGH, HIGH},
  {  LOW,  LOW,  LOW, HIGH},
  { HIGH,  LOW,  LOW, HIGH},
  { HIGH,  LOW,  LOW,  LOW},
  { HIGH, HIGH,  LOW,  LOW},
  {  LOW, HIGH,  LOW,  LOW}
};

// Function to rotate the stepper motor based on the specified number of steps
void rotate(int step) {
  static int phase = 0;
  int i, j;
  int delta = (step > 0) ? 1 : 7; // Determine direction of rotation
  int dt = 20; // Initial delay time

  step = (step > 0) ? step : -step; // Convert to positive step count
  for(j = 0; j < step; j++) {
    phase = (phase + delta) % 8; // Update phase
    for(i = 0; i < 4; i++) {
      digitalWrite(port[i], seq[phase][i]); // Control the motor
    }
    delay(dt); // Wait for the specified delay
    if(dt > delaytime) dt--; // Gradually decrease delay
  }
  // Power cut: stop the motor
  for(i = 0; i < 4; i++) {
    digitalWrite(port[i], LOW);
  }
}

// Setup function, runs once at startup
void setup() {
  // Initialize motor control ports as outputs
  pinMode(port[0], OUTPUT);
  pinMode(port[1], OUTPUT);
  pinMode(port[2], OUTPUT);
  pinMode(port[3], OUTPUT);

  // Perform initial approach runs to position the minute hand
  rotate(-20); // Approach run in one direction
  rotate(20);  // Approach run in the opposite direction
  rotate(STEPS_PER_ROTATION / 60); // Position the minute hand
}

// Main loop, runs continuously
void loop() {
  static long prev_min = 0, prev_pos = 0; // Track previous minute and position
  long min;
  static long pos;

  min = millis() / MILLIS_PER_MIN; // Get the current minute
  if(prev_min == min) {
    return; // Exit if the minute hasn't changed
  }
  prev_min = min; // Update previous minute
  pos = (STEPS_PER_ROTATION * min) / 60; // Calculate target position
  rotate(-20); // Approach run in one direction
  rotate(20);  // Approach run in the opposite direction
  if(pos - prev_pos > 0) {
    rotate(pos - prev_pos); // Rotate to the new position if needed
  }
  prev_pos = pos; // Update previous position
}
-
ステッピングモーターの接続を確認: ステッピングモーターの4本の制御線をポート配列で指定されたポート(0、1、2、3)に接続してください。
-
時間設定の調整: 実際の状況に応じてMILLIS_PER_MIN値を調整し、時計が正確であることを確認してください。時計が進みすぎたり遅れたりする場合は、この値を適宜調整してください。
-
ステップ計算の確認: STEPS_PER_ROTATION値がモーターの実際のステップ数とシステム設計に基づいて正しく計算されていることを確認してください。
-
遅延時間の調整: delaytimeは各ステップ間の遅延を制御します。モーターの性能と要件に基づいてこのパラメータを微調整し、モーターの動作を最適化してください。
-
制御シーケンス設定: seq配列はステッピングモーターの制御シーケンスを定義します。モーターが間違った方向に回転する場合は、この配列の値を調整できます。
-
関数の説明: rotate(int step): モーターを指定されたステップ数回転させる制御を行います。正または負の値を渡して方向を制御できます。モーターは各回転後に遅延を徐々に減らして速度を上げます。
-
setup(): 起動時に一度実行され、制御ポートを初期化し、初期位置決めを行います。これはモーターのセットアップに必要なステップです。
-
loop(): 継続的に実行されるメインループで、現在の分を計算し、分針の位置を更新します。この関数は各分の更新時にrotate()関数を呼び出して針を回転させます。
-
電源がステッピングモーターに適していることを確認し、すべての接続が正しいことをチェックしてください。
-
テスト中は、モーターの動作を監視して期待通りに機能することを確認し、必要に応じて調整を行ってください。
さらなるアイデアや改良がある場合は、XIAOシリーズを使って自由に紹介してください!
Resouce
- 📄 [SCH] Motor Driver Board
- 📄 [PCB] Motor Driver Board
- 📄 [3D] Clock 3D Modeling
技術サポート・製品ディスカッション
私たちの製品をお選びいただき、ありがとうございます!私たちは、お客様の製品体験が可能な限りスムーズになるよう、さまざまなサポートを提供しています。異なる好みやニーズに対応するため、複数のコミュニケーションチャンネルを用意しています。