Build a Four-Camera Fisheye Surround View Demo on Jetson AGX Thor
Introduction
This demo runs a four-camera fisheye surround-view pipeline on NVIDIA Jetson AGX Thor. Four cameras around the chassis are calibrated and stitched into a real-time bird's-eye view (BEV). Occupancy hints chassis motion, YOLO-World localizes grasp targets, and a VLM captions the scene.
BEV layout after stitching:
- Top of the image = vehicle front
- Center of the image = vehicle body
- Cameras face front, back, left, and right
YOLO answers where the target is. The VLM answers what the scene looks like. Occupancy is a 2D ground hint, not a LiDAR map.
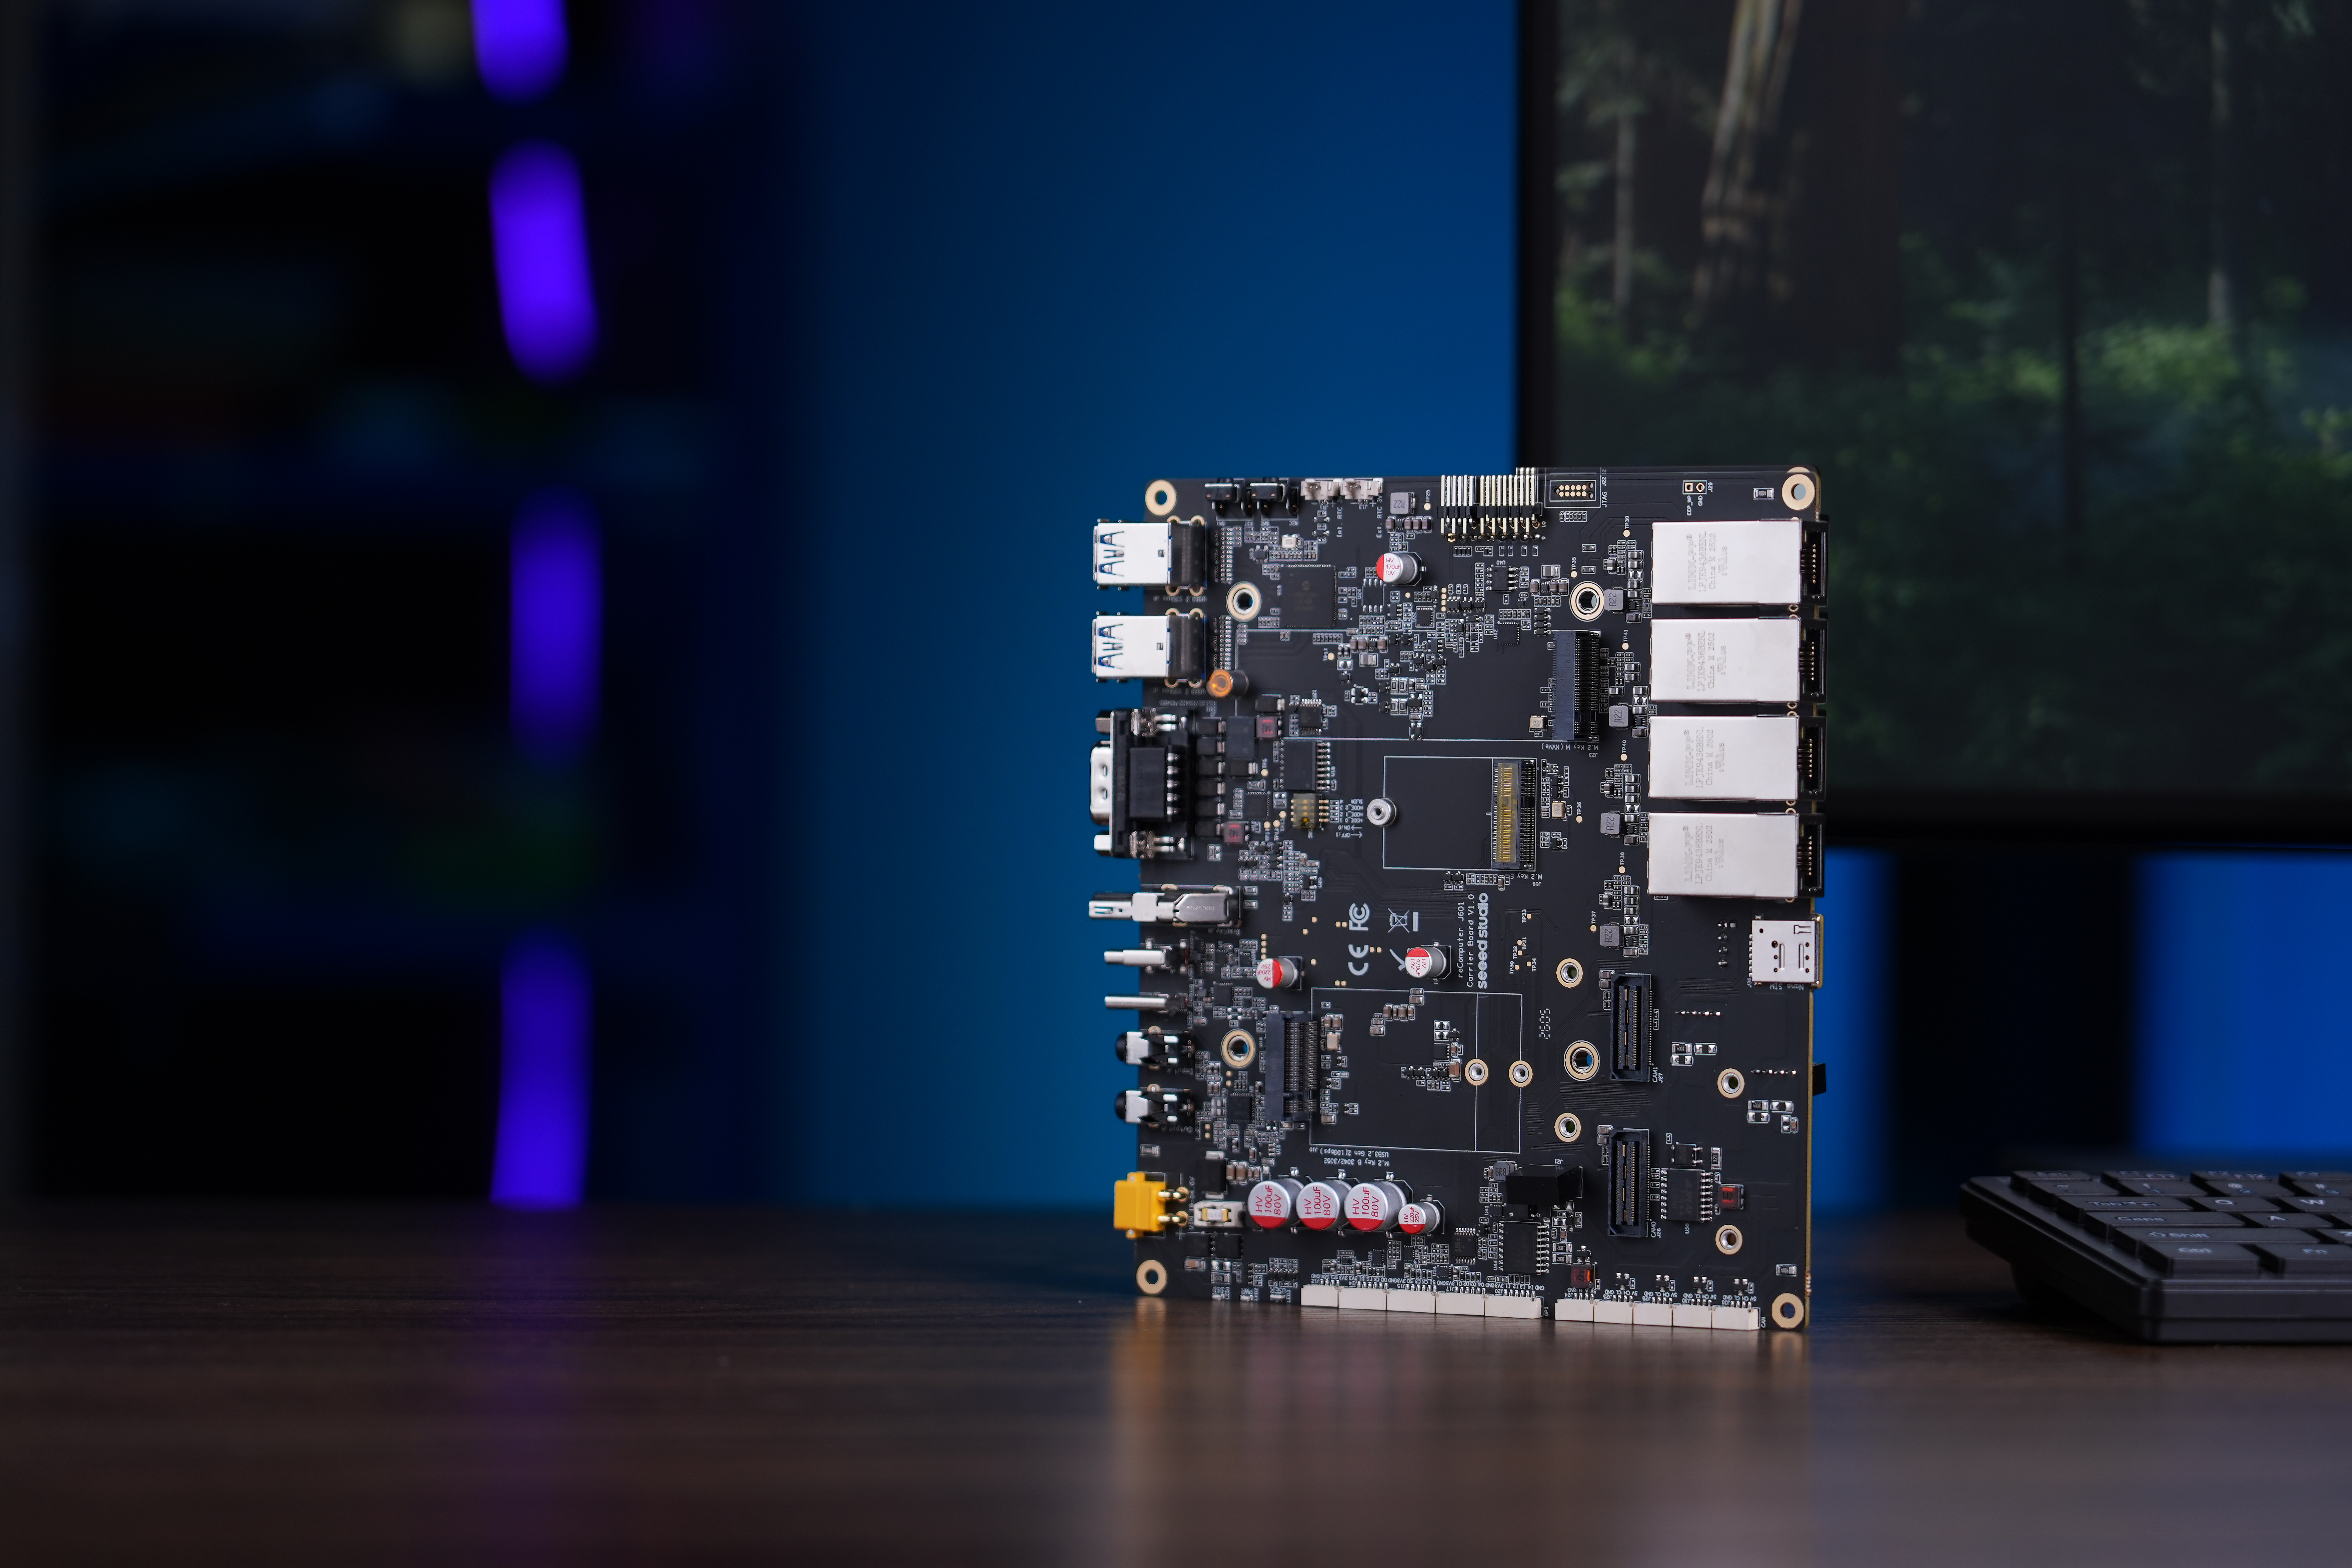
This demo is verified on reComputer Robotics J601.
| reComputer Robotics J601 | Sensing SG3S-ISX031C-GMSL2F |
|---|---|
 |  |
Key Features
- GPU stitching with CUDA OpenCV
- Web calibration for intrinsics, extrinsics, and seams
- Occupancy, YOLO-World, and VLM on one shared BEV
- Verified on Jetson AGX Thor / reComputer Robotics J601
Prerequisites
Hardware
- reComputer Robotics J601 (Jetson AGX Thor)
- Four Sensing SG3S-ISX031C-GMSL2F GMSL2 fisheye cameras
- One Mini-Fakra 4-in-1 cable so all four cameras share a single GMSL port
- A display or a remote desktop session
- Network access if you open the calibration page from another computer
Optional:
- A mobile chassis, if you want to use occupancy for movement assistance
- A robot arm, if you want to use YOLO target positions for grasp assistance
Software
- JetPack with GMSL driver support for J601
- CUDA-enabled OpenCV for real-time stitching
- Python environment for the web calibration UI
- YOLO-World and optional VLM model dependencies
Hardware Connection
Connect four Sensing GMSL2 fisheye cameras to one Mini-Fakra GMSL port on reComputer Robotics J601 before calibration. J601 has two Mini-Fakra connectors (up to eight GMSL2 cameras). This demo uses one GMSL port and a 4-in-1 Mini-Fakra cable.
- Power the J601 board through the XT30 DC input.
- If you are using the GMSL expansion board, seat it on the camera expansion header first.
- Plug the Mini-Fakra 4-in-1 cable into one Mini-Fakra GMSL port.
- Connect the four Sensing fisheye cameras to the four Fakra ends of that cable.
- Mount the cameras around the chassis so they face front, back, left, and right.
- Optionally connect an HDMI display if you want to watch the live BEV window on the board.
For GMSL bring-up on J601, see Robotics J601 Hardware Interfaces Usage.
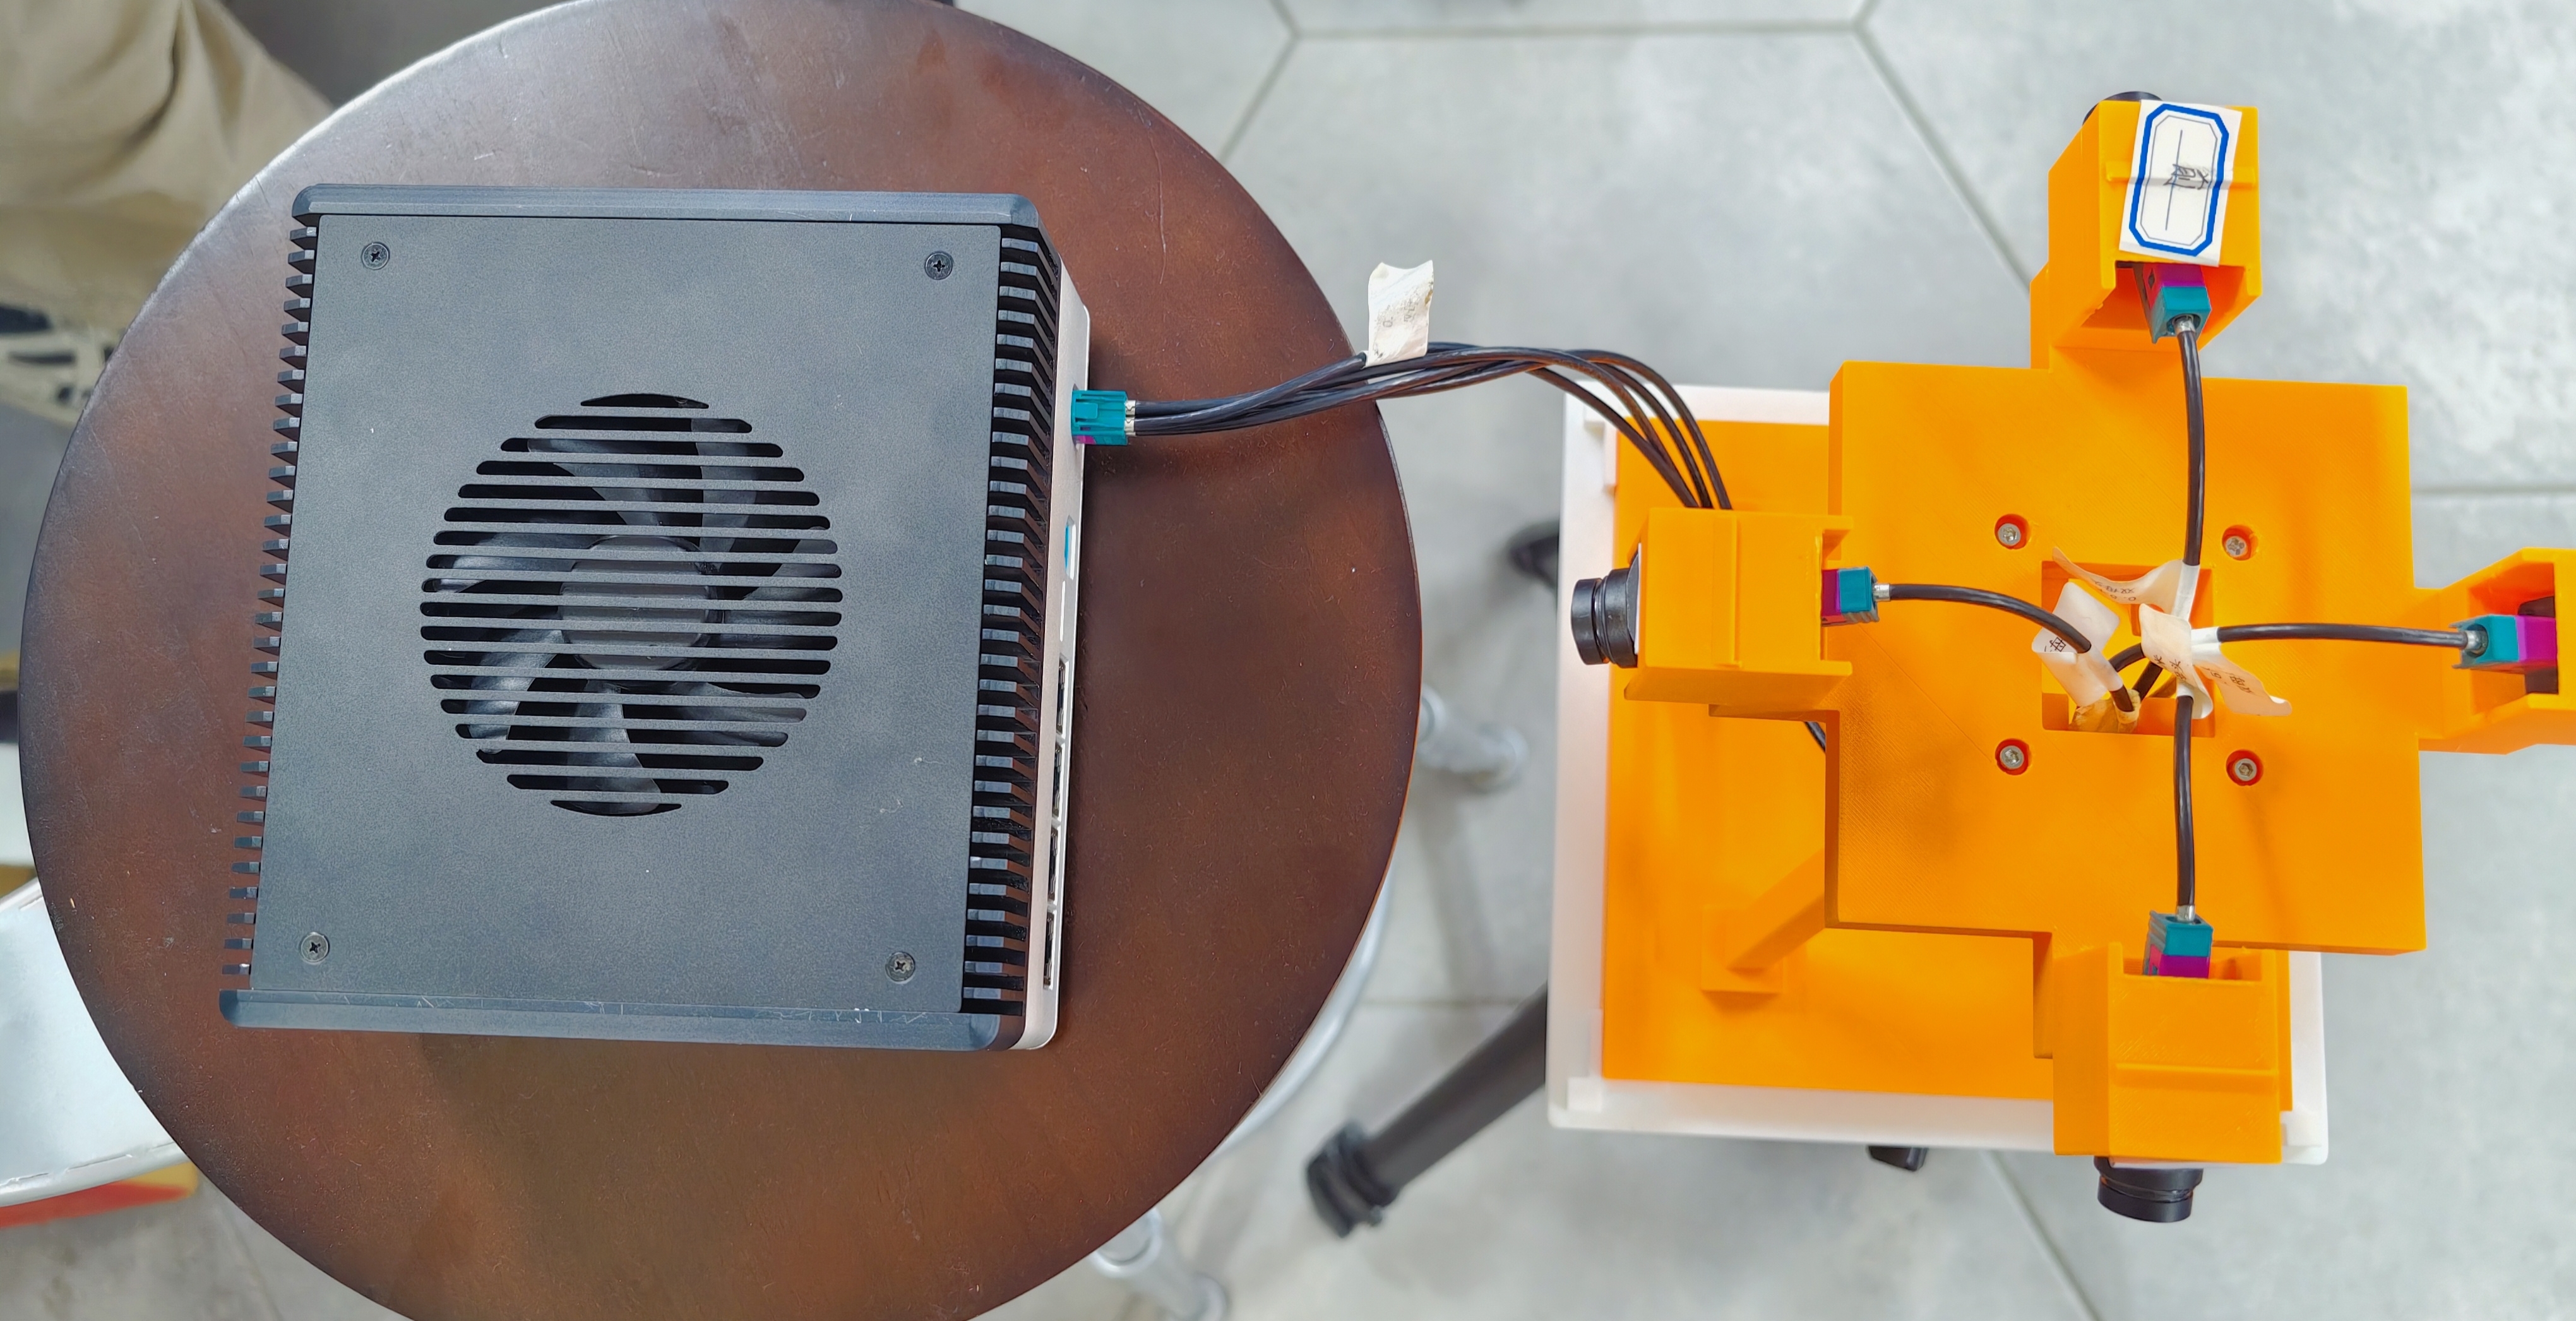
After the cameras are connected, confirm the /dev/video* nodes and the mapping in config/camera_profile.json. See Step 1. Check Camera Mapping.
Installation and Setup
Step 1. Clone the Repository
git clone https://github.com/xbs0325/j601-surround-demo.git
cd j601-surround-demo
Step 2. Build CUDA OpenCV
Before running the live surround-view demo, make sure CUDA-enabled OpenCV is available.
cd ~/j601-surround-demo
./scripts/build_opencv_cuda.sh --jobs $(nproc)
source scripts/env_opencv_cuda.sh
python3 -c "import cv2; print(cv2.__version__, cv2.cuda.getCudaEnabledDeviceCount())"
If the setup is correct, the CUDA device count should be 1.
Step 3. Install Web Calibration Dependencies
The calibration web UI depends on aiortc and related Python packages.
./scripts/install_web_deps.sh
On Ubuntu 24.04, do not run a plain pip3 install -r requirements.txt into the system Python. This project keeps the stitching environment separate from the perception model environment.
Step 4. Install Perception Dependencies
To enable YOLO-World grasp assistance and VLM scene understanding, run:
./scripts/setup_perception_thor.sh
./scripts/download_perception_models.sh
This prepares the perception environment and downloads the required model files.
How to Use
Calibrate the four cameras first, then start the live surround-view demo. Do not run both at the same time; they need exclusive camera access.
Step 1. Check Camera Mapping
Camera device mapping is defined in:
config/camera_profile.json
Typical mapping in the repository:
front:/dev/video0back:/dev/video2left:/dev/video3right:/dev/video1
Confirm these device nodes before calibration. After the demo is running, you can double-check by covering the front camera: the top of the BEV image should go dark. If front and back are swapped, change the device mapping in the config file. Do not edit the calibration result files for this.
Step 2. Open the Calibration Web UI
Start the calibration service:
./calib.sh
Then open the calibration page in your browser:
http://<board-ip>:8787/

The calibration UI is used for:
- intrinsic calibration
- extrinsic alignment
- seam refinement
For seam refinement, follow the repository pairing:
front + leftfront + rightback + leftback + right
Place the chessboard in the overlap between the two camera views. When both views detect the board and show ready status, the system can refine that seam.
Step 3. Run the Demo
After calibration is complete, start the surround-view demo:
./run.sh
This launches the live BEV pipeline: stitching, occupancy, YOLO grasp assistance, and optional VLM scene captioning.
You can also start the perception launcher directly:
./scripts/run_perception.sh --vlm off --mode nav --range 2.5
./scripts/run_perception.sh --mode grasp --target bottle
Common Modes
| Goal | Command |
|---|---|
| Chassis movement assistance | ./scripts/run_perception.sh --vlm off --mode nav --range 2.5 |
| Robot-arm grasp assistance | ./scripts/run_perception.sh --mode grasp --target bottle |
| Headless run | ./scripts/run_perception.sh --no-window |
| Offline smoke test | /usr/bin/python3 -m perception.smoke_offline |
--mode navfocuses on occupancy around the chassis--mode grasp --target bottleasks YOLO to look for a grasp target--vlm offskips scene captioning when you only need positioning or detection
Demo Result and Controls
When the demo window is running, these keyboard shortcuts are available:
| Key | Action |
|---|---|
ESC or q | Quit |
o | Run YOLO-World once for grasp assistance |
a | Trigger one VLM caption for scene understanding |
s | Save a frame |
m | Toggle occupancy map |
During runtime, the demo can also write:
output/perception/preview.jpgevents.jsonl
These files are useful for debugging, validation, and later integration.
Coordinate Convention
The project uses this BEV convention:
| Item | Meaning |
|---|---|
| Image up | Vehicle front |
base_link origin | Approximately the BEV center |
+X | Forward |
+Y | Left |
YOLO can therefore report approximate 2D target positions, such as direction, forward distance, and lateral offset, to assist grasping.
The result is still a ground-plane approximation. It is not a 6-DoF grasp pose and should not be treated as precise manipulation ground truth.
Notes and Limitations
- This demo provides perception assistance. It does not send control commands to the chassis or arm
- YOLO localizes targets to assist grasping; it does not close the grasp loop by itself
- VLM output is for scene understanding, not for coordinates
- Occupancy is a 2D ground hint, not a LiDAR SLAM map
- Real-time stitching is intended for CUDA-enabled Jetson AGX Thor
- CPU-only mode is useful for debugging, but not recommended for live deployment
Resources
- Demo video
- Getting Started with reComputer Robotics J601
- Robotics J601 Hardware Interfaces Usage
- GitHub
Tech Support & Product Discussion
Thank you for choosing our products! We are here to provide you with different support to ensure that your experience with our products is as smooth as possible. We offer several communication channels to cater to different preferences and needs.