MUI Introduction
What is MUI?
MUI (Meshtastic User Interface) is an open-source graphical interface designed for Meshtastic devices. It provides a more intuitive way for users to interact with device.
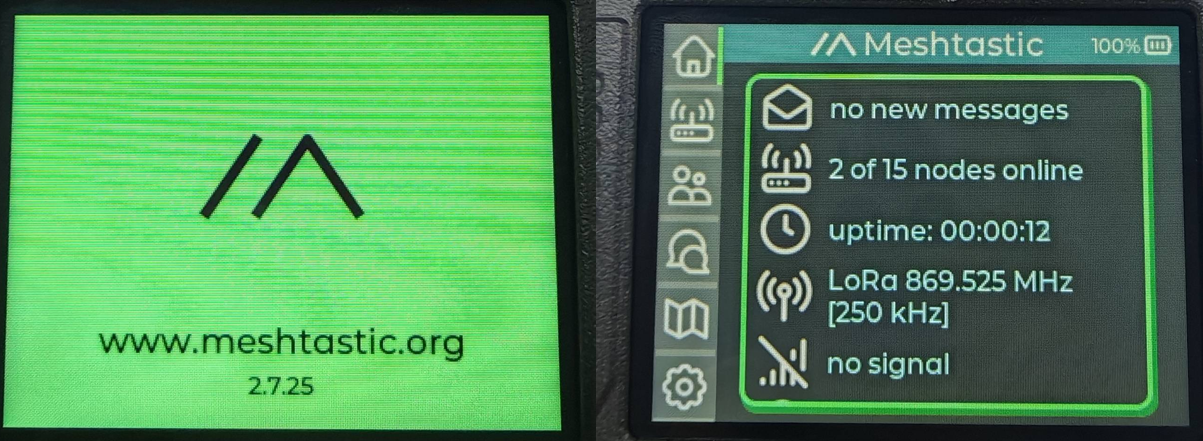
Key Features
-
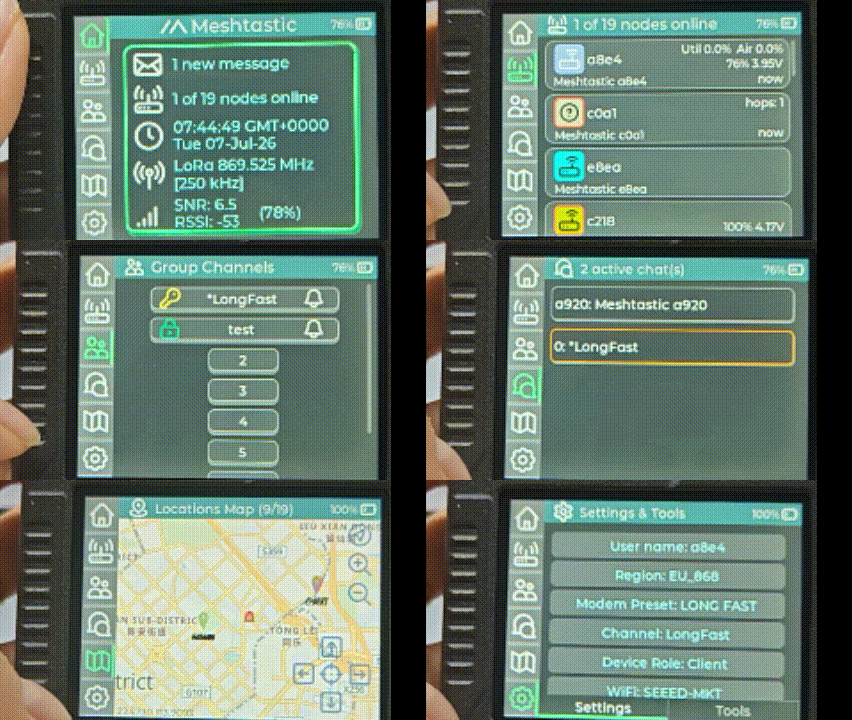
Interactive Map: MUI displays node locations directly on online or offline maps. Check nearby devices and their positions without opening a mobile or desktop APP.
-
Convenient Device Configuration: Configure Meshtastic settings directly on the device, including radio, GPS, display, and other common options. No external app is required for routine configuration.
-
Intuitive Graphical Interface: MUI provides a touchscreen-optimized interface with clear menus and map-based navigation. Common operations can be completed with just a few taps, making the device easier to use for both new and experienced users.
Get start with MUI based on Wio Tracker L2
UI Switching
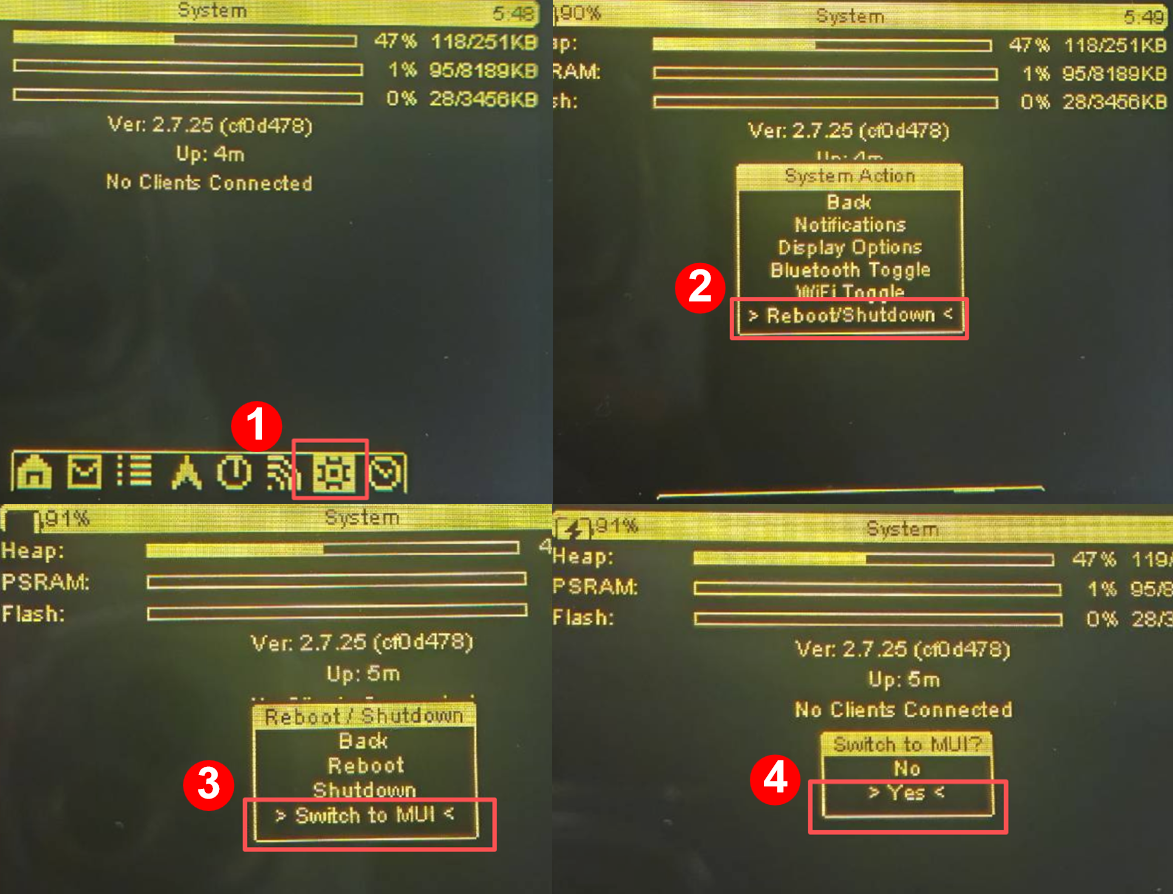
- MUI to BaseUI
- BaseUI to MUI
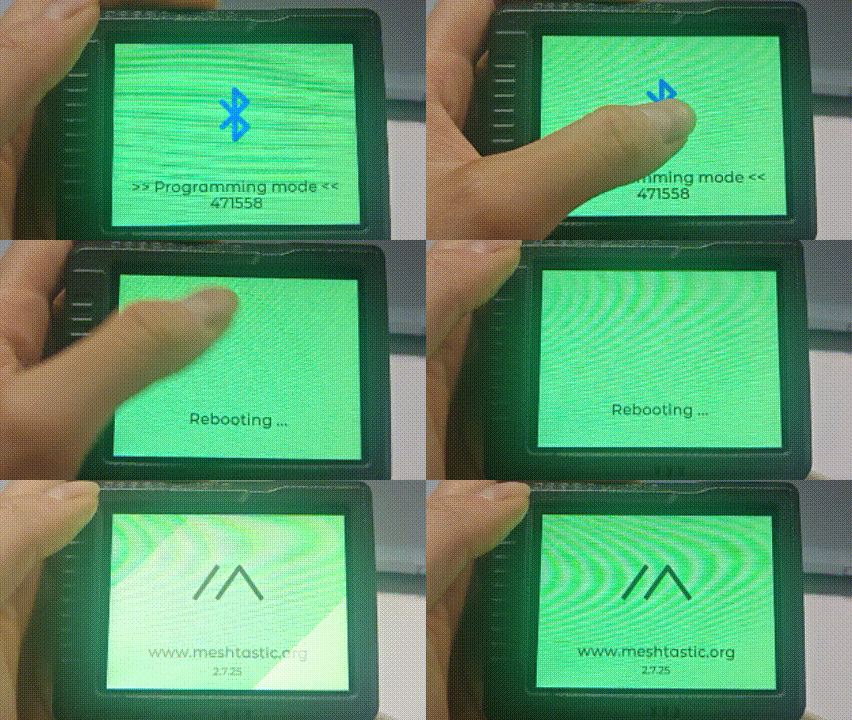
Go to Setting page -> Choose Reboot/Shutdown -> Long press the Bluetooth icon -> Click OK
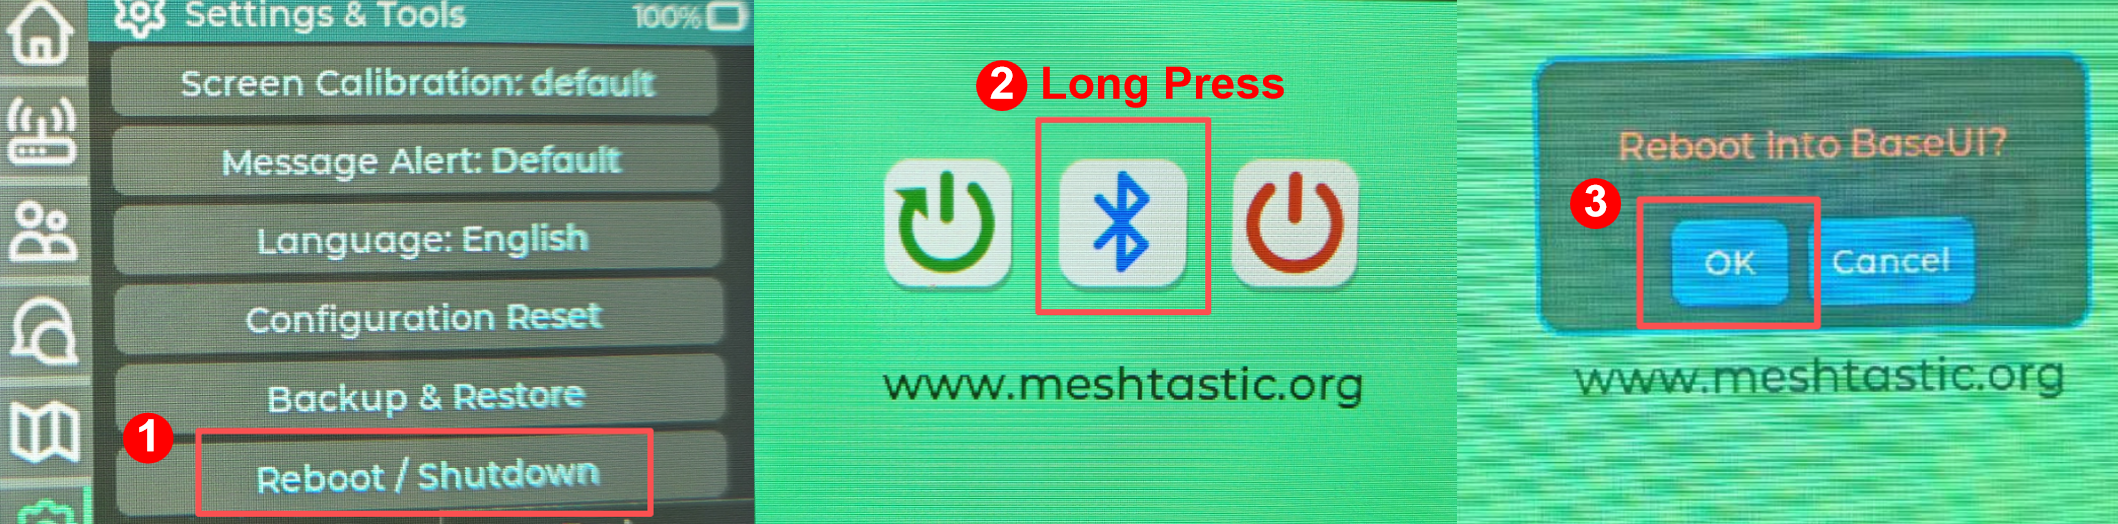
The BaseUI switch popup appears when you long-press the Bluetooth icon.
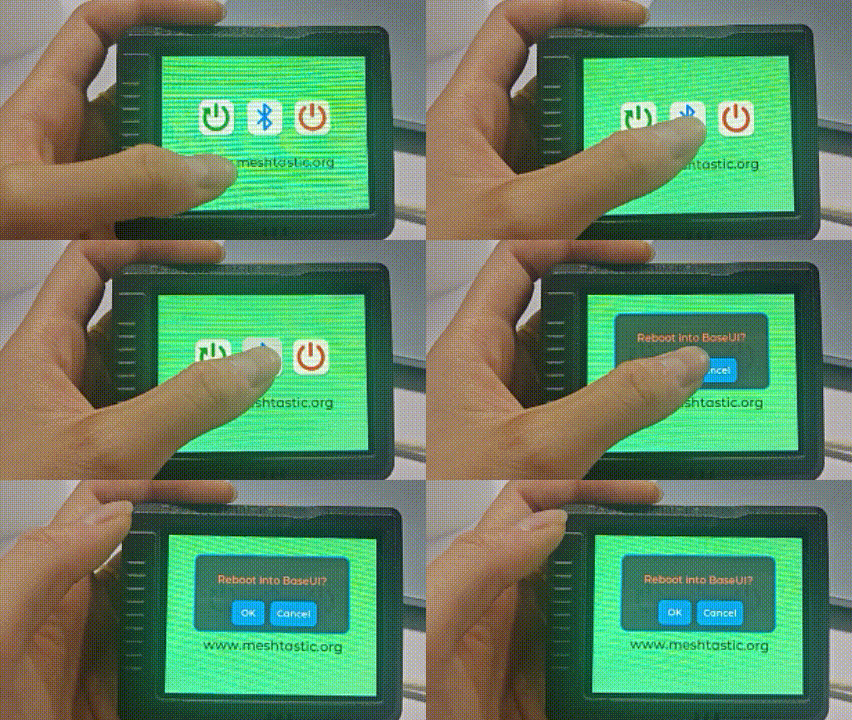
If you just click the Bluetooth icon, you will enter Bluetooth mode. If so, long press the Bluetooth icon shown on the screen, the device will automatically reboot to MUI.
Phone Connection
Go to Setting page, click Reboot/Shutdown, then click the Bluetooth icon.
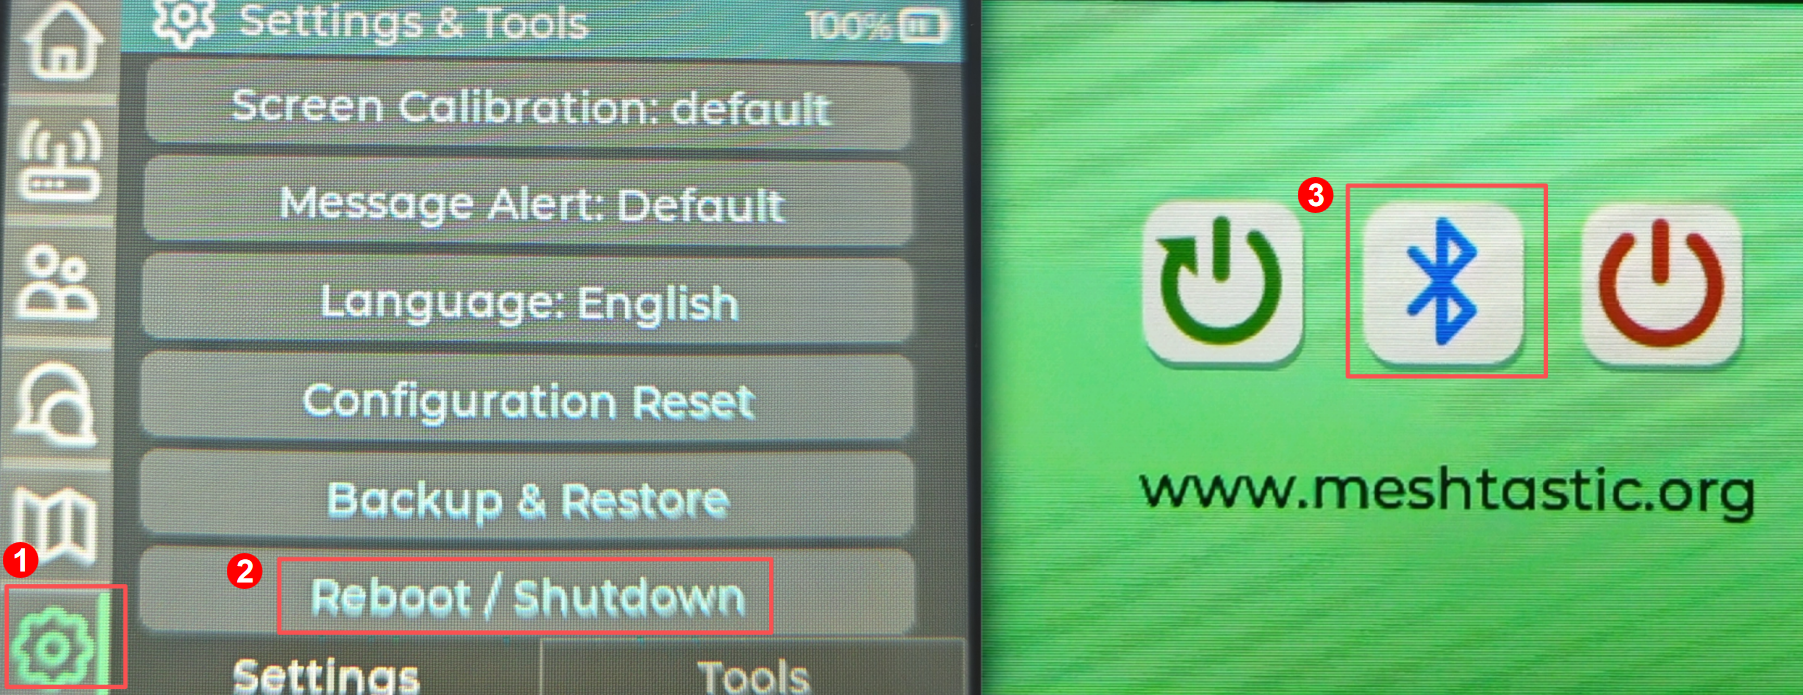
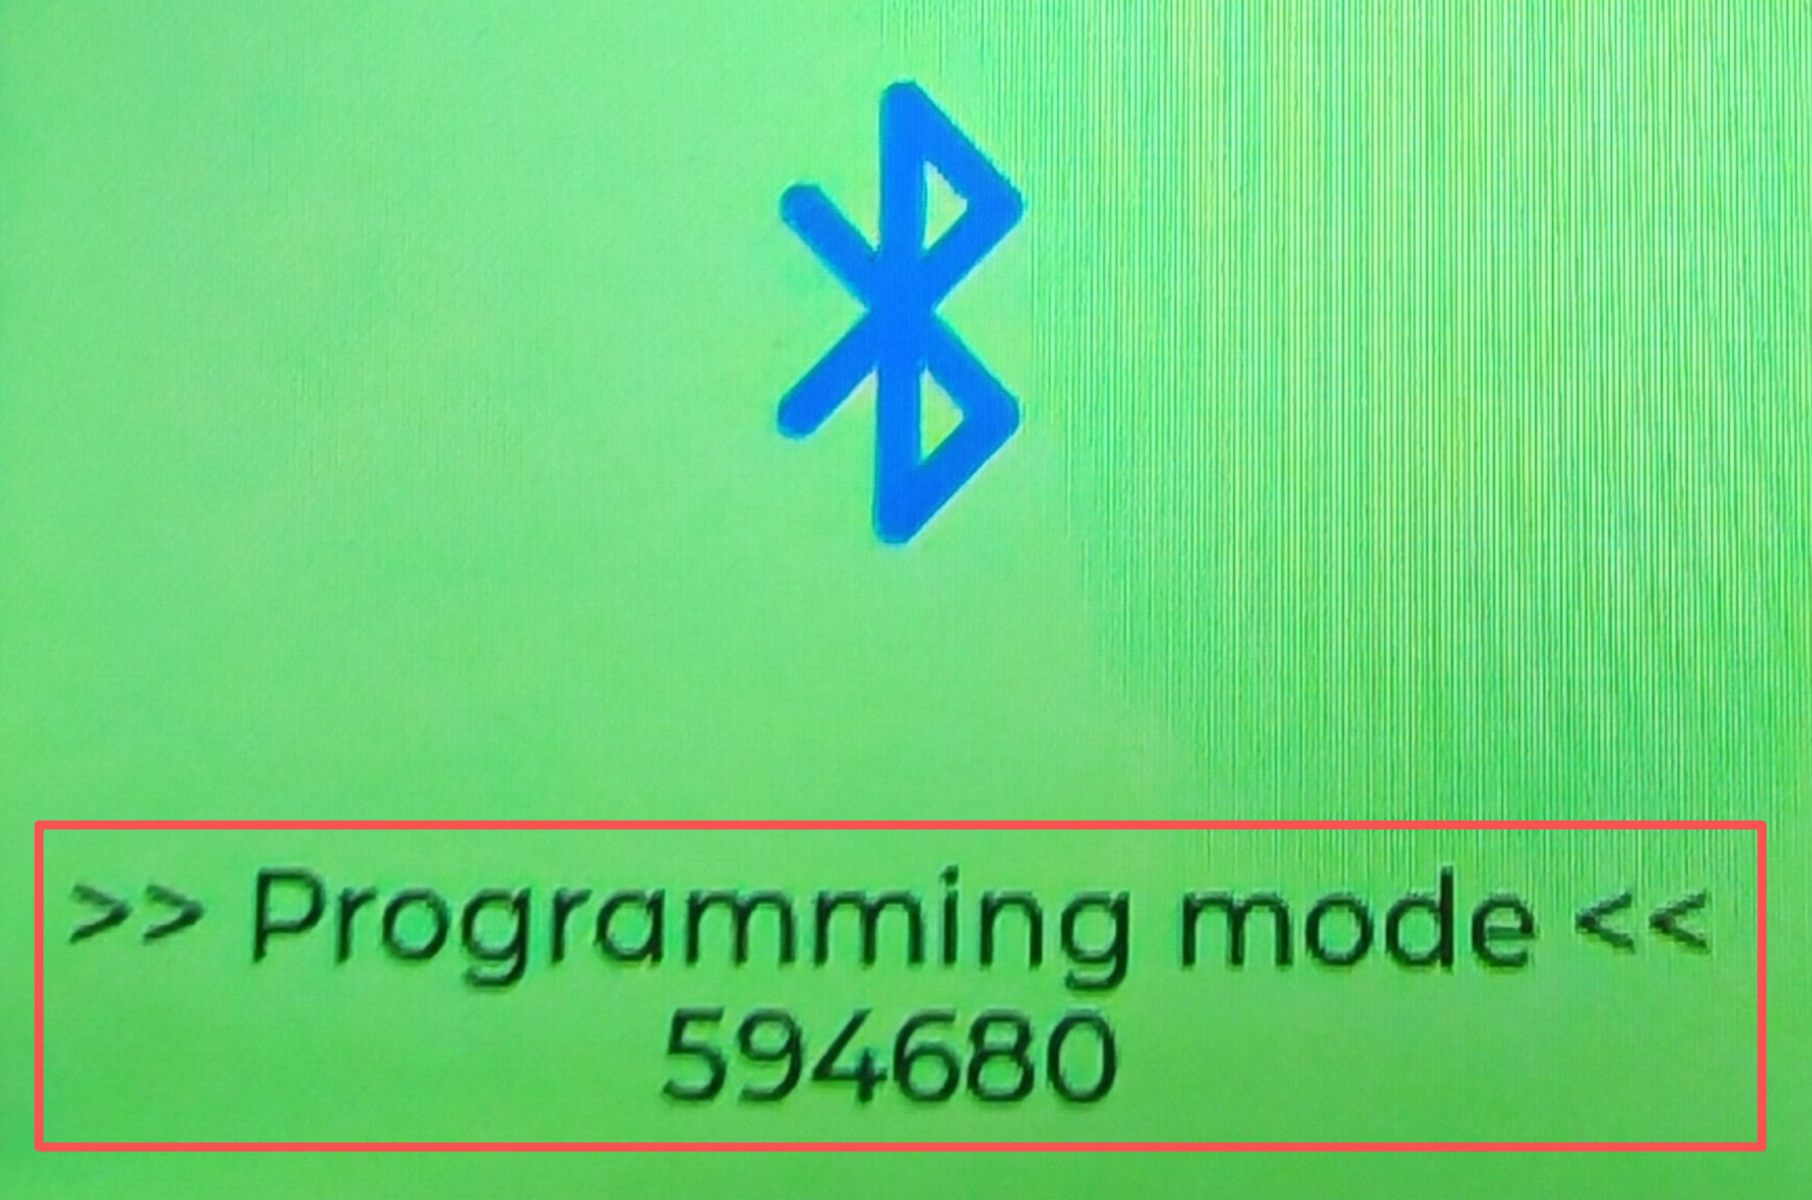
The device will then reboot in Bluetooth mode. The Bluetooth pairing code will be shown on the screen.
LoRa Configuration
In order to start communicating over the mesh, you must set your region. This setting controls which frequency range your device uses and should be set according to your regional location.
Region List
| Region Code | Description | Frequency Range (MHz) | Duty Cycle (%) | Power Limit (dBm) |
|---|---|---|---|---|
| UNSET | Unset | N/A | N/A | N/A |
| US | United States | 902.0 - 928.0 | 100 | 30 |
| EU_868 | European Union 868MHz | 869.4 - 869.65 | 10 | 27 |
Refer to LoRa Region by Country for a more comprehensive list.
EU_868 has to adhere to an hourly duty cycle limitation of 10%, calculated every minute on a rolling 1-hour basis. Your device will stop transmitting if you reach it, until it is allowed again.
- Configure on MUI
- Configure on Phone
Go to Setting page, click Region, choose region and then click the OK.
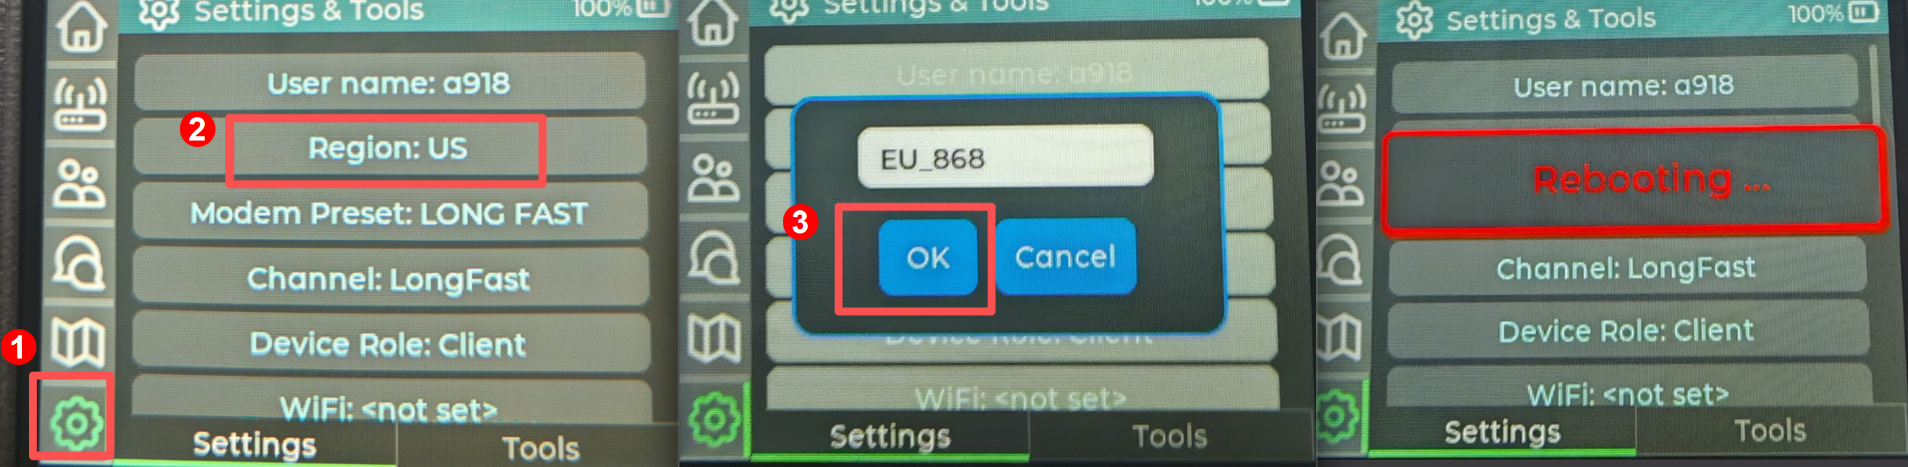
- IOS App
- Android App

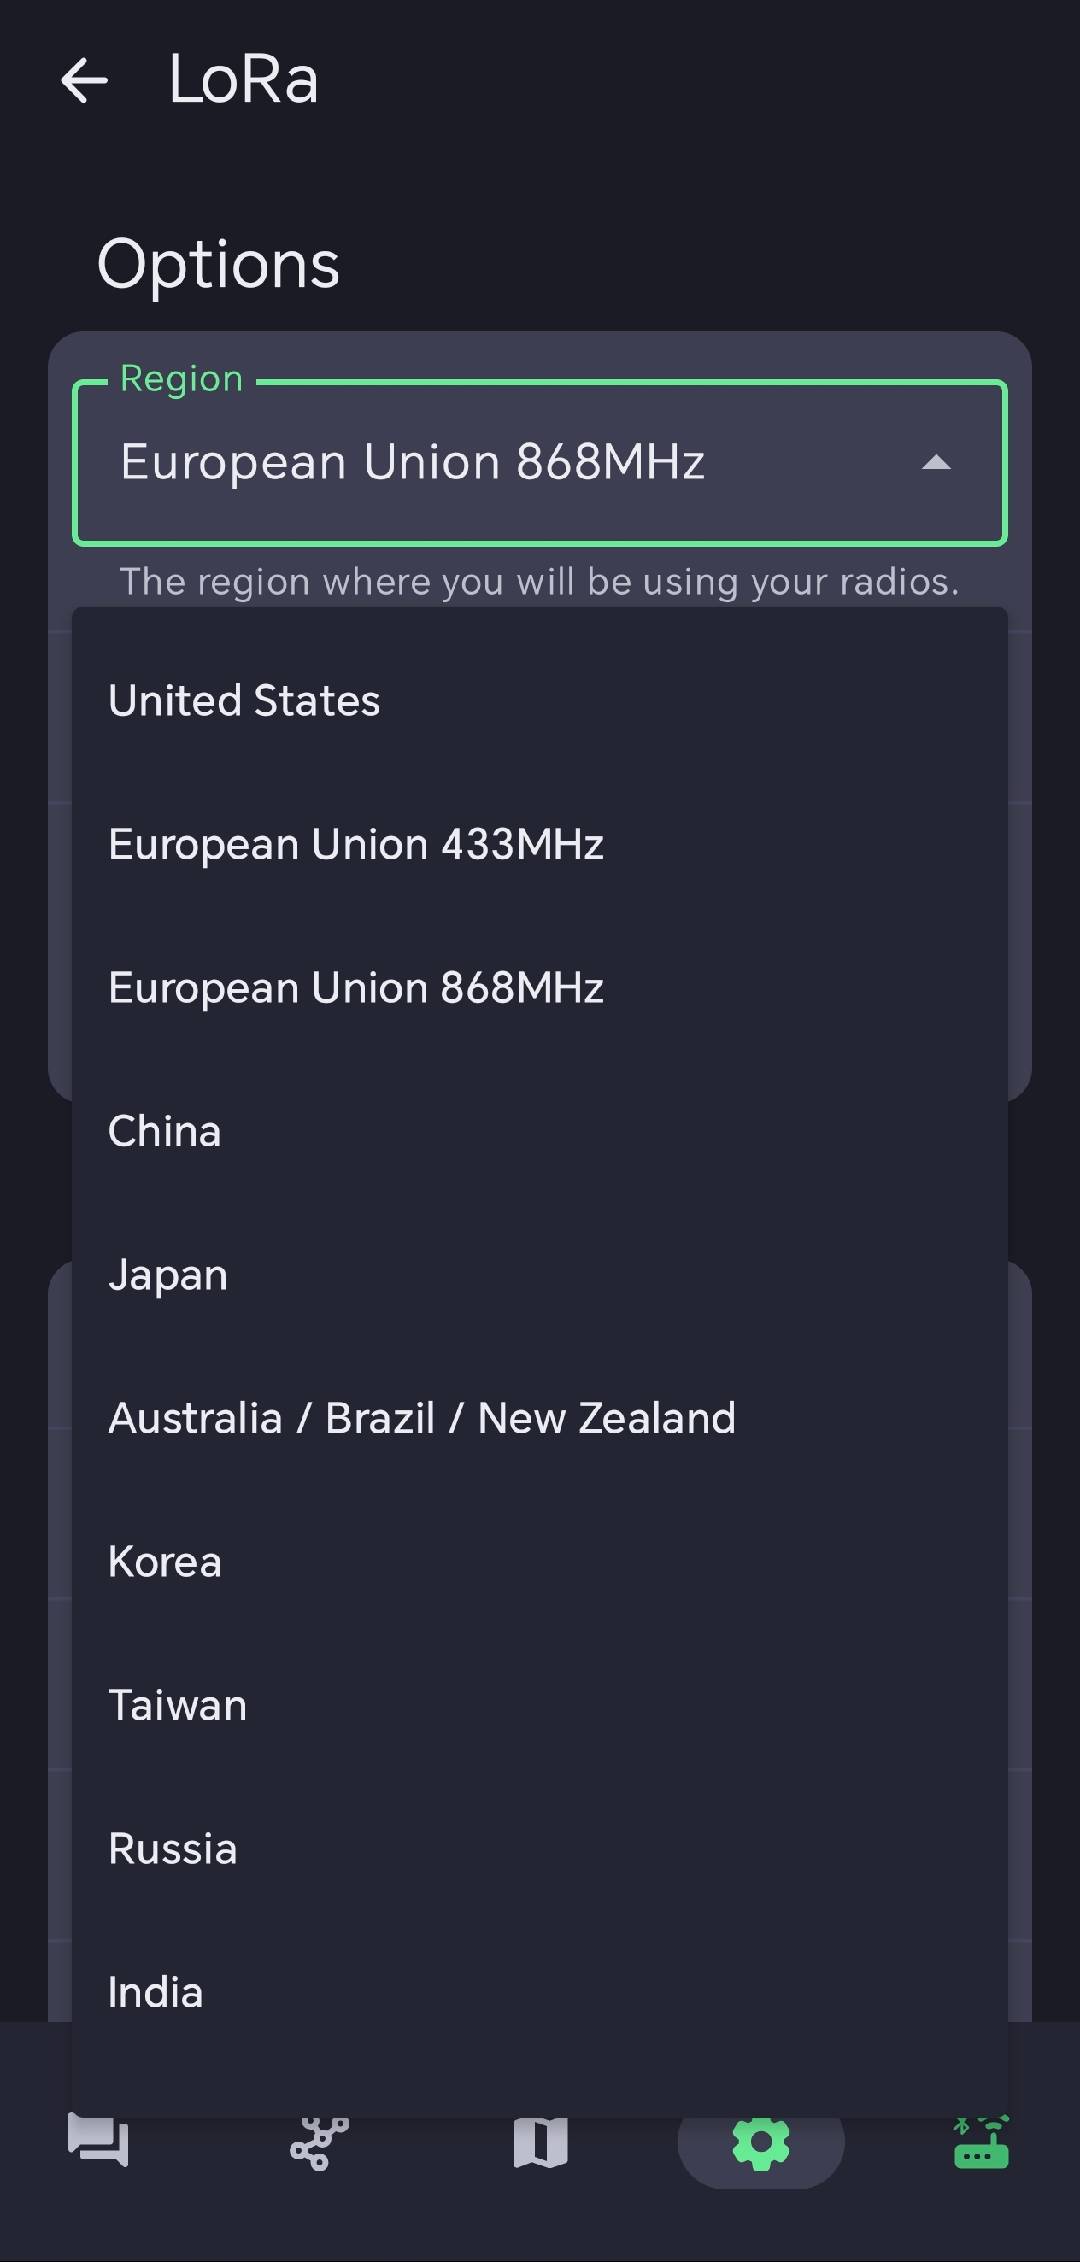
Now that you have set the LoRa region on your device, you can continue with configuring any LoRa Configs to suit your needs.
Map Usage
- Online Map
- Offline Map
Step1. Enable GPS
You need to enable GPS to get position. This can be configured directly on device by long pressing the position icon.
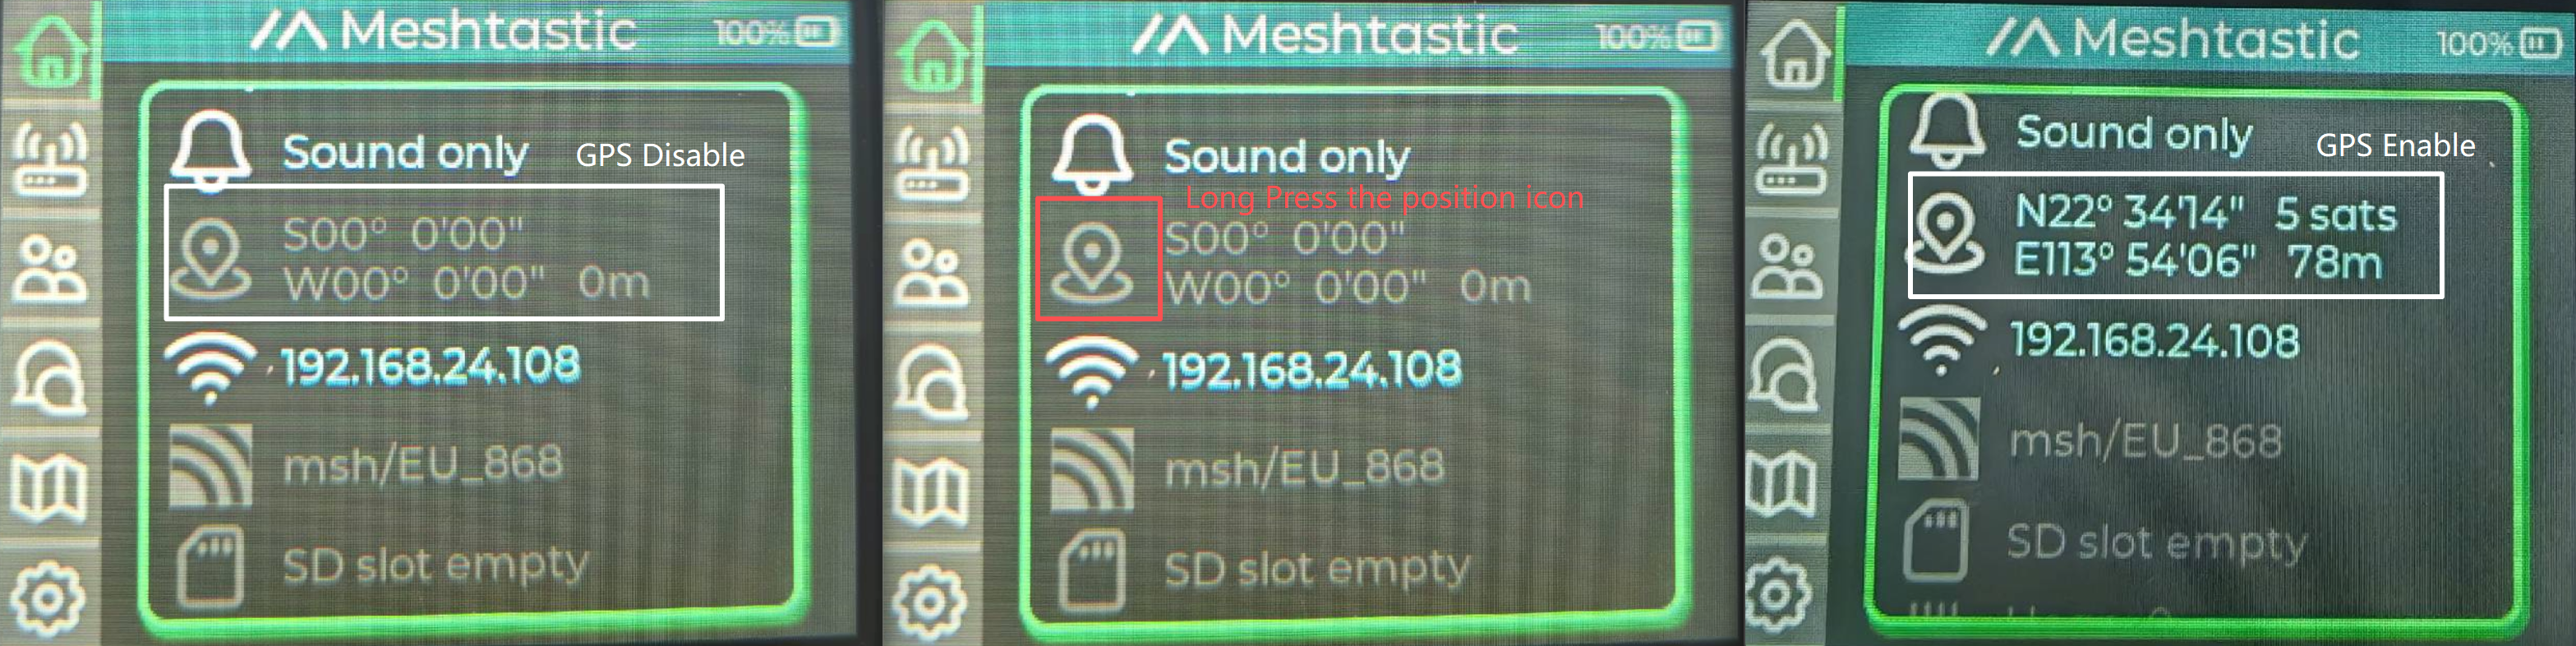
Also, you can configure it on your phone APP.
Step2. SD Card Preparation
You need to format and install map in your SD card. For detailedd SD card usage tutorial, please click here to view.
Step3. Install SD Card
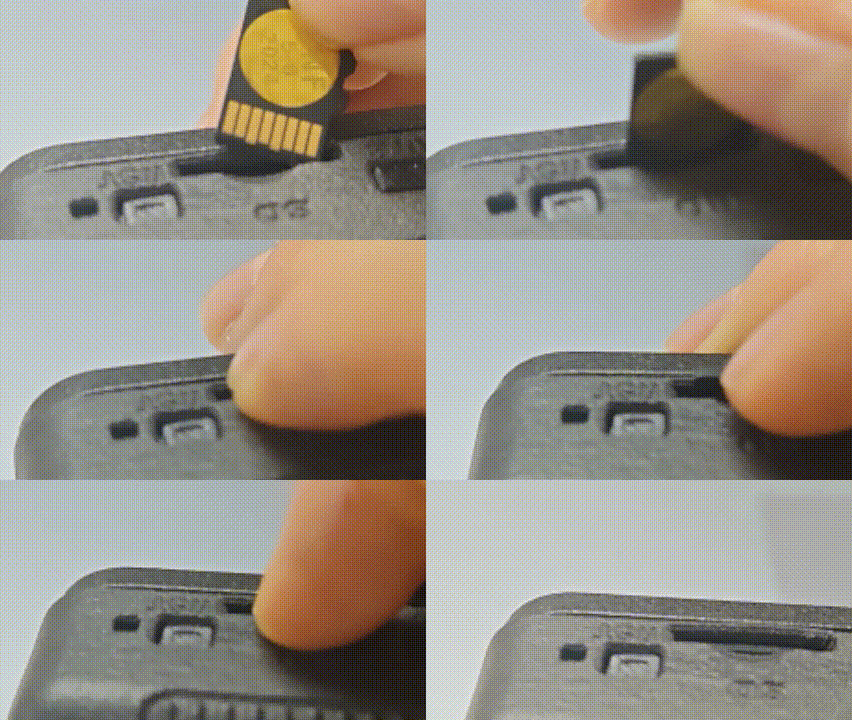
Step4. View Map
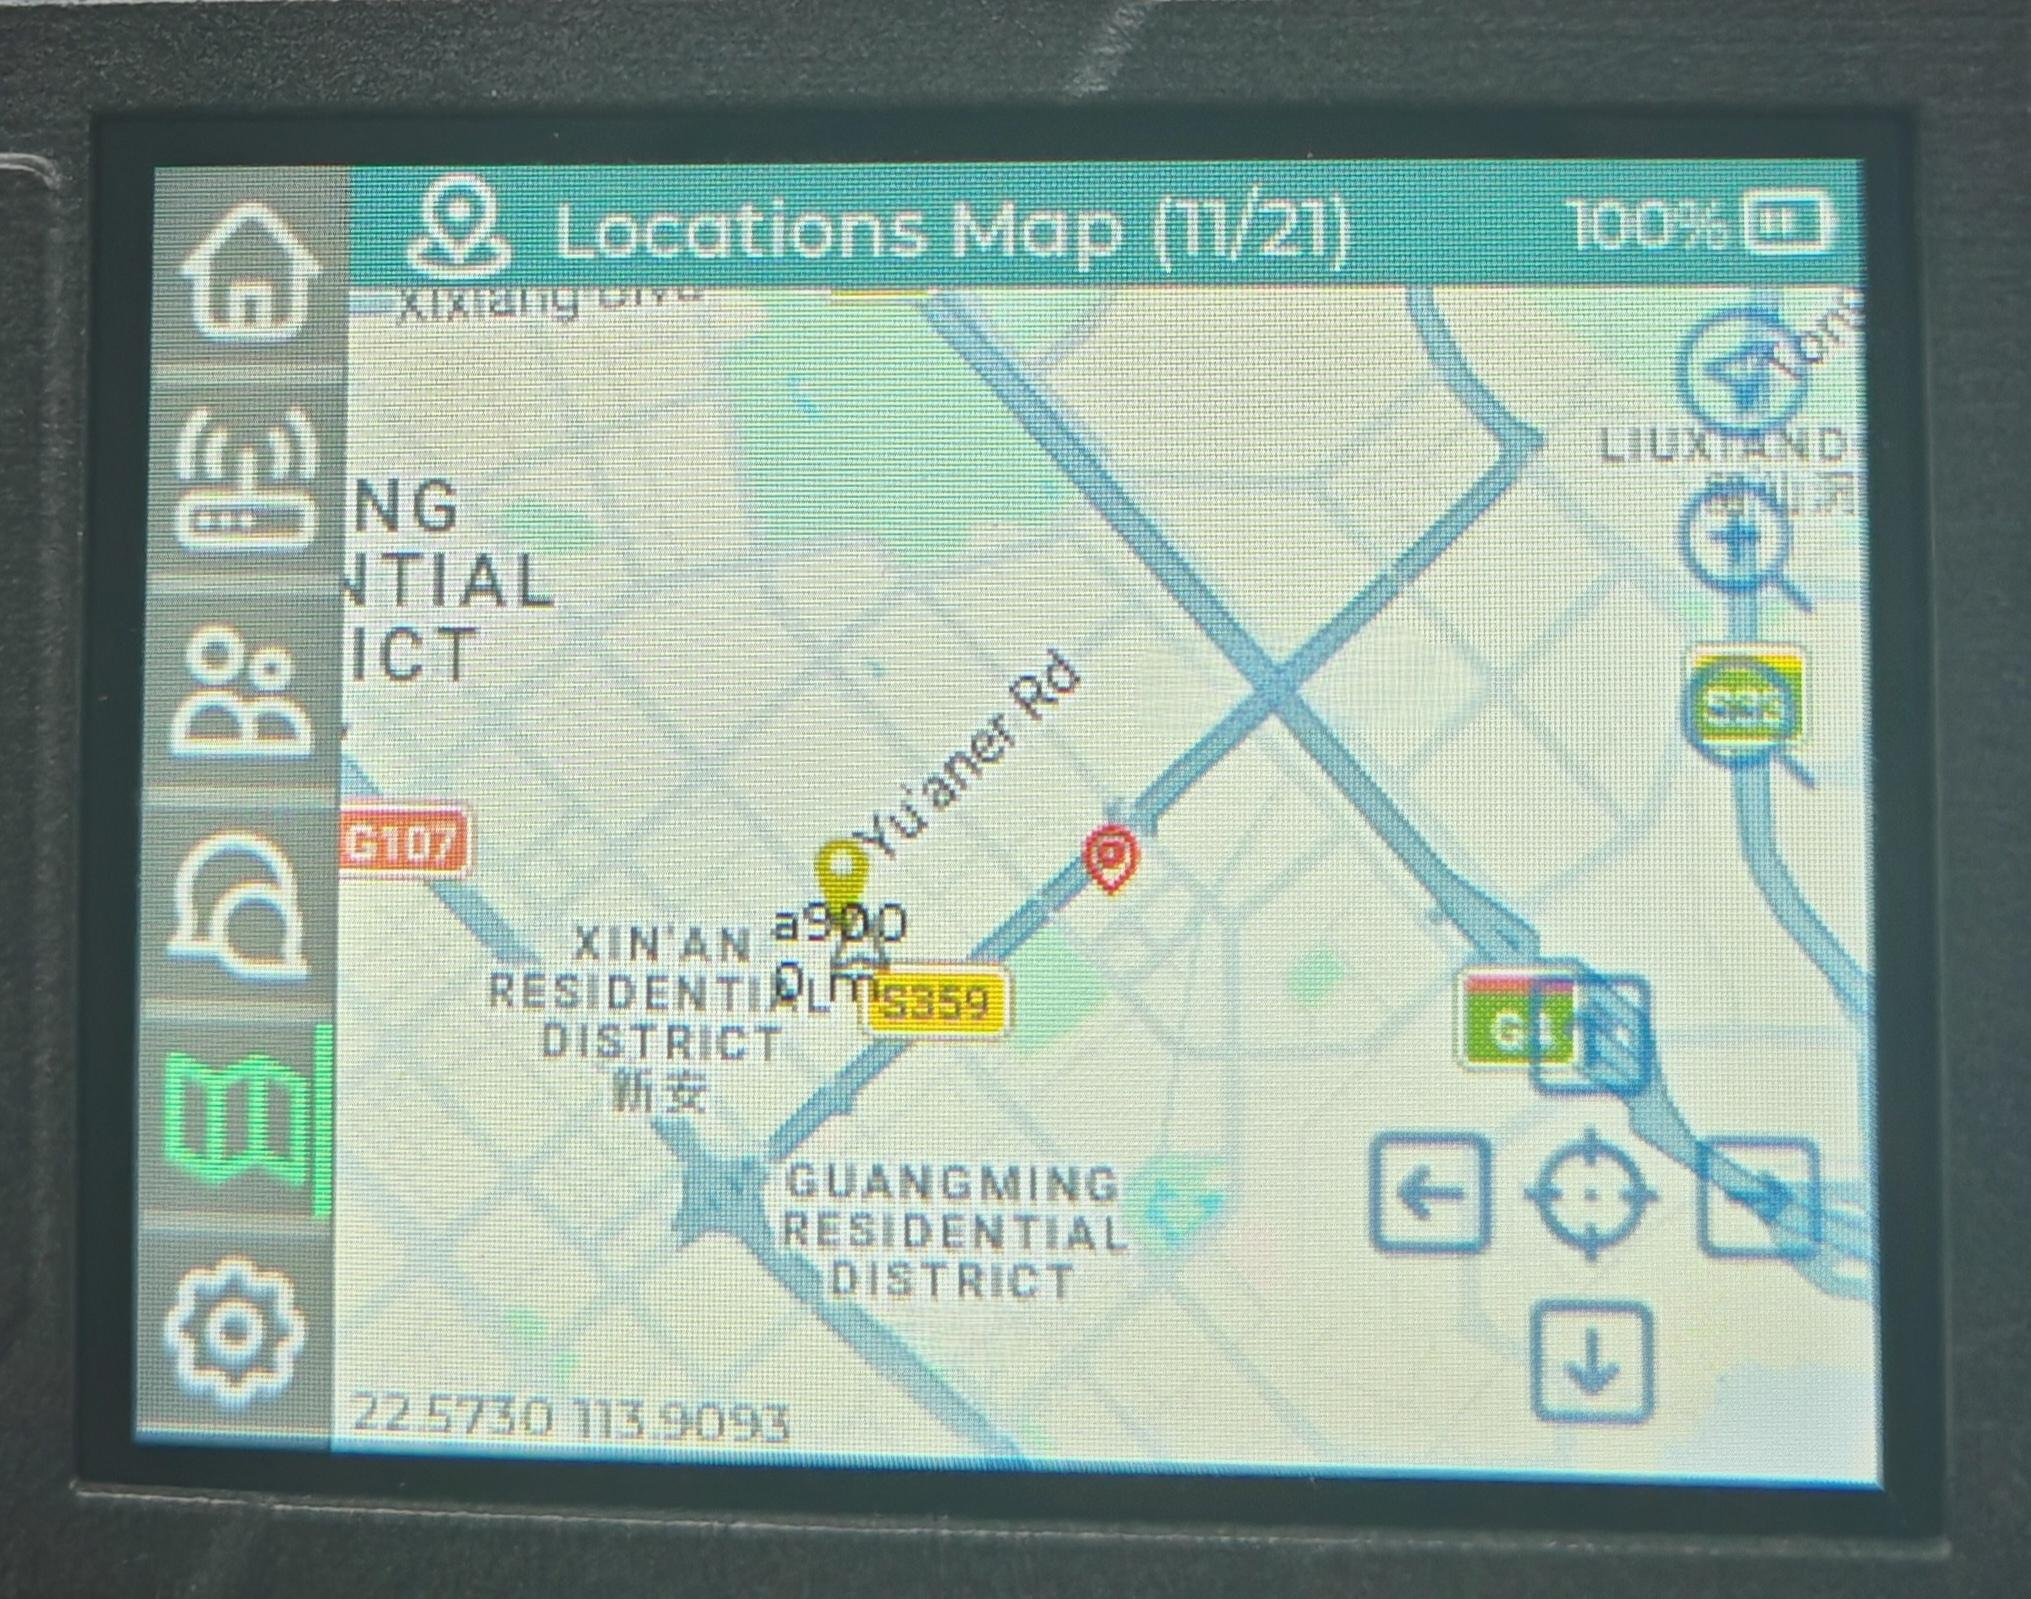
Waiting for the map to load. After successfully connecting to Wi-Fi and obtaining location, the device will display an offline map.
Step1. Enable GPS
You need to enable GPS to get position. This can be configured directly on device by long pressing the position icon.
Also, you can configure it on your phone APP.
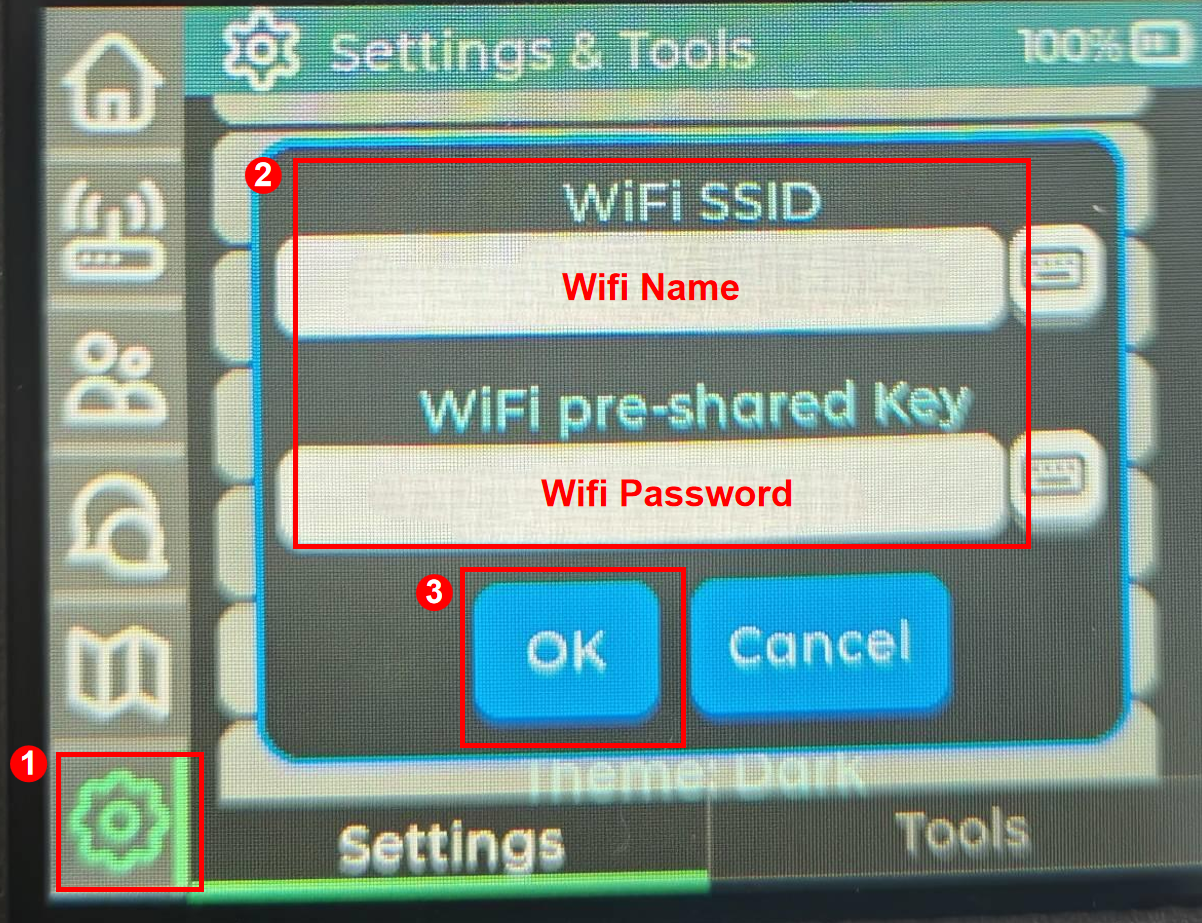
Step2. Set and enable Wifi
Set the Wifi name and password. This can be operated directly on device.
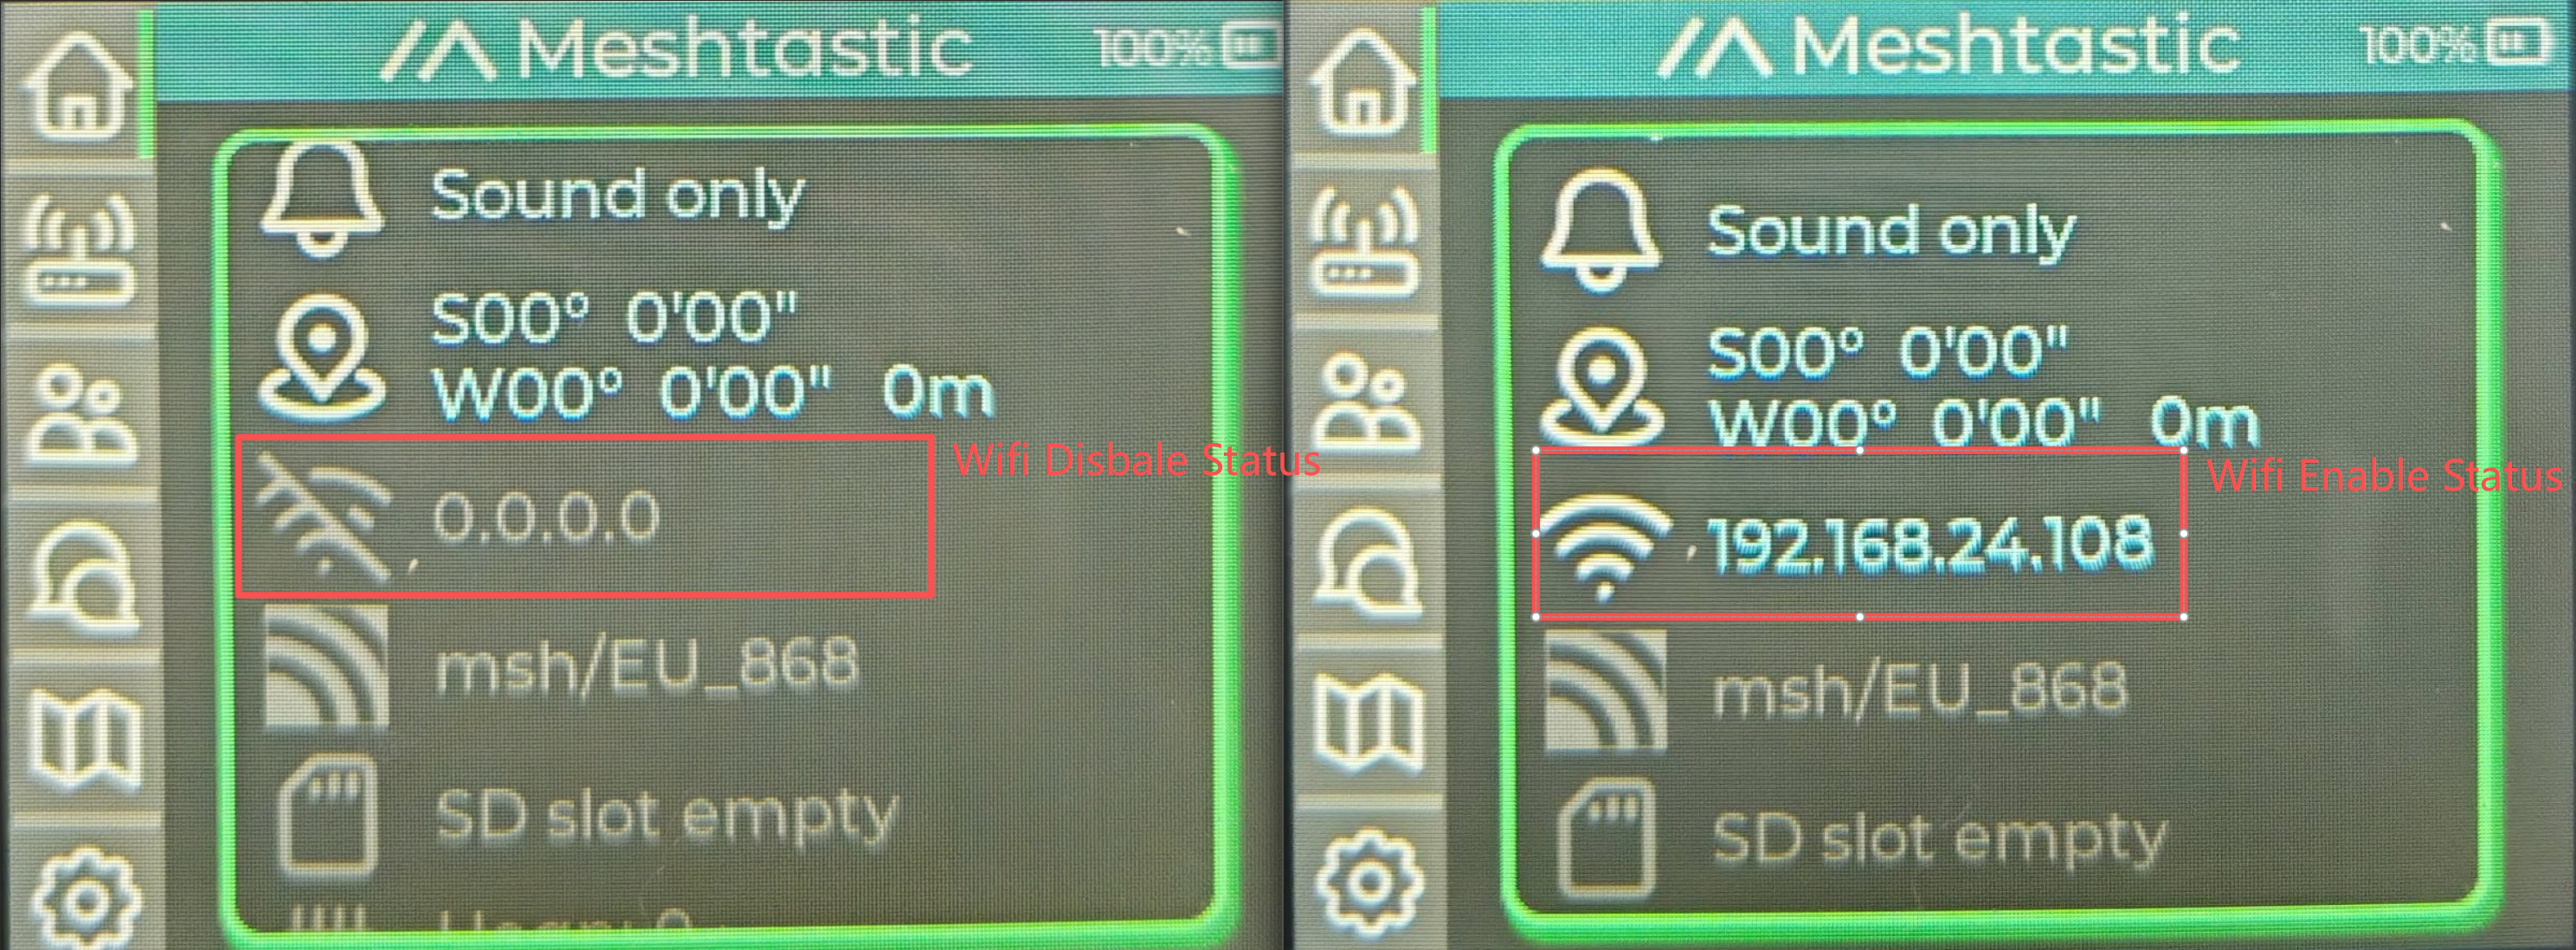
Wifi is disabled when the wifi ip is empty and the wifi icon is grey. Wifi is enabled when the wifi ip is displayed and the wifi icon is white.
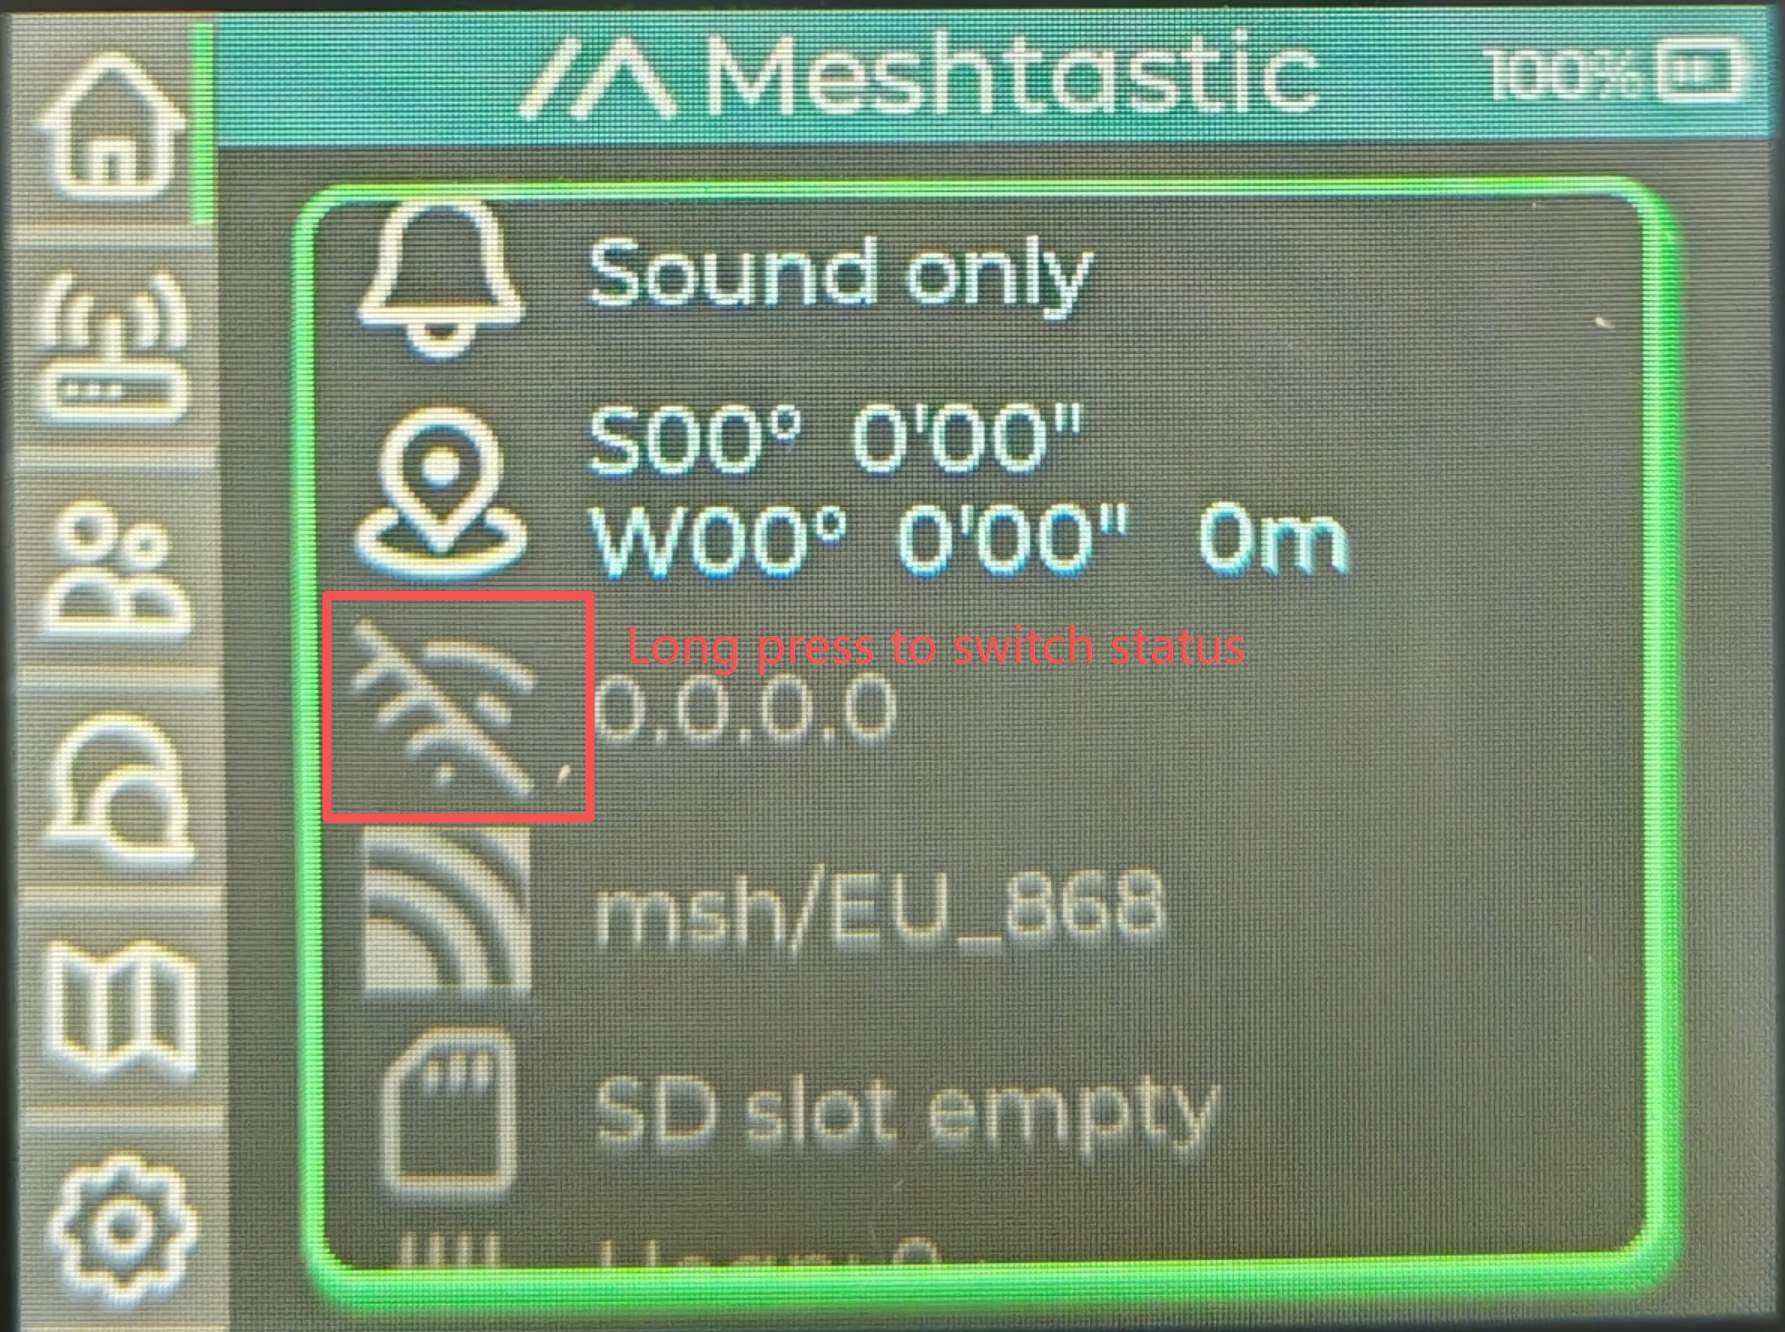
Long press the Wifi icon to switch status.
The connected Wifi should be 2.4G. 5G Wifi can not be used by the device.
Step3. View map
Waiting for the map to load. After successfully connecting to Wi-Fi and obtaining location, the device will display an online map.
Advance Interation
Menu Bar
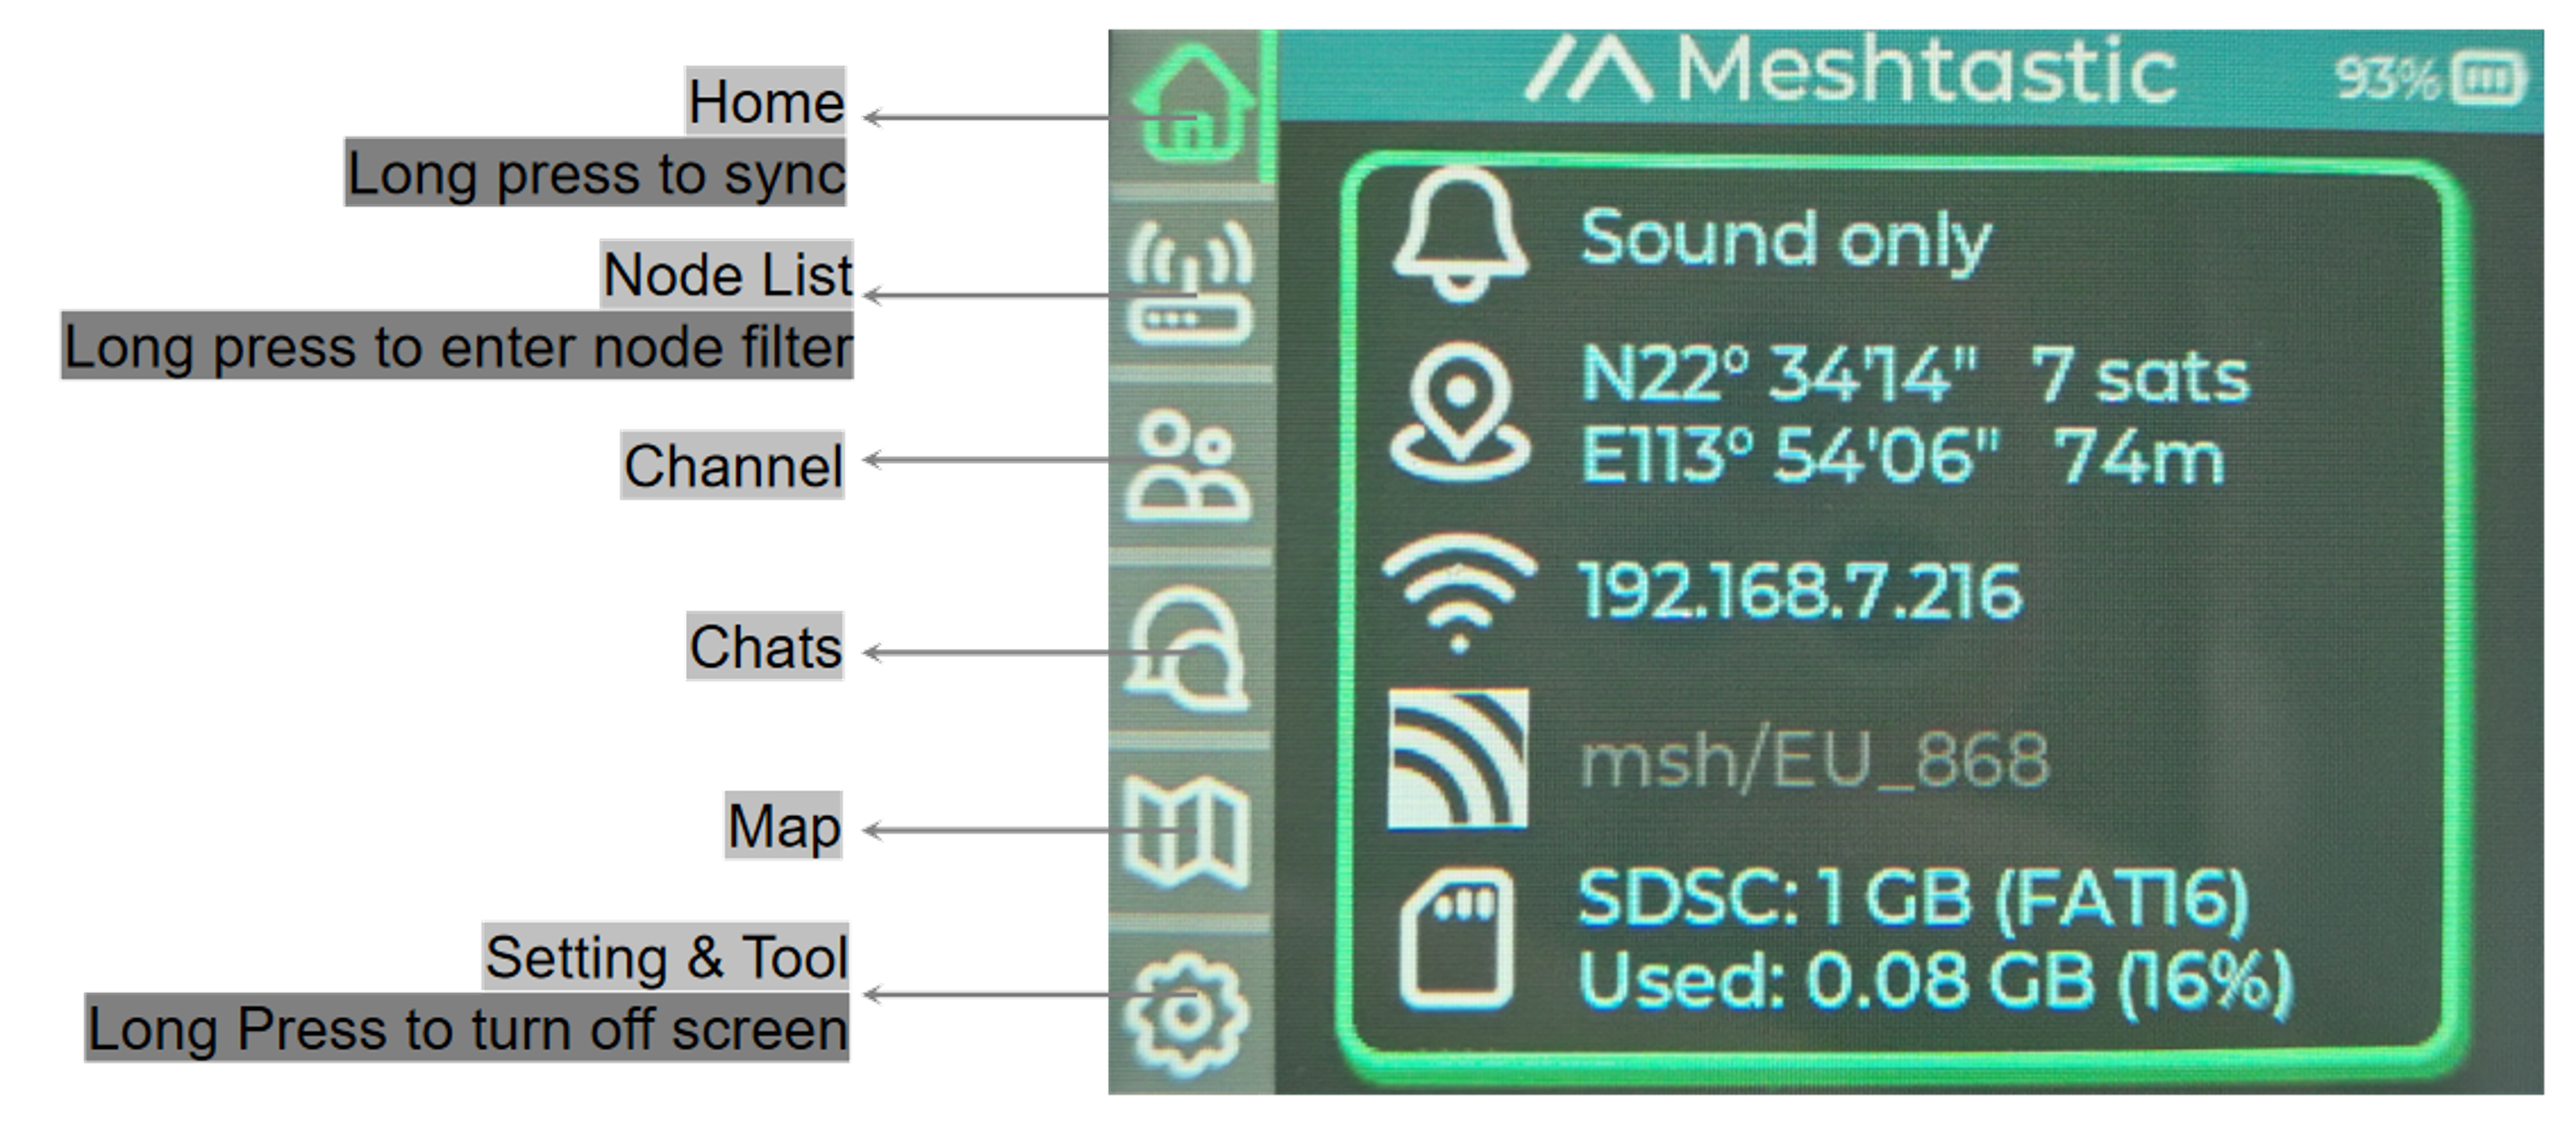
Home Page
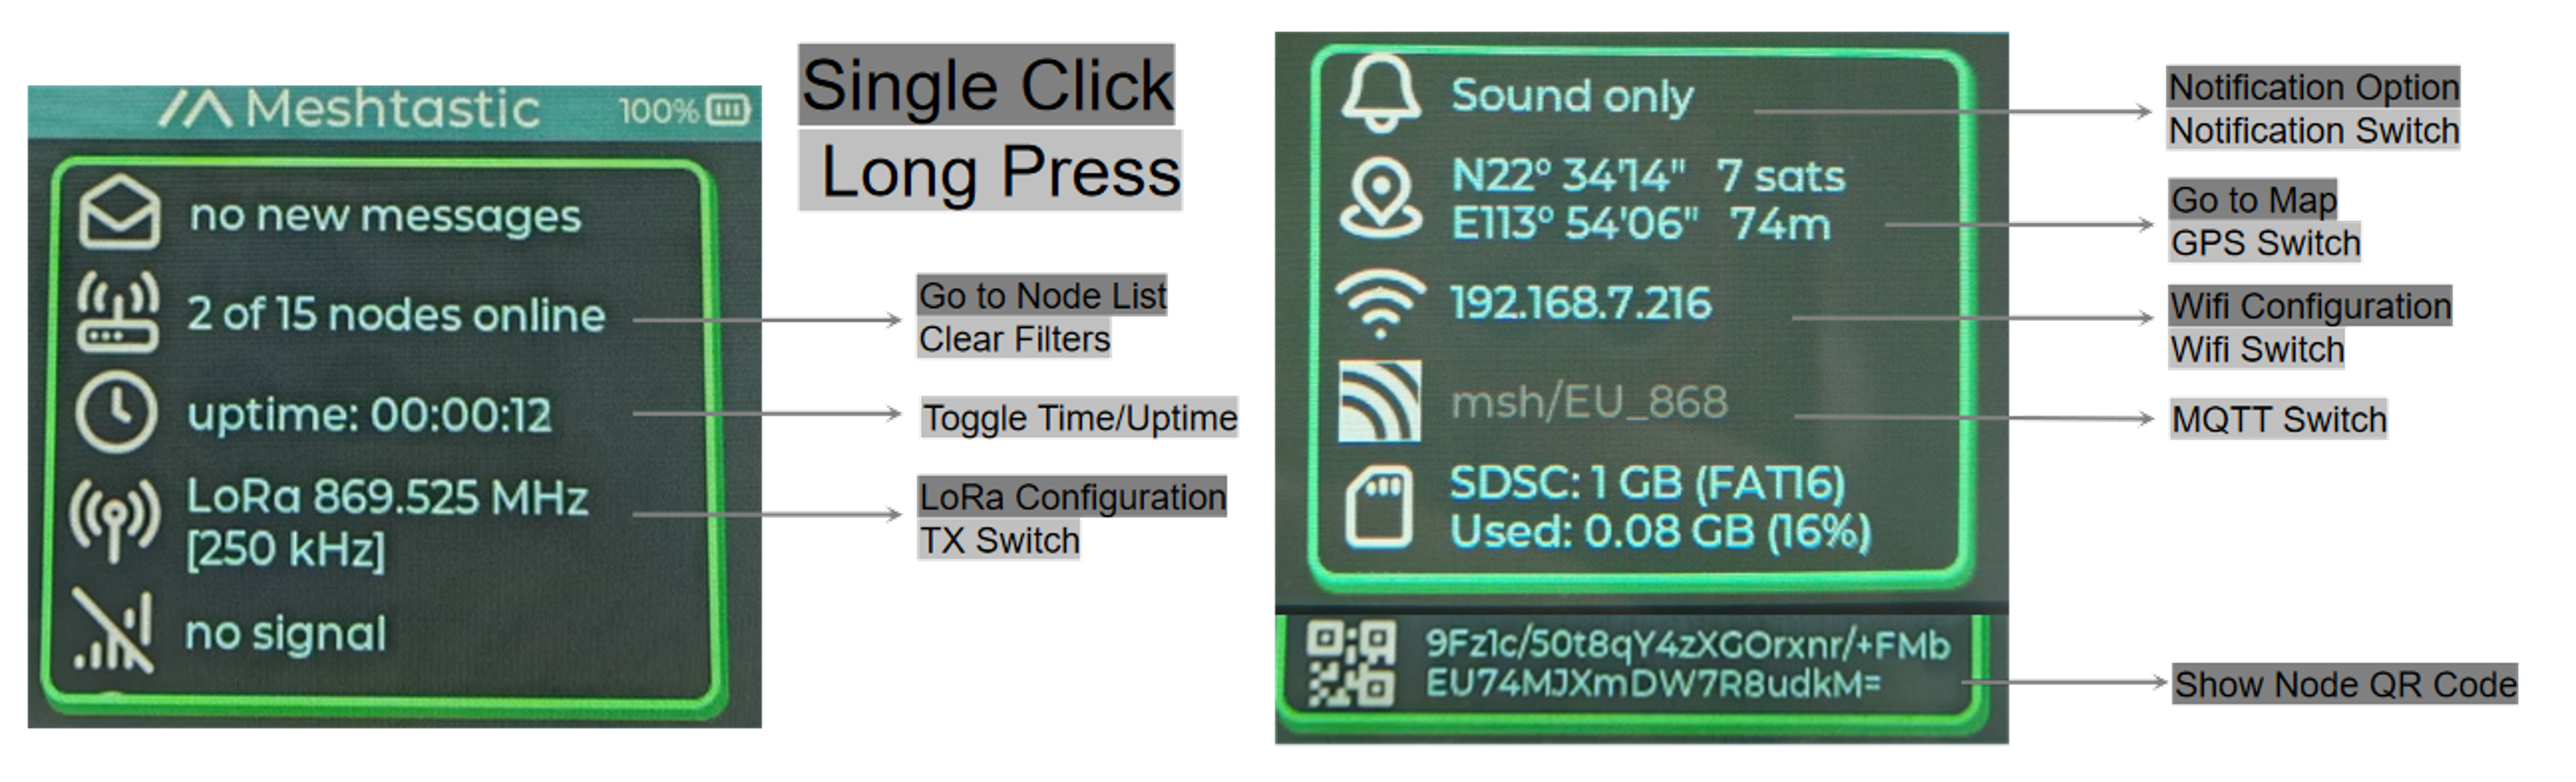
Node Page
-
Click any node: Expand node detailed parameter information
-
Long press any node: Enter chatting
-
Long press coordinate: See node position on map
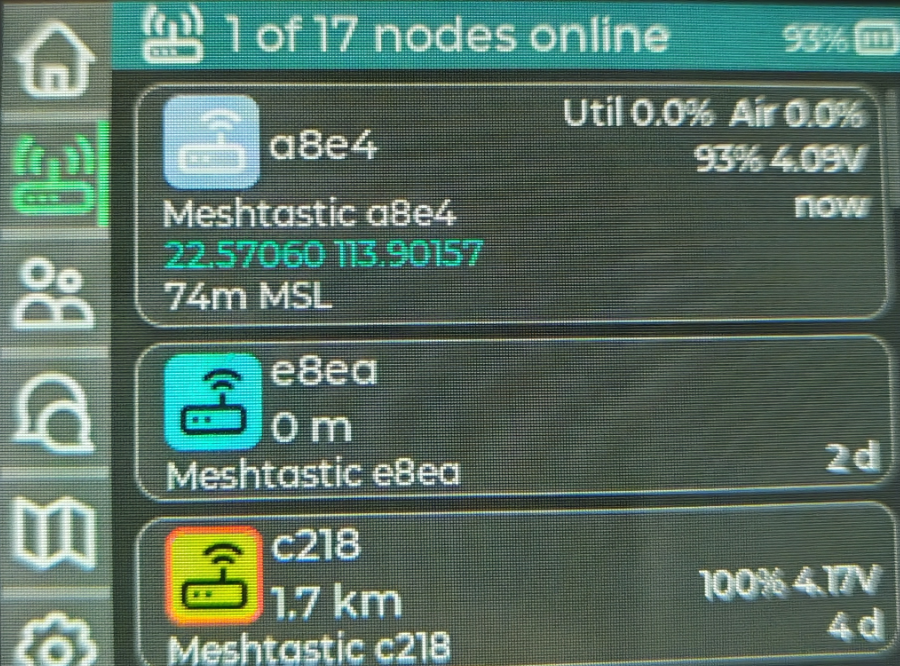
Channel Page
-
Click a channel: Enter channel chatting
-
Long press a channel: Mute/Unmute the channel
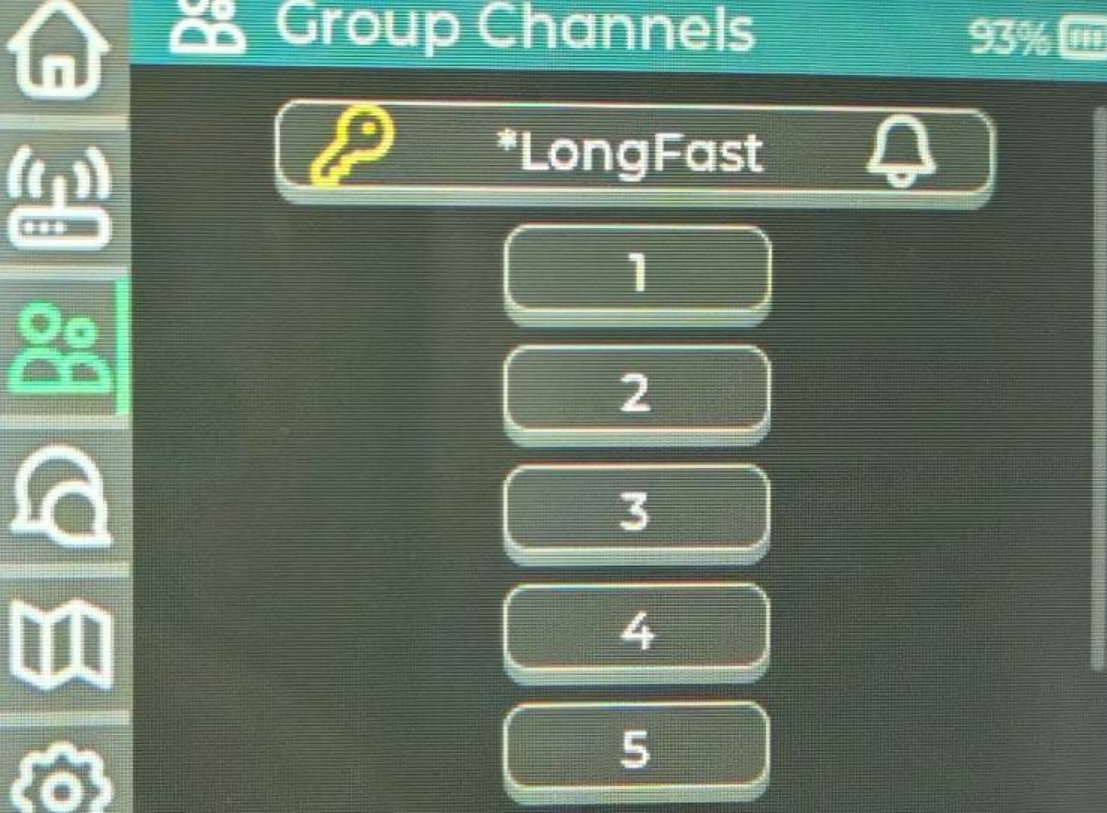
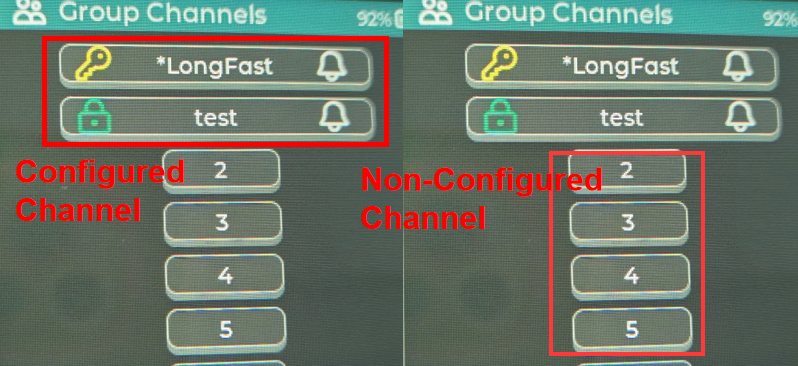
Only configured channels, such as the named channel shown in the left image below, can be interacted with. Channels like the one shown in the right image, which are not configured and only labeled, cannot be interacted with.
Message Page
-
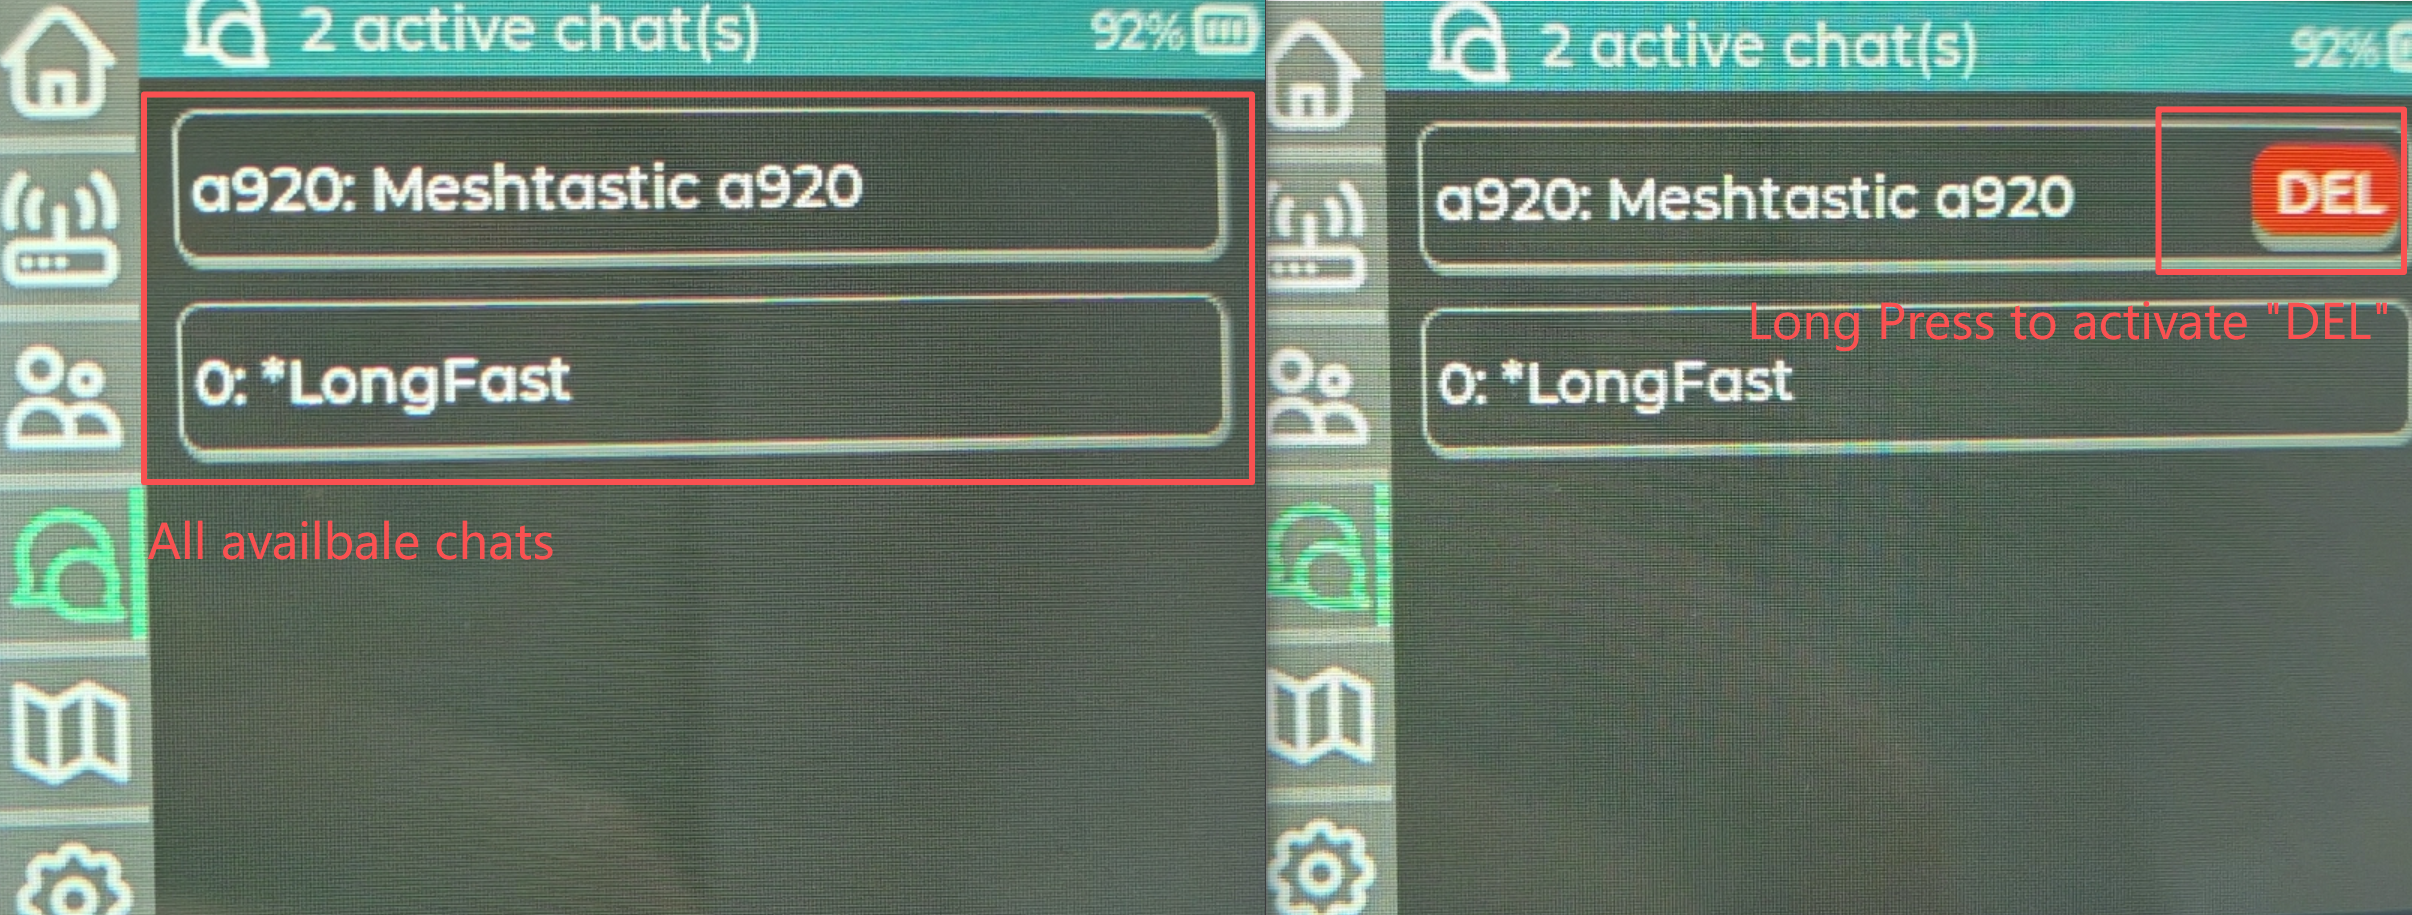
Click a chat: Enter a chatting.
-
Long press a chat: Reveals a DEL button to delete it.
-
Highlighted in orange: Indicates a new unread message.
Setting Page
-
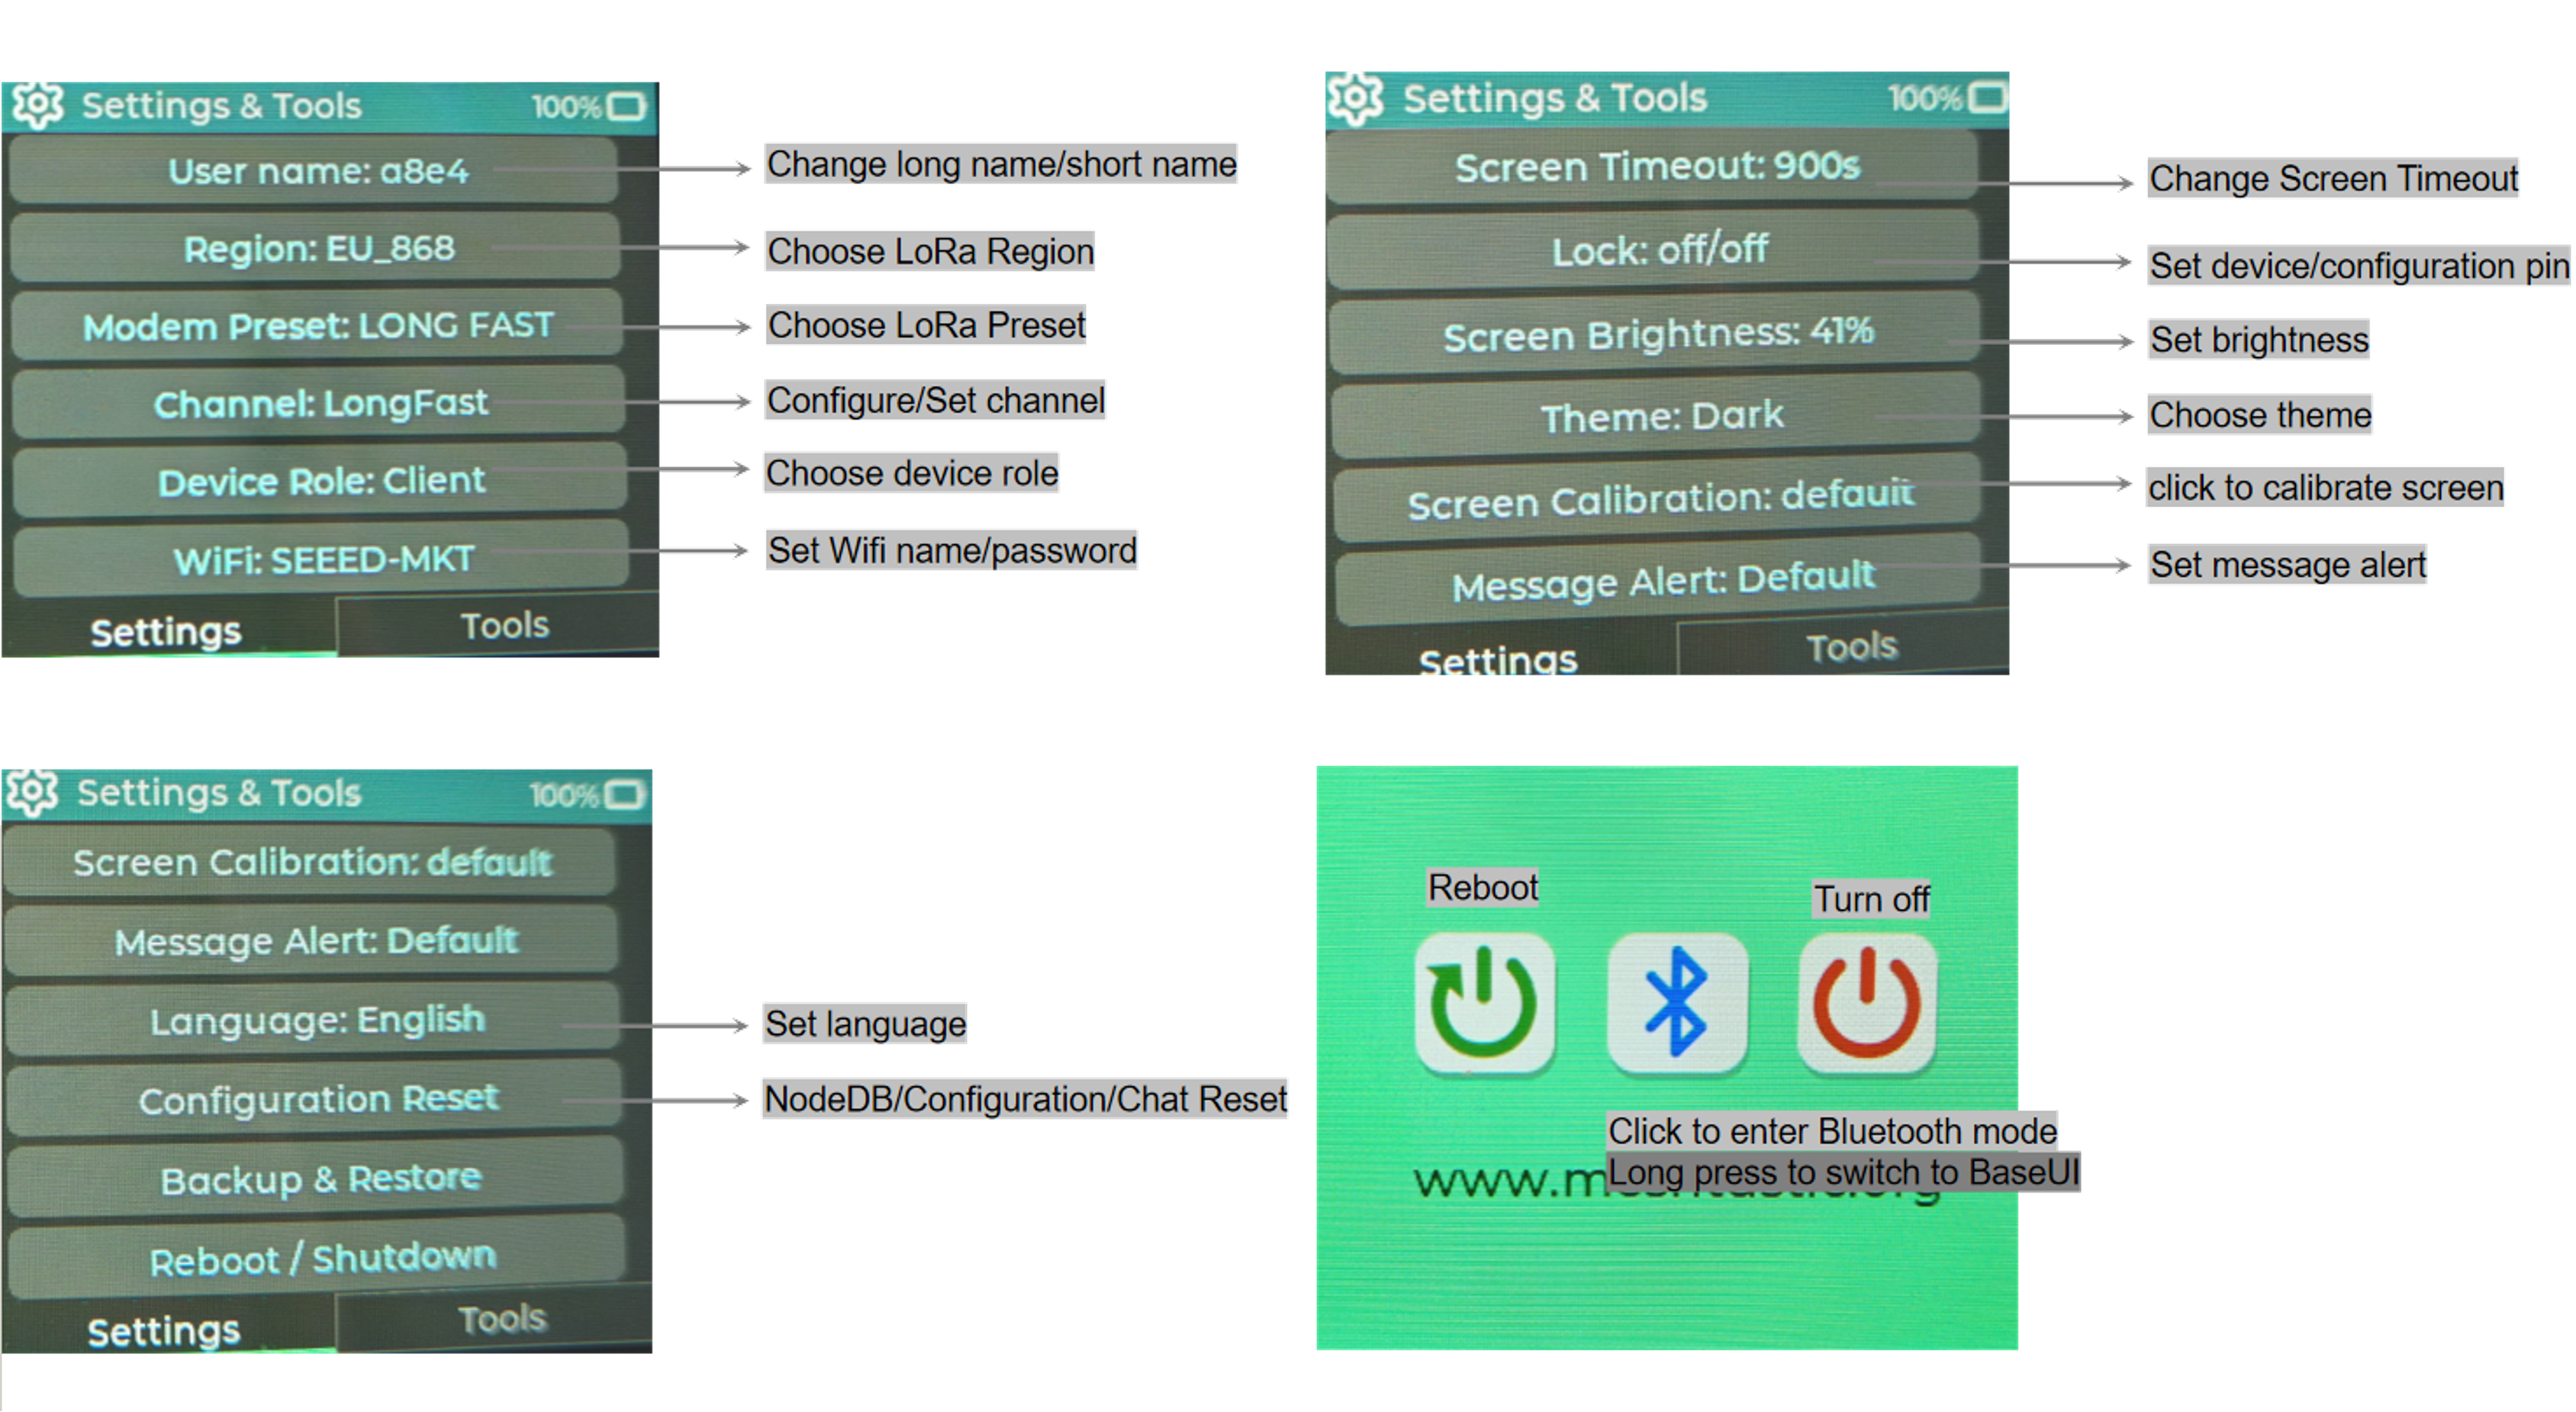
Reboot: Choose "Reboot/Shutdown", click the green "Reboot" icon.
-
Turn off: Choose "Reboot/Shutdown", click the red "Turn off" icon.
-
Enter Bluetooth mode: Choose "Reboot/Shutdown", click the blue "Bluetooth" icon.
-
Switch to BaseUI: Choose "Reboot/Shutdown", long press the blue "Bluetooth" icon.
Tool
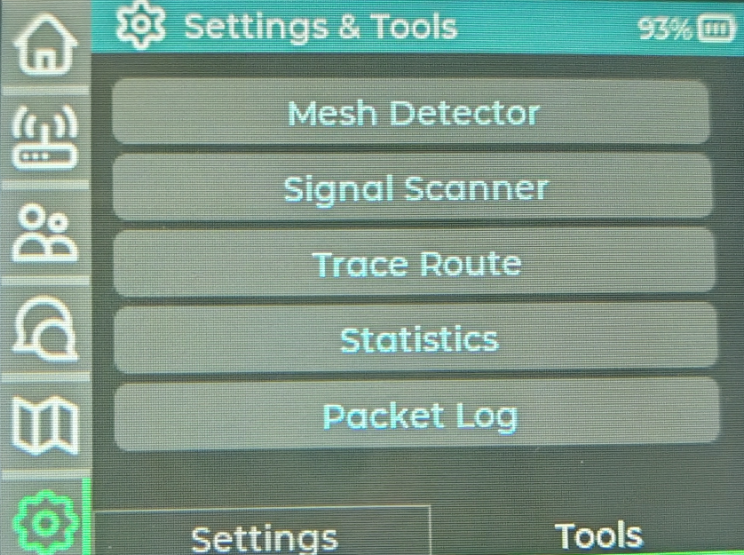
- Mesh Detector: Displays detected active nodes
- Signal Scanner: Displays RSSI and SNR of the selected node
- Trace Route: Displays the routing path of the selected node
- Statistic: Displays packet decoding information
- Packet Log: Show device log
MUI Device Requirement
MUI is designed to run on hardware that supports Meshtastic and provides a graphical display. To use all MUI features, including offline maps, your device should meet the following requirements.
| Component | Requirement |
|---|---|
| Display | Color display with touch support |
| GNSS | Built-in GNSS receiver for location services |
| LoRa® | Compatible LoRa® radio for Meshtastic communication |
| Storage | microSD card slot for offline maps |
| MCU | A high-performance MCU is required, capable of supporting both screen display and Meshtastic firmware |
Seeed Wio Tracker L2 is the recommended hardware platform for MUI.
It integrates all required components in a single device:
- Color touchscreen
- Built-in GNSS
- LoRa® communication
- Wi-Fi and Bluetooth® connectivity
- microSD card slot for offline maps
- USB Type-C for programming and power
No additional expansion boards are required.
FAQ
How to activate keyboard
Click the keyboard icon shown as below.
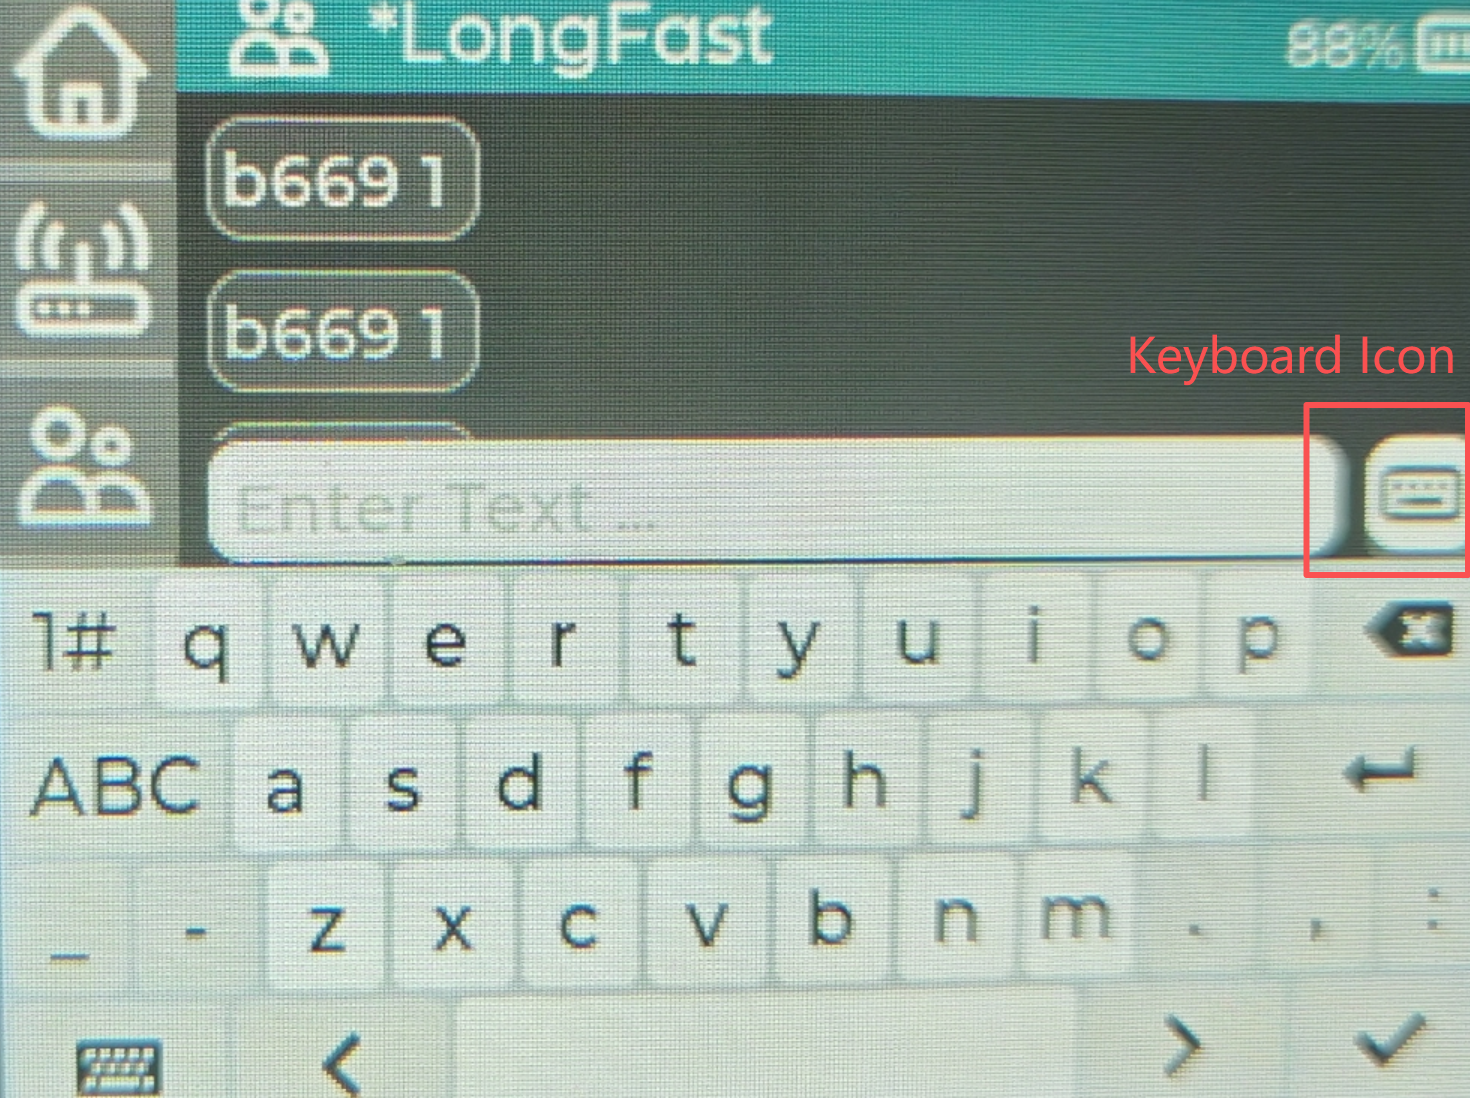
Then you can enter numbers and letters. Not every page has a keyboard icon; it usually appears only on pages where input is required.
Why my wifi automatically turned off
When you enter Bluetooth pairing mode, the device wifi will be automatically set to be disabled. You can enable wifi in the phone app wdevice is in Bluetooth mode.
How to send mqtt message in MUI
Device can not transmit mqtt message when it is in MUI. If you want to transmit mqtt message, please:
Step1. Enter Bluetooth pairing mode
Step2. Pair your device with phone APP
Step3. Configure mqtt in phone APP
Step4. Start message transmission