How to Import and Control SO100Arm Kit in Isaac Sim 4.2(Only)
Introduction
The SO-100ARM is a fully open-source robotic arm project launched by TheRobotStudio. It includes the follower arm and the leader robotic arm, and also provides detailed 3D printing files and operation guides. LeRobot is committed to providing models, datasets and tools for real-world robotics in PyTorch. Its aim is to reduce the entry barrier of robotics, enabling everyone to contribute and benefit from sharing datasets and pretrained models.
This wiki provides instructions on how to import the SO100 Arm Kit robotic arm into NVIDIA's Isaac Sim simulation platform and control it using ROS2 and Python scripts.
Projects Introduction
The SO-ARM100 and reComputer Jetson AI intelligent robot kit seamlessly combine high-precision robotic arm control with a powerful AI computing platform, providing a comprehensive robot development solution. This kit is based on the Jetson Orin or AGX Orin platform, combined with the SO-ARM100 robotic arm and the LeRobot AI framework, offering users an intelligent robot system applicable to multiple scenarios such as education, research, and industrial automation. This wiki provides the assembly and debugging tutorial for the SO ARM100 and realizes data collection and training within the Lerobot framework.
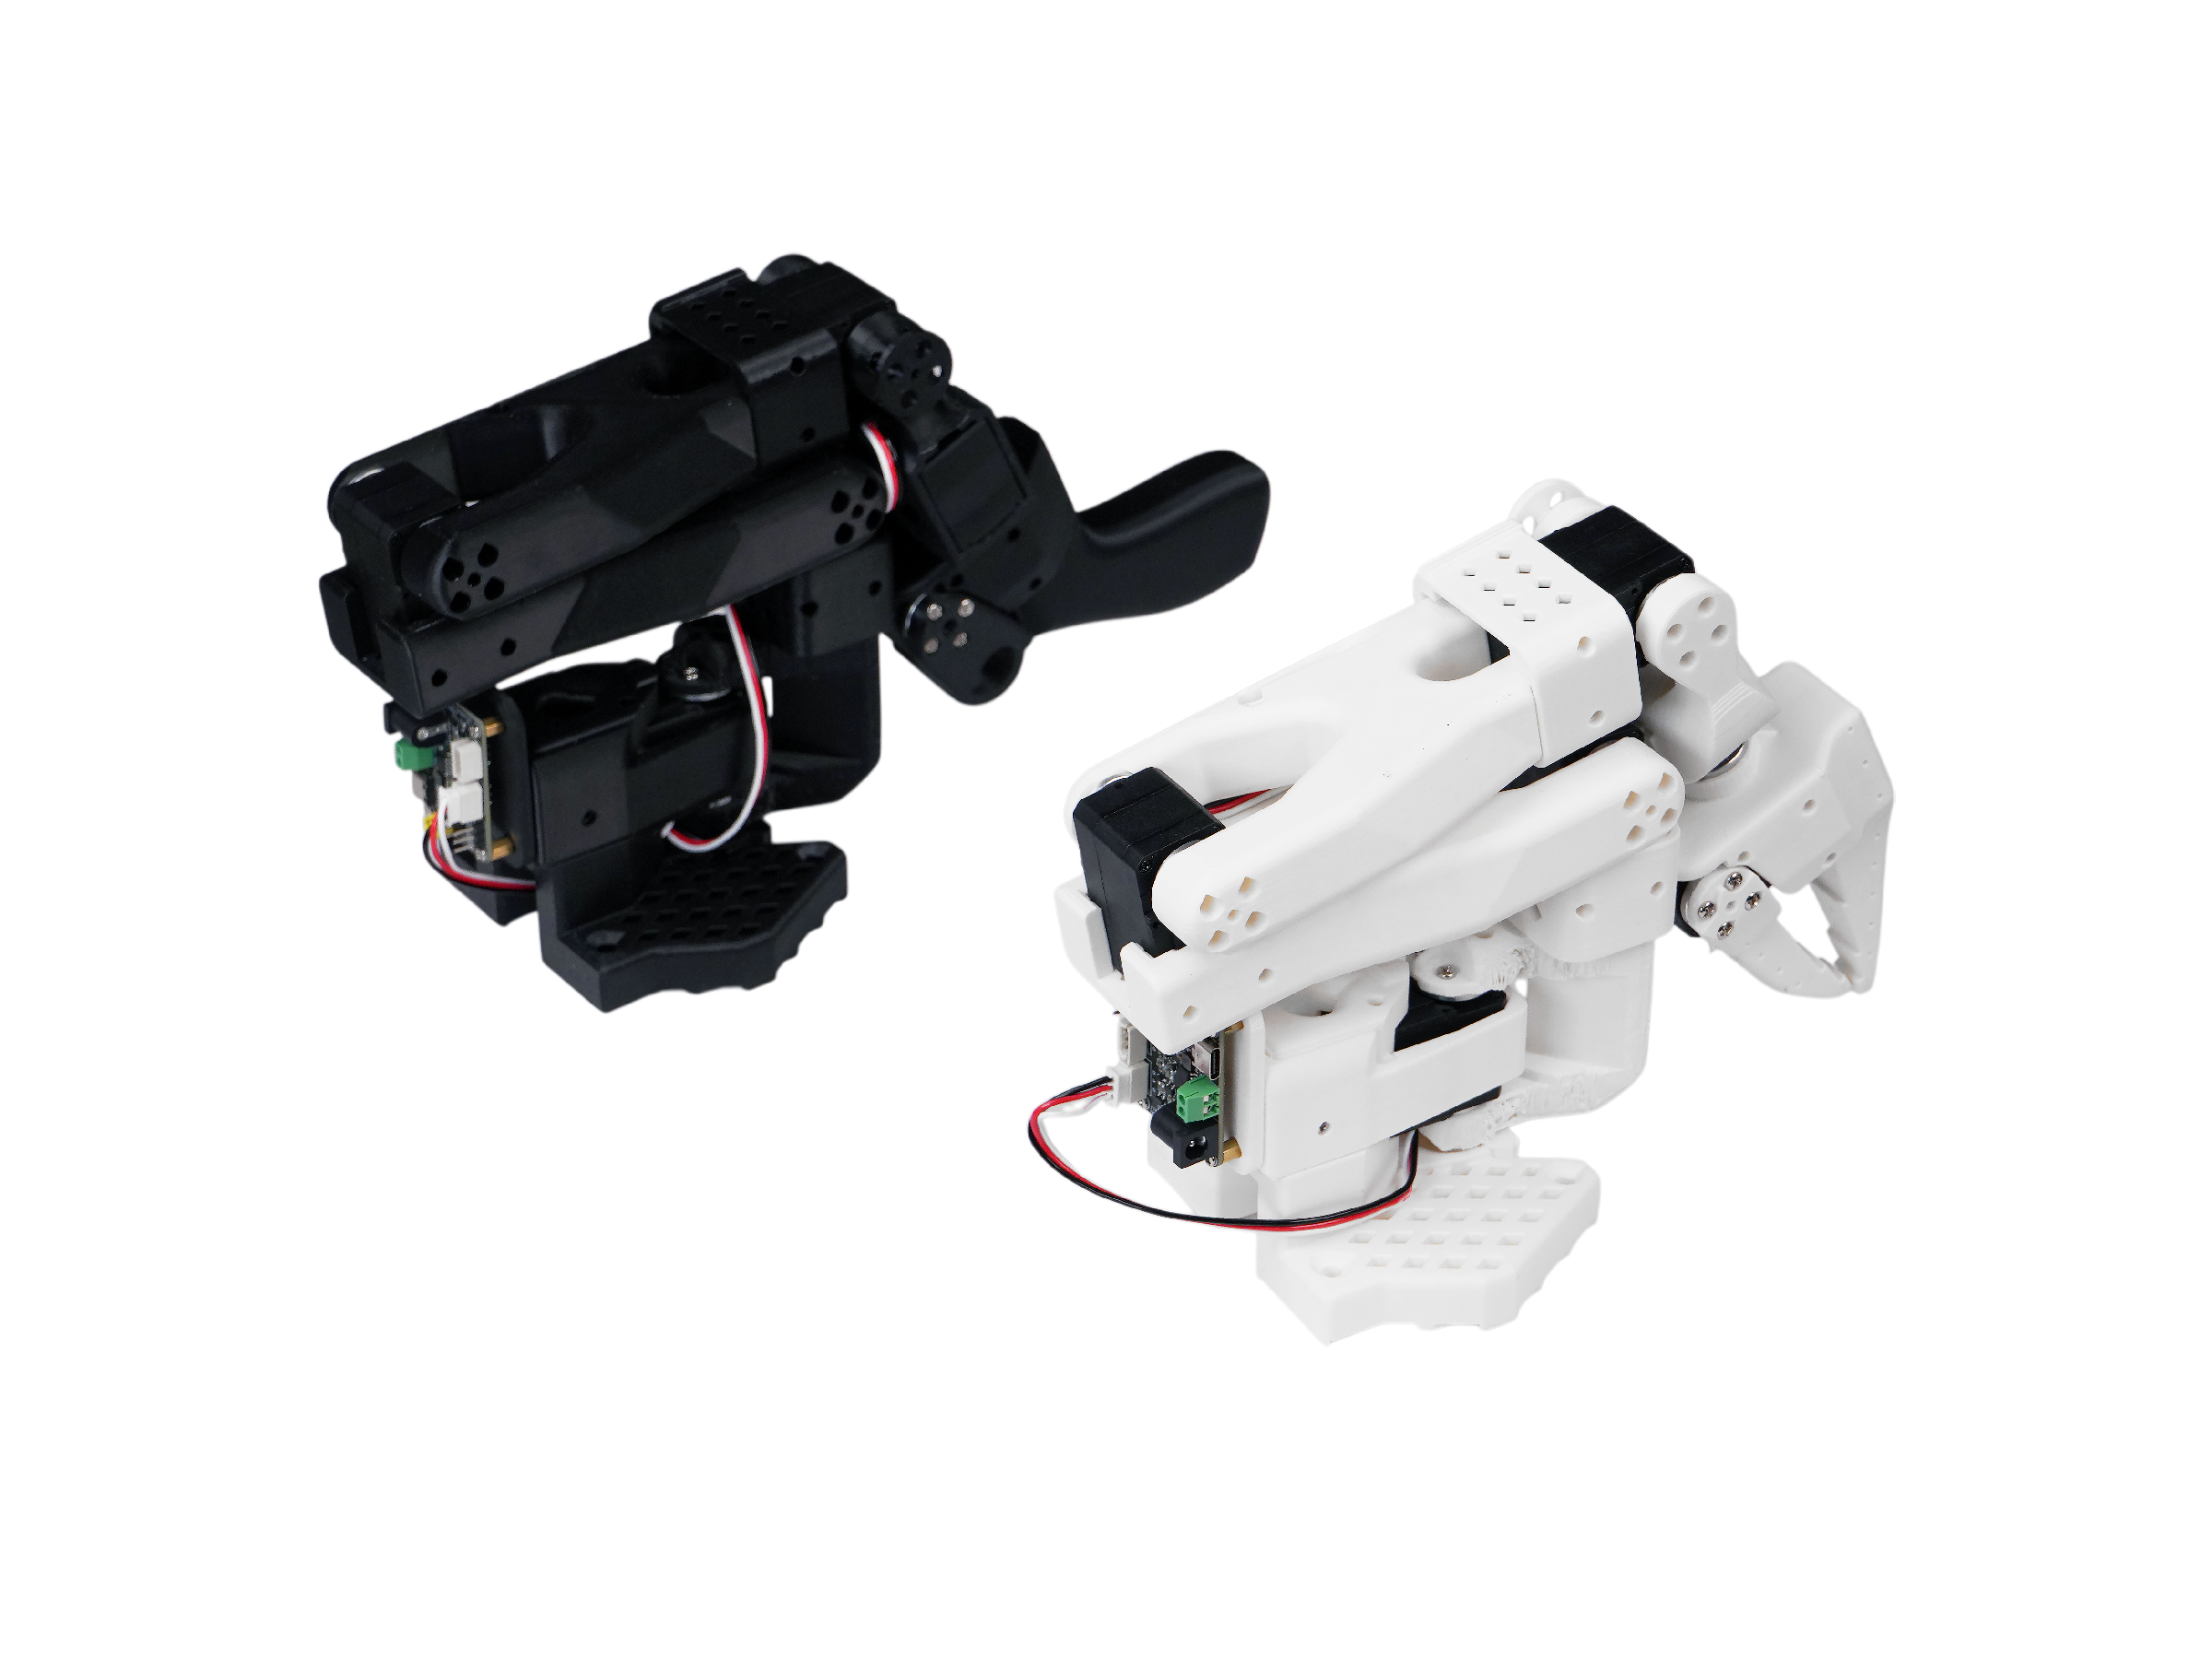
Specification
| Specification | Arm Kit | Arm Kit Pro |
|---|---|---|
| Type | Arm Kit | Arm Kit Pro |
| Degree of freedom | 6 | 6 |
| Max Torque | 19.5kg.cm 7.4V | 30kg.cm 12V |
| Servo | STS3215 Bus Servo | STS3215 Bus Servo |
| Power Supply | 5.5mm*2.1mm DC 5V4A | 5.5mm*2.1mm DC 12V1A |
| Angle sensor | 12-bit magnetic encoder | 12-bit magnetic encoder |
| Recommended Operating Temperature Range | 0℃~40℃ | 0℃~40℃ |
| Communication Method | UART | UART |
| Control Method | PC | PC |
Bill of Materials(BOM)
| Part | Amount | Included |
|---|---|---|
| STS3215 Servo1 | 12 | ✅ |
| Motor Control Board | 2 | ✅ |
| USB-C Cable 2 pcs | 1 | ✅ |
| Power Supply2 | 2 | ✅ |
| Table Clamp | 1 | ❌ |
| 3D printed parts of the arm | 1 | ❌ |
The 3D printed parts and table clamps are not included in the product. However, the SO-100ARM provides detailed 3D printing STL files and printing parameters. Besides, we also offer the 3D printed parts of the Table Clamp.
Prerequisites
- Be familiar with our Lerobot SO100Arm basic usage tutorial.
- Install Isaac Sim according to the tutorial
- Complete the Installation and Configuration of ROS2 According to the Tutorial
Install the Lerobot environment
Step 1. Clone the Lerobot project
  cd ~/
  git clone https://github.com/ZhuYaoHui1998/lerobot.git
  cd lerobot
Ensure that you have installed the Lerobot environment according to the tutorial
Import the URDF into Isaac Sim
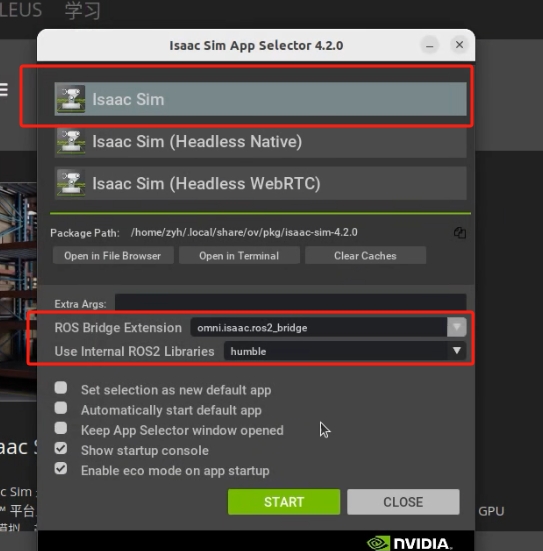
Step 1. Open Isaac Sim
Ensure that Isaac Sim has been installed according to NVIDIA's official tutorial, ROS2 has been installed, and the basic environment configuration has been completed. Open the Isaac Sim interface with parameters as shown in the figure below.
Step 2.Using URDF Importer
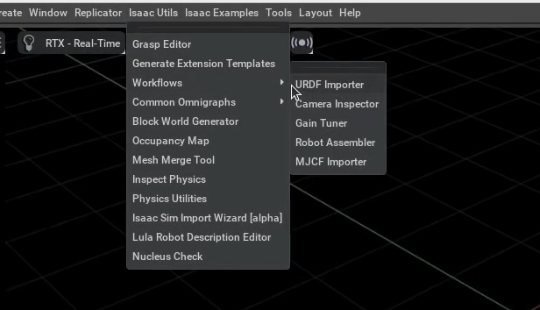
Open Isaac Utils → Workflows → URDF Importer in the Isaac Sim toolbar
Step 3.Import URDF
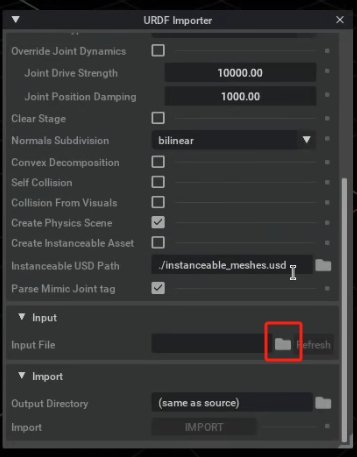
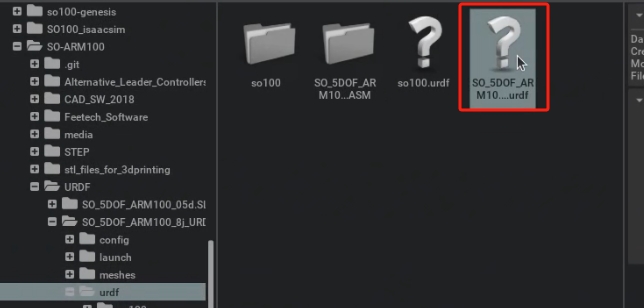
Keep the default parameters, browse for the file in Input, and import the URDF from the cloned Lerobot repository at /lerobot/SO-ARM100/URDF/SO_5DOF_ARM100_8j_URDF.SLDASM/urdf/SO_5DOF_ARM100_8j_URDF.SLDASM.urdf
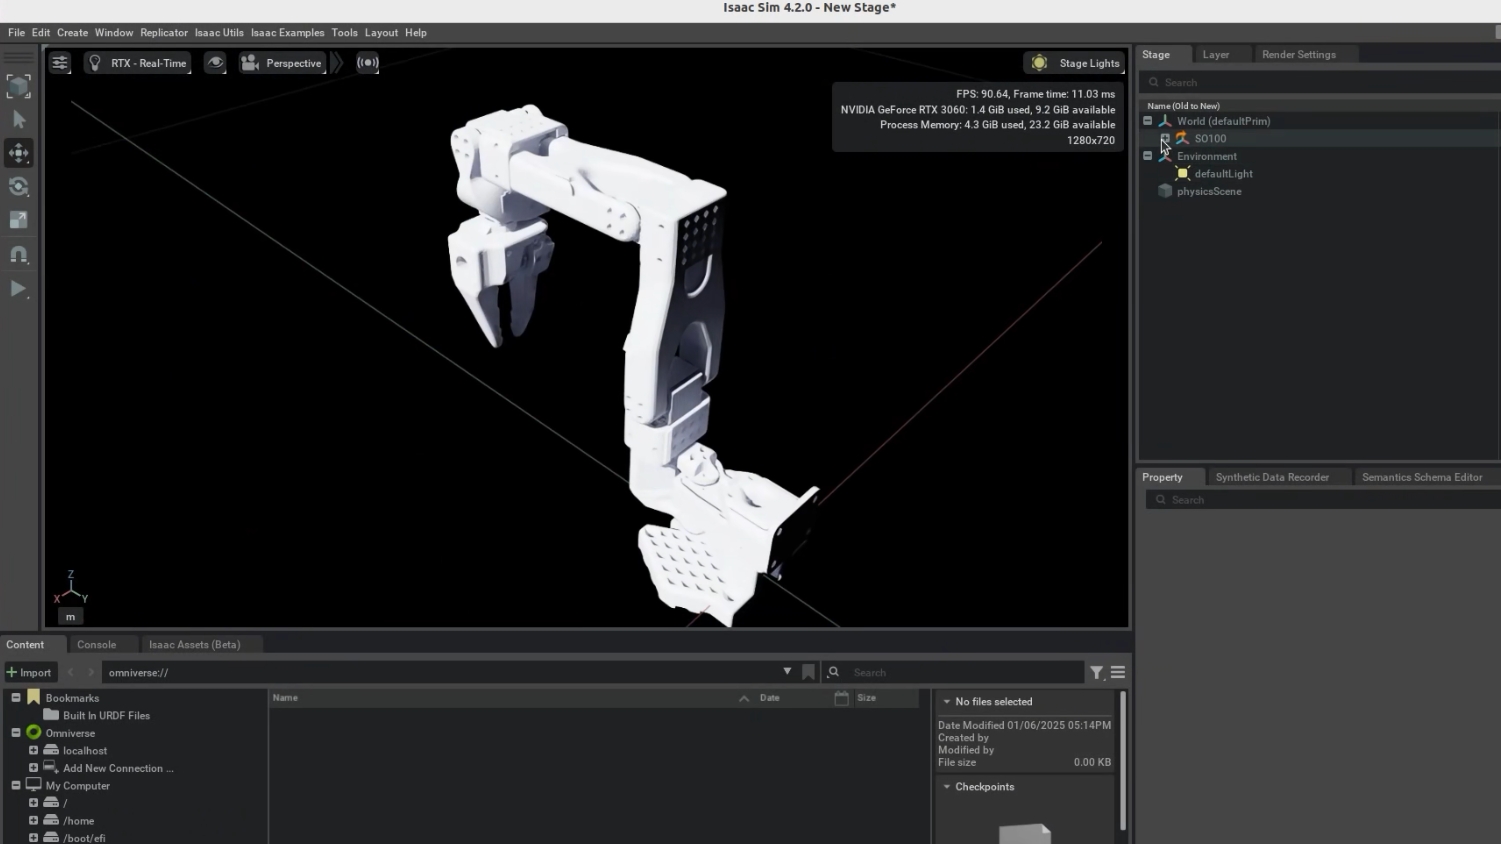
You can now see that our SO100 robotic arm has been imported into Isaac Sim.
Step 4. Add Physics elements
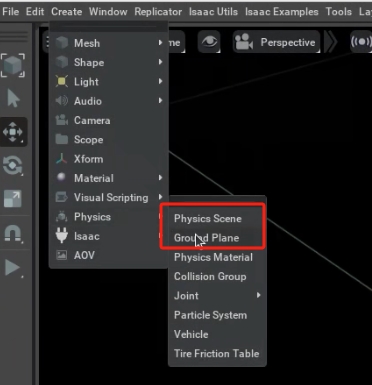
In the Isaac Sim toolbar, navigate to Create → Physics and add both Physics Scene and Ground Plane to set up the physical environment and ground.
Step 5. Delete Articulation Root of root_joint
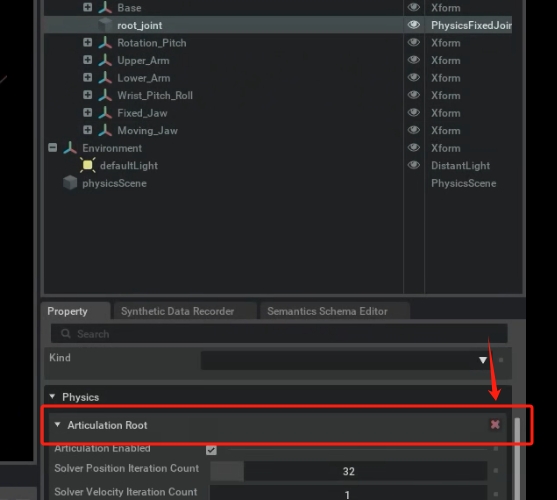
In the Stage panel on the right, locate root_joint. Click on it, then in the Properties below, find Articulation Root under Physics, and click the × on the right to delete this root.
Step 6. Add Articulation Root of root_joint
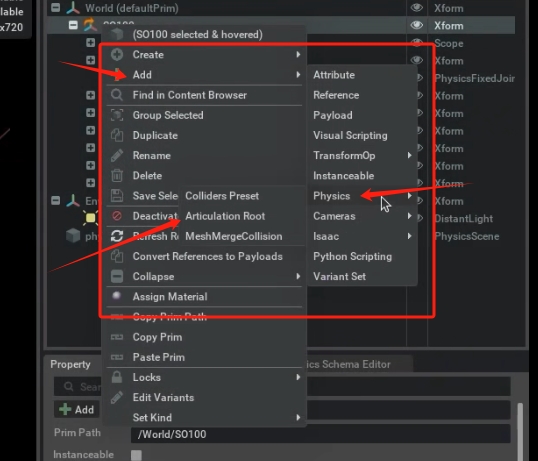
In the Stage panel, click on SO100, right-click, then Add → Physics → Articulation Root.
Add Action Graph
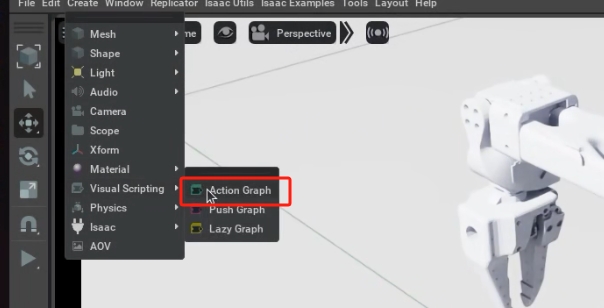
Step 1. In the toolbar, navigate to Create → Visual Scripting and add Action Graph.
Step 2. Add Action Components.
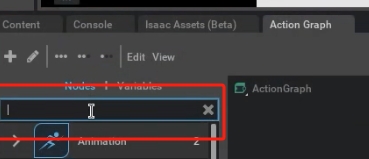
In the search box, add in order: On Playback Tick, Isaac Read Simulation Time, ROS2 Publish Joint State, Articulation Controller, ROS2 Subscribe Joint State.
For a clearer understanding of this part, please perform action connections and basic parameter configurations according to the video content.
Step 3. Play
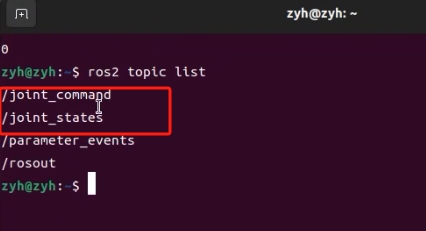
Click the Play button on the right to start the action normally. At this point, use the ros2 topic list command to view topic information.
ROS2 Python Control of Robotic Arm Movement
Now, you can run the following Python scripts in the ROS2 environment to control the robotic arm. The script files are located under lerobot/lerobot/scripts/ as control_motor.py and lerobot_publisher.py.
control_motor.py allows you to send the angle of a specific servo individually, with angle values ranging between -π and π.
control_motor.py
import threading

import rclpy
from sensor_msgs.msg import JointState

rclpy.init()
node = rclpy.create_node('position_velocity_publisher')
pub = node.create_publisher(JointState, 'joint_command', 10)

thread = threading.Thread(target=rclpy.spin, args=(node, ), daemon=True)
thread.start()

joint_state_position = JointState()

joint_state_position.name = ["Rotation", "Pitch","Elbow","Wrist_Pitch","Wrist_Roll","Jaw"]

joint_state_position.position = [0.2,0.2,float('nan'),0.2,0.2,0.2]
#joint_state_position.position = [0.0,0.0,0.0,0.0,0.0,0.0]

rate = node.create_rate(10)
try:
    while rclpy.ok():
        pub.publish(joint_state_position)

        rate.sleep()
except KeyboardInterrupt:
    pass
rclpy.shutdown()
thread.join()
lerobot_publisher.py implements continuously sending action commands to the servos.
lerobot_publisher.py
import rclpy
from rclpy.node import Node
from sensor_msgs.msg import JointState
import numpy as np
import time


class TestROS2Bridge(Node):
    def __init__(self):

        super().__init__("test_ros2bridge")

        # Create the publisher. This publisher will publish a JointState message to the /joint_command topic.
        self.publisher_ = self.create_publisher(JointState, "joint_command", 10)

        # Create a JointState message
        self.joint_state = JointState()

        self.joint_state.name = [
            "Rotation",
            "Pitch",
            "Elbow",
            "Wrist_Pitch",
            "Wrist_Roll",
            "Jaw"
        ]


        num_joints = len(self.joint_state.name)

        # make sure kit's editor is playing for receiving messages
        self.joint_state.position = np.array([0.0] * num_joints, dtype=np.float64).tolist()
        self.default_joints = [0, 0, 0, 0, 0, 0]

        # limiting the movements to a smaller range (this is not the range of the robot, just the range of the movement
        self.max_joints = np.array(self.default_joints) + 0.3
        self.min_joints = np.array(self.default_joints) - 0.3

        # position control the robot to wiggle around each joint
        self.time_start = time.time()

        timer_period = 0.05  # seconds
        self.timer = self.create_timer(timer_period, self.timer_callback)

    def timer_callback(self):
        self.joint_state.header.stamp = self.get_clock().now().to_msg()

        joint_position = (
            np.sin(time.time() - self.time_start) * (self.max_joints - self.min_joints) * 0.5 + self.default_joints
        )
        self.joint_state.position = joint_position.tolist()

        # Publish the message to the topic
        self.publisher_.publish(self.joint_state)


def main(args=None):
    rclpy.init(args=args)

    ros2_publisher = TestROS2Bridge()

    rclpy.spin(ros2_publisher)

    # Destroy the node explicitly
    ros2_publisher.destroy_node()
    rclpy.shutdown()


if __name__ == "__main__":
    main()
Citation
TheRobotStudio Project: SO-ARM100
Huggingface Project: Lerobot
Dnsty: Jetson Containers
Tech Support & Product Discussion
Thank you for choosing our products! We are here to provide you with different support to ensure that your experience with our products is as smooth as possible. We offer several communication channels to cater to different preferences and needs.