Getting Started with SO-ARM100 and SO-ARM101 Robotic Arms in LeRobot
From assembly and calibration to dataset collection, training, and real-robot deployment
This wiki walks you through the complete SO-ARM100 / SO-ARM101 workflow in LeRobot: hardware setup, servo configuration, arm calibration, teleoperation, camera integration, dataset recording, visualization, replay, policy training, evaluation, and deployment tips.
Before running any program that can move the robotic arm, clear valuable items, fragile objects, tools, cables, and unrelated objects within 1 meter of the workspace. During debugging and operation, keep people away from the arm’s motion range.
- Do not touch joints, motors, links, the gripper, or end tools after the arm is powered on.
- Before servo setup, calibration, teleoperation, dataset recording, replay, or policy evaluation, make sure the arm is firmly fixed.
- Keep at least 1 meter of safety distance and make sure nearby people understand that the arm may move suddenly.
- If abnormal motion, noise, shaking, loose cables, poor power contact, or communication loss occurs, stop the program immediately and power off before inspection.
- Power off before plugging or unplugging servo cables, USB cables, power connectors, or motor control board cables.
Recommended Learning Path
Follow the real debugging workflow step by step
For a first-time SO-ARM10x setup, complete hardware preparation, environment setup, and calibration before moving to teleoperation, cameras, datasets, training, and evaluation.
Confirm your SO-ARM100 / SO-ARM101 version, motor type, voltage, and BOM.
Set up Miniforge, the verified Seeed LeRobot repository, ffmpeg, PyTorch, and camera dependencies.
Set servo IDs and baud rates, then assemble the leader and follower arms.
Calibrate both arms and verify that the leader-to-follower control chain is stable.
Connect OpenCV, RealSense, or Orbbec cameras and record clean, repeatable episodes.
Start with ACT, then explore SmolVLA, Pi0, Pi0.5, GR00T, PEFT, and asynchronous inference.
Overview
Project Introduction
SO-ARM10x combines an open-source low-cost robotic arm with the LeRobot ecosystem for data collection, imitation learning, and real-robot deployment.
SO-10xARM is a fully open-source robotic arm project launched by TheRobotStudio. It includes both a follower arm and a leader arm, with detailed 3D printing files and operation guides. LeRobot provides PyTorch models, datasets, and tools for real-world robotics, lowering the entry barrier for imitation learning and policy deployment.
SO-ARM10x and the reComputer Jetson AI robotics kit combine high-precision robotic arm control with an AI computing platform. Together with Jetson Orin or AGX Orin and the LeRobot framework, this setup can be used for education, research, and industrial automation experiments.
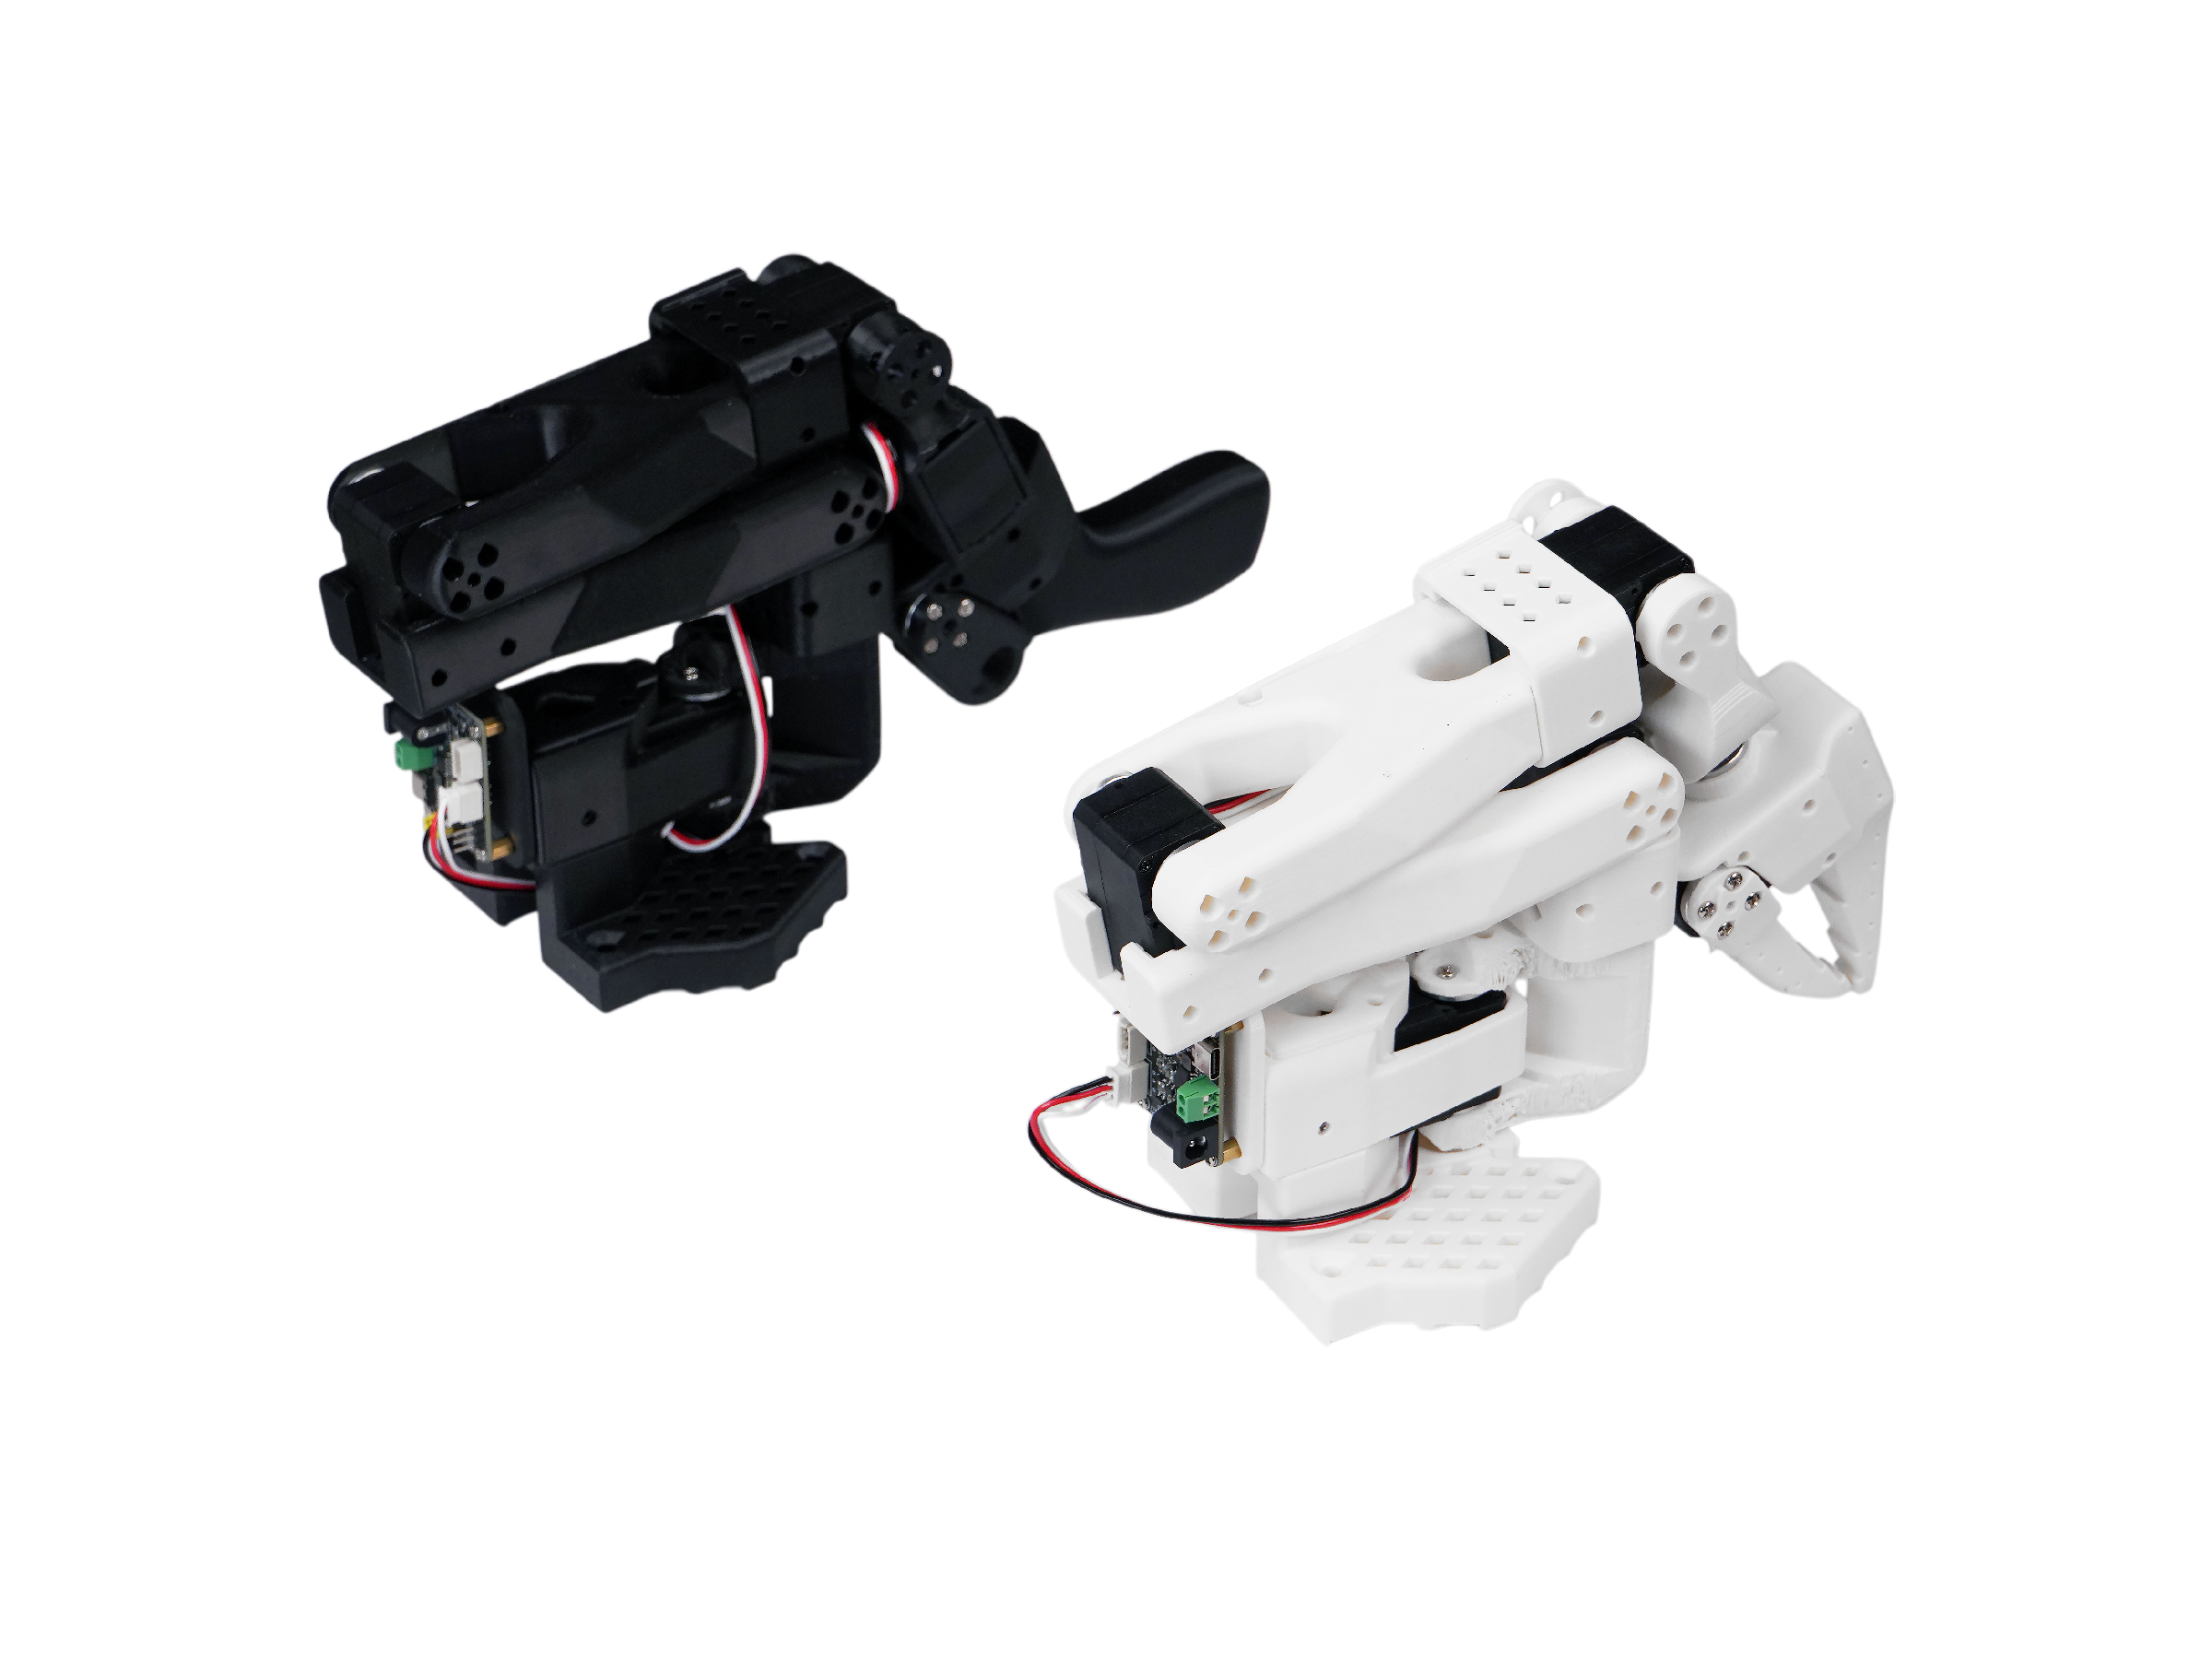
Seeed Studio is responsible for the hardware quality of the kit. The software tutorial follows the official LeRobot documentation as closely as possible. If you encounter unresolved software or dependency issues, check the FAQ at the end of this page and report issues to the LeRobot GitHub repository or the LeRobot Discord channel.
Main Features
Main Features
SO-ARM10x focuses on open-source learning, low-cost robotics, LeRobot integration, and NVIDIA deployment.
What's New
What's New in SO-ARM101
SO-ARM101 improves wiring, leader-arm gear ratios, and real-time following behavior.
Specification
Specification
View motor, power, communication, and control specifications for SO-ARM100 and SO-ARM101.
View SO-ARM10x specifications
| Type | SO-ARM100 | SO-ARM101 | ||
|---|---|---|---|---|
| Arm Kit | Arm Kit Pro | Arm Kit | Arm Kit Pro | |
| Leader Arm | 12x ST-3215- C001 (7.4V) motors with 1:345 gear ratio for all joints | 12x ST-3215-C018/ST-3215-C047 (12V) motors with 1:345 gear ratio for all joints | 1x ST-3215- C001 (7.4V) motor with 1:345 gear ratio for joint 2 only | |
| Follower Arm | Same as SO-ARM100 | |||
| Power Supply | 5.5 mm × 2.1 mm DC 5 V 4 A | 5.5 mm × 2.1 mm DC 12 V 2 A | 5.5 mm × 2.1 mm DC 5 V 4 A | 5.5 mm × 2.1 mm DC 12 V 2 A (Follower Arm) |
| Angle Sensor | 12-bit magnetic encoder | |||
| Recommended Operating Temperature | 0 °C to 40 °C | |||
| Communication | UART | |||
| Control Method | PC | |||
If you purchase the Arm Kit version, both power supplies are 5V. If you purchase the Arm Kit Pro version, please use the 5V power supply for the calibration and every step of the Leader robotic arm, and the 12V power supply for the calibration and every step of the Follower robotic arm.
Bill of Materials (BOM)
Bill of Materials (BOM)
Check the servos, motor control boards, cables, power supplies, clamps, and optional 3D-printed parts included in the kit.
View bill of materials
| Part | Amount | Included |
|---|---|---|
| Servo Motos | 12 | ✅ |
| Motor Control Board | 2 | ✅ |
| USB-C Cable 2 pcs | 1 | ✅ |
| Power Supply2 | 2 | ✅ |
| Table Clamp | 4 | ✅ |
| 3D printed parts of the arm | 1 | Option |
3D Printing Guide
3D Printing Guide
Choose the right STL files and print settings before assembling a kit version of the arm.
View 3D printing parameters
Following the official update of SO101, SO100 will no longer support it and the source files will be deleted as per the official, but the source files can still be found in our Makerworld. However, for users who have previously purchased SO100, the tutorials and installation methods remain compatible. The print of SO101 is fully compatible with the motor kit installation of SO100.
Step 1: Choose a printer
The STL files provided are ready to print on many FDM printers. Below are the tested and suggested settings though others may work.
- Material: PLA+
- Nozzle Diameter and Precision: 0.4mm nozzle diameter at 0.2mm layer height or 0.6mm nozzle at 0.4mm layer height.
- Infill Density: 15%
Step 2: Set up the printer
- Ensure that the printer is calibrated and the bed level is correctly set using the printer specific instructions.
- Clean the print bed, making sure it is free from dust, or grease. If cleaning the bed using water, or other liquid, dry the bed.
- If your printer recommends it, use a standard glue stick and apply a thin, even layer of glue across the print area of the bed. Avoid clumping or uneven application.
- Load the printer filament using printer specific instructions.
- Ensure the printer settings match the ones suggested above (most printers have multiple settings so choose the ones that most closely match).
- Set for supports everywhere but ignore slopes greater than 45 degrees to the horizontal.
- There should be no supports in the screw holes with horizontal axes.
Step 3: Print the parts
All the parts for the leader or follower are for easy 3D printing already contained in a single file, correctly orientated for z upwards to minimize supports.
-
For printer bed sizes of 220mmx220mm (such as the Ender), print these files:
-
For printer bed sizes of 205mm x 250mm (such as the Prusa/Up):
Step 4: Print the Soft Gripper and Camera Mount Bracket Insert (Optional)
If you want the robotic arm to be able to grasp soft, fragile, or irregularly shaped objects, you can print a soft gripper to replace the default rigid gripper. You can also print the camera mount bracket insert if you need to mount a camera. The print files are available in the soarm_soft_gripper repository.
Printing material instructions:
- Two gripper fingers: print with TPU material
- Other parts: print with PLA material
Initial System Environment
Initial System Environment
Confirm Ubuntu, Jetson, CUDA, Python, PyTorch, and Torchvision requirements before installation.
For Ubuntu x86:
- Ubuntu 22.04
- CUDA 12+
- Python 3.12
- Torch 2.6+
For Jetson Orin:
- Jetson JetPack 6.0 and 6.1, JetPack 6.2 is not supported yet
- Python 3.12
- Torch 2.3+
Install LeRobot
Install LeRobot
Install Miniforge, the verified Seeed LeRobot repository, ffmpeg, PyTorch, and hardware-specific dependencies.
Environments such as pytorch and torchvision need to be installed based on your CUDA.
- Jetson
- X86 Ubuntu 22.04
- Install Miniforge:
wget https://github.com/conda-forge/miniforge/releases/latest/download/Miniforge3-Linux-aarch64.sh
chmod +x Miniforge3-Linux-aarch64.sh
./Miniforge3-Linux-aarch64.sh
# Follow the prompts by entering 'yes' or pressing Enter. Once the installation is complete:
source ~/.bashrc
- Create and activate a fresh conda environment for lerobot
conda create -y -n lerobot python=3.12 && conda activate lerobot
- Clone Lerobot:
git clone https://github.com/Seeed-Projects/lerobot.git ~/lerobot
- When using miniforge, install ffmpeg in your environment:
conda install ffmpeg -c conda-forge
This usually installs ffmpeg 7.X for your platform compiled with the libsvtav1 encoder. If libsvtav1 is not supported (check supported encoders with ffmpeg -encoders), you can:
- [On any platform] Explicitly install ffmpeg 7.X using:
conda install ffmpeg=7.1.1 -c conda-forge
- [On Linux only] Install ffmpeg build dependencies and compile ffmpeg from source with libsvtav1, and make sure you use the corresponding ffmpeg binary to your install with
which ffmpeg.
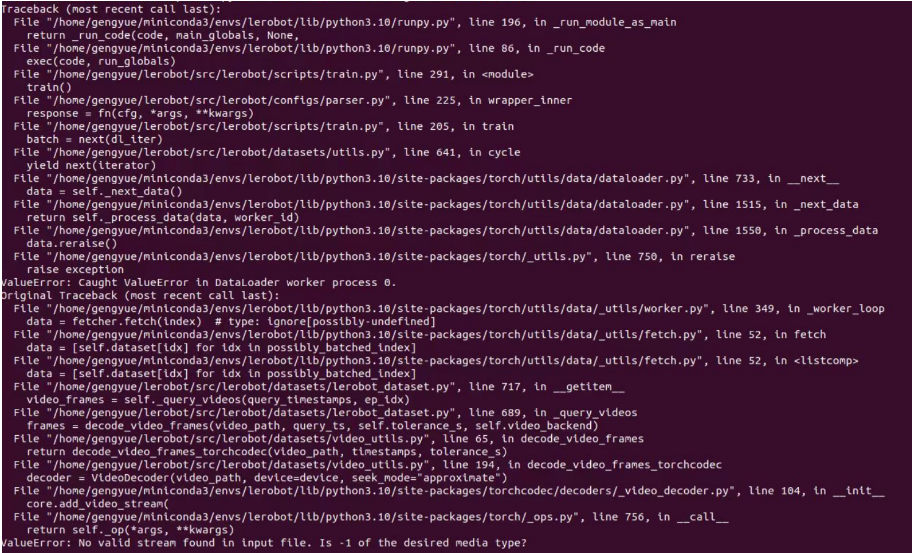
If you encounter an error like this, you can use this command too.
- Install LeRobot with dependencies for the feetech motors:
cd ~/lerobot && pip install -e ".[feetech]"
- For Jetson Jetpack 6.0+ devices (please make sure to install Pytorch-gpu and Torchvision from step 5 before executing this step):
conda install -y -c conda-forge "opencv>=4.10.0.84"  # Install OpenCV and other dependencies through conda, this step is only for Jetson Jetpack 6.0+
conda remove opencv   # Uninstall OpenCV
pip3 install opencv-python==4.10.0.84  # Then install opencv-python via pip3
conda install -y -c conda-forge ffmpeg
conda uninstall numpy
pip3 install numpy==1.26.0  # This should match torchvision
- Check Pytorch and Torchvision
Since installing the lerobot environment via pip will uninstall the original Pytorch and Torchvision and install the CPU versions of Pytorch and Torchvision, you need to perform a check in Python.
python   # Command to start Python in the terminal
import torch
print(torch.cuda.is_available())
exit()   # Exit Python
If the printed result is False, the current environment is using the CPU version of PyTorch. If you need GPU-enabled PyTorch and Torchvision on Jetson, install them according to this tutorial. For environments that need GPU training or inference, the final check result should be True.
- Install Miniforge:
wget https://github.com/conda-forge/miniforge/releases/latest/download/Miniforge3-Linux-x86_64.sh
chmod +x Miniforge3-Linux-x86_64.sh
./Miniforge3-Linux-x86_64.sh
# Once the installation is complete:
source ~/.bashrc
# Initialize all shells
conda init --all
- Create and activate a fresh conda environment for lerobot
conda create -y -n lerobot python=3.12 && conda activate lerobot
- Clone Lerobot:
git clone https://github.com/Seeed-Projects/lerobot.git ~/lerobot
- When using miniforge, install ffmpeg in your environment:
conda install ffmpeg -c conda-forge
This usually installs ffmpeg 7.X for your platform compiled with the libsvtav1 encoder. If libsvtav1 is not supported (check supported encoders with ffmpeg -encoders), you can:
- [On any platform] Explicitly install ffmpeg 7.X using:
conda install ffmpeg=7.1.1 -c conda-forge
- [On Linux only] Install ffmpeg build dependencies and compile ffmpeg from source with libsvtav1, and make sure you use the corresponding ffmpeg binary to your install with
which ffmpeg.
If you encounter an error like this, you can use this command too.
- Install LeRobot with dependencies for the feetech motors:
On a newly configured Ubuntu 22.04 VM, especially a minimal installation, gcc and other C build tools may not be installed by default. In that case, installing LeRobot with feetech dependencies can fail because the evdev Python package cannot be built.
Install the basic build tools first:
sudo apt update
sudo apt install build-essential
After installation, rerun the LeRobot installation command.
cd ~/lerobot && pip install -e ".[feetech]"
- Check Pytorch and Torchvision
Since installing the lerobot environment via pip will uninstall the original Pytorch and Torchvision and install the CPU versions of Pytorch and Torchvision, you need to perform a check in Python.
python   # Command to start Python in the terminal
import torch
print(torch.cuda.is_available())
exit()   # Exit Python
If the printed result is False, the current environment is using the CPU version of PyTorch. If you need GPU training or inference, install the Pytorch and Torchvision versions that match your CUDA version according to the official PyTorch guide. For environments with an NVIDIA GPU that need GPU acceleration, the final check result should be True.
Note: NVIDIA RTX 50-series GPUs require the preview version of CUDA 12.8 or higher.
The download command is as follows:
pip install --pre torch torchvision torchaudio --index-url https://download.pytorch.org/whl/nightly/cu128
Configure Motors and Assemble the Arm
Configure Motors and Assemble the Arm
Set servo IDs and baud rates, verify wiring and power, then assemble the leader and follower arms.
Clear valuable items and unrelated people within 1 meter of the robotic arm workspace. Make sure the arm is firmly mounted and that power and cables are connected properly before running this section.
If you purchased a pre-assembled robotic arm, please skip to the Calibrate section.
For kit version, please follow the steps below
The servo calibration and initialization process for SO-ARM101 is the same as that of SO-ARM100 in terms of both method and code. However, please note that the gear ratios for the first three joints of the SO-ARM101 Leader Arm differ from those of SO-ARM100, so it’s important to distinguish and calibrate them carefully.
To configure the motors designate one bus servo adapter and 6 motors for your leader arm, and similarly the other bus servo adapter and 6 motors for the follower arm. It's convenient to label them and write on each motor if it's for the follower F or for the leader L and it's ID from 1 to 6. We use F1–F6 to represent joints 1 to 6 of the Follower Arm, and L1–L6 to represent joints 1 to 6 of the Leader Arm. The corresponding servo model, joint assignments, and gear ratio details are as follows:
| Servo Model | Gear Ratio | Corresponding Joints |
|---|---|---|
| ST-3215-C044(7.4V) | 1:191 | L1 |
| ST-3215-C001(7.4V) | 1:345 | L2 |
| ST-3215-C044(7.4V) | 1:191 | L3 |
| ST-3215-C046(7.4V) | 1:147 | L4–L6 |
| ST-3215-C001(7.4V) / C018(12V) / C047(12V) | 1:345 | F1–F6 |
You now should plug the 5V or 12V power supply to the motor bus. 5V for the STS3215 7.4V motors and 12V for the STS3215 12V motors. Note that the leader arm always uses the 7.4V motors, so watch out that you plug in the right power supply if you have 12V and 7.4V motors, otherwise you might burn your motors! Now, connect the motor bus to your computer via USB. Note that the USB doesn't provide any power, and both the power supply and USB have to be plugged in.
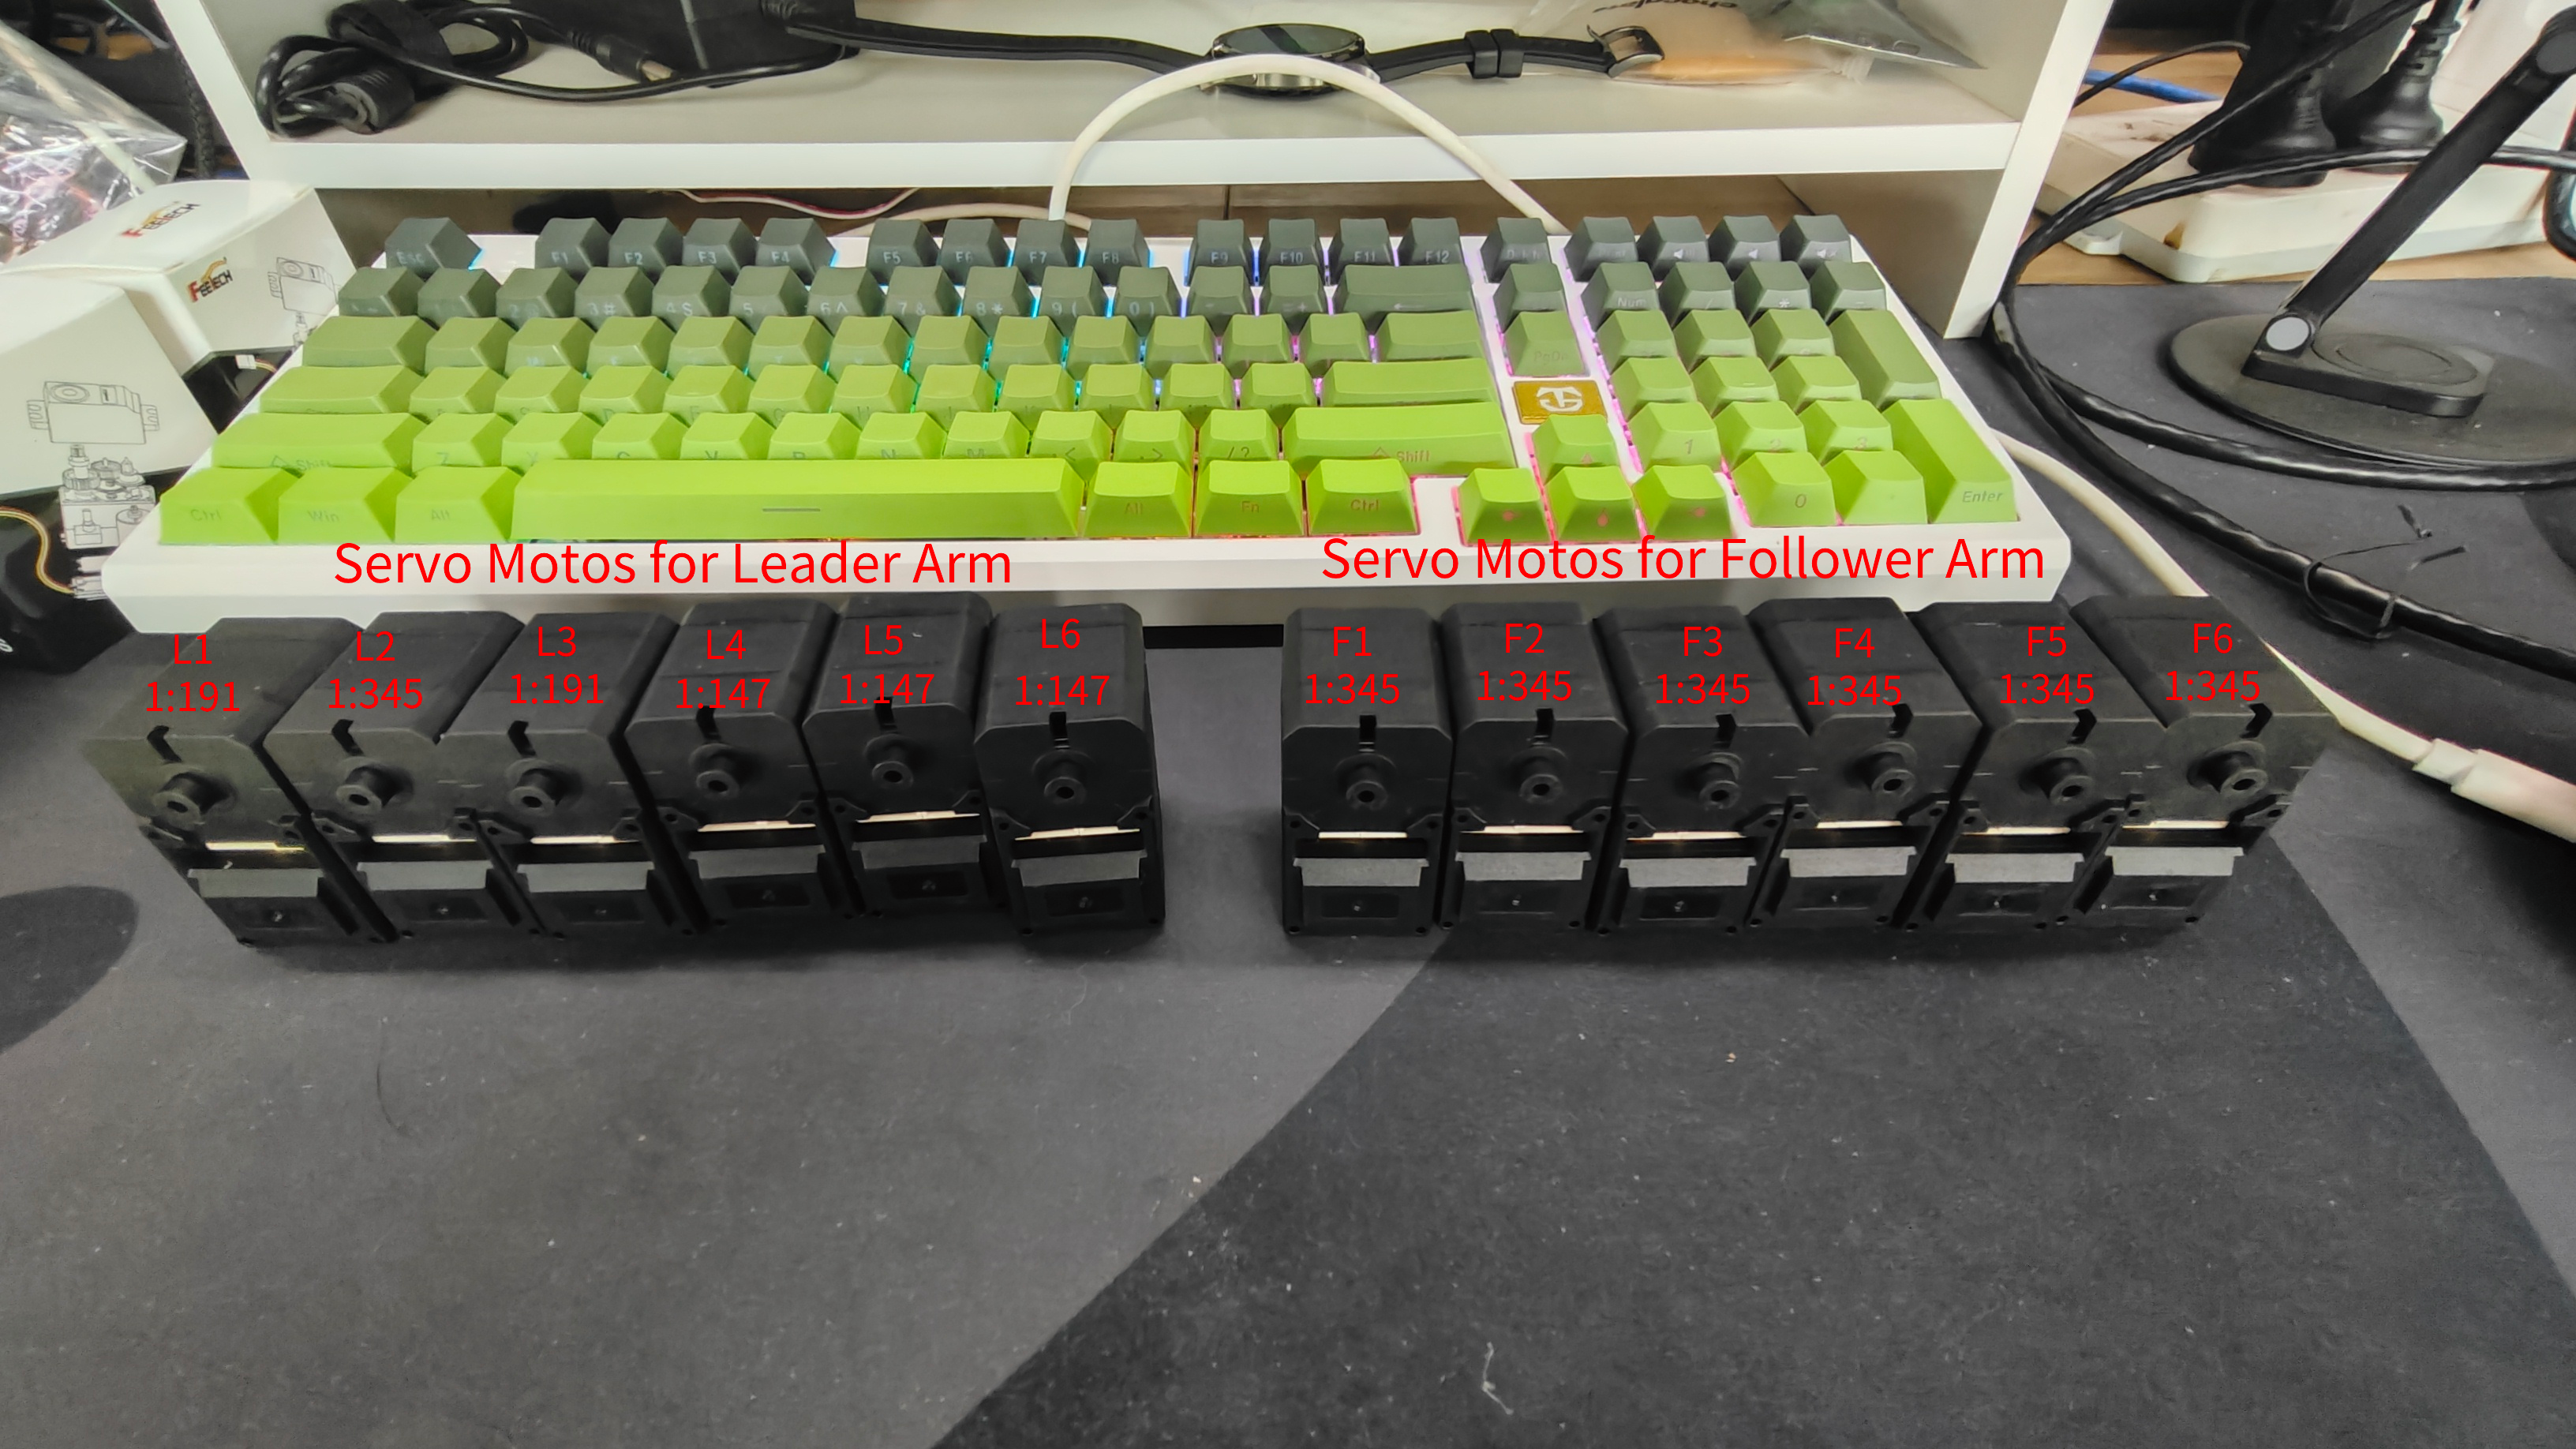
The following are the code calibration steps, please calibrate with the reference wiring servo in the picture above
Find USB ports associated to your arms To find the correct ports for each arm, run the utility script twice:
lerobot-find-port
Example output:
Finding all available ports for the MotorBus.
['/dev/ttyACM0', '/dev/ttyACM1']
Remove the usb cable from your MotorsBus and press Enter when done.

[...Disconnect corresponding leader or follower arm and press Enter...]

The port of this MotorsBus is /dev/ttyACM1
Reconnect the USB cable.
Remember to remove the usb, otherwise the interface will not be detected.
Example output when identifying the follower arm's port (e.g., /dev/tty.usbmodem575E0031751 on Mac, or possibly /dev/ttyACM0 on Linux):
Example output when identifying the leader arm's port (e.g., /dev/tty.usbmodem575E0032081, or possibly /dev/ttyACM1 on Linux):
You might need to give access to the USB ports by running:
sudo chmod 666 /dev/ttyACM0
sudo chmod 666 /dev/ttyACM1
When connecting the arms, the first device plugged in will be assigned to ttyACM0 (Slave/Follower arm), and the second device plugged in will be assigned to ttyACM1 (Master/Leader arm).
Configure your motors
Leader servo calibration reference images
| Leader Arm Joint 6 Calibration | Leader Arm Joint 5 Calibration | Leader Arm Joint 4 Calibration | Leader Arm Joint 3 Calibration | Leader Arm Joint 2 Calibration | Leader Arm Joint 1 Calibration |
|---|---|---|---|---|---|
 |  |  |  |  |  |
Follower servo calibration reference images
| Follower Arm Joint 6 Calibration | Follower Arm Joint 5 Calibration | Follower Arm Joint 4 Calibration | Follower Arm Joint 3 Calibration | Follower Arm Joint 2 Calibration | Follower Arm Joint 1 Calibration |
|---|---|---|---|---|---|
 |  |  |  |  |  |
Again, please make sure that the servo joint IDs and gear ratios strictly correspond to those of the SO-ARM101.
Calibrate Follower Arm Servos
Connect the usb cable from your computer and the power supply to the follower arm’s controller board. Then, run the following command.
lerobot-setup-motors \
  --robot.type=so101_follower \
  --robot.port=/dev/ttyACM0  # <- paste here the port found at previous step
You should see the following instruction.
Connect the controller board to the 'gripper' motor only and press enter.
As instructed, plug the gripper’s motor. Make sure it’s the only motor connected to the board, and that the motor itself is not yet daisy-chained to any other motor. As you press [Enter], the script will automatically set the id and baudrate for that motor.
You should then see the following message:
'gripper' motor id set to 6
Followed by the next instruction:
Connect the controller board to the 'wrist_roll' motor only and press enter.
You can disconnect the 3-pin cable from the controller board, but you can leave it connected to the gripper motor on the other end, as it will already be in the right place. Now, plug in another 3-pin cable to the wrist roll motor and connect it to the controller board. As with the previous motor, make sure it is the only motor connected to the board and that the motor itself isn’t connected to any other one.
Repeat the operation for each motor as instructed.
Check your cabling at each step before pressing Enter. For instance, the power supply cable might disconnect as you manipulate the board.
When you are done, the script will simply finish, at which point the motors are ready to be used. You can now plug the 3-pin cable from each motor to the next one, and the cable from the first motor (the ‘shoulder pan’ with id=1) to the controller board, which can now be attached to the base of the arm.
Calibrate Leader Arm Servos
Do the same steps for the leader arm.
lerobot-setup-motors \
  --teleop.type=so101_leader \
  --teleop.port=/dev/ttyACM0  # <- paste here the port found at previous step
Assembly
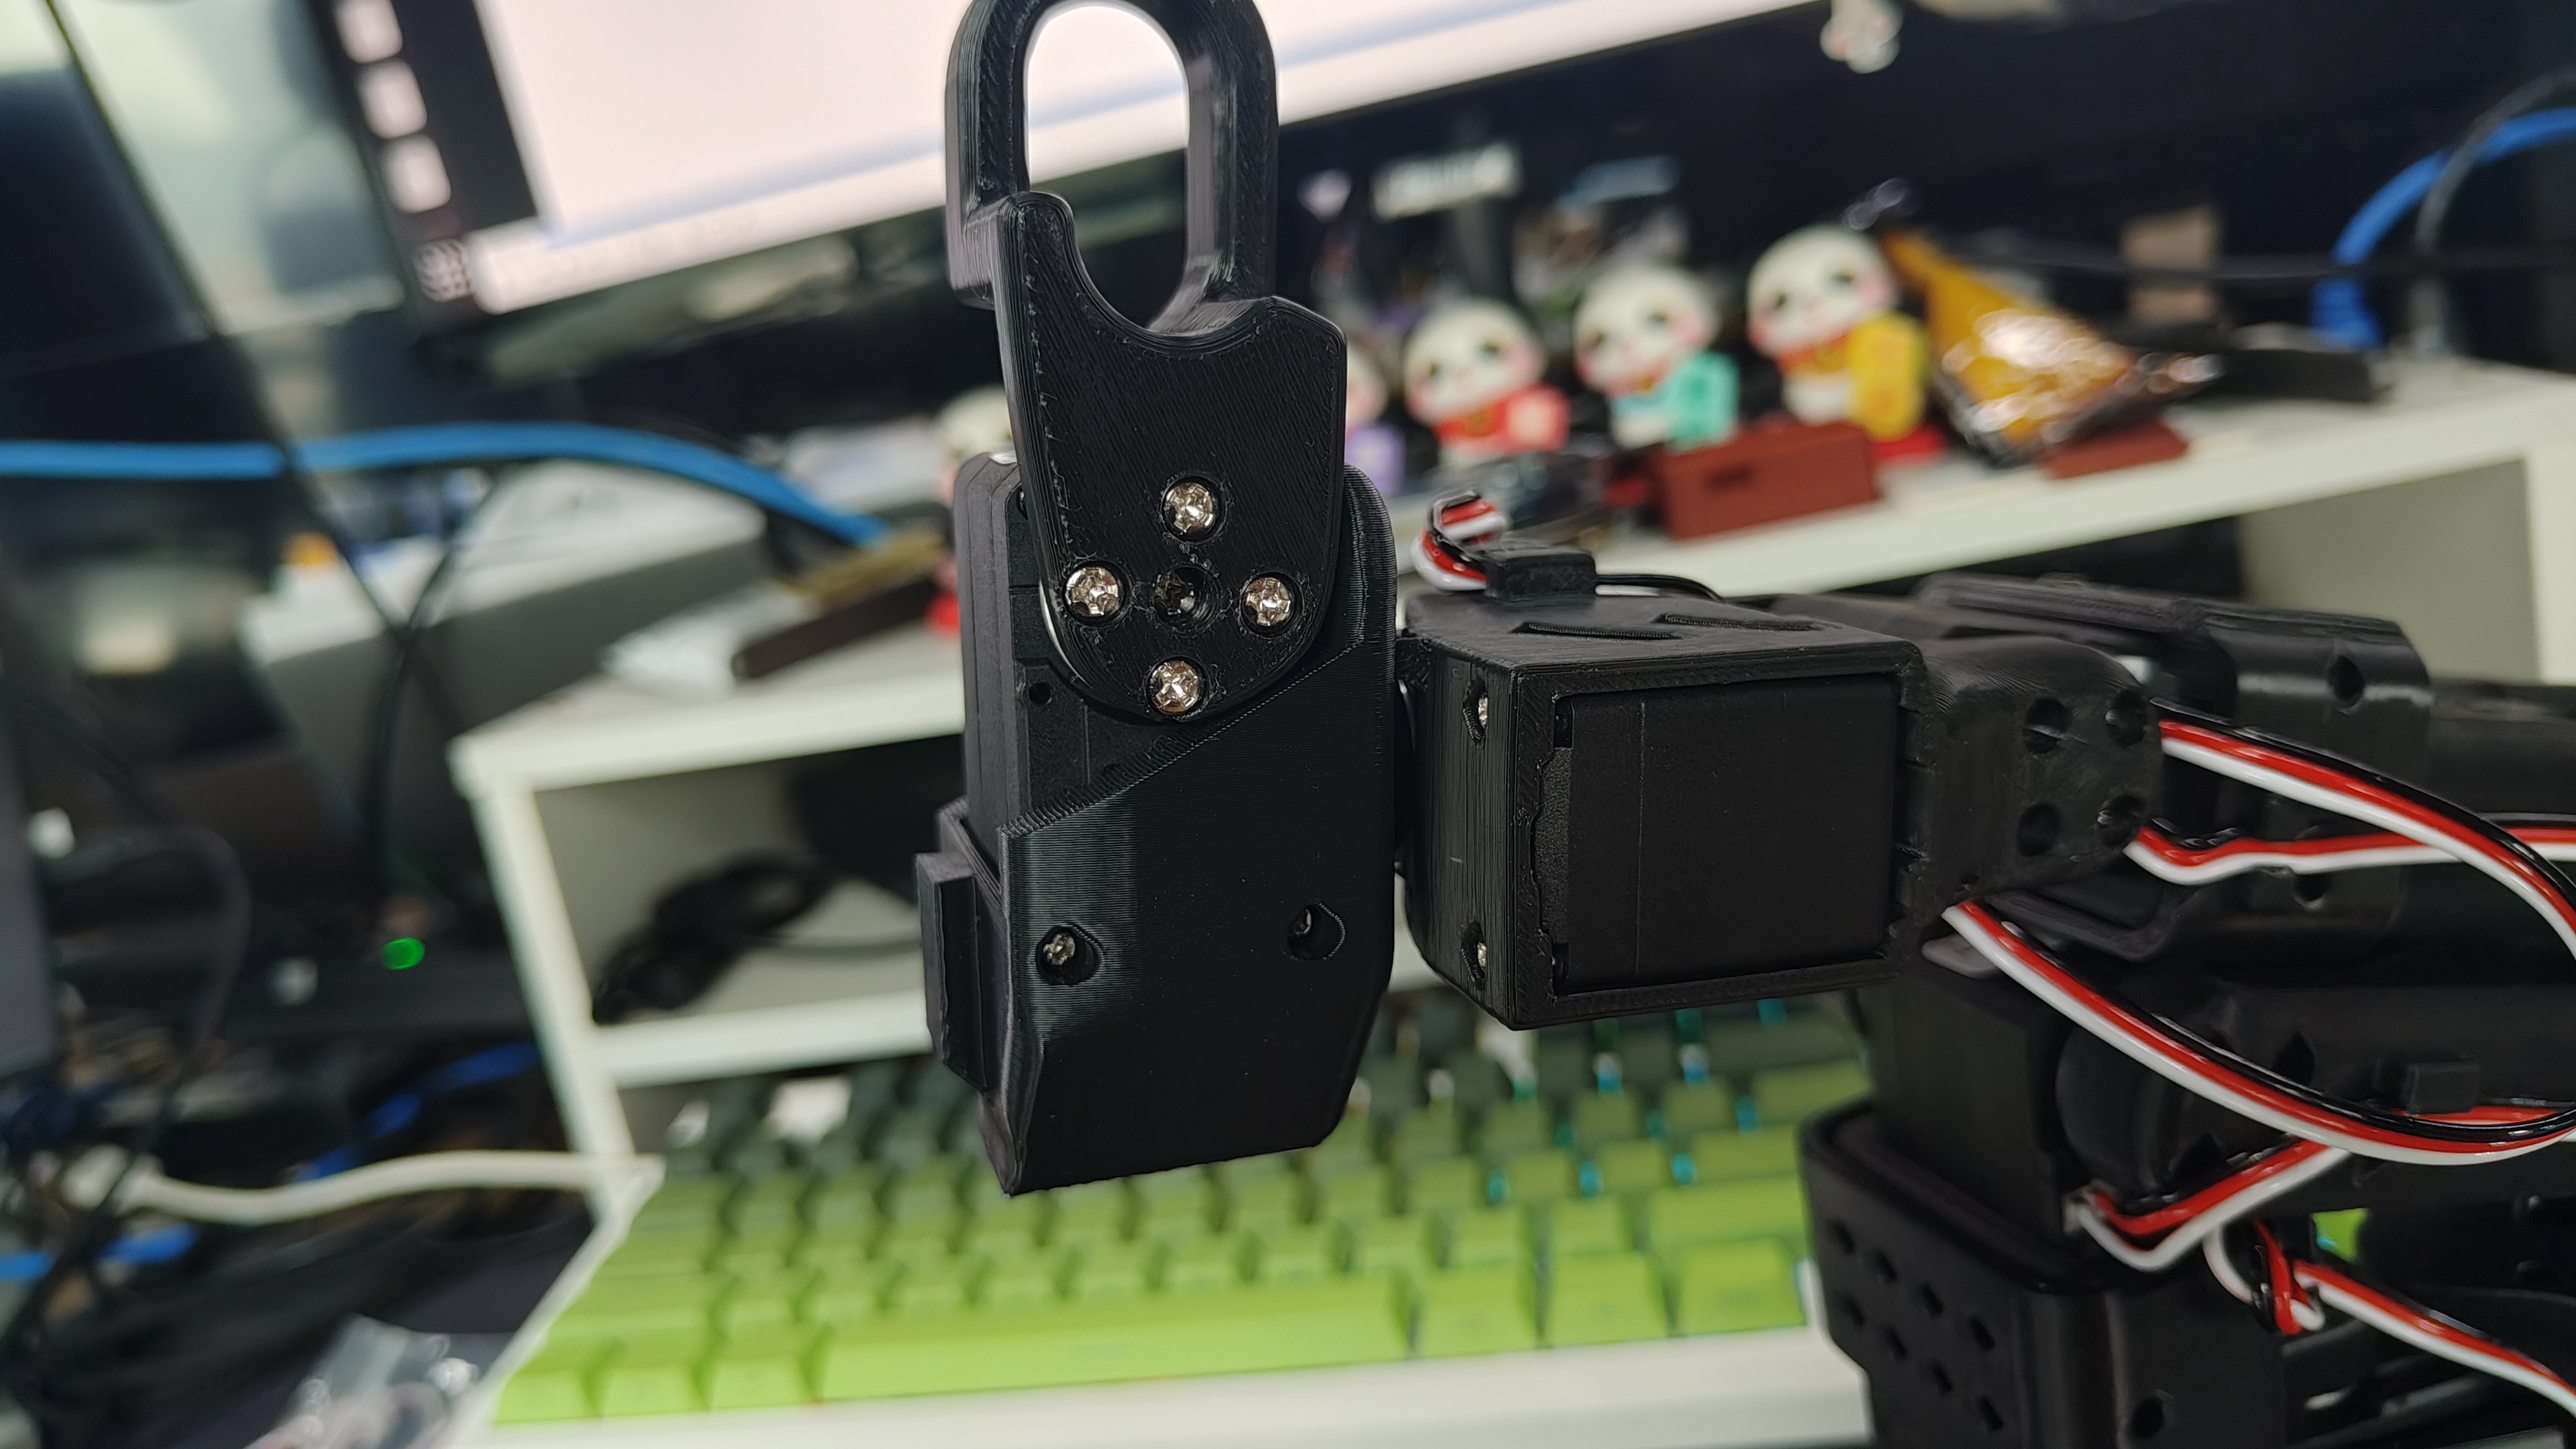
- The dual-arm assembly process of SO-ARM101 is the same as that of SO-ARM100. The only differences are the addition of cable clips on SO-ARM101 and the different gear ratios of the joint servos on the Leader Arm. So both SO100 and SO101 can be installed by referring to the following content
- Before assembly, please check your motor model, gear ratio, and power supply voltage again. If you purchased SO101, refer to the servo model and joint mapping table above to distinguish F1 to F6 and L1 to L6.
Assemble Leader Arm
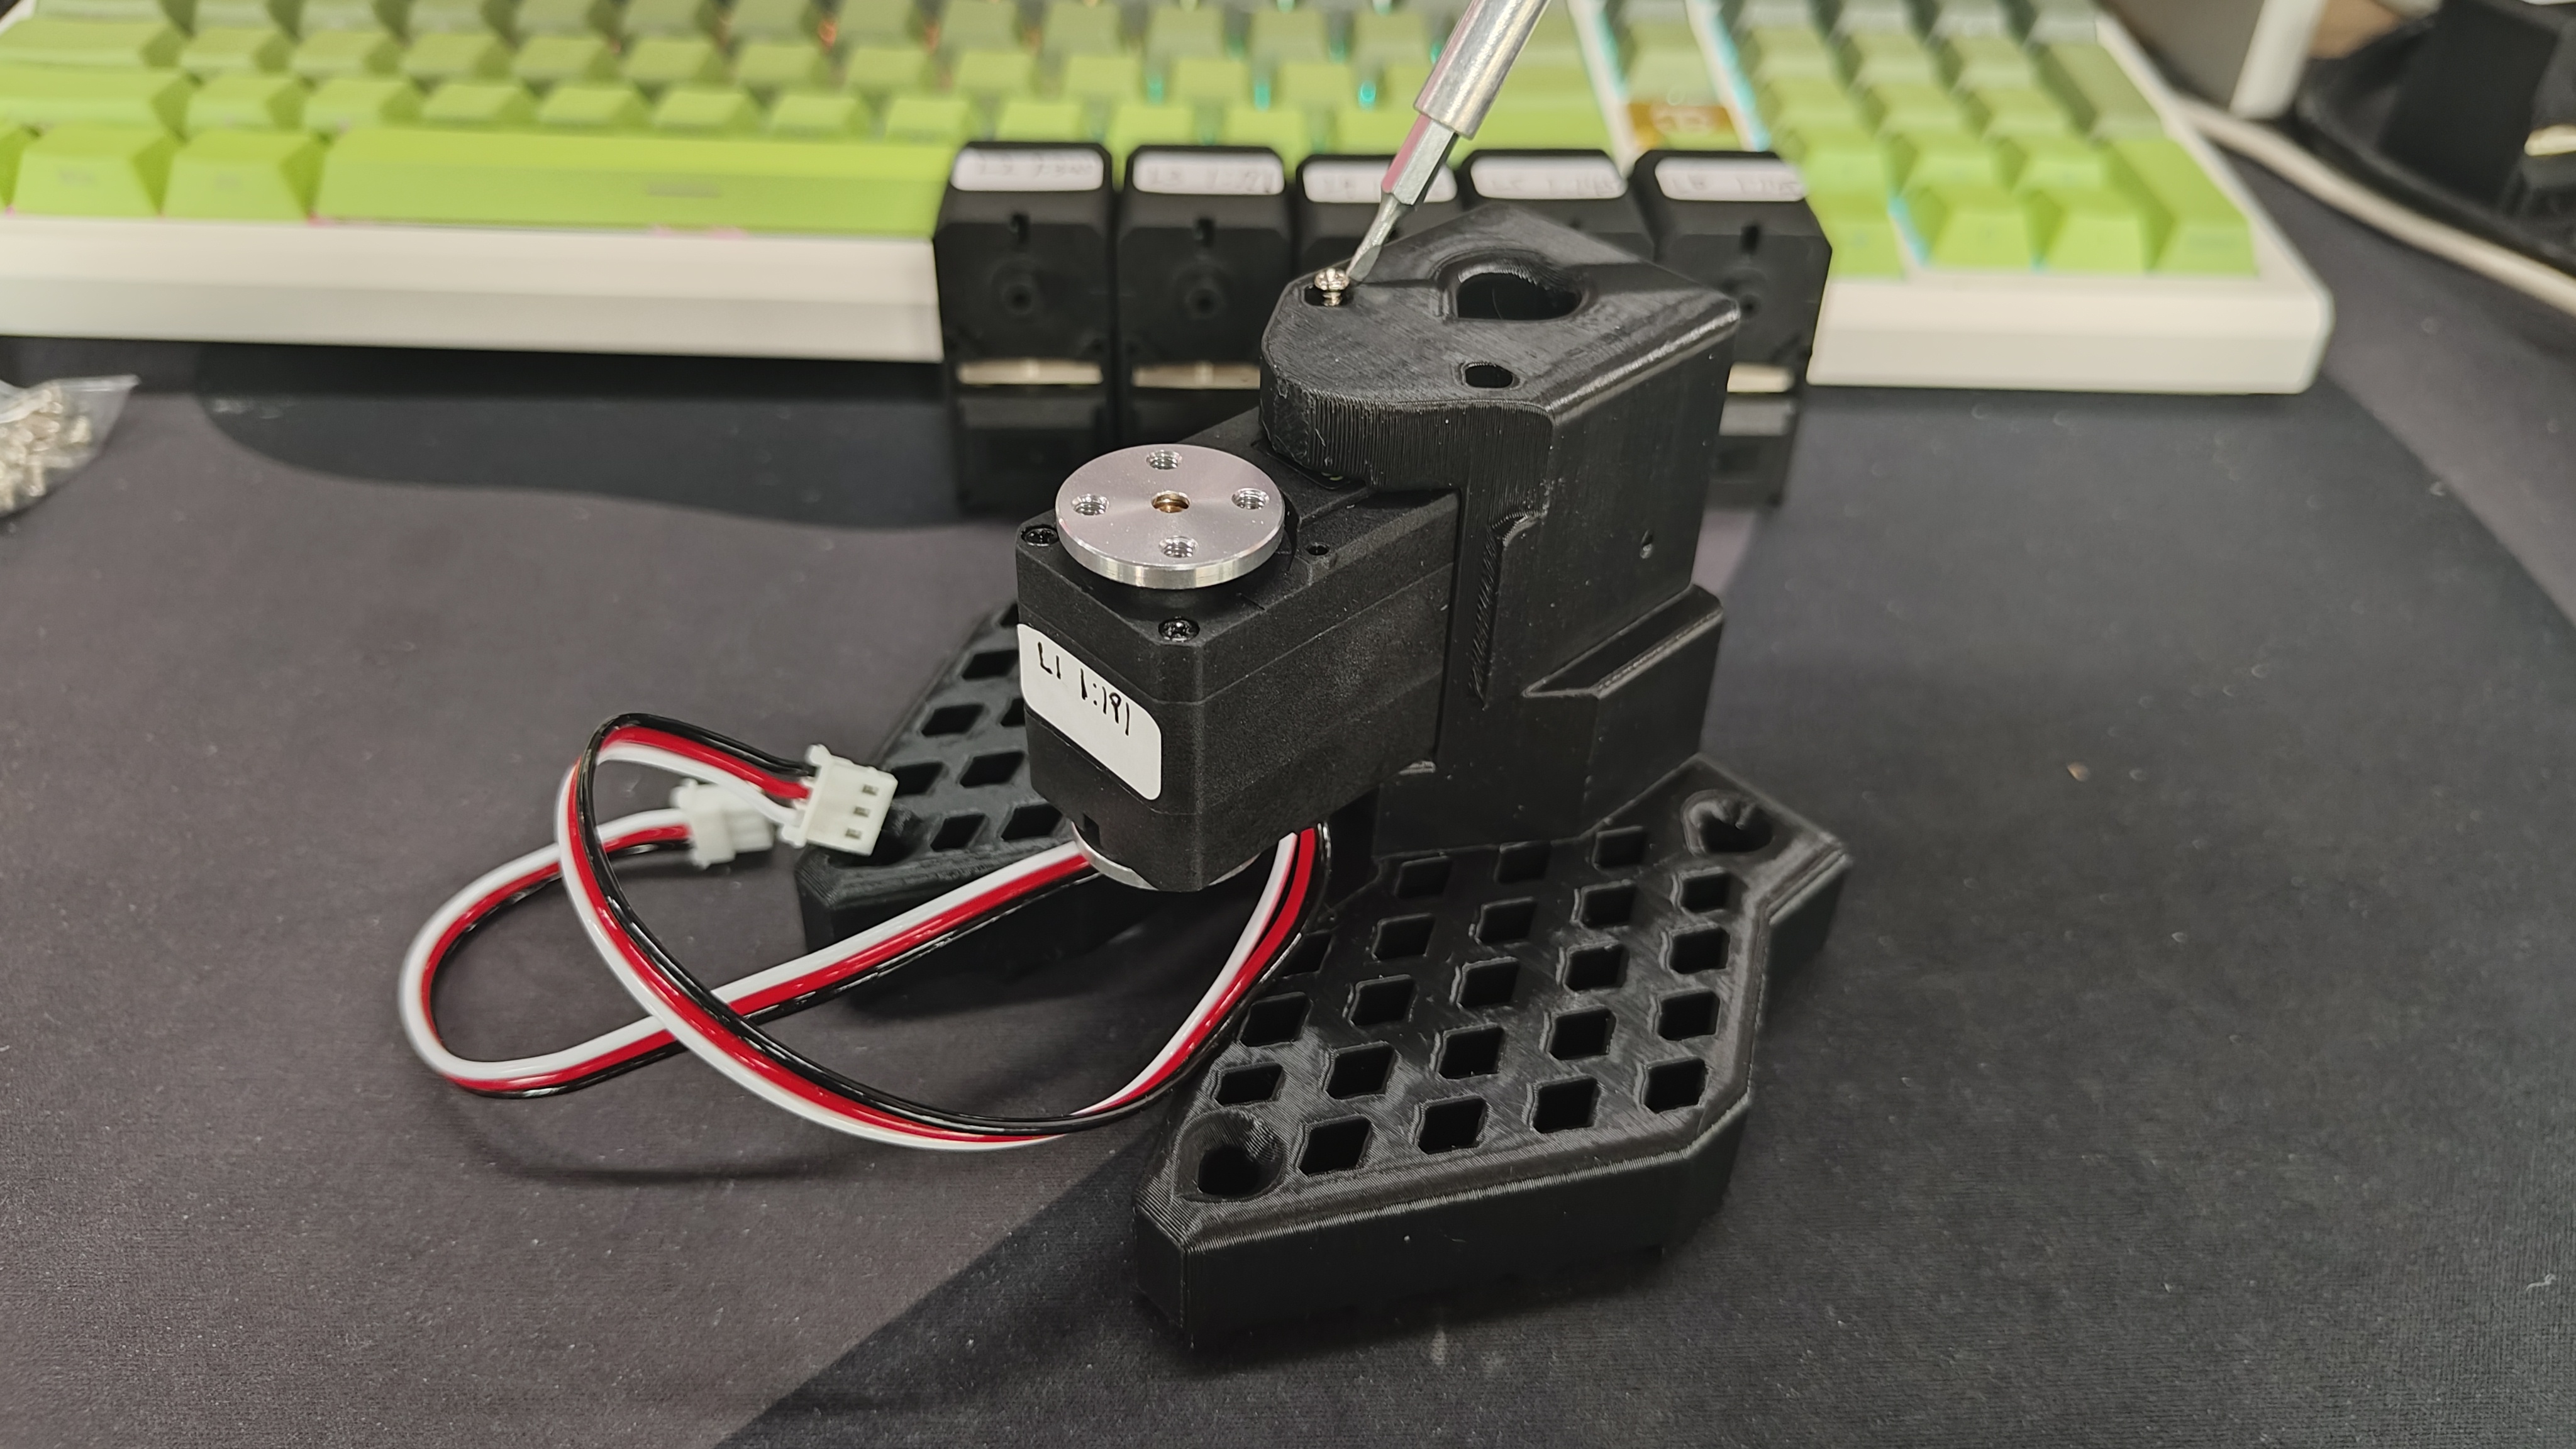
| Step 1 | Step 2 | Step 3 | Step 4 | Step 5 | Step 6 |
|---|---|---|---|---|---|
 |  |  |  |  |  |
| Step 7 | Step 8 | Step 9 | Step 10 | Step 11 | Step 12 |
 |  |  |  |  |  |
| Step 13 | Step 14 | Step 15 | Step 16 | Step 17 | Step 18 |
 |  |  |  |  |  |
| Step 19 | Step 20 | ||||
 |  |
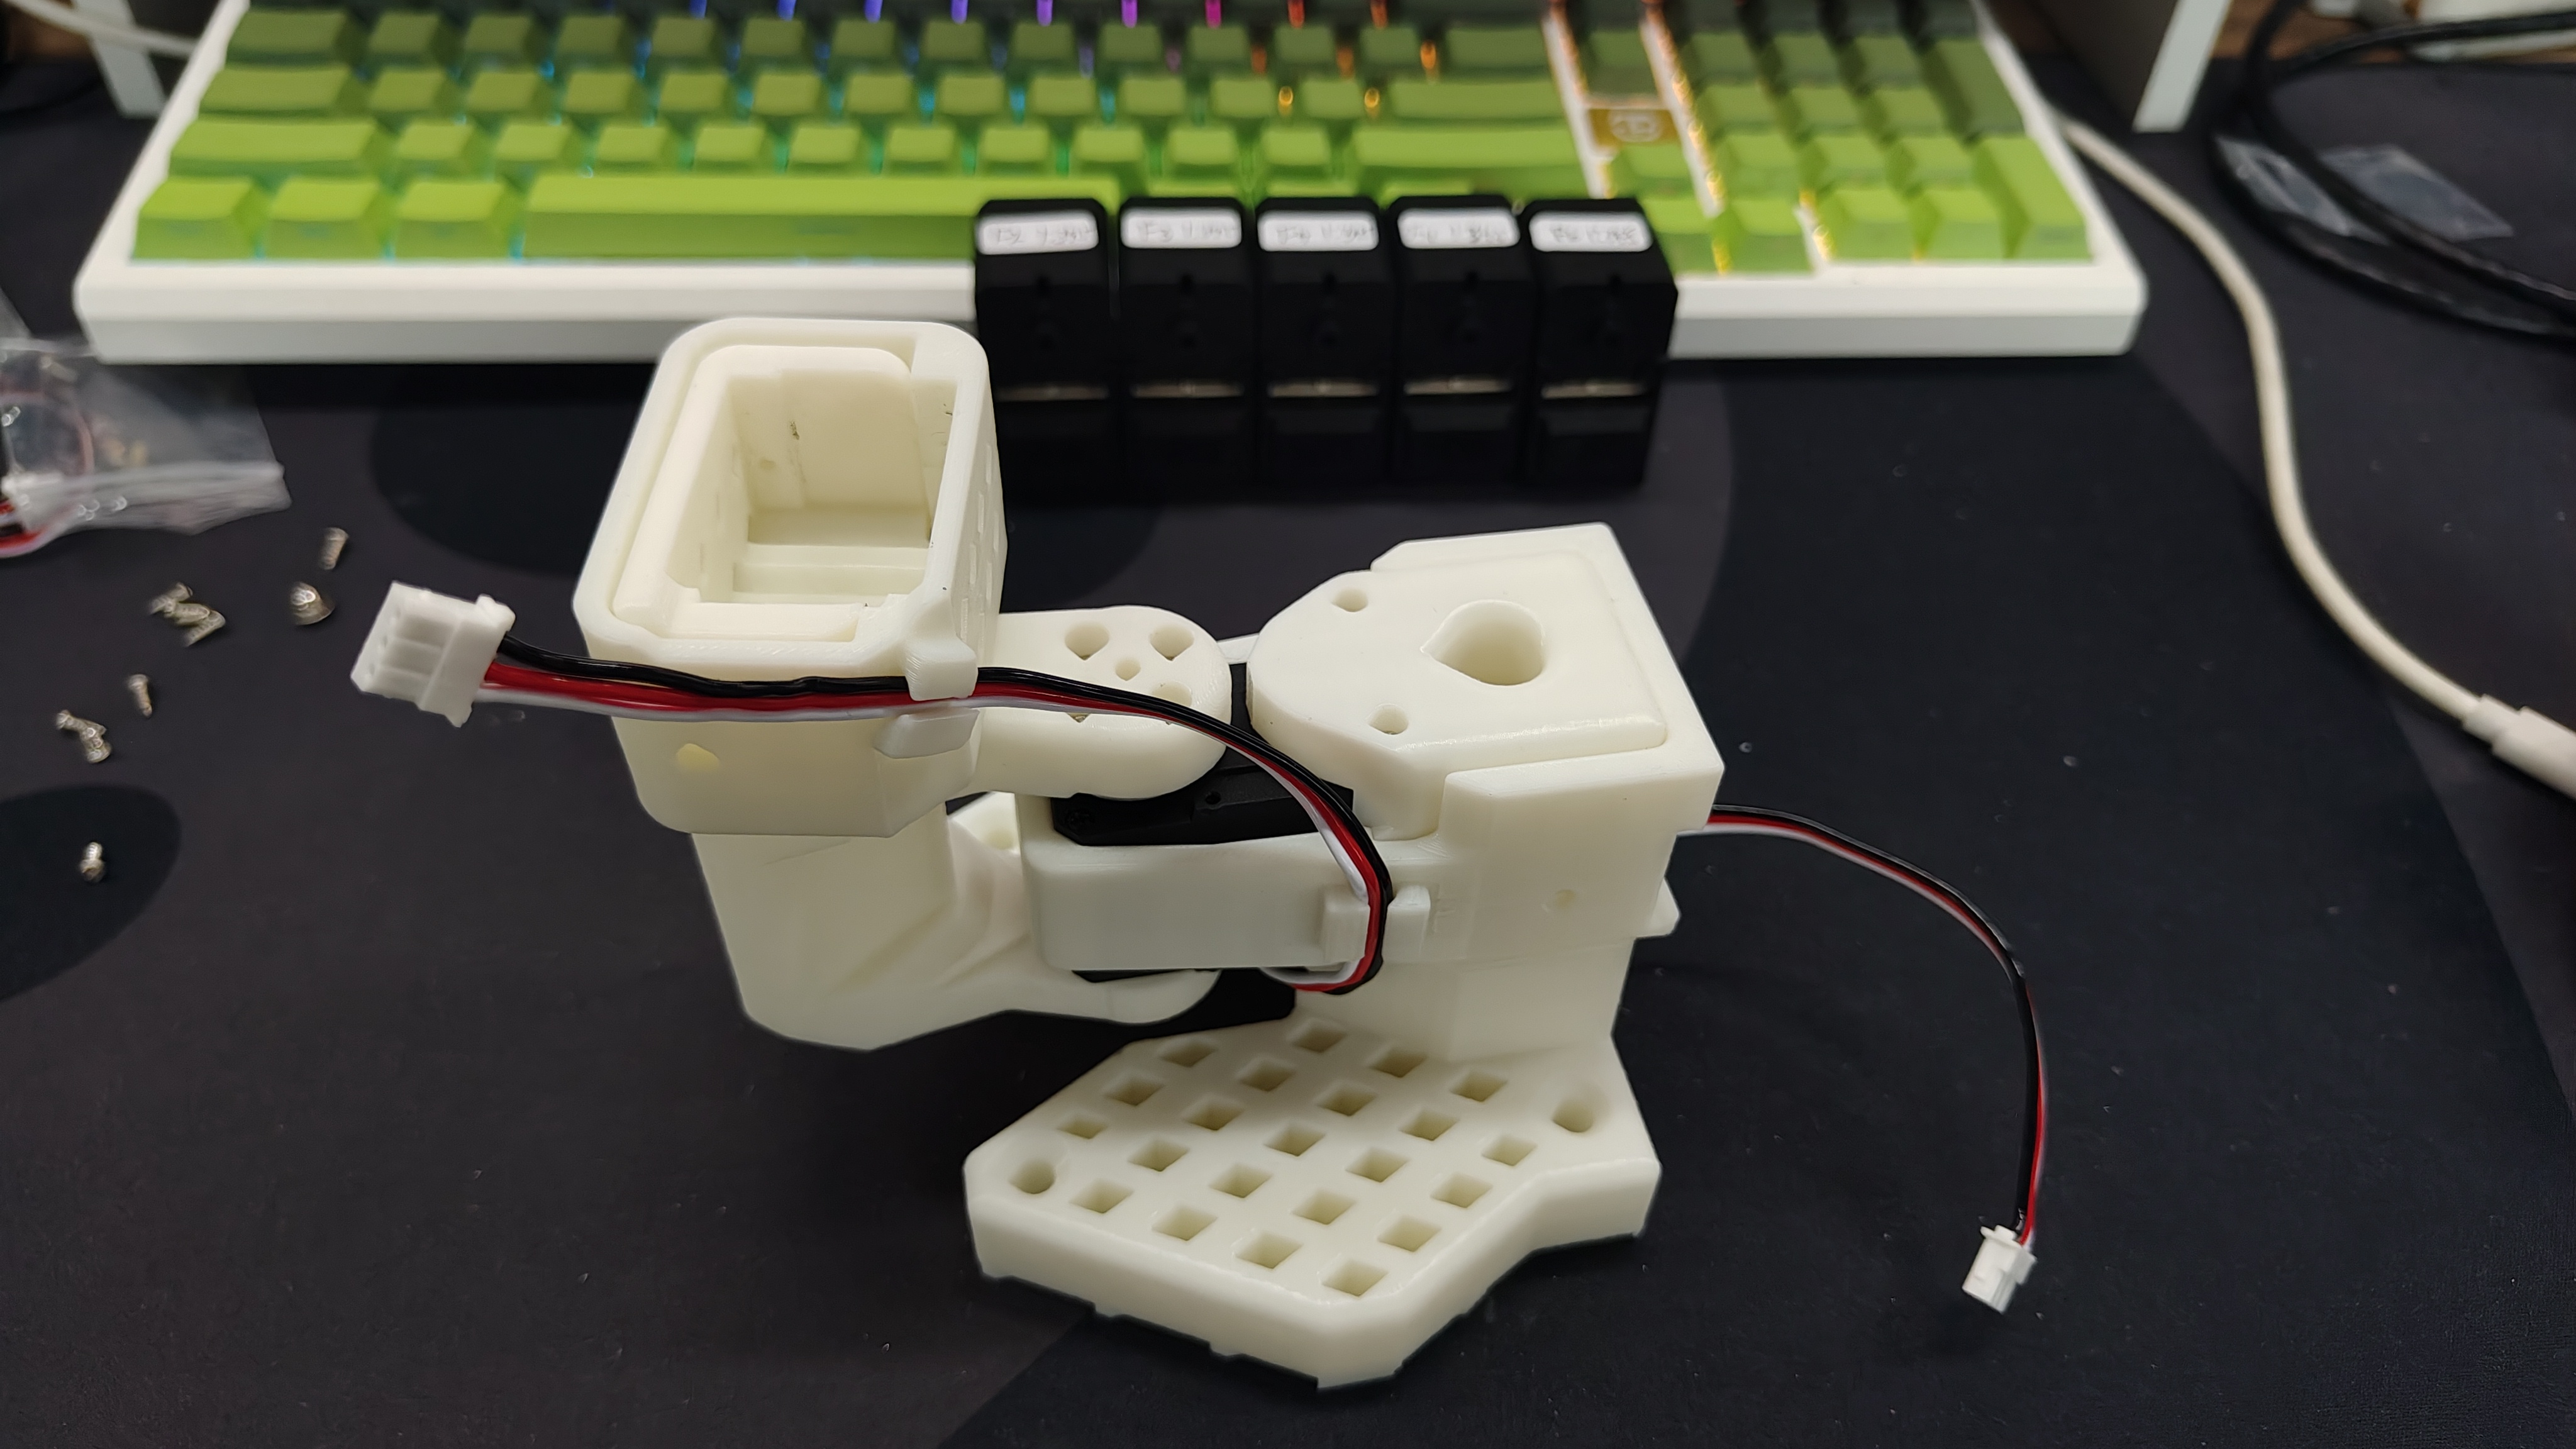
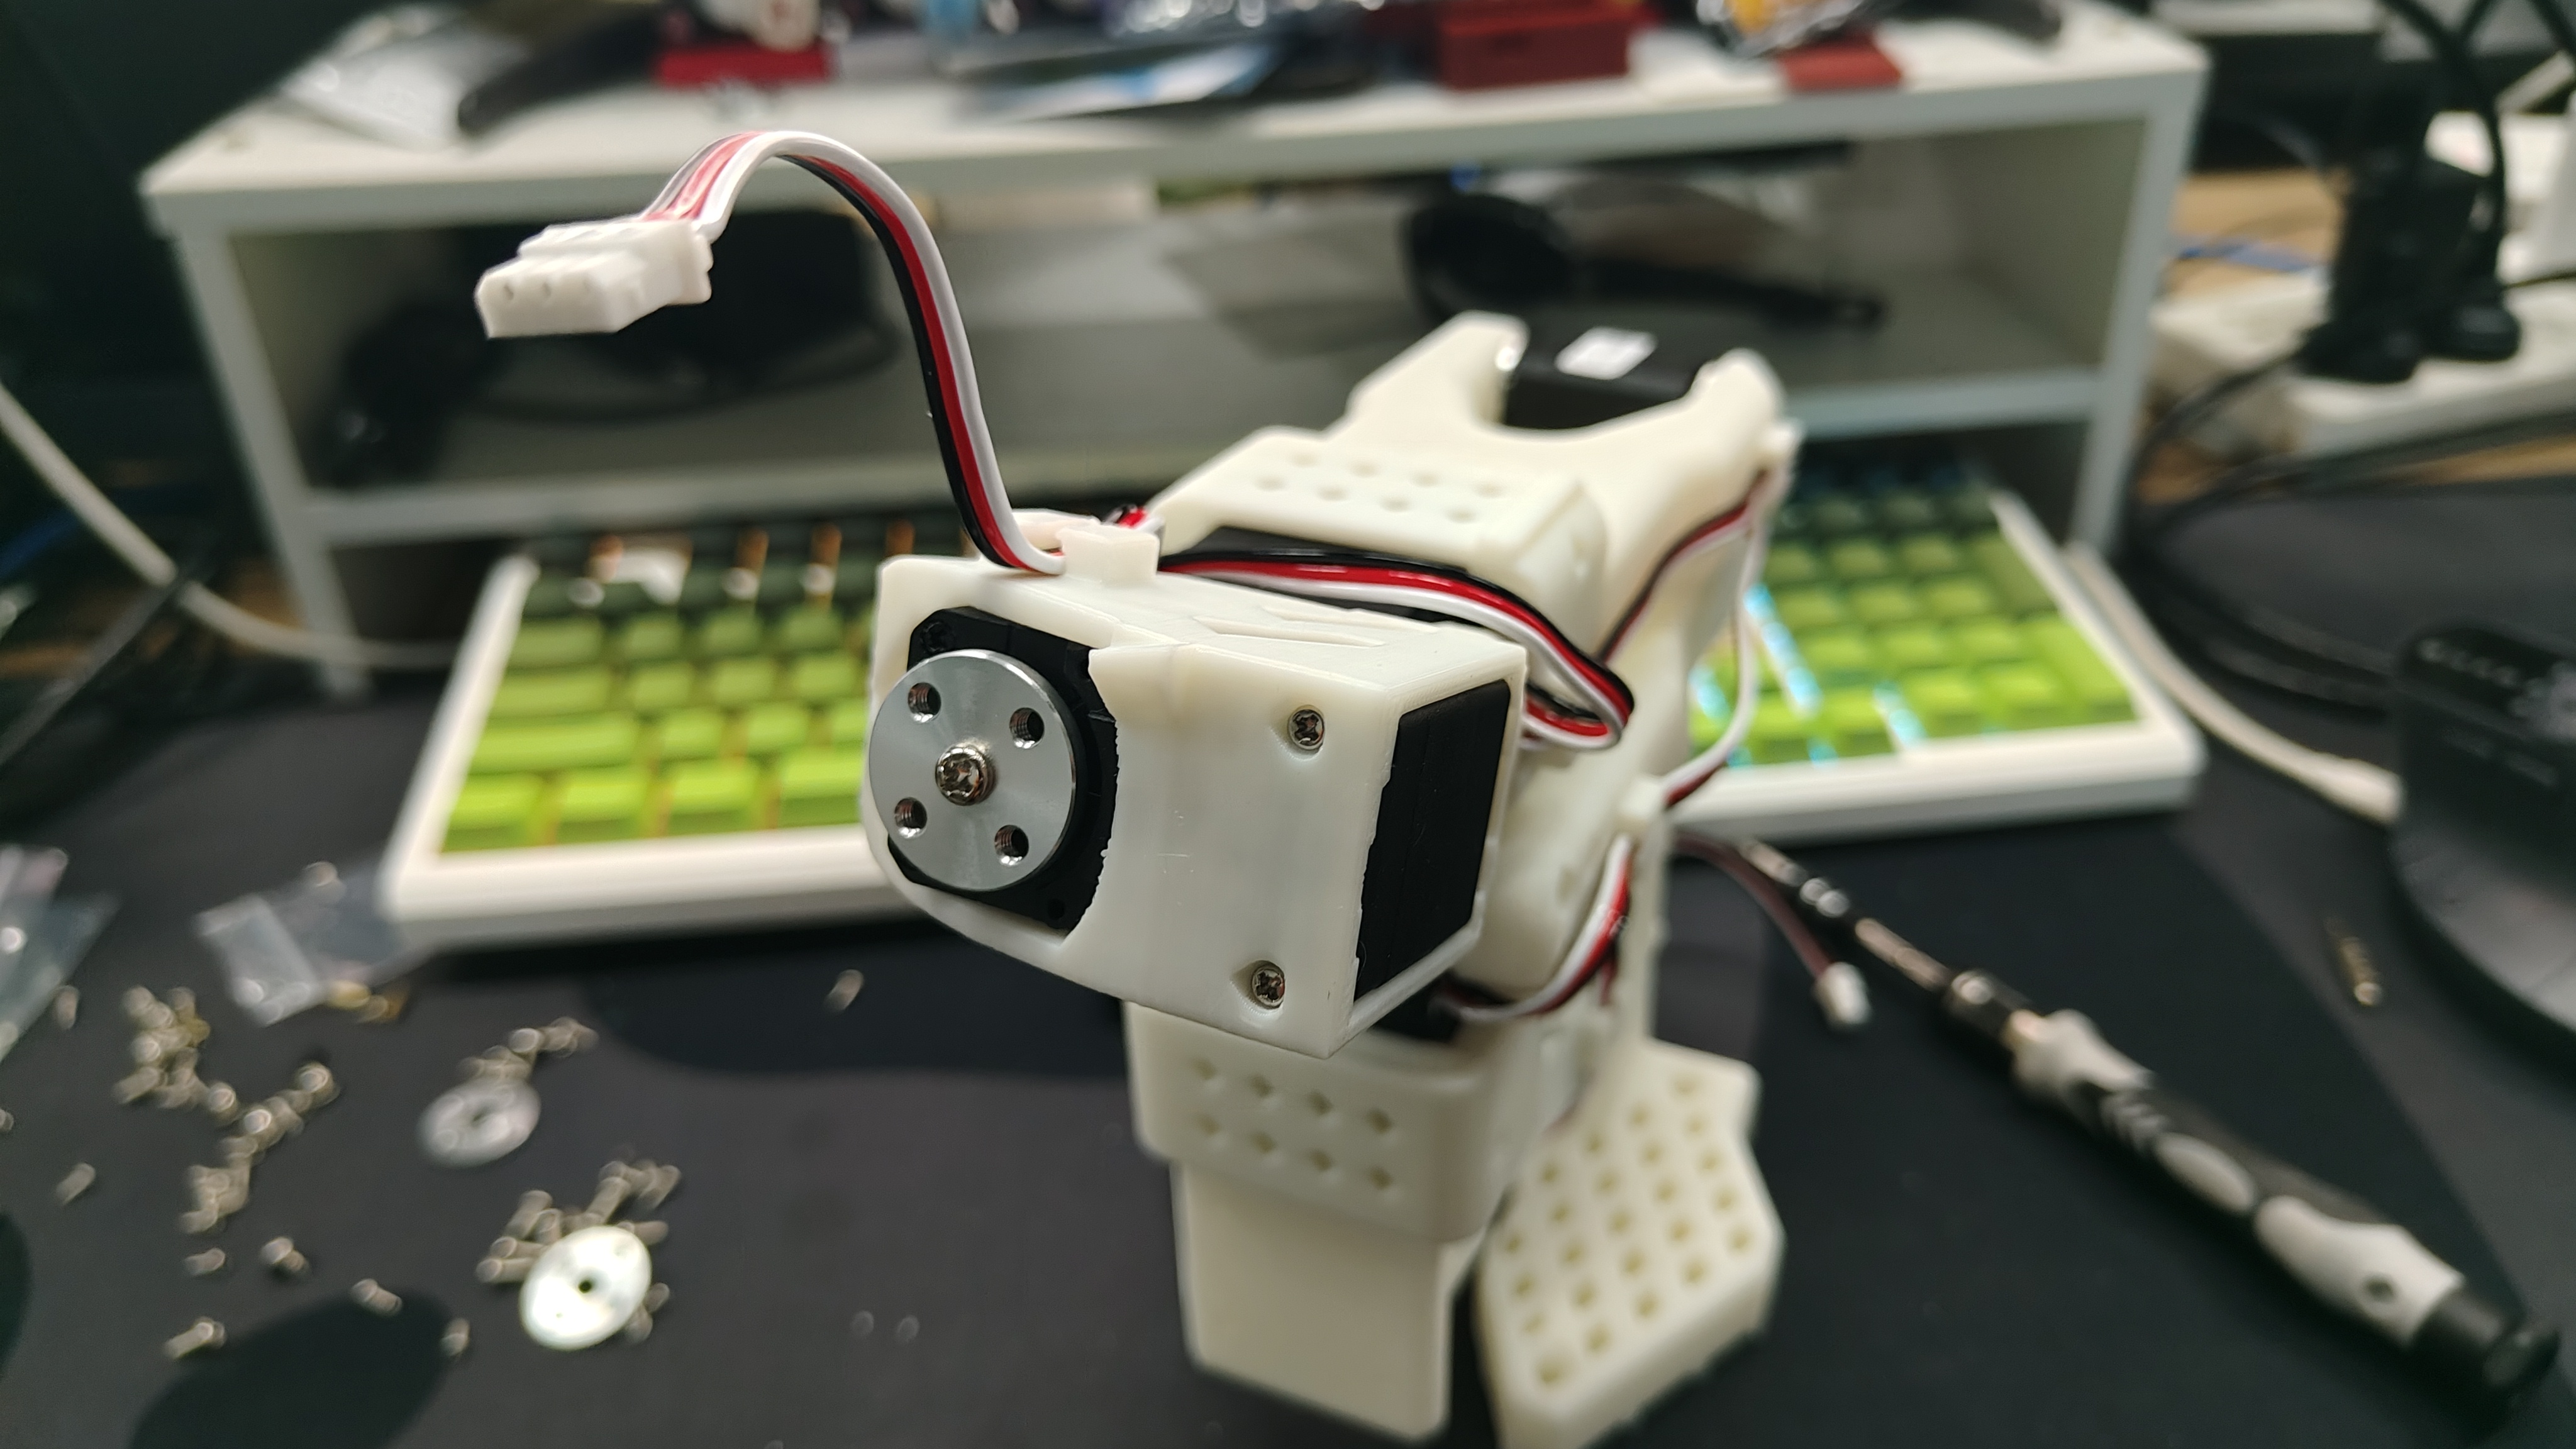
Assemble Follower Arm
- The steps for assembling the Follower Arm are generally the same as those for the Leader Arm. The only difference lies in the installation method of the end-effector (gripper and handle) after Step 12.
| Step 1 | Step 2 | Step 3 | Step 4 | Step 5 | Step 6 |
|---|---|---|---|---|---|
 |  |  |  |  |  |
| Step 7 | Step 8 | Step 9 | Step 10 | Step 11 | Step 12 |
 |  |  |  |  |  |
| Step 13 | Step 14 | Step 15 | Step 16 | Step 17 | |
 |  |  |  |  |
Calibrate the Robotic Arm
Calibrate the Robotic Arm
Calibrate the follower and leader arms so their physical positions match their software state.
Clear valuable items and unrelated people within 1 meter of the robotic arm workspace. Make sure the arm is firmly mounted and that power and cables are connected properly before running this section.
The SO100 and SO101 codes are compatible. Users of SO100 can directly utilize SO101's parameters and code for operation.
If you purchased the SO101 Arm Kit Standard Edition, all power supplies are 5V. If you purchased the SO101 Arm Kit Pro Edition, the Leader Arm should be calibrated and operated at every step using a 5V power supply, while the Follower Arm should be calibrated and operated at every step using a 12V power supply.
Next, you need to connect the power supply and data cable to your SO-10x robot for calibration to ensure that the leader and follower arms have the same position values when they are in the same physical position. This calibration is essential because it allows a neural network trained on one SO-10x robot to work on another.
Recalibrate the robotic arm
View recalibration options
If you need to re-calibrate the robotic arms, there are two options available:
Option 1: Delete local calibration files
Completely delete the files under ~/.cache/huggingface/lerobot/calibration/robots or ~/.cache/huggingface/lerobot/calibration/teleoperators before re-calibrating. Otherwise, the system may trigger an error prompt because the previous calibration data is stored in JSON files within these directories.
Option 2: Choose recalibration in the calibration command
Run the calibration command directly in the terminal. If the arm has been calibrated before, the following prompt will appear:
Press ENTER to use provided calibration file associated with the id my_awesome_leader_arm, or type 'c' and press ENTER to run calibration:
Type c and press Enter to start recalibration. Press Enter directly to keep and use the existing calibration data.
Connect the 6 robot servos via the 3-pin interfaces and connect the chassis servo to the servo driver board. Then, run the following command or API example to calibrate the arm:
On PC (Linux) and Jetson devices, the first USB device you plug in typically maps to ttyACM0, and the second maps to ttyACM1. Double-check which port is mapped to the leader and follower before running commands.
Manual calibration of follower arm
Please connect the interfaces of the 6 robot servos via a 3-pin cable and connect the chassis servo to the servo drive plate, then run the following command or API example to calibrate the robot arm:
Interface permissions are given first
sudo chmod 666 /dev/ttyACM*
Then calibrate the follower arm
lerobot-calibrate \
  --robot.type=so101_follower \
  --robot.port=/dev/ttyACM0 # <- The port of your robot
  --robot.id=my_awesome_follower_arm  # <- Give the robot a unique name
The video below shows how to perform the calibration. First you need to move the robot to the position where all joints are in the middle of their ranges. Then after pressing enter you have to move each joint through its full range of motion.
Due to the update of the lerobot repository, it is normal that the terminal does not receive a signal from servo 5 when performing master-slave arm calibration. You can continue with the operation.
Manual calibration of leader arm
Do the same steps to calibrate the leader arm, run the following command or API example:
lerobot-calibrate \
  --teleop.type=so101_leader \
  --teleop.port=/dev/ttyACM1 # <- The port of your robot
  --teleop.id=my_awesome_leader_arm  # <- Give the robot a unique name
If you encounter the error “Could not connect on port '/dev/ttyACM0'. Make sure you are using the correct port., Try running lerobot-find-port” while calibrating the Leader or Follower arms, you need to grant the necessary permissions by running:sudo chmod 666 /dev/ttyACM*
(Optional) Middle-position calibration with the Seeed Studio SoARM quick tool
When calibrating or running the robot, if you see errors like:
Magnitude 30841 exceeds 2047 (max for sign_bit_index=11)
This usually means the current position / zero-offset of a servo is abnormal, causing the read angle to exceed the expected range. In that case, you can use Seeed Studio’s SoARM tool to do a middle-position calibration (write the current position to the middle value 2048), and then redo the full-arm calibration.
1) Clone the tool from GitHub and install dependencies
git clone https://github.com/Seeed-Projects/Seeed_RoboController.git
cd Seeed_RoboController
pip install -r requirements.txt
2) Middle-position calibration and verification
Script locations:
src/tools/servo_middle_calibration.py: middle-position calibration (write current position as 2048)src/tools/servo_disable.py: disable servo torque (easier to rotate joints by hand)src/tools/servo_center_test.py: move to 2048 to verify the calibration result
Run in order (the commands will interactively ask you to select a port):
- (Optional) Disable torque to adjust joints manually:
python -m src.tools.servo_disable
- Do middle-position calibration (set current position to 2048):
python -m src.tools.servo_middle_calibration
- Verify: move the servo to 2048 and check if it returns to the expected middle position:
python -m src.tools.servo_center_test
After the middle-position calibration, return to the lerobot-calibrate steps above and redo the full-arm calibration.
If you encounter the above errors, you can use the Steering Gear Debugging Tool for debugging. It supports Windows, Ubuntu, and Mac.
Teleoperation
Teleoperation
Run a leader-to-follower teleoperation test before adding cameras or collecting data.
Clear valuable items and unrelated people within 1 meter of the robotic arm workspace. Make sure the arm is firmly mounted and that power and cables are connected properly before running this section.
Simple teleop Then you are ready to teleoperate your robot! Run this simple script (it won't connect and display the cameras):
Note that the id associated with a robot is used to store the calibration file. It’s important to use the same id when teleoperating, recording, and evaluating when using the same setup.
sudo chmod 666 /dev/ttyACM*
lerobot-teleoperate \
  --robot.type=so101_follower \
  --robot.port=/dev/ttyACM0 \
  --robot.id=my_awesome_follower_arm \
  --teleop.type=so101_leader \
  --teleop.port=/dev/ttyACM1 \
  --teleop.id=my_awesome_leader_arm
The teleoperate command will automatically:
- Identify any missing calibrations and initiate the calibration procedure.
- Connect the robot and teleop device and start teleoperation.
Add Cameras
Add Cameras
Add OpenCV, RealSense, or Orbbec cameras and verify image streams before recording datasets.
If using RealSense D435i/D405
RealSense depth cameras can provide RGB-D perception for LeRobot and are suitable for tasks such as object recognition, point cloud reconstruction, and tabletop manipulation. The recommended models here are RealSense D405 and RealSense D435i.
RealSense D405
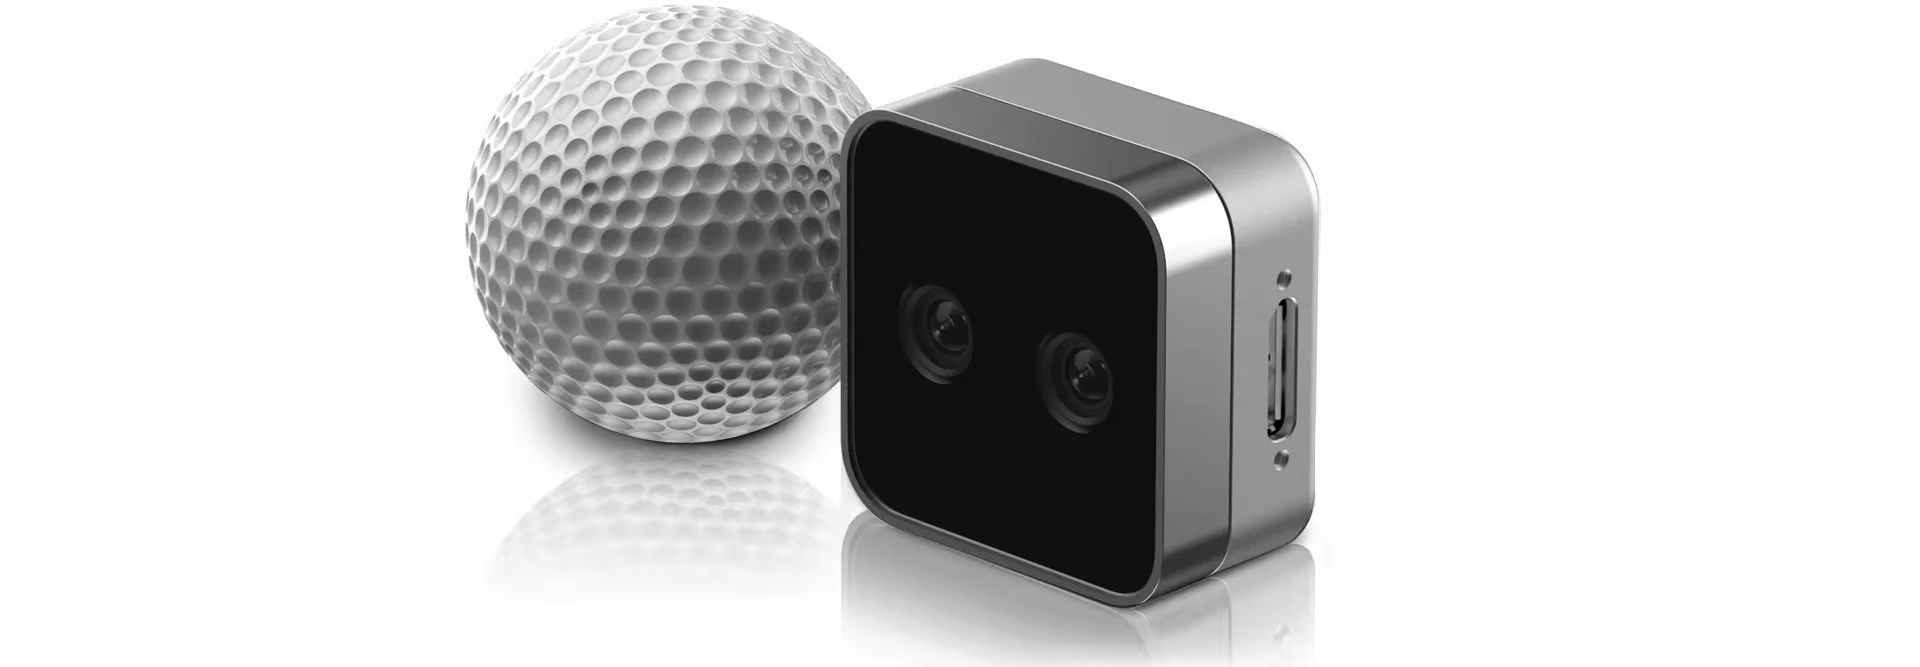
The RealSense D405 is a short-range stereo depth camera designed for high-precision close-range tasks such as tabletop robotic manipulation, with a typical working range of 7 cm to 50 cm.
RealSense D435i
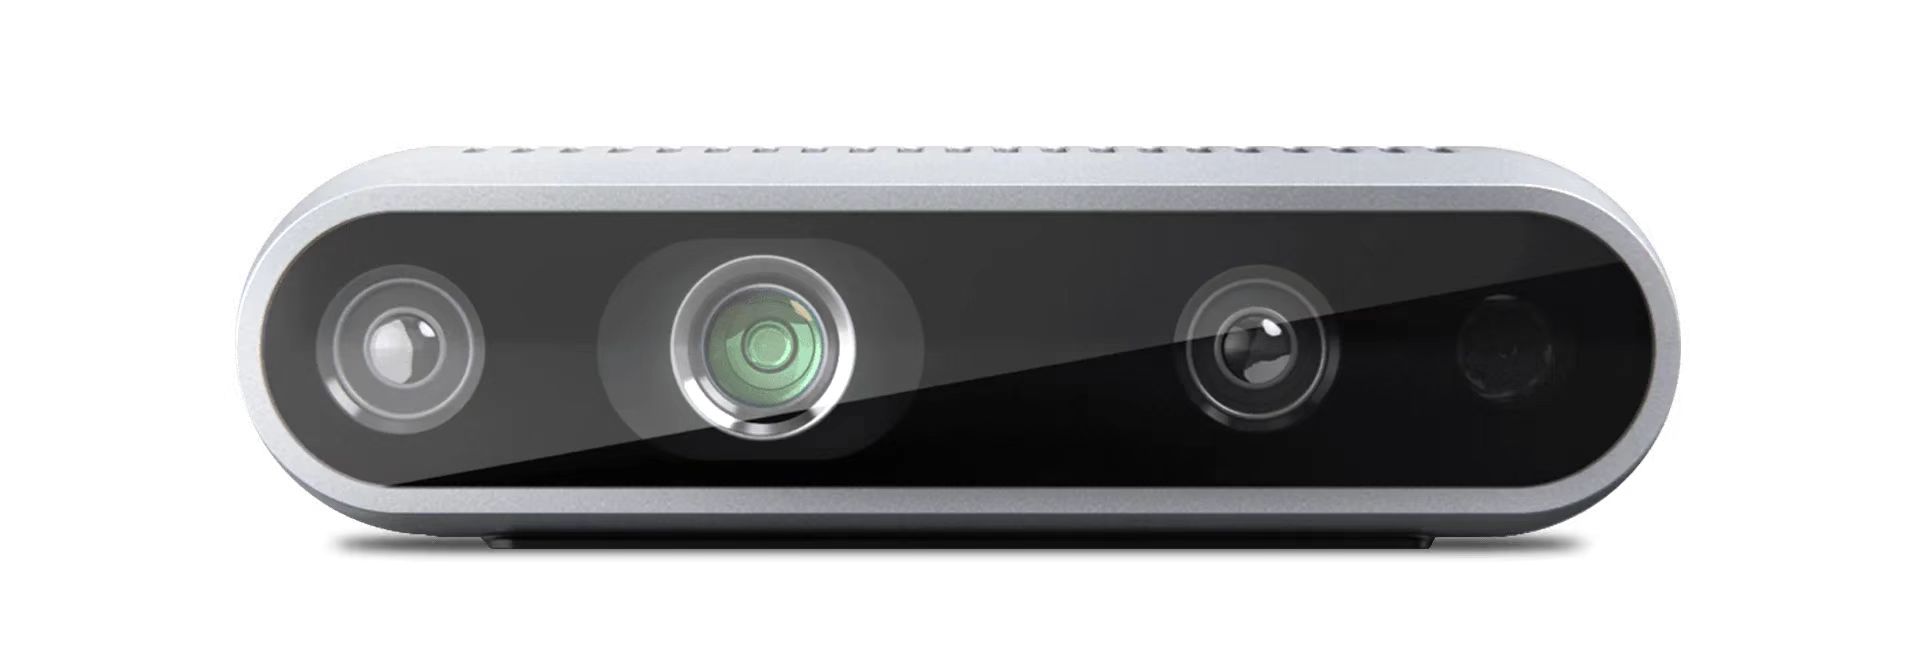
The RealSense D435i combines depth sensing, RGB imaging, and an IMU, making it suitable for mid- to close-range applications such as 3D reconstruction, SLAM, and robotic environment perception.
1. Switch to the Camera Branch
Current camera support is available on the DepthCameraSupport branch:
git checkout DepthCameraSupport
git pull origin DepthCameraSupport
Confirm the current branch:
git branch --show-current
Expected output:
DepthCameraSupport
2. Install RealSense in Editable Mode
If you only use RealSense:
pip install -e ".[realsense]"
3. Grant Camera Permissions
chmod a+rw /dev/bus/usb/*/*
4. Detect Cameras
lerobot-find-cameras realsense
This step will output:
- Camera model
- Serial number
- USB information
- Default stream configuration
Enter the retrieved Serial number into the serial_number_or_name parameter of the camera command below.
5. RealSense Example
Dual RealSense test:
lerobot-teleoperate \
--robot.type=so101_follower \
--robot.port=/dev/ttyACM0 \
--robot.id=my_awesome_follower_arm \
--robot.cameras='{
  d435i_color: {
    type: realsense_d435i_color,
    serial_number_or_name: "419522072950",
    width: 640,
    height: 480,
    fps: 30,
    color_mode: rgb,
    color_stream_format: rgb8,
    rotation: 0,
    warmup_s: 1
  },
  d435i_depth: {
    type: realsense_d435i_depth,
    serial_number_or_name: "419522072950",
    width: 640,
    height: 480,
    fps: 30,
    max_depth_m: 2.0,
    depth_alpha: 0.2,
    rotation: 0,
    warmup_s: 5
  },
  d405_color: {
    type: realsense_d405_color,
    serial_number_or_name: "409122273421",
    width: 640,
    height: 480,
    fps: 30,
    color_mode: rgb,
    color_stream_format: rgb8,
    rotation: 0,
    warmup_s: 1
  },
  d405_depth: {
    type: realsense_d405_depth,
    serial_number_or_name: "409122273421",
    width: 640,
    height: 480,
    fps: 30,
    depth_alpha: 0.03,
    rotation: 0,
    warmup_s: 5
  }
}' \
--teleop.type=so101_leader \
--teleop.port=/dev/ttyACM1 \
--teleop.id=my_awesome_leader_arm \
--display_data=true
6. Parameter Notes
depth_alphacontrols the scaling factor of the depth image and can be adjusted based on the display result and target distance range.- If you connect three or more depth cameras, it is recommended to reduce
fpsto15to improve overall stability. - It is recommended to keep the resolution at
640x480for a better balance of stability and real-time performance.
If using Orbbec Gemini2/Gemini336 cameras

Orbbec Gemini 2 is a high-performance RGB-D camera for robotics applications, providing synchronized RGB and depth streams with precise depth-to-color alignment. Combined with stereo depth sensing and a built-in 6-axis IMU, it is well suited for robotic tasks such as object detection, 3D perception, mapping, and navigation. Its compact design and full Orbbec SDK support make it suitable for both research and real-world deployment.
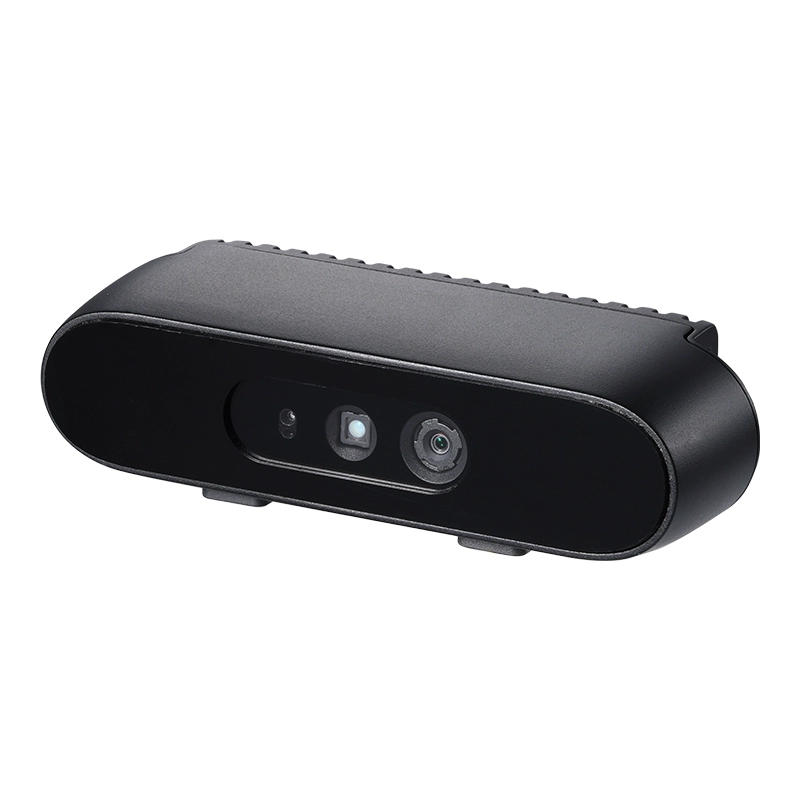
Gemini 336 is a new member of the Gemini 330 series. It inherits the strong depth performance of Gemini 335 and further improves depth imaging quality in reflective indoor areas, dark regions in high-dynamic scenes, and bright outdoor environments. For robotics applications, it can provide more stable, high-quality depth data for tasks such as perception, localization, and manipulation.
1. Switch to the Camera Branch
Current camera support is available on the DepthCameraSupport branch:
git checkout DepthCameraSupport
git pull origin DepthCameraSupport
Confirm the current branch:
git branch --show-current
Expected output:
DepthCameraSupport
2. Install LeRobot in Editable Mode
If you only use Orbbec:
pip install -e ".[orbbec]"
3. Grant Camera Permissions
chmod a+rw /dev/bus/usb/*/*
4. USBFS Cache Size Configuration
By default, the USBFS cache size is 16 MB. This value is insufficient for high-resolution images, multiple data streams, and multi-device scenarios. Users can increase the cache size up to 128 MB.
Check the USBFS Cache Size
cat /sys/module/usbcore/parameters/usbfs_memory_mb
Temporarily Increase USBFS Cache Size
sudo sh -c 'echo 128> /sys/module/usbcore/parameters/usbfs_memory_mb'
If you still encounter the timeout error TimeoutError: Timed out waiting for frame from <lerobot.cameras.orbbec.camera_orbbec.OrbbecDepthCamera object at 0x7ba4ba130910.........>, simply reconnect the camera.
5. Detect Cameras
lerobot-find-cameras orbbec
This step will output:
- Camera model(Name)
- Serial number(Serial number)
- USB information
- Default stream configuration
Enter the retrieved Serial Number into the serial_number_or_name parameter of the camera command shown below.
6. Orbbec Example
Single Orbbec test:
lerobot-teleoperate \
--robot.type=so101_follower \
--robot.port=/dev/ttyACM0 \
--robot.id=my_awesome_follower_arm \
--robot.cameras='{
  orbbec_color: {
    type: orbbec_color,
    serial_number_or_name: "CP9JA530003A",
    width: 640,
    height: 480,
    fps: 30,
    color_mode: rgb,
    rotation: 0,
    warmup_s: 1
  },
  orbbec_depth: {
    type: orbbec_depth,
    serial_number_or_name: "CP9JA530003A",
    width: 640,
    height: 400,
    fps: 30,
    depth_alpha: 0.2,
    rotation: 0,
    warmup_s: 5
  }
}' \
--teleop.type=so101_leader \
--teleop.port=/dev/ttyACM1 \
--teleop.id=my_awesome_leader_arm \
--display_data=true
Single Orbbec Camera Test + Standard Camera Test:
  lerobot-teleoperate \
  --robot.type=so101_follower \
  --robot.port=/dev/ttyACM0 \
  --robot.id=my_awesome_follower_arm \
  --robot.cameras='{
    orbbec_color: {
      type: orbbec_color,
      serial_number_or_name: "CP9JA530003A",
      width: 640,
      height: 480,
      fps: 30,
      color_mode: rgb,
      rotation: 0,
      warmup_s: 1
    },
    orbbec_depth: {
      type: orbbec_depth,
      serial_number_or_name: "CP9JA530003A",
      width: 640,
      height: 400,
      fps: 30,
      depth_alpha: 0.2,
      rotation: 0,
      warmup_s: 5
    },
    side: {
    type: opencv,
    index_or_path: 8,
    width: 640,
    height: 480,
    fps: 30,
    fourcc: "MJPG"}
  }' \
  --teleop.type=so101_leader \
  --teleop.port=/dev/ttyACM1 \
  --teleop.id=my_awesome_leader_arm \
  --display_data=true
When using a single Orbbec camera together with a standard camera, it is recommended to plug in the Orbbec camera first, followed by the standard camera.
When running the lerobot-find-cameras opencv command to detect camera IDs, you will find that the Orbbec camera occupies 3 consecutive camera numbers. Therefore, it is advisable to plug in the standard camera last so that its number is assigned at the end.
7. Parameter Notes
depth_alphacontrols the scaling factor of the depth image. A good starting point is0.2, then you can fine-tune it based on the display result.- If you connect three or more depth cameras, it is recommended to reduce
fpsto15for better stability. - It is recommended to keep the resolution at
640x480for more stable display and data transfer.
For camera-related errors, see the FAQ section at the end of this page.
If using a regular camera
The SO100 and SO101 codes are compatible. Users of SO100 can directly utilize SO101's parameters and code for operation.
To instantiate a camera, you need a camera identifier. This identifier might change if you reboot your computer or re-plug your camera, a behavior mostly dependant on your operating system.
To find the camera indices of the cameras plugged into your system, run the following script:
lerobot-find-cameras opencv # or realsense for Intel Realsense cameras
The terminal will print out the following information.
--- Detected Cameras ---
Camera #0:
Name: OpenCV Camera @ 0
Type: OpenCV
Id: 0
Backend api: AVFOUNDATION
Default stream profile:
  Format: 16.0
  Width: 1920
  Height: 1080
  Fps: 15.0
--------------------
(more cameras ...)
You can find the pictures taken by each camera in the outputs/captured_images directory.
When using Intel RealSense cameras in , you could get this error: , this can be solved by running the same command with permissions. Note that using RealSense cameras in is unstable.macOSError finding RealSense cameras: failed to set power statesudomacOS.
Then you will be able to display the cameras on your computer while you are teleoperating by running the following code. This is useful to prepare your setup before recording your first dataset.
lerobot-teleoperate \
  --robot.type=so101_follower \
  --robot.port=/dev/ttyACM0 \
  --robot.id=my_awesome_follower_arm \
  --robot.cameras="{ front: {type: opencv, index_or_path: 0, width: 640, height: 480, fps: 30, fourcc: "MJPG"}}" \
  --teleop.type=so101_leader \
  --teleop.port=/dev/ttyACM1 \
  --teleop.id=my_awesome_leader_arm \
  --display_data=true
If you have more cameras, you can change --robot.cameras to add cameras. You should note the format of the index_or_path, which is determined by the last digit of the camera ID output by python -m lerobot.find_cameras opencv.
Images in the fourcc: "MJPG" format are compressed. You can try higher resolutions, and you may also attempt the YUYV format. However, the latter will reduce the image resolution and FPS, leading to lag in the robotic arm's operation. Currently, under the MJPG format, it can support 3 cameras at a resolution of 1920*1080 while maintaining 30FPS. That said, connecting 2 cameras to a computer via the same USB HUB is still not recommended.
For example, you want to add a side camera:
lerobot-teleoperate \
  --robot.type=so101_follower \
  --robot.port=/dev/ttyACM0 \
  --robot.id=my_awesome_follower_arm \
  --robot.cameras="{ front: {type: opencv, index_or_path: 0, width: 640, height: 480, fps: 30, fourcc: "MJPG"}, side: {type: opencv, index_or_path: 2, width: 640, height: 480, fps: 30, fourcc: "MJPG"}}" \
  --teleop.type=so101_leader \
  --teleop.port=/dev/ttyACM1 \
  --teleop.id=my_awesome_leader_arm \
  --display_data=true
Images in the fourcc: "MJPG" format are compressed. You can try higher resolutions, and you may also attempt the YUYV format. However, the latter will reduce the image resolution and FPS, leading to lag in the robotic arm's operation. Currently, under the MJPG format, it can support 3 cameras at a resolution of 1920*1080 while maintaining 30FPS. That said, connecting 2 cameras to a computer via the same USB HUB is still not recommended.
If you find bug like this.
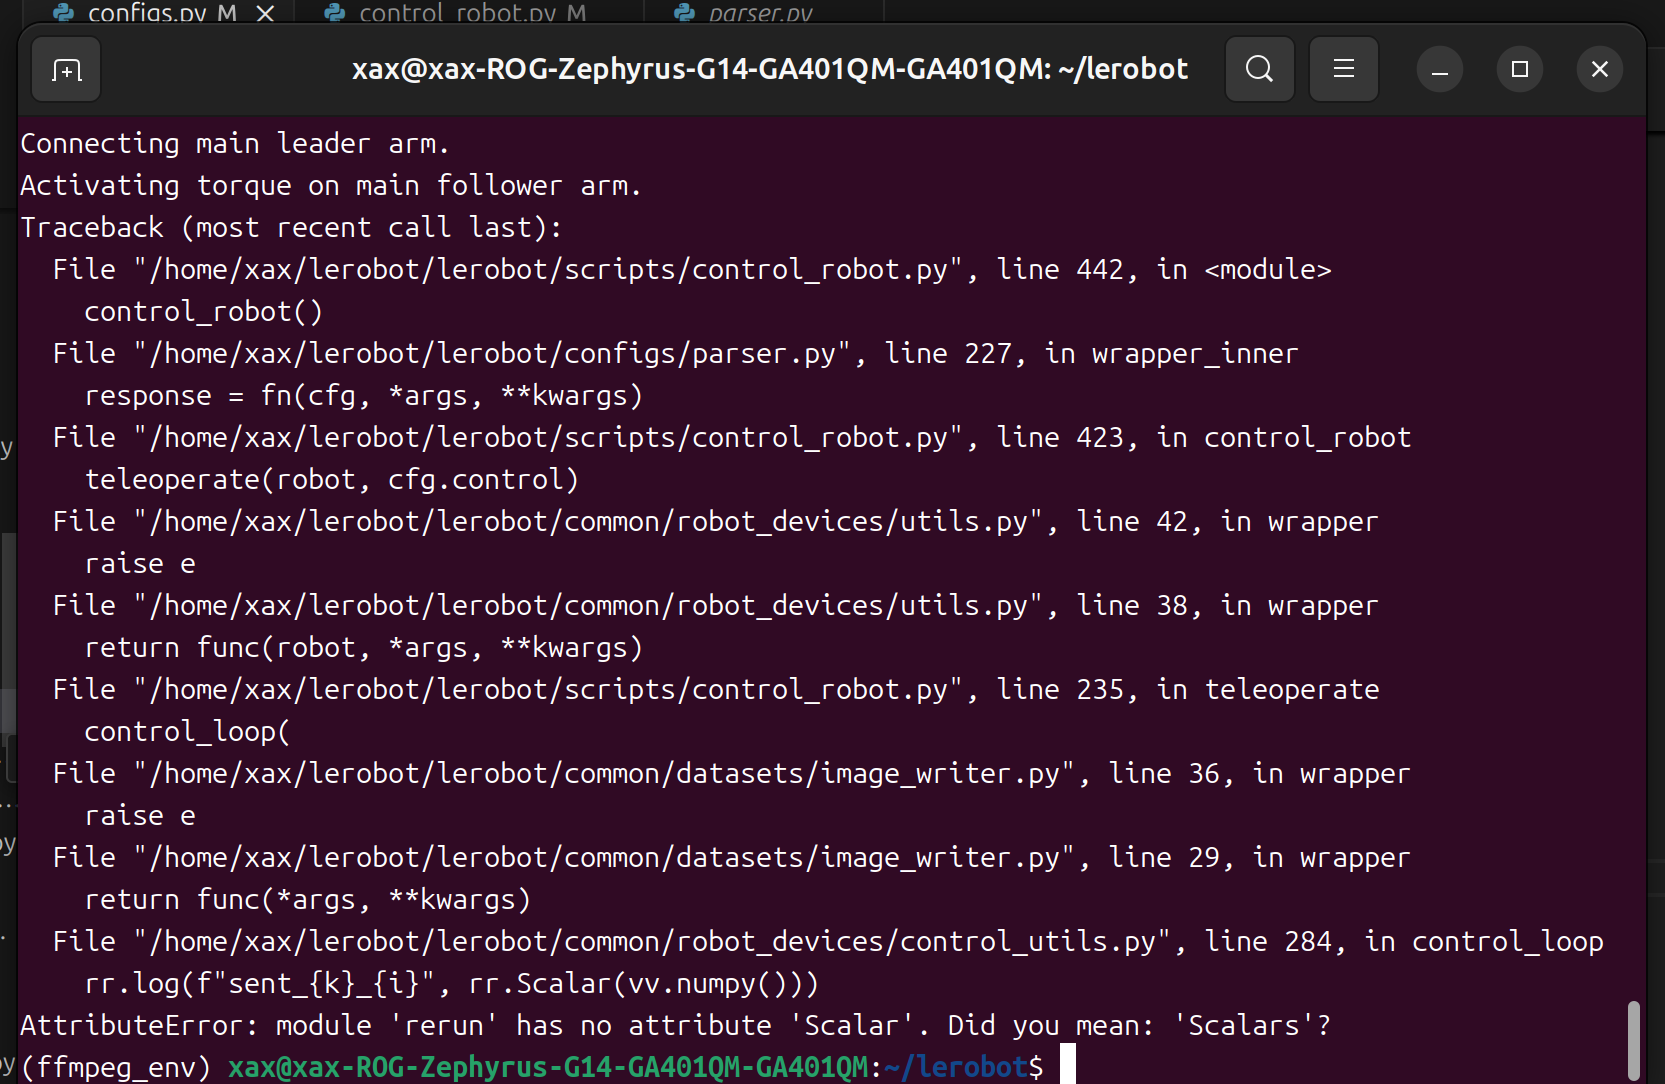
You can downgrade the rerun version to resolve the issue.
pip3 install rerun-sdk==0.23
Record Dataset
Record Dataset
Record local datasets or upload them to Hugging Face Hub, then keep the dataset clean and consistent.
Clear valuable items and unrelated people within 1 meter of the robotic arm workspace. Make sure the arm is firmly mounted and that power and cables are connected properly before running this section.
- If you want to save the dataset locally, you can run it directly:
lerobot-record \
  --robot.type=so101_follower \
  --robot.port=/dev/ttyACM0 \
  --robot.id=my_awesome_follower_arm \
  --robot.cameras="{ front: {type: opencv, index_or_path: 0, width: 640, height: 480, fps: 30, fourcc: "MJPG"}, side: {type: opencv, index_or_path: 2, width: 640, height: 480, fps: 30, fourcc: "MJPG"}}" \
  --teleop.type=so101_leader \
  --teleop.port=/dev/ttyACM1 \
  --teleop.id=my_awesome_leader_arm \
  --display_data=true \
  --dataset.repo_id=seeedstudio123/test \
  --dataset.num_episodes=5 \
  --dataset.single_task="Grab the black cube" \
  --dataset.push_to_hub=false \
  --dataset.episode_time_s=30 \
  --dataset.reset_time_s=30
Among them, repo_id can be modified customarily, and push_to_hub=false. Finally, the dataset will be saved in the ~/.cache/huggingface/lerobot directory in the home folder, where the aforementioned seeedstudio123/test folder will be created.
- If you want to use the Hugging Face hub features for uploading your dataset and you haven't previously done it, make sure you've logged in using a write-access token, which can be generated from the Hugging Face settings:
huggingface-cli login --token ${HUGGINGFACE_TOKEN} --add-to-git-credential
Store your Hugging Face repository name in a variable to run these commands:
HF_USER=$(huggingface-cli whoami | head -n 1)
echo $HF_USER
Record 5 episodes and upload your dataset to the hub:
lerobot-record \
  --robot.type=so101_follower \
  --robot.port=/dev/ttyACM0 \
  --robot.id=my_awesome_follower_arm \
  --robot.cameras="{ front: {type: opencv, index_or_path: 0, width: 640, height: 480, fps: 30, fourcc: "MJPG"}, side: {type: opencv, index_or_path: 2, width: 640, height: 480, fps: 30, fourcc: "MJPG"}}" \
  --teleop.type=so101_leader \
  --teleop.port=/dev/ttyACM1 \
  --teleop.id=my_awesome_leader_arm \
  --display_data=true \
  --dataset.repo_id=${HF_USER}/record-test \
  --dataset.num_episodes=5 \
  --dataset.single_task="Grab the black cube" \
  --dataset.push_to_hub=true \
  --dataset.episode_time_s=30 \
  --dataset.reset_time_s=30
You will see a lot of lines appearing like this one:
INFO 2024-08-10 15:02:58 ol_robot.py:219 dt:33.34 (30.0hz) dtRlead: 5.06 (197.5hz) dtWfoll: 0.25 (3963.7hz) dtRfoll: 6.22 (160.7hz) dtRlaptop: 32.57 (30.7hz) dtRphone: 33.84 (29.5hz)
Record function
The record function provides a suite of tools for capturing and managing data during robot operation.
1. Data Storage
- Data is stored using the
LeRobotDatasetformat and is stored on disk during recording. - By default, the dataset is pushed to your Hugging Face page after recording.
- To disable uploading, use:
--dataset.push_to_hub=False
2. Checkpointing and Resuming
- Checkpoints are automatically created during recording.
- To resume after an interruption, re-run the same command with:
--resume=true
⚠️ Critical Note: When resuming, set --dataset.num_episodes to the number of additional episodes to record (not the targeted total number of episodes in the dataset).
- To start recording from scratch, manually delete the dataset directory.
3. Recording Parameters
Set the flow of data recording using command-line arguments:
| Parameter | Description | Default |
|---|---|---|
| --dataset.episode_time_s | Duration per data episode (seconds) | 60 |
| --dataset.reset_time_s | Environment reset time after each episode (seconds) | 60 |
| --dataset.num_episodes | Total episodes to record | 50 |
4. Keyboard Controls During Recording
Control the data recording flow using keyboard shortcuts:
| Key | Action |
|---|---|
| → (Right Arrow) | Early-stop current episode/reset; move to next. |
| ← (Left Arrow) | Cancel current episode; re-record it. |
| ESC | Stop session immediately, encode videos, and upload dataset. |
If keyboard not work, you may need install other version of pynput.
pip install pynput==1.6.8
Tips for Gathering Data
- Task Suggestion: Grasp objects at different locations and place them in a bin.
- Scale: Record ≥50 episodes (10 episodes per location).
- Consistency:
- Keep cameras fixed.
- Maintain identical grasping behavior.
- Ensure manipulated objects are visible in camera feeds.
- Progression:
- Start with reliable grasping before adding variations (new locations, techniques, camera adjustments).
- Avoid rapid complexity increases to prevent failures.
💡 Rule of Thumb: You should be able to do the task yourself by only looking at the camera images.
If you want to dive deeper into this important topic, you can check out the blog post we wrote on what makes a good dataset.
For keyboard shortcut issues during recording, see the FAQ section at the end of this page.
Visualize Dataset
Visualize Dataset
Inspect recorded images, actions, and episodes before training.
The SO100 and SO101 codes are compatible. Users of SO100 can directly utilize SO101's parameters and code for operation.
If you uploaded your dataset to the hub with --control.push_to_hub=true, you can visualize your dataset online by copy pasting your repo id given by:
echo ${HF_USER}/so101_test
If you didn't upload with --dataset.push_to_hub=false, you can also visualize it locally with:
lerobot-dataset-viz \
--repo-id ${HF_USER}/so101_test \
If you upload with --dataset.push_to_hub=false, you can also visualize it locally with:
lerobot-dataset-viz \
--repo-id seeed_123/so101_test \
Here, seeed_123 is the custom repo_id name defined when collecting data.
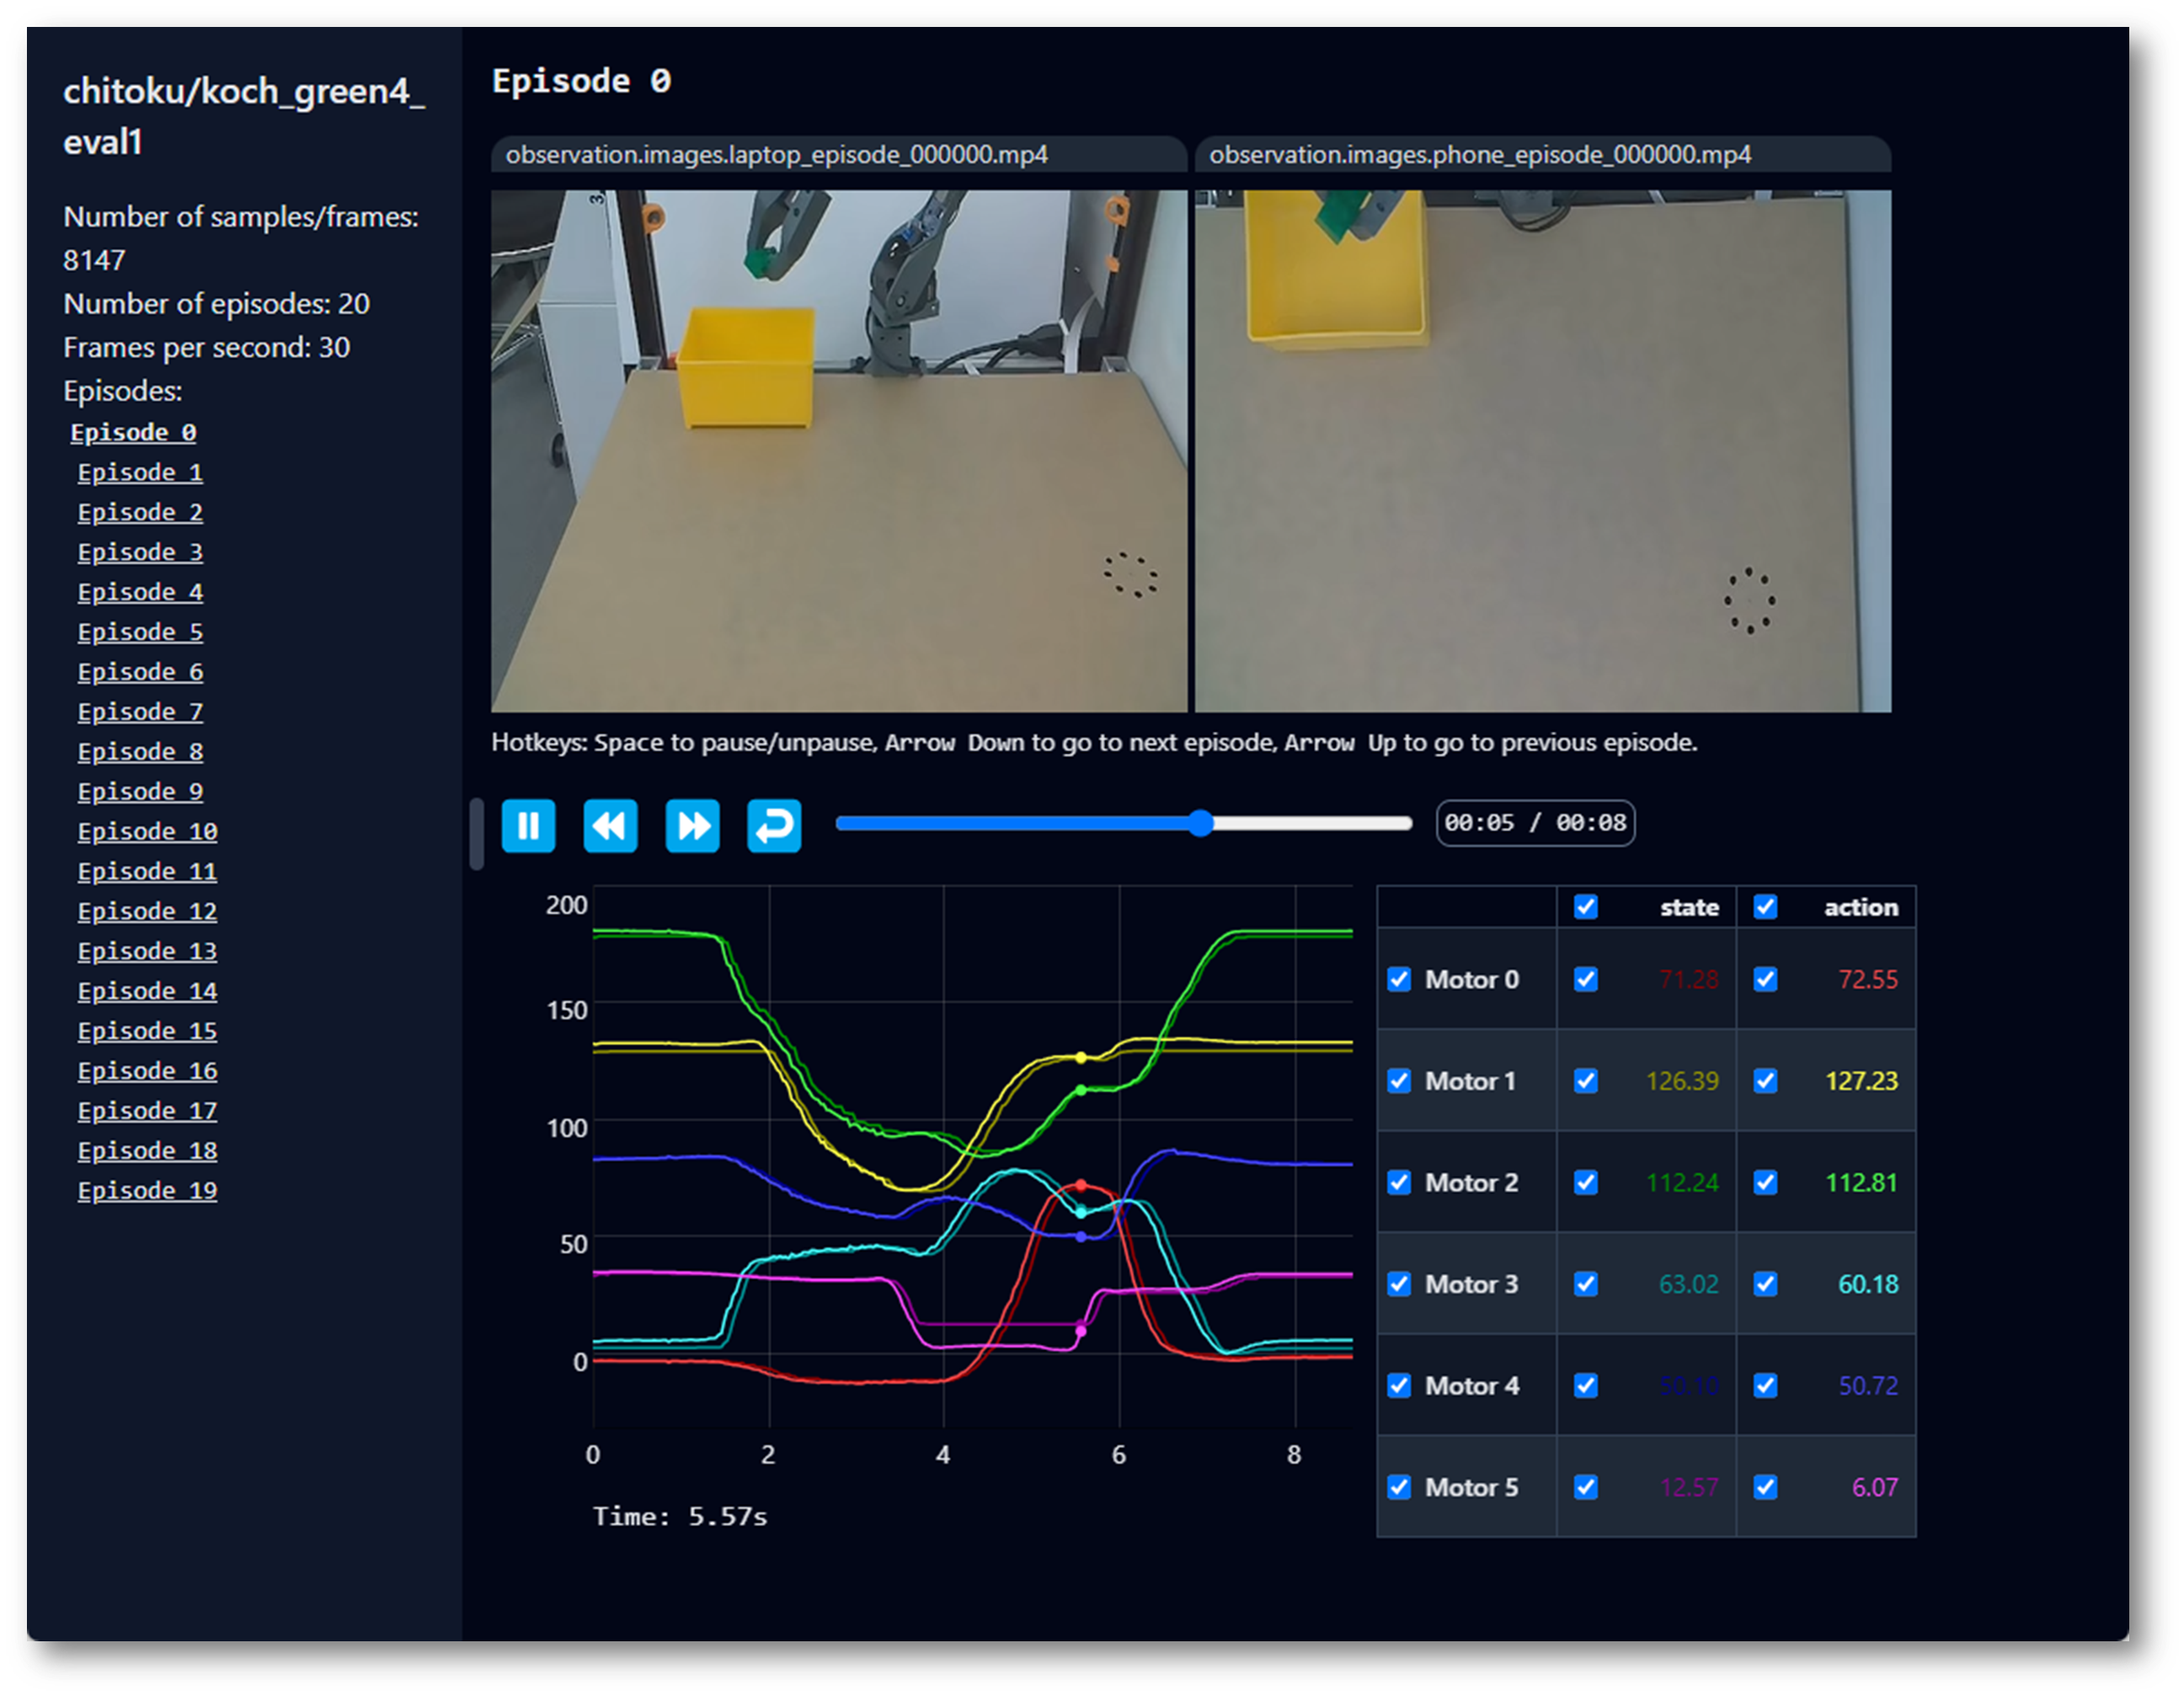
Replay Dataset
Replay Dataset
Replay a recorded episode on the real arm to check action consistency.
Clear valuable items and unrelated people within 1 meter of the robotic arm workspace. Make sure the arm is firmly mounted and that power and cables are connected properly before running this section.
The SO100 and SO101 codes are compatible. Users of SO100 can directly utilize SO101's parameters and code for operation.
A useful feature is the replay function, which allows you to replay any episode that you’ve recorded or episodes from any dataset out there. This function helps you test the repeatability of your robot’s actions and assess transferability across robots of the same model.
You can replay the first episode on your robot with either the command below or with the API example:
lerobot-replay \
  --robot.type=so101_follower \
  --robot.port=/dev/ttyACM0 \
  --robot.id=my_awesome_follower_arm \
  --dataset.repo_id=seeedstudio123 \
  --dataset.root=~/.cache/huggingface/lerobot/seeedstudio123 \
  --dataset.episode=0 \
Your robot should replicate movements similar to those you recorded.
In this command, dataset.root specifies the physical path to the dataset, and dataset.repo_id is the custom name defined during data collection.
Train and Evaluate
Train and Evaluate
Train and evaluate policies such as ACT, SmolVLA, Pi0, Pi0.5, GR00T, PEFT, and asynchronous inference.
Clear valuable items and unrelated people within 1 meter of the robotic arm workspace. Make sure the arm is firmly mounted and that power and cables are connected properly before running this section.
ACT
Refer toACT
To train a policy to control your robot, use the lerobot-train script.
Train
lerobot-train \
--dataset.repo_id=${HF_USER}/so101_test \
--policy.type=act \
--output_dir=outputs/train/act_so101_test \
--job_name=act_so101_test \
--policy.device=cuda \
--wandb.enable=false \
--steps=300000
If you want to train on a local dataset, make sure the repo_id matches the one used during data collection and add --policy.push_to_hub=False.
lerobot-train \
--dataset.repo_id=seeedstudio123/test \
--policy.type=act \
--output_dir=outputs/train/act_so101_test \
--job_name=act_so101_test \
--policy.device=cuda \
--wandb.enable=false \
--policy.push_to_hub=false\
--steps=300000
If you are using an RTX 50-series GPU, you must append --dataset.video_backend=pyav to the training command. This bypasses missing APIs in the preview version of torchvision. The full training command should look like this:
lerobot-train \
--dataset.repo_id=seeedstudio123/test \
--dataset.video_backend=pyav \
--policy.type=act \
--output_dir=outputs/train/act_so101_test \
--policy.device=cuda \
--wandb.enable=false \
--policy.push_to_hub=false \
--steps=300000 \
Let's explain it:
- Dataset specification: We provide the dataset via the parameter
--dataset.repo_id=\${HF_USER}/so101_test. - Training steps: We modify the number of training steps using
--steps=300000. The algorithm defaults to 800000 steps, and you can adjust it based on the difficulty of your task and by observing the loss during training. - Policy type: We provide the policy with
policy.type=act. Similarly, you can switch between policies such as [act,diffusion,pi0,pi0fast,pi0fast,sac,smolvla]., which will load the configuration fromconfiguration_act.py. Importantly, this policy will automatically adapt to your robot's (e.g.,laptopandphone) motor states, motor actions, and the number of cameras, as this information is already stored in your dataset. - Device selection: We provide
policy.device=cudabecause we are training on an Nvidia GPU, but you can usepolicy.device=mpsfor training on Apple Silicon. - Visualization tool: We provide
wandb.enable=trueto visualize training charts using Weights and Biases. This is optional, but if you use it, ensure you have logged in by runningwandb login.
Evaluate
The SO100 and SO101 codes are compatible. Users of SO100 can directly utilize SO101's parameters and code for operation.
You can use the record function from lerobot/record.py but with a policy checkpoint as input. For instance, run this command to record 10 evaluation episodes:
lerobot-record \
--robot.type=so100_follower \
--robot.port=/dev/ttyACM0 \
--robot.cameras="{ up: {type: opencv, index_or_path: /dev/video10, width: 640, height: 480, fps: 30, fourcc: "MJPG"}, side: {type: intelrealsense, serial_number_or_name: 233522074606, width: 640, height: 480, fps: 30, fourcc: "MJPG"}}" \
--robot.id=my_awesome_follower_arm \
--display_data=false \
--dataset.repo_id=${HF_USER}/eval_so100 \
--dataset.single_task="Put lego brick into the transparent box" \
--policy.path=${HF_USER}/my_policy
such as:
lerobot-record \
--robot.type=so101_follower \
--robot.port=/dev/ttyACM0 \
--robot.cameras="{ front: {type: opencv, index_or_path: 0, width: 640, height: 480, fps: 30, fourcc: "MJPG"},   side: {type: opencv, index_or_path: 2, width: 640, height: 480, fps: 30, fourcc: "MJPG"}}" \
--robot.id=my_awesome_follower_arm \
--display_data=false \
--dataset.repo_id=seeed/eval_test123 \
--dataset.single_task="Put lego brick into the transparent box" \
--policy.path=outputs/train/act_so101_test/checkpoints/last/pretrained_model
-
The
--policy.pathparameter indicates the path to the weight file of your policy training results (e.g.,outputs/train/act_so101_test/checkpoints/last/pretrained_model). If you upload the model training result weight file to Hub, you can also use the model repository (e.g.,\${HF_USER}/act_so100_test). -
The dataset name
dataset.repo_idstarts witheval_. This operation will separately record videos and data during evaluation, which will be saved in the folder starting witheval_, such asseeed/eval_test123. -
If you encounter
File exists: 'home/xxxx/.cache/huggingface/lerobot/xxxxx/seeed/eval_xxxx'during the evaluation phase, please delete the folder starting witheval_first and then run the program again. -
When encountering
mean is infinity. You should either initialize with stats as an argument or use a pretrained model, please note that keywords like front and side in the--robot.camerasparameter must be strictly consistent with those used when collecting the dataset.
SmolVLA
SmolVLA is Hugging Face’s lightweight foundation model for robotics. Designed for easy fine-tuning on LeRobot datasets, it helps accelerate your development!
Set Up Your Environment
Install SmolVLA dependencies by running:
pip install -e ".[smolvla]"
Finetune SmolVLA on your data
Use smolvla_base, our pretrained 450M model, and fine-tune it on your data. Training the model for 20k steps will roughly take ~4 hrs on a single A100 GPU. You should tune the number of steps based on performance and your use-case.
If you don’t have a gpu device, you can train using our notebook on Google Colab.
Pass your dataset to the training script using --dataset.repo_id. If you want to test your installation, run the following command where we use one of the datasets we collected for the SmolVLA Paper.
lerobot-train \
--policy.path=lerobot/smolvla_base \
--dataset.repo_id=${HF_USER}/mydataset \
--batch_size=64 \
--steps=20000 \
--output_dir=outputs/train/my_smolvla \
--job_name=my_smolvla_training \
--policy.device=cuda \
--wandb.enable=true
You can start with a small batch size and increase it incrementally, if the GPU allows it, as long as loading times remain short.
Fine-tuning is an art. For a complete overview of the options for finetuning, run
lerobot-train --help
Evaluate the finetuned model and run it in real-time
Similarly for when recording an episode, it is recommended that you are logged in to the HuggingFace Hub. You can follow the corresponding steps: Record a dataset. Once you are logged in, you can run inference in your setup by doing:
lerobot-rollout \
--strategy.type=base \
--policy.path=${HF_USER}/act_policy \
--robot.type=so101_follower \
--robot.port=/dev/ttyACM0 \
--robot.cameras=="{ front: {type: opencv, index_or_path: 8, width: 640, height: 480, fps: 30, fourcc: "MJPG"}}" \
--display_data=true \
--task="Your task description" \ # can be skipped for ACT
--duration=60
Depending on your evaluation setup, you can configure the duration and the number of episodes to record for your evaluation suite.
LIBERO
LIBERO is a benchmark designed to study lifelong robot learning. The idea is that robots won’t just be pretrained once in a factory, they’ll need to keep learning and adapting with their human users over time. This ongoing adaptation is called lifelong learning in decision making (LLDM), and it’s a key step toward building robots that become truly personalized helpers.
Evaluating with LIBERO
At LeRobot, we ported LIBERO into our framework and used it mainly to evaluate SmolVLA, our lightweight Vision-Language-Action model.
LIBERO is now part of our multi-eval supported simulation, meaning you can benchmark your policies either on a single suite of tasks or across multiple suites at once with just a flag.
To Install LIBERO, after following LeRobot official instructions, just do: pip install -e ".[libero]"
Single-suite evaluation
Evaluate a policy on one LIBERO suite:
lerobot-eval \
--policy.path="your-policy-id" \
--env.type=libero \
--env.task=libero_object \
--eval.batch_size=2 \
--eval.n_episodes=3
--env.taskpicks the suite (libero_object,libero_spatial, etc.).--eval.batch_sizecontrols how many environments run in parallel.--eval.n_episodessets how many episodes to run in total.
Multi-suite evaluation
Benchmark a policy across multiple suites at once:
lerobot-eval \
--policy.path="your-policy-id" \
--env.type=libero \
--env.task=libero_object,libero_spatial \
--eval.batch_size=1 \
--eval.n_episodes=2
- Pass a comma-separated list to
--env.taskfor multi-suite evaluation.
Example training command
lerobot-train \
--policy.type=smolvla \
--policy.repo_id=${HF_USER}/libero-test \
--dataset.repo_id=HuggingFaceVLA/libero \
--env.type=libero \
--env.task=libero_10 \
--output_dir=./outputs/ \
--steps=100000 \
--batch_size=4 \
--eval.batch_size=1 \
--eval.n_episodes=1 \
--eval_freq=1000 \
Note on rendering
LeRobot uses MuJoCo for simulation. You need to set the rendering backend before training or evaluation:
export MUJOCO_GL=egl→ for headless servers (e.g. HPC, cloud)
Pi0
Refer to Pi0
pip install -e ".[pi]"
Train
lerobot-train \
  --dataset.repo_id=your_dataset \
  --policy.type=pi0 \
  --output_dir=./outputs/pi0_training \
  --job_name=pi0_training \
  --policy.pretrained_path=lerobot/pi0_base \
  --policy.repo_id=your_repo_id \
  --policy.compile_model=true \
  --policy.gradient_checkpointing=true \
  --policy.dtype=bfloat16 \
  --policy.freeze_vision_encoder=false \
  --policy.train_expert_only=false \
  --steps=3000 \
  --policy.device=cuda \
  --batch_size=32
Evaluate
lerobot-record \
--robot.type=so101_follower \
--robot.port=/dev/ttyACM0 \
--robot.cameras="{ front: {type: opencv, index_or_path: 0, width: 640, height: 480, fps: 30, fourcc: "MJPG"},   side: {type: opencv, index_or_path: 2, width: 640, height: 480, fps: 30,fourcc: "MJPG"}}" \
--robot.id=my_awesome_follower_arm \
--display_data=false \
--dataset.repo_id=seeed/eval_test123 \
--dataset.single_task="Put lego brick into the transparent box" \
--policy.path=outputs/pi0_training/checkpoints/last/pretrained_model
Pi0.5
Refer to Pi0.5
pip install -e ".[pi]"
Train
lerobot-train \
  --dataset.repo_id=seeed/eval_test123 \
  --policy.type=pi05 \
  --output_dir=./outputs/pi05_training \
  --job_name=pi05_training \
  --policy.repo_id=your_repo_id \
  --policy.pretrained_path=lerobot/pi05_base \
  --policy.compile_model=true \
  --policy.gradient_checkpointing=true \
  --wandb.enable=true \
  --policy.dtype=bfloat16 \
  --policy.freeze_vision_encoder=false \
  --policy.train_expert_only=false \
  --steps=3000 \
  --policy.device=cuda \
  --batch_size=32
Evaluate
lerobot-record \
--robot.type=so101_follower \
--robot.port=/dev/ttyACM0 \
--robot.cameras="{ front: {type: opencv, index_or_path: 0, width: 640, height: 480, fps: 30, fourcc: "MJPG"},   side: {type: opencv, index_or_path: 2, width: 640, height: 480, fps: 30,fourcc: "MJPG"}}" \
--robot.id=my_awesome_follower_arm \
--display_data=false \
--dataset.repo_id=seeed/eval_test123 \
--dataset.single_task="Put lego brick into the transparent box" \
--policy.path=outputs/pi05_training/checkpoints/last/pretrained_model
GR00T N1.5
Refer to the official documentation: GR00T N1.5.
GR00T N1.5 is an open foundation model from NVIDIA for more general robot reasoning and skill learning. It is a cross-embodiment model: it can take multimodal inputs such as language and images, and execute manipulation tasks across different environments.
In LeRobot, the key is to set the policy type to --policy.type=groot. Note that GR00T N1.5 has higher environment requirements (it depends on FlashAttention and requires a CUDA GPU). It is recommended to first get ACT / Pi0 running end-to-end, and then try GR00T.
Installation (important)
According to the current official docs, GR00T N1.5 requires flash-attn and can only be used on CUDA-capable hardware.
Recommended order:
- Prepare your base environment first (Python, CUDA, drivers, etc.). Do not install
lerobotyet. - Install PyTorch for your CUDA version (different CUDA versions may require a different
--index-url; follow the PyTorch install page).
pip install "torch>=2.2.1,<2.8.0" "torchvision>=0.21.0,<0.23.0"
If you are using an RTX 50 Series GPU, the following requirements must be met: Python=3.10, CUDA=12.8, Torch=2.7.1
The download command is as follows:
pip install torch==2.7.1 torchvision==0.22.1 torchaudio==2.7.1 --index-url https://download.pytorch.org/whl/cu128
- Install the build dependencies for
flash-attn, then installflash-attnitself.
pip install ninja "packaging>=24.2,<26.0"
pip install "flash-attn>=2.5.9,<3.0.0" --no-build-isolation
python -c "import flash_attn; print(f'Flash Attention {flash_attn.__version__} imported successfully')"
If you are using an RTX 50 Series GPU, the following requirement must be met: flash_attn=2.8.0
The download command is as follows:
pip install flash_attn==2.8.0.post2 torch==2.7.1 --no-build-isolation
- Install LeRobot with the
grootoptional dependencies (lerobot[groot]).
pip install "lerobot[groot]"
If flash-attn installation fails, it is usually due to (1) a PyTorch/CUDA mismatch, (2) missing build dependencies, or (3) an environment that is too new/too old. Cross-check the official GR00T docs and the PyTorch install instructions first.
Training (fine-tuning)
The official docs provide a multi-GPU example with accelerate launch --multi_gpu .... If you only have a single GPU, you can still start by getting a single-process run working first (exact support/arguments depend on the official docs).
accelerate launch \
--multi_gpu \
--num_processes=$NUM_GPUS \
$(which lerobot-train) \
--output_dir=$OUTPUT_DIR \
--save_checkpoint=true \
--batch_size=$BATCH_SIZE \
--steps=$NUM_STEPS \
--save_freq=$SAVE_FREQ \
--log_freq=$LOG_FREQ \
--policy.push_to_hub=true \
--policy.type=groot \
--policy.repo_id=$REPO_ID \
--policy.tune_diffusion_model=false \
--dataset.repo_id=$DATASET_ID \
--wandb.enable=true \
--wandb.disable_artifact=true \
--job_name=$JOB_NAME
On-robot validation (evaluation)
After training, you can evaluate and record replays with lerobot-record like other policies. The official docs include a bimanual example; SO101 single-arm users do not need left_arm_port/right_arm_port-style arguments.
lerobot-record \
--robot.type=bi_so_follower \
--robot.left_arm_port=/dev/ttyACM1 \
--robot.right_arm_port=/dev/ttyACM0 \
--robot.id=bimanual_follower \
--robot.cameras='{ right: {"type": "opencv", "index_or_path": 0, "width": 640, "height": 480, "fps": 30}, left: {"type": "opencv", "index_or_path": 2, "width": 640, "height": 480, "fps": 30}, top: {"type": "opencv", "index_or_path": 4, "width": 640, "height": 480, "fps": 30} }' \
--display_data=true \
--dataset.repo_id=${HF_USER}/eval_groot_bimanual \
--dataset.num_episodes=10 \
--dataset.single_task="Grab and handover the red cube to the other arm" \
--policy.path=${HF_USER}/groot-bimanual \
--dataset.episode_time_s=30 \
--dataset.reset_time_s=10
License: Apache 2.0 (same as the original GR00T repository).
(Optional) Parameter-Efficient Fine-Tuning (PEFT)
PEFT (Parameter-Efficient Fine-Tuning) is a family of methods and tools that help a large pretrained model adapt to new tasks without updating all parameters. For pretrained LeRobot policies (e.g., SmolVLA, Pi0), you can often train only a small set of “adapter” parameters (e.g., LoRA) to reduce VRAM usage and training cost, while still achieving performance close to full fine-tuning.
Install
After installing LeRobot with the optional peft dependencies, you can use PEFT-related arguments in training.
pip install -e ".[peft]"
pip install "lerobot[peft]"
More concepts and methods: 🤗 PEFT documentation.
Example: Fine-tune SmolVLA with LoRA (LIBERO libero_spatial sub-task)
This example fine-tunes lerobot/smolvla_base with LoRA on the HuggingFaceVLA/libero dataset. Argument names depend on the LeRobot version; it’s recommended to also check lerobot-train --help.
lerobot-train \
--policy.path=lerobot/smolvla_base \
--policy.repo_id=${HF_USER}/my_libero_smolvla_peft \
--dataset.repo_id=HuggingFaceVLA/libero \
--env.type=libero \
--env.task=libero_spatial \
--output_dir=outputs/train/my_libero_smolvla_peft \
--job_name=my_libero_smolvla_peft \
--policy.device=cuda \
--steps=10000 \
--batch_size=32 \
--optimizer.lr=1e-3 \
--peft.method_type=LORA \
--peft.r=64
Key PEFT arguments
--peft.method_type: Select the PEFT method. LoRA (Low-Rank Adapter) is one of the most common options.--peft.r: LoRA rank. Higher rank usually increases capacity, but also increases parameter count and VRAM usage.
Choose which layers/modules to inject LoRA into (optional)
By default, PEFT usually injects LoRA into the most important projection layers (e.g., attention q_proj, v_proj), and may also cover state/action projections. If you want to customize, use --peft.target_modules.
Common patterns:
- Provide a list of module-name suffixes (example):
--peft.target_modules="['q_proj', 'v_proj']"
- Provide a regex (example; adjust to the actual module names in the model):
--peft.target_modules='(model\\.vlm_with_expert\\.lm_expert\\..*\\.(down|gate|up)_proj|.*\\.(state_proj|action_in_proj|action_out_proj|action_time_mlp_in|action_time_mlp_out))'
Fully train some modules (optional)
If you want some modules to be fully trained (instead of only injecting LoRA), use --peft.full_training_modules. For example, only fully train state_proj:
--peft.full_training_modules="['state_proj']"
Learning rate suggestion (rule of thumb)
LoRA learning rates are often ~10× higher than full fine-tuning. For example, if full fine-tuning commonly uses 1e-4, LoRA can start from 1e-3. If you use a learning-rate scheduler, the final learning rate is often around 1e-4 as a reference.
(Optional) Multi-GPU training with Accelerate
Training steps
Method 1: Use CLI flags.
- Install
acceleratein yourlerobotenvironment.
pip install accelerate
- Launch multi-GPU training with
accelerate launchand the--multi_gpuand--num_processesflags.
accelerate launch \

--multi_gpu \

--num_processes=2 \

$(which lerobot-train) \

--dataset.repo_id=${HF_USER}/my_dataset \

--policy.type=act \

--policy.repo_id=${HF_USER}/my_trained_policy \

--output_dir=outputs/train/act_multi_gpu \

--job_name=act_multi_gpu \

--wandb.enable=true
Key accelerate flags:
--multi_gpu: Enable multi-GPU training.--num_processes: Number of GPUs to use (usually equals the number of available GPUs on the machine).--mixed_precision=fp16: Use fp16 mixed precision (if your hardware supports it, you can also use bf16).
Please note: bf16 requires hardware support and is not available on all GPUs.
| Precision | Hardware support |
|---|---|
| fp16 | Supported by almost all NVIDIA GPUs |
| bf16 | Only supported by some newer GPUs (Ampere and later) |
If your GPU does not support bf16, choose fp16 in the Accelerate configuration, or specify fp16 explicitly.
Method 2: Use an accelerate config file (optional).
If you train on multiple GPUs frequently, you can save the configuration to avoid repeatedly typing the same flags.
accelerate config saves your hardware configuration (number of GPUs, mixed precision, etc.) into a config file, so you don’t have to re-enter those options when running accelerate launch later. It does not change LeRobot’s training logic; it only reduces repeated CLI inputs.
If you only use multi-GPU occasionally (or this is your first time), skipping this is completely fine.
In the interactive configuration, for the common “single machine + multiple GPUs” scenario, typical choices are:
- Compute environment: This machine
- Number of machines: 1
- Number of processes: Number of GPUs you want to use
- GPU ids to use: press Enter (use all GPUs)
- Mixed precision: prefer fp16; choose bf16 only if you know your GPU supports it
accelerate config
accelerate launch $(which lerobot-train) \

--dataset.repo_id=${HF_USER}/my_dataset \

--policy.type=act \

--policy.repo_id=${HF_USER}/my_trained_policy \

--output_dir=outputs/train/act_multi_gpu \

--job_name=act_multi_gpu \

--wandb.enable=true
How multi-GPU affects hyperparameters (and how to adjust)
LeRobot does not automatically adjust learning rate or training steps based on the number of GPUs, to avoid silently changing training behavior. This differs from some other distributed training frameworks.
If you want to adjust hyperparameters for multi-GPU, a common approach is:
- Steps: effective batch size increases (batch_size × num_gpus), so you can reduce steps roughly proportional to
1 / num_gpusto keep a similar total number of samples seen.
accelerate launch --num_processes=2 $(which lerobot-train) \

--batch_size=8 \

--steps=50000 \

--dataset.repo_id=lerobot/pusht \

--policy=act
- Learning rate: since each step uses more samples, you can often scale the learning rate linearly with the number of GPUs: new_lr = single_gpu_lr × num_gpus
accelerate launch --num_processes=2 $(which lerobot-train) \

--optimizer.lr=2e-4 \

--dataset.repo_id=lerobot/pusht \

--policy=act
These are not strict rules; they are common heuristics. If you’re unsure, you can also keep the learning rate and steps unchanged as long as training remains stable.
For advanced configuration and troubleshooting, see the Accelerate documentation: Accelerate.
(Optional) Asynchronous Inference
When asynchronous inference is not enabled, LeRobot’s control flow can be understood as conventional sequential / synchronous inference: the policy first predicts a segment of actions, then executes that segment, and only after that waits for the next prediction.
For larger models, this can cause the robot to noticeably pause while waiting for the next action chunk.
The goal of asynchronous inference is to let the robot execute the current action chunk while computing the next one in advance, thereby reducing idle time and improving responsiveness.
Asynchronous inference is applicable to policies supported by LeRobot, including chunk-based action policies such as ACT, OpenVLA, Pi0, and SmolVLA.
Since inference is decoupled from actual control, asynchronous inference also helps leverage machines with stronger compute resources to perform inference for the robot.
You can read more about asynchronous inference in the blog by Hugging Face
Let us first introduce some basic concepts:
-
Client: connects to the robotic arm and cameras, collects observation data (such as images and robot poses), sends these observations to the server, and receives the action chunks returned by the server and executes them in order.
-
Server: the device that provides compute resources. It receives camera data and robotic arm data, performs inference (that is, computation) to produce action chunks, and sends them back to the client. It can be the same device connected to the robotic arm and cameras, another computer on the same local network, or a rented cloud server on the Internet.
-
Action chunk: a sequence of robotic arm action commands obtained by policy inference on the server side.
Three deployment scenarios for asynchronous inference
- Single-machine deployment
The robot, cameras, client, and server are all on the same device.
This is the simplest case: the server can listen on 127.0.0.1, and the client can also connect to 127.0.0.1:port. The command example in the official documentation is for this scenario.
- LAN deployment
The robot and cameras are connected to a lightweight device, while the policy server runs on another high-compute machine in the same local network.
In this case, the server must listen on an address that is accessible by other machines, and the client must also connect to the server’s LAN IP, rather than 127.0.0.1.
- Cross-network / cloud deployment
The policy server runs on a publicly accessible cloud host, and the client connects to it over the public Internet.
This approach can use the stronger GPU of the cloud host. When network conditions are good, the round-trip network time (network latency) can sometimes be relatively small compared with inference time, but this depends on your actual network environment.
Security note: the LeRobot async inference pipeline has a risk related to unauthenticated gRPC + pickle deserialization. If there is important information or important services on the server, it is not recommended to expose the service directly to the Internet in a public deployment. A safer approach is to use VPN or SSH tunneling, or at least restrict the allowed source IPs in the security group to your own client public IP.
Getting started with asynchronous inference deployment
Step 1: Environment setup
First, use pip to install the additional dependencies required for asynchronous inference. Both the client and the server need to have lerobot installed along with the extra dependencies:
pip install -e ".[async]"
Step 2: Network configuration and checks
- Proxy issues
If your current terminal is configured to use a proxy and the connection behaves abnormally, you can temporarily unset the proxy environment variables:
unset http_proxy https_proxy ftp_proxy all_proxy HTTP_PROXY HTTPS_PROXY FTP_PROXY ALL_PROXY
Note: the command above only affects the current terminal session. If you open another terminal window, you need to run it again.
- Open the port in the firewall / security group
Single-machine deployment: this can usually be skipped.
LAN deployment: you need to open the listening port on the server side.
Example for opening the listening port on a LAN setup (run on the server side):
sudo ufw allow 8080/tcp
Cloud deployment: you need to open this port in the cloud server security group, and it is recommended to restrict the source IPs as much as possible.
If you are running on a cloud server:
Open port 8080 in the server management console’s security group, or use another port that is already open. Different cloud service platforms handle this differently; refer to your cloud provider’s documentation.
- Confirm the IP address
This step can be skipped for single-machine deployment (the IP address for a single machine is always 127.0.0.1).
If this is a LAN deployment:
You need to confirm and remember the LAN IP address of the server side. When the client connects, what should be filled in is the LAN IP of the machine running policy_server, not the client’s own IP.
Linux / Jetson / Raspberry Pi:
hostname -I
If multiple addresses are shown, generally choose the one corresponding to the current LAN network interface, for example 192.168.x.x.
You can also use:
ip addr
to view the inet field under the currently connected network interface.
Windows:
ipconfig
Find a field like IPv4 Address . . . . . . . . . . . : 192.168.14.140; that is the LAN IP address of that machine.
macOS:
ifconfig
Find the inet field corresponding to the currently connected network interface; that is the LAN IP address.
We need to remember the server-side LAN IP address. We will use <LAN IP address> to refer to it.
If this is a cloud server deployment:
Look for the public IP in the server control panel. It is usually called one of the following:
Public IPv4
External IP
Public IP address
EIP
Public IP
We need to remember the public IP address. We will use <server public IP> to refer to it.
- Connection test
Single-machine deployment: this step can be skipped
LAN / cloud deployment: it is recommended to test from the client side whether the server port is reachable. Example tests are as follows:
LAN example: run on the client side
nc -vz <LAN IP address> 8080
Cloud example: run on the client side
nc -vz <server public IP> 8080
Step 3: Start the service
Scenario A: Single-machine deployment
Start the local service in one terminal:
python -m lerobot.async_inference.policy_server \
--host=127.0.0.1 \
--port=8080
After it starts successfully, you need to keep this terminal open. You will need to open a new terminal to run other commands.
Scenario B: LAN deployment
Run on the server side:
python -m lerobot.async_inference.policy_server \
--host=0.0.0.0 \
--port=8080
In this case, when the client connects, the --server_address should be the server-side LAN IP address, such as <LAN IP address>:8080.
Scenario C: Cloud server deployment
Run on the server side:
python -m lerobot.async_inference.policy_server \
--host=0.0.0.0 \
--port=8080
In this case, when the client connects, the --server_address should be the server public IP address, such as <server public IP>:8080.
Step 4: Choose inference parameters
Run on the client side:
python -m lerobot.async_inference.robot_client \
--server_address=<ip address>:8080 \
--robot.type=so100_follower \
--robot.port=/dev/tty.usbmodem585A0076841 \
--robot.id=follower_so100 \
--robot.cameras="{ laptop: {type: opencv, index_or_path: 0, width: 1920, height: 1080, fps: 30}, phone: {type: opencv, index_or_path: 0, width: 1920, height: 1080, fps: 30}}" \
--task="dummy" \
--policy_type=your_policy_type \
--pretrained_name_or_path=user/model \
--policy_device=cuda \
--actions_per_chunk=50 \
--chunk_size_threshold=0.5 \
--aggregate_fn_name=weighted_average \
--debug_visualize_queue_size=True
Parameter explanations:
--server_address
Specifies the address and port of the policy server. <ip address> should be replaced with 127.0.0.1 (local machine), <LAN IP address> (LAN), or <server public IP> (cloud server).
--robot.type, --robot.port, --robot.id, --robot.cameras
Hardware device parameters. These should be kept consistent with the parameters used during dataset collection.
--task
The task description. Vision-language policies such as SmolVLA can determine the action target based on the task text.
--policy_type
Replace this with the specific policy name, for example:
-
smolvla
-
act
-
--pretrained_name_or_path
This value should be replaced with the model path on the server side, or a model path on Hugging Face.
--policy_device
Specifies the inference device used on the server side.
It can be cuda, mps, or cpu.
--actions_per_chunk=50
Specifies how many actions are output in each inference.
The larger this value is:
Advantage: the action buffer is more sufficient, making it less likely to run out Disadvantage: the prediction horizon is longer, so control error may accumulate more noticeably
--chunk_size_threshold=0.5
Specifies when to request the next action chunk from the server.
This is a threshold, usually in the range 0 to 1.
It can be understood as: when the remaining proportion of the current action queue falls below this threshold, the client will send a new observation in advance and request the next action chunk.
Setting it to 0.5 here means:
when the current action chunk is about half consumed
the client starts requesting the next action chunk
The larger this value is, the more frequently requests are sent, and the more responsive the system becomes, but the load on the server also increases.
The smaller this value is, the closer the behavior gets to synchronous inference.
--aggregate_fn_name=weighted_average
Specifies the aggregation method for overlapping action intervals.
In asynchronous inference, when the old action chunk has not yet been fully executed, the new action chunk may already have arrived.
In that case, the two chunks overlap over part of the time interval, and an aggregation function is needed to combine them into the final executed action.
The meaning of weighted_average is:
use a weighted average to fuse the overlapping part.
This usually makes action switching smoother and reduces abrupt changes.
--debug_visualize_queue_size=True
Whether to visualize the action queue size at runtime.
When enabled, it allows you to see more directly whether the queue frequently hits the bottom, which helps you tune actions_per_chunk and chunk_size_threshold.
Step 5: Adjust parameters based on robot behavior
In asynchronous inference, there are two additional parameters that need adjustment which do not exist in synchronous inference:
Parameter Suggested initial value Description
actions_per_chunk 50 How many actions the policy outputs at one time. Typical values: 10–50.
chunk_size_threshold 0.5 When the remaining proportion of the action queue is ≤ chunk_size_threshold, the client sends a new action chunk request. The value range is [0, 1].
When --debug_visualize_queue_size=True, the change in action queue size will be plotted at runtime.
What asynchronous inference needs to balance is: the speed at which the server generates action chunks must be greater than or equal to the speed at which the client consumes action chunks. Otherwise, the action queue will empty, and the robot will begin to stutter again (this can be seen as the curve hitting the bottom in the queue visualization).
The speed at which the server generates action chunks is affected by factors such as model size, device type, VRAM / memory, and GPU compute power.
The speed at which the client consumes action chunks is affected by the configured execution fps.
If the queue frequently runs empty, you need to increase actions_per_chunk, increase chunk_size_threshold, or reduce fps.
If the queue curve fluctuates frequently but the remaining actions in the queue are always sufficient, you can appropriately decrease chunk_size_threshold.
In general:
the empirical range for actions_per_chunk is 10–50
the empirical range for chunk_size_threshold is 0.5–0.7; when tuning, it is recommended to start from 0.5 and gradually increase it
If you encounter the following error:
TypeError: stack(): argument 'tensors' (position 1) must be tuple of Tensors, not Column
Try running the following command to resolve it:
pip install datasets==2.19
Training should take several hours. You will find checkpoints in outputs/train/act_so100_test/checkpoints.
To resume training from a checkpoint, below is an example command to resume from last checkpoint of the act_so101_test policy:
lerobot-train \
--config_path=outputs/train/act_so101_test/checkpoints/last/pretrained_model/train_config.json \
--resume=true
Upload policy checkpoints
Once training is done, upload the latest checkpoint with:
huggingface-cli upload ${HF_USER}/act_so101_test \
outputs/train/act_so101_test/checkpoints/last/pretrained_model
You can also upload intermediate checkpoints with:
CKPT=010000
huggingface-cli upload ${HF_USER}/act_so101_test${CKPT} \
outputs/train/act_so101_test/checkpoints/${CKPT}/pretrained_model
FAQ
FAQ
Centralized troubleshooting for ports, servo IDs, ffmpeg, cameras, datasets, evaluation, and training.
Which LeRobot repository should I use?
Use the repository recommended in this wiki:
git clone https://github.com/Seeed-Projects/lerobot.git ~/lerobot
This version has been verified with SO-ARM10x. The upstream LeRobot repository changes quickly, so command arguments, dataset formats, and dependencies may differ from this tutorial.
Motor 'gripper' was not found during servo ID setup
If you see the following error:
Motor 'gripper' was not found, Make sure it is connected
check whether the communication cable is connected correctly and whether the servo bus is powered with the correct voltage.
Could not connect on port "/dev/ttyACM0"
If /dev/ttyACM0 exists but LeRobot cannot connect to it, the serial port permissions are usually missing. Run:
sudo chmod 666 /dev/ttyACM*
Also double-check whether the leader and follower arms are mapped to the expected ports.
No valid stream found in input file
If you see:
No valid stream found in input file. Is -1 of the desired media type?
install ffmpeg 7.1.1:
conda install ffmpeg=7.1.1 -c conda-forge
Present_Position sync read failed
If you see:
ConnectionError: Failed to sync read 'Present_Position' on ids=[1,2,3,4,5,6] after 1 tries. [TxRxResult] There is no status packet!
check whether the corresponding arm is powered on and whether the bus-servo data cables are loose or disconnected. If a servo LED is off, the cable before that servo may be loose.
Magnitude 30841 exceeds 2047 during calibration
If you see:
Magnitude 30841 exceeds 2047 (max for sign_bit_index=11)
power off and restart the arm, then calibrate again. If the issue persists, use the Seeed Studio SoARM quick calibration tool to perform middle-position calibration and servo ID verification, then redo full-arm calibration.
How do I recalibrate after repair or part replacement?
Delete the old calibration files and recalibrate:
rm -rf ~/.cache/huggingface/lerobot/calibration/robots
rm -rf ~/.cache/huggingface/lerobot/calibration/teleoperators
Calibration information is stored as JSON files in these directories. If the hardware changes but the old calibration files remain, LeRobot may reuse outdated offsets.
Keyboard shortcuts do not work during recording
If the right arrow, left arrow, or ESC key does not respond during dataset recording, first check that the $DISPLAY environment variable is set. You can also try downgrading pynput:
pip install pynput==1.6.8
How should I handle failed episodes during recording?
If the object falls, the gripper misses, or the episode quality is poor, move the arm back to a safe rest pose and press the left arrow key to discard and re-record the episode. If the task finishes early and the robot has returned to rest, press the right arrow key to move to the next episode without waiting for the full remaining time.
What should I pay attention to during dataset collection?
Keep camera position, camera angle, and ambient lighting stable. Avoid unstable backgrounds or pedestrians in the camera view, because large differences between the recording and deployment environment may cause the policy to fail.
Set --dataset.num_episodes high enough before starting. Do not manually stop the recording midway unless necessary, because dataset statistics such as mean and variance are calculated after collection finishes and are required for training.
How do I delete or modify recorded datasets?
For deleting or editing recorded datasets, refer to the dataset tool tutorial:
USB camera image data cannot be read
Avoid connecting the USB camera through a USB hub. Connect it directly to the device, preferably through a USB 3.0 port, to ensure sufficient image transmission bandwidth.
Orbbec camera timeout or serial-number mismatch
If you see a timeout while waiting for frames, unplug and reconnect the camera. If you see:
No Orbbec camera found for 'XXXX'
run the camera detection command and update serial_number_or_name with the actual serial number:
lerobot-find-cameras orbbec
File exists during evaluation
If evaluation reports that an eval_ directory already exists, delete the existing evaluation folder first and run the program again.
File exists: 'home/xxxx/.cache/huggingface/lerobot/xxxxx/seeed/eval_xxxx'
mean is infinity during evaluation
If you see:
mean is infinity. You should either initialize with stats as an argument or use a pretrained model
make sure the camera keys in --robot.cameras, such as front and side, exactly match the keys used during dataset recording.
TypeError: stack(): argument 'tensors' must be tuple of Tensors
If you see:
TypeError: stack(): argument 'tensors' (position 1) must be tuple of Tensors, not Column
try installing the compatible datasets version:
pip install datasets==2.19
rerun has no attribute scalar
If you see:
AttributeError: module 'rerun' has no attribute 'scalar'. Did you mean: 'scalars'?
downgrade the rerun SDK:
pip3 install rerun-sdk==0.23
How long does ACT training usually take?
As a rough reference, training ACT on 50 episodes takes about 6 hours on a laptop RTX 3060 8GB, and about 2–3 hours on an RTX 4090 or A100. Actual time depends on dataset size, image resolution, batch size, and hardware.
If you encounter unresolved software or dependency issues after checking this FAQ, report them to the LeRobot GitHub repository or the LeRobot Discord channel.
Citation
Citation
Related documentation, projects, papers, and external resources.
TheRobotStudio Project: SO-ARM10x
Huggingface Project: Lerobot
Dnsty: Jetson Containers
Tech Support & Product Discussion
Tech Support & Product Discussion
Contact Seeed Studio and join community discussions for product questions.
Thank you for choosing our products! We are here to provide you with different support to ensure that your experience with our products is as smooth as possible. We offer several communication channels to cater to different preferences and needs.