Meshtastic Firmware Source Code Practical Tutorial
This tutorial is intended for users who are just getting started with the Meshtastic firmware source code. It includes common workflows for both Windows and macOS. The goal is straightforward: clone the official repository, complete a successful build, make one simple UI change, and flash the modified firmware to the device for verification.
If you are already familiar with Git, Python, or PlatformIO, you can skip the corresponding sections and jump directly to the hands-on part.
This guide includes common commands for both Windows and macOS. Most screenshots are still taken from a Windows environment, but the overall workflow on macOS is very similar.
Prerequisites
Before you begin, prepare the following tools:
- Git
- Python 3
- VS Code
- PlatformIO
1. Install Git
- Windows
- macOS
Open the official Git for Windows download page:
The installer usually starts downloading automatically when you open the page. After the download is complete, double-click the installer and follow the setup wizard.
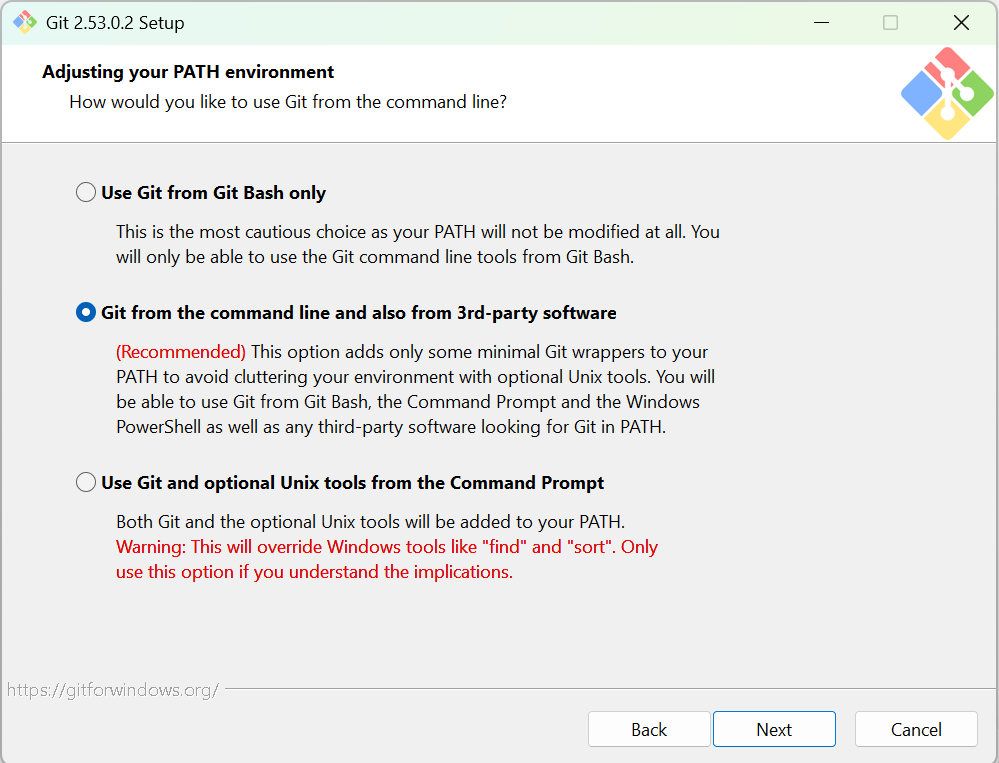
During installation, the most important step is Adjusting your PATH environment. Choose:
Git from the command line and also from 3rd-party software
For the other options, the default values are usually fine. Just keep clicking Next.
Wait until the installation finishes.
After installation, close all current PowerShell and VS Code terminal windows, then open a new PowerShell window and run:
& "C:\Program Files\Git\cmd\git.exe" --version

If a Git version number is displayed, Git has been installed successfully.
If the git command is still unavailable
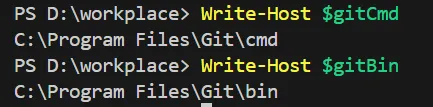
You can first run the following commands in PowerShell to confirm the default Git installation paths:
$gitCmd = "C:\Program Files\Git\cmd"
$gitBin = "C:\Program Files\Git\bin"
Write-Host $gitCmd
Write-Host $gitBin
Then manually add Git to the system environment variables.
GUI fix steps
- Press
Win - Search for "Edit the system environment variables"
- Open it and click Environment Variables
- Find
Pathunder System variables - Click Edit
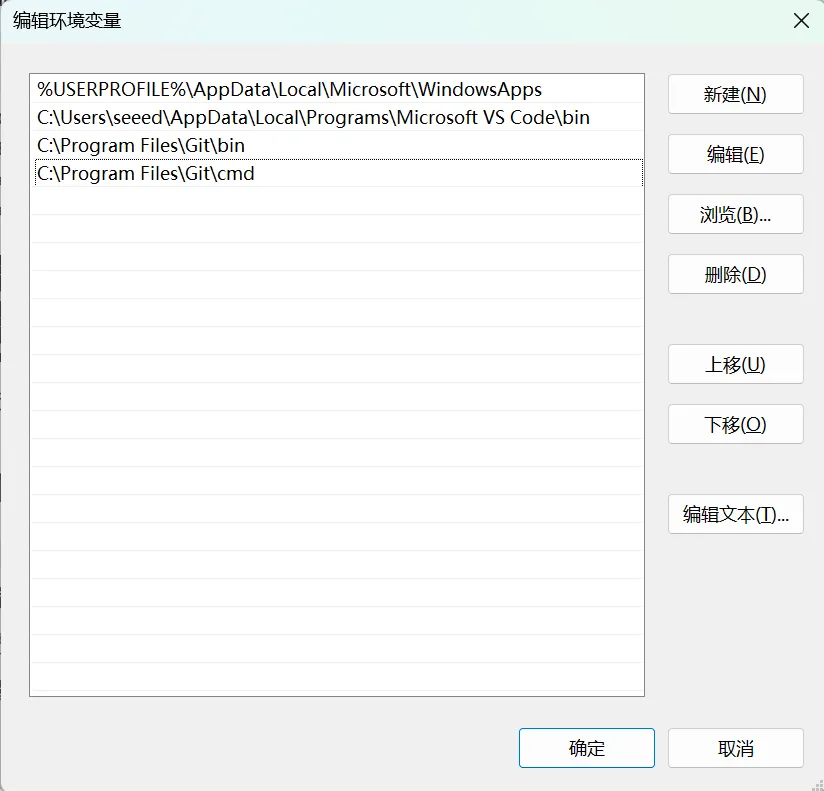
- Click New and add the following two paths:
C:\Program Files\Git\cmd
C:\Program Files\Git\bin
- Click OK all the way to save
After saving, you still need to:
- Close all PowerShell windows
- Open PowerShell again
Then run:
git --version
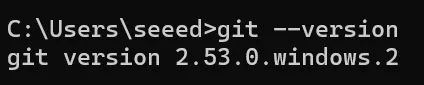
If a version number appears, the installation is complete.
On macOS, Git can be installed in more than one way, but using Homebrew is usually the easiest option:
- Install the Command Line Tools first:
xcode-select --install
- If Homebrew is not installed yet, install it first:
/bin/bash -c "$(curl -fsSL https://raw.githubusercontent.com/Homebrew/install/HEAD/install.sh)"
- Install Git:
brew install git
- Check the installed version:
git --version
If your terminal already returns a valid Git version, you do not need to install it again.
Configure your Git identity
Next, configure your Git user information. Replace the example values with your own name and email address:
git config --global user.name "your name"
git config --global user.email "your [email protected]"
Then run:
git config --global --list
to confirm the configuration has taken effect.
2. Install Python 3
Install Python from the command line
- Windows
- macOS
Run the following commands in the terminal:
winget search --id Python.Python.3.13 --source winget
winget install -e --id Python.Python.3.13 --source winget
If the first command can find Python, the second one should normally install it directly.
After installation, close the terminal and open it again, then run:
python --version
pip --version

If version numbers are shown, Python and pip are ready to use.
macOS often already includes a Python environment. Before installing a new version, check whether python3 and pip3 are already available:
python3 --version
pip3 --version
If they are not available, or if you want a newer version, install Python with Homebrew:
brew install python
After installation, reopen the terminal and run:
python3 --version
pip3 --version
If you prefer using python and pip, you can set shell aliases yourself. On macOS, however, using python3 and pip3 is usually the more reliable choice.
3. Install PlatformIO
This step may feel less beginner-friendly because PlatformIO downloads many dependencies automatically, and the installation can take some time. If errors appear during installation, it is usually best to wait patiently and troubleshoot one issue at a time. Using AI tools to help inspect the error messages can also save time.
Search for PlatformIO in the VS Code Extensions marketplace and install it.
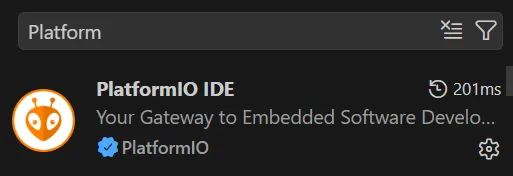
After installation, an ant-shaped icon usually appears in the left toolbar.
4. Clone the Meshtastic firmware repository
The official Meshtastic firmware repository is meshtastic/firmware.
- Windows
- macOS
Run the following commands in your working directory terminal:
git clone https://github.com/meshtastic/firmware.git
cd firmware
git submodule update --init
If your project directory is on a different drive or under a different path, switch to that location first.


If the output looks similar to the screenshots above, the repository has been cloned successfully.
Run the following commands in your working directory terminal:
cd ~/workplace
git clone https://github.com/meshtastic/firmware.git
cd firmware
git submodule update --init
If ~/workplace does not exist yet, create it first:
mkdir -p ~/workplace
If the commands complete normally, the repository has been cloned successfully.
After the repository is ready, you can continue with either of the following two practical projects. Project A focuses on Wio Tracker L1 UI customization. Project B focuses on XIAO ESP32S3 environmental telemetry over Meshtastic.
Project A: Wio Tracker L1 UI customization
Hands-on practice
At this stage, do not rush into editing the code. First, make sure the project can run through the complete build process successfully.
It is recommended to start with three tasks:
- Open
firmware - Check
platformio.ini - Find the build environment for your target board
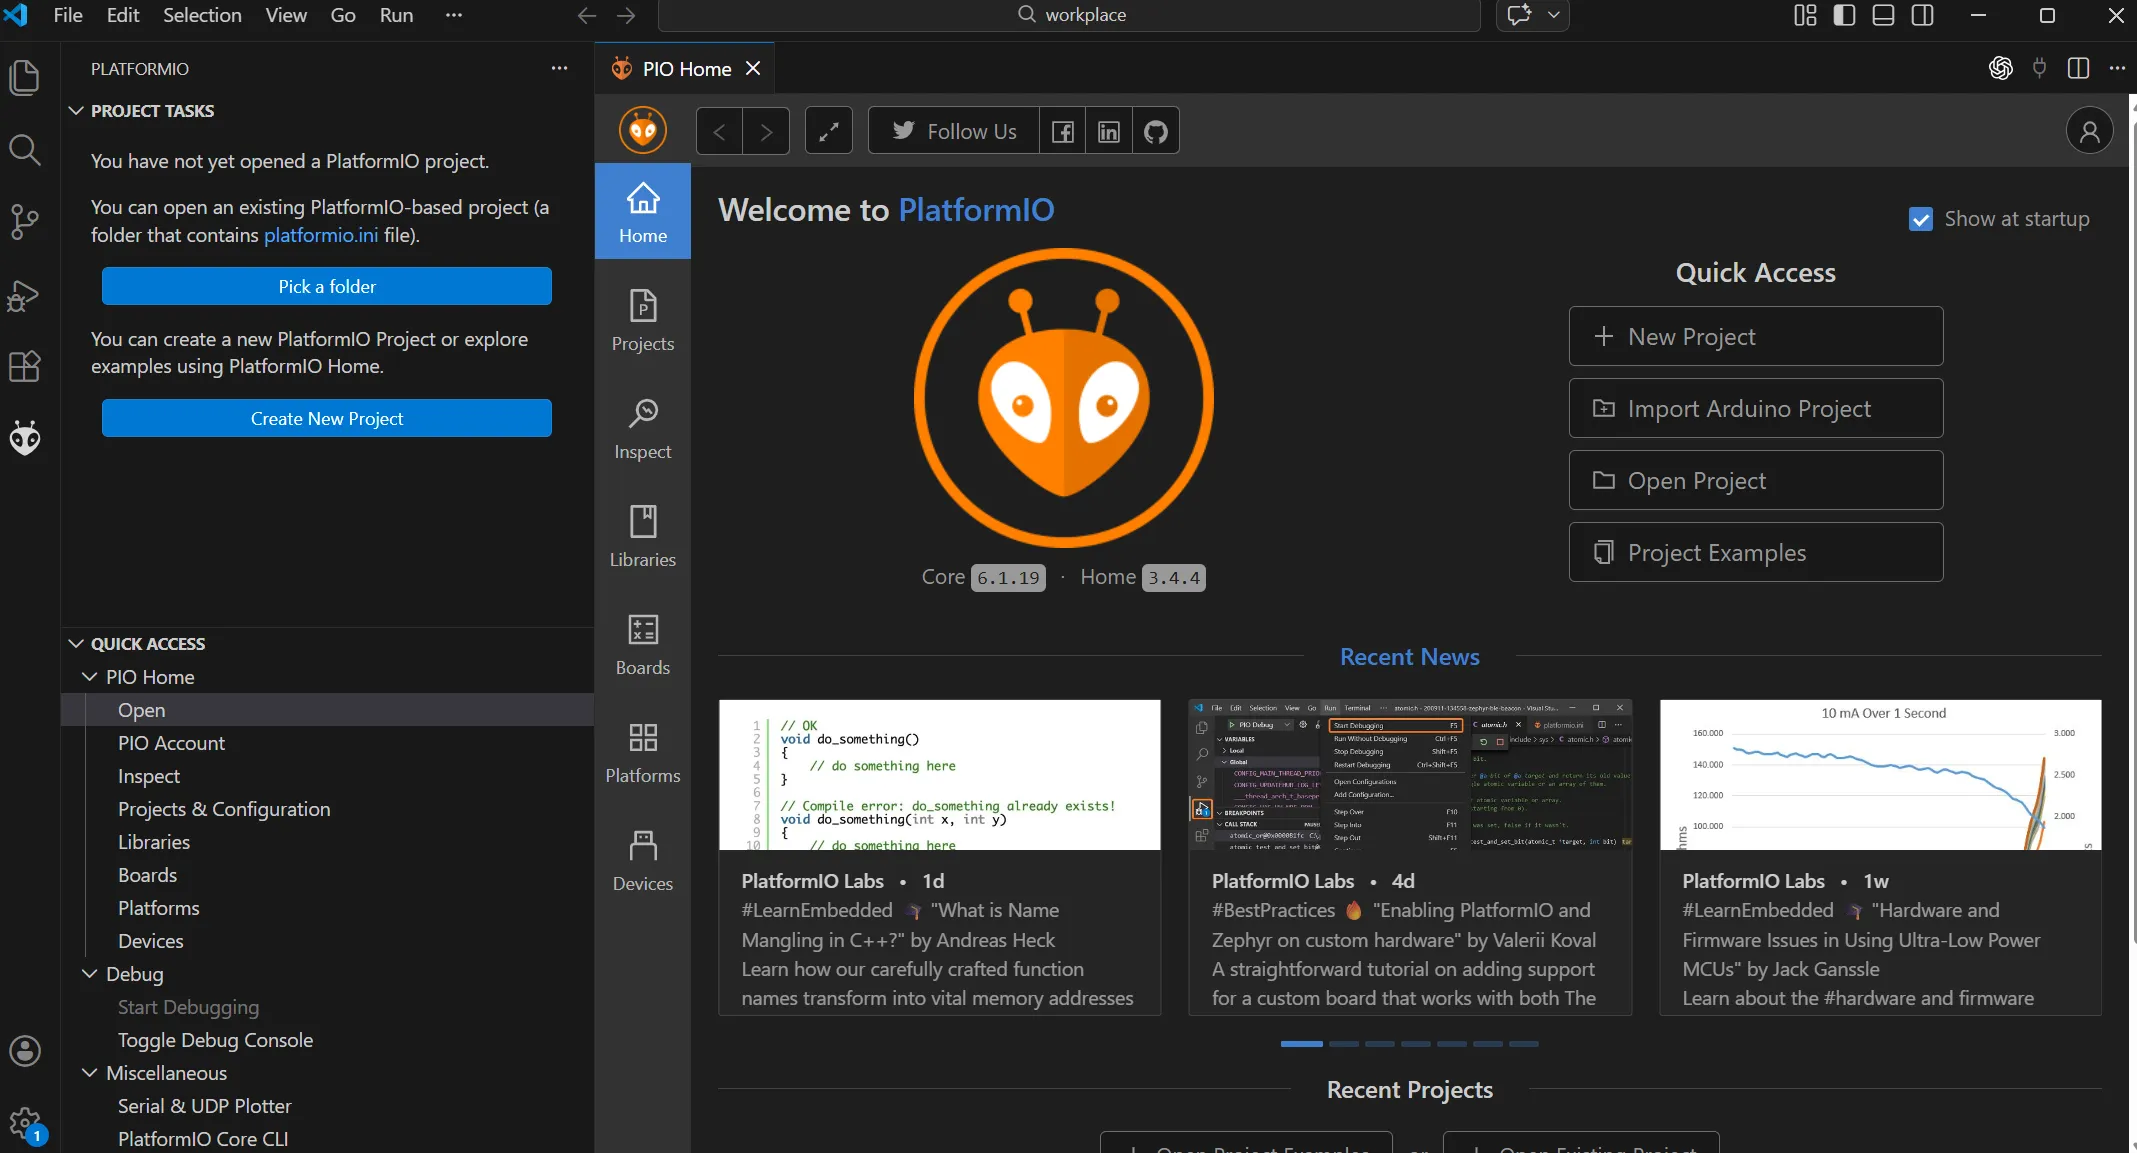
One important detail: do not focus only on the root platformio.ini. It actually includes additional configuration files, for example:
extra_configs =
    variants/*/*.ini
    variants/*/*/platformio.ini
    variants/*/diy/*/platformio.ini
That means the real board-level environment definitions are usually located under variants/.../platformio.ini.
When identifying the target board, pay special attention to these two directories:
variants/boards/
Here we use Wio Tracker L1 Pro as the example target.
This shows that, in Meshtastic, the build target for Wio Tracker L1 / L1 Pro is seeed_wio_tracker_L1.
Minimal modification summary
If you only want to complete one minimal end-to-end practice run, focus on these key steps:
- Install Git, Python 3, VS Code, and PlatformIO.
- Clone the
meshtastic/firmwarerepository and initialize the submodules. - Use
pio run -e seeed_wio_tracker_L1to confirm the original project builds successfully. - Modify the display logic in
src/graphics/SharedUIDisplay.cpp. - Rebuild the firmware and flash the generated UF2 file to the device for verification.
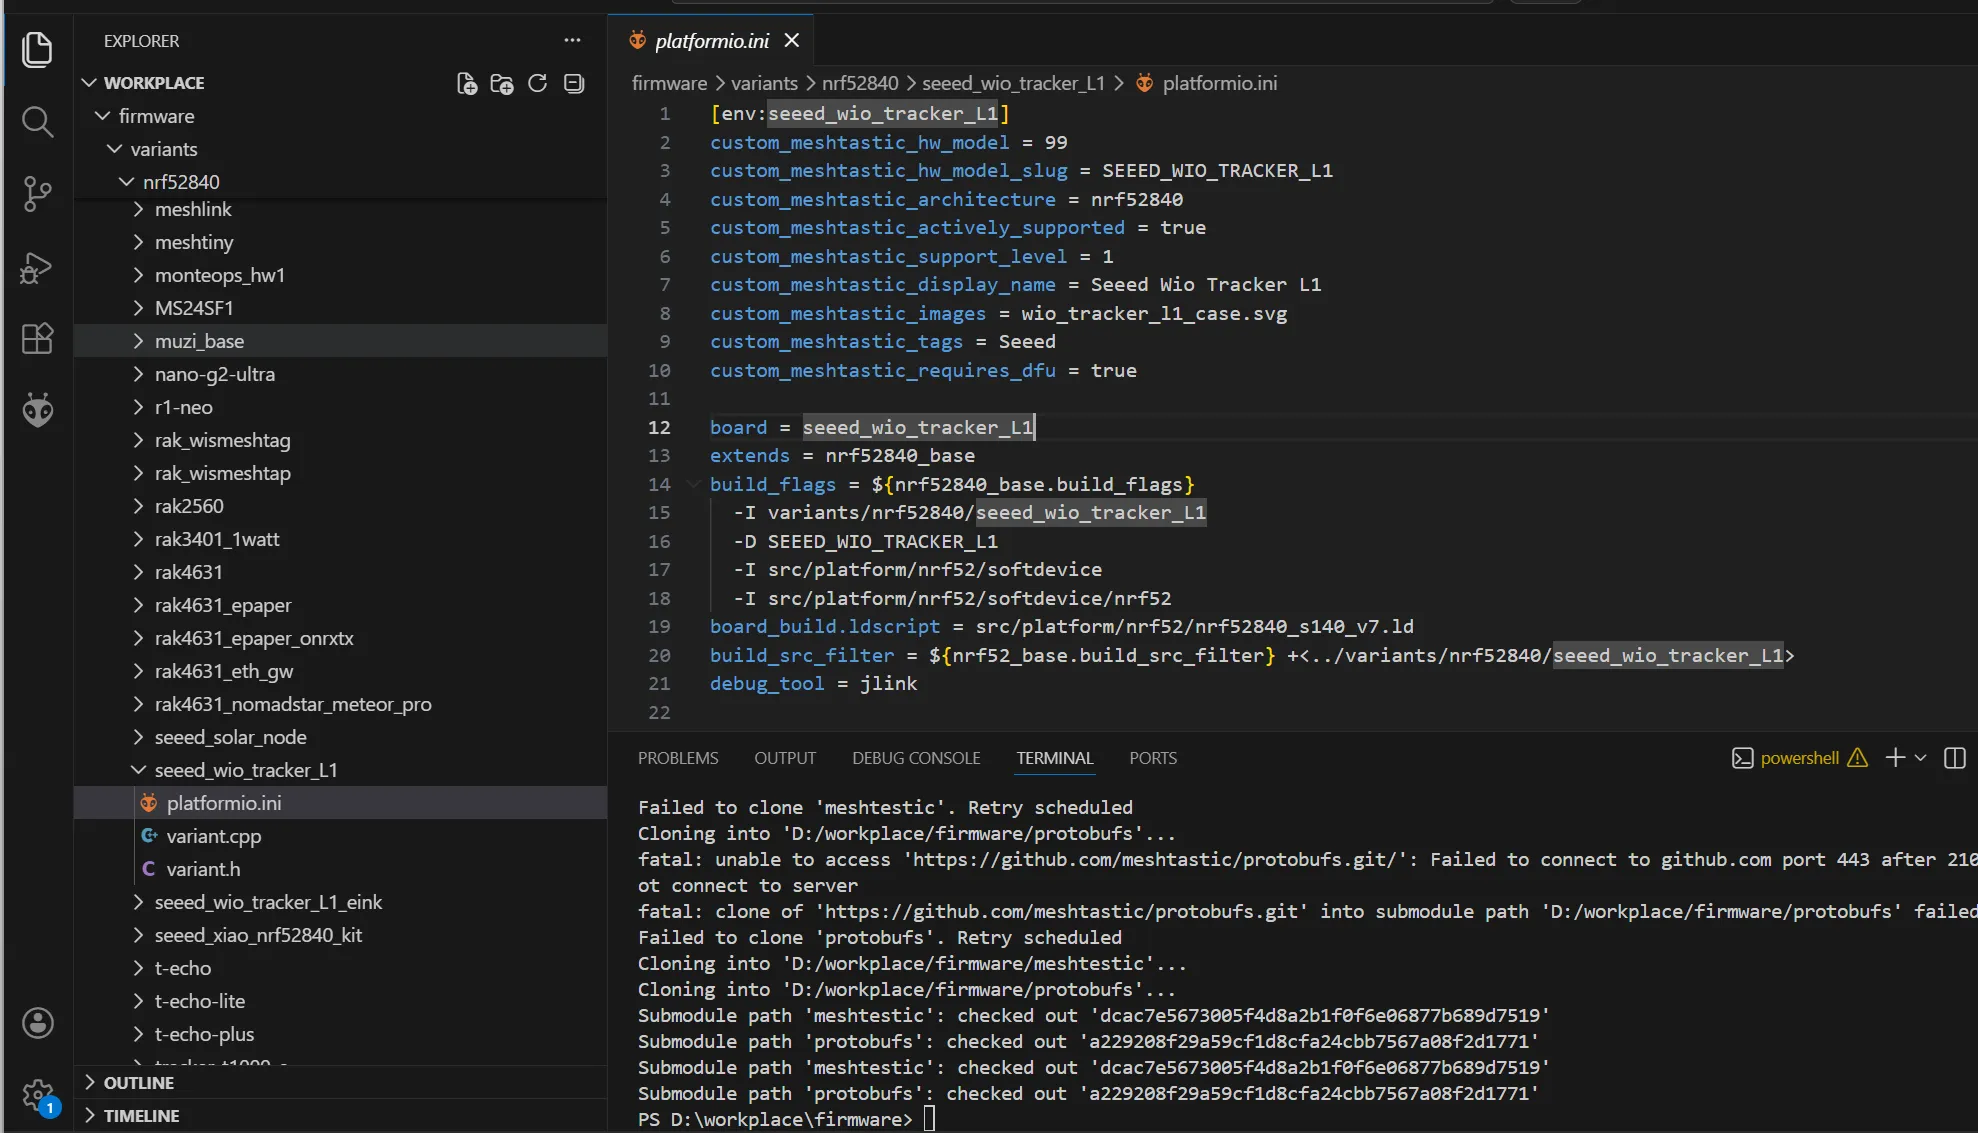
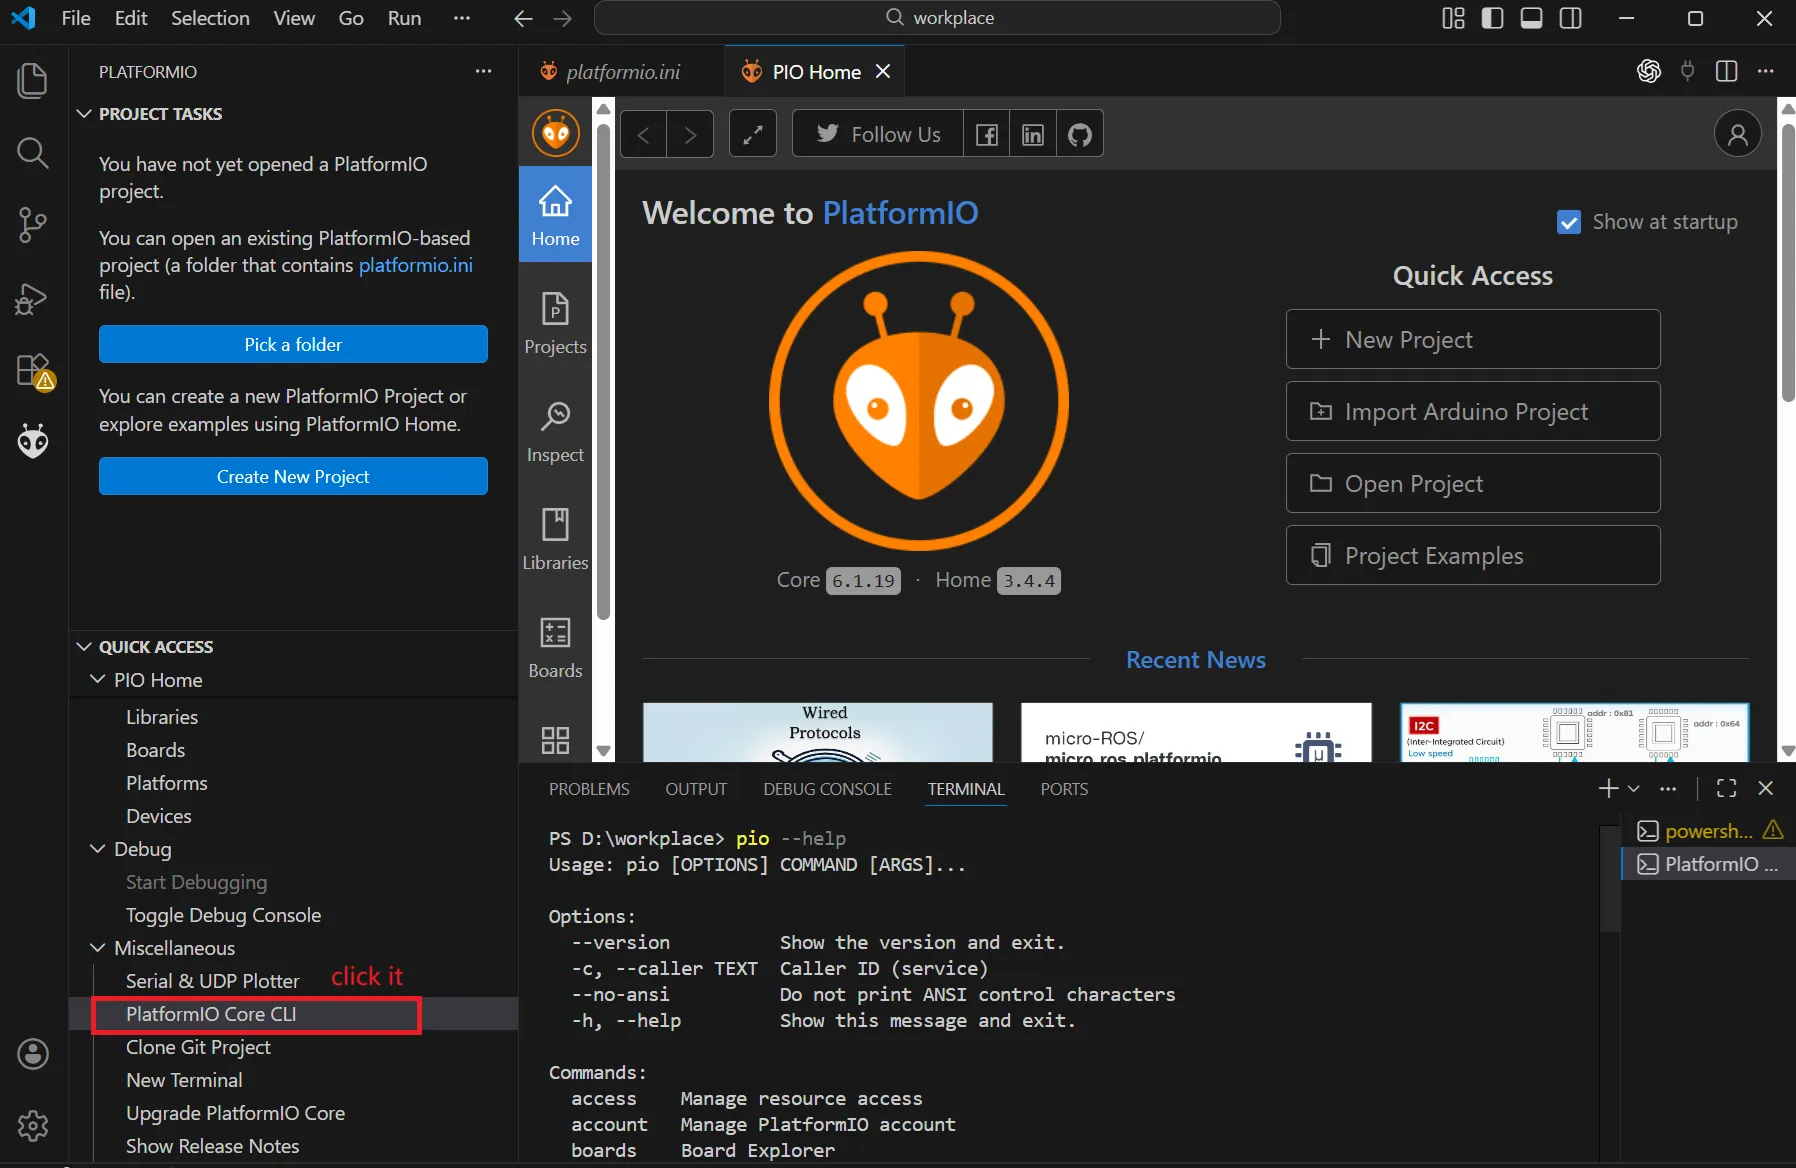
Step 1: Confirm that the project builds successfully
Here we use the PlatformIO Core CLI for building.
For the first build, it is recommended to run the following command:
- Windows
- macOS
cd D:\workplace\firmware  # Adjust to your actual project path
pio run -e seeed_wio_tracker_L1
cd ~/workplace/firmware  # Adjust to your actual project path
pio run -e seeed_wio_tracker_L1

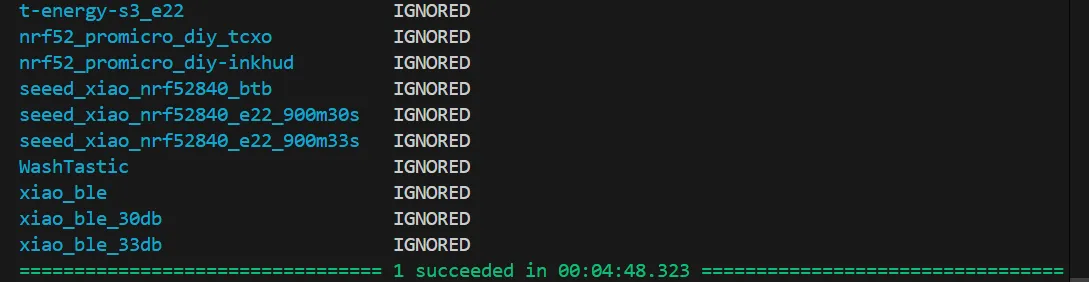
If the interface looks similar to the screenshot above, the build process has started correctly. The first build often takes a while, so be patient.
If the build fails
When a build fails, you can first ask PlatformIO to install the dependencies required by the current environment:
- Windows
- macOS
cd D:\workplace\firmware  # Adjust to your actual project path
pio pkg install -e seeed_wio_tracker_L1
cd ~/workplace/firmware  # Adjust to your actual project path
pio pkg install -e seeed_wio_tracker_L1
This approach has several benefits:
- It installs dependencies only, without immediately starting a full build.
- It makes it easier to see which package is causing the problem.
- The error messages are usually more focused and easier to troubleshoot.
After the dependencies are installed, run:
- Windows
- macOS
pio run -e seeed_wio_tracker_L1 -v
pio run -e seeed_wio_tracker_L1 -v
Once dependency installation is complete, run the normal build again:
- Windows
- macOS
pio run -e seeed_wio_tracker_L1
pio run -e seeed_wio_tracker_L1
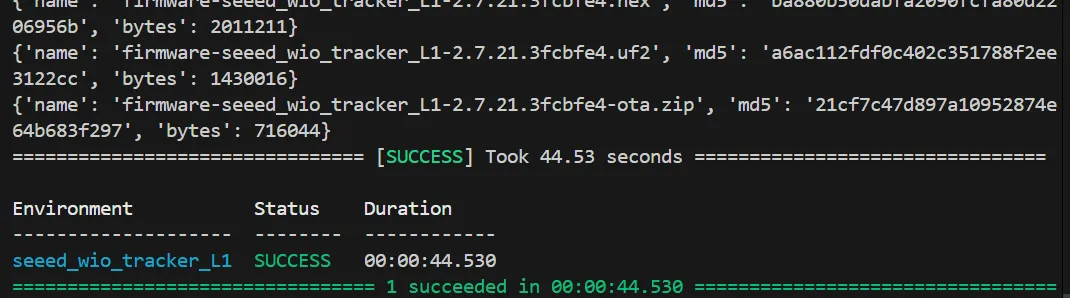
If the build passes at this point, your firmware output has been generated successfully.
Step 2: Modify the code
Practice 1: Modify the UI display
Start by tracing the display implementation from the board-level configuration. You can first check:
variants/nrf52840/seeed_wio_tracker_L1/platformio.inivariants/nrf52840/seeed_wio_tracker_L1/variant.h
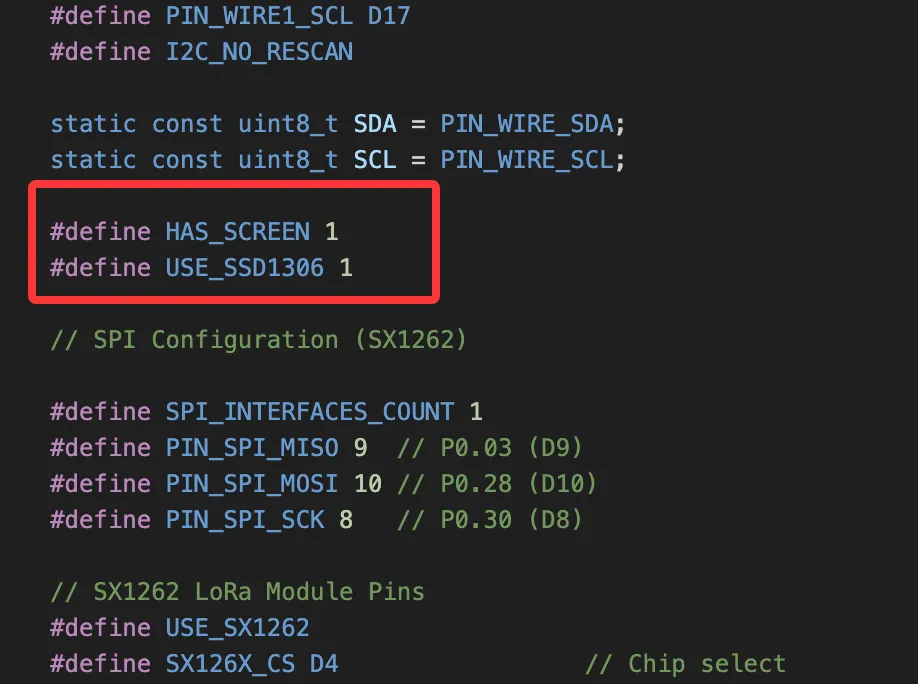
From these configuration files, you can see that L1 defines HAS_SCREEN and USE_SSD1306. That means it uses the standard OLED display pipeline, not a screenless configuration and not an E-Ink solution.
If you continue tracing the display logic, most of the related code is located under:
src/graphics/src/graphics/draw/
Exactly how you modify it depends on your ability to read the source code. Here we start with a very simple example: modifying the home screen UI.
Change 1: Record the right edge of the battery text
Before / After

// Before
int batteryX = 1;
int batteryY = HEADER_OFFSET_Y + 1;

// After
int batteryX = 1;
int batteryY = HEADER_OFFSET_Y + 1;
int batteryTextEndX = batteryX - 1;
src/graphics/SharedUIDisplay.cpp:157
This adds batteryTextEndX, which records the end position of the battery percentage text. That makes it easier to append custom text after the battery information later.
Change 2: Calculate the right boundary while drawing the battery percentage
// Before
if (chargePercent != 101) {
    char chargeStr[4];
    snprintf(chargeStr, sizeof(chargeStr), "%d", chargePercent);
    int chargeNumWidth = display->getStringWidth(chargeStr);
    display->drawString(batteryX, textY, chargeStr);
    display->drawString(batteryX + chargeNumWidth - 1, textY, "%");
    if (isBold) {
        display->drawString(batteryX + 1, textY, chargeStr);
        display->drawString(batteryX + chargeNumWidth, textY, "%");
    }
}

// After
if (chargePercent != 101) {
    char chargeStr[4];
    snprintf(chargeStr, sizeof(chargeStr), "%d", chargePercent);
    int chargeNumWidth = display->getStringWidth(chargeStr);
    int percentWidth = display->getStringWidth("%");
    display->drawString(batteryX, textY, chargeStr);
    display->drawString(batteryX + chargeNumWidth - 1, textY, "%");
    if (isBold) {
        display->drawString(batteryX + 1, textY, chargeStr);
        display->drawString(batteryX + chargeNumWidth, textY, "%");
    }
    batteryTextEndX = batteryX + chargeNumWidth + percentWidth - 1 + (isBold ? 1 : 0);
} else {
    batteryTextEndX = batteryX - 1;
}
src/graphics/SharedUIDisplay.cpp:204
This code sits inside the battery percentage drawing logic. In addition to displaying the battery level normally, it also calculates the right boundary of the text area so that custom labels can be placed after the battery information.
Change 3: Reserve a boundary for the icon area on the right
// Before
int iconRightEdge = timeX - 2;

// After
int iconRightEdge = timeX - 2;
int headerLabelRight = timeX - 4;
src/graphics/SharedUIDisplay.cpp:263
This part handles the area used by the time, mail, mute, and other icons on the right side. I added headerLabelRight to limit the maximum right boundary of the center text and prevent overlap with the right-side content.
Change 4: Draw a custom label when the title is empty
// Newly added core logic
#if defined(SEEED_WIO_TRACKER_L1) && !defined(SEEED_WIO_TRACKER_L1_EINK)
if (titleStr && titleStr[0] == '\0') {
    static const char *yclLabel = "made by AE";
    int labelWidth = display->getStringWidth(yclLabel);
    int labelLeft = batteryTextEndX + 4;
    if (labelLeft + labelWidth <= headerLabelRight) {
        int labelX = labelLeft + ((headerLabelRight - labelLeft) - labelWidth) / 2;
        display->drawString(labelX, textY, yclLabel);
        if (isBold)
            display->drawString(labelX + 1, textY, yclLabel);
    }
}
#endif
src/graphics/SharedUIDisplay.cpp:350
This is the core logic of the modification. It only applies to SEEED_WIO_TRACKER_L1 and explicitly excludes the E-Ink variant. It centers the text made by AE in the blank space between the battery information and the time display.
Change 5: Handle the branch where no time is displayed
// Add the same boundary control for the no-time branch
int iconRightEdge = screenW - xOffset;
int headerLabelRight = screenW - xOffset - 2;
src/graphics/SharedUIDisplay.cpp:377
This is the branch used when no time value is displayed. The same boundary control needs to be added here as well.
#if defined(SEEED_WIO_TRACKER_L1) && !defined(SEEED_WIO_TRACKER_L1_EINK)
        if (titleStr && titleStr[0] == '\0') {
            static const char *yclLabel = "made by AE";
            int labelWidth = display->getStringWidth(yclLabel);
            int labelLeft = batteryTextEndX + 4;
            if (labelLeft + labelWidth <= headerLabelRight) {
                int labelX = labelLeft + ((headerLabelRight - labelLeft) - labelWidth) / 2;
                display->drawString(labelX, textY, yclLabel);
                if (isBold)
                    display->drawString(labelX + 1, textY, yclLabel);
            }
        }
#endif
src/graphics/SharedUIDisplay.cpp:426
This is the implementation for drawing made by AE in the no-time branch.
You can find the complete code here:
Step 3: Build your own firmware
After finishing the modification, return to the project root and build the same target again:
- Windows
- macOS
cd D:\workplace\firmware  # Adjust to your actual project path
pio run -e seeed_wio_tracker_L1
cd ~/workplace/firmware  # Adjust to your actual project path
pio run -e seeed_wio_tracker_L1
The display logic has changed, but the build target is still the same:
seeed_wio_tracker_L1
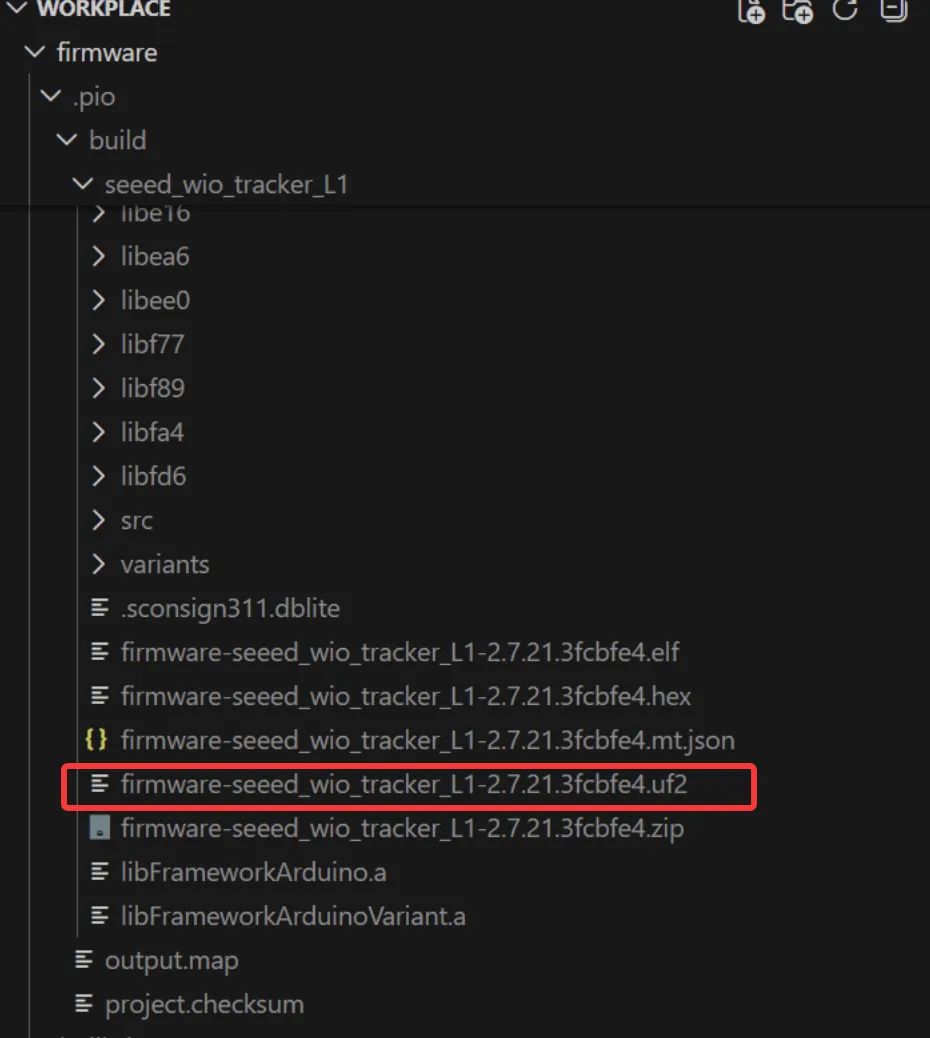
After a successful build, the output is usually located in:
- Windows
- macOS
D:\workplace\firmware\.pio\build\seeed_wio_tracker_L1\
~/workplace/firmware/.pio/build/seeed_wio_tracker_L1/
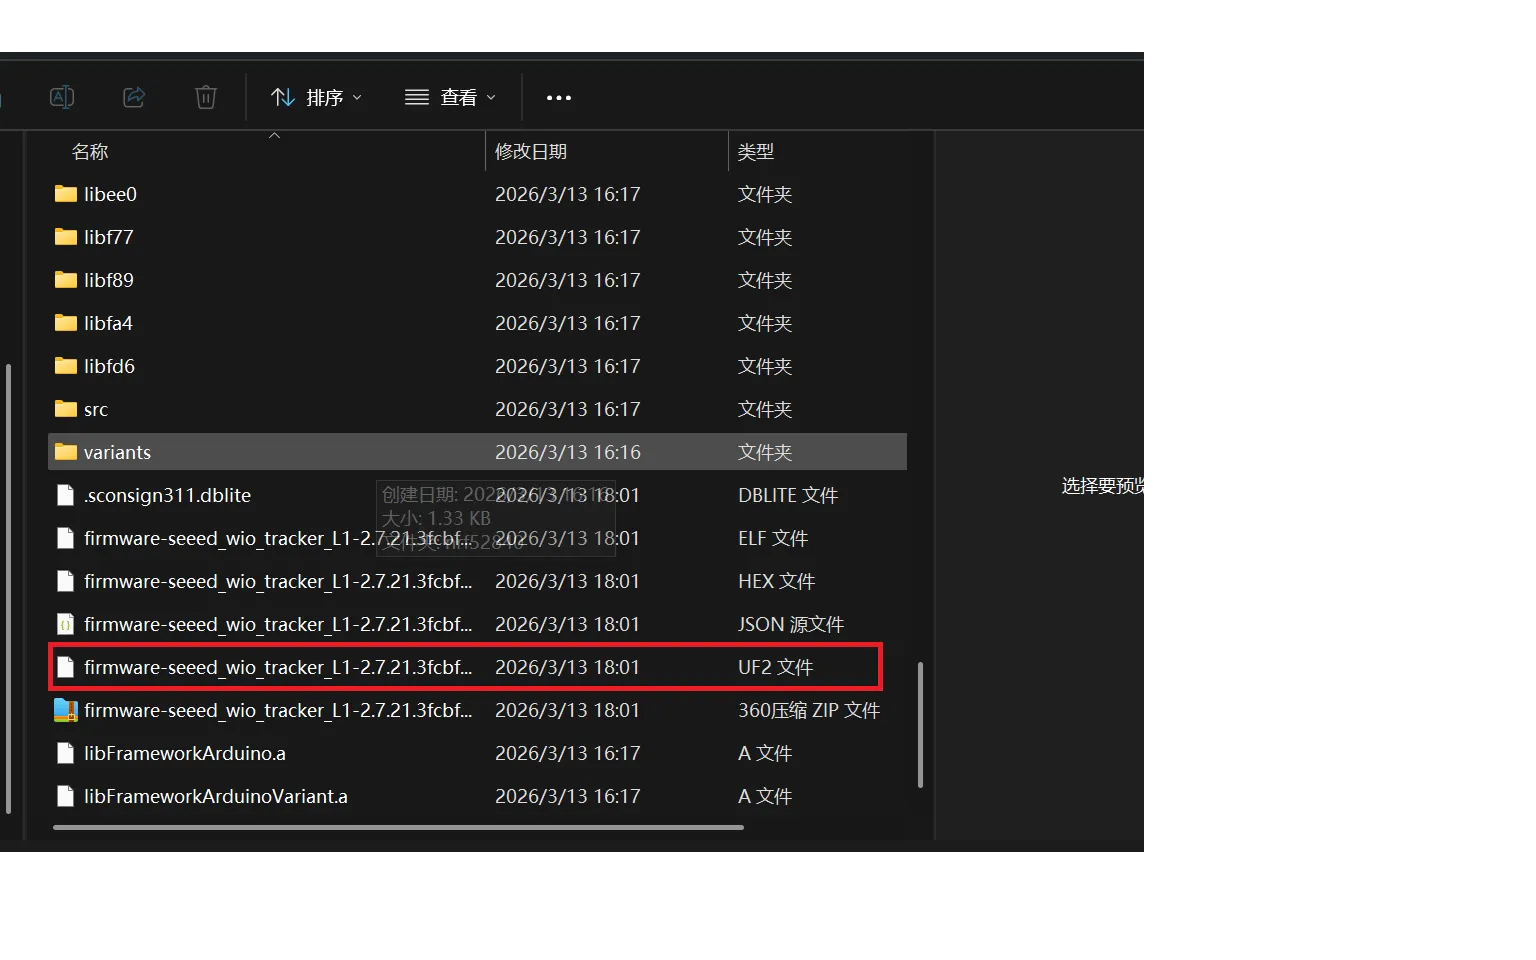
The file you should confirm has been updated is:
firmware-seeed_wio_tracker_L1-*.uf2
Flash the firmware
After the build is complete, open the official flashing page:
In most cases, you should perform an erase operation first.
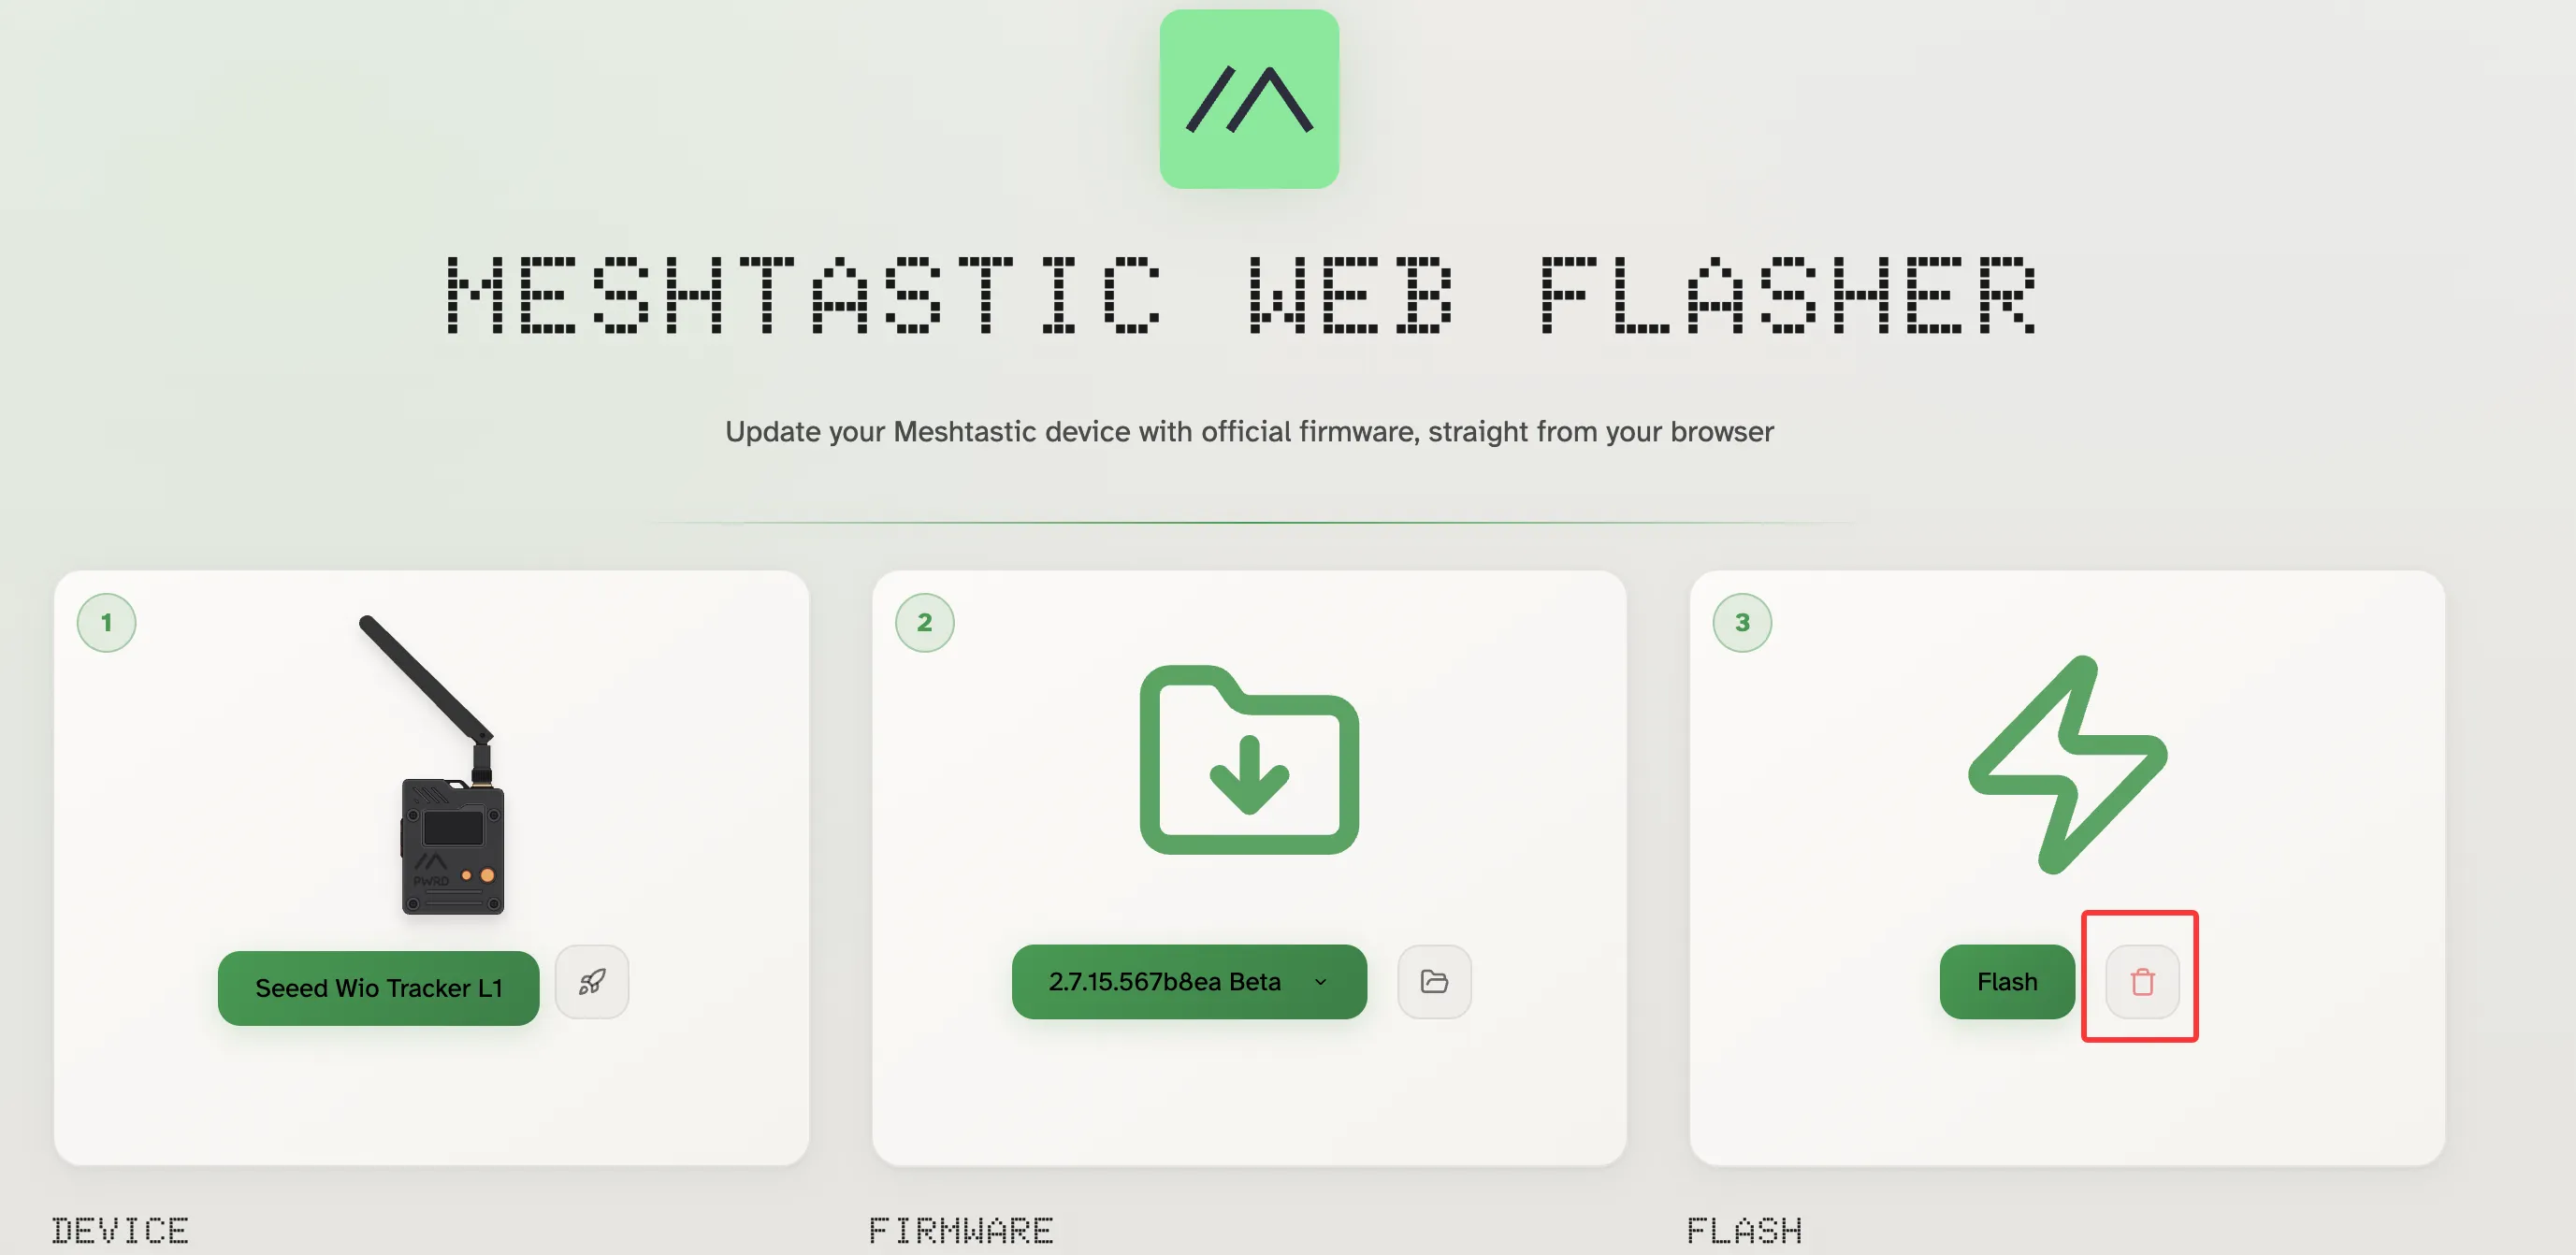
Then select the firmware file you just built and flash it to the device.
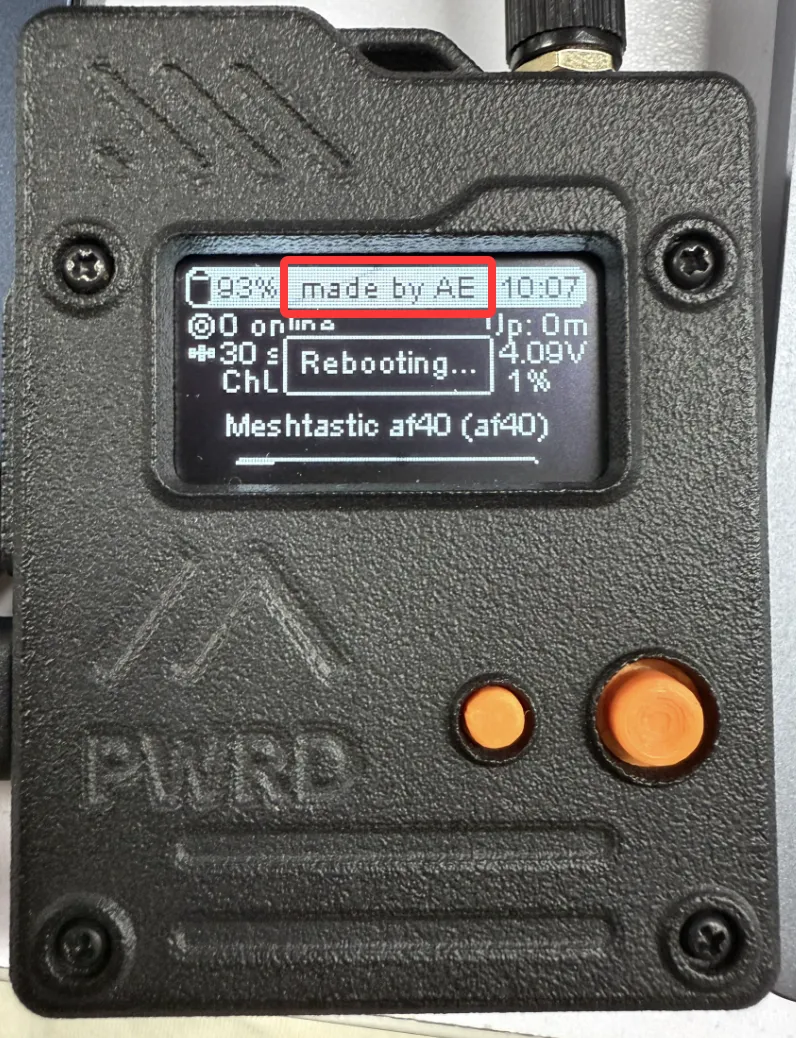
At this point, the practical Meshtastic source code exercise is complete. You have gone through the full workflow: environment setup, repository cloning, board configuration discovery, firmware compilation, display logic modification, and final flashing verification.
If you want to go further, you can continue exploring these directions:
- Modify more elements on the home screen
- Adjust the behavior of buttons, GPS, Bluetooth, and other modules
- Add an independent
variantfor your own board - Continue tracing the relationships between
src/,variants/, andboards/
If you want a more feature-oriented source-level example, continue to Project B below. It builds a dedicated environmental telemetry node with XIAO ESP32S3 + Wio-SX1262 + SHT40. Compared with the Wio Tracker L1 UI modification above, this part focuses on default configuration, telemetry timing, and real mesh verification between two nodes.
Project B: XIAO ESP32S3 environmental telemetry node
Project goal
This advanced example uses two Meshtastic devices in the same mesh.
Remote sensor node
- Read temperature and humidity from
SHT40 - Use Meshtastic environmental telemetry
- Send telemetry into the mesh
- Change the mesh send interval to
60s - Skip the first-boot interactive region setup
- Set the default region to
US
Nearby gateway node
- Join the Meshtastic network as a
CLIENT - Receive remote
TELEMETRY_APPpackets over LoRa - Parse
environmentMetrics.temperature - Parse
environmentMetrics.relativeHumidity
Communication path
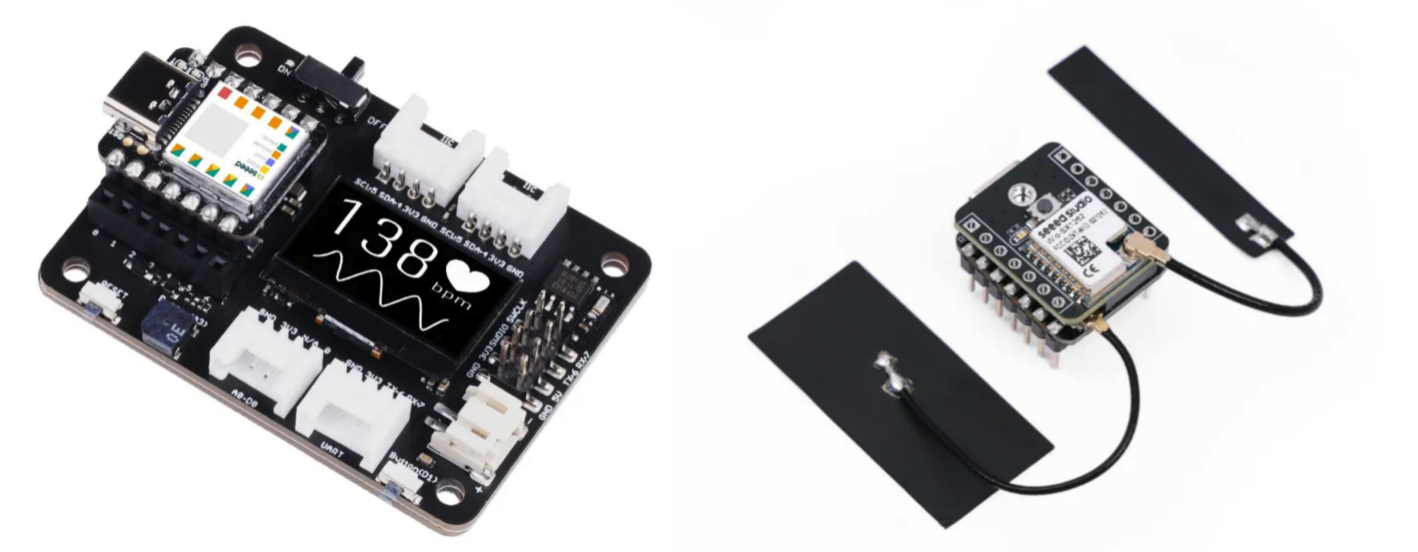
XIAO ESP32S3 + Wio-SX1262 + SHT40 -> Meshtastic LoRa -> XIAO ESP32S3 + Wio-SX1262 (or any other device on the same mesh)
Hardware preparation
Remote node hardware
- Seeed
XIAO ESP32S3 Wio-SX1262SHT40
Gateway node hardware
The nearby node can be any Meshtastic device that joins the same network. In the examples below, I still use another XIAO ESP32S3 + Wio-SX1262 device.
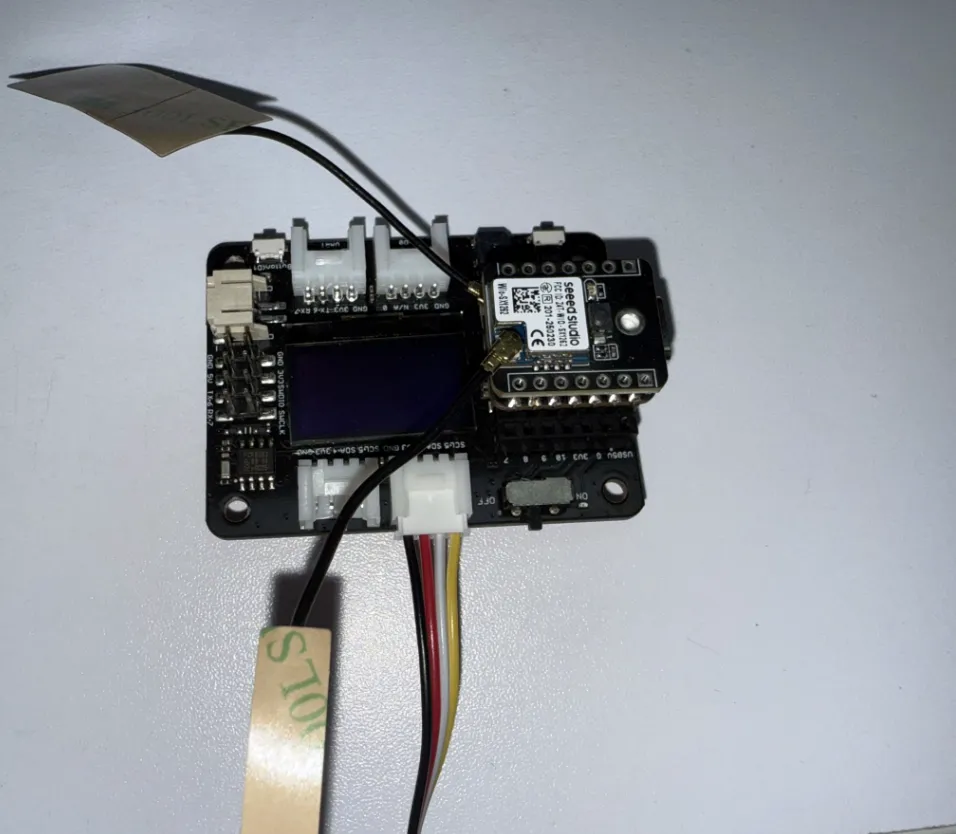
SHT40 wiring
VCC -> 3V3GND -> GNDSDA -> GPIO5SCL -> GPIO6
Confirmed working settings:
I2C address = 0x44GPIO5 / GPIO6is the current working I2C wiring pair
The following photo shows the actual wiring used on the remote node:
Modules and SKU used in this project
Seeeduino XIAO Expansion Board(SKU: 103030356)XIAO ESP32S3 & Wio-SX1262 Kit for Meshtastic & LoRa(SKU: 102010611)
Modify the Meshtastic firmware for the remote node
The target environment for this project is:
seeed-xiao-s3
The main files are:
variants/esp32s3/seeed_xiao_s3/platformio.inisrc/modules/Telemetry/EnvironmentTelemetry.hsrc/modules/Telemetry/EnvironmentTelemetry.cpp
In this part, only update the build_flags section in variants/esp32s3/seeed_xiao_s3/platformio.ini. Keep the rest of the upstream file unchanged.
build_flags =
  ${esp32s3_base.build_flags}
  -D SEEED_XIAO_S3
  -D ENVIRONMENTAL_TELEMETRY_MODULE_ENABLE=1 ; enable environmental telemetry by default
  -D USERPREFS_CONFIG_LORA_REGION=meshtastic_Config_LoRaConfig_RegionCode_US ; set the default region to US
  -D USERPREFS_CONFIG_DEVICE_ROLE=meshtastic_Config_DeviceConfig_Role_SENSOR ; set the default role to SENSOR
  -I variants/esp32s3/seeed_xiao_s3
  -DBOARD_HAS_PSRAM
  -DARDUINO_USB_MODE=0
The build_flags change should look similar to this:
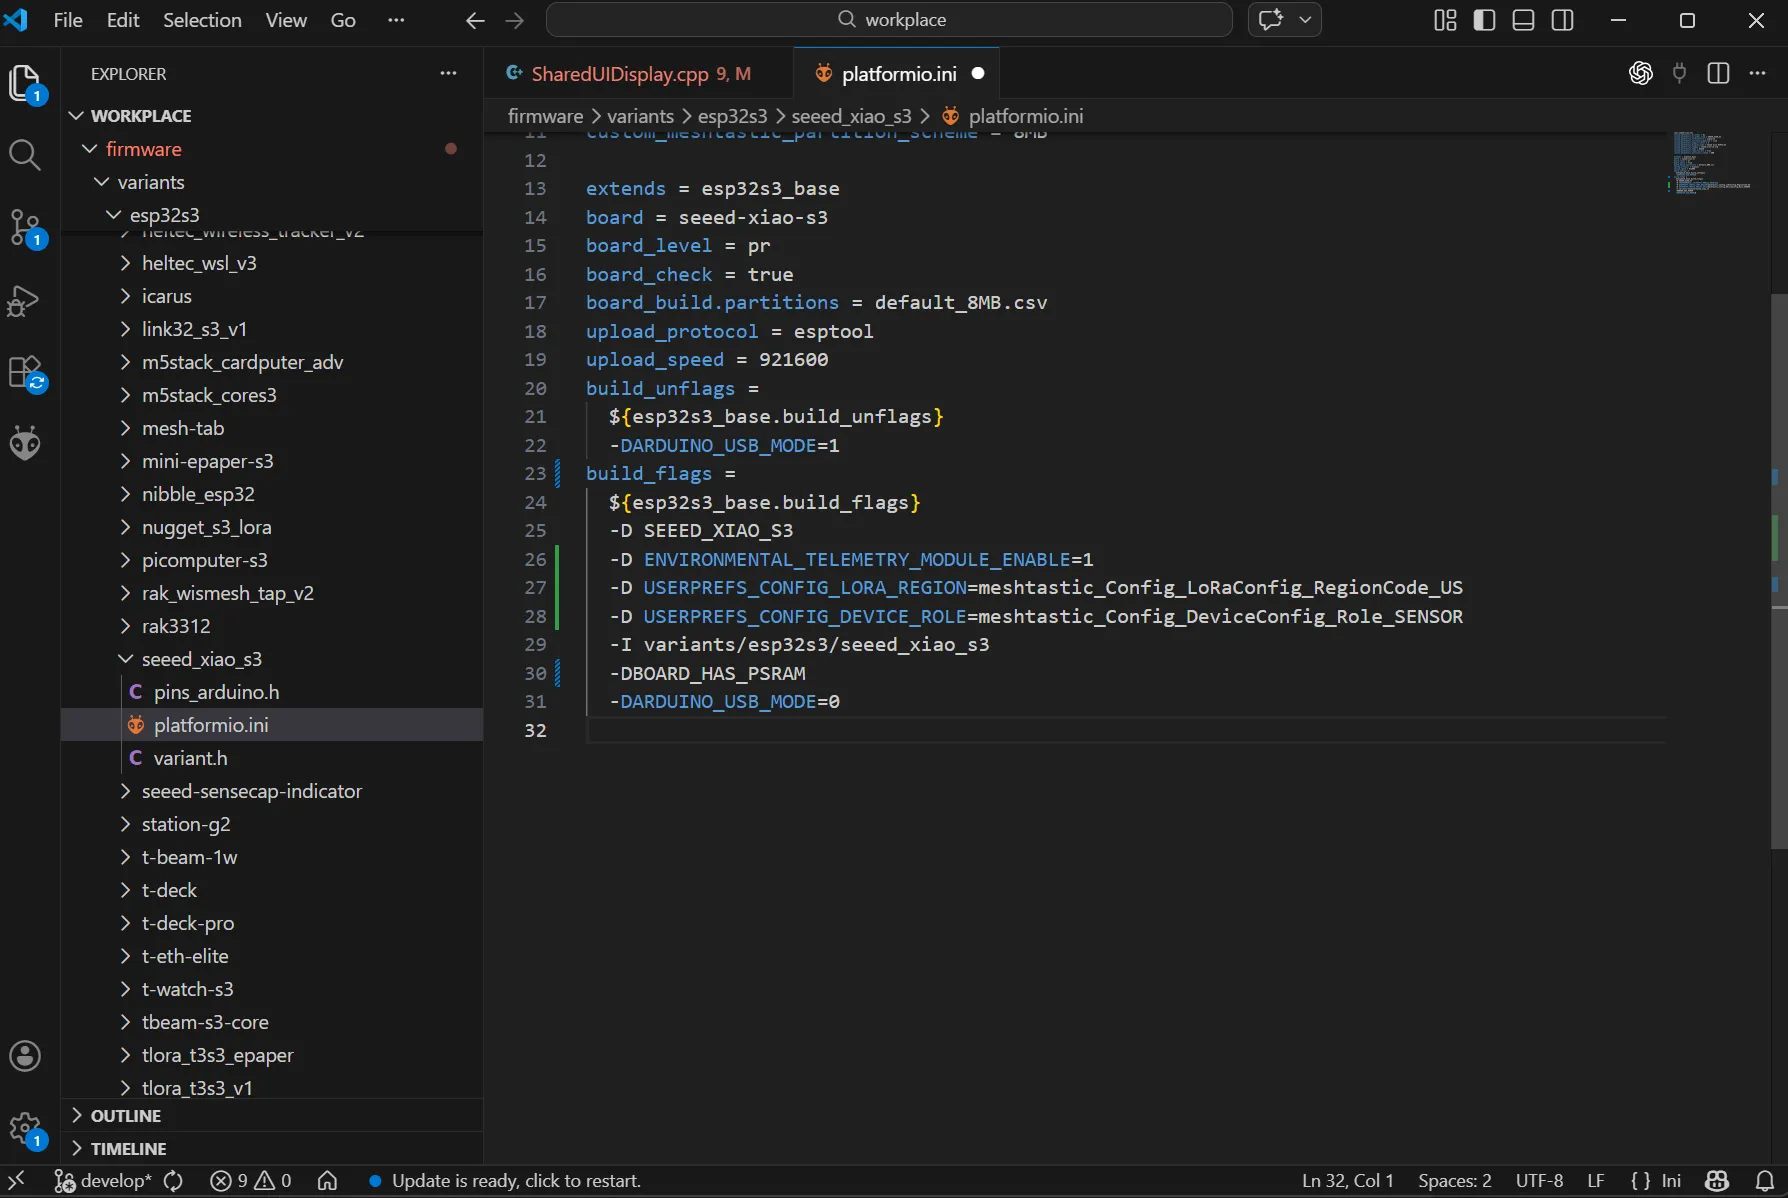
These three flags do the following:
- Enable environmental telemetry by default
- Set the default region to
US, so the first boot no longer stops at region selection - Set the default device role to
SENSOR
The telemetry timing change is implemented in EnvironmentTelemetry.h and EnvironmentTelemetry.cpp, not in platformio.ini.
After the full modification, the behavior becomes:
- Environmental telemetry is enabled by default
- The device starts with region
US - The device starts with role
SENSOR - Mesh environmental telemetry is sent every
60s path=phoneandpath=meshare logged separately- The mesh send timestamp is updated only after a real mesh send succeeds
The expected mesh dispatch log looks like this:
Environment telemetry dispatch path=mesh dest=0xffffffff interval_mesh_s=60
Configure the nearby gateway node
Use a nearby Meshtastic device as a CLIENT on the same mesh. After the remote node starts sending telemetry, confirm that the gateway can receive:
TELEMETRY_APPenvironmentMetrics.temperatureenvironmentMetrics.relativeHumidity
If the gateway keeps trying to connect to Wi-Fi during testing, disable Wi-Fi with the Meshtastic CLI. Replace <gateway_port> with your actual serial port, such as COMx on Windows or /dev/cu.usbmodem... on macOS.
meshtastic --port <gateway_port> --set network.wifi_enabled false
Build, flash, and verify
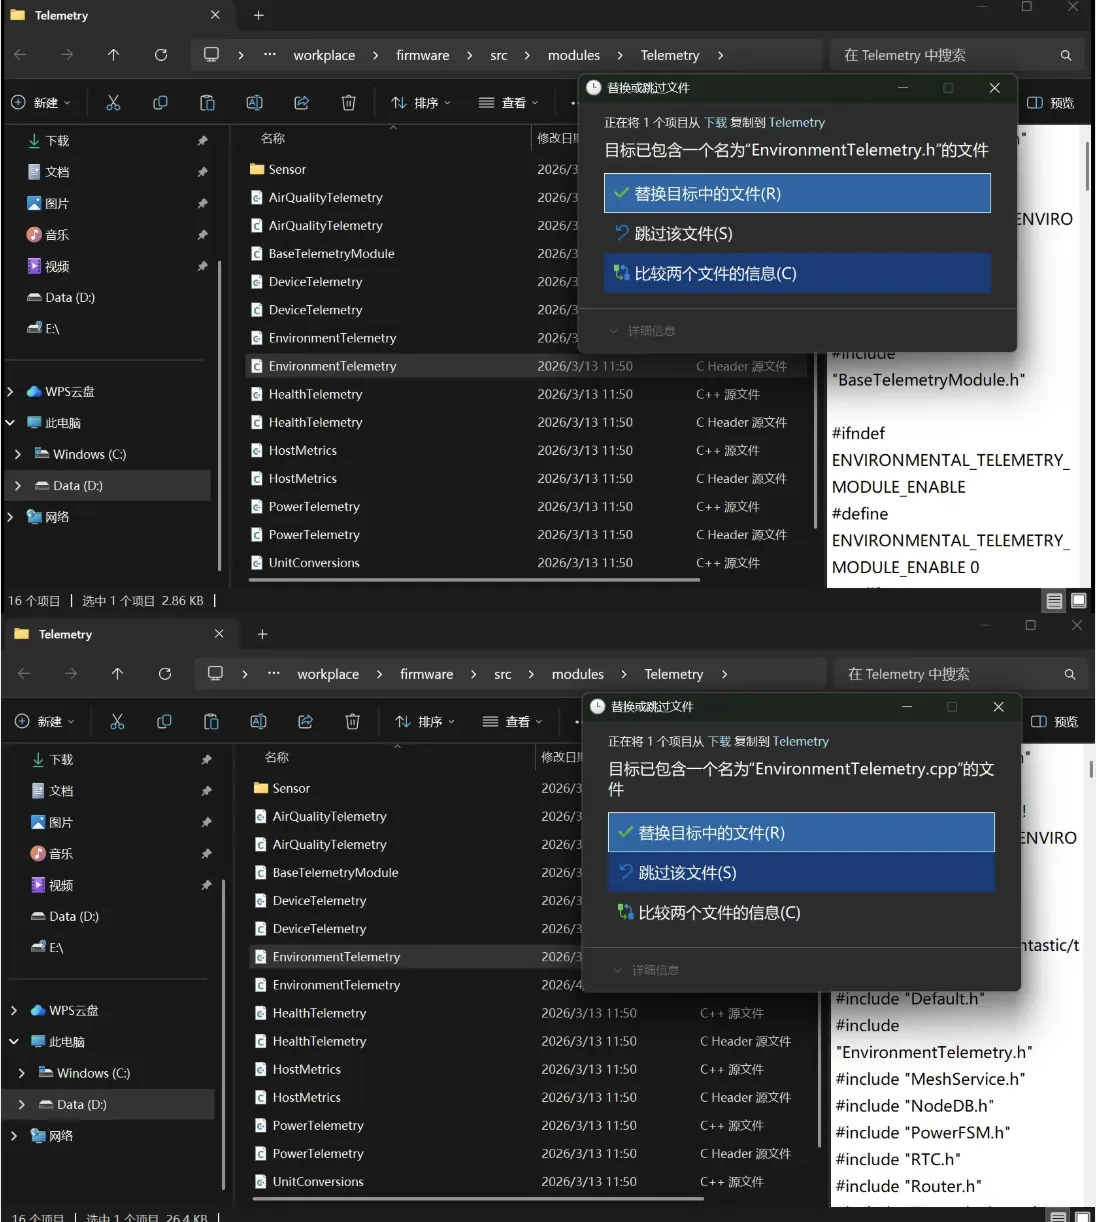
Step 1: Copy the modified files
Before building, copy the three modified files into your Meshtastic 2.7.20 or 2.7.21 source tree:
| File in the package | Replace this file in your Meshtastic source tree |
|---|---|
meshtastic-2.7.20-s3-files/variants/esp32s3/seeed_xiao_s3/platformio.ini | <your Meshtastic directory>/variants/esp32s3/seeed_xiao_s3/platformio.ini |
meshtastic-2.7.20-s3-files/src/modules/Telemetry/EnvironmentTelemetry.h | <your Meshtastic directory>/src/modules/Telemetry/EnvironmentTelemetry.h |
meshtastic-2.7.20-s3-files/src/modules/Telemetry/EnvironmentTelemetry.cpp | <your Meshtastic directory>/src/modules/Telemetry/EnvironmentTelemetry.cpp |
Direct download links:
If you copy the files with a graphical file manager, the replacement prompt should look similar to this:
Step 2: Build the remote firmware
From the Meshtastic firmware root, run:
pio run -e seeed-xiao-s3

Step 3: Upload to the remote node
- Windows
- macOS
pio device list
pio run -e seeed-xiao-s3 -t upload --upload-port COMx
If you need to enter download mode manually:
- Hold
BOOT - Tap
RESET - Release
RESET - Release
BOOT
pio device list
pio run -e seeed-xiao-s3 -t upload --upload-port /dev/cu.usbmodemXXXX
Use pio device list first so you can identify the correct serial port:

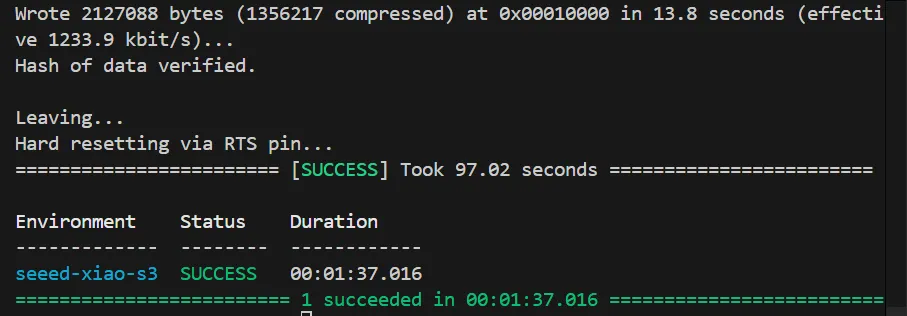
After the upload finishes, PlatformIO should report a successful flash:
Step 4: Monitor the serial logs
Use PlatformIO's serial monitor to check both the remote node and the nearby gateway.
- Windows
- macOS
pio device monitor -p COMx -b 115200
pio device monitor -p COMy -b 115200
pio device monitor -p /dev/cu.usbmodemE072A1D89EB81 -b 115200
pio device monitor -p /dev/cu.usbmodem3030F917FF281 -b 115200
Look for logs such as:
Environment telemetry dispatch path=mesh dest=0xffffffff interval_mesh_s=60
Send: relative_humidity=...
Send: ... temperature=...
Step 5: Validate with the Meshtastic CLI
Install the CLI first:
- Windows
- macOS
pip install meshtastic
pip3 install meshtastic
After installation, reopen the terminal and confirm that meshtastic --help works.
For the commands below, replace <gateway_port> with your actual gateway serial port:
- Windows example:
COMx - macOS example:
/dev/cu.usbmodem3030F917FF281
meshtastic --port <gateway_port> --listen --debug
meshtastic --port <gateway_port> --nodes --show-fields user.id,user.longName,user.shortName
meshtastic --port <gateway_port> --get bluetooth.enabled --get bluetooth.mode --get bluetooth.fixed_pin --get power.wait_bluetooth_secs --get power.is_power_saving
meshtastic --port <gateway_port> --set network.wifi_enabled false
Focus on:
TELEMETRY_APPenvironmentMetrics.temperatureenvironmentMetrics.relativeHumidity
Step 6: Confirm in the mobile app
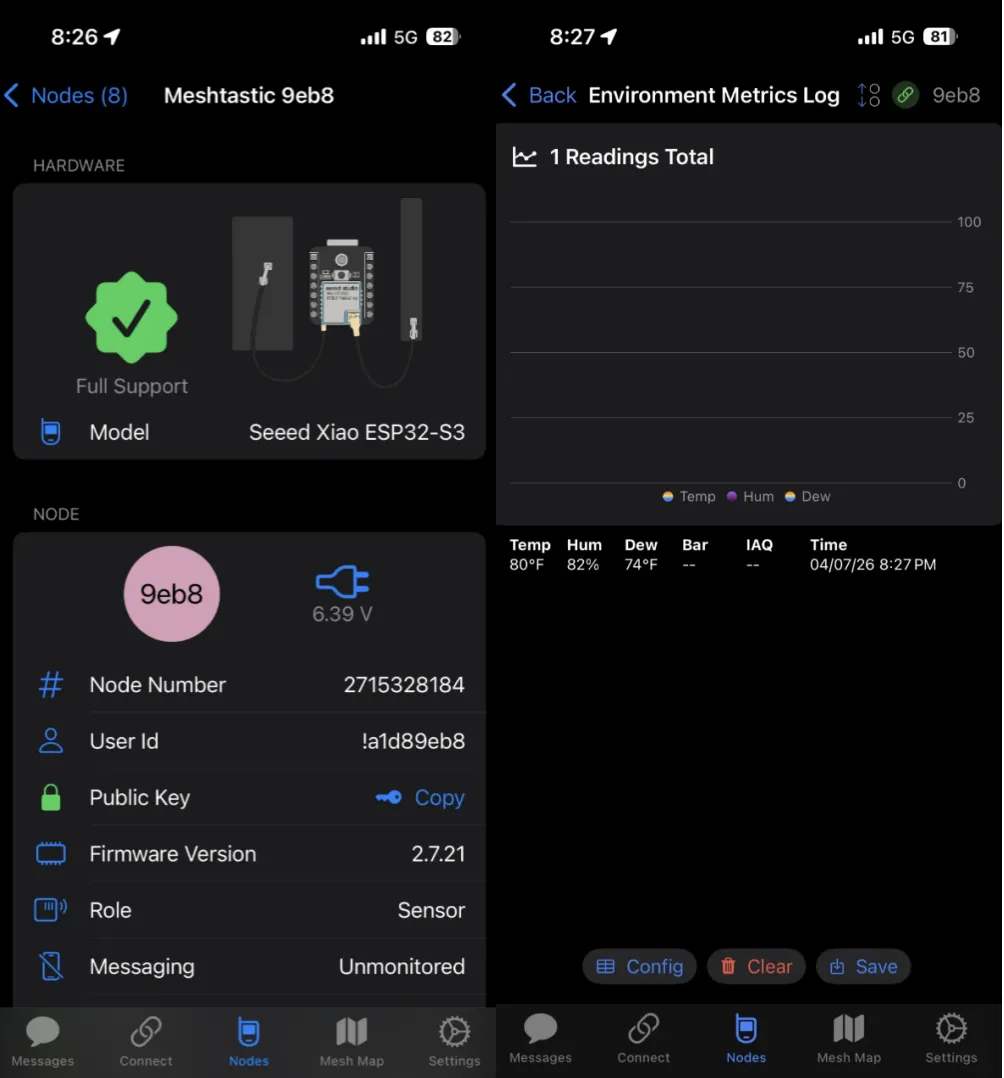
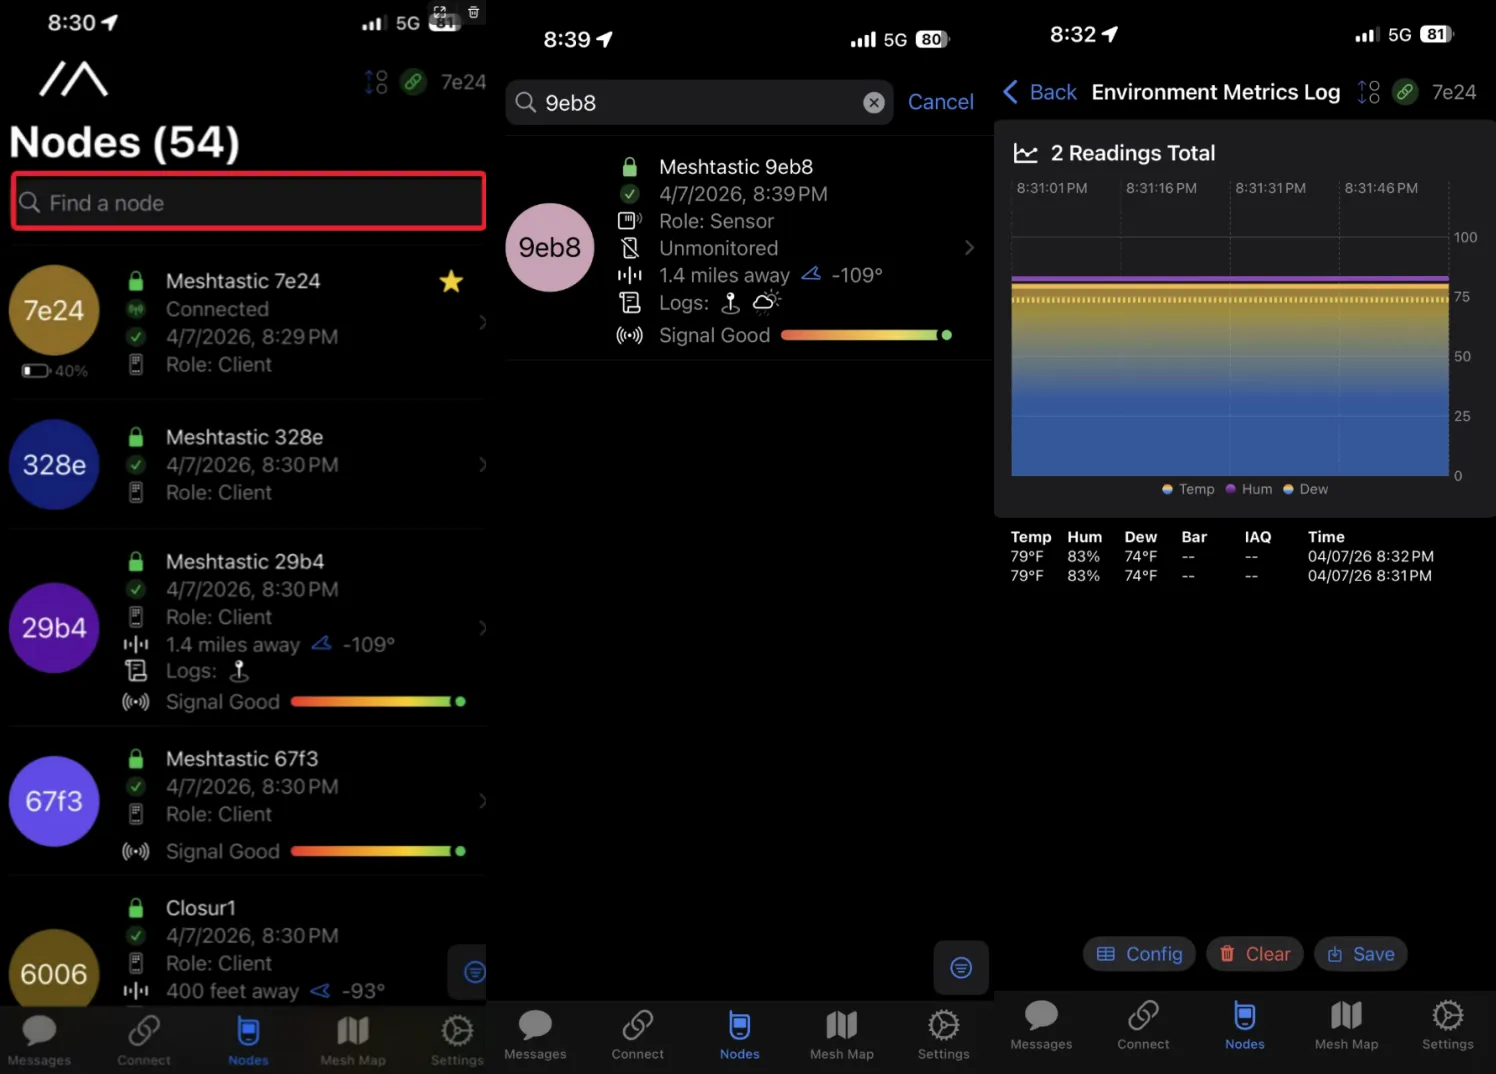
After flashing, connect to the remote node with the Meshtastic mobile app and confirm that the environmental data is visible. Then connect the app to another device on the same mesh and check the Nodes view to confirm that the sensor values are being received over the mesh.
On the remote sensor node, you should be able to see the environmental telemetry values directly in the app:
On the nearby node, the same readings should appear in the Nodes view after they are forwarded through the mesh:
Project C: T1000-E startup and shutdown chime customization
Project goal
This compact example focuses on a very small but easy-to-feel source-level customization: replacing the default T1000-E startup and shutdown sounds with a cleaner custom chime.
Compared with Project A and Project B, this project changes only one source file and only two functions. It is a good example of how to make a board-specific behavior change without affecting the rest of the Meshtastic codebase.
Modify buzz.cpp
The only file changed in this project is:
src/buzz/buzz.cpp
The two modified functions are:
playStartMelody()playShutdownMelody()
In both places, a #if defined(TRACKER_T1000_E) branch is added.
That structure is important because it keeps the customization isolated to the T1000-E target:
TRACKER_T1000_Euses the custom startup chimeTRACKER_T1000_Euses the matching custom shutdown chime- All other Meshtastic boards still follow the original default melody in the existing
#elsepath
This means the change is intentionally narrow in scope. It customizes the user experience for one board, while preserving the original behavior for every other supported target.
In my local test version, the startup melody is changed to a more phone-like ascending chime, and the shutdown melody is changed to a matching descending chime.
If you want to document the modification more clearly, it is enough to capture one screenshot that includes both functions in the same view:
- the
#if defined(TRACKER_T1000_E)block inplayStartMelody() - the
#if defined(TRACKER_T1000_E)block inplayShutdownMelody()
That single screenshot already explains both the code change and the board-specific scope, so you do not need a separate image just to explain that other boards are unaffected.
Build and verify
After the modification is complete, build the T1000-E target:
pio run -e tracker-t1000-e
In my test build, this target compiled successfully after the melody change.
After the build passes, flash the firmware to the T1000-E and verify the result directly on hardware:
- Power on the device and confirm that the new startup chime plays.
- Power off the device and confirm that the matching shutdown chime plays.
- If possible, compare the new sound with the original default melody so the difference is easy to notice.
Suggested images
To keep Project C short and readable, three images are usually enough:
- One
buzz.cppscreenshot showing bothplayStartMelody()andplayShutdownMelody()in the same frame - One terminal screenshot showing
pio run -e tracker-t1000-esucceeded - One real-device verification image or short video showing the T1000-E power-on or power-off test
If the buzzer does not play during testing, first check whether the device buzzer mode is enabled. In playTones(), the code returns early when the buzzer is disabled or set to notification-only mode.
Common issues
The git command is unavailable
- On Windows, first check whether Git has been added to
PATH. - On macOS, run
git --versionfirst. If the system asks you to install the Command Line Tools, follow the prompt.
python3 or pip3 is unavailable
- On Windows, confirm that Python was added to
PATH, or reopen the terminal and try again. - On macOS, first check whether
python3/pip3already exists, and install Python with Homebrew only if needed.
The pio command is unavailable
- Run
pio --versionfirst. - If the command is still unavailable, restart VS Code and the terminal, then try again.
- If necessary, reinstall the PlatformIO extension and confirm that PlatformIO Core has been initialized correctly.
The code still looks incomplete after git submodule update --init
- First make sure you are in the root directory of the
firmwarerepository. - If the network connection is unstable, try again with:
git submodule update --init --recursive
The first build takes too long
- It is normal for the first build to download many dependencies.
- If it seems stuck for too long, try installing the packages separately first:
pio pkg install -e seeed_wio_tracker_L1
Then run the build again.
The web client does not show the full environmental telemetry
- The Meshtastic Web Client currently does not provide a complete UI for remote environmental telemetry.
- The
Messages/Broadcastpage is for chat traffic, not a dedicated telemetry page. - If the values do not appear there, it does not automatically mean that the mesh link has failed.
Seeing data on a phone does not prove mesh forwarding
- Seeing refreshed values on a directly connected phone only proves that the local phone-to-device link is working.
- It does not automatically prove that the environmental telemetry has already been forwarded into the mesh.
- To confirm a real mesh forward, check for these items in the logs:
Environment telemetry dispatch path=mesh ...TELEMETRY_APPenvironmentMetrics.temperatureenvironmentMetrics.relativeHumidity
The seeed-xiao-s3 build fails during the first setup
- The first dependency installation can take a long time. This is normal.
- If the target environment fails, install the packages first and then run a verbose build:
pio pkg install -e seeed-xiao-s3
pio run -e seeed-xiao-s3 -v
- After the dependencies are ready, go back to the normal build:
pio run -e seeed-xiao-s3